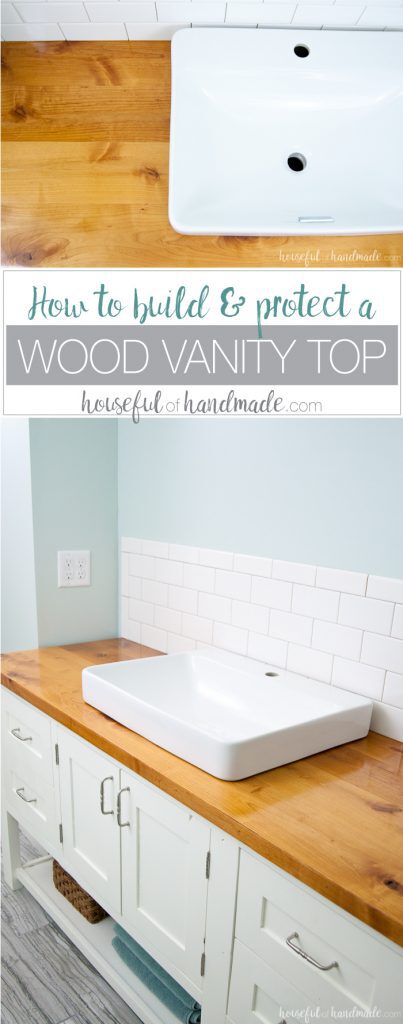
Don’t skimp on style to remodel a bathroom on a budget with this beautiful DIY wood vanity top.
I couldn’t be more excited to share today’s remodel update! A DIY bathroom renovation can sometimes take more time than planned. But this gorgeous wood vanity top was worth the wait.
It has been almost 8 years since we ripped out our tiny, dated, disgusting master bathroom. But today, we are one large step closer to having the spa-like bathroom of my dreams! And it started with learning how to build & seal our own vanity top.
I partnered with Waterlox to use their Original Sealer to seal the wood bathroom countertop against all the water that comes with a bathroom.
This post may contain affiliate links. As an Amazon Associate I earn from qualifying purchases. Click here to read my full disclosure policy.
Spa Inspired Bathroom Design
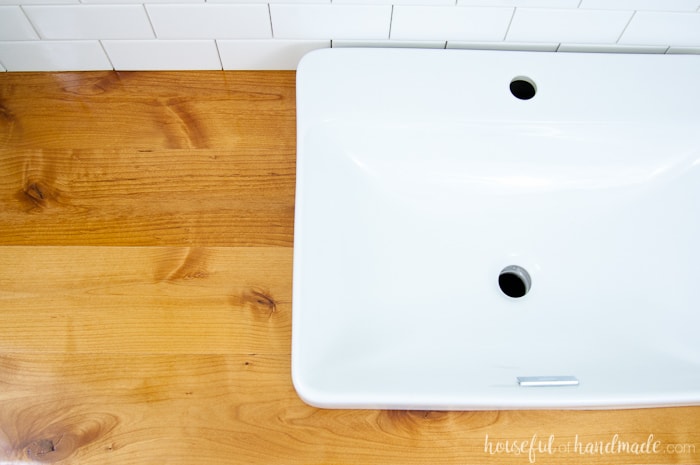
When I was putting together the design board for our master bathroom, I knew I wanted a white vanity and white subway tile. But to add some warmth to the room I started looking at pictures of beautiful wood vanity tops and I was hooked!
The wood vanity top was the perfect way to add the rustic spa feel I was hoping for in our new bathroom. So now I had the design down, I needed to figure out how to DIY my perfect wood vanity top.
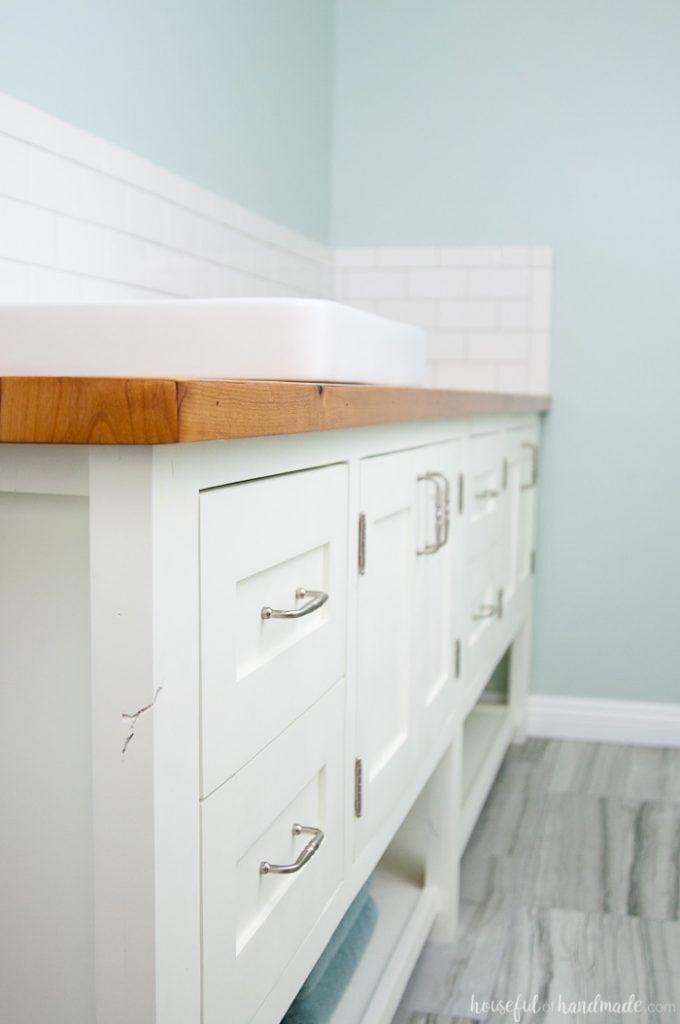
I knew building the vanity top would not be the issue, I have tackled much bigger projects (like the 8 foot double vanity build it was going on top of), but how do you protect a wood vanity top. I don’t know about you, but in our bathroom there is a lot of water!
I am sure banning the kids from going anywhere near my new master bathroom would help, but there will still be a lot more water than you should have around wood.
After many, many google searches I came across Waterlox Sealers & Finishes. Their Original formula has been around since 1910 and is made to penetrate the wood to offer a waterproof finish.
Unlike most wood finished that sit on top of the wood, Waterlox penetrates the wood.
I realized just how much the product soaked into the wood as I started layering it on the vanity top. Now that I had the right product, I was ready to build a wood vanity top and get this master bathroom done!
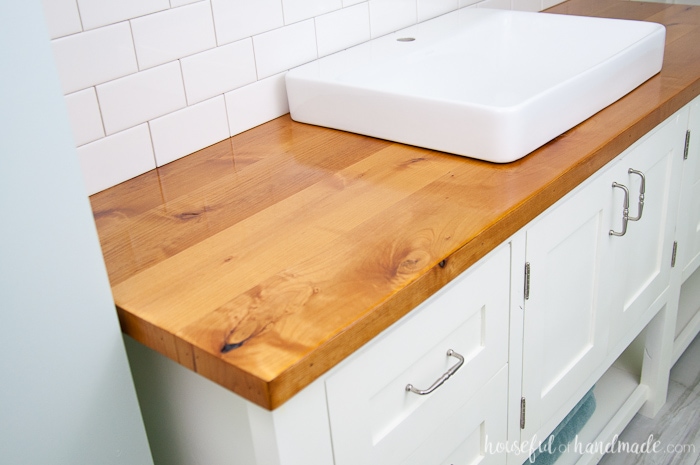
How Much Does a Wood Vanity Top Cost?
Now before we get into the nitty gritty of how to build & protect a wood vanity top, I want to talk budget. I am very budget conscious with our remodel.
When you have a whole house that needs to be redone, you need to be smart about how you spend your funds. One of the best parts about doing a wood vanity top with the Waterlox finish, it cost less than $150 for our 8 foot vanity top!
But it looks like it cost so much more. Compare that to around $800 for the same things in granite and this is definitely a win-win!
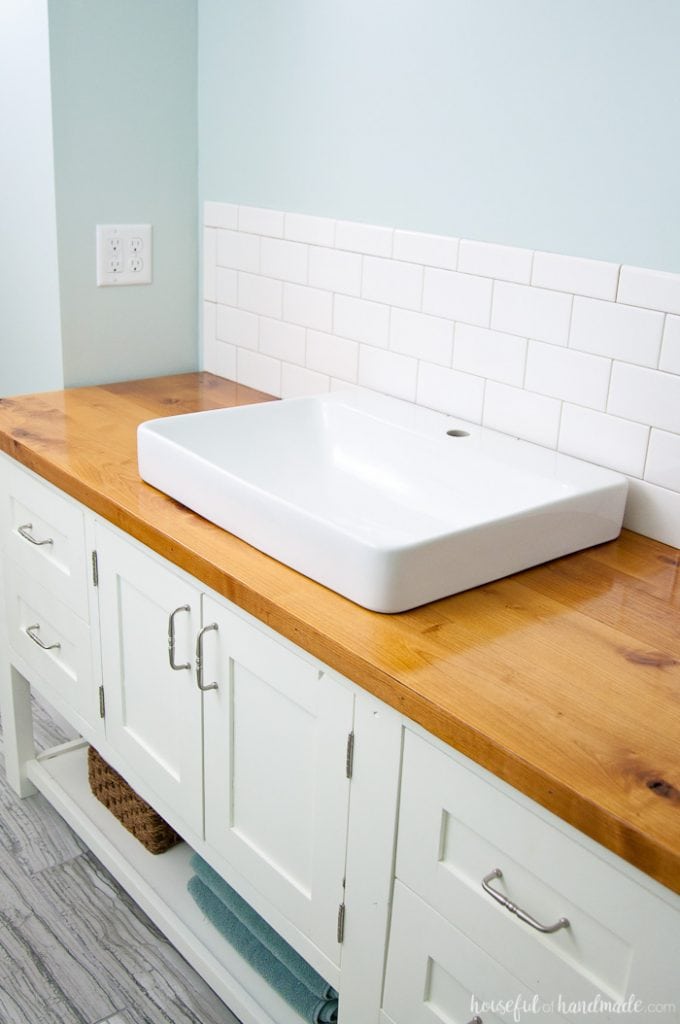
How long does a wood vanity top last?
It has been 3 years since we added our wood vanity top to our master bathroom and it still looks amazing! The Waterlox sealer did such a great job of protecting the vanity that we were excited to use it again in our new home.
And what better test for a waterproofing finish than on kitchen countertops? See how amazing it looks and learn how to build & seal wood countertops here. And we used a newer formula that has a matte finish.
Plus, you can use Waterlox on way more than just countertops! We just used it to protect the benches around our fire pit area and it looks amazing.
How to Build & Protect a Wood Vanity Top
Supplies:
- Waterlox Original Sealer & Finish
- 1/2″ plywood (a piece large enough for your vanity top)
- 3/4″ thick solid wood boards (enough cover your plywood)
- I used knotty alder for a harder (but budget friendly) wood and I love the knots in it. I used 4- 1×4 boards across the top and a 1×2 board for the edging along the front.
- Heavy duty construction adhesive made for wood
- 1″ wood screws
- 1 1/4″ wood screws
- Finishing nails
- Natural bristle brush
- Paint thinner
- Scrap wood
Build the vanity top
STEP 1- Cut and scribe plywood base
Start by measuring carefully, then cut a piece of plywood that would be the size of your vanity top, minus the 3/4″ edging on the front (and sides if needed).
I wanted the vanity top to hang over the front of the vanity 1″ so I cut my piece of wood 1/4″ bigger than the vanity.
EXPERT TIP:
Make sure to measure from the wall to the front of the vanity and measure in multiple spots along the vanity top since most walls are not perfectly straight.
Make sure the plywood is the largest measurement.
When I installed our vanity, I discovered our wall was very crooked and there was a 1/2″ difference from one end of the vanity to the other.
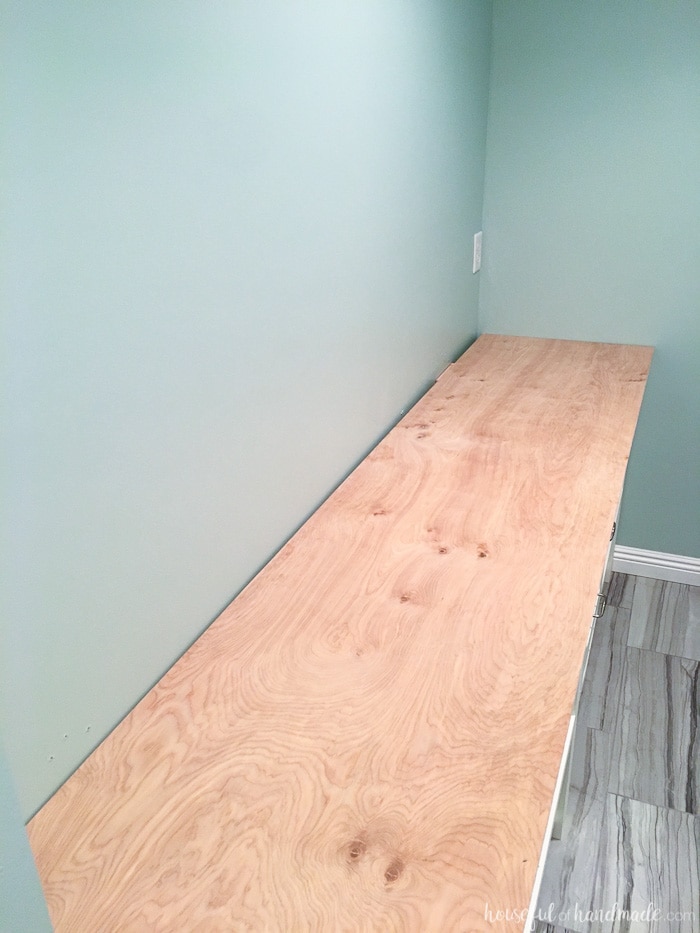
Once the plywood is cut, place it on top of the vanity. Make sure the plywood has an even overhang on the front of the vanity.
Now you will want to scribe the shape of the wall onto the plywood so you get a nice tight fit against the wall.
To do this, use a scrap piece of wood or paint stirrer and tape a pencil to it so the wood is flush against the wall and the pencil tip is at the edge of the wood at the widest gap.
Then keeping the wood flush against the wall, run the pencil along the entire piece of wood, drawing the line of the wall onto the plywood. Do this on any edge of the plywood that is going to be flush agains the wall.
Once you have your wall lines drawn on the plywood. Remove it and using a jig saw, cut along the lines. Now you have a piece of plywood that should fit nicely on top of your vanity.

STEP 2- Build wood top
UPDATE: The method I used of glueing the boards to the plywood is not recommended because it does not allow for wood movement.
The best method is to glue the pieces of wood together at the sides (like I did for these DIY wood kitchen countertops) and let that float on top of the plywood.
You can attach the plywood with a few screws & washer through large holes (like in the wood countertops post) to still allow wood movement.
I am still leaving the previous tutorial for reference, but this method will result in small gaps between the boards as the wood expands and contracts over time and with humidity changes.
It is time to add your solid wood to the top of the plywood now. I only had one side that was not against the wall so I started with that side and let the wood extend past the plywood on the other side.
When it was done, I just cut off the excess along my wall line with the jig saw. If both edges are going to be flush agains the wall you can do that on both sides.
Cut the edges that will not be against the wall at 45 degree angles. I cut the short edges on the ends of my 1×4 boards with my miter saw and I cut the long end of the board that would be on the front of the vanity with my table saw.
Add a line of construction adhesive to the underside of the wood board and then carefully line the bottom edges of the 45 degree angle with the top edges of the plywood. Clamp the board in place and secure with some 1″ wood screws from underneath.
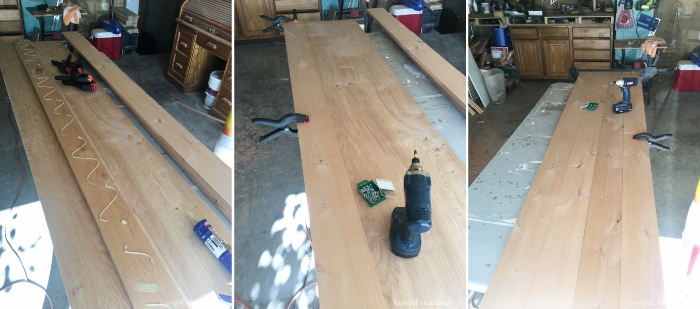
Now repeat with the remaining boards until you have covered your entire plywood with the solid wood boards. Make sure the cut the edges of any boards that will not be flush against the wall at a 45 degree angle.
Once all the top boards are secure, it is time to add the edge boards. Cut these boards at 45 degree angles to. I cut the 1×2 board for the very front of the vanity with my table saw.
For the sides, I cut 4 pieces of 1×4 boards 1 1/2″ wide (so they were the same as my 1×2 board), then mitered the top and used them to cover the side edges. I feel like it looks nicer to have the seam in the boards on the side the same as you do on the top. I made these cuts on my miter saw.

Using the construction adhesive and finishing nails, secure the edges to the vanity top. Make sure the miters match up nicely.
Let the adhesive dry well.
STEP 3- Cut top to fit & for sinks
Cut the excess boards off the sides that will be flush against the walls.
Flip the vanity over so the plywood is on top and use the plywood that was already cut to fit flush against the wall as a guide to cut away the excess boards.
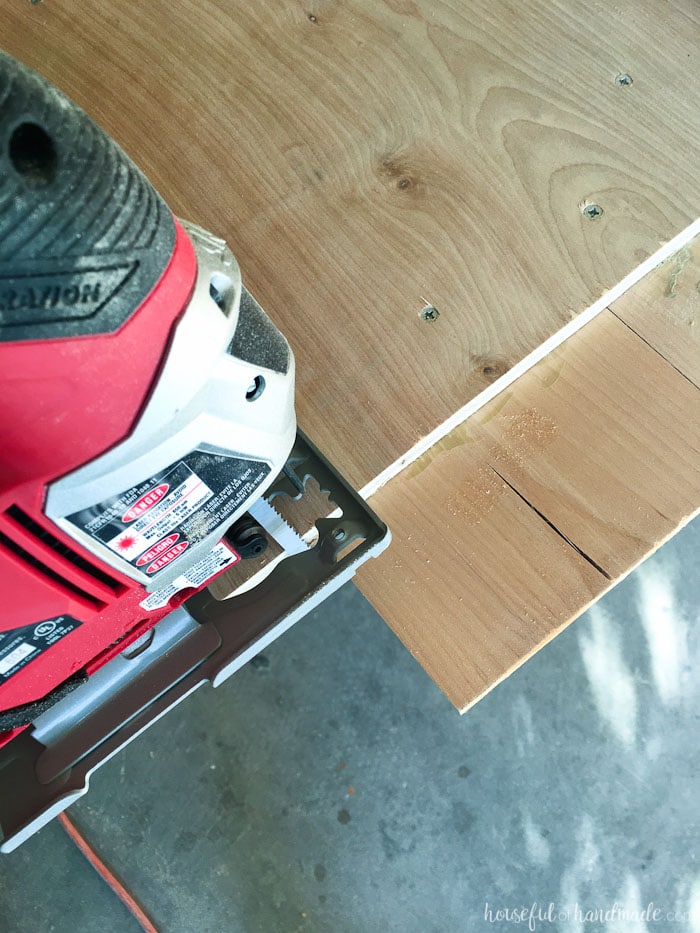
Then it is time to cut holes for your sink.
I chose to cut the holes before sealing the wood so that the edges where I would be cutting would be properly sealed too.
Obviously there will be more water around the sinks so this is a good precaution.
Use the cutting guide that comes with your sinks to cut the holes. Use a drill to make starter holes, then use a jig saw to finish the cutting.

STEP 4- Sand vanity top
Fill any holes with a stainable wood putty. I decided to leave the few holes left by the finishing nails to the edging because I love the homemade, rustic look of it.
Give your DIY vanity top a proper sanding.
Start with a coarse sandpaper, then step down to finer grit. Use a 100-150 grit sandpaper for the final sanding to make the surface ready to receive the Waterlox sealer.
After sanding, clean off the surface of your wood so you have no lingering dust.
I start with a good vacuuming, then use a microfiber cloth. Then I finish with a tack cloth. You can also use a lint-free cloth dampened with mineral spirits.
Seal the Vanity Top
If you want to stain your countertop, you need to do it before adding the sealer. The Waterlox TrueTone color infused Tung Oil stains are a great option that works with the sealer. You can see how each color looks on different species of wood here.
Now before we get into applying the Waterlox sealer & finish we need to talk about a few things. This finish is super awesome because it is a tung oil to penetrate the wood and a resin to seal and waterproof the wood. This special finish requires oxygen to cure.
If you are lucky enough to have a bathroom with windows, you can use a fan on low in the open window to bring in fresh oxygen to allow the Waterlox finish to cure. I am not that lucky. All of our bathrooms are completely window free.
So after reading all the instructions on the Waterlox website, I decided the best option would be to apply the finish to our vanity top in the garage and then install it after it was dry.
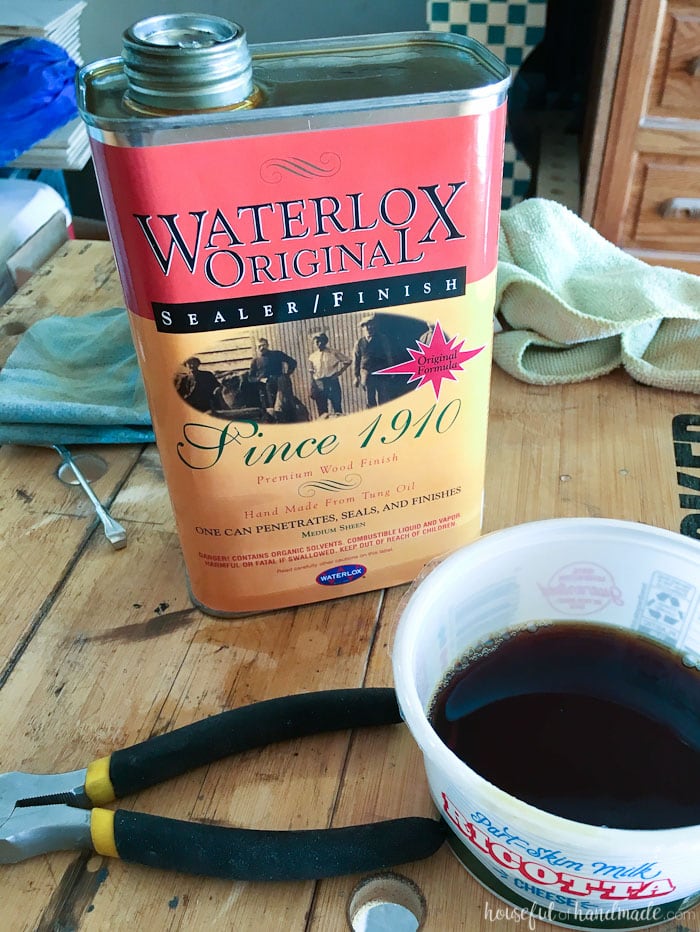
This plan worked well for us because the weather has been so nice, we were able to leave our garage door open all day (closing it at night). Each coat of finish was properly dried after 24 hours.
There was no wind so we didn’t have to worry about dust being blown into the finish before it dried. And most importantly, I didn’t have to worry about dripping the finish on my new tile floor or all over the vanity.
STEP 1- Apply the first coat
Now it’s time to add the first coat of Waterlox Sealer & Finish!
Pour some of the finish into a different container. Only pour out a little bit because it will start to set up when exposed to oxygen and you should never return unused finish back to the container or it can start to gel. Immediately put the plug back on the container to keep out oxygen.
I’m not going to lie, I was a bit scared to finally put sealer to the wood, but it went on like… well, like water. The finish is not thick like a polyurethane coating, but more like a stain.
Using a natural bristle brush, soak up a good amount of the sealer and brush it onto the wood. The wood will start to darken as the finish absorbs into the wood, bringing out the natural deeper tones of it.
Working with the grain, brush the finish onto the wood. Make sure to get all around the edging (even on the underside of it) and inside the sink holes. Feather out the strokes so you don’t end up with thick spots.
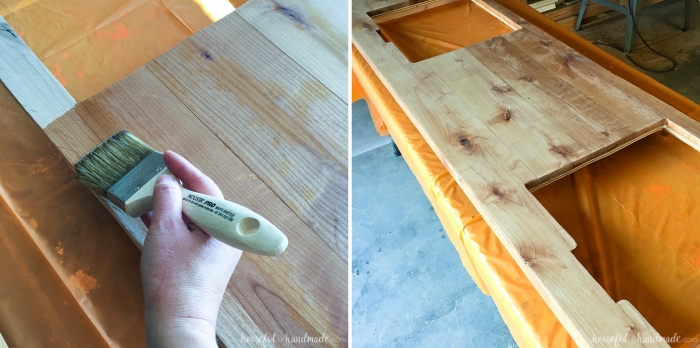
The first coat really soaked into the wood almost immediately. The wood looked wet, but not shiny at all.
Let the coat cure with good ventilation (in our case, leaving the garage door open) for 24 hours. If it is cold or humid or you have poor ventilation it can take longer than 24 hours to cure.
STEP 2- Apply remaining coats
When the first coat is fully dry, you can put on the second coat.
Because of the way the Waterlox finish is made to work, you do not even have to sand between coats, I just wiped it down with a lint-free cloth to make sure there was no dust on it before adding the new coat.
The second coat left a bit of sheen on the surface, but after the 24 hours was almost completely gone as it too had soaked into the wood. I was really impressed with how much it was truly penetrating the wood.
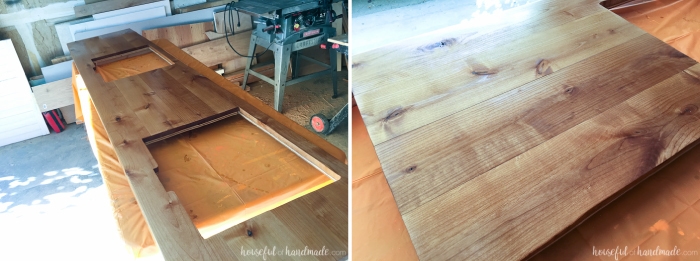
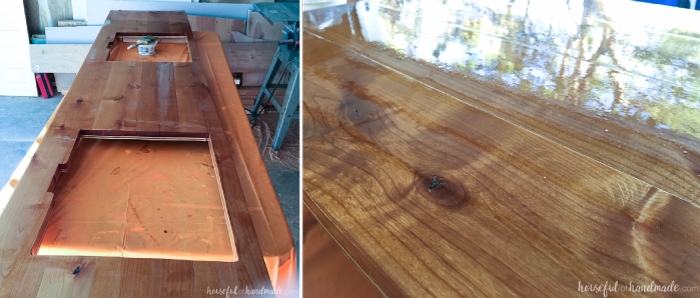
After 3 more coats, the surface had an almost glass-like film on the top of the entire vanity top. The whole surface had a sheen, that will dull to more of a satin sheen as the finish continues to cure.
After the 5th (and final) coat of Waterlox, we let the vanity cure in the garage for 48 hours before bringing it in the house to install.
It will continue to need adequate oxygen (which we will give it with open windows in the bedroom and fans) for about 30 days until the surface is fully cured. But I was eager to get it installed so we could continue on with the remodel.
Install the vanity top
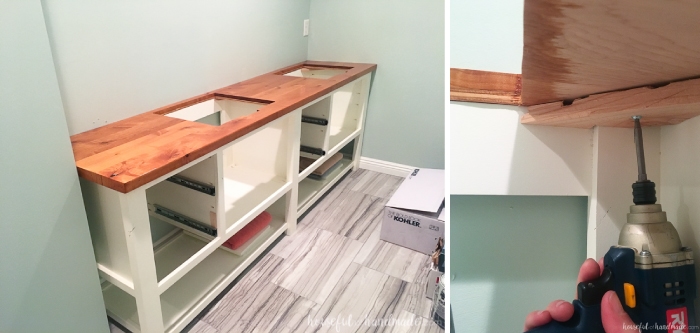
To install the vanity top, I needed something on the vanity to attach the top to. Using some scrap wood, I cut some 1x3s with the ends at 45 degree angles to attach to the corners of the vanity.
I used my Kreg jig to add holes to these pieces of wood and secured them to the top corners of the vanity.

After installing, drill holes larger than the screw head into the center to attach the vanity top. This larger hole holds the vanity in place (with a washer) but still allows wood movement.
Carefully slide your new wood vanity top in place.
Use 1 1/4″ wood screws with washers to attach it to the wood corners. Now the vanity top is not going anywhere!
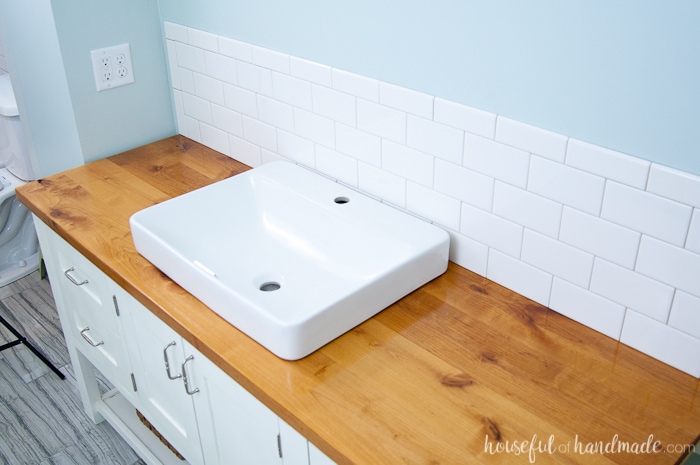
I couldn’t believe the difference the new wood vanity top had on our room.
It adds the warmth I was looking for in an otherwise white and gray bathroom. And it really does feel like a spa!
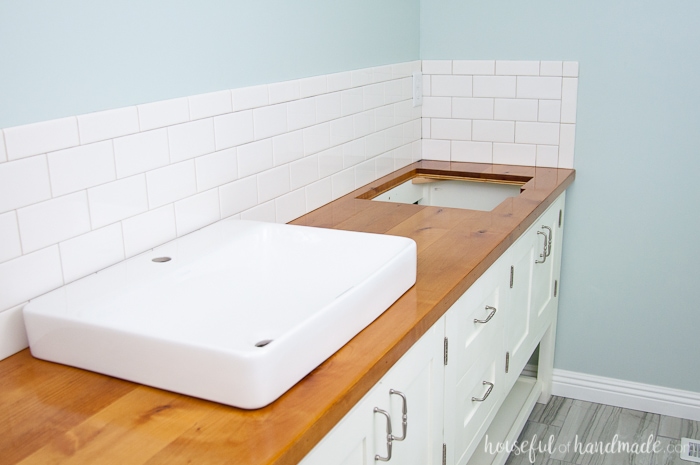
I was so eager to get the rest of the vanity finished, that I spent my Saturday night tiling the backsplash.
It only took me a couple hours and I am finally seeing the finished room come together.
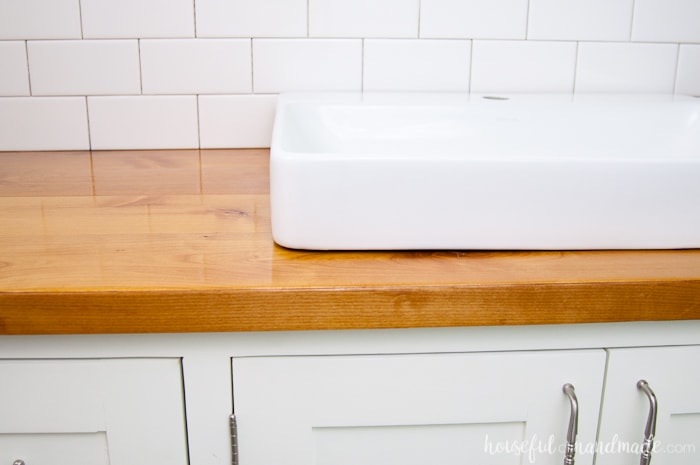
There is still a lot to do, if you look closely you will see that I need to grout the backsplash.
We also need to buy sink #2 and get them installed (I am just waiting until the backsplash is finished so it’s not in the way). But I just wanted to give you a sneak peak of what our DIY spa like bathroom will look like with our new wood vanity top.
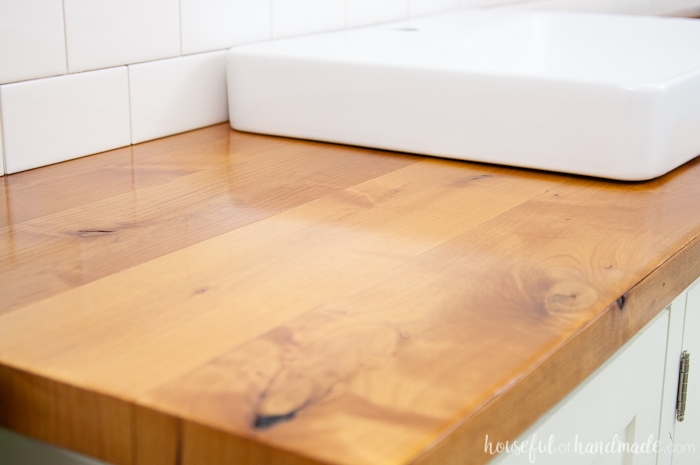
And don’t forget to check out Waterlox for your own DIY wood vanity top. I promise you will not be disappointed. I’m practically giddy with how awesome it looks 🙂
Now it’s time to go finish up that tile back splash so I can install that sink. I am beyond ready to be able to use my new bathroom!

Thank you to Waterlox for sponsoring this post. I only recommend products that I use and love and all opinions are 100% my own. Click here to read my full disclosure policy.
