Understand the difference in all the many sheen options to pick the right one for your next project.
When you see multiple sheens available for the different finishes, does it confuse you? Making sure the sheen you use is actually what you want is important!
So what is the difference between satin and semi-gloss? Does a matte finish actually have no shine to it? I partnered with Waterlox to test out all the different sheens they offer in all their products so you can see what the differences are.
No more guessing or being upset with the final product. Now you know exactly how glossy or shiny your finish will be before you get started.
This post may contain affiliate links. As an Amazon Associate I earn from qualifying purchases. Click here to read my full disclosure policy.
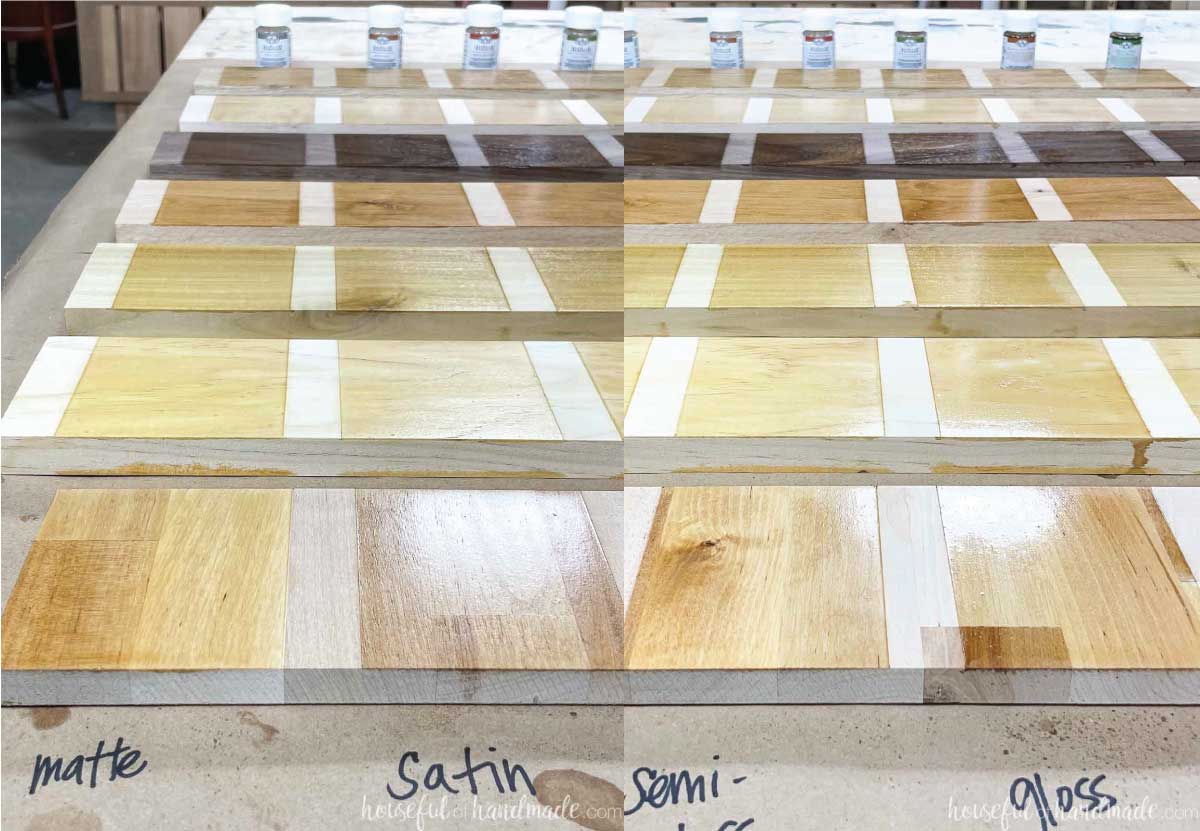
Different Sheens of Different Finishes
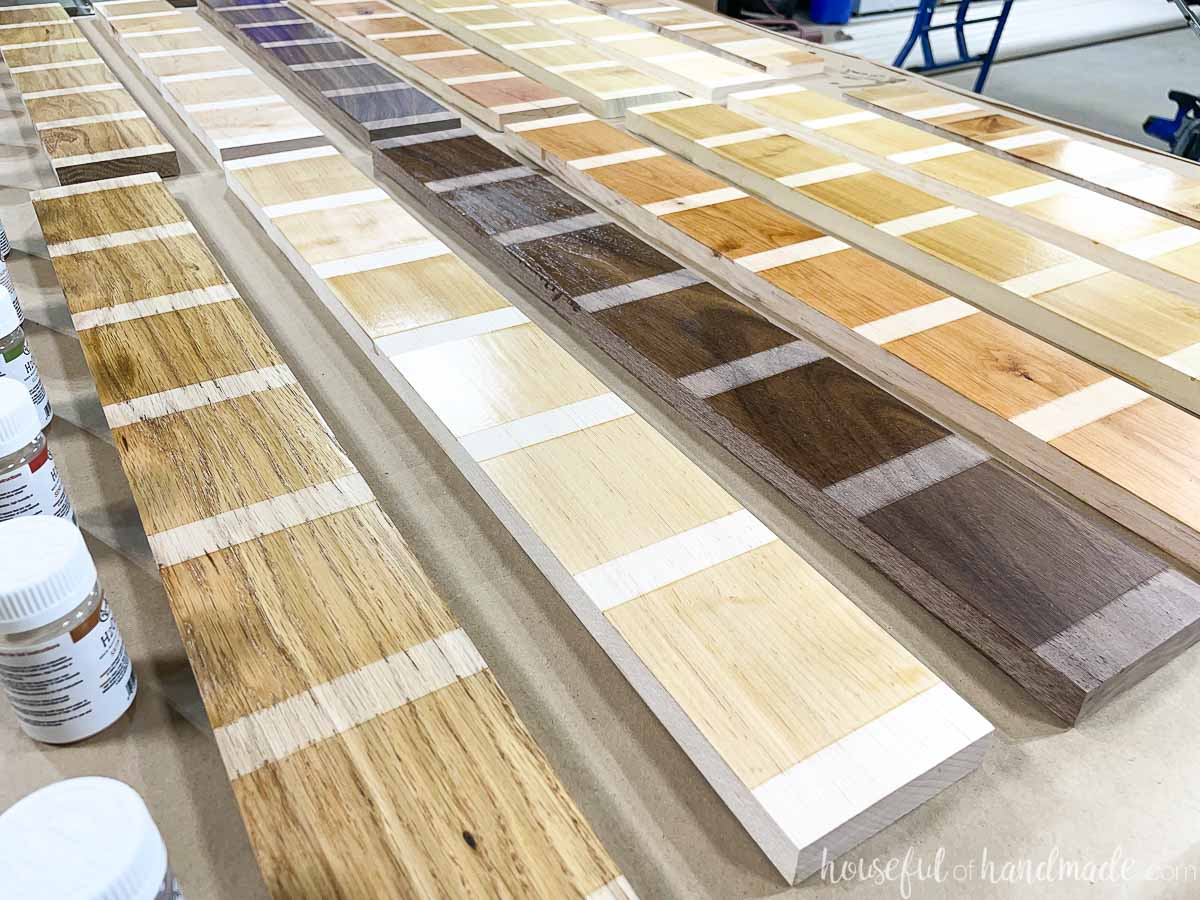
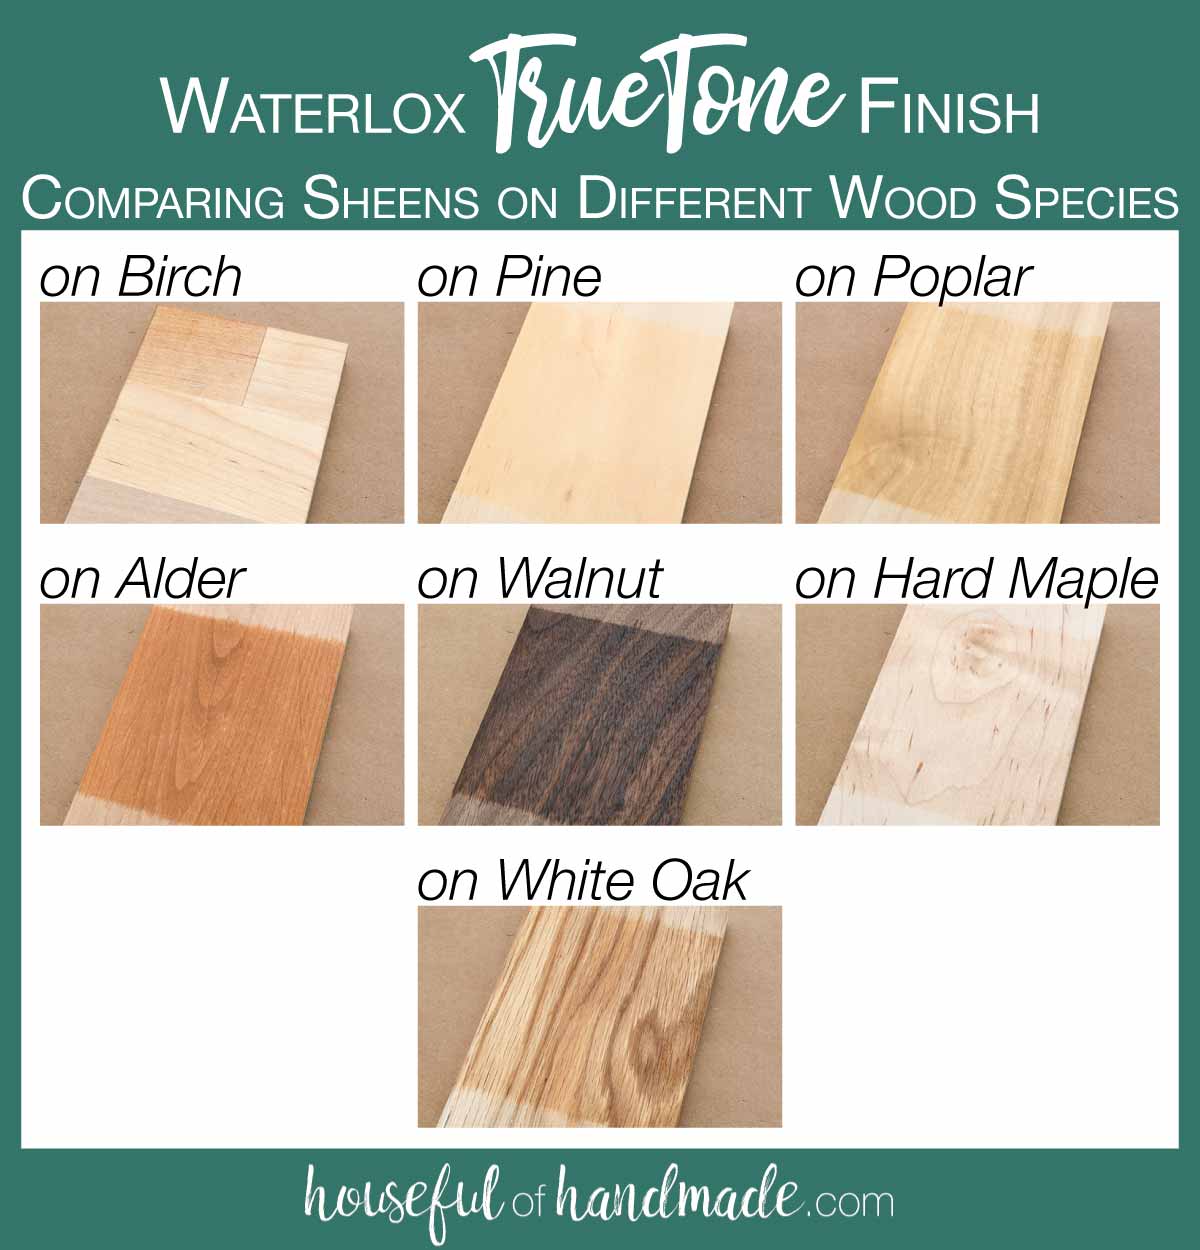
For the test, I used 7 different wood species to test the different sheens for all the finishes on:
- Birch (it was a scrap of a butcher block countertop)
- Pine
- Poplar
- Alder
- Walnut
- Hard Maple
- White Oak
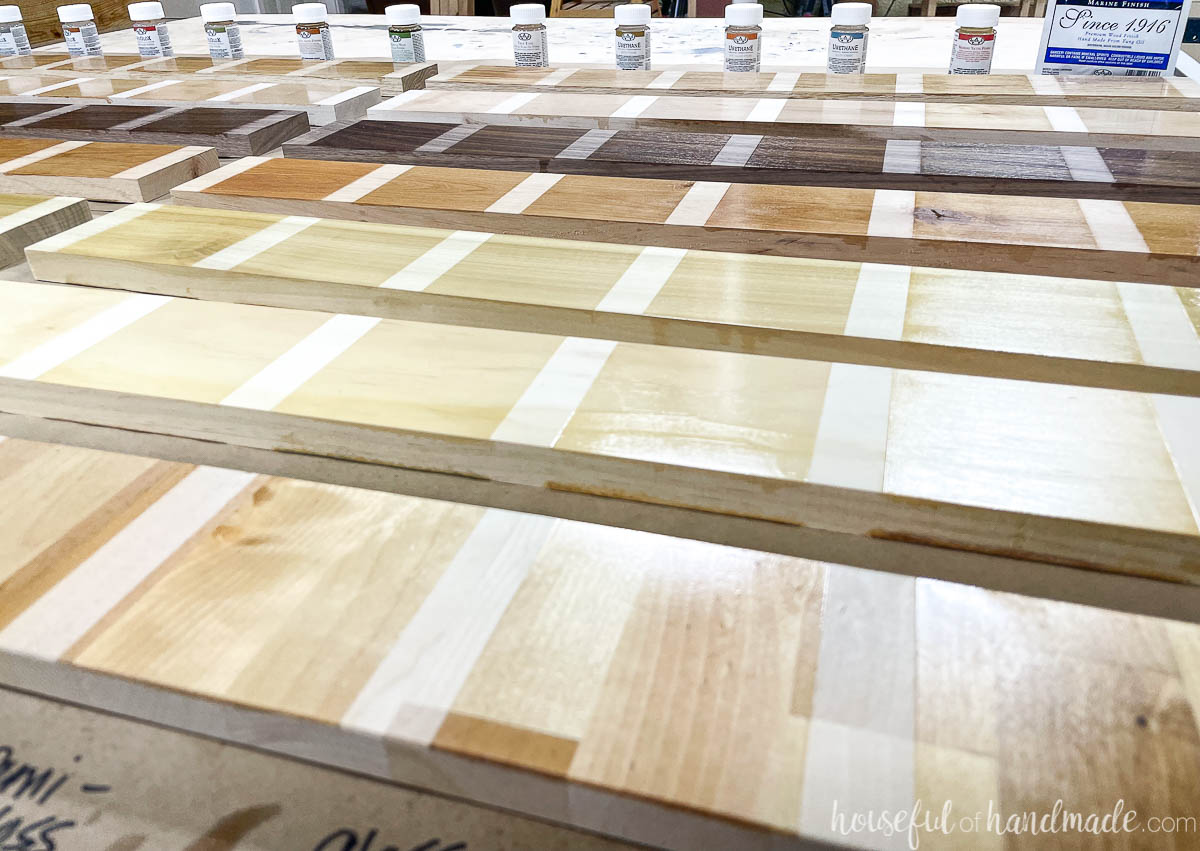
These different species offered a variety of wood harnesses and colors. Seeing the different sheens and how the finishes effect the wood is very helpful.
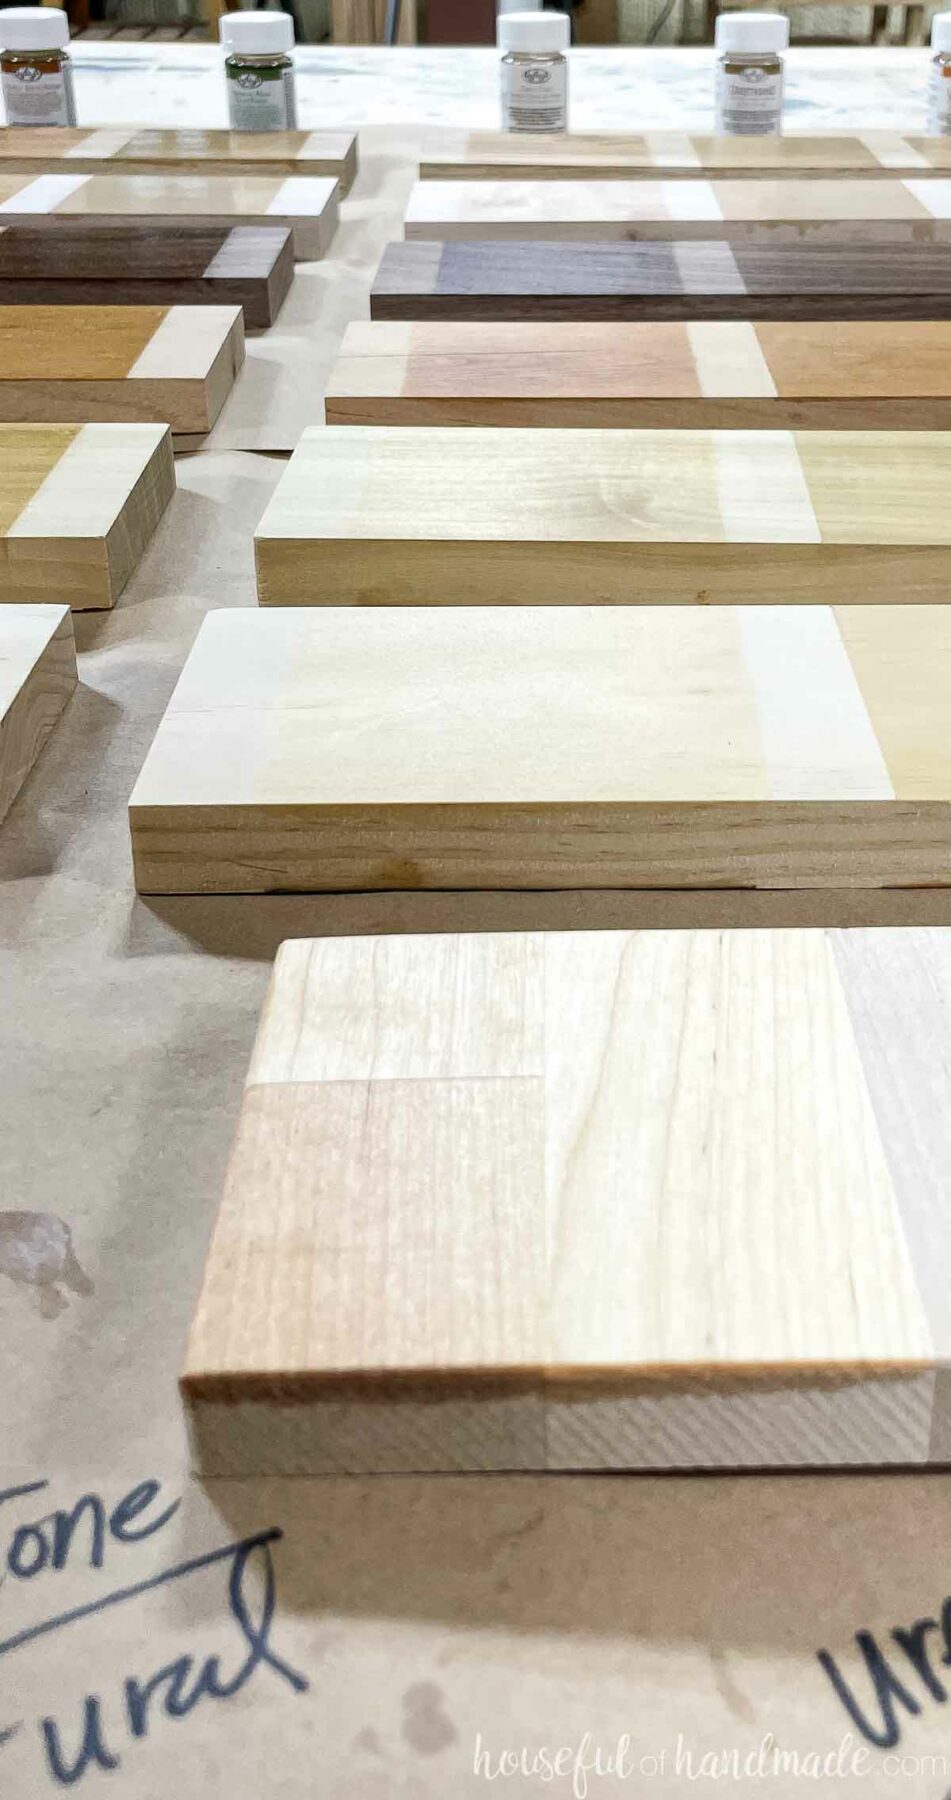
Also for the test, I made sure to finish the sample boards the same way I would finish the final project. If you do not sand the boards the same, the finish could be different from your test to your final project.
Below I summarize the application process for all the Waterlox finishes, which is how I applied it for my samples. Then I included close up pictures of the final sheens on each different board.
H2OLox Finish
H2OLOX is a low VOC, water-based finish perfect for any indoor project. It is non-toxic when dry and fully cured (great for food surfaces).
When used with the Universal Tung Oil sealer, the H2OLOX finish creates an elastic finish on the wood.
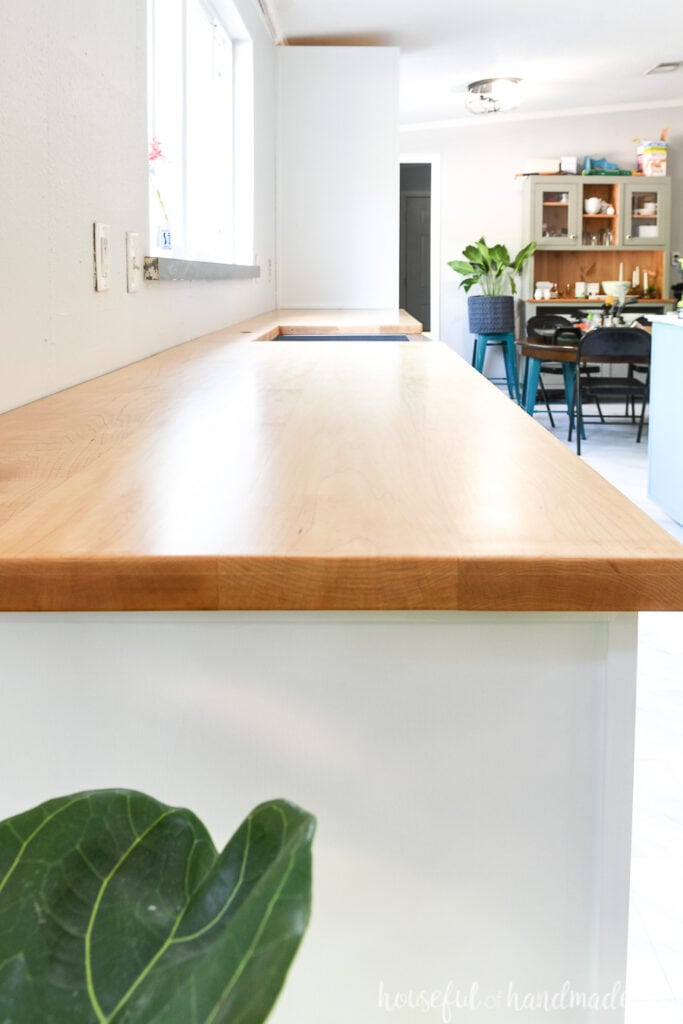
I used the H2OLOX in Matte on my DIY wood countertops to seal them against all the water the kitchen can throw at them. Almost 2 years later they still look amazing!
H2OLOX is available in 4 different sheens:
- Matte: 8-12° gloss level
- Satin: 30-40° gloss level
- Semi-gloss: 55-60° gloss level
- Gloss: 75-80° gloss level

How to Apply H2OLOX Finish
The H2OLOX application process starts with the Universal Tung Oil Sealer (UTOS). This sealer seals the wood to minimize grain raise and tannin/water interactions on your project. It creates a warm, rich color on the wood.
Universal Tung Oil Sealer Application
- Applicator: Lint free rag
- Dry time between coats: 24 hours
- Number of coats: 1 or 2 (for woods softer than oak or oily woods)
Step 1- Sand the finished piece to 100-150 grit. Vacuum away the dust and then clean the surface with a cloth dampened with water or mineral spirits to remove fine dust.
Step 2- Pour out small puddle of UTOS on surface of wood and buff into wood. Let sit for 10-15 minutes and wipe off any excess sealer.
Step 3- Let dry for 24 hours with good ventilation and airflow.
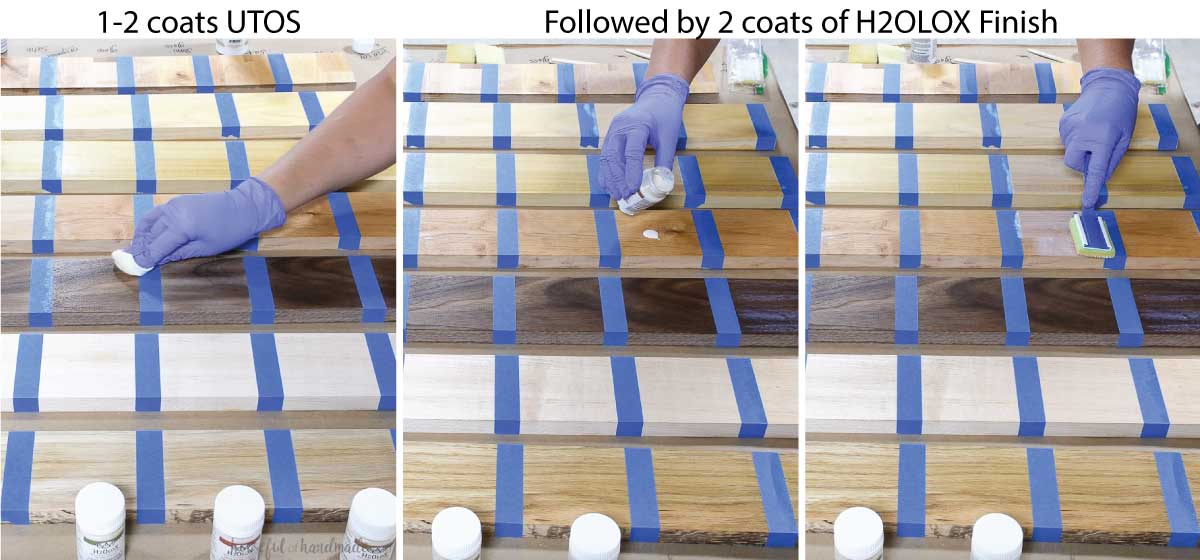
H2OLOX Finish Application
- Applicator: Foam brush or paint pad
- Dry time between coats: 24 hours
- Number of coats: 2 (may want a 3rd for very soft woods)
Step 1- Apply the UTOS (see above) and allow to dry for 24 hours.
Step 2- Pour out the amount of product needed for the first coat. Wet the entire surface.
Step 3- Pull the applicator with the grain to smooth out the finish. Do not overwork, it will naturally level. Watch for drips on edges.
Step 4- Let dry for 24 hours with good ventilation and airflow.
Step 5- Lightly sand between coats. Clean the surface with a lint free cloth dampened with water or mineral spirits.
Step 6- Apply second coat the same as the first. Repeat for a 3rd if very soft wood.
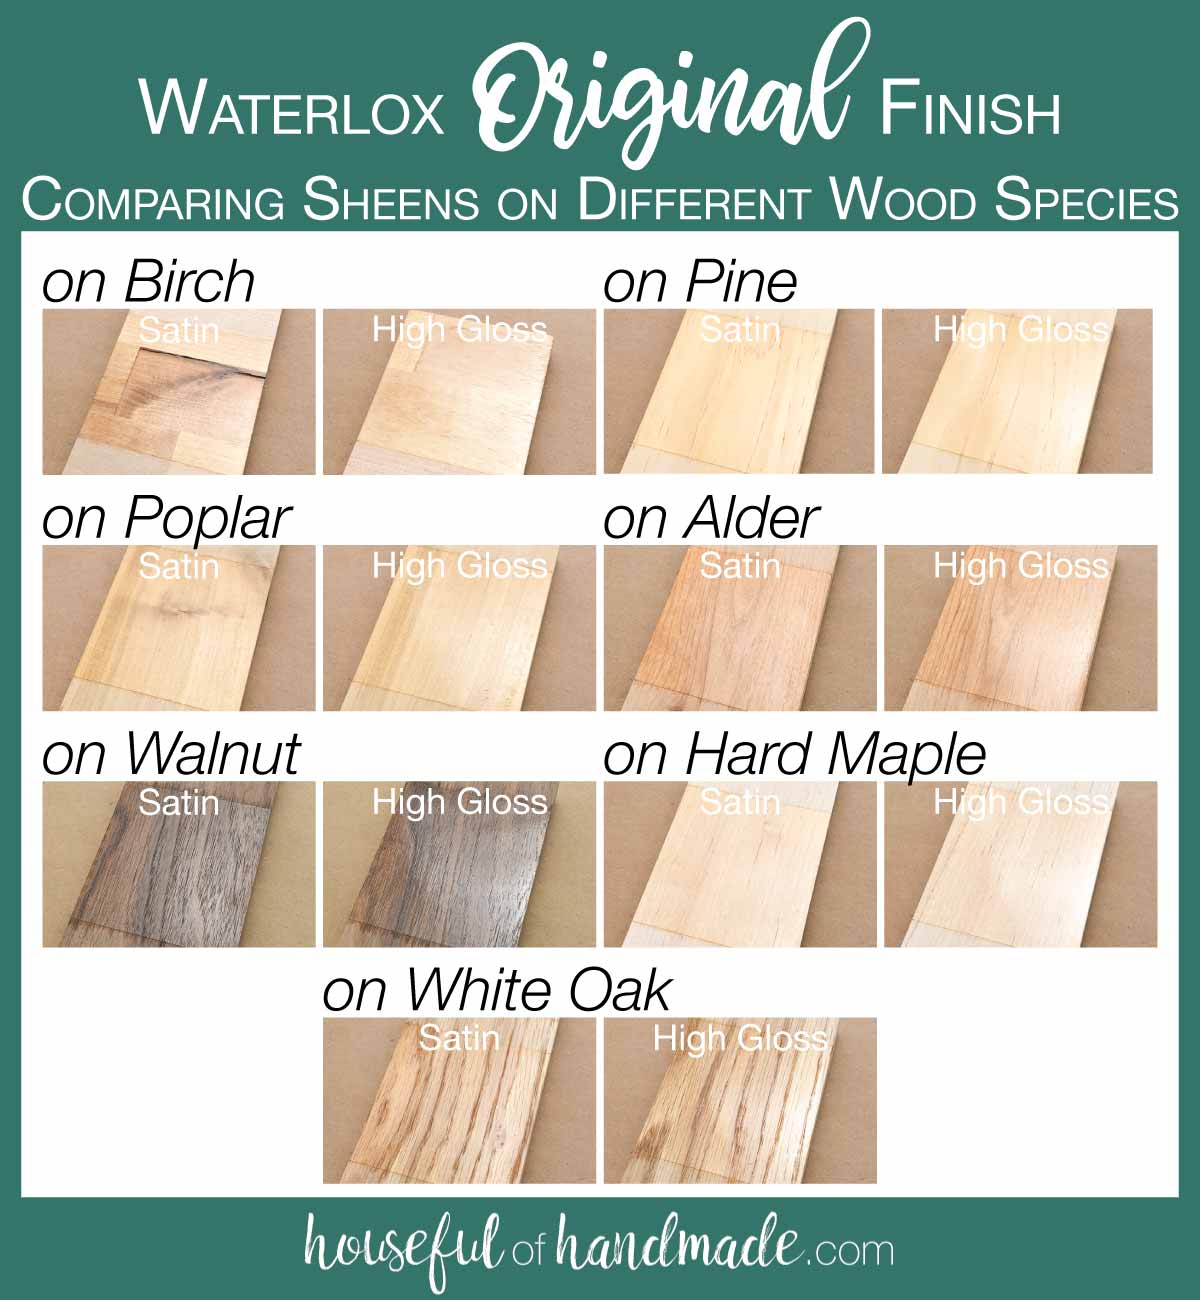
Original Finish
The Original finish from Waterlox is their oldest product (started in 1910). It brings out the beauty of your wood in any indoor project. It is non-toxic when dry and fully cured.
When used with a Waterlox sealer, the Original finish penetrates deep into the wood to create a waterproof barrier that remains elastic on the wood.
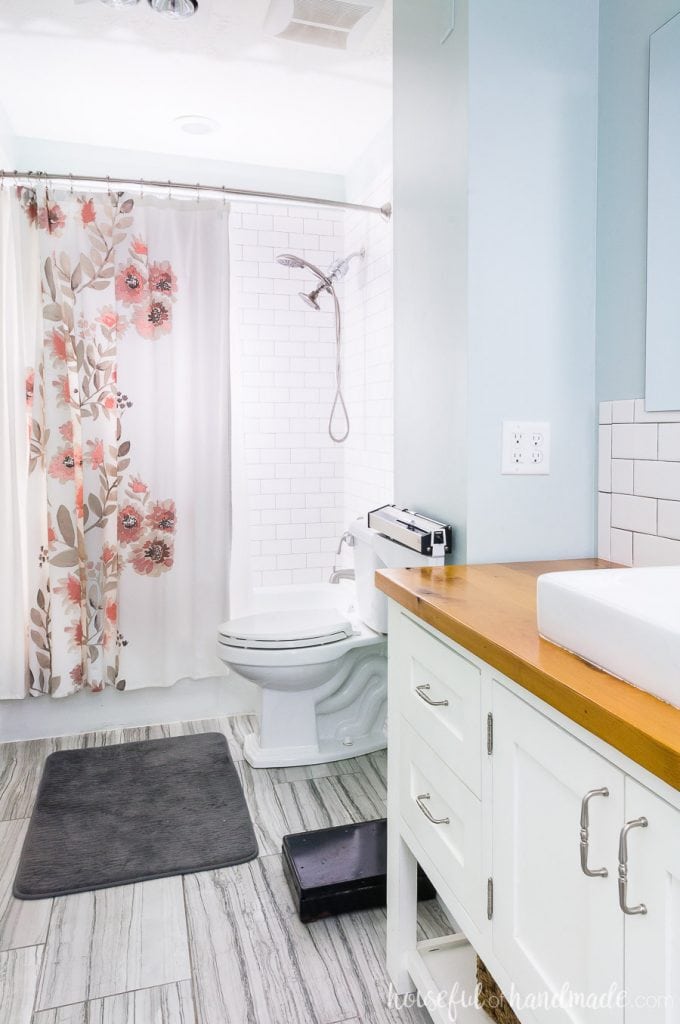
I used the Original finish on my DIY wood vanity top in our last home. The warmth of the finish gave our bathroom a spa-like feel. I miss this amazing space!
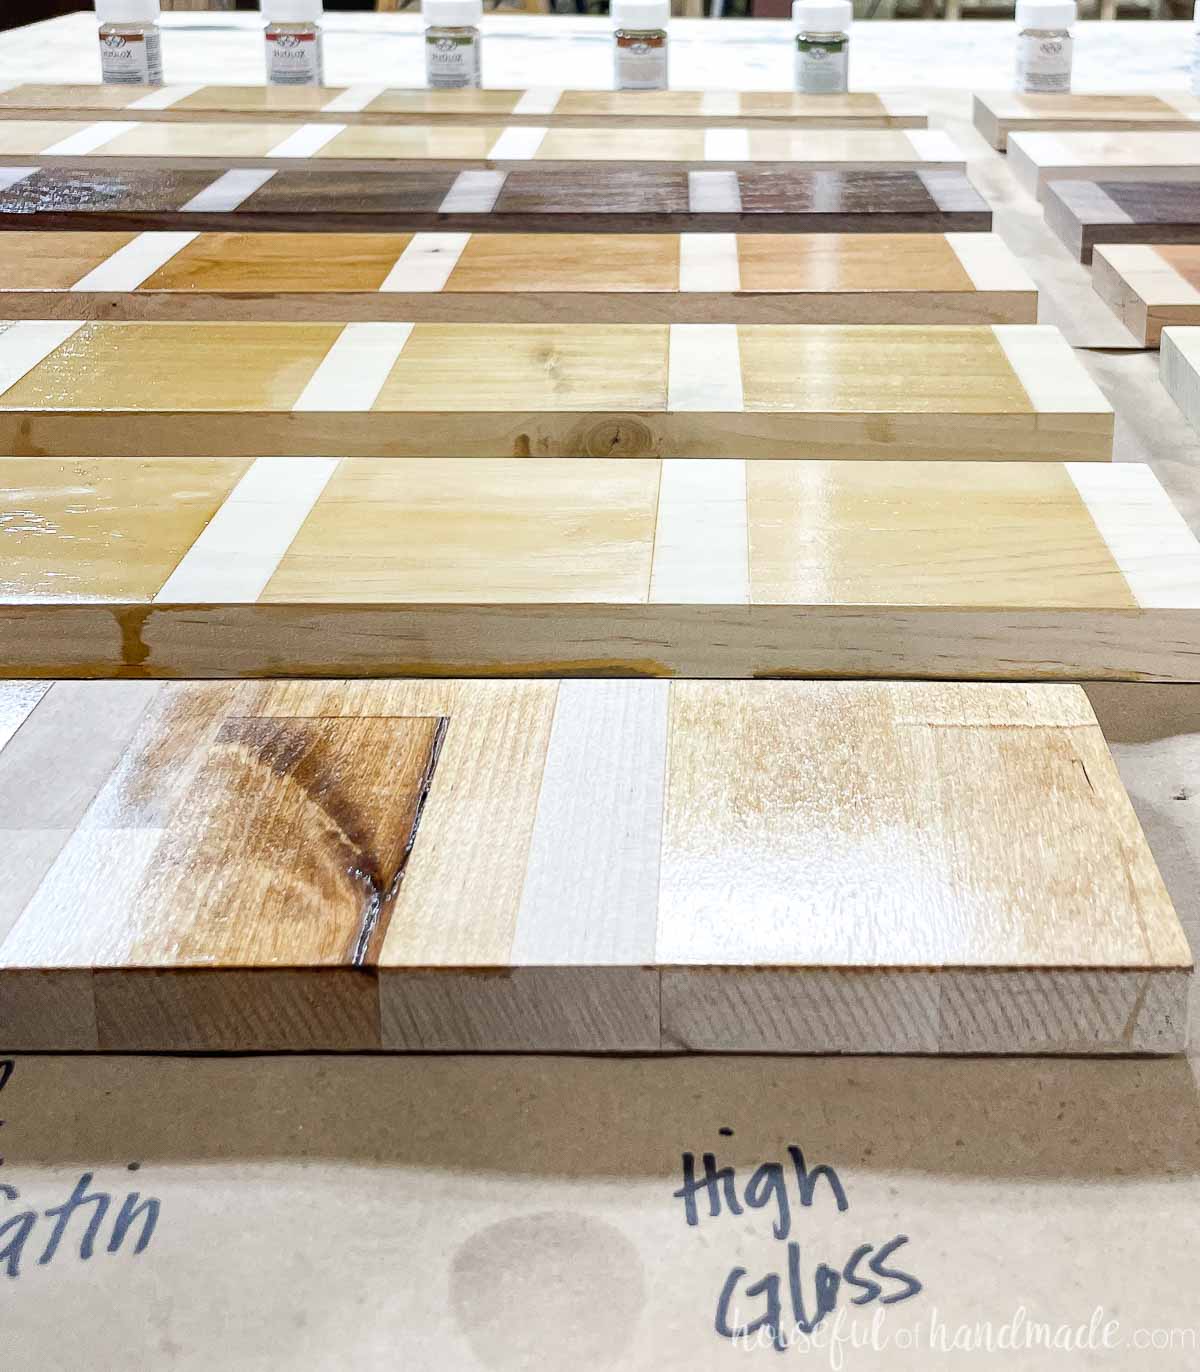
Original Finish is available in 2 different sheens:
- Satin: 20-25° gloss level
- High Gloss: 85° gloss level
How to Apply Waterlox Original Finish
The Original Finish requires a Waterlox sealer as the first coat. You can use either the UTOS or the Original Sealer. For this test, the Original Sealer was used.
The Original sealer seals the wood from within. It creates a warm, rich color on the wood.
Original Sealer Application
- Applicator: Natural Bristle Brush or Lambs Wool Pad
- Dry time between coats: 24 hours
- Number of coats: 1 or 2 (for woods softer than oak)
Step 1- Sand the finished piece to 100-150 grit. Vacuum away the dust and then clean the surface with a cloth dampened with mineral spirits to remove fine dust.
Step 2- Pour out the amount needed in a paint tray/container. Dip applicator in the finish and lightly drag across the wood with the grain. Make sure to maintain a wet edge.
Step 3- Let dry for 24 hours with good ventilation and airflow.
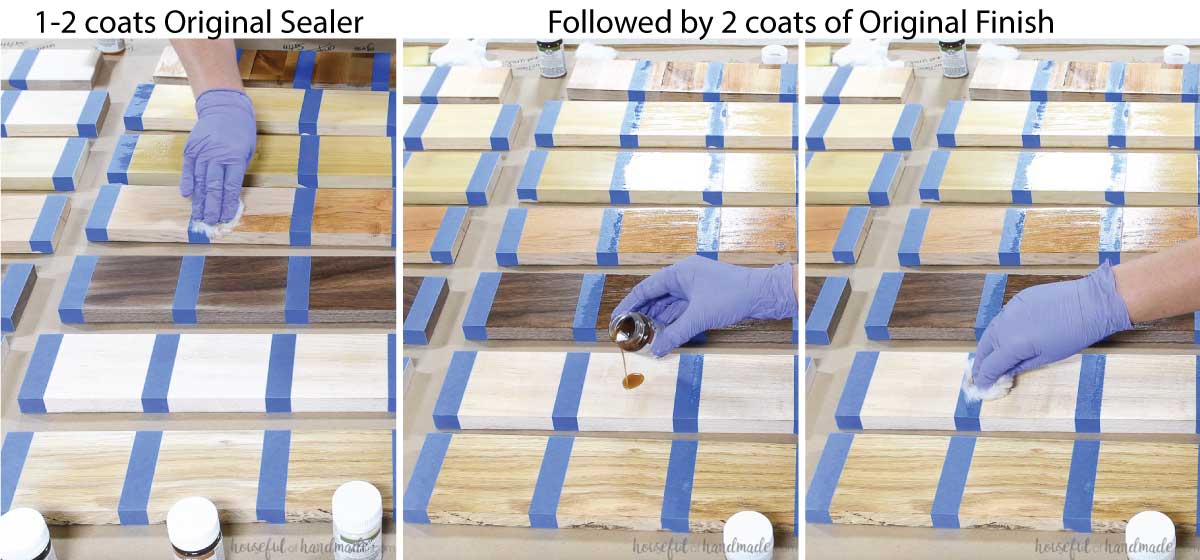
Original Finish Application
- Applicator: Natural Bristle Brush or Lambs Wool Pad
- Dry time between coats: 24 hours
- Number of coats: 2 (may want a 3rd for very soft woods)
Step 1- Apply the Sealer (see above) and allow to dry for 24 hours.
Step 2- Pour out the amount needed in a paint tray/container.
Step 3- Dip applicator in the finish and lightly drag across the wood with the grain. Make sure to maintain a wet edge. Watch for drips on edges.
Step 4- Let dry for 24 hours with good ventilation and airflow.
Step 5- Sanding between coats is not required, but you can if you see things that need a light sanding. If sanding, clean the surface with a lint free cloth dampened with water or mineral spirits.
Step 6- Apply second coat the same as the first.
TrueTone Tung Oil Finish
The TrueTone Tung Oil Finish is a buff in finish that creates a truly flat finish. It is used over the top of any of the TrueTone color infused tung oils (which I tested them all out in a similar test here).
The finish and color are buffed in to the wood. You can buff it in my hand with a lint free cloth, or use a buffer. The TrueTone finish is non-toxic when dry and fully cured.
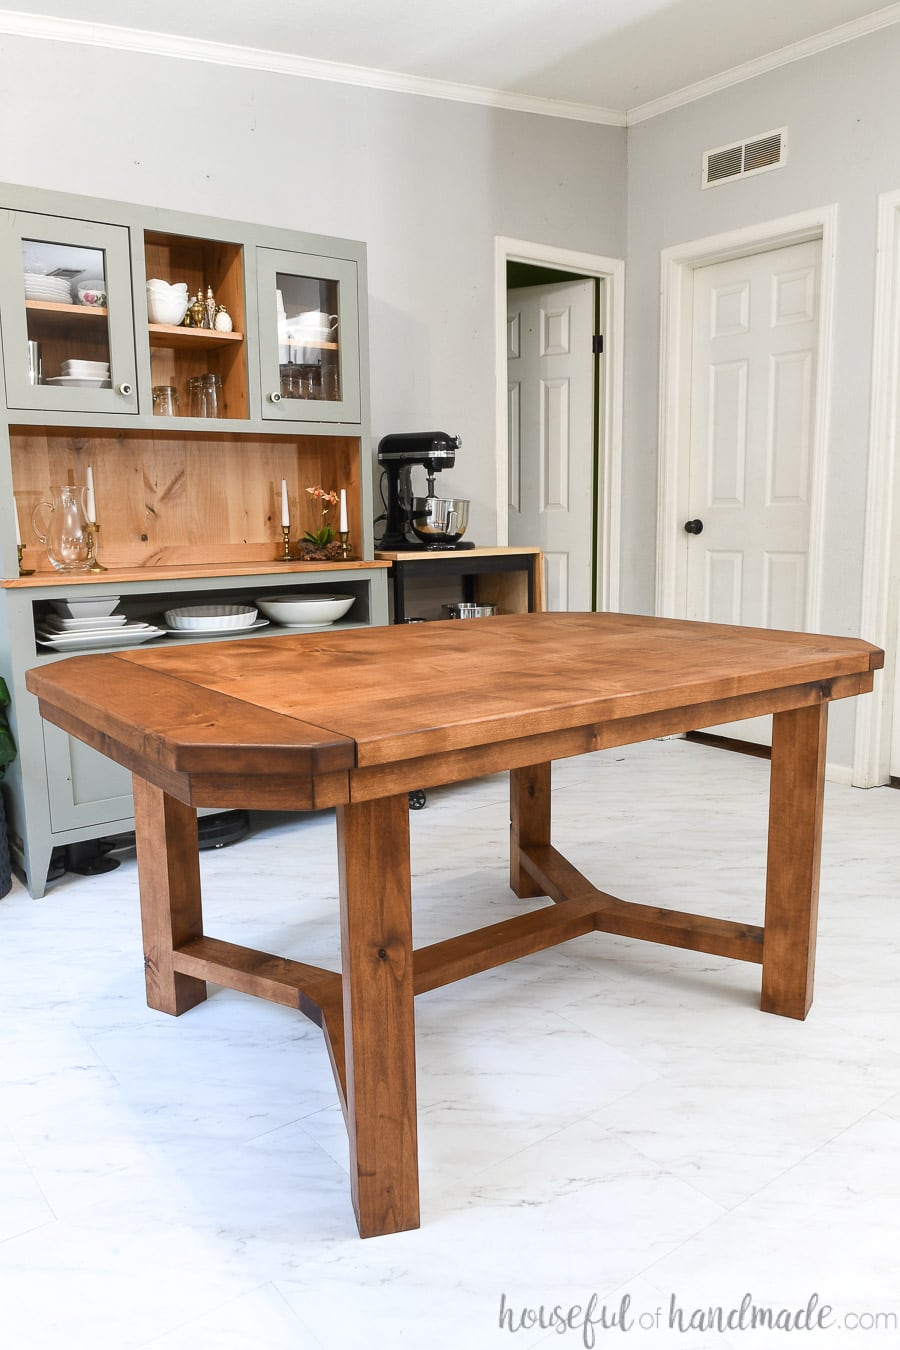
I have used the TrueTone finish on multiple projects (DIY dining table with leaves and refinishing an oak table). The color options are amazing and it’s so easy to apply.
This finish is the perfect way to get a matte, unfinished look on your project. You can use the white stain color to prevent the wood from darkening with the sealer like I did when sealing butcher block countertops in this post.
TrueTone Buff In Finish is only available in one sheen:
- Flat (no gloss)
How to Apply TrueTone Tung Oil Finish
The TrueTone Finish requires a a first coat of the TrueTone color infused Tun Oil. I tested all the TrueTone colors for you here.
If you do not want to add color to the wood, use the Natural color. This will add depth to the wood but not change the color. If you want the wood to stay light and unfinished looking, use the White or Pickled White.
TrueTone Color Infused Tung Oil Application
- Applicator: Lint Free Cloth or Buffing Pad
- Dry time between coats: 24 hours
- Number of coats: 1
Step 1- Sand the finished piece to 100-150 grit. Vacuum away the dust and then clean the surface with a cloth dampened with water or mineral spirits to remove fine dust.
Step 2- Pour out small puddle of TrueTone on surface of wood and buff color into wood. Don’t let puddles sit on raw wood.
Step 3- Rub off any excess TrueTone after 10-15 minutes. Do not let excess to dry on the surface.
Step 4- Let dry for 24 hours with good ventilation and airflow.
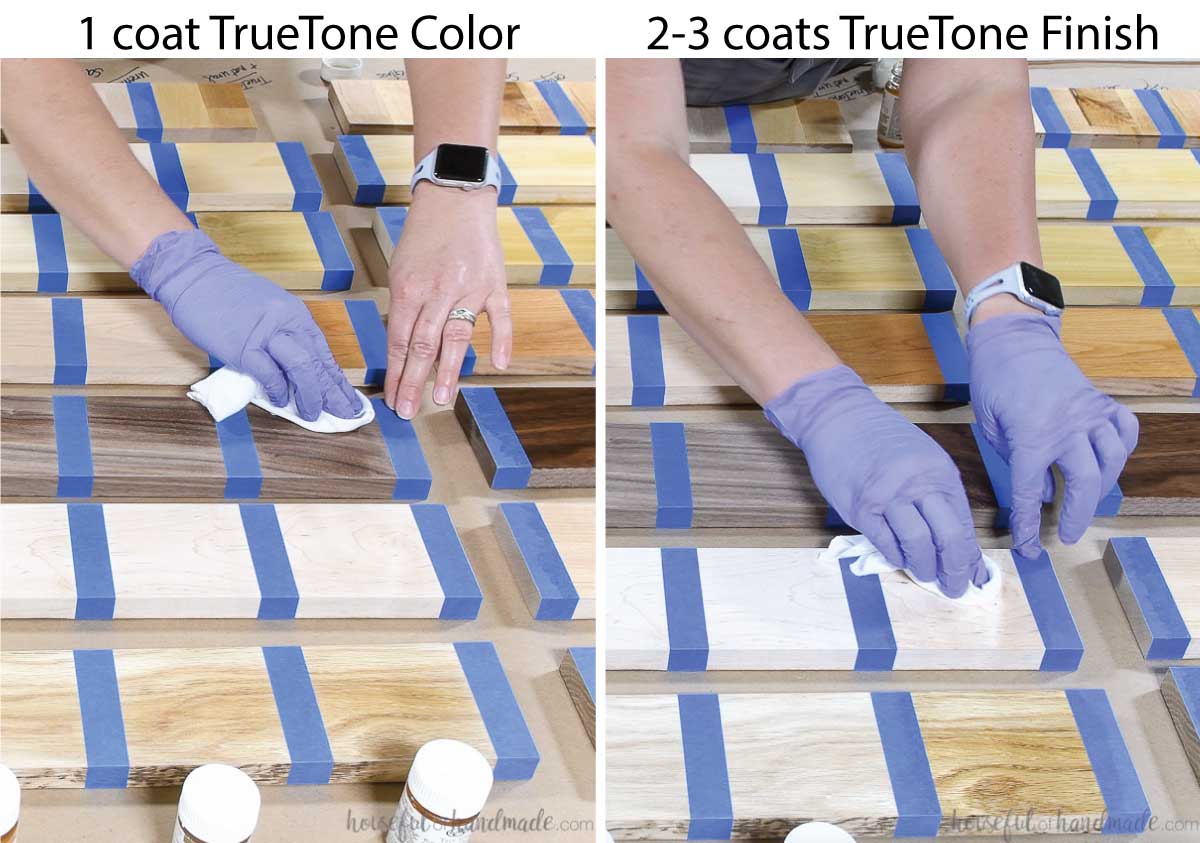
TrueTone Tung Oil Finish Application
- Applicator: Natural Bristle Brush or Lambs Wool Pad
- Dry time between coats: 24 hours
- Number of coats: 2 or 3 (for softer woods)
Step 1- Apply the TrueTone color (see above) and allow to dry for 24 hours.
Step 2- Pour out small puddle of TrueTone Tung Oil Finish on surface of wood and buff into wood. Don’t let puddles sit on raw wood.
Step 3- Rub off any excess TrueTone after 10-15 minutes. Do not let excess to dry on the surface.
Step 4- Let dry for 24 hours with good ventilation and airflow.
Step 5- Apply second coat the same as the first. Repeat for the 3rd.
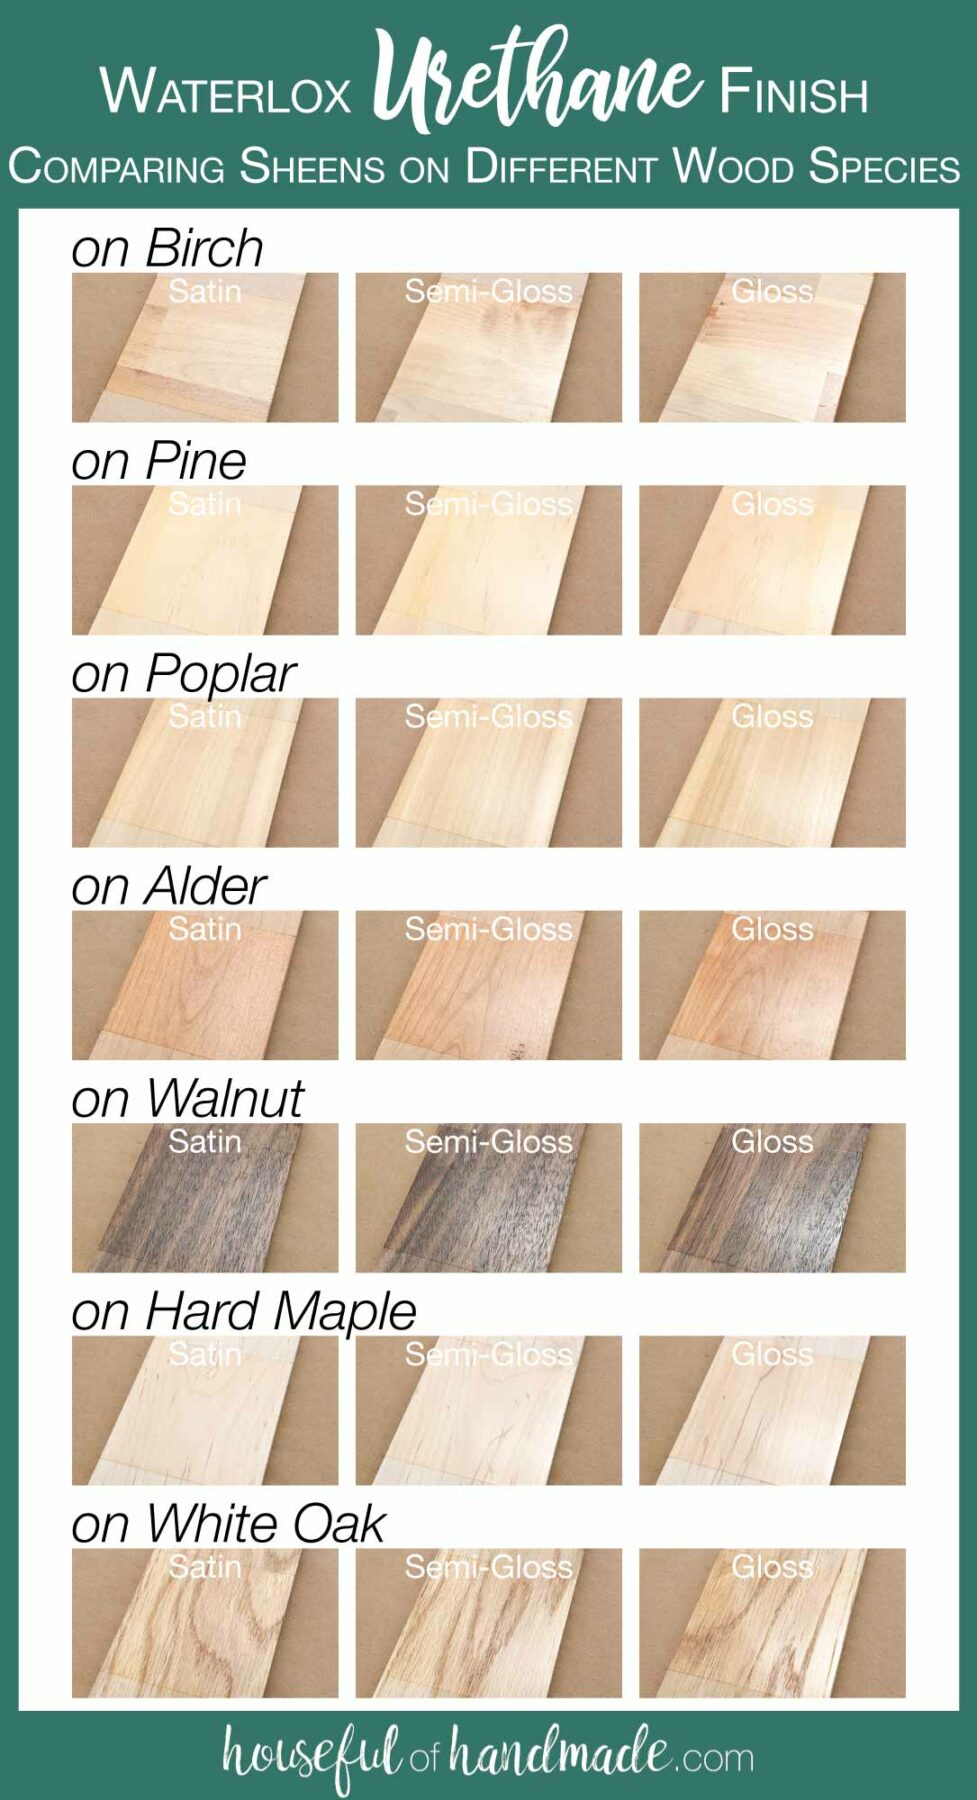
Urethane Finish
The Urethane Finish creates a rock-hard and crystal clear protective finish on your project. The Waterlox urethane formula will not yellow over time.
Because there is no ambering with the Urethane finish, it allows the natural color (or stained color) of your wood show through. The Urethane finish is non-toxic when dry and fully cured.
This is the first time I have used the Urethane finish, but it will not be the last. It looks amazing, creates a satin smooth finish, and is easy to work with.
Urethane Finish comes in 3 different sheen:
- Satin: 25-30° gloss level
- Semi-gloss: 70-80° gloss level
- High Gloss: 85° gloss level
How to Apply Urethane Finish
The Urethane finish does not require a sealer. The finish is applied directly to the
Urethane Finish Application
- Applicator: Paint Pad or Foam Brush
- Dry time between coats: 6-10 hours, if longer than 10 hours lightly sand between coats
- Number of coats: 3

Step 1- Pour out a small amount on the surface of your wood or dip your brush into the urethane.
Step 2- Wet the entire surface in the direction of the wood grain. Watch for drips on edges.
Step 4- Let dry for 6 hours before applying the next coat.
Step 5- Sanding between coats is only required if you wait longer than 10 hours between coats or if needed for aesthetics. If sanding, clean the surface with a lint free cloth dampened with water or mineral spirits.
Step 6- Apply second coat the same as the first. Then repeat for the 3rd.
Marine Finish
The Marine Finish creates an elastic finish on your project that protects it from the sun’s UV rays and harsh weather.
Use it with either the Marine sealer or UTOS. The two together penetrate deep into the wood to create a durable protective barrier. It is non-toxic when dry and fully cured.
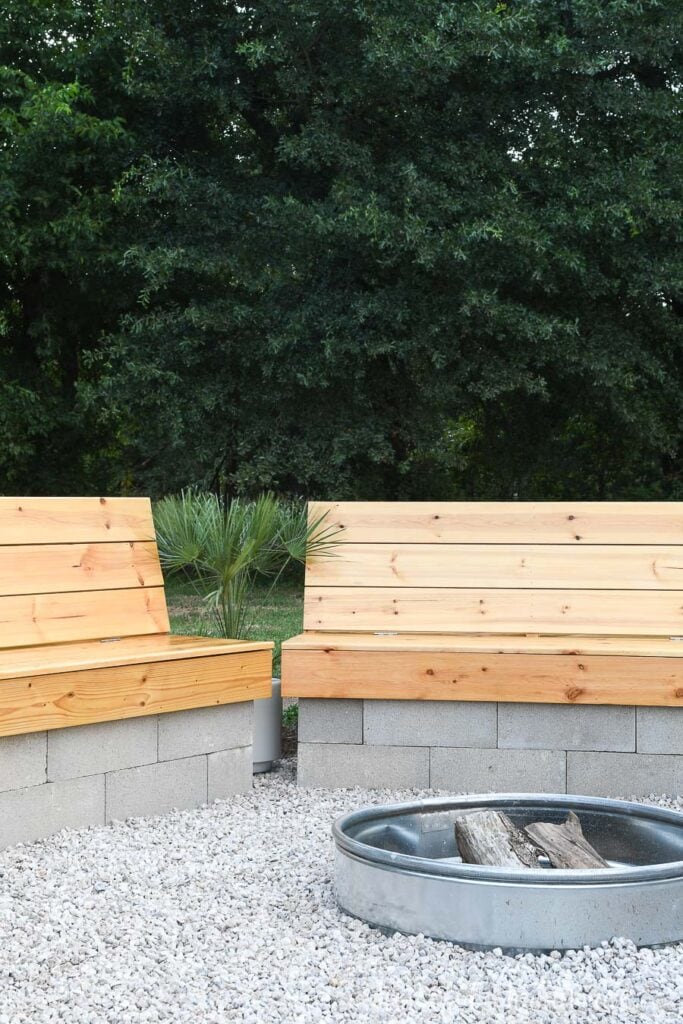
I used the Marine finish on the fire pit benches with storage. The UV protection is perfect for outdoor projects. Make sure to cover outdoor furniture when not in use to ensure a long lasting finish.
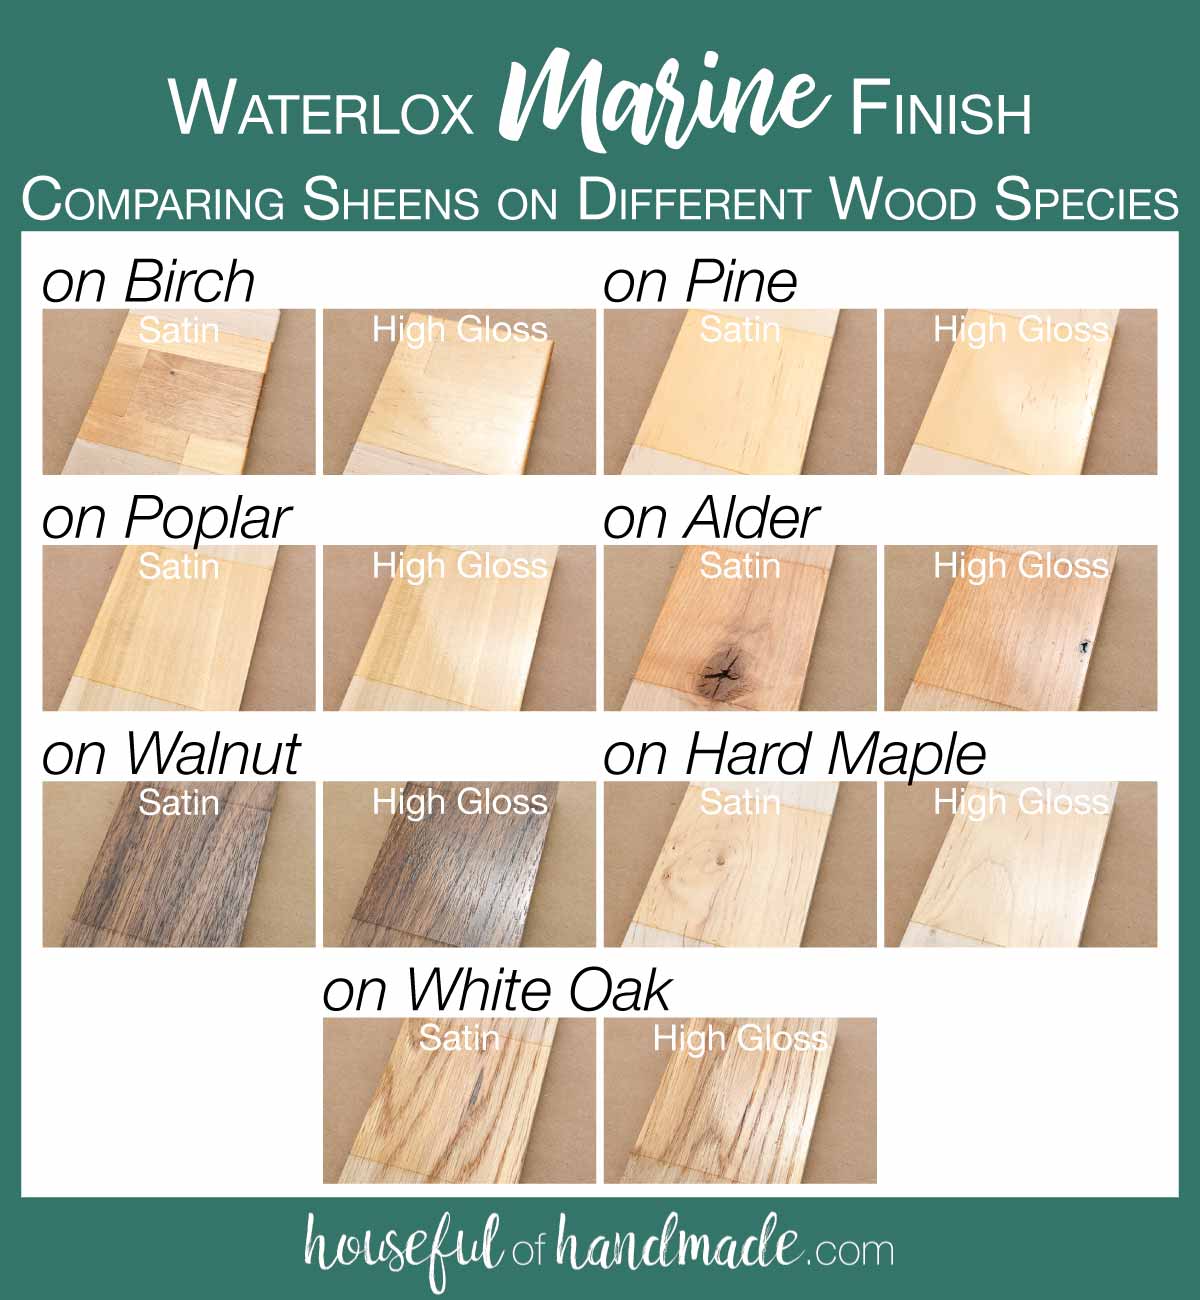
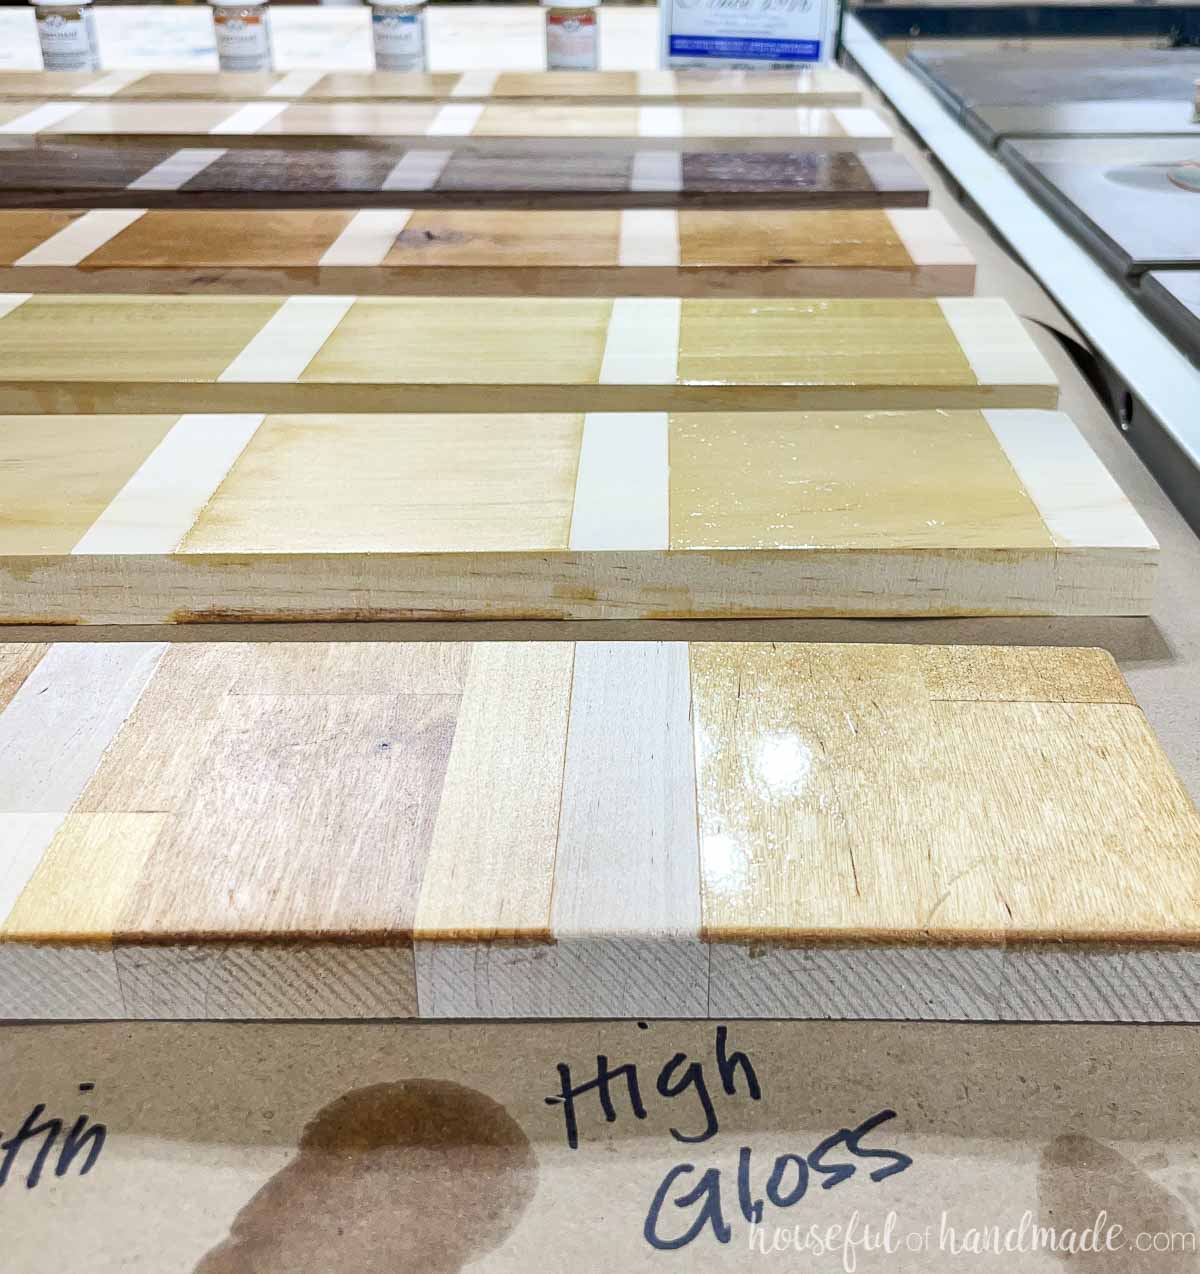
Marine Finish is available in 2 different sheens:
- Satin: 30-40° gloss level
- High Gloss: 90-95° gloss level
How to Apply Waterlox Marine Finish
The Marine Finish requires a Waterlox sealer as the first coat. You can use either the UTOS or the Marine Sealer. For this test, the Marine Sealer was used.
The Marine sealer seals the wood from within. It creates a warm, rich color on the wood.
Marine Sealer Application
- Applicator: Natural Bristle Brush or Lambs Wool Pad
- Dry time between coats: 24 hours
- Number of coats: 2
Step 1- Sand the finished piece to 100-150 grit. Vacuum away the dust and then clean the surface with a cloth dampened with mineral spirits to remove fine dust.
Step 2- Pour out the amount needed in a paint tray/container. Dip applicator in the finish and lightly drag across the wood with the grain. Make sure to maintain a wet edge.
Step 3- Let dry for 24 hours with good ventilation and airflow.
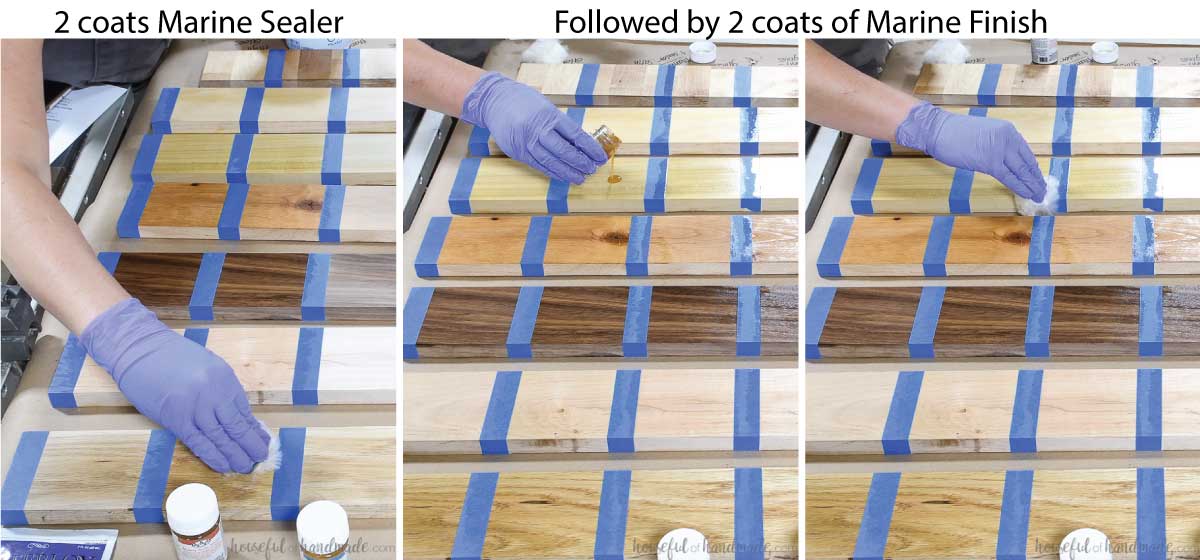
Marine Finish Application
- Applicator: Natural Bristle Brush or Lambs Wool Pad
- Dry time between coats: 24 hours
- Number of coats: 2
Step 1- Apply the Sealer (see above) and allow to dry for 24 hours.
Step 2- Pour out the amount needed in a paint tray/container.
Step 3- Dip applicator in the finish and lightly drag across the wood with the grain. Make sure to maintain a wet edge. Watch for drips on edges.
Step 4- Let dry for 24 hours with good ventilation and airflow.
Step 5- Sanding between coats is not required.
Step 6- Apply second coat the same as the first.
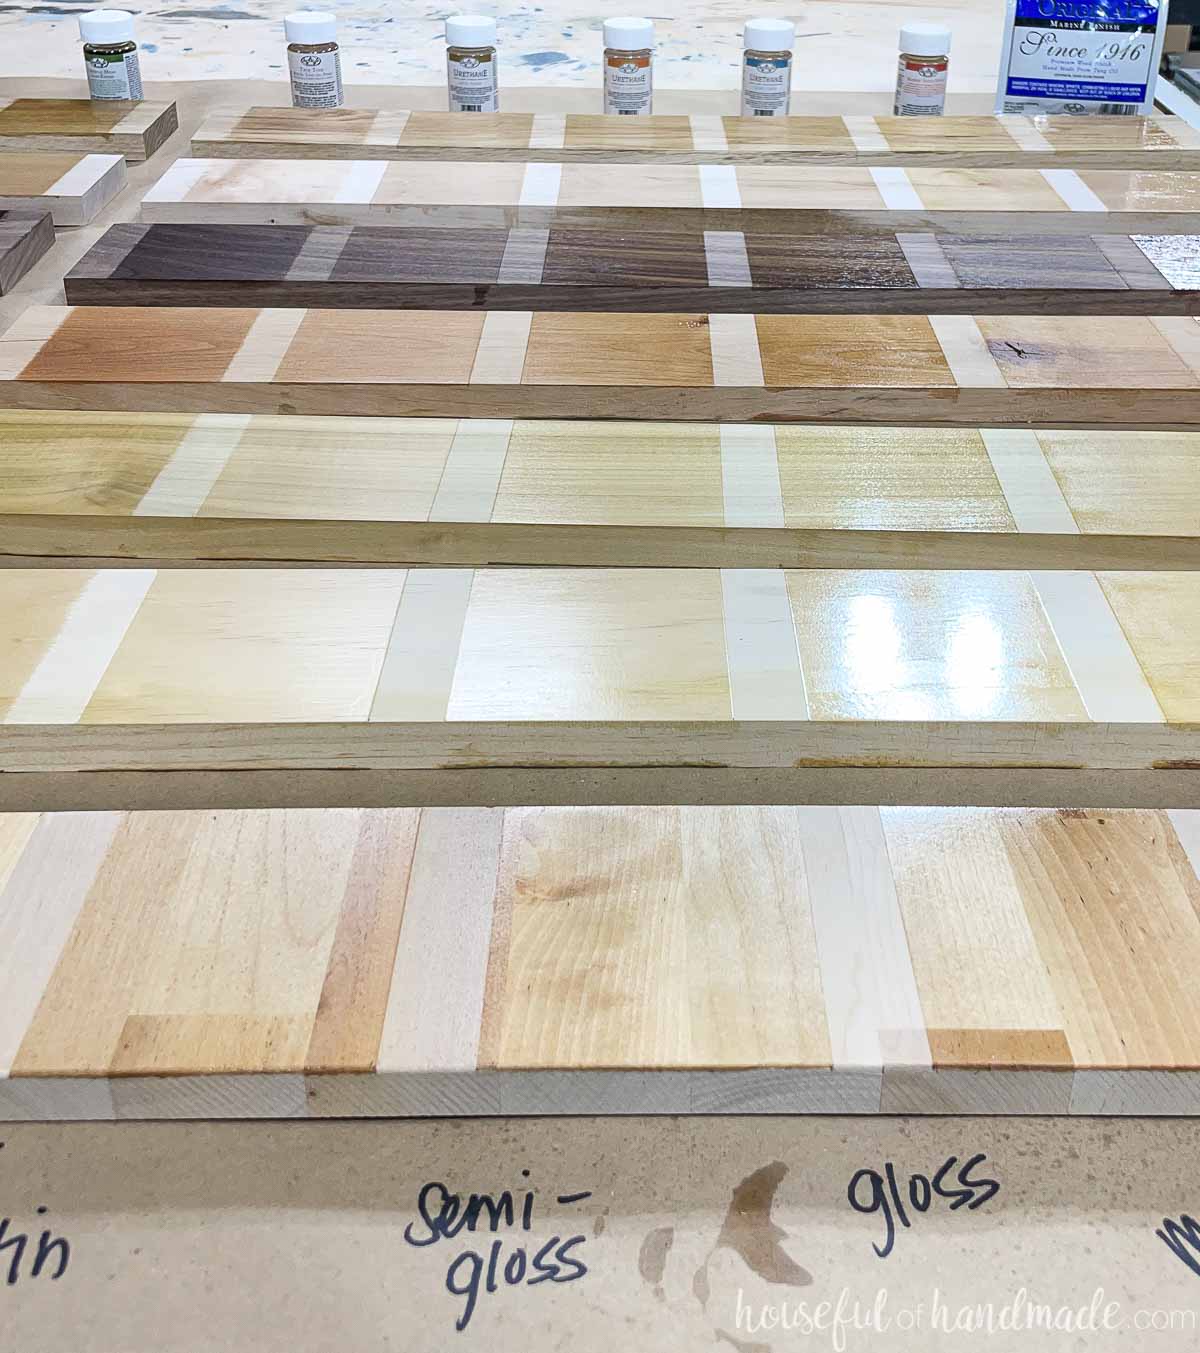
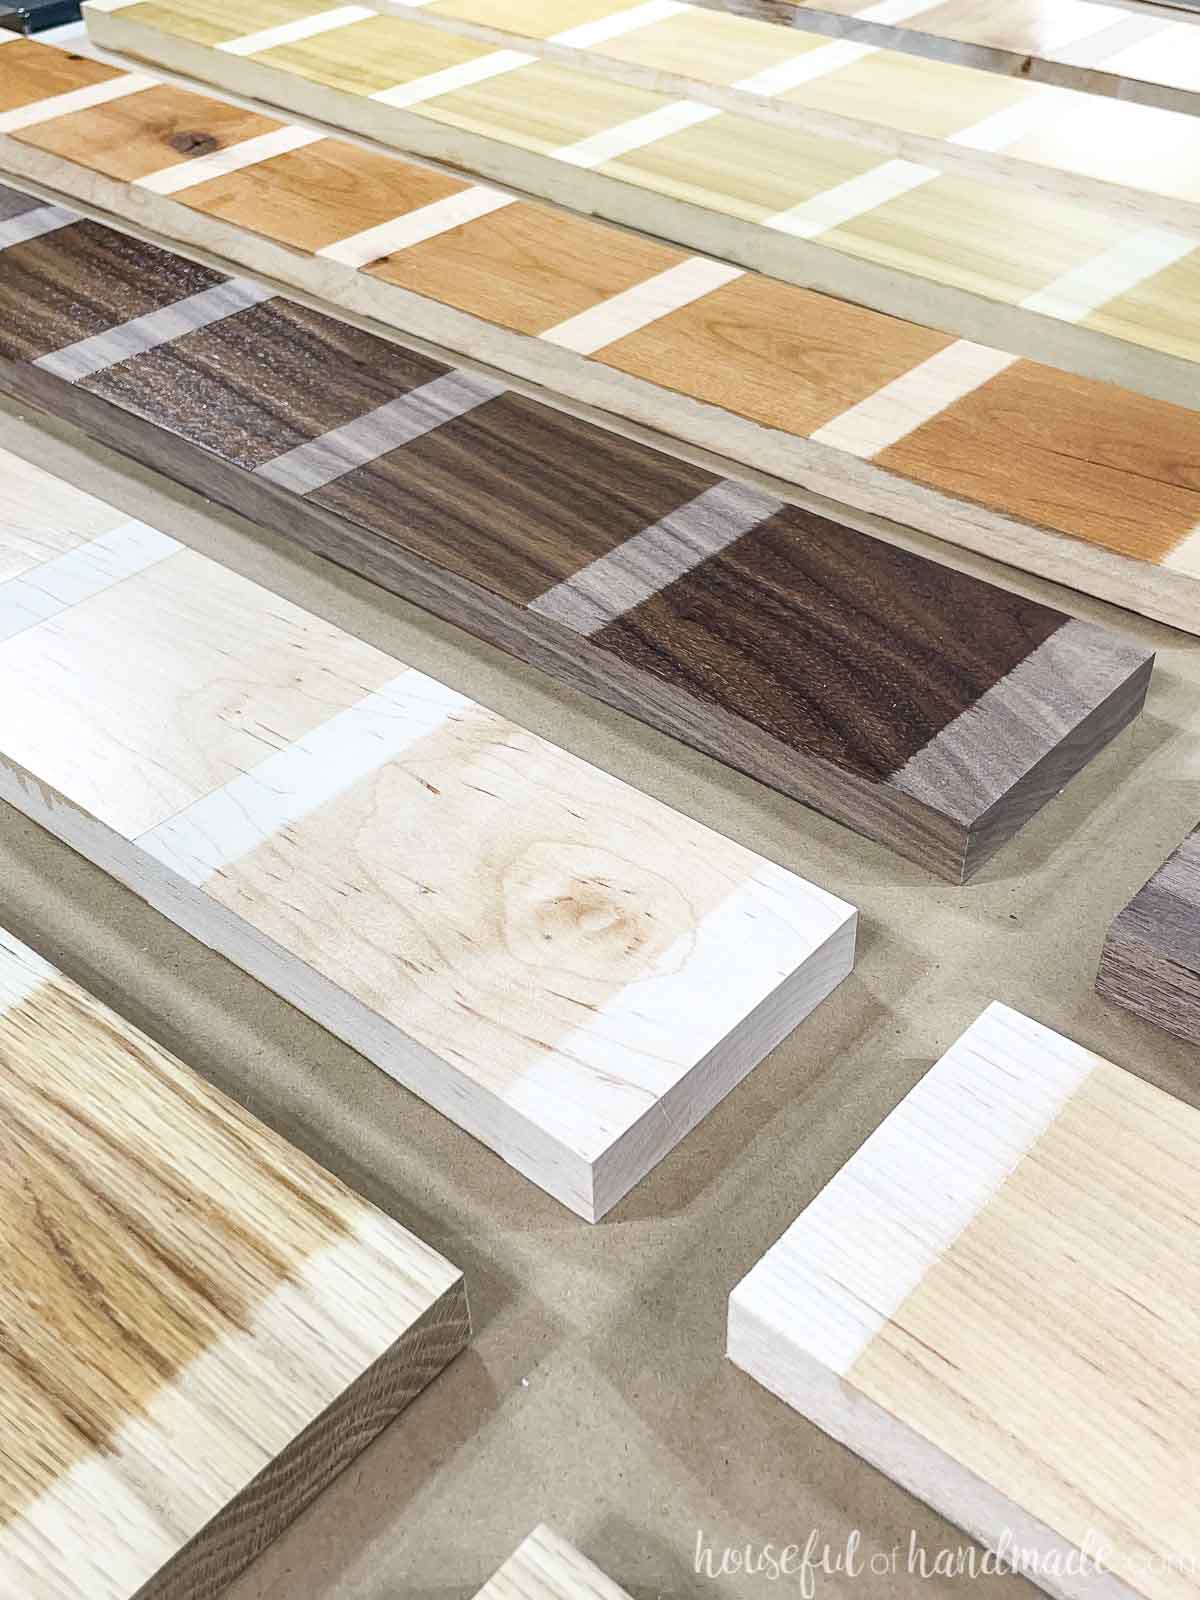
How Different Finishes Affect the Wood
Each finish has its own formula and can affect the appearance of the wood. When looking at the different sheens above, it is harder to see the difference the finish has on the color of the wood.
So I made a photo with all the different finishes on the same species next to each other. This way you can see how the different finishes affect the color/tone of the wood.
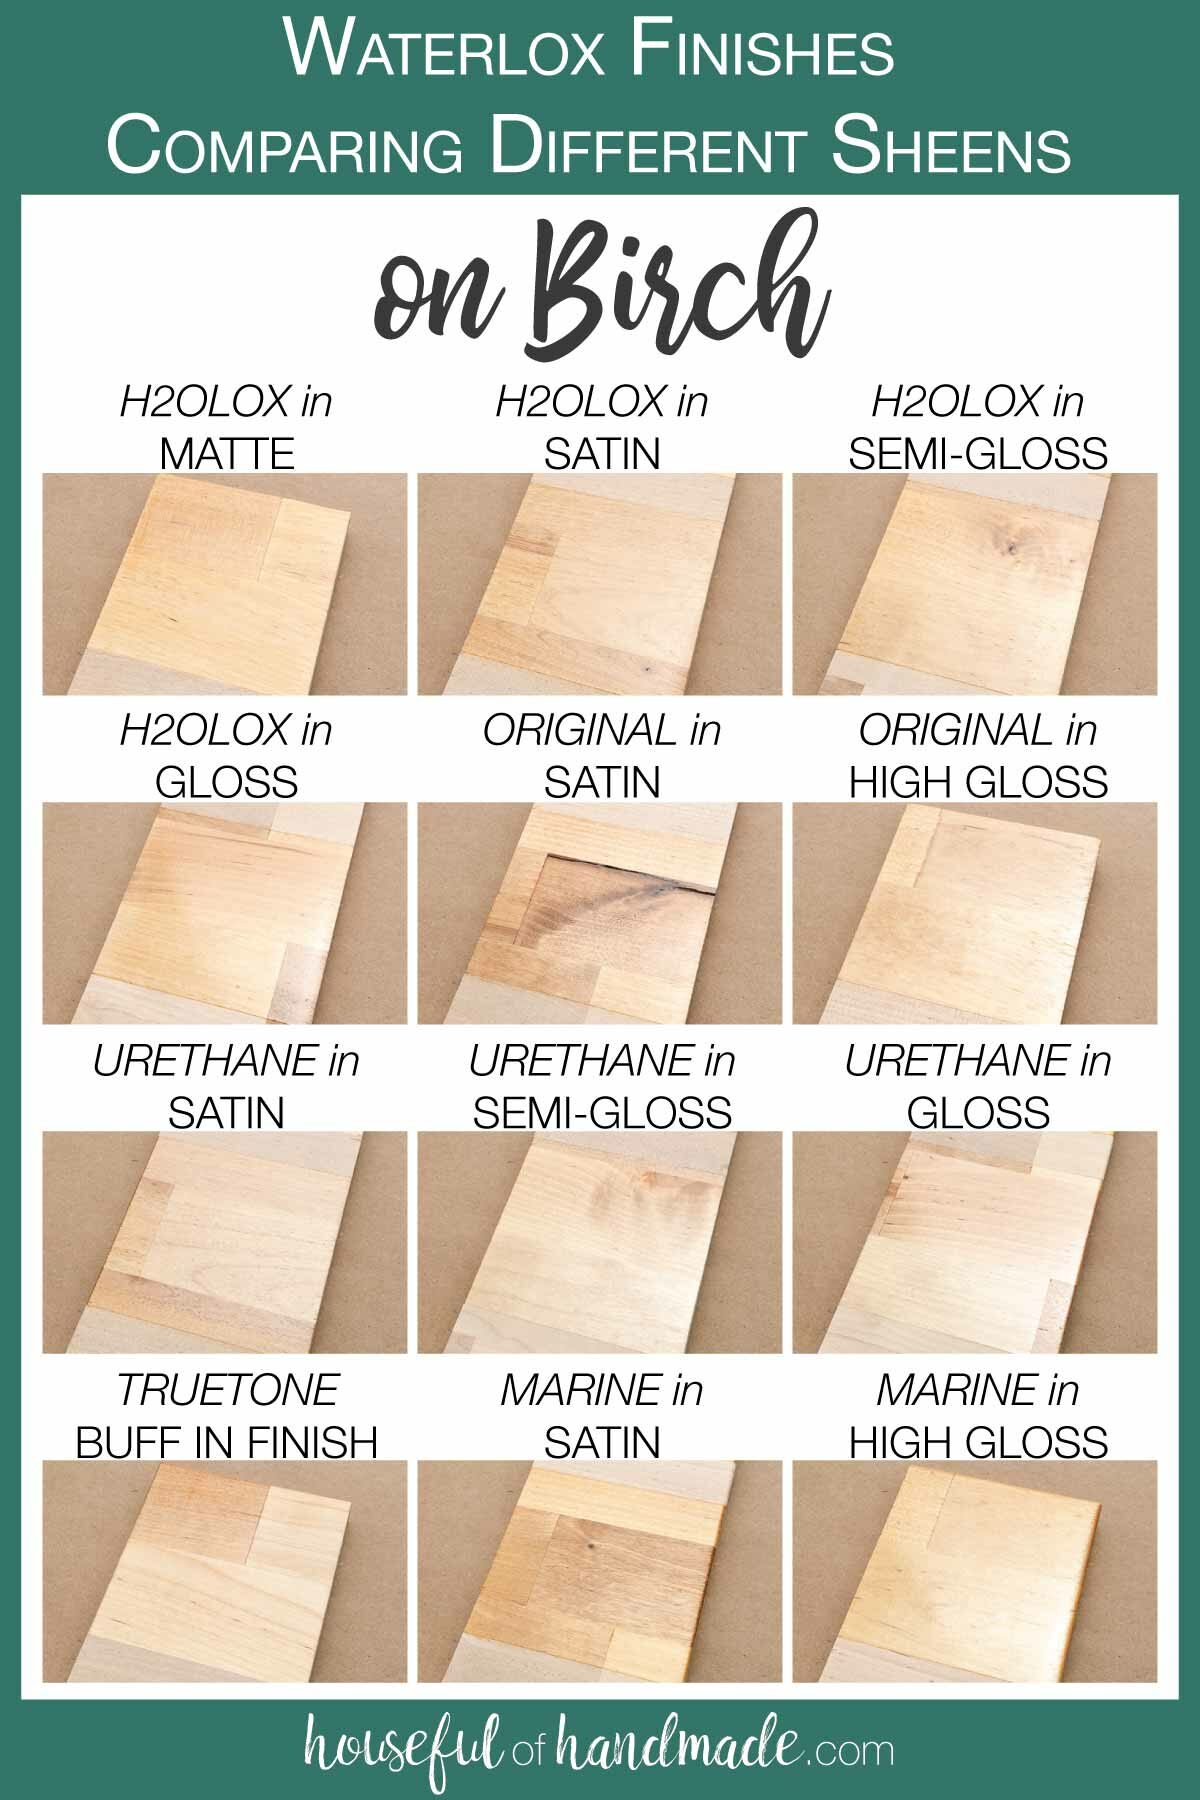
Birch
Birch is a light colored hard wood that is common for butcher block countertops (the sample I used is a scrap of butcher block) and plywood.
The ambering is noticeable in the H2OLOX, Original, and Marine finishes on the birch. It creates a warmer look than the clear coat from the Urethane finish.
Also, with the variation in boards in the butcher block, some boards were much darker than others with the ambering finishes.
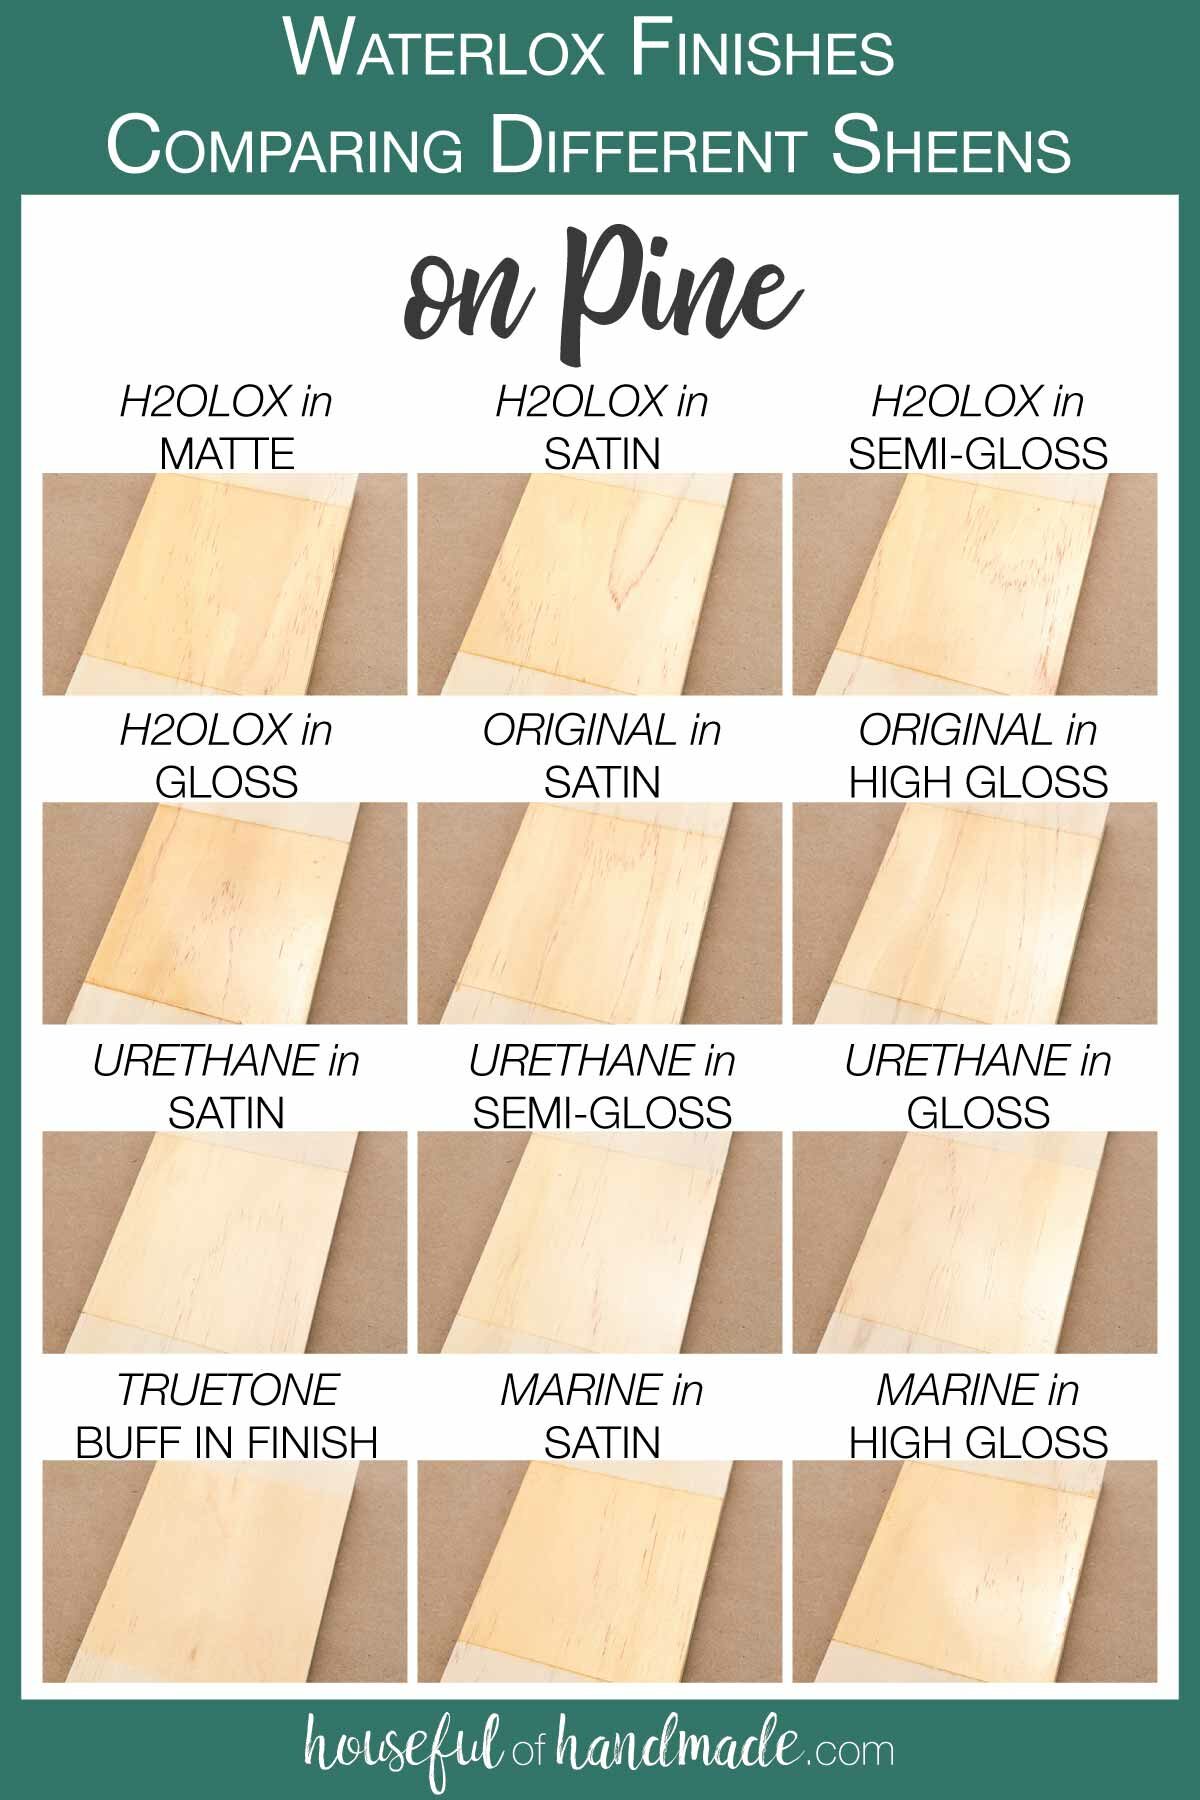
Pine
Pine is a softer wood that is very easy to work with, so it is great for beginners or when you are trying out a new technique.
Pine is a common floor wood. If you are laying new pine floors, or refinishing old ones, seeing the different finishes below is very helpful!
Again, since it is light, the ambering is more noticeable on the H2OLOX, Original and Marine finishes.
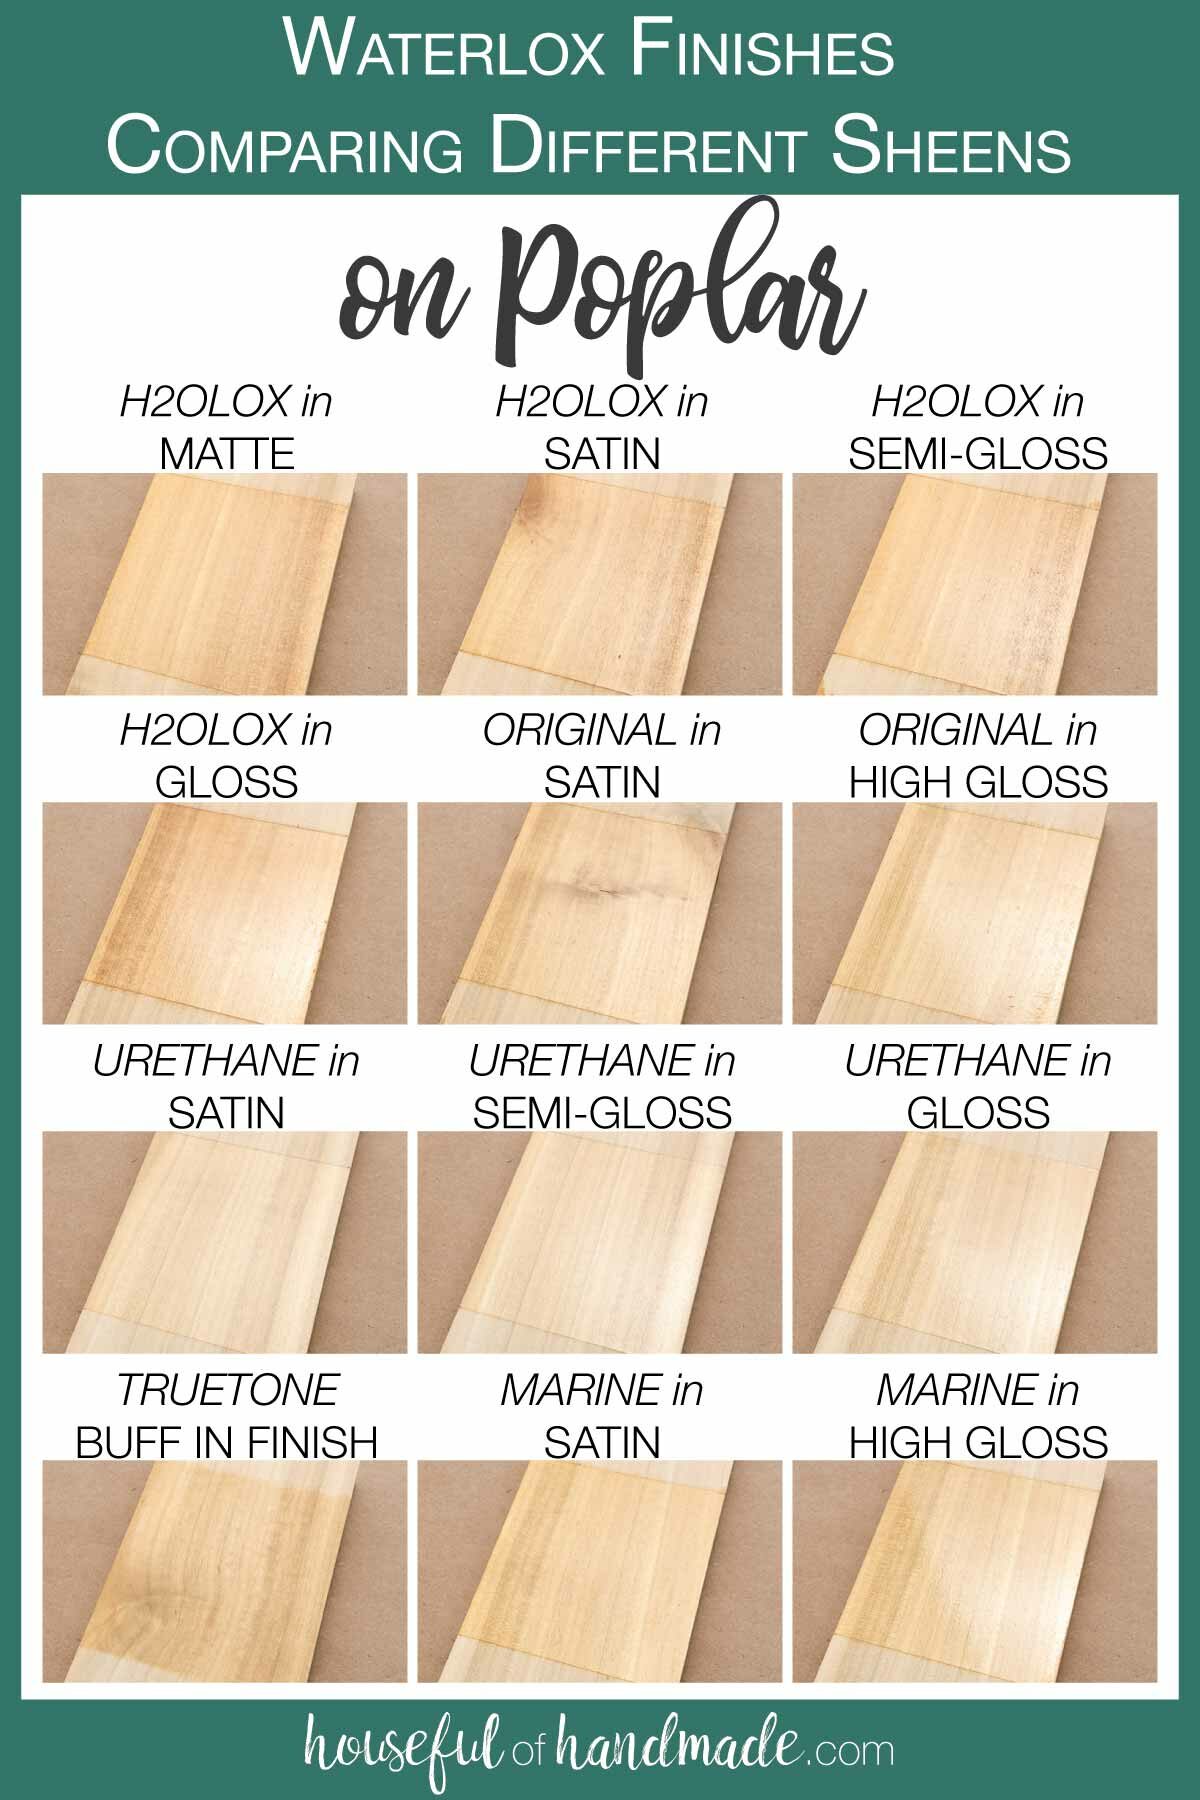
Poplar
Poplar is one of my favorite inexpensive woods to use. It is considered a hard wood, but it is still relatively soft. That means it is easy to work with.
Poplar is a very pale wood that can have a green color cast to it. It also has a more subtle grain pattern than pine.
The ambering finishes really warm up the greenish tones of the poplar. Poplar is a fun wood to stain with the TrueTone colors to get different color options before finishing with your desired finish.
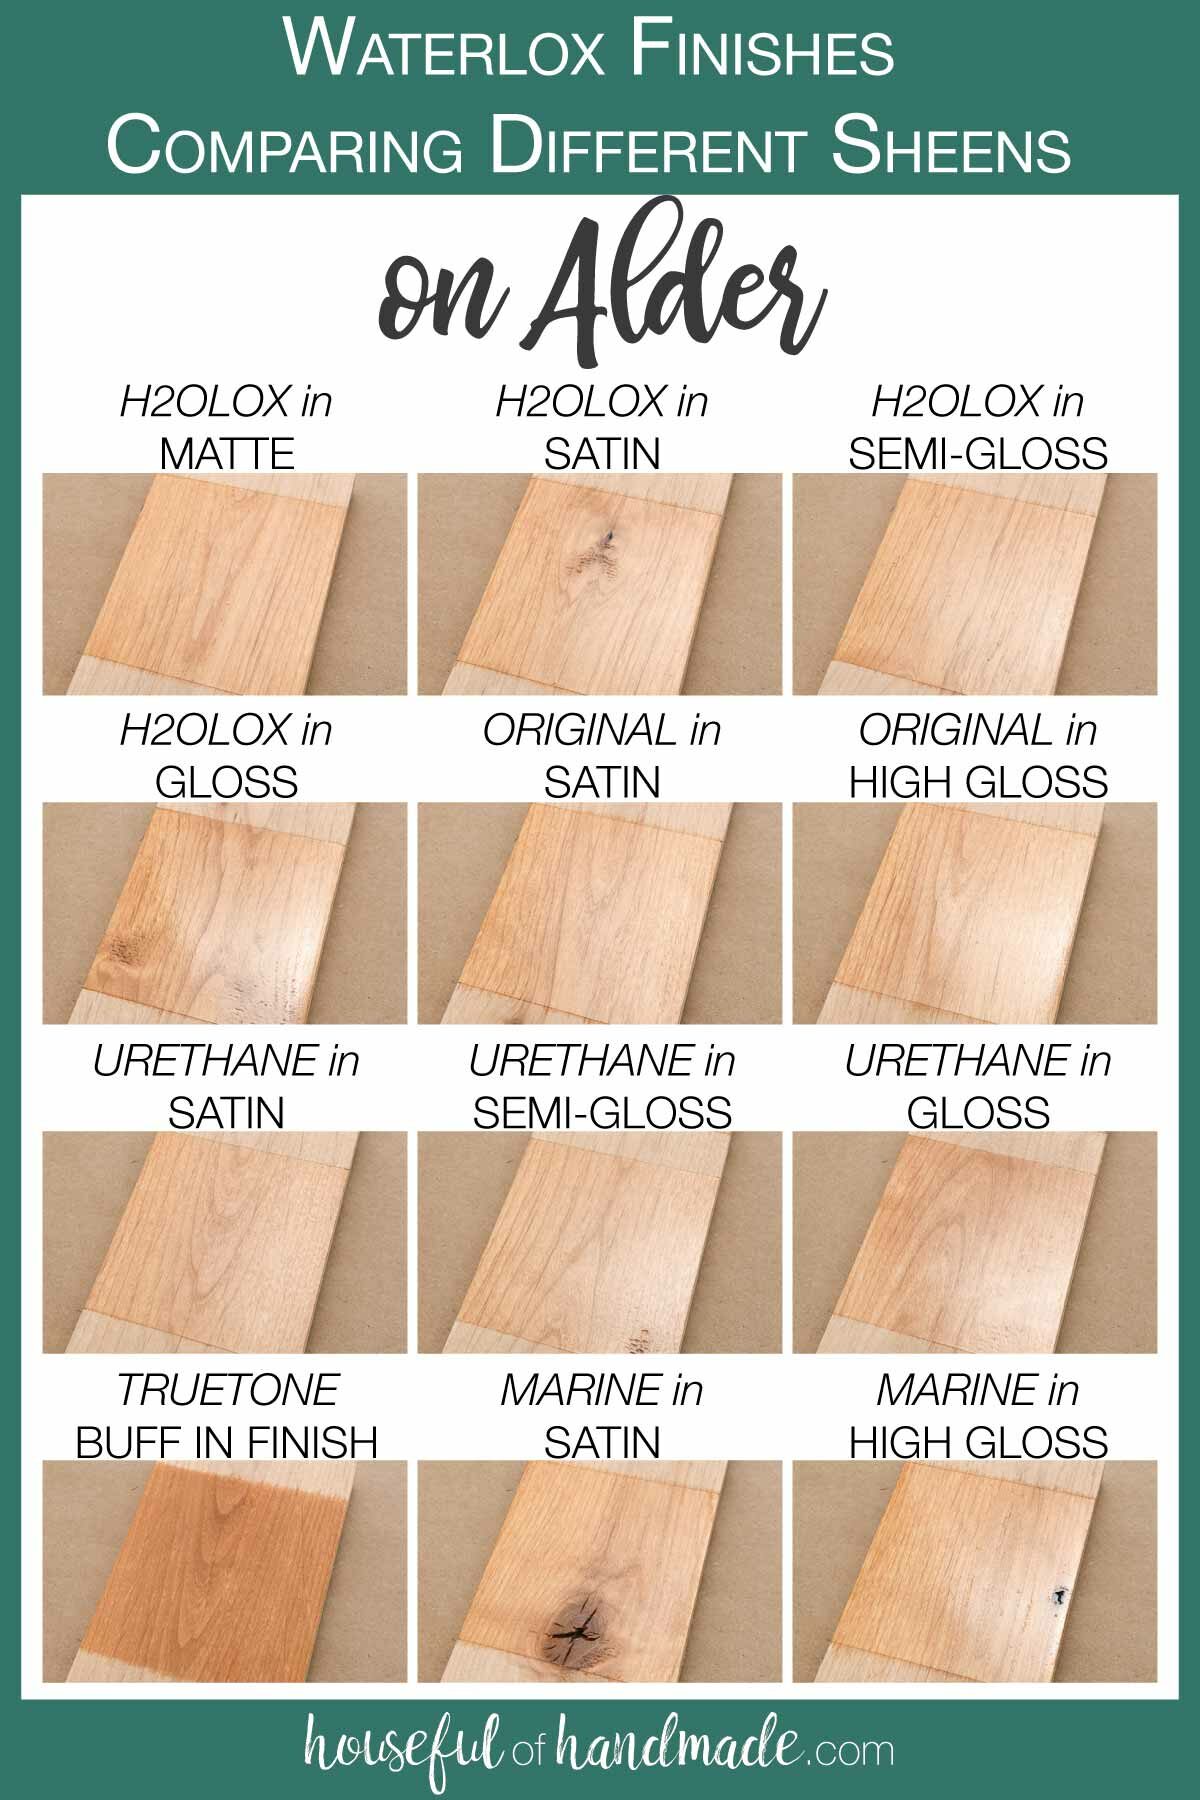
Alder
Alder is a softer hardwood with reddish undertones. It has a similar coloring to Cherry, but costs less.
You can find alder in two different classes: knotty or select. The knotty alder has more knots in it (great for rustic flooring or furniture) and the select is smoother boards.
The ambering finishes warm up the already warm alder beautifully and create a deep rich appearance. I also love the cooler color of the wood created by the clear Urethane finishes.
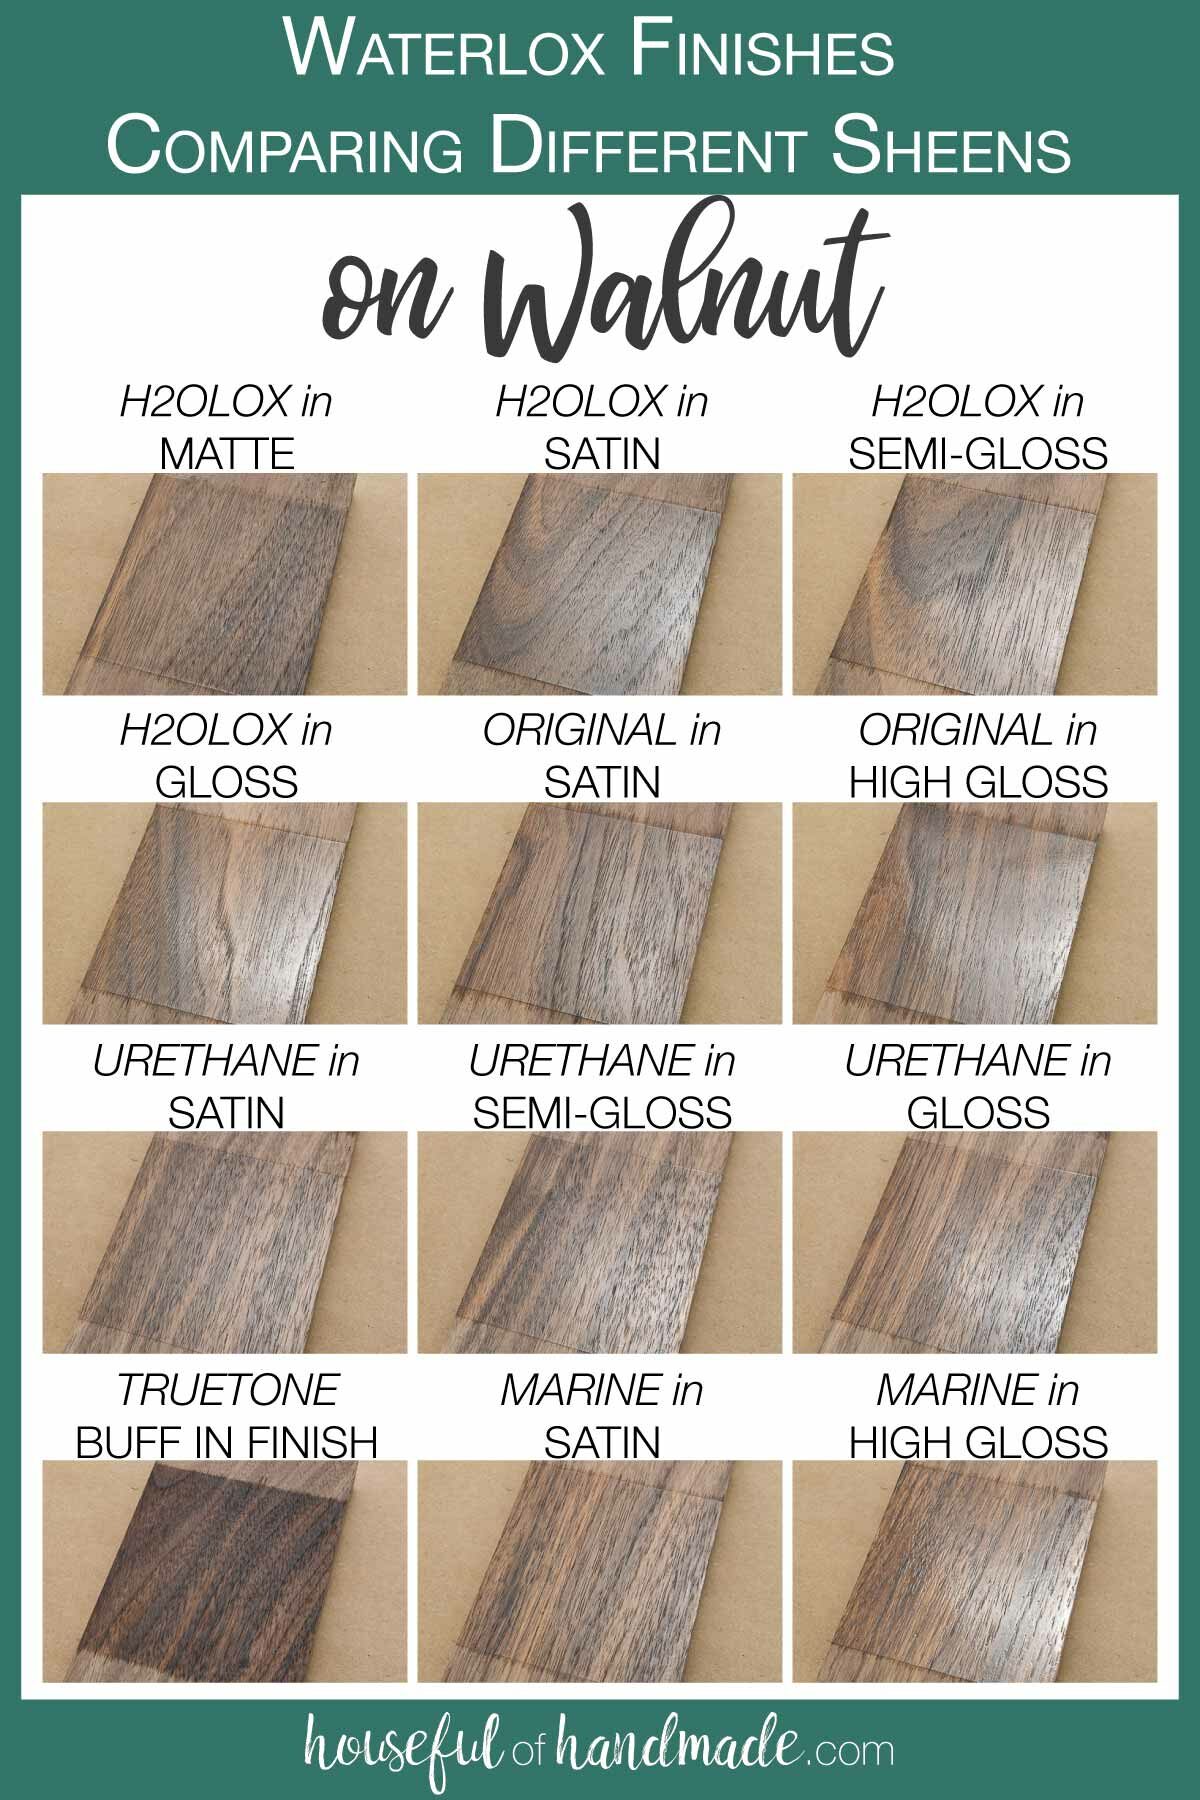
Walnut
Walnut is a dark wood. It can range in tone from a medium brown to very dark brown. It darkens up significantly when the finish is added.
Walnut is a nice hard wood, but I find it still easy to cut and work with. Unfortunately it can be pretty pricey.
The ambering is not as noticeable on this dark wood. But the glossiness of the different sheens is more pronounced on it than other species.
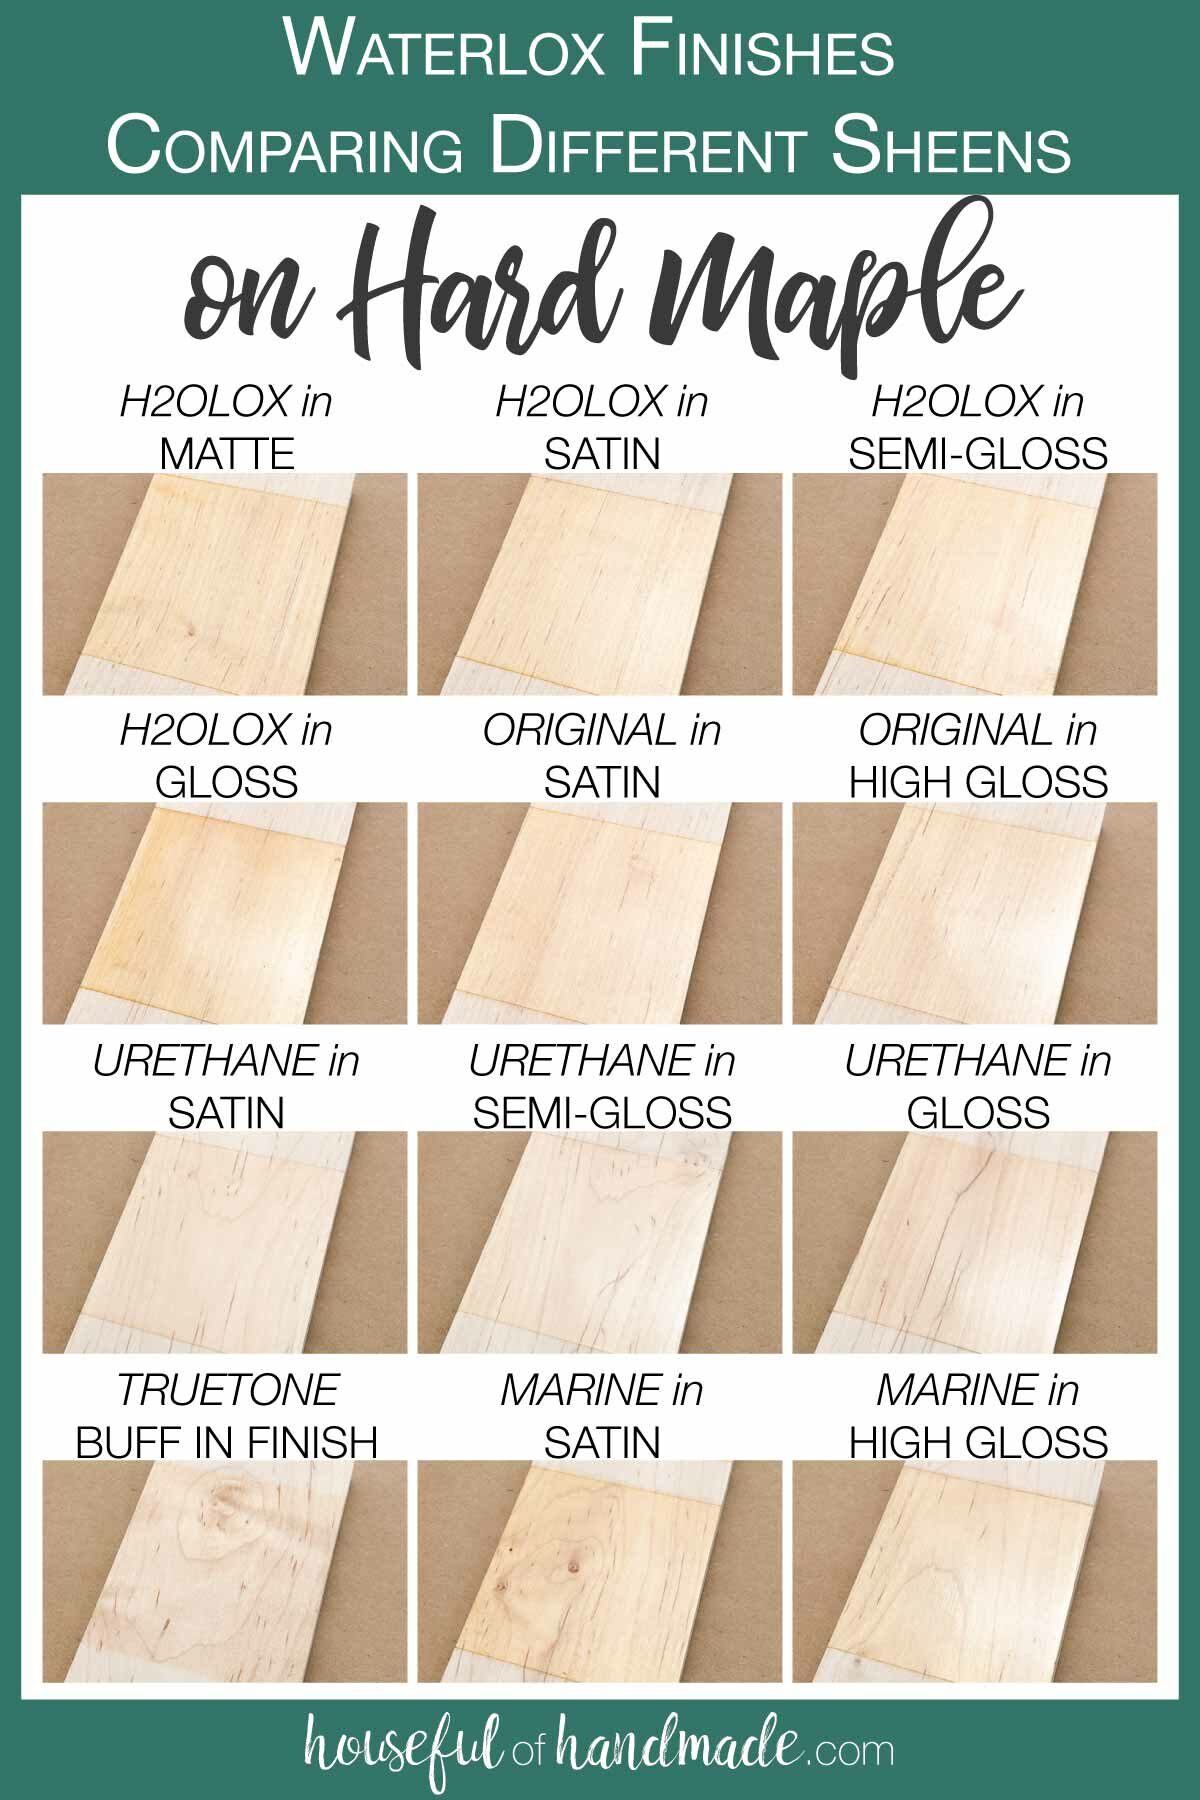
Hard Maple
You can find maple in a few different hardnesses and tones. I have used browner toned maple (labeled as brown maple) that was more similar to walnut in hardness to work with.
This sample is a hard maple that is very light and hard to cut. It has a tight grain.
The different finishes had the least amount of affect on the coloring on this hard light wood. You can still see some ambering, but it is not as obvious as the other light wood species.
White Oak
White oak is my current favorite wood species. I used it to build these DIY nightstands. But white oak is a very hard wood and hard to work with. I broke a few bits on that project.
White oak is so beautiful and offers a lot of character in the grain of the wood. It can vary in color from board to board and has a nice open grain.
The ambering finishes definitely warmed up the white oak, almost giving it a red oak appearance.

Frequently Asked Questions
The TrueTone Tung Oil Finish and Urethane finishes do not add warmth or ambering to the wood.
If you do not want the wood to dark up at all with your finish (for a bare-wood look), use the TrueTone stain in White or Pickled White before your finish.
The highest gloss finish is the Marine Finish in High Gloss. It is followed closely by the Original Finish in High Gloss and the H2OLOX Finish in Gloss.
The Urethane Finish is Gloss is looks less glossy to me than the other gloss finishes.
The most matte finish is the TrueTone Buff in Tung Oil Finish. It is followed by the H20LOX Finish in Matte and the Urethane Finish in Satin.
All of the Waterlox finishes can be applied over the TrueTone color-infused tung oil stains. Use the TrueTone color as the Sealer (applied the same as the Natural color in the test).
If you have any other questions about the different sheens or finishes, please let me know. I will try to answer everything the best I can!
But I would also recommend you do some testing of your own, especially before using any finish on a large project. It takes way less time to test first, than to have to remove the finish and start over!
Happy finishing!

Thank you to Waterlox for sponsoring this post. I only recommend products that I use and love and all opinions are 100% my own. Click here to read my full disclosure policy.