
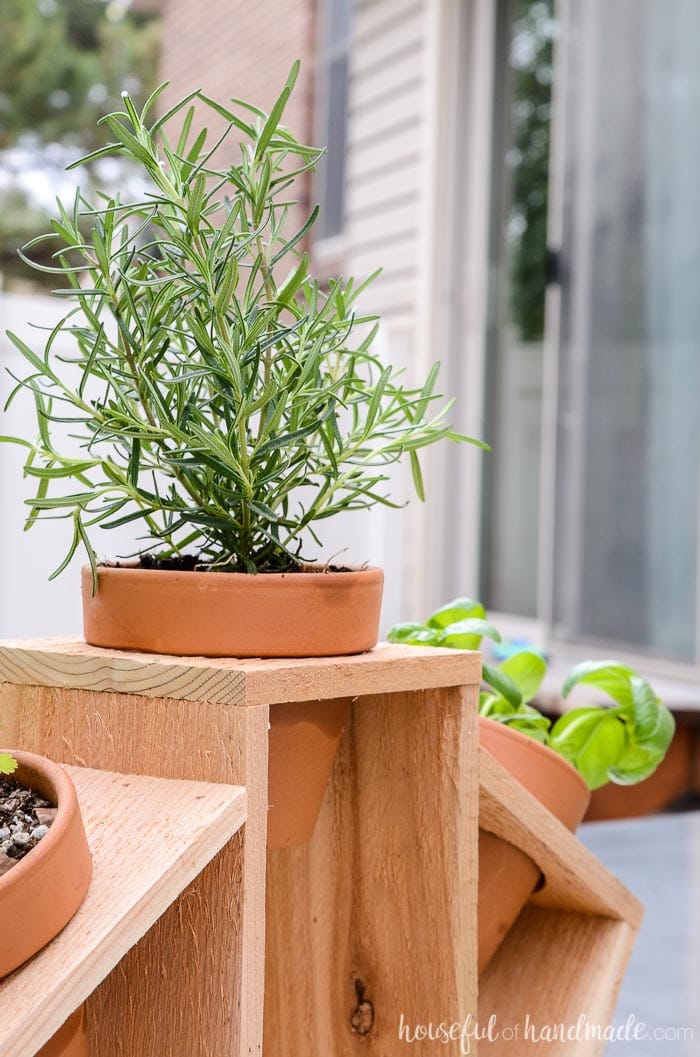
Clay pots and a cedar fence picket are turned into a beautiful kitchen herb planter. Use it for a beautiful indoor herb garden or as a fun tabletop garden for your patio.
These small plant stands are so easy, you can whip up a countertop herb garden in just minutes. About 15 minutes to be exact!
Transforming a few inexpensive clay pots and a cedar fence picket into a mini garden is such a simple wood proejct.
This post may contain affiliate links. As an Amazon Associate I earn from qualifying purchases. Click here to read my full disclosure policy.
You will want to make simple plant stands for everyone you know. Fill them with herbs, flowers, or succulents!
I needed a fast and easy craft since I have been working so hard planning the kitchen remodel. So I stole away 15 minutes in the garage to have some fun.
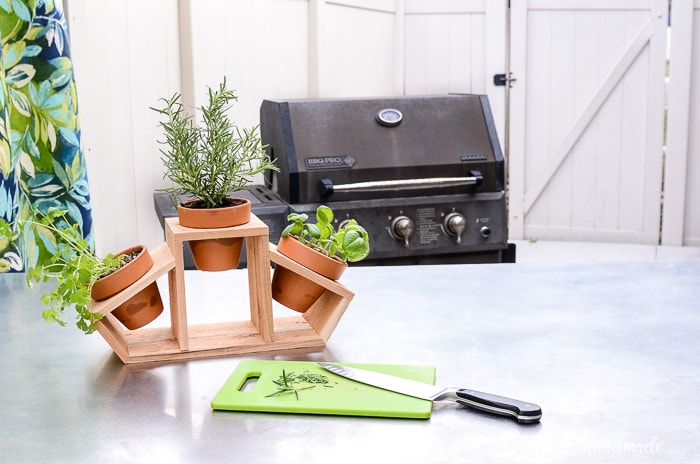
I used my little break to make this super quick countertop plant stand to hold my clay pots.
And I am sharing the mini herb garden plans with you today!
Simple Cedar Plant Holder
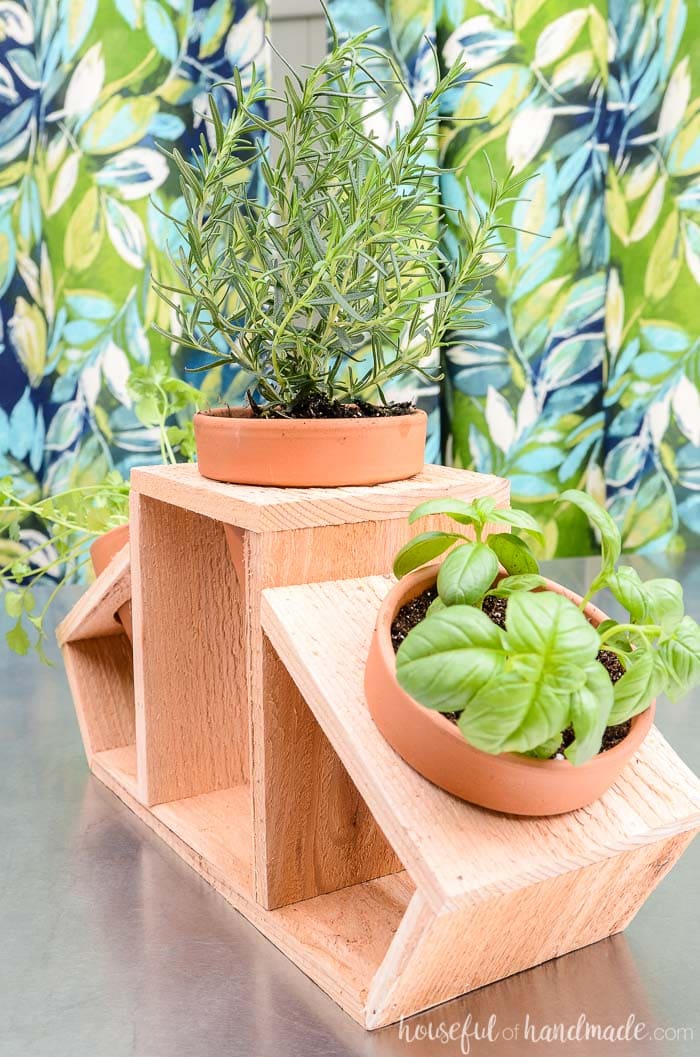
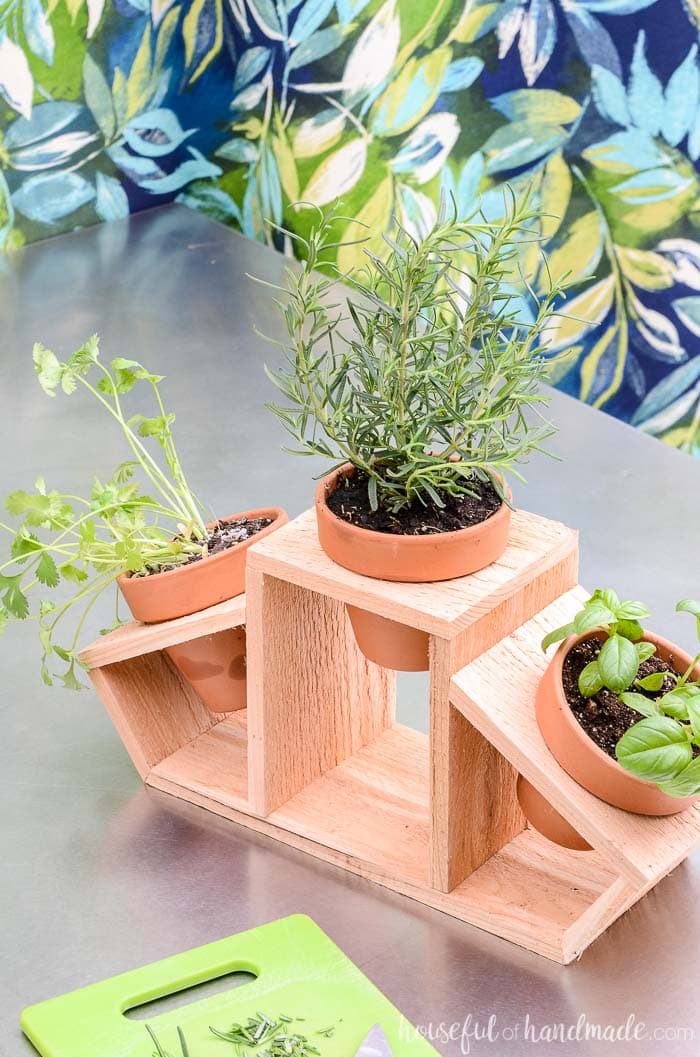
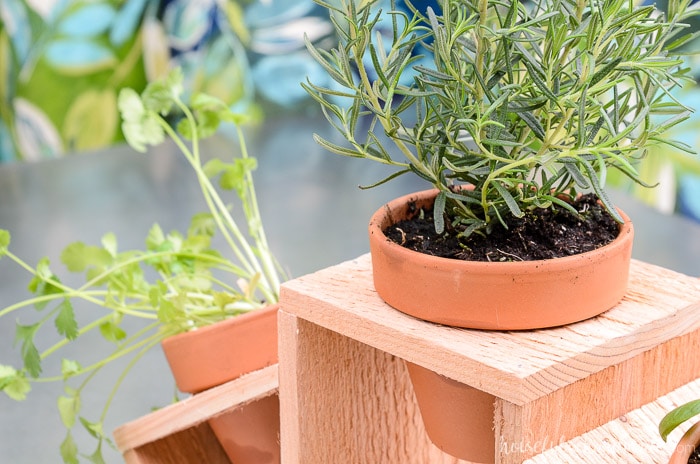
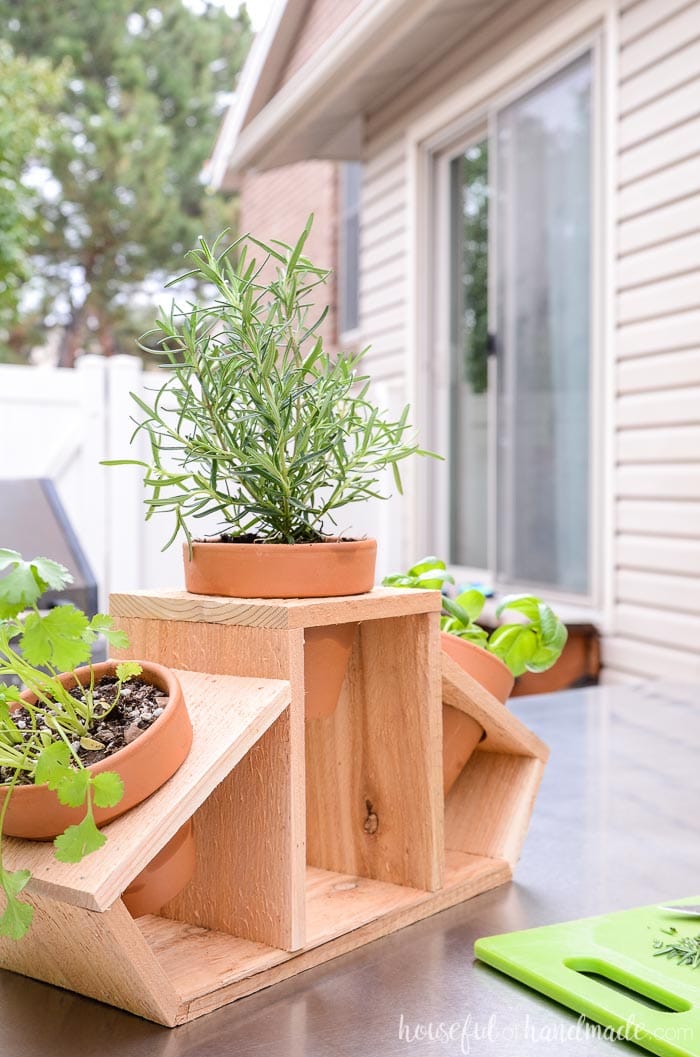
I used 5 1/2″ wide cedar fence picket to make my countertop herb garden. Cedar is great because it resists rot so the water from the herb garden is not going to hurt it.
It also gets a beautiful patina over time.
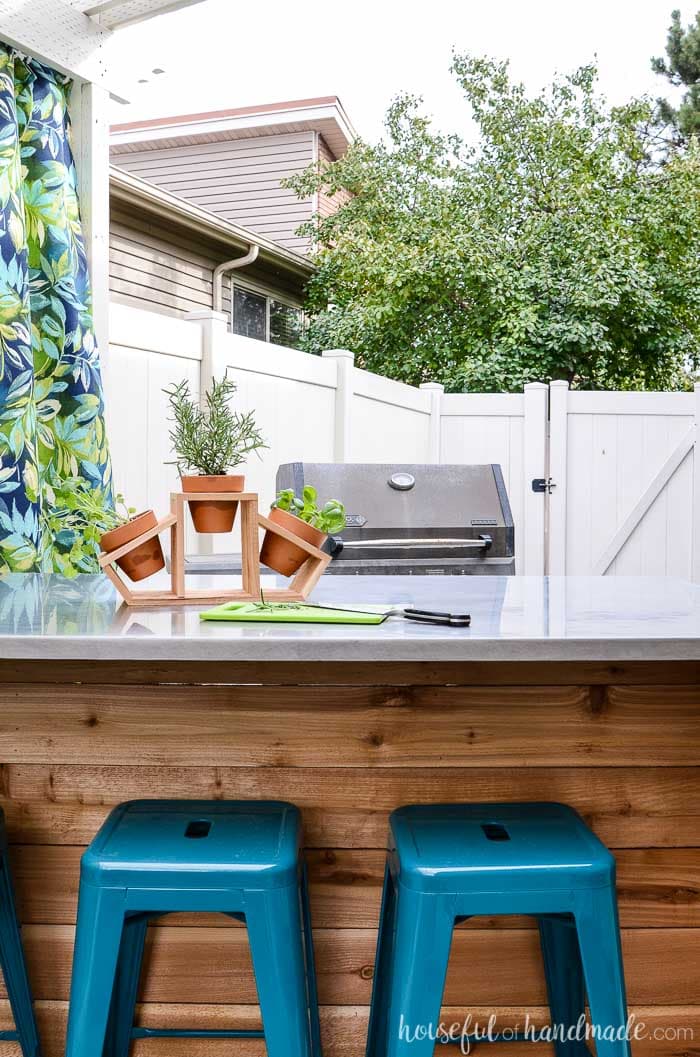
I love using cedar for outdoor projects and I plan on putting my cute countertop herb garden on the outdoor kitchen island so I am ready to cook up some delish dinners on the BBQ.
But this would also make the perfect indoor herb garden planters. The three clay pots will be perfect in the kitchen window with your favorite plants.
Or you can use it as a centerpiece for a rustic dining room table. And how fun would it be to make this easy DIY for gifts, who wouldn’t love a little herb garden?!
There are so many indoor herb garden ideas.
More Super Quick DIY
Don’t have a lot of time? No problem! You can still make something great with just a bit of time.


How to Make a Countertop Plant Stand
Tools & Materials
Recommended Tools:
- Miter saw
- You could also make the cuts with a hand saw and miter box. It might just take a little longer so it would be a 30 minute craft (depending on your sawing skills).
- Finish nailer
- I love my Ryobi battery powered nail guns, especially for quick projects because I don’t have to take the time to hook up the air compressor.
- Jig saw
- Measuring tape
- Clamps
Supplies:
- (1) 5 1/2″ wide cedar fence picket, 6′ long
- (3) 4″ terra cotta pots
- Wood glue
- 1 1/4″ finishing nails
- Herbs or plants
Cut List
Cut out the pieces according to the easy to read table in the PDF plans.

STEP 1- Build center of stand
Attach two 6 1/2″ long pieces to the bottom of a 5 1/2″ long piece.
Add wood glue to the top of the pieces and lay the other piece on top of them to create an upside-down U.
Secure with 4 finishing nails on each board.
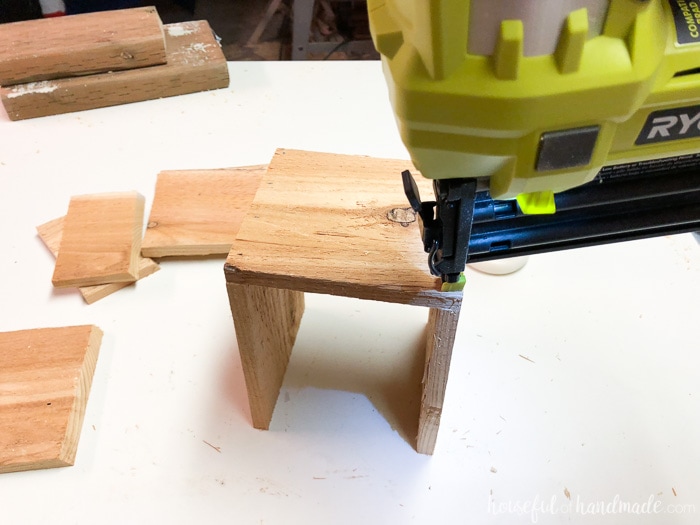
Attach the side pieces on either side of the bottom so the angled sides are touching.
Add wood glue to the angled sides and then secure with 4 finishing nail on each board.
Getting the nails in at the right angle can be tricky, just try to keep the nail gun parallel to the floor so the nails go into the bottom.

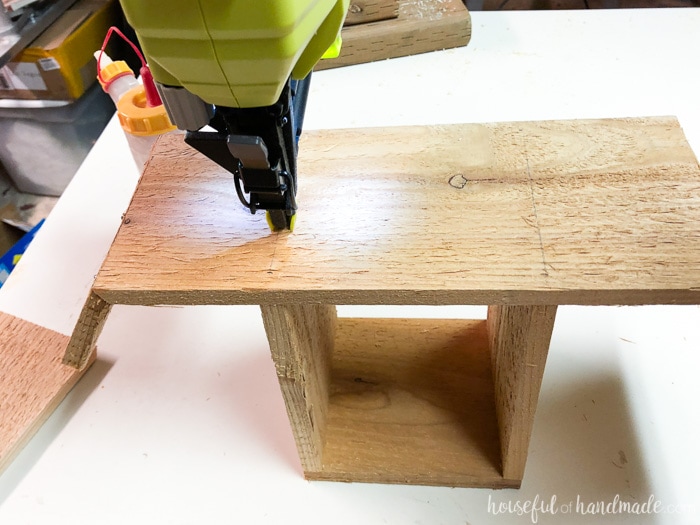
Turn the upside-down U over and place the bottom piece on top of it.
Center it and secure with wood glue and finishing nails.
STEP 2- Attach sides
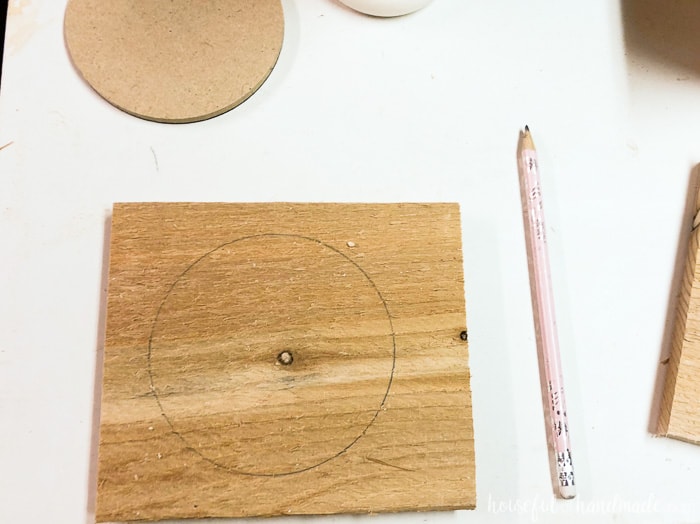
Trace a 4″ circle on the side pieces.
Trace the circle so it is 3/4″ in from the sides and 3/4″ in from the straight cut side (it will be about 1 1/4″ away from the angled cut side.
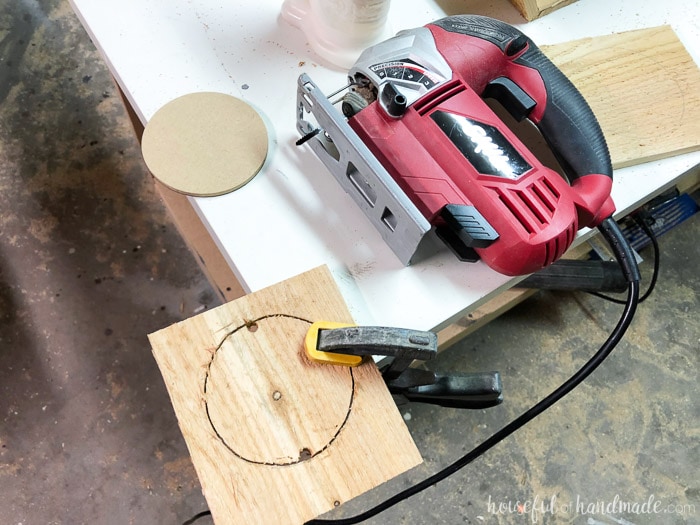
Drill 2 holes in the opposite sides of the circle big enough for your jig saw blade. Then using the jig saw, cut out the circle.
Try to keep the blade just on the inside of the 4″ circle so the pots fit tightly. I like to clamp the small piece to the work table when I cut it with the jig saw to give me a hand.
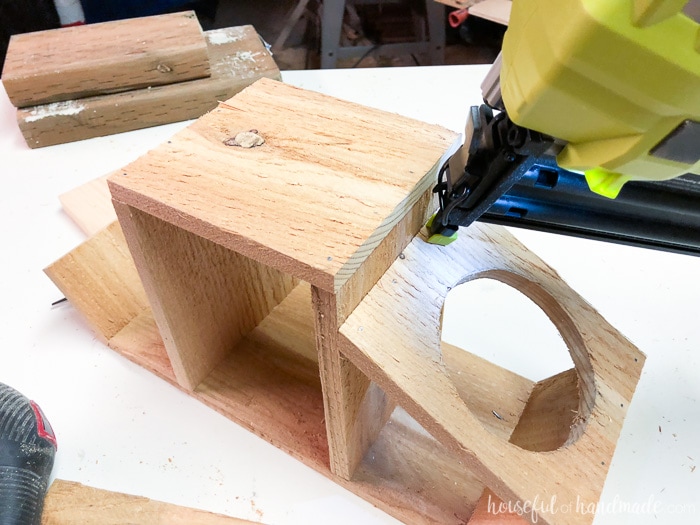
Place the pieces with the circles cut out on top of the angled board coming off the bottom. Secure it with wood glue and finishing nails so it is attached to the angled board.
Then press it securely to the upside-down U and secure with glue and finishing nails. Repeat on the other side.
STEP 3- Finish the stand
Trace the 4″ circle on the center of the top piece. Cut it out the same way you did before.
This one was easier to cut out after the planter was assembled, but you could do it before if you want.
Also, feel free to sand and paint/stain the wood. I love the raw cedar and so I left it be.
PDF mini plans include:
- Recommended Tools
- Shopping list
- Easy to read cut list table
- X-ray view with measurements
- Step-by-step instructions
- BONUS: 3D SketchUp file
Now all you need to do is place your clay pots in the 3 holes and fill them with your favorite herbs.
I chose basil, cilantro and rosemary and cannot wait to use them up this spring.
Fresh herbs are the best and our new countertop herb garden will make enjoying them much easier!
Happy easy building!
