You’ll love this easy and useful project! Creating a place to hold your paper towels will mean you can always find them when you need them.
But you don’t need a boring basic paper towel holder. Instead create a beautiful wooden one from your scrap wood pile.
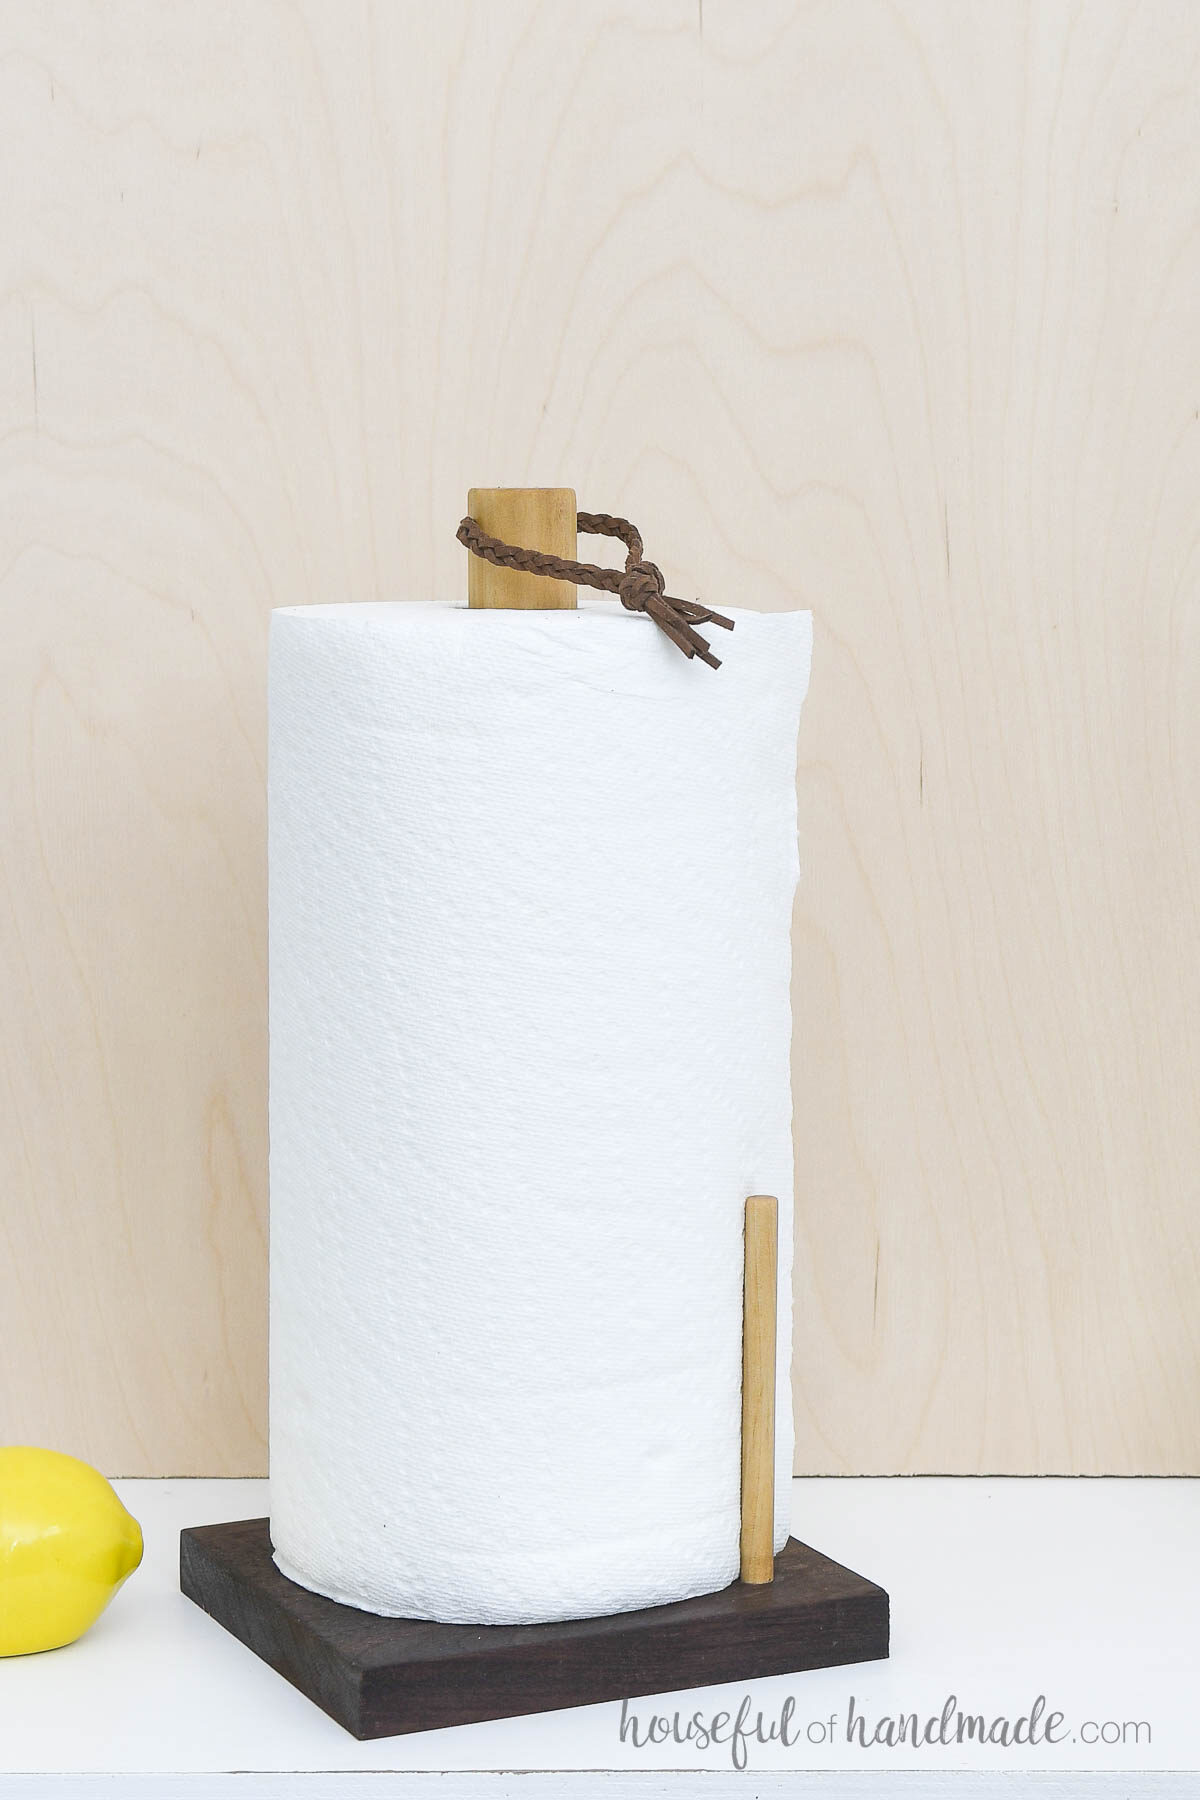
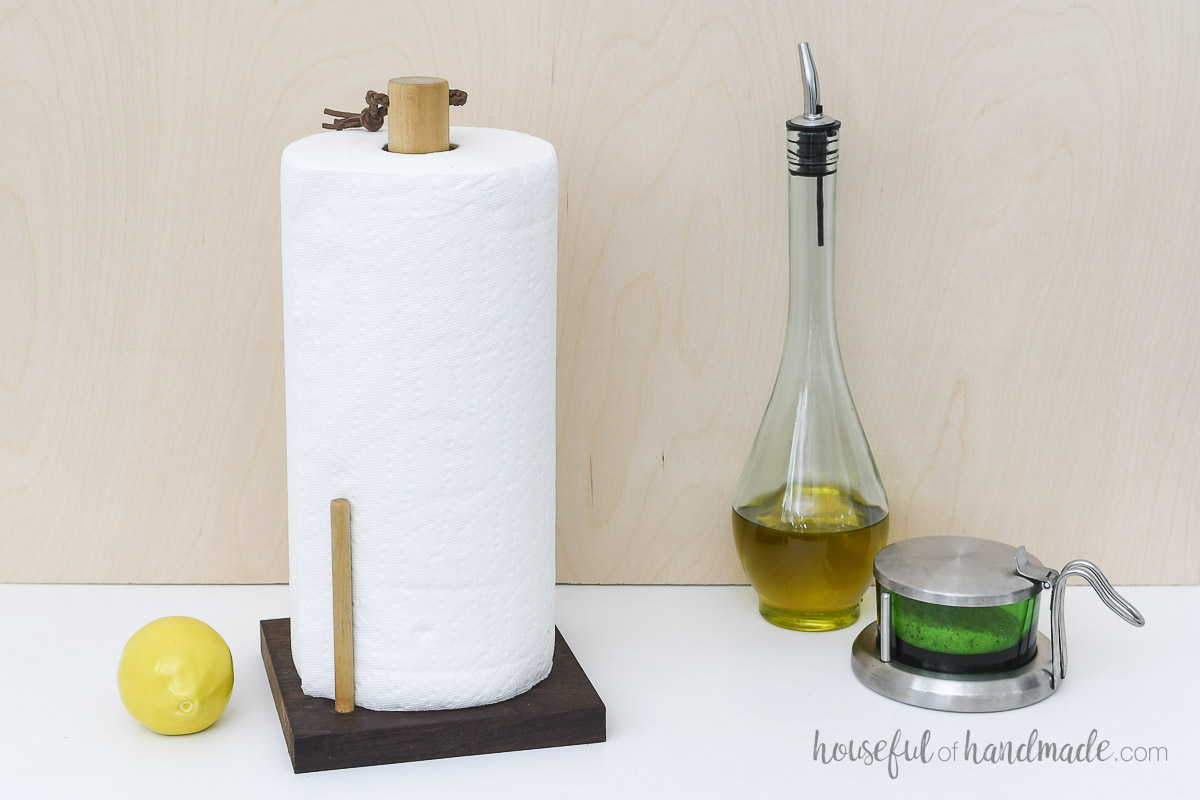
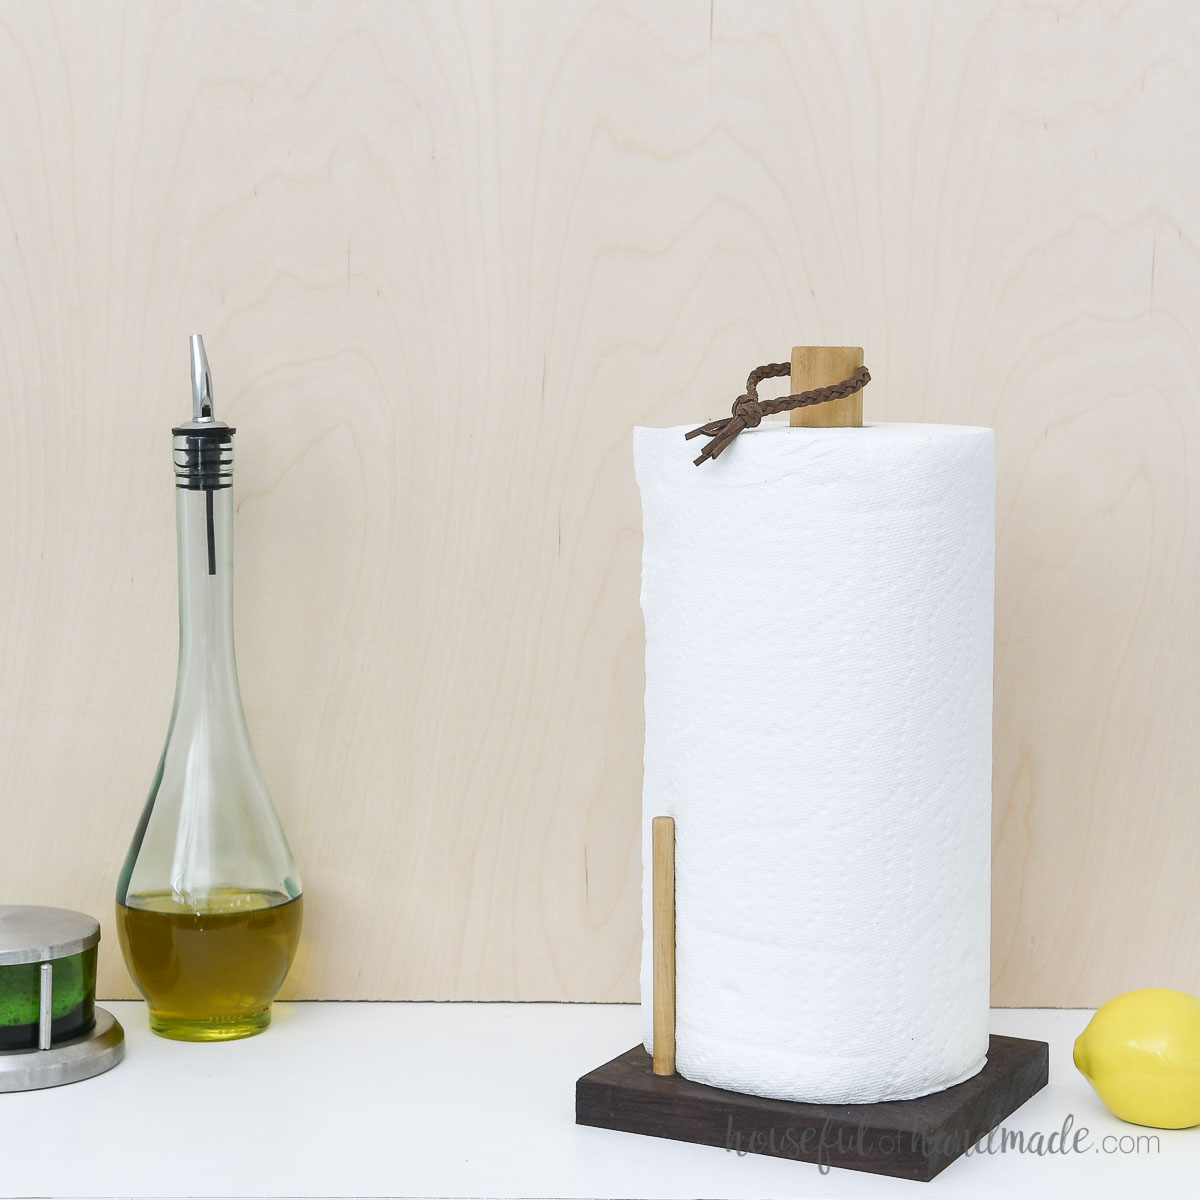
This DIY paper towel holder also offers more than a place to hold the paper towel roll. It also has a stopper to prevent the roll from unrolling.
This post may contain affiliate links. As an Amazon Associate I earn from qualifying purchases. Click here to read my full disclosure policy.
And my favorite feature, a leather loop on top so you can easily grab the whole roll and move it where you need it!
Easy Scrap Wood Project
Sometimes you have just a small piece of a board too pretty to toss… but too small to use. Or so you thought.
All you need is a piece of wood about 6 1/2″ by 6 1/2″ to make this modern paper towel holder. And the simple design makes the wood really shine!
This is the perfect place to use up a fancier board. I used a small piece of walnut wood and love the dark base it give the paper towel holder.
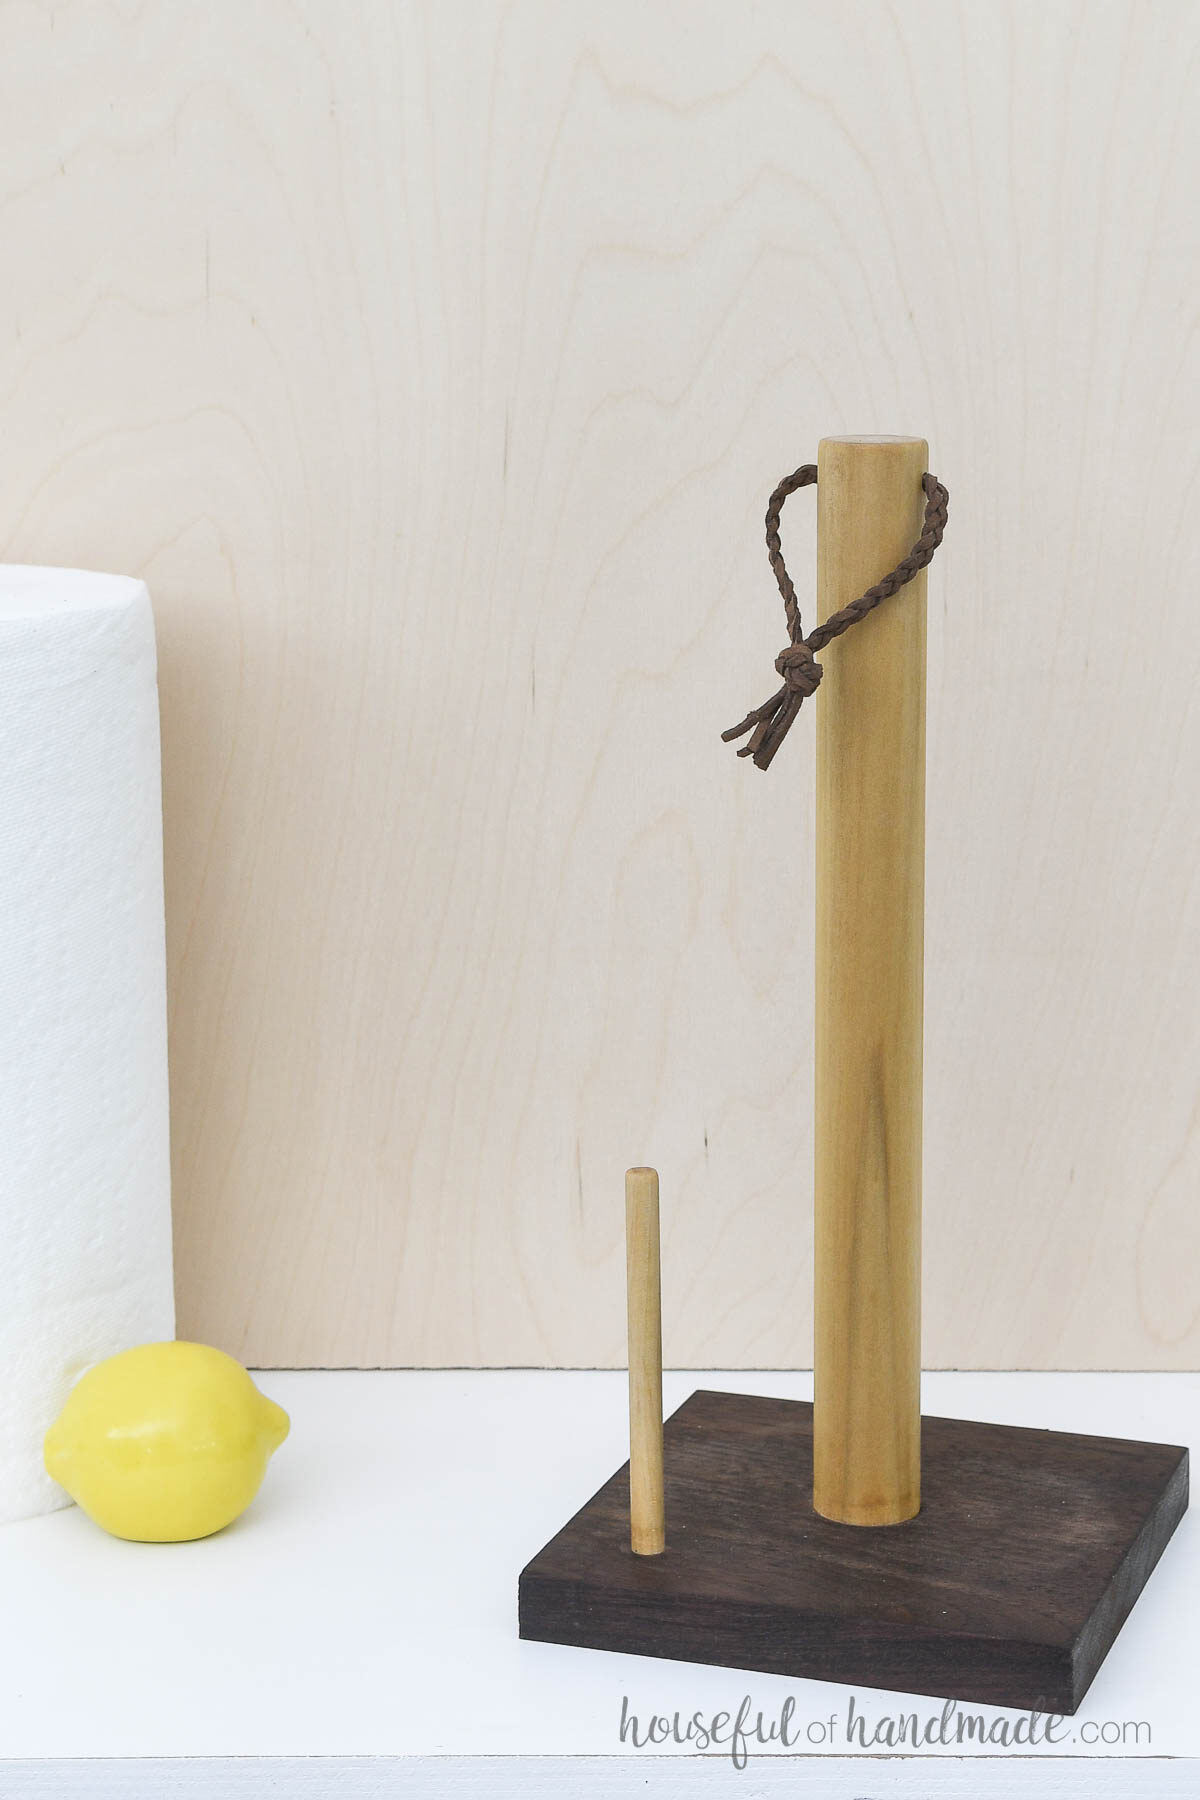
Luckily for me, I also had a dowel scrap to use. This dowel was left over from building my favorite modern firewood holder.
Use what dowel pieces you have left over in your scrap wood bin. Anything from 3/4″ to 1 1/4″ will work.
For the smaller dowel, used to stop your paper towel roll from unwinding, I used a 3/8″ dowel. But again, you can use what you have.
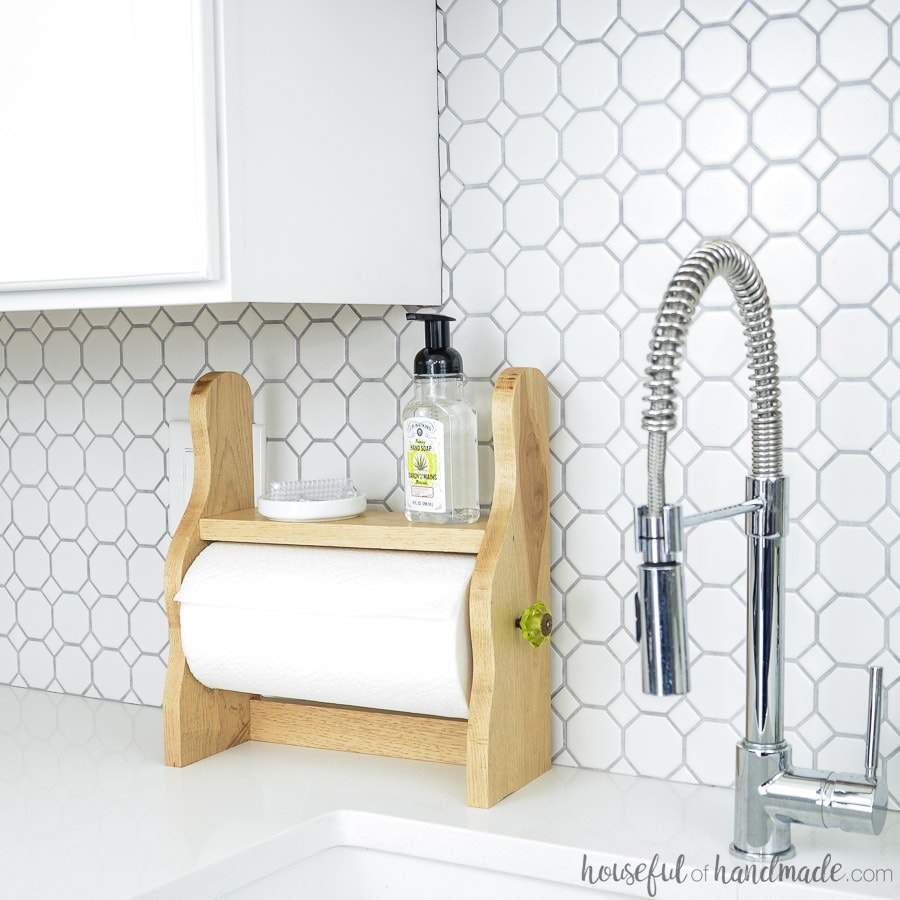
Prefer a horizontal paper towel holder?
I also still love (and use) this stunning DIY paper towel holder with a shelf on top. It is perfect for placing next to the sink and holding your soap.
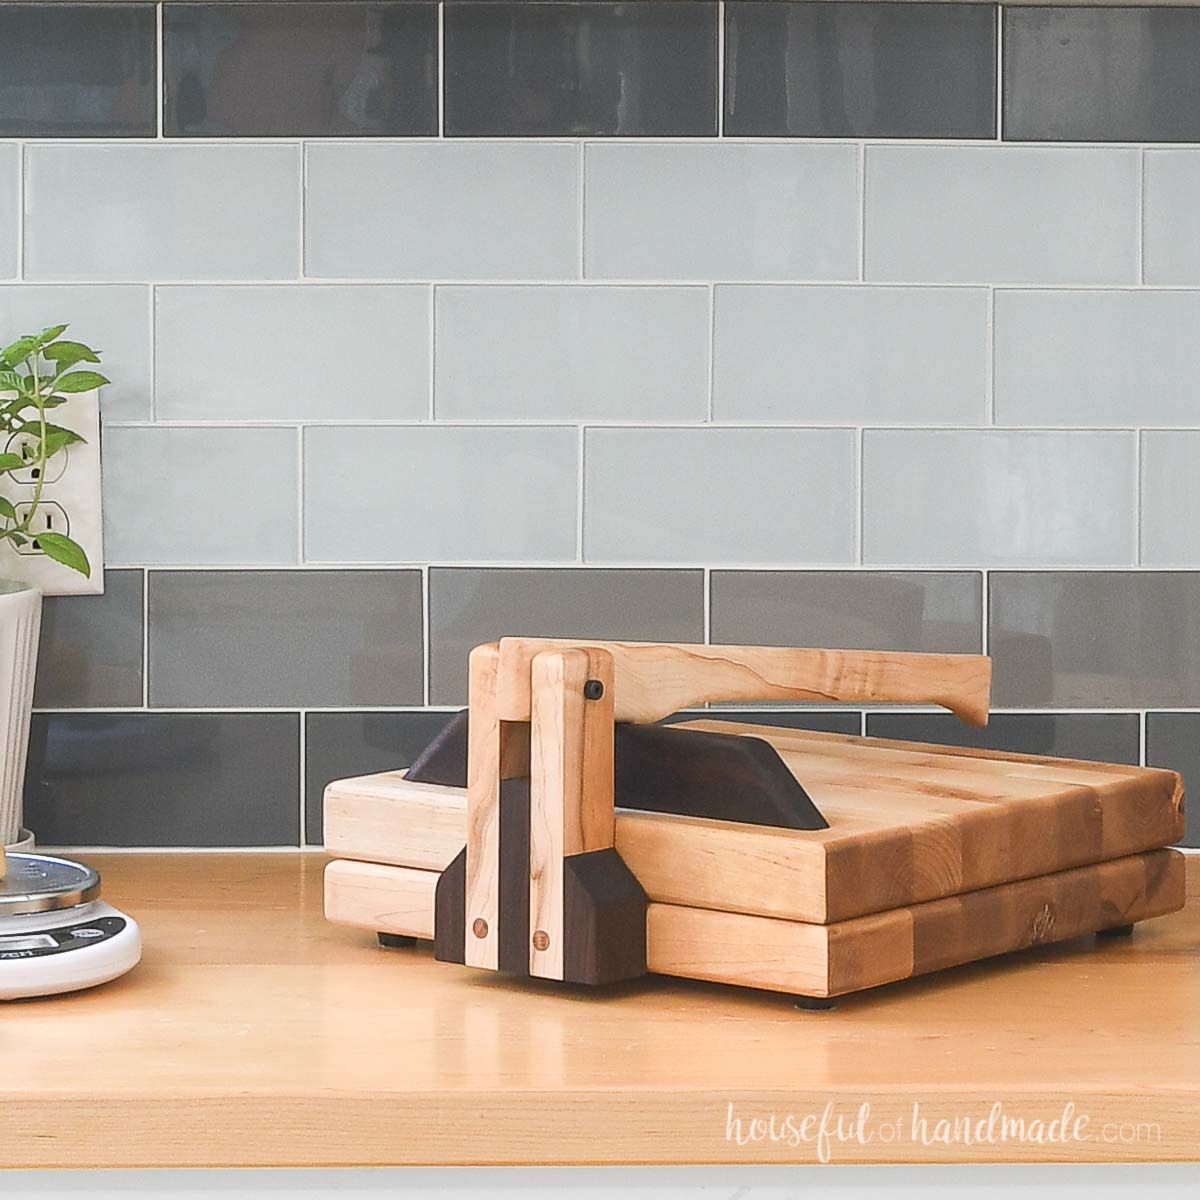
How to Build a Vertical Paper Towel Holder
Tools & Materials
Recommended Tools:
- Miter saw
- I recently upgraded to this larger sliding miter saw (watch for it to go on sale), but all my projects before were built with this inexpensive miter saw that I loved.
- Saw to cut base
- Table saw, circular saw, or sliding miter saw all will work.
- Drill press or Drill guide
- Drill
- Impact driver (optional, but I love not having to switch bits with the drill)
- Speed square
- Sander
Supplies:
- Wood products
- (1) 6 1/2″ x 6 1/2″ board
- 3/4″ to 1 1/4″ dowel
- 3/8″ dowel
- 1 1/2″ wood screw
- Wood glue
- Leather cord
STEP 1- Prepare the base piece
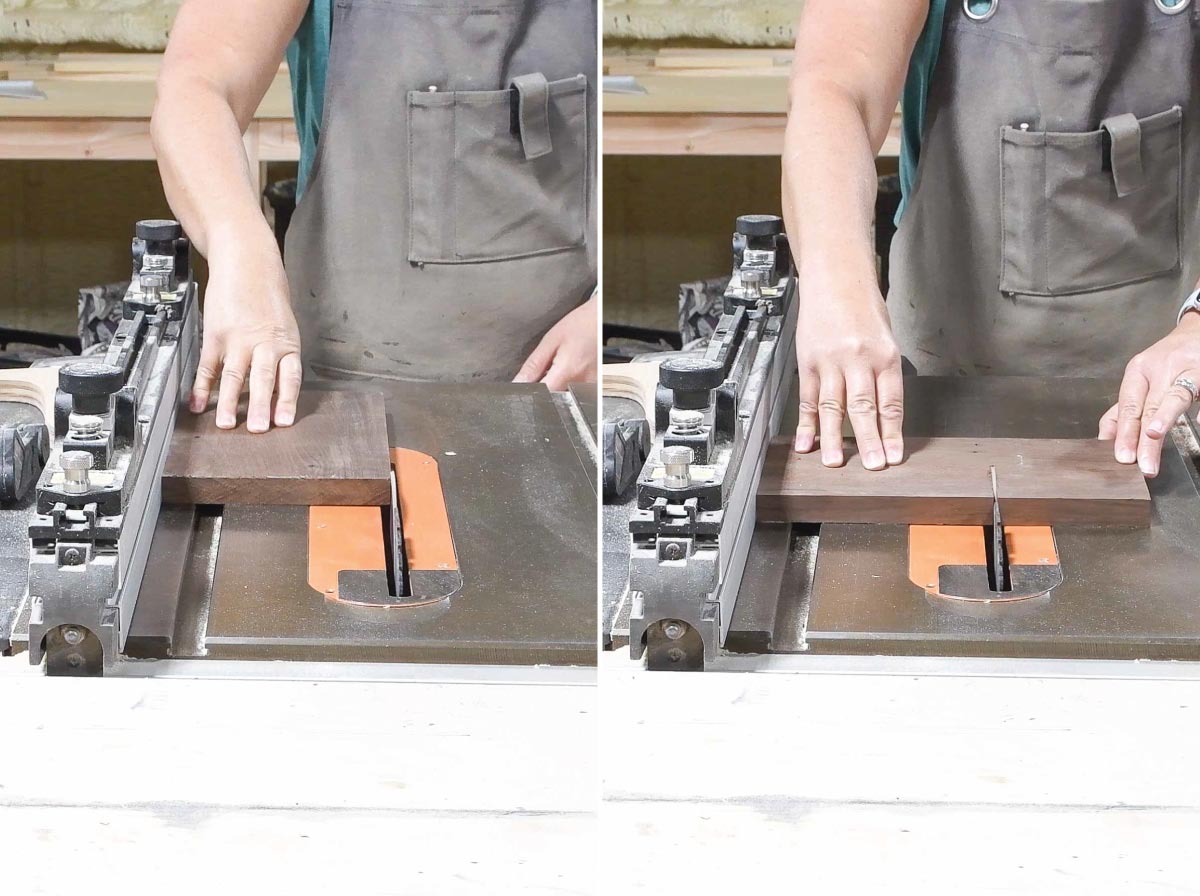
Cut your scrap of wood to be around 6 1/2″ x 6 1/2″ square.
This size will work for a basic sized roll, if you have large rolls, measure it and cut a base to fit.
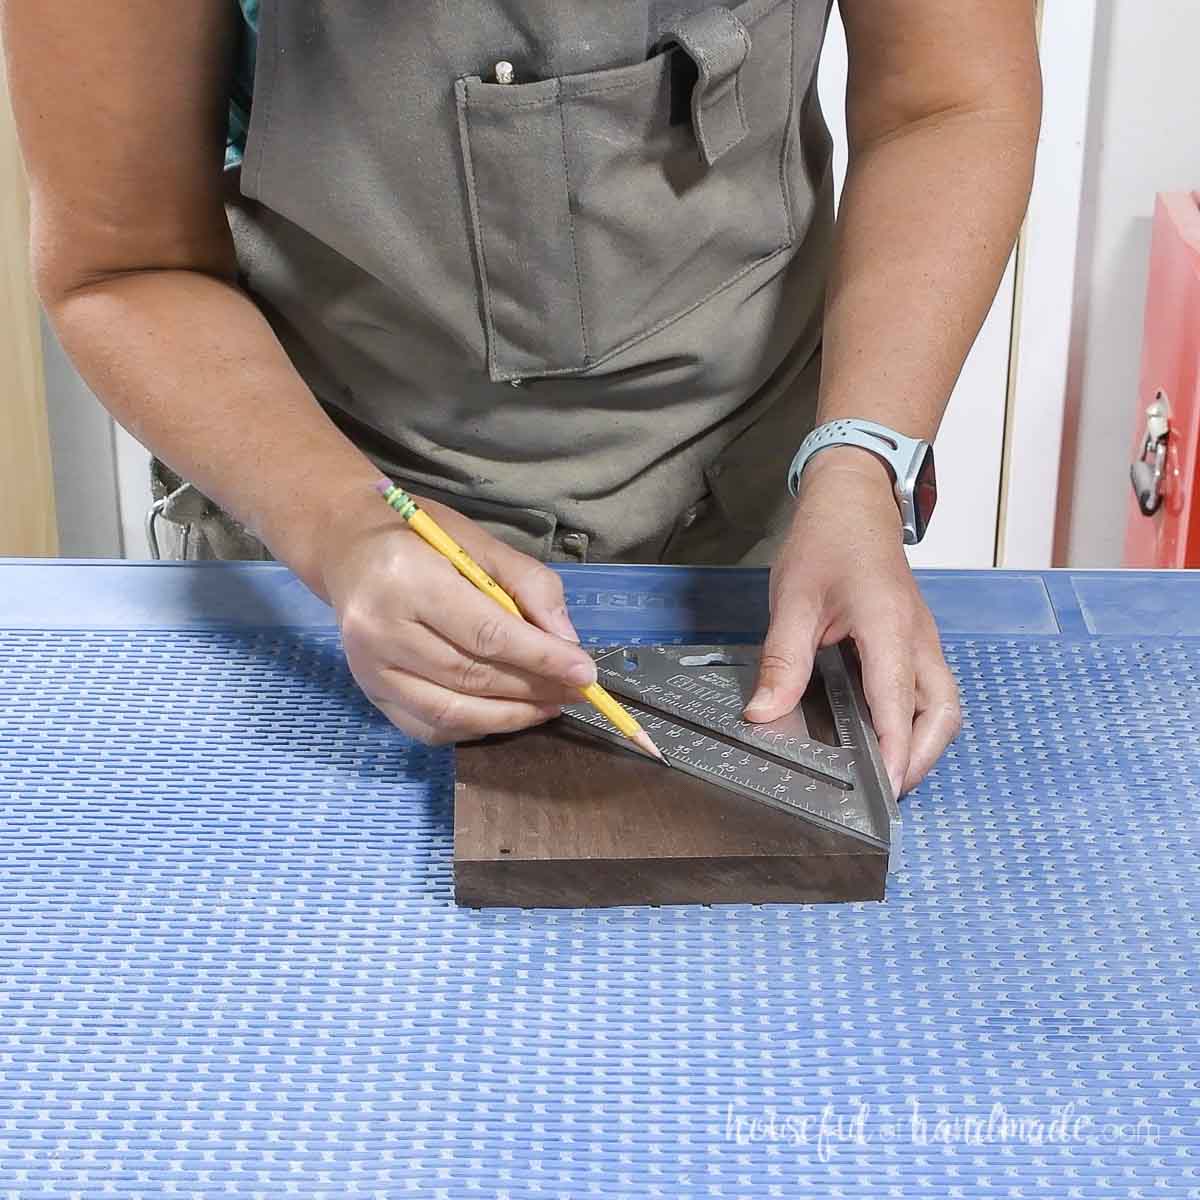
Using a speed square, draw a line from corner to opposite corner. Repeat on the other two corners.
Mark where the two lines overlap. This is the center of the board.
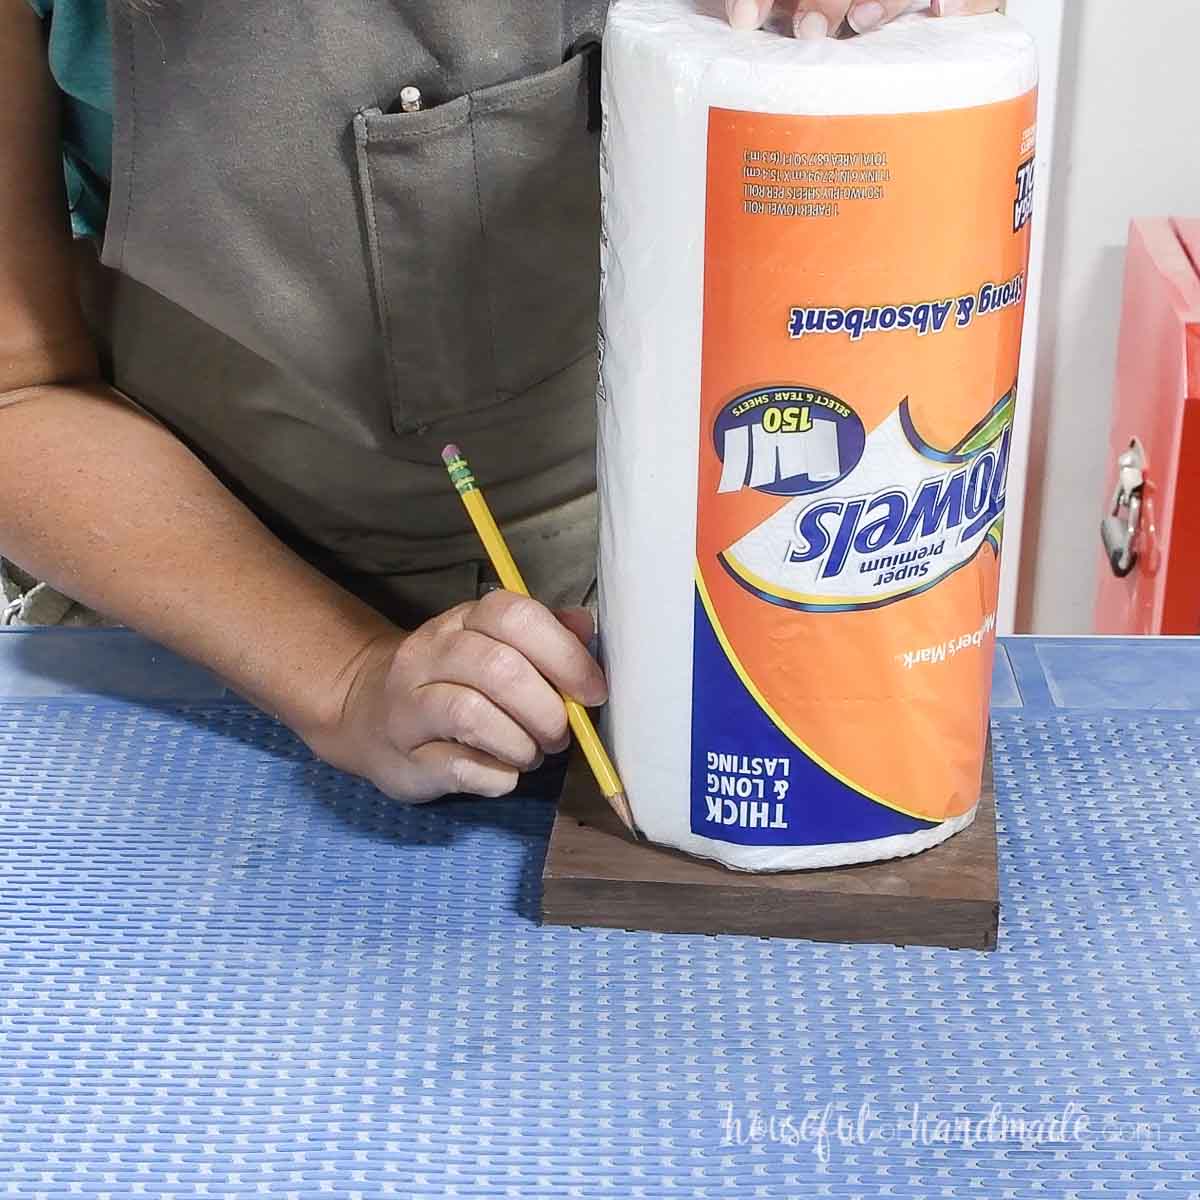
Place your paper towel roll on the piece of wood. Center it.
Mark the edge of your roll on one of the diagonal lines. This is where the stop dowel will go.
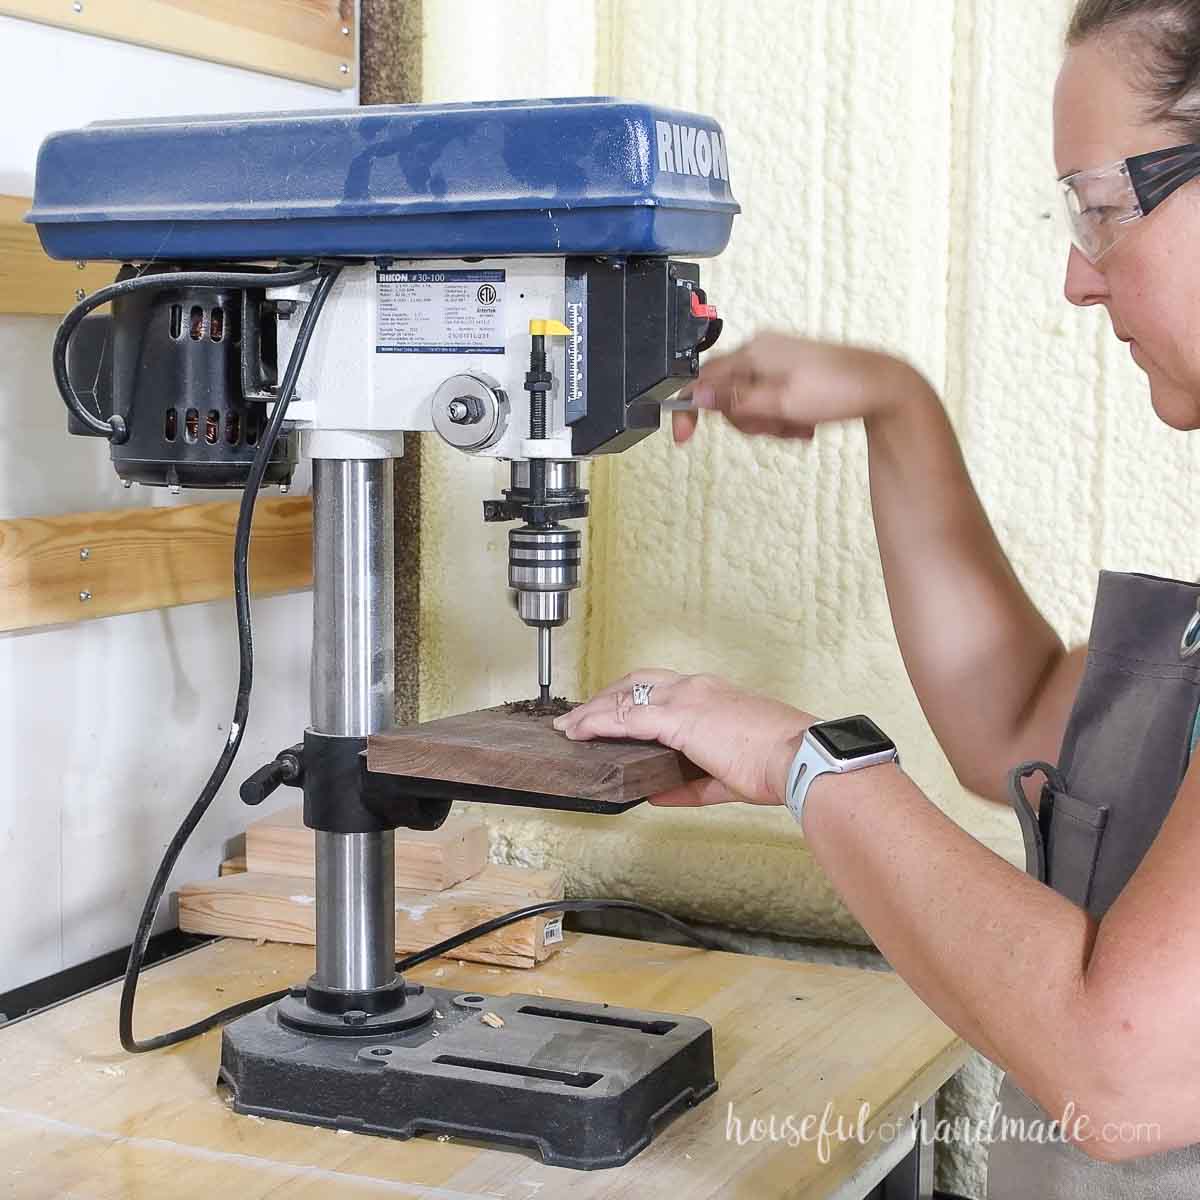
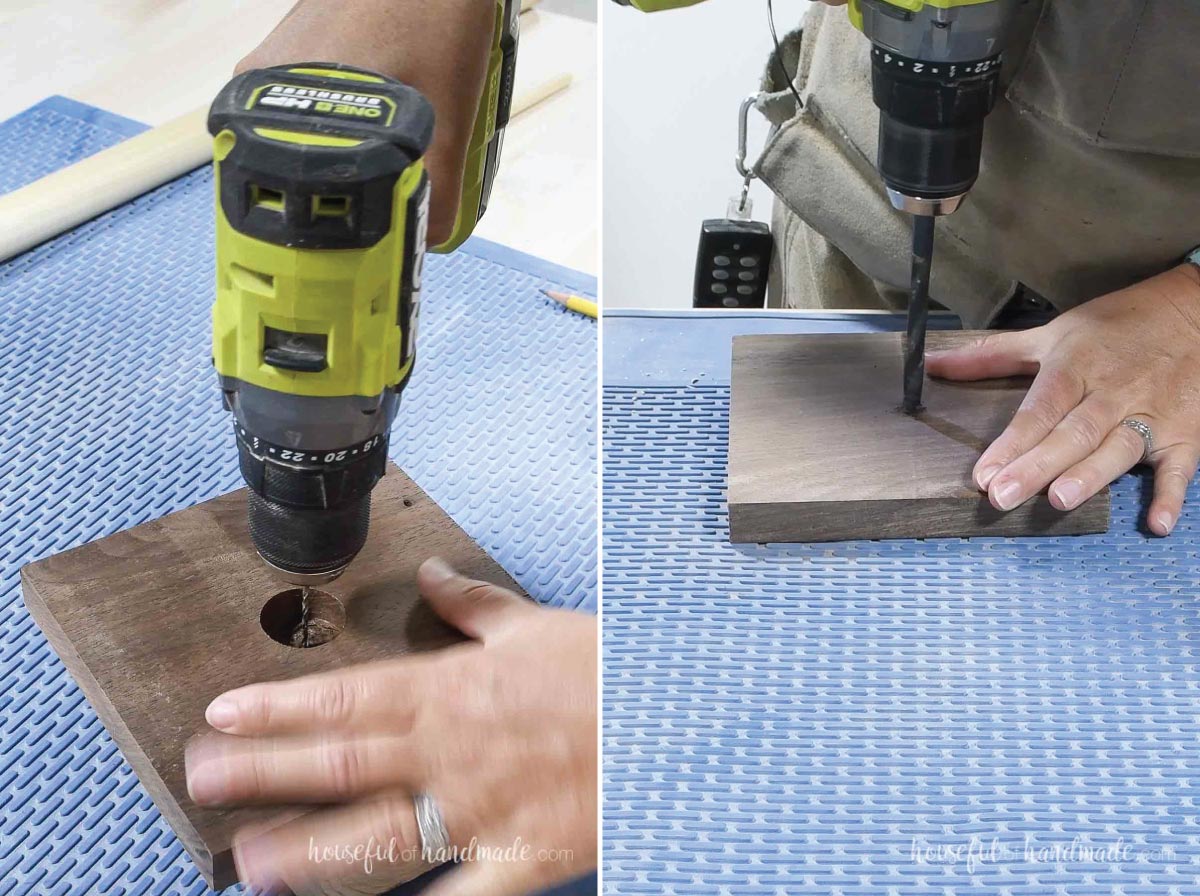
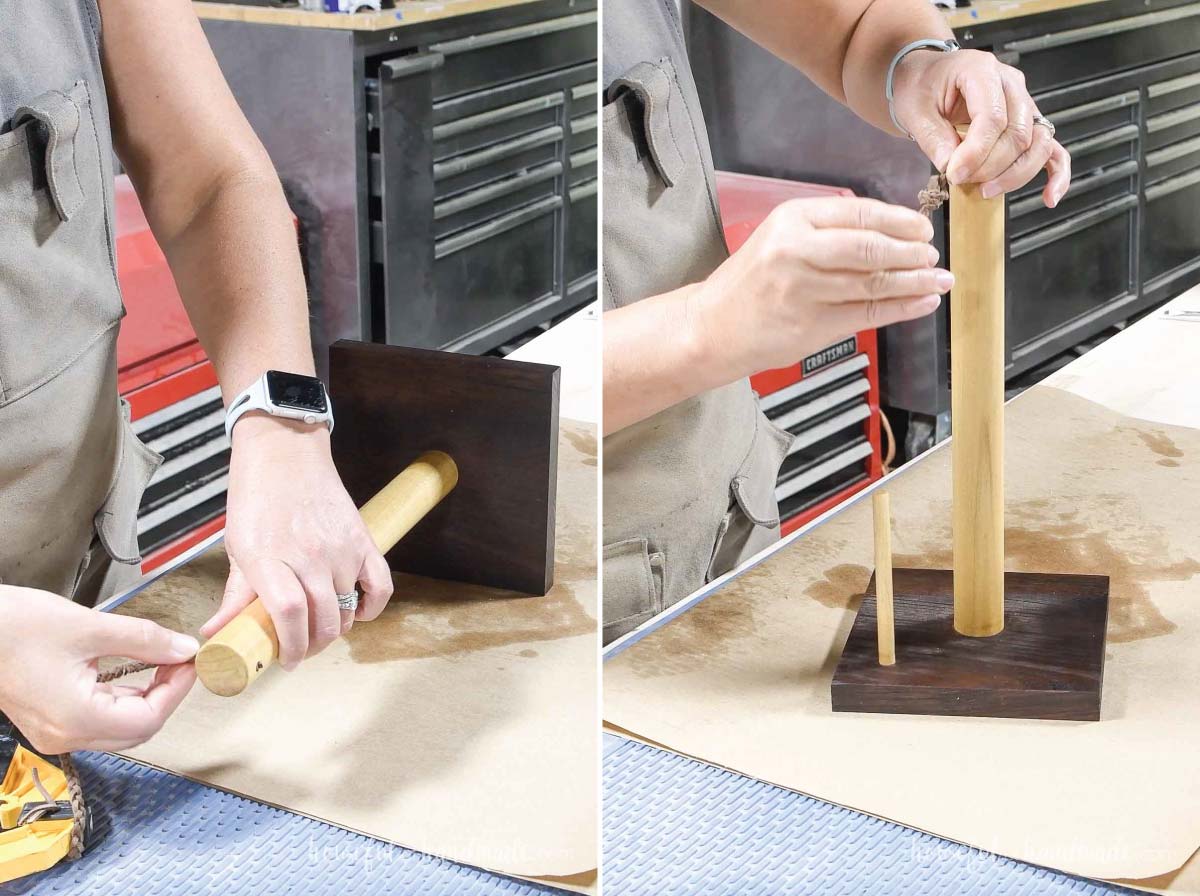
Drill a 1/2″ deep hole the same size as your large dowel on the center mark. Then drill a 1/2″ deep hole the same size as the smaller dowel on the other mark.
Use a drill press or drill guide to make sure the holes are straight up and down or your dowels will be crooked.
Then sand your board smooth before glueing the pieces together.
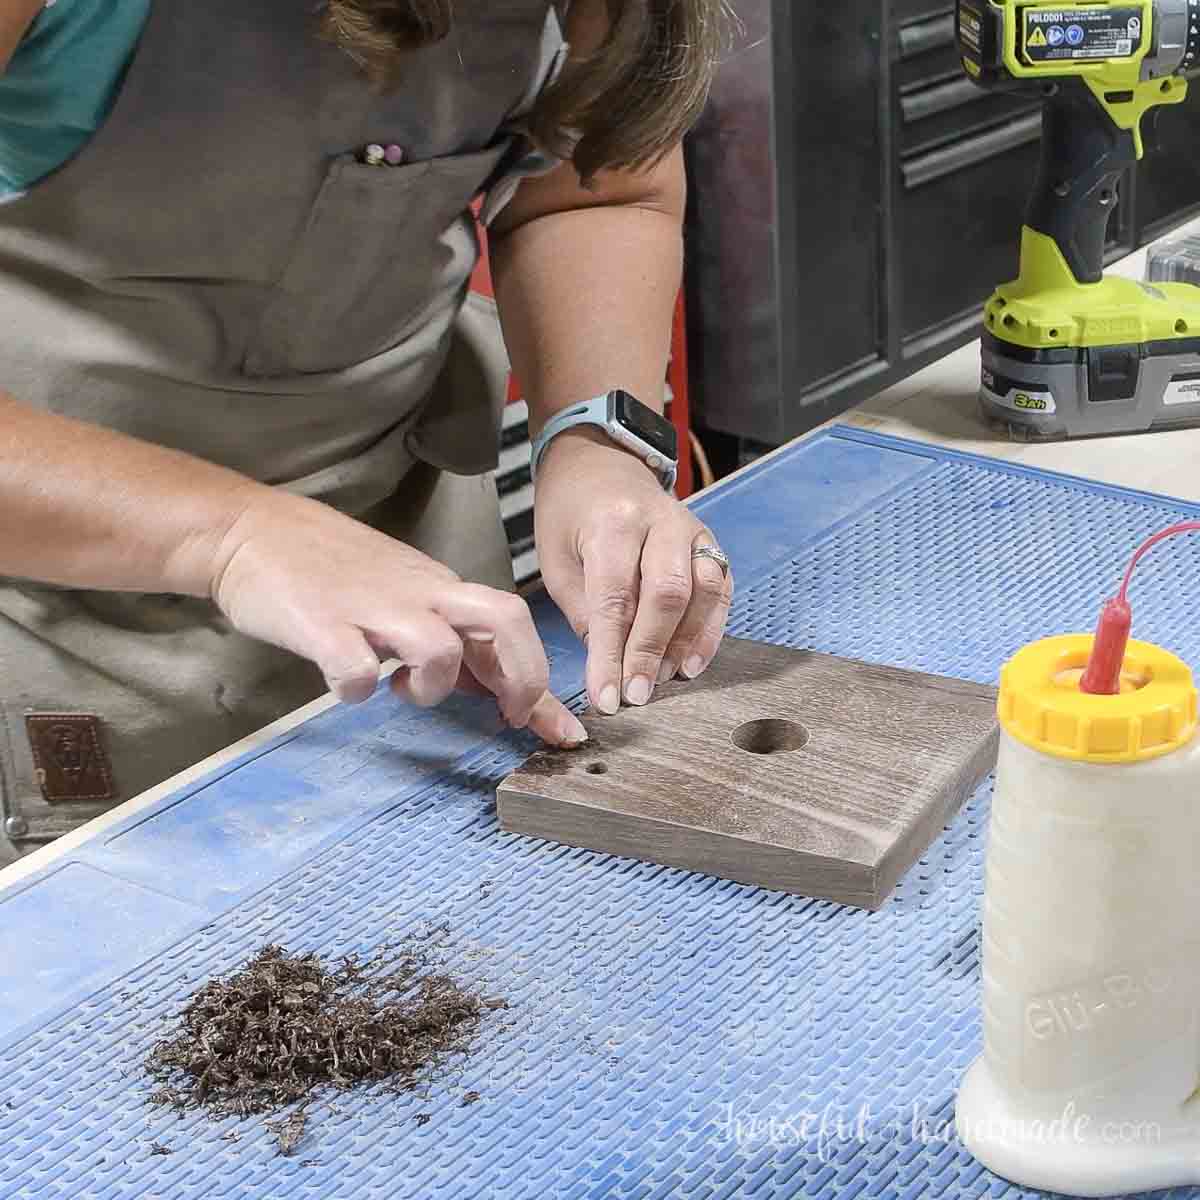
I had some small holes in my base piece. To hide them, I filled them with a mixture of wood glue and the sawdust left over from drilling the holes.
Once dry, I sanded it smooth and now I can barely see where the holes were.
STEP 2- Cut the dowels
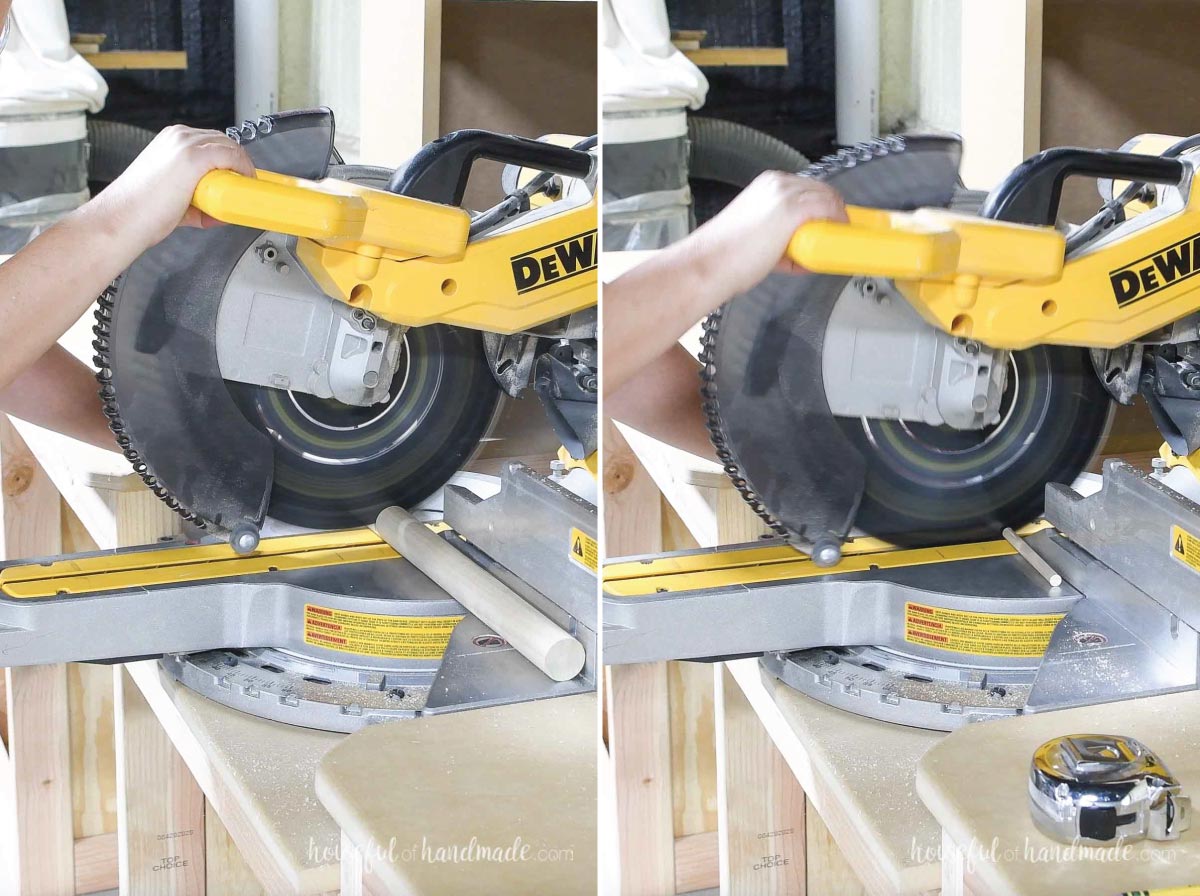
Cut the larger dowel to 13″ long.
Cut a 5″ piece from the smaller dowel.
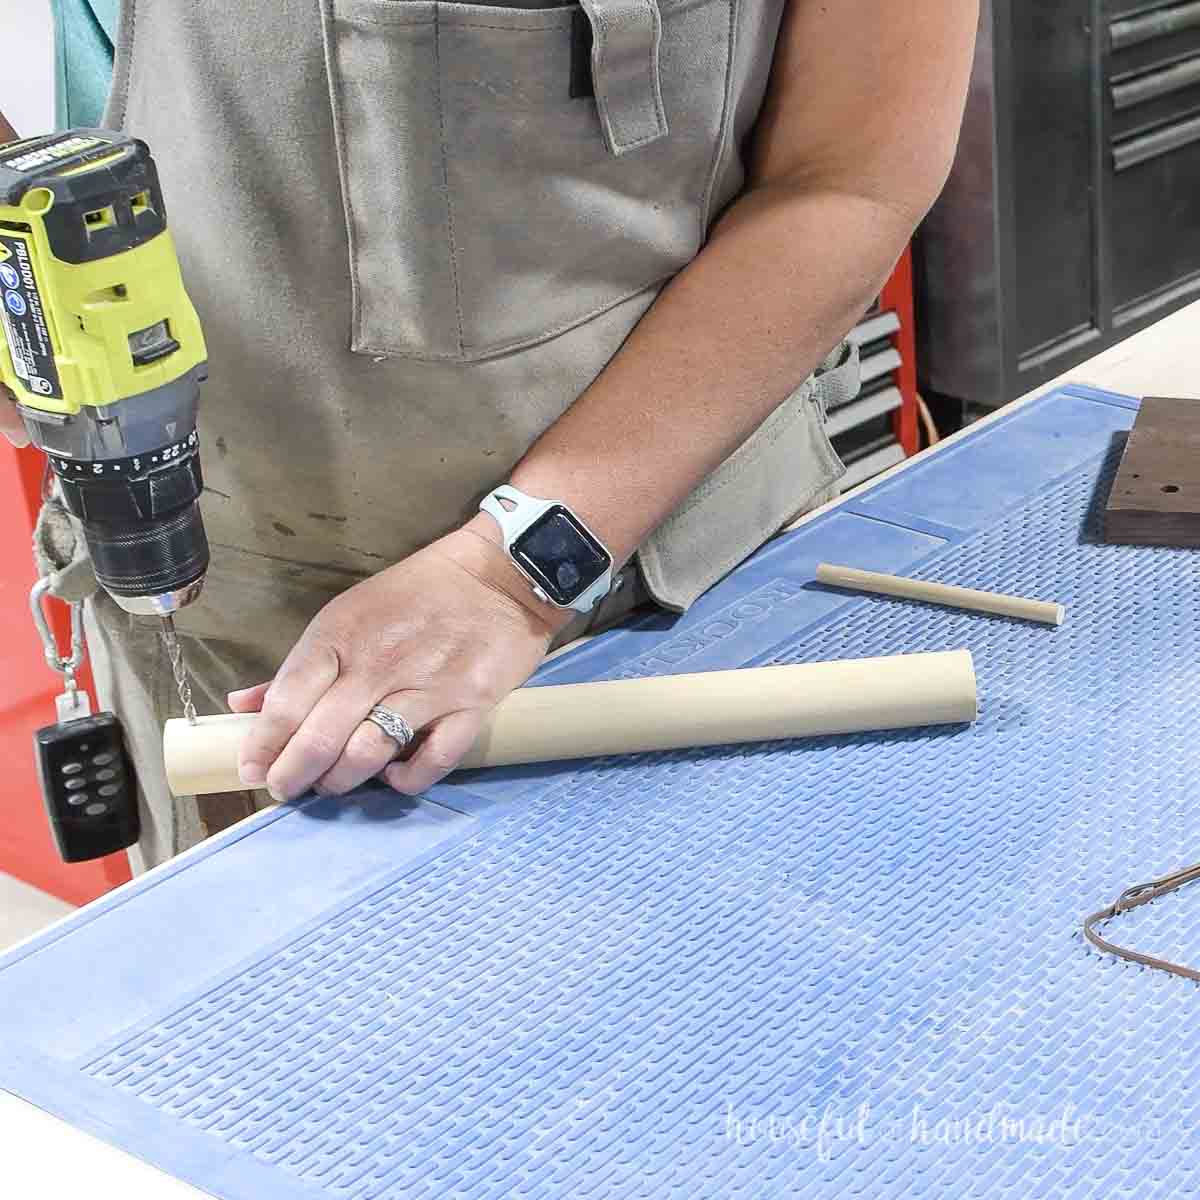
Drill a hole through the top of the larger dowel.
This is for the handy carrying loop, so make sure the hole is big enough for your cording.
Then sand both dowel pieces.
STEP 3- Assemble paper towel holder
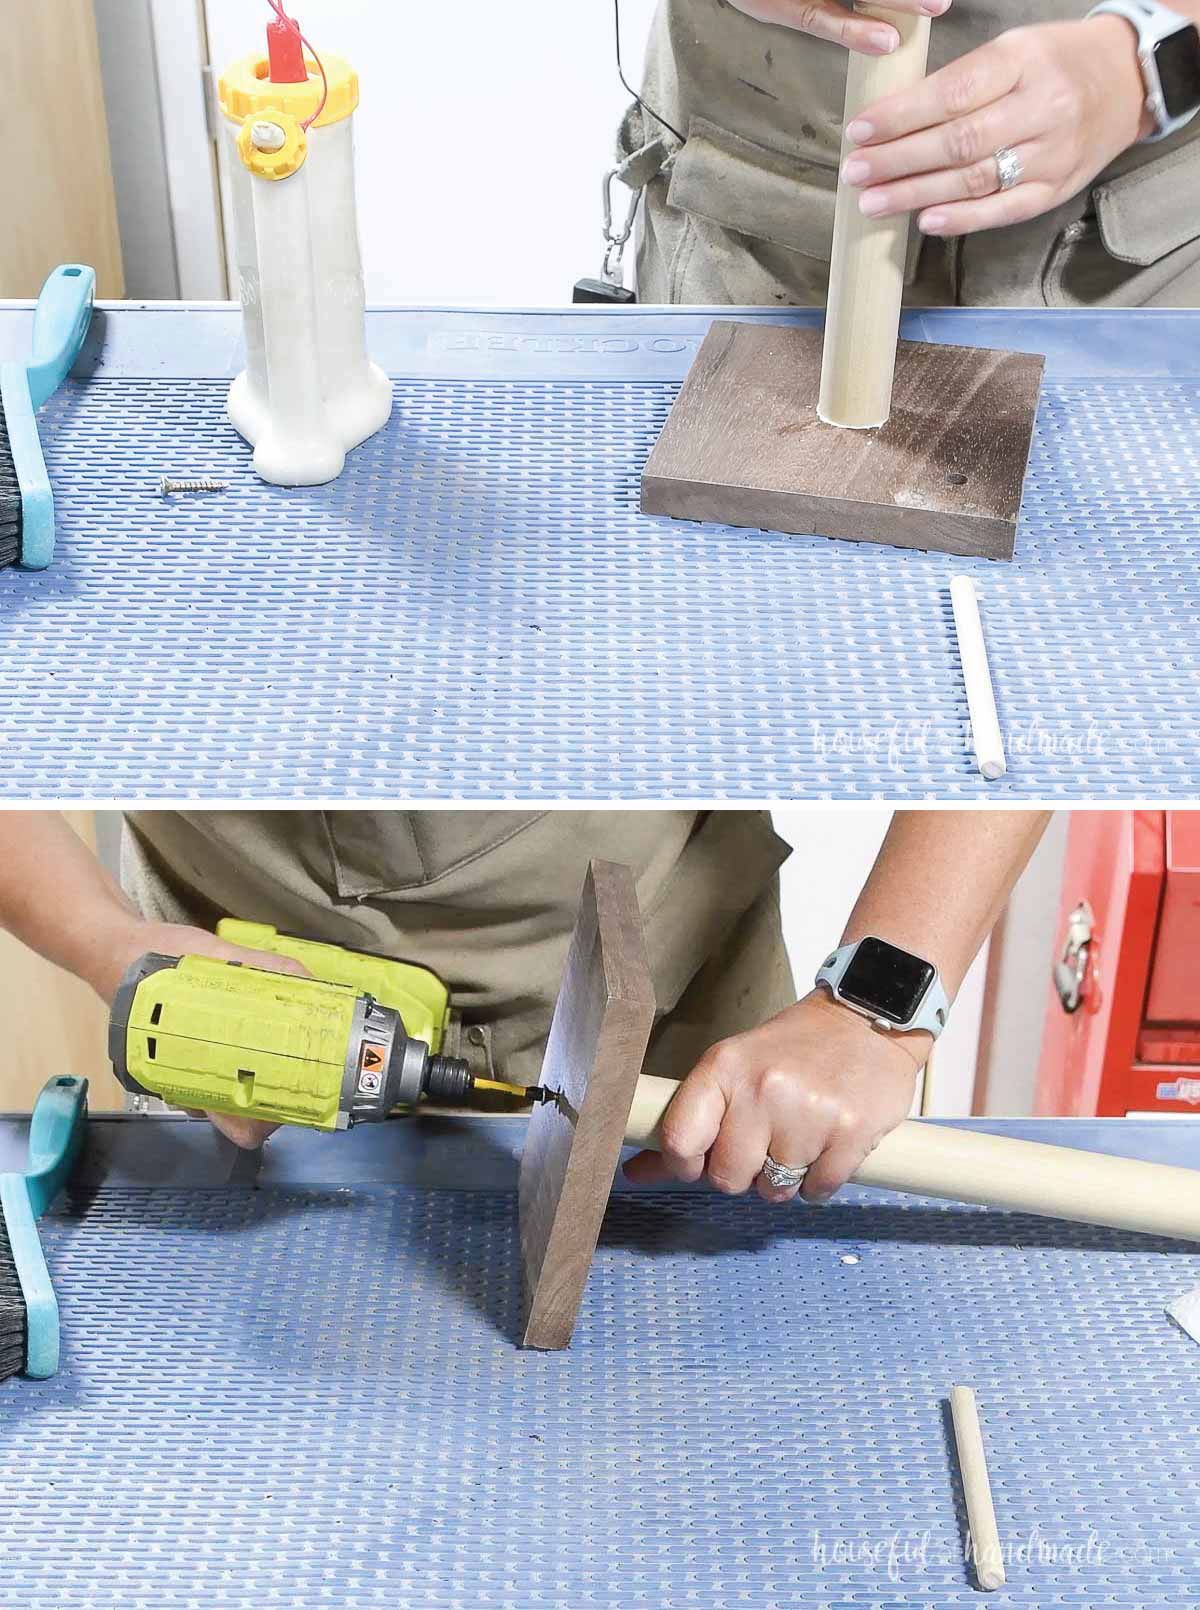
In the center of the larger hole, use a smaller drill bit to drill all the way through the board.
Flip the board over and using a standard drill bit, create a divot on the bottom of the board where the hole came through.
This is for the screw head to sit into so the bottom stays flat.
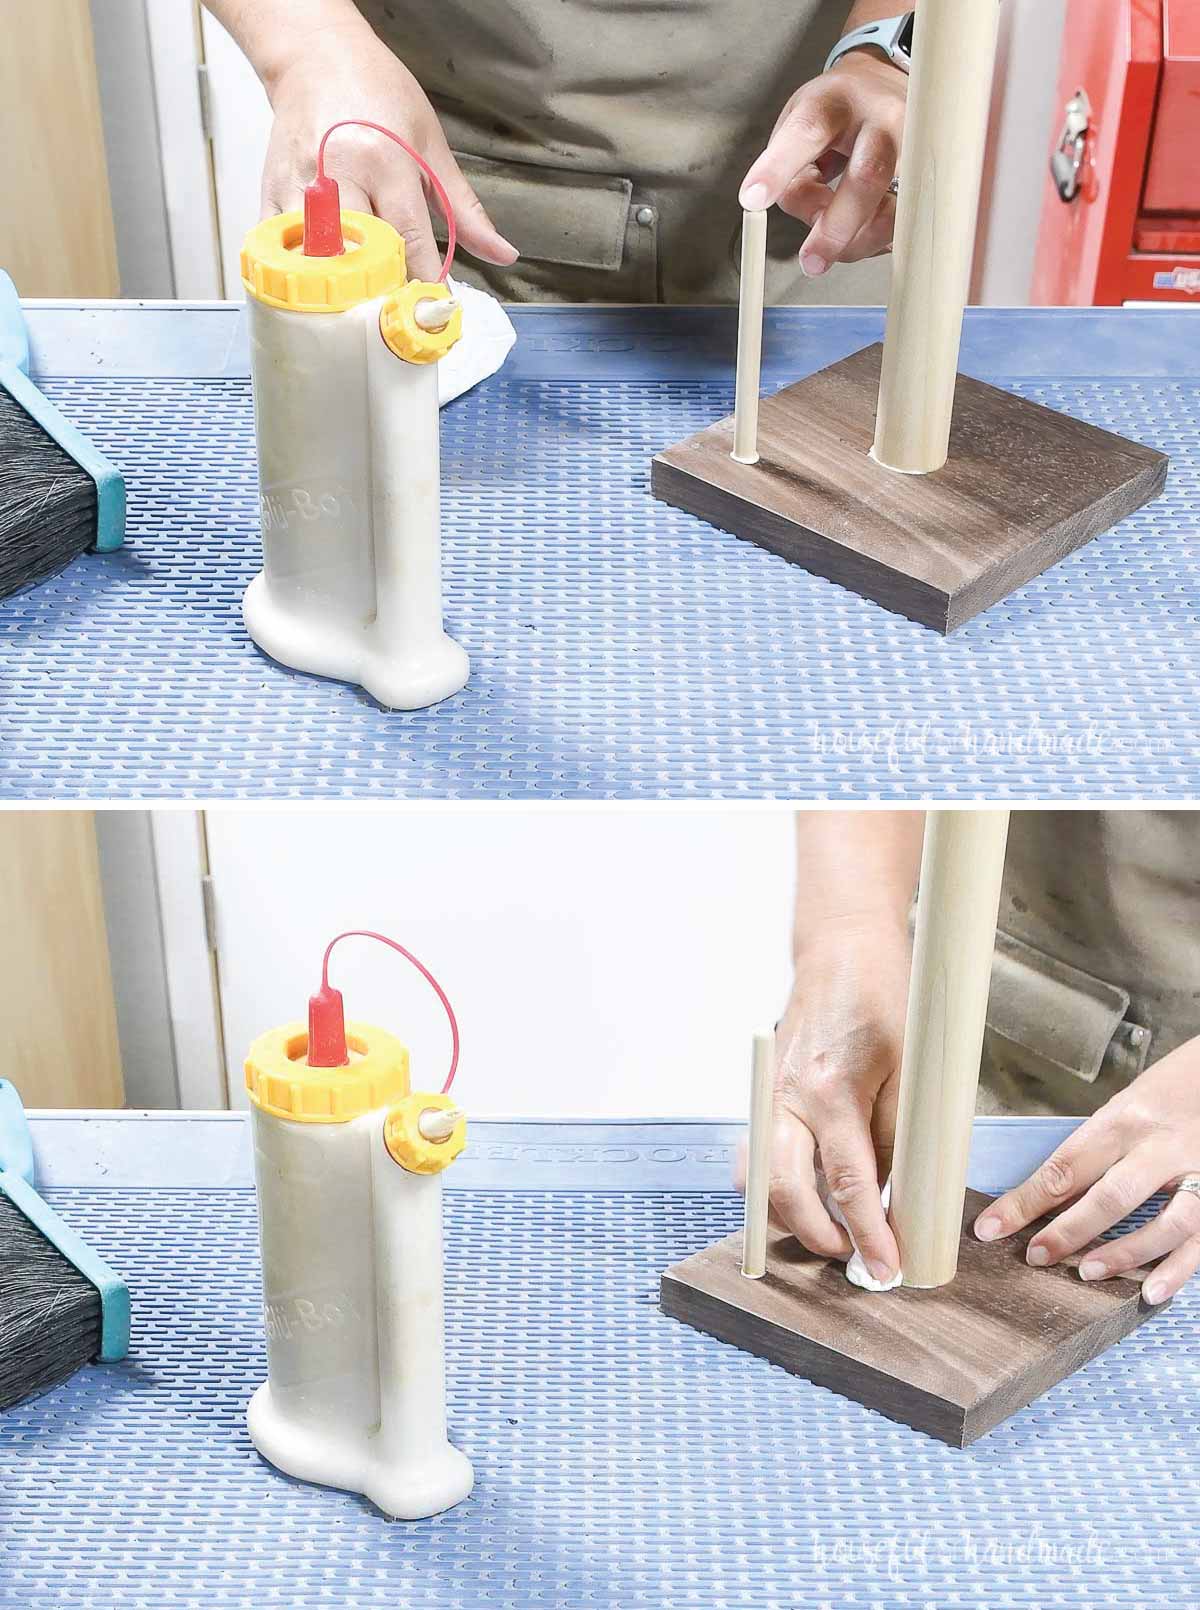
Glue the large dowel into the hole.
Then flip the board over and secure the dowel with a wood screw through the hole.
Glue the smaller dowel into place.
Then quickly wipe away any glue squeeze out with a damp paper towel before it dries.
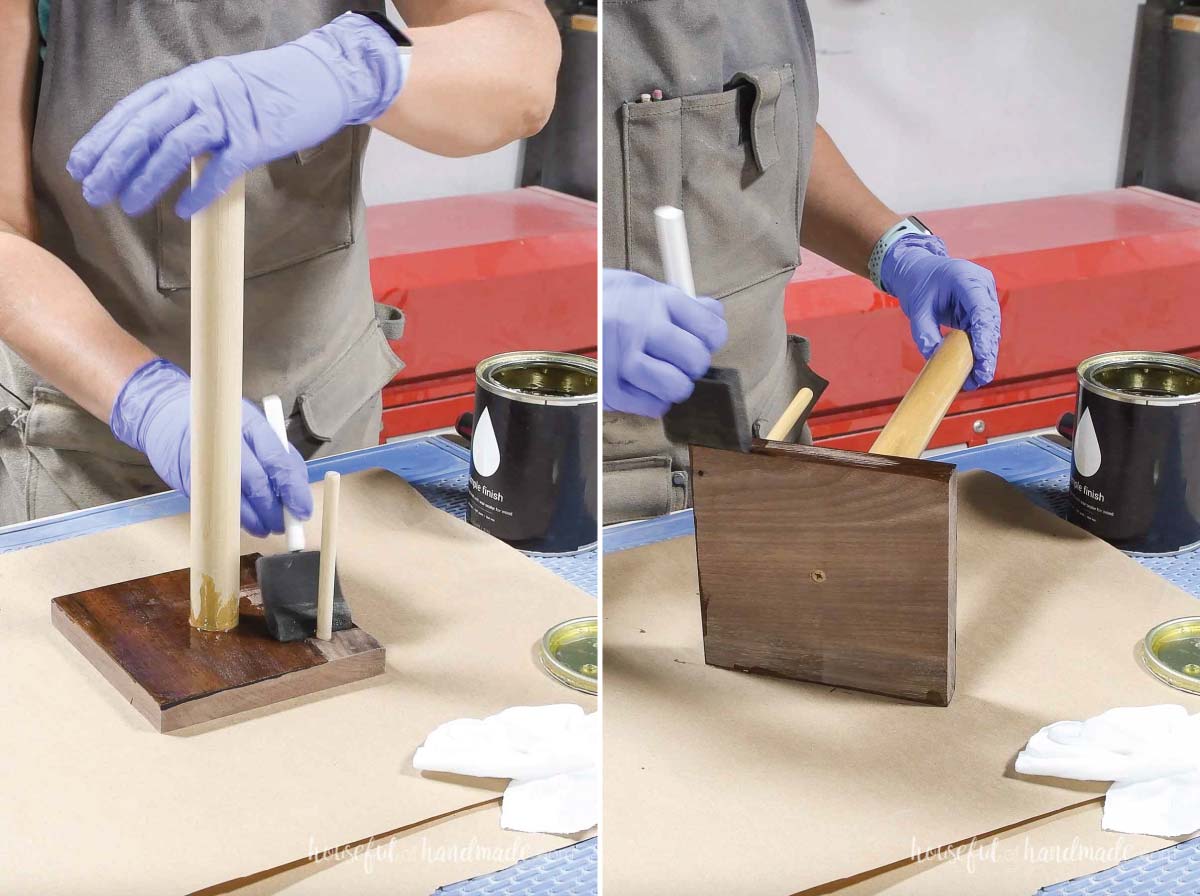
STEP 4- Seal and finish
Touch up any sanding.
Then seal your new paper towel holder. I used Maker Brand Simple Finish.
This penetrating wax seal is water-resistant and food safe. Perfect for a kitchen.
While the finish was drying, I made a braid of the leather cording.
The cording I had looked too thin on the paper towel holder. But a 3 strand braid made it more substantial without having to buy new cord.
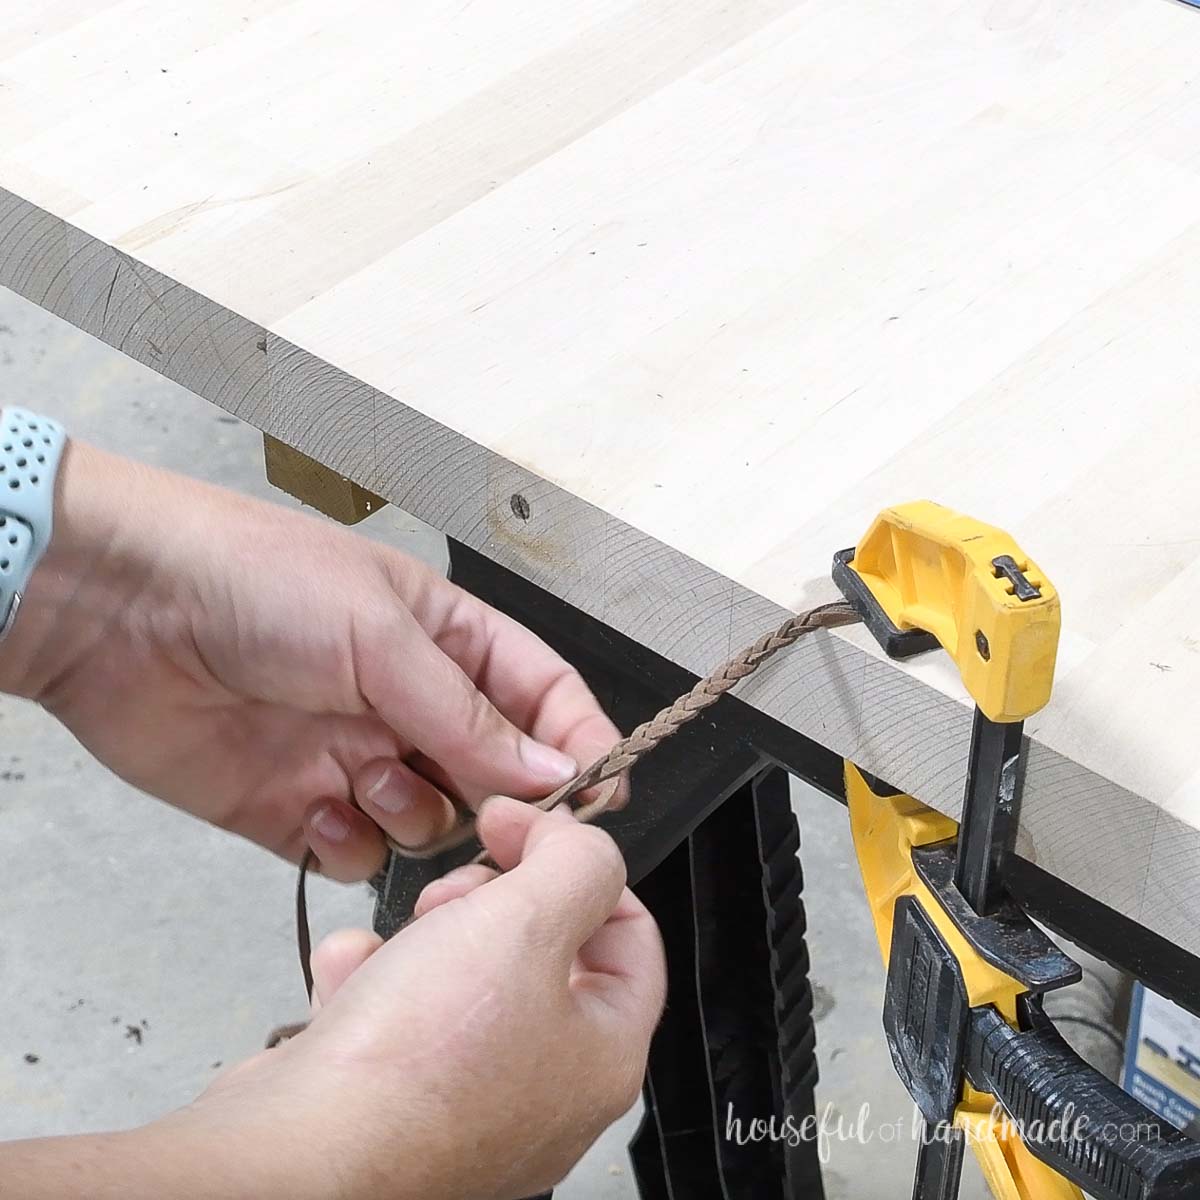
Thread the cording through the hole on the top. Then tie it together to create a chunky knot.
If using a braid, fray out the ends after the knot.
You did it!
Now you can slip your paper towel roll onto your new vertical holder.
I love that even with messy hands, I can grab the paper towel holder from the loop on top and take wherever I need it.
And it looks amazing too!
More Scrap Wood Projects:
This project is part of Scrap Wood Summer series!
Each week during August, Woodshop Diaries and have been sharing new scrap wood project. It’s the perfect time of year to turn your scrap pile into something beautiful.
Check out any projects you may have missed below and come back next Tuesday for new builds.


Happy building!
