OMG, there is only 1 week left to wrap up this Office & Craft Room Makeover! And my money is almost gone.
Well, $100 can go pretty quickly, but I am proud of how carefully I’ve spent it. The biggest purchase, a $32 piece of plywood, was used for 3 projects. I think I got my money worth.
I also really utilized the scraps of wood cluttering up my garage. I have always been afraid to toss anything bigger than a couple inches and now I am glad I kept it.
This post may contain affiliate links. As an Amazon Associate I earn from qualifying purchases. Click here to read my full disclosure policy.
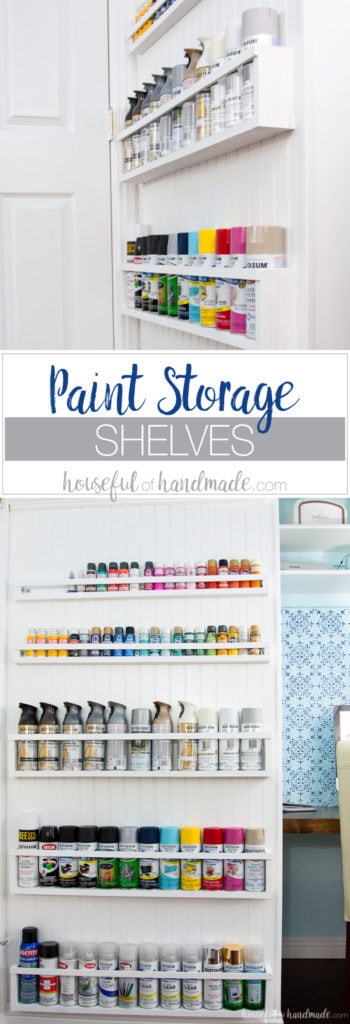
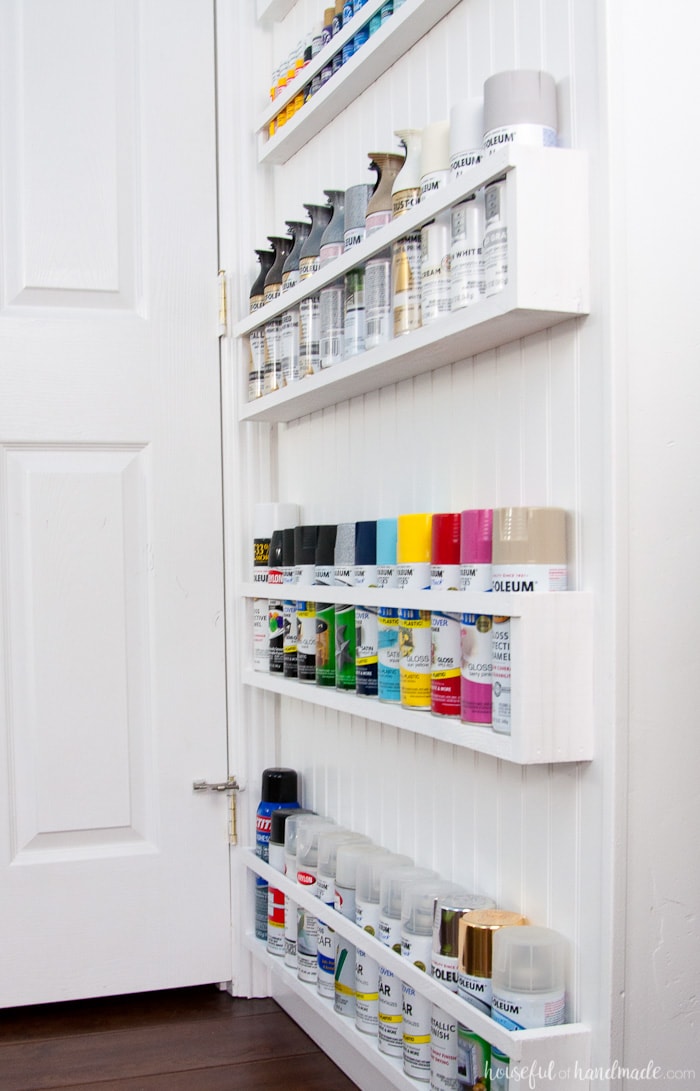
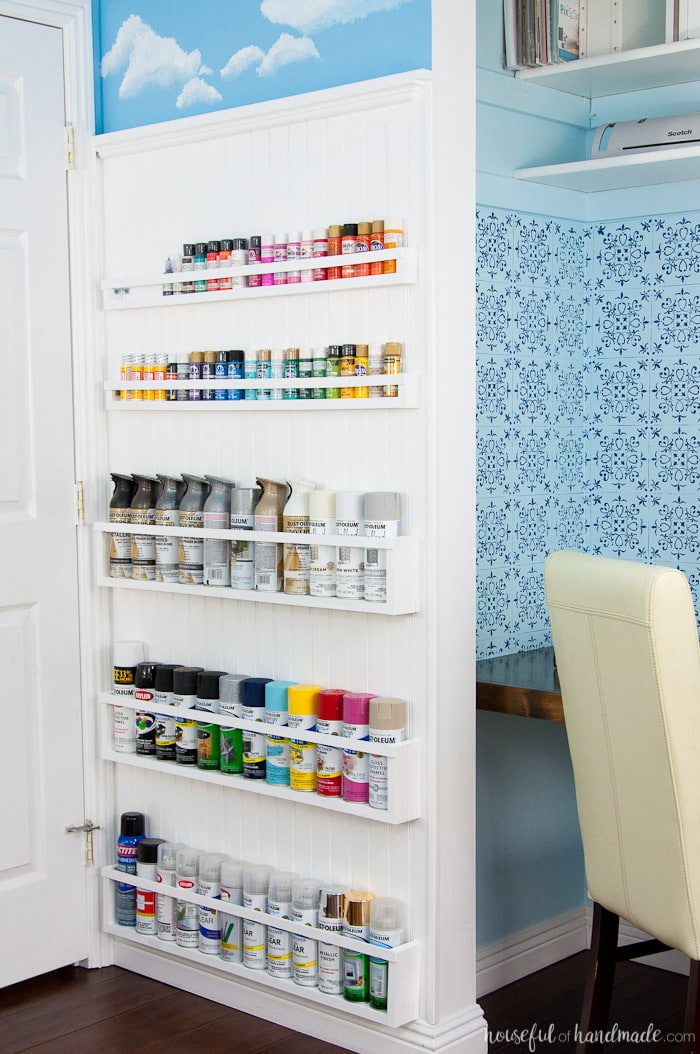
Last week I was able to build this DIY paint storage completely out of scraps of ugly, twisted wood that I was hoarding for the right occasion.
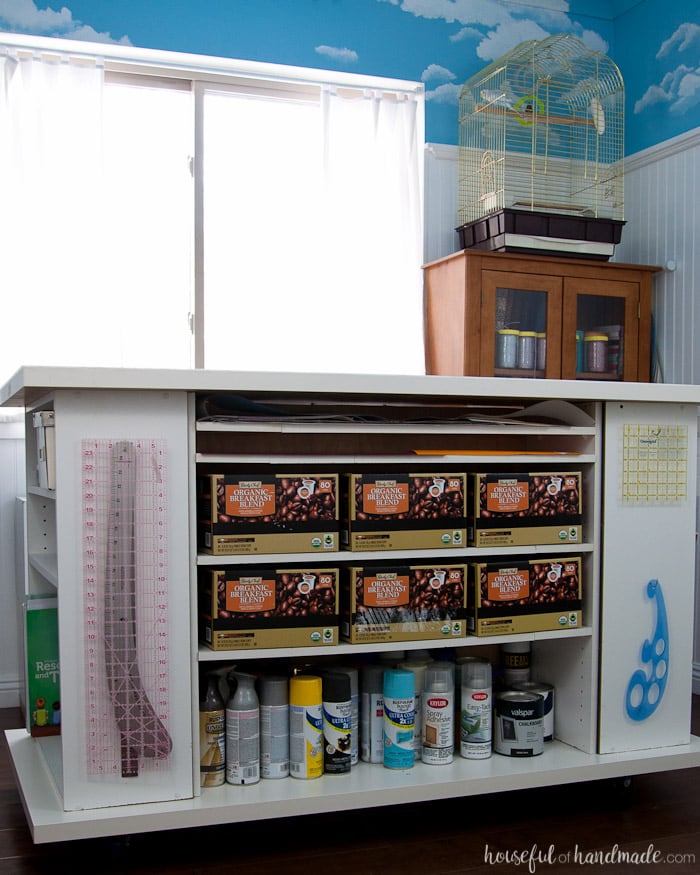
When I built the rolling workstation out of some old bookcases, I filled the bottom shelf full of my spray paint cans. This seemed like a great place to store them.
As I moved the rest of the cans that were stored haphazardly in my garage, I realized this wasn’t the best solution. But now I have a rotating spray paint storage in the garage to help manage the overflow.
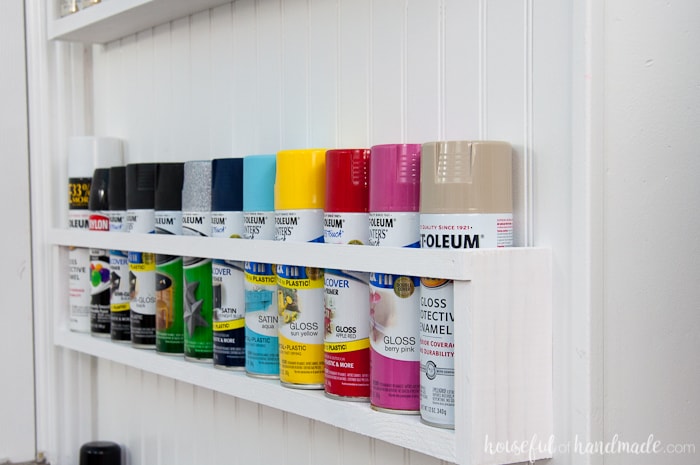
Apparently I had a lot more spray paint then I thought. I also seemed to have a lot of duplicates because my storage solution before was less than stellar.
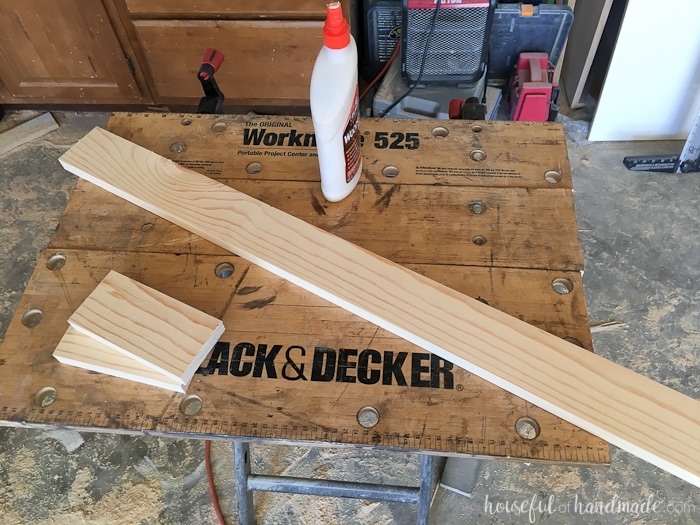
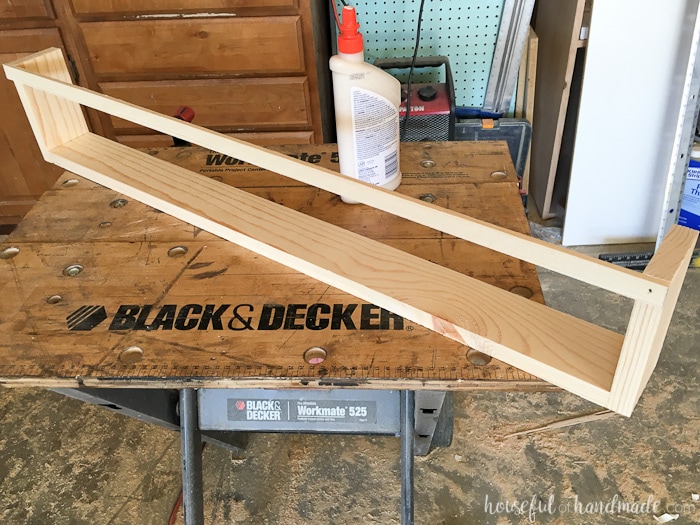
While I was in the garage building the farmhouse console table for the space, I found a scrap of 1×10 that was about 40″ long. But it was warped and twisted, not something that I would be able to use for a larger project.
Usually I would cringe at cutting up a larger board like this, but since it was not getting any use as it was, I decided to turn it into the perfect DIY Paint storage solution for my new office & craft room.
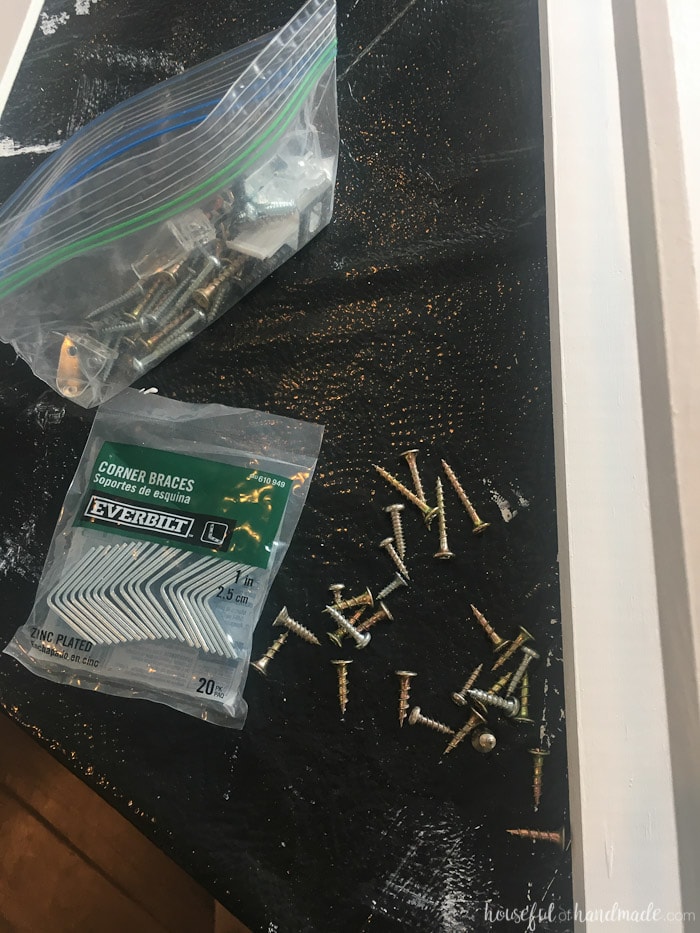
I was pretty excited about completing this project out of scraps of wood and left over white paint. However, when it came time to hang my awesome DIY paint storage shelves, I realized I didn’t have a good solution without spending a few dollars.
So I ran to the Home Depot and found some 1″ L-brakets. Luckily the pack of 20 was only $7.50. I figured it was worth it for this awesome storage solution.
So all in all I completed this project for only $7.50! If you have been on the fence about whether you wanted to add a table saw to your arsenal of tools, maybe this post will convince you.
Honestly, I don’t know that I would have been able to easily create all the budget friendly DIYs without it. It allows you to do so many things with scraps.
If you want to see how I created this super easy DIY paint storage solution for the $100 Room Challenge, read below for the full tutorial.
How to Make DIY Paint Storage Shelves
Supplies:
- 2 3/4″ wide boards for spray paint storage
- 1 3/8″ wide boards for craft paint storage
- 1/4″ wide strips of wood for shelf braces
- 1″ L-brakets
- Table saw
- The table saw is needed to rip the boards to the widths needed. If you do not have a table saw, you can make these with standard width boards, they will just be deeper than needed.
- Nail gun and finishing nails
- Wood glue
- Paint
- Screws
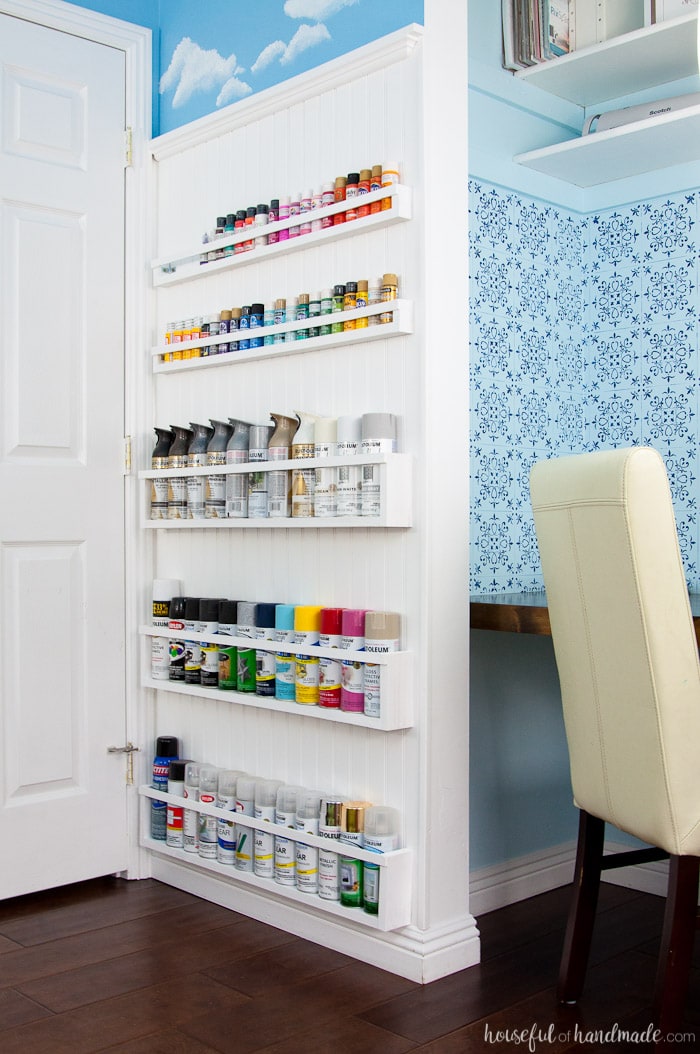
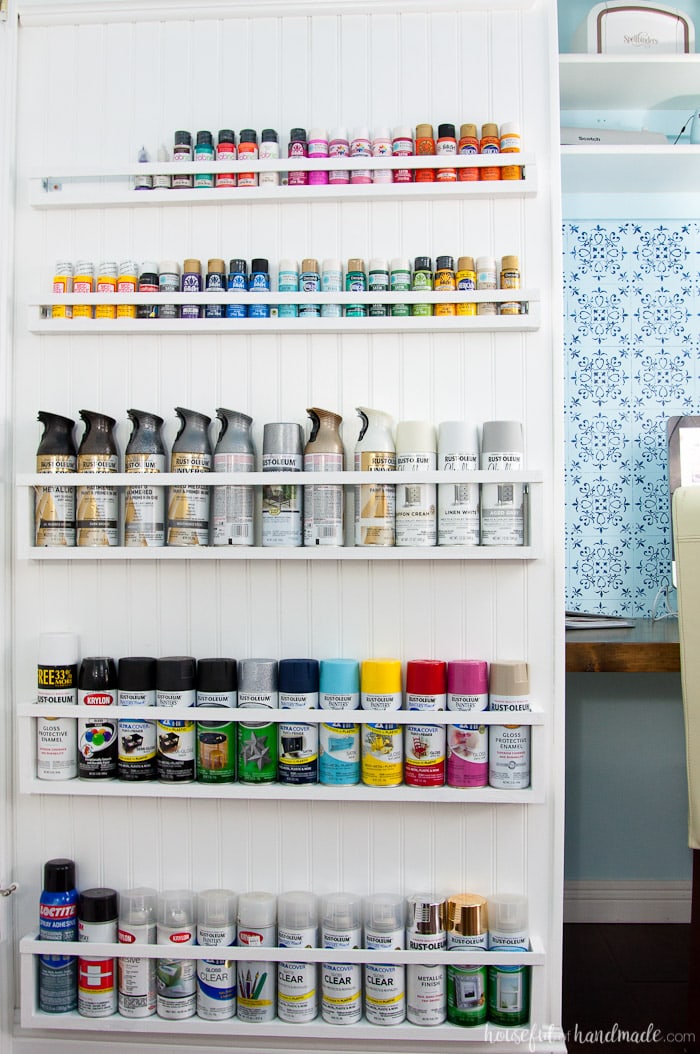
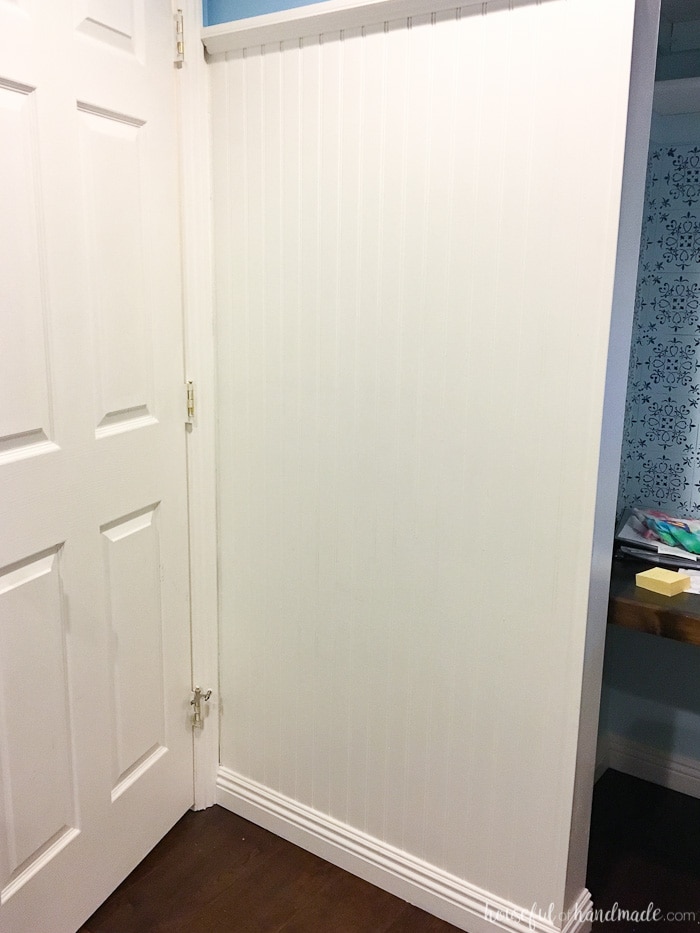
These really are one of the easiest woodworking projects. I almost feel silly writing this tutorial. I chose to put my DIY paint storage shelves behind my door. Just look at all this unused real estate begging for a project.
Start by ripping your boards to the widths needed on the table saw. Use the left over edges of the boards for the front brace.
Determine the length you want your DIY paint storage shelves. Cut a piece of wood to that length minus 1 1/2″ (to accommodate for the boards you will attach to the ends). Cut 2 boards about 1/2-2/3 the height of you paint cans/jars.
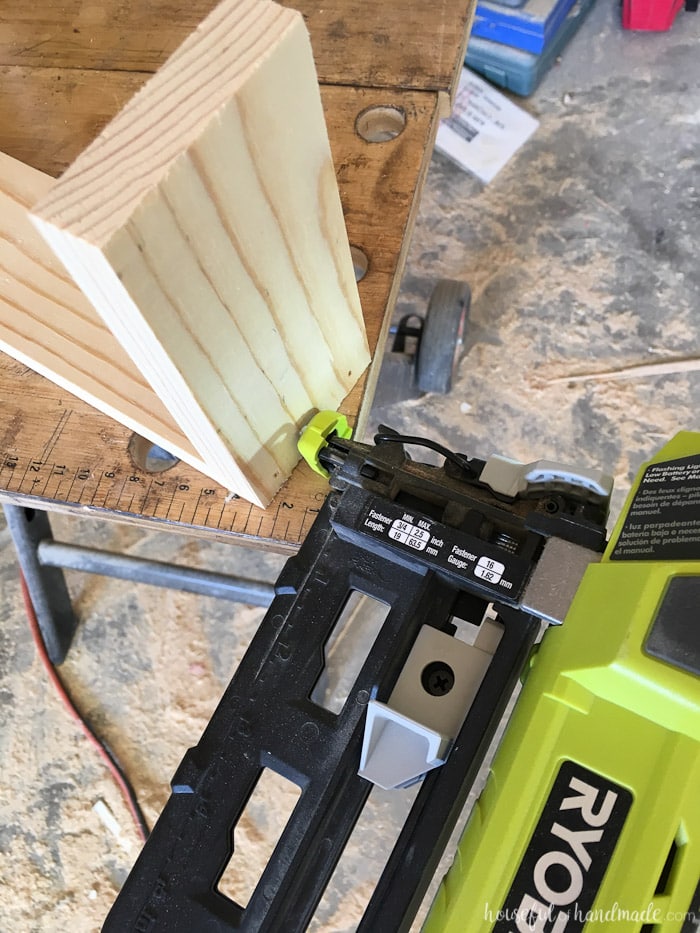
Using wood glue and finishing nails, attach the smaller boards to the ends of the large board. Making sure it is flush along the bottom.
Cut a piece of 1/4″ thick wood to the total length of the paint storage shelves. Using wood glue and finishing nails, attach it to the front of the shelf so it is flush with the top of the shelf sides.
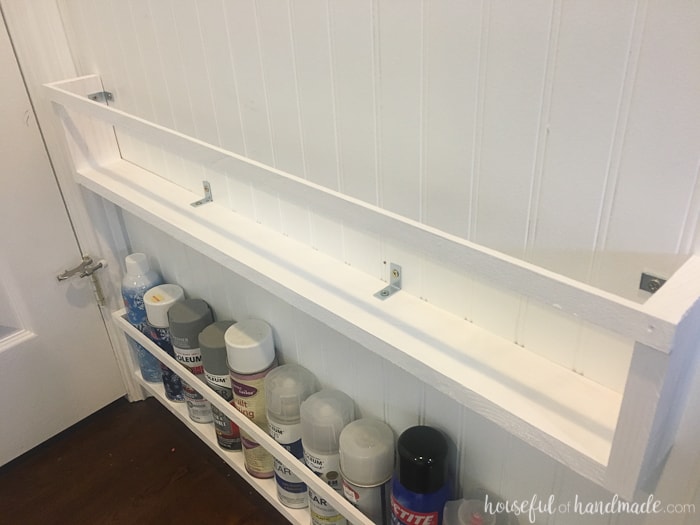
Now sand and finish your shelves. I painted mine so they were the same color as the wall.
To attach them to the wall, use the L-brackets on the inside of the shelves (this way they are hidden from view when the shelves are filled with paint). Secure them to the DIY paint storage shelves with 1/2″ wood screws then to the wall with 1 1/2″ wood screws. Make sure you get them into a stud or use drywall anchors so they don’t come crashing down later.
Also, when hanging the shelves, make sure you leave enough room between the shelves to be able to insert and remove the paint. I put a paint can on the top of the shelf side (so I knew it would clear the brace) and then mounted the next shelf 2″ above that.
And all that is left is to load the DIY paint storage shelves with all your paint! I discovered I have plenty of top coat (in lots of different gloss options) to complete quite a few projects. Also, apparently I can stop grabbing a bottle of Mod Podge whenever I see it at the dollar store. My husband mentioned I had enough gray, I had to explain to him that those were all metal looks and totally different. Boys!
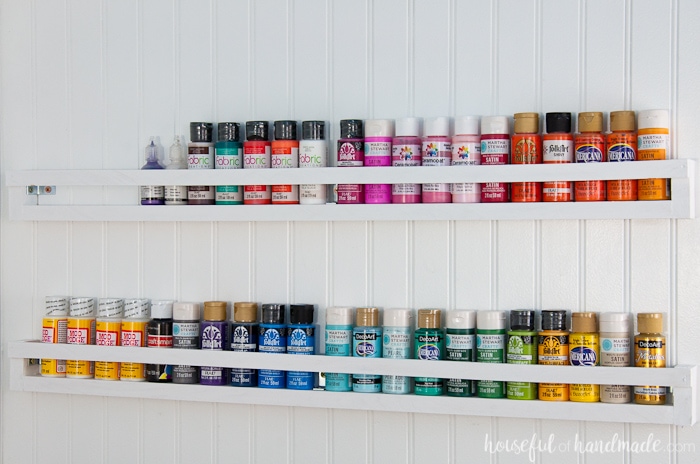
The best part is having everything organized and in plain view will actually save me money on upcoming projects. Now I can use what I have instead of buying more.
And now let’s take a look at everything that was completed this week and were we are at on budget…
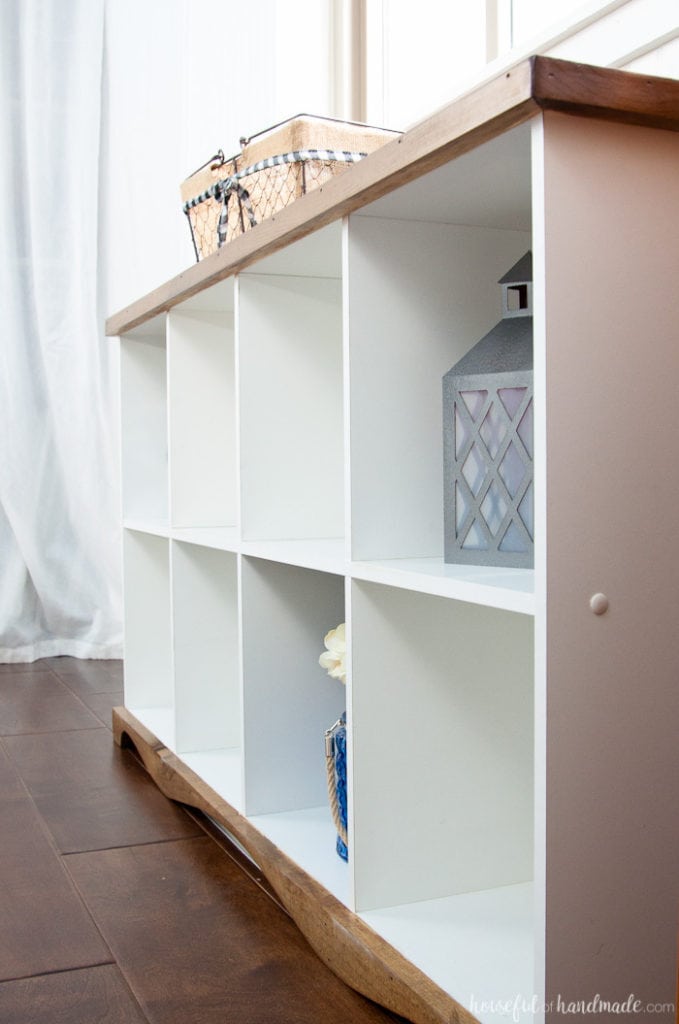
This last week I did take a bit of a break from projects, the sun was shining and we enjoyed the beginnings of spring! It’s really good we have 5 weeks this month. But I did manage to spend a little time working and completed the cube bookcase makeover. I still can’t believe that old piece looks this good now!
I also got started on the legs for the sewing table, an ironing board/iron storage solution and prettying up all those coffee boxes in the rolling worktable. Luckily for me, my husband and I have a coffee addiction so the boxes just keep coming. Now I just need to spend a day organizing everything into the boxes. I can’t wait to share these projects!
And how is the budget coming along?
- DIY Idea Board – $17
- Pegboard Storage – $0
- Upcycled Bookcase Rolling Work Table – $0
- Desk – $40
- Patterned Tile Wall Stencil – $0
- Curtains for closet – $0
- Bamboo Blinds – $0
- Paint Storage – $7.50
- Cube Bookcase Makeover – $5.50
- New Legs for Sewing Table – $2
- Navy Paint – $9
- Storage Boxes – $6.50
TOTAL SPENT $87.50
That leaves me with only $12.50 to finish my room! Yikes. Here is the list of what I wanted still to accomplish. I am pretty sure I am going to have to scrap the desk sconces (due to time and budget). Also, I settled for sticking my photography equipment on the high shelf in the closet because I just didn’t like it being out in view. And whether I have enough fabric that will work in my stash to cover the desk chair is still up for debate.
Desk Sconces- Paint walls/ceiling
- Paint glass front cabinet
Find a way to organize photography/lighting equipment- Iron/ironing board storage
- Cover desk chair ???
- Decor
This weekend I will be finishing the storage boxes, sewing table legs, and then painting the sewing table and curio cabinet. Then next week I will say good-bye to the clouds and try to add a bit of decor with my measly little budget.
I can’t wait to share the final room with you next week (and then take a much needed break)!