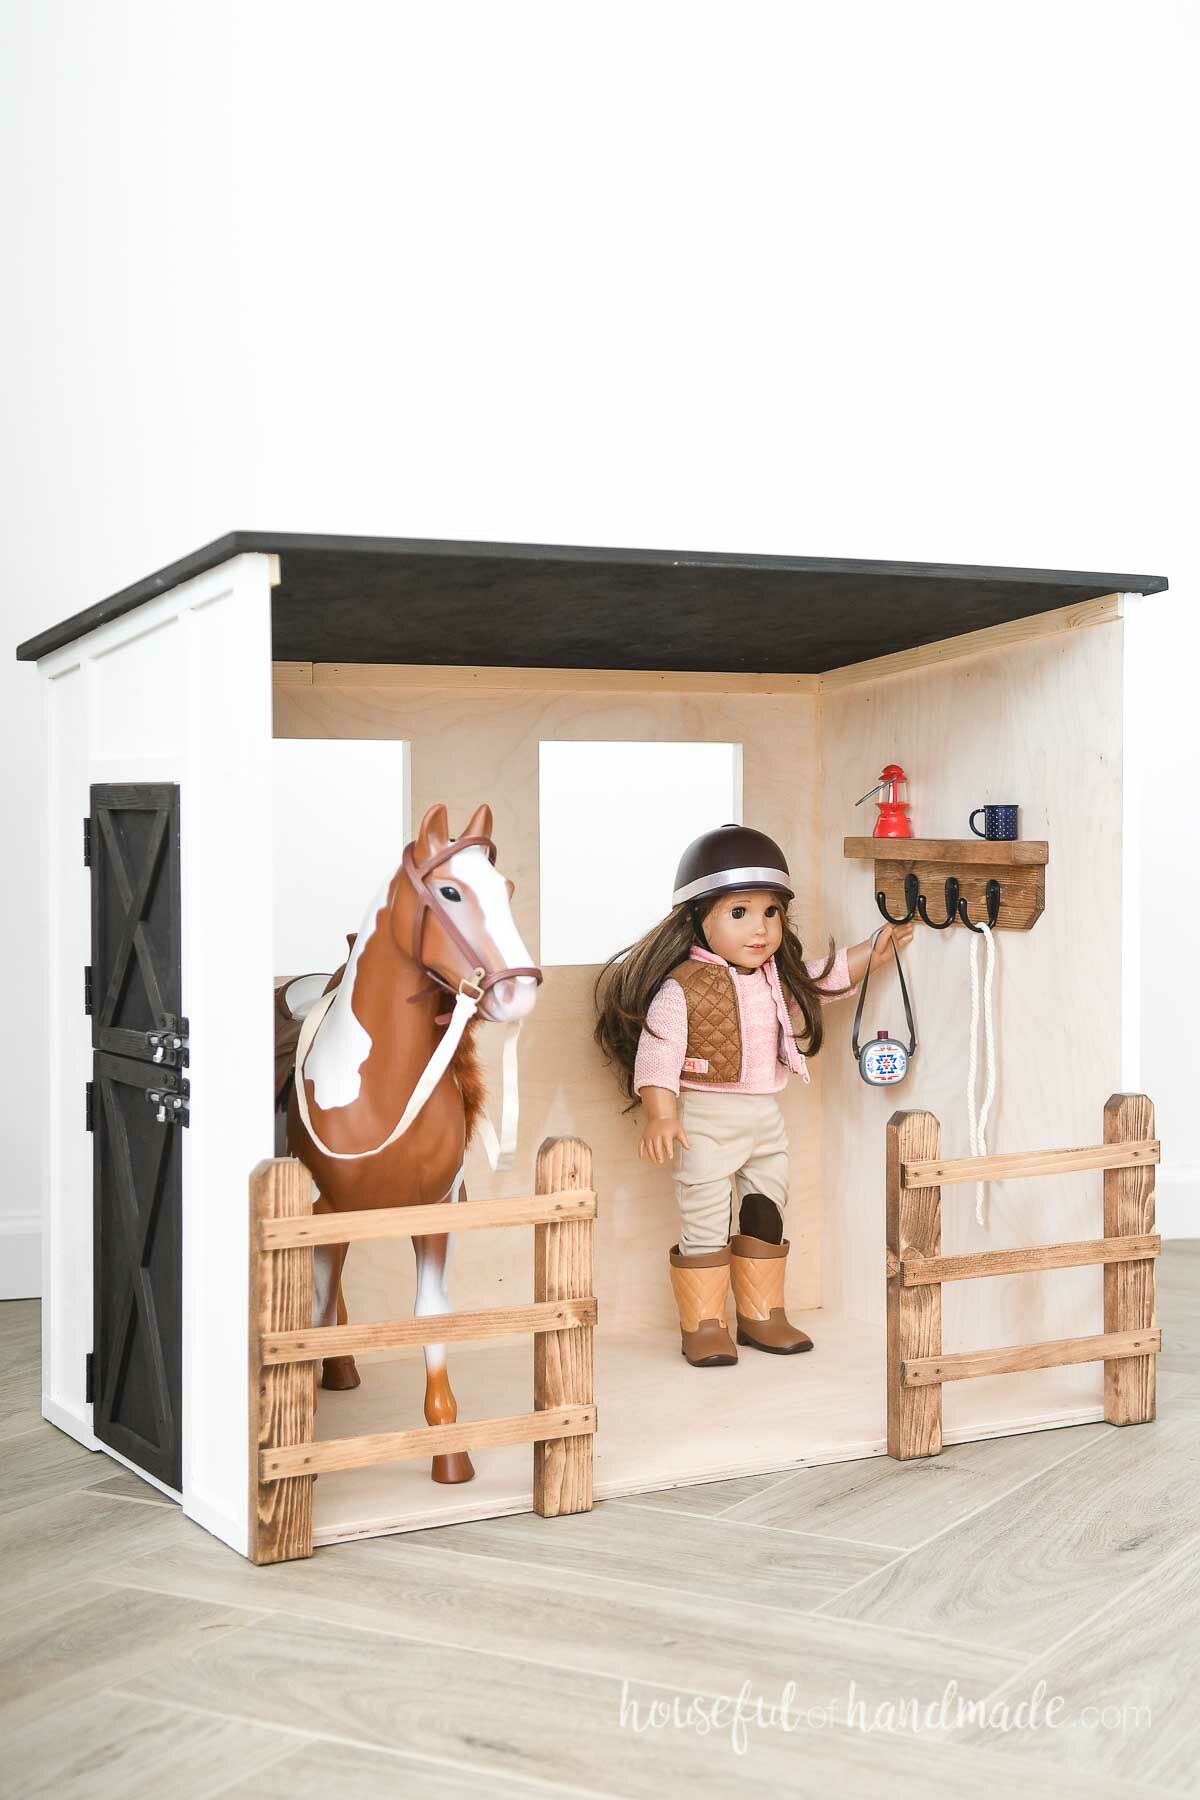
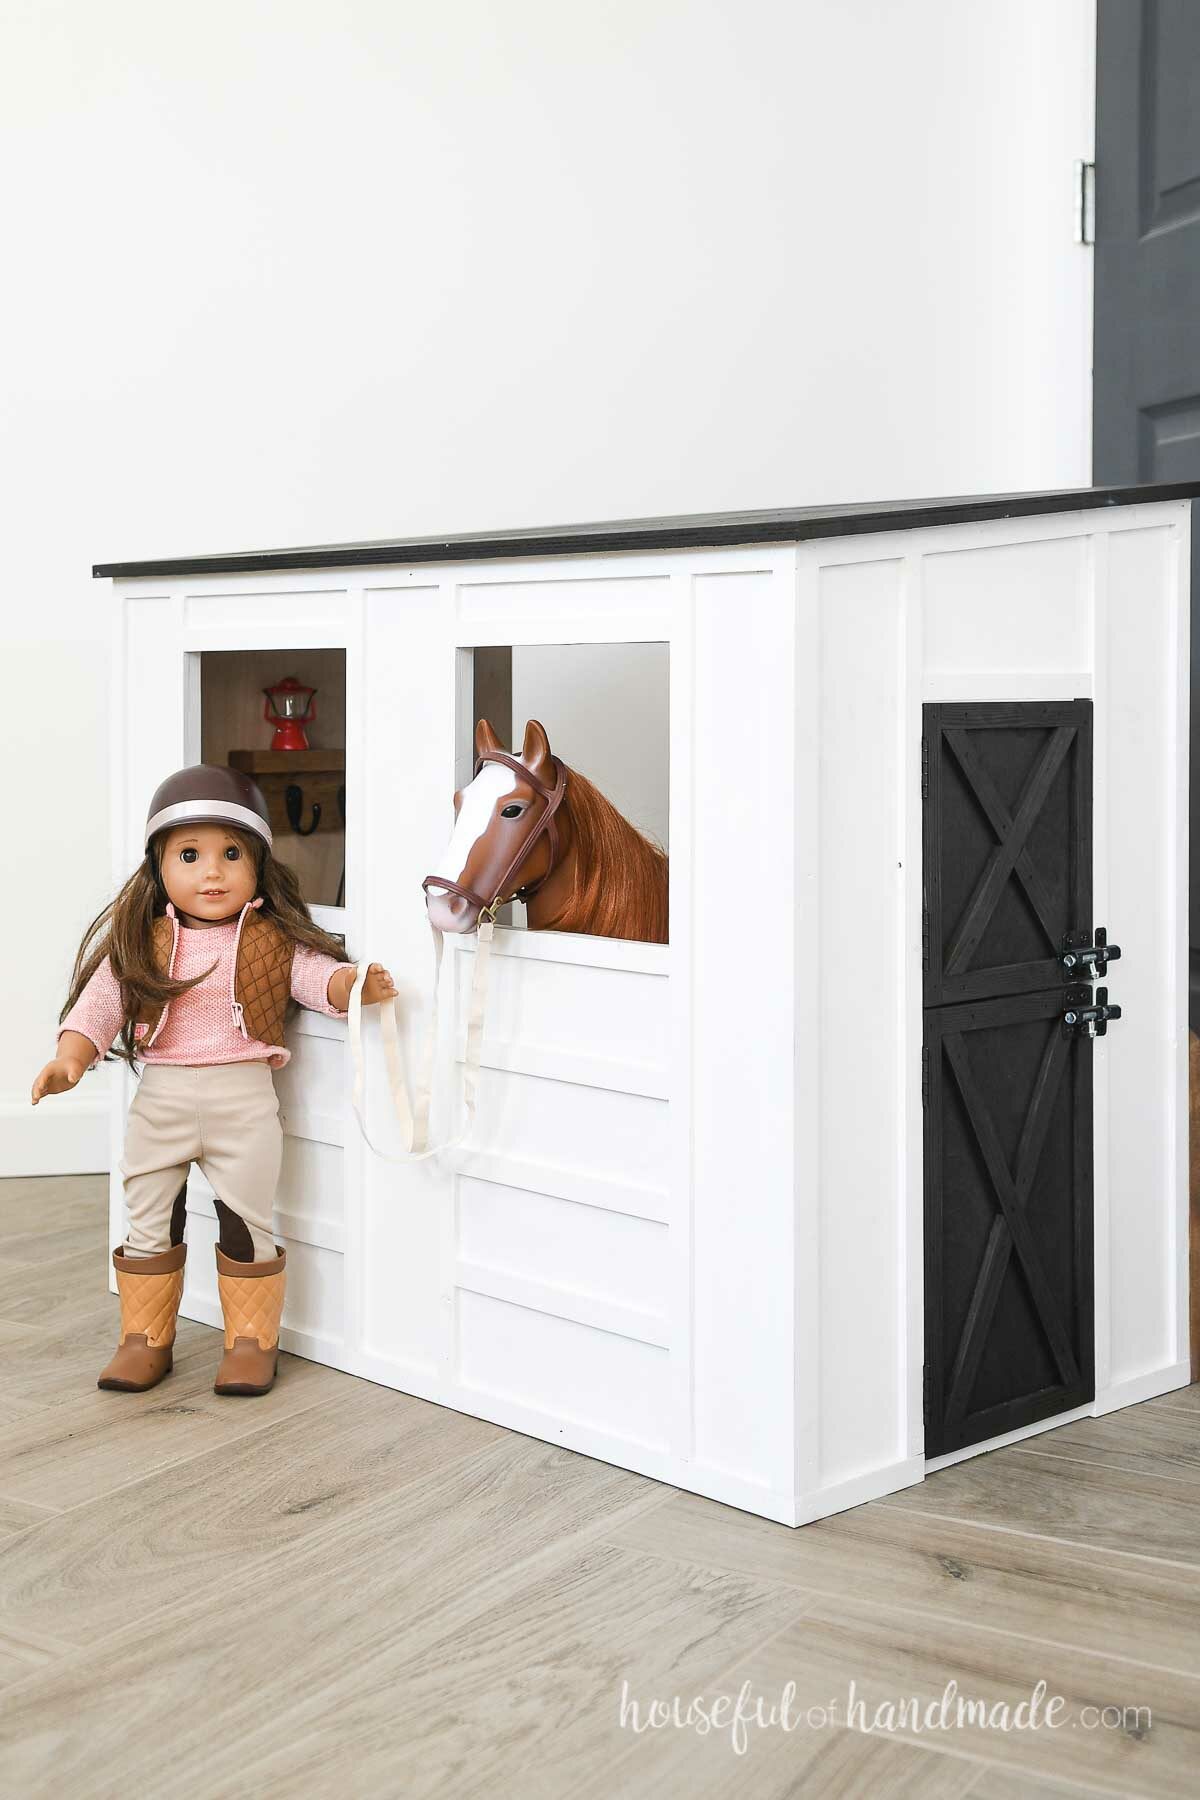
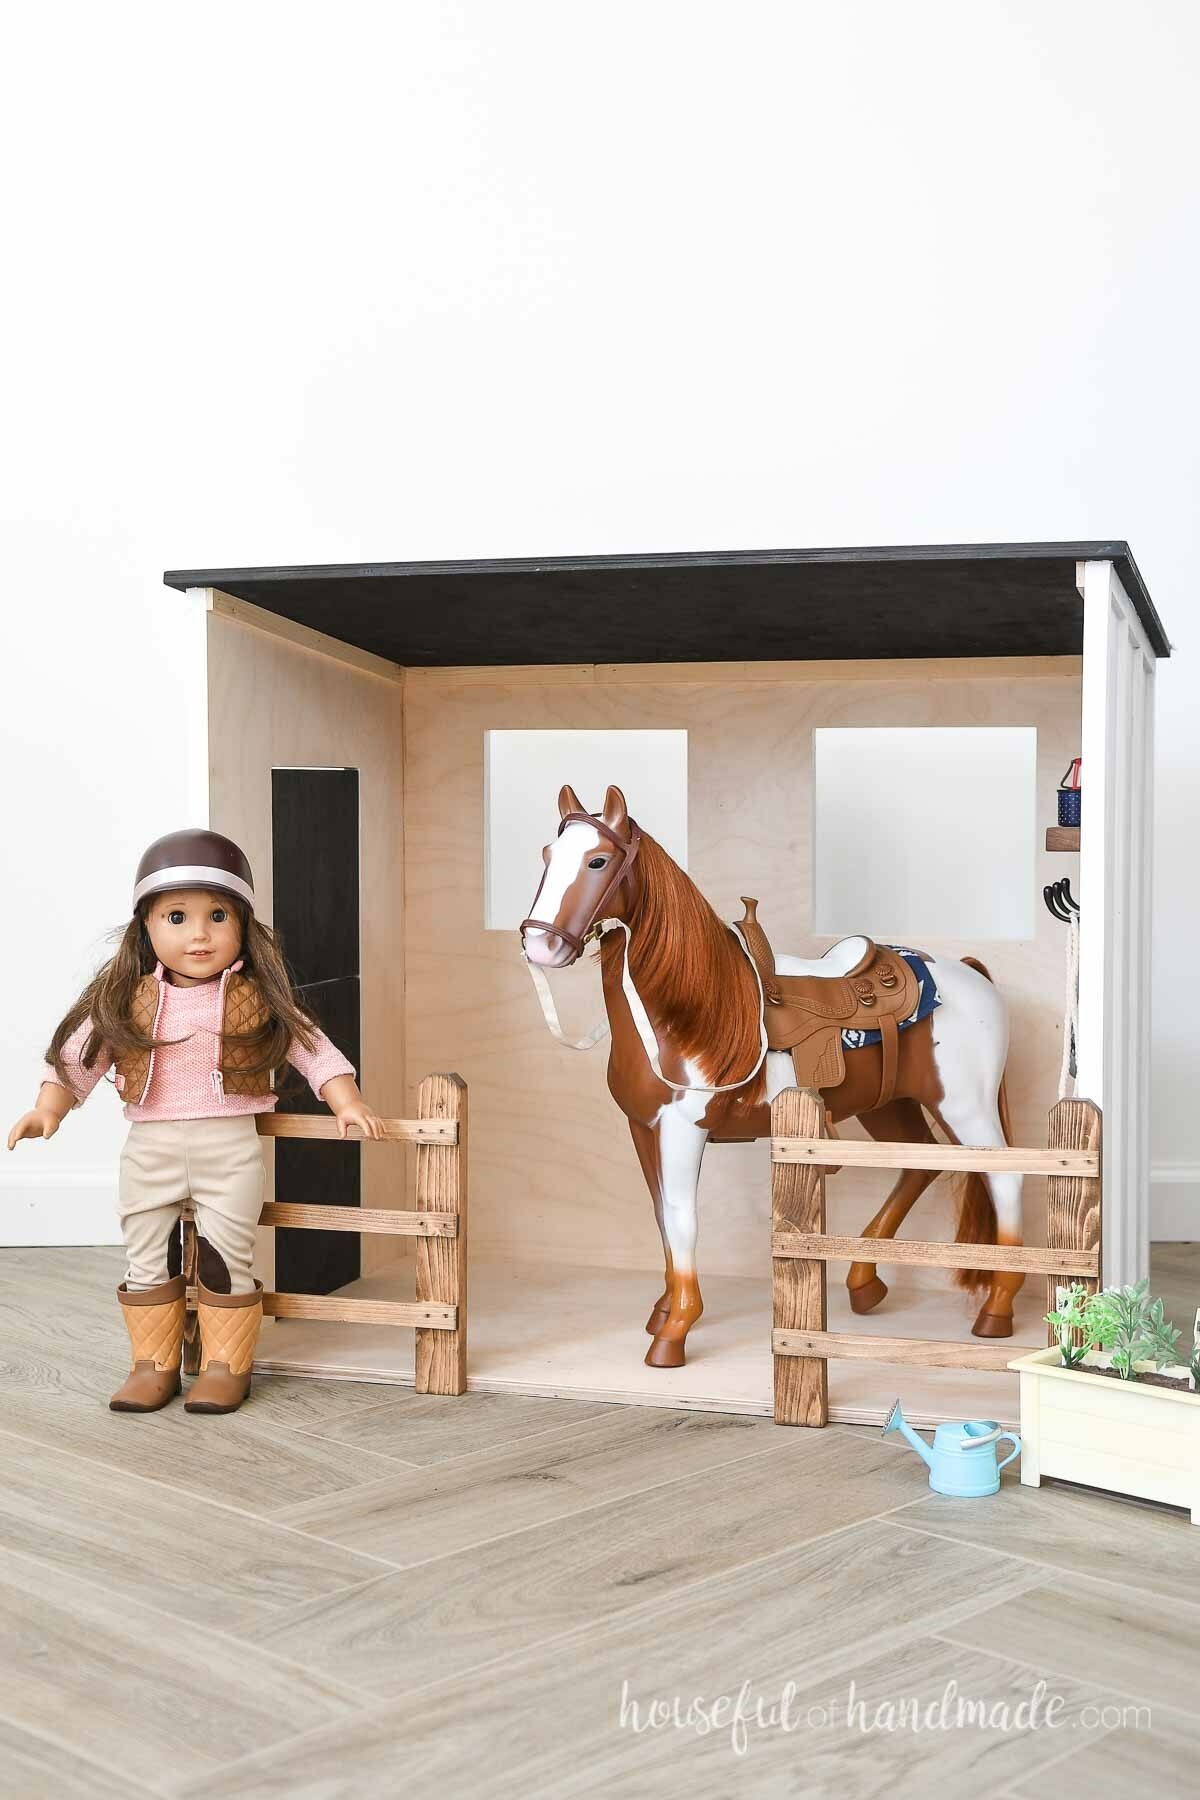
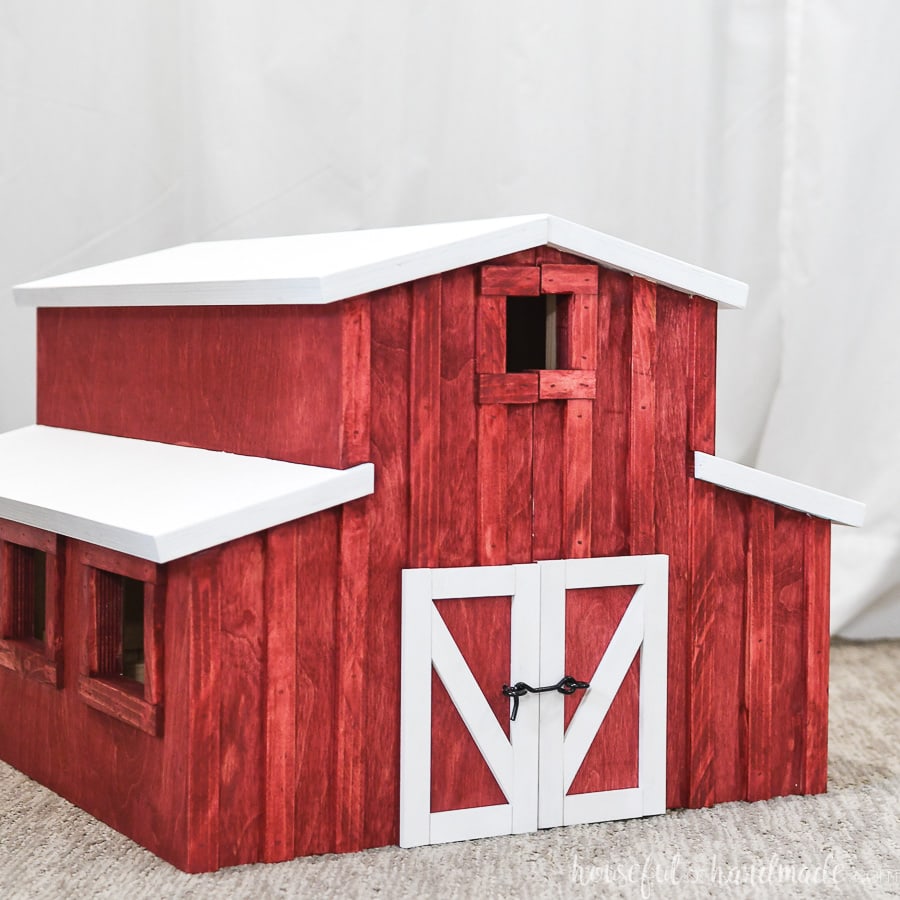
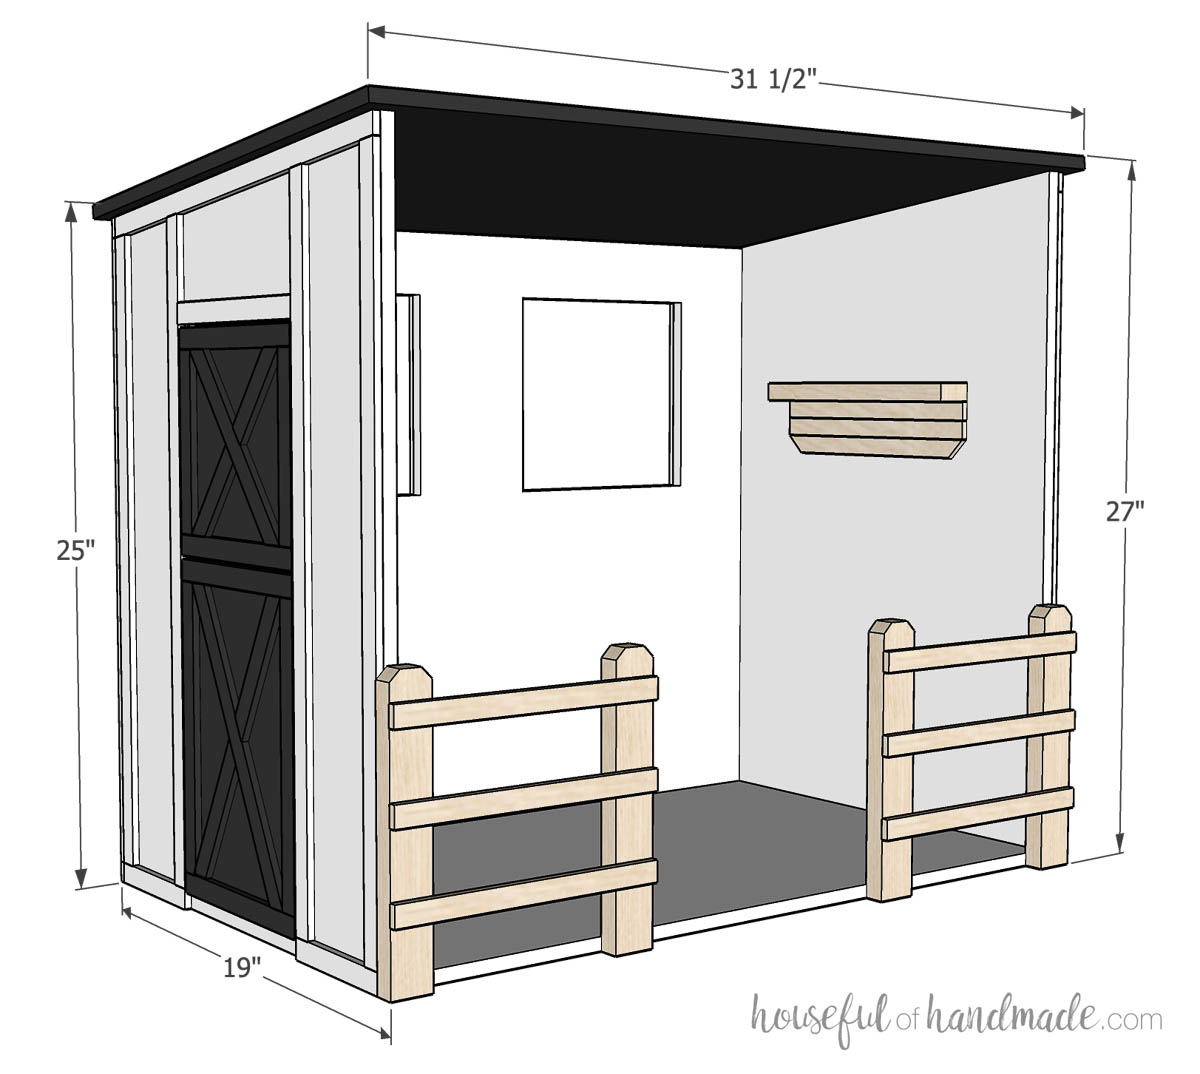
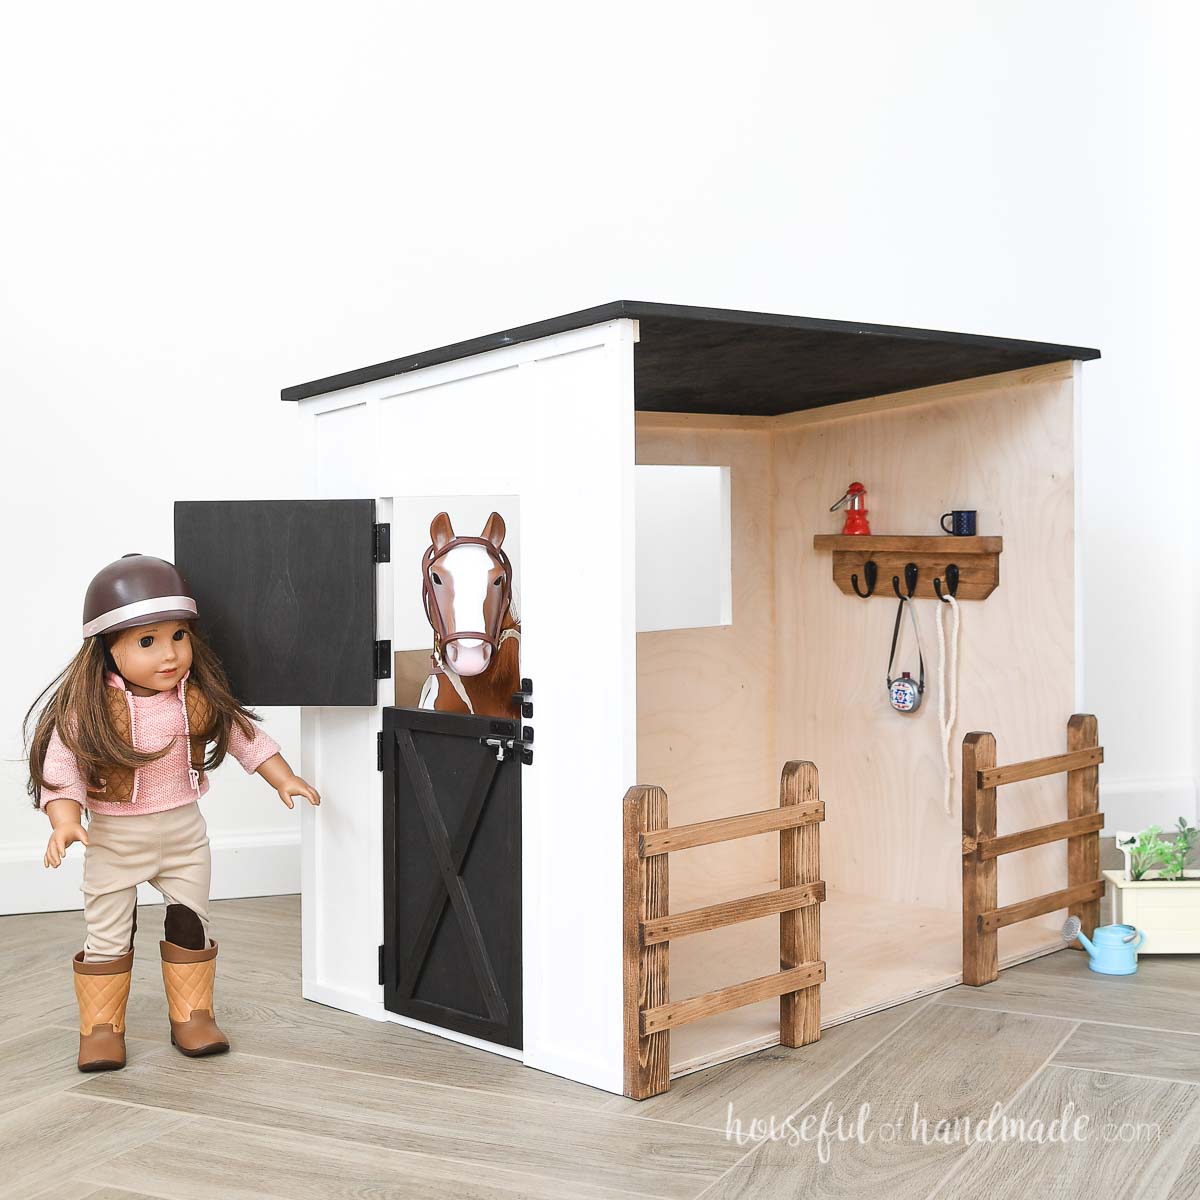
If your child loves 18″ dolls (like American Girl dolls or Our Generation dolls) and horses, they will love this amazing stable dollhouse.
This beautiful dollhouse barn has everything you could ever want in a stable:
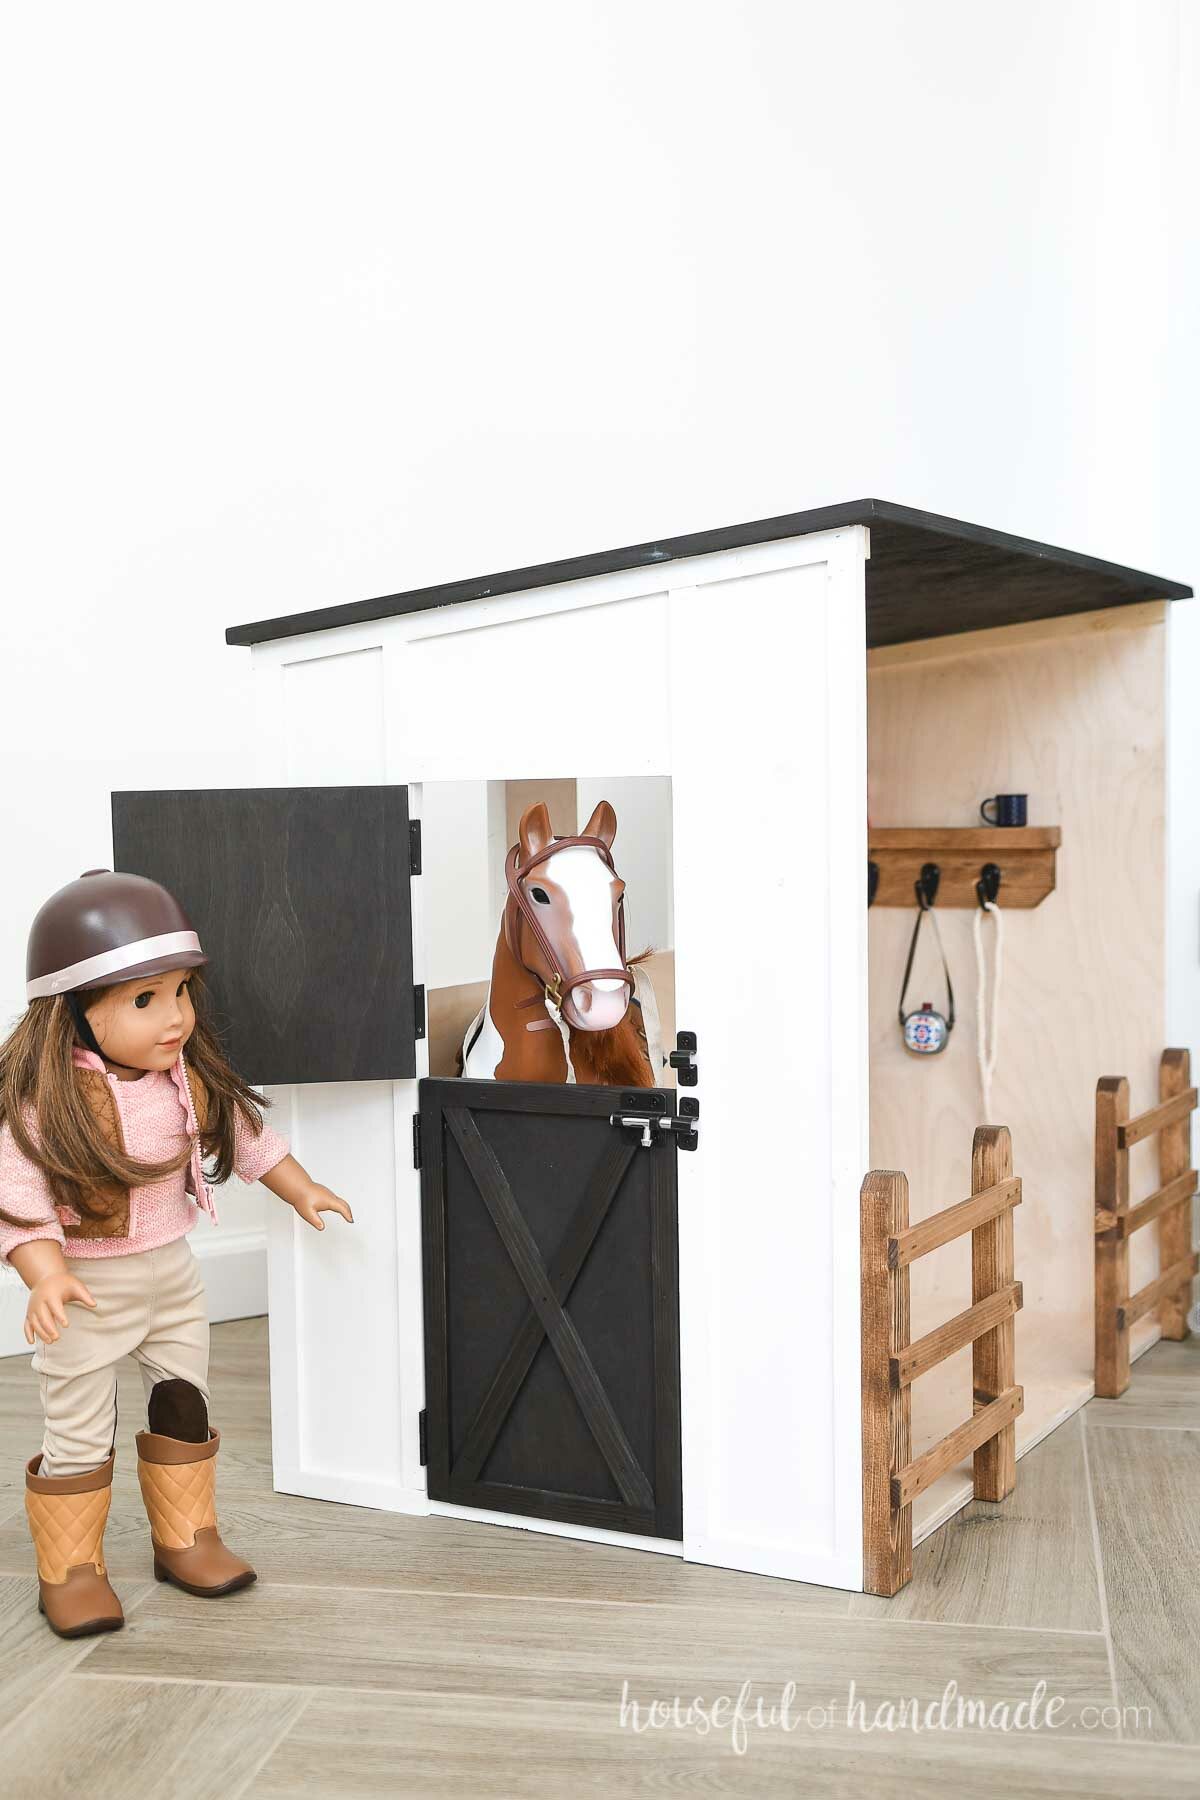
- Dutch door
- Hooks for tack and accessories
- Two windows
- Lean-to style roof
- Board & batten exterior
- Rustic fence
It is a beautiful modern barn that will result in hours of imaginative play. But best of all, it is a fun and easy to build DIY!
This post may contain affiliate links. As an Amazon Associate I earn from qualifying purchases. Click here to read my full disclosure policy.
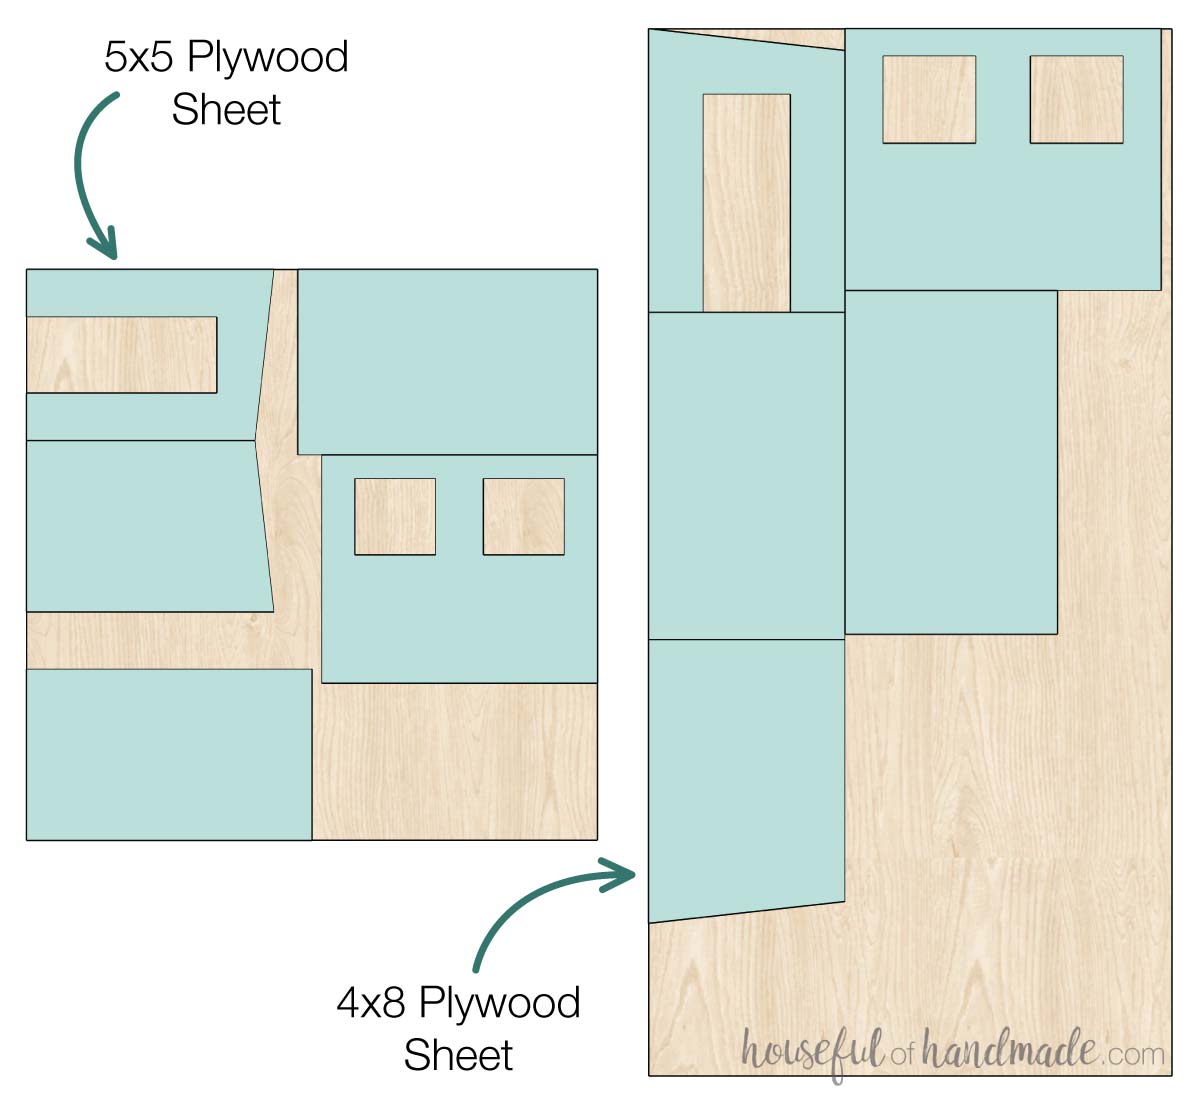
One Sheet of Plywood Dollhouse
You will love how easy this toy stable is to put together. And all the main pieces are built out of a single sheet of 1/2″ plywood.
The dollhouse pieces fit on either a 5×5 sheet or 4×8 sheet of plywood. I recommend using baltic birch plywood to build the DIY barn because it has less voids in the plywood layers.
Less voids means a clean edges on all the plywood cuts. And baltic birch plywood is commonly found in 5×5 sheets at your local lumberyard.
All the trim work on the stable is done with 1/4″ thick trim. You can purchase small trim to create the board and batten design on the outside of the dollhouse or rip down 1x boards on a table saw.
And the final parts of this amazing toy stable are made from an inexpensive 1×2 board.
And those simple details really make this DIY stable dollhouse amazing!
I built this amazing dollhouse stable for my daughter for Christmas. She always wanted a pony, and this one is way easier to take care of then a real horse!
But I didn’t want her to feel like she was missing out, so I outfitted the toy barn with everything she would need to care for her new horse.
The excited screams from her on Christmas morning were proof enough for me that I succeeded.
It made the perfect gift. And I am so excited to share the woodworking plans with you so you can make a horse-loving-child’s day too!
More Woodworking Plans for Kids Toys
How to Build a Dollhouse Barn
Tools & Materials
Tools needed:
- Miter saw
- I recently upgraded to this larger sliding miter saw (watch for it to go on sale), but all my projects before were built with this inexpensive miter saw that I loved.
- Circular saw with guide track
- Drill
- Impact driver (optional, but I love not having to switch bits with the drill)
- Finish nailer and/or Brad nailer
- I used a 16 gauge finish nailer to assemble the stable and the smaller brad nailer to attach the trim. You can attach the trim with the finish nailer, but you will have larger holes to fill and more chance of splitting the small trim.
- Sander
- Optional: Table saw
- You can either purchase trim or rip down boards from 1x boards.
Supplies:
- Wood products
- (1) 1/2″ plywood, 5×5 or 4×8 sheet
- 1/4″ x 3/4″ trim
- (1) 1×2 board
- 1 1/4″ finish nails
- 5/8″ brad nails
- (2) pair 1″ hinges
- (2) barrel bolts
- (3) single robe hooks
Overall Dimensions
This dollhouse stable is built for 18″ dolls and with a 20″-22″ toy horse.
The final stable is 31 1/2″ wide by 19″ deep. It is 27″ tall in the front and 25″ tall in the back.
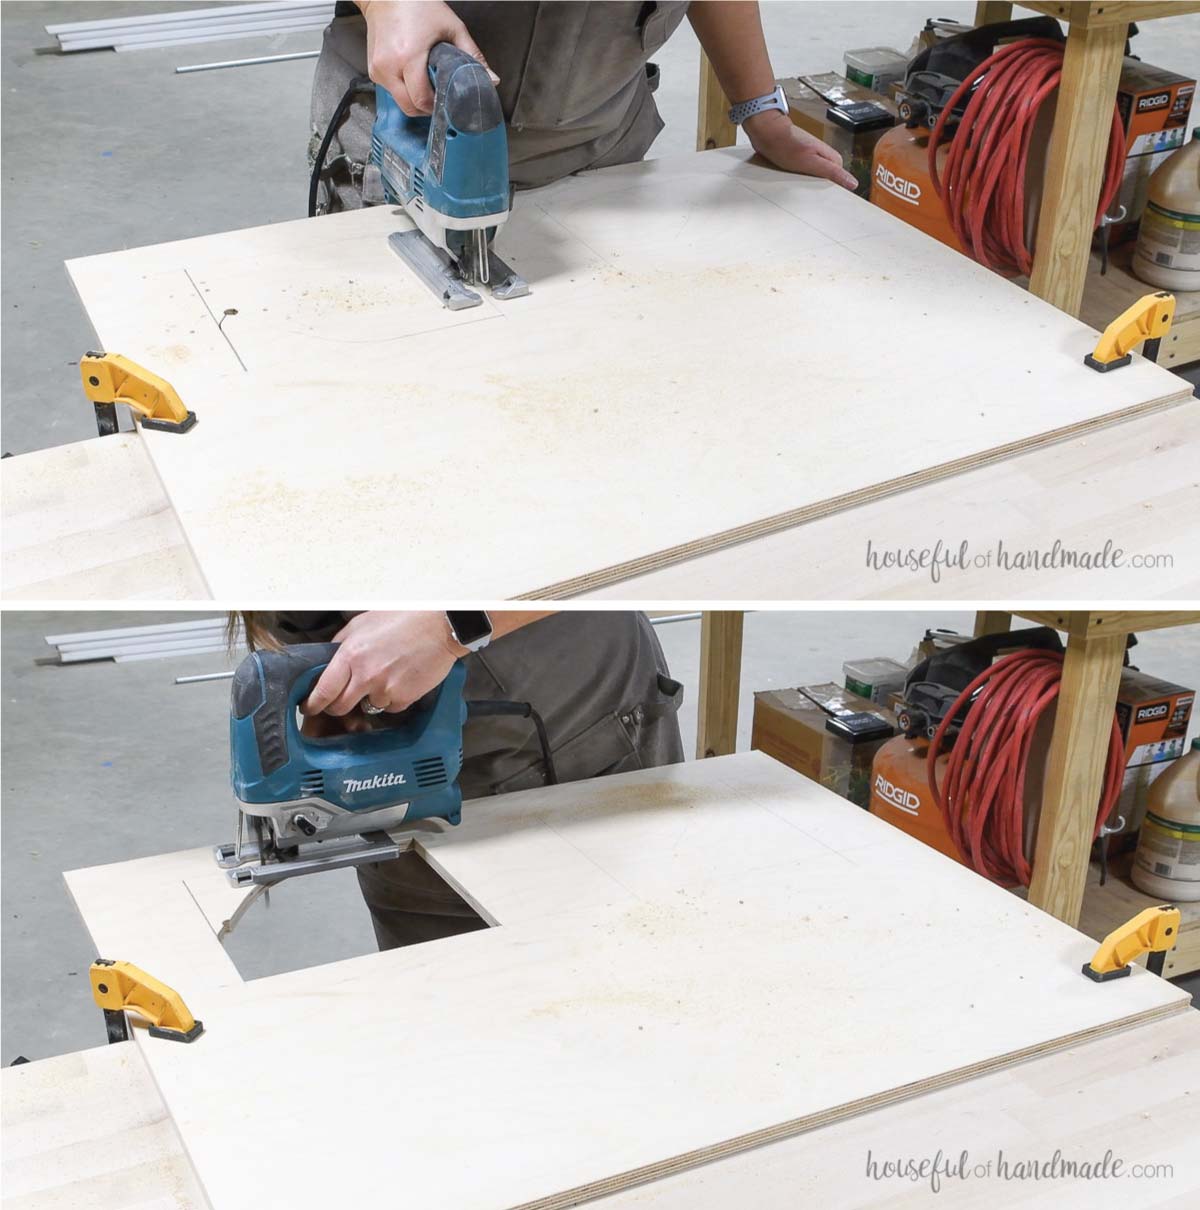
STEP 1- Cut the plywood
Cut out all the pieces from the plywood according to the diagram in the plans.

I recommend using Baltic birch plywood since it has less voids in the layers.
Mark out one piece at a time, then cut it out. Otherwise your pieces will be too small since there will be an amount of plywood removed by the blade (called kerf).
Measure and mark carefully to make sure the pieces are square. This will prevent the final dollhouse from being wobbly.

Use a circular saw with guide track or straight edge to ensure you have straight cuts.
Cut just to the corners of each piece to make sure you can get all pieces out of one sheet of plywood.
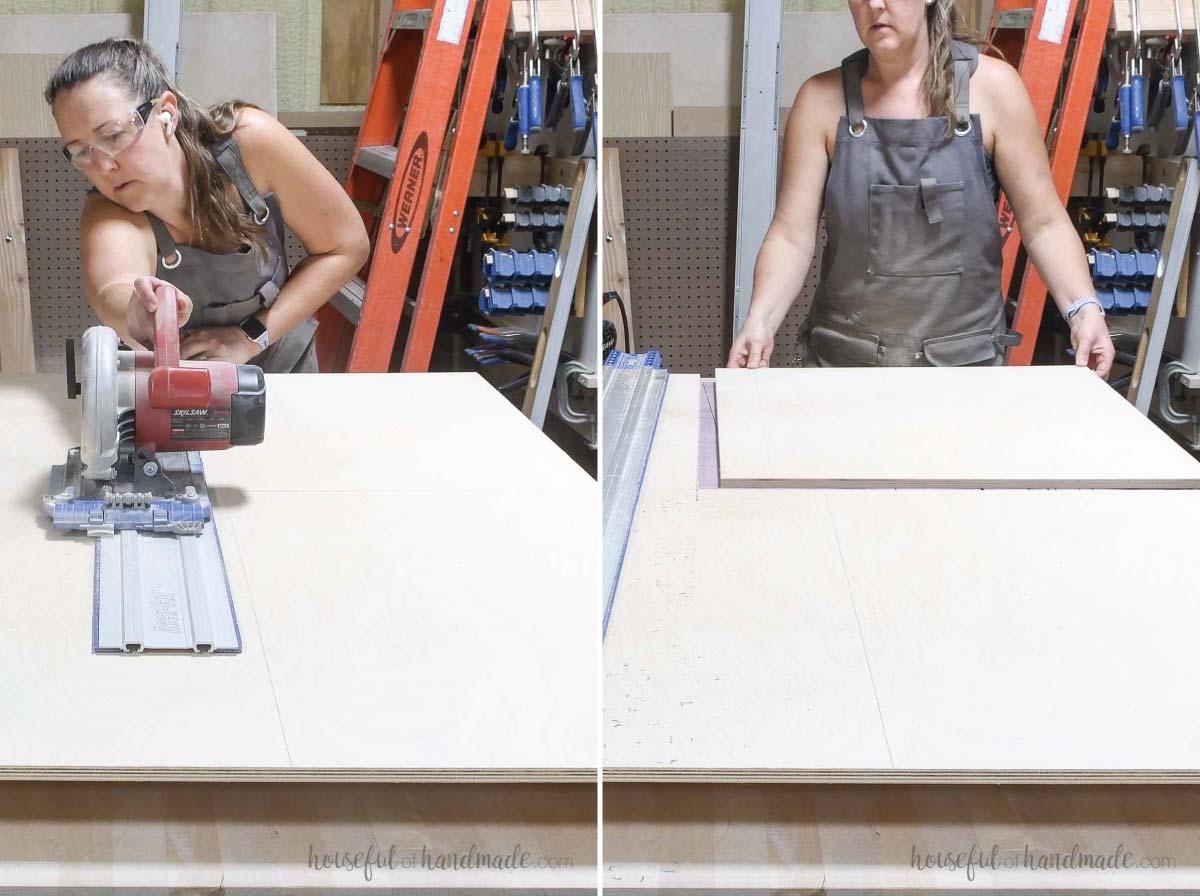
Cut the door out of the side carefully, you will keep this piece to use as a door.
Cut along the sides with your circular saw just to the mark. Plunge the circular saw into the plywood along the line for the top of the door opening and cut just to the sides.
Use a jigsaw to cut the remaining wood where the circular saw blade curves to release the door piece.
The jigsaw blade is likely thinner than the circular saw blade so you will need to sand off some parts to get a nice clean cut.
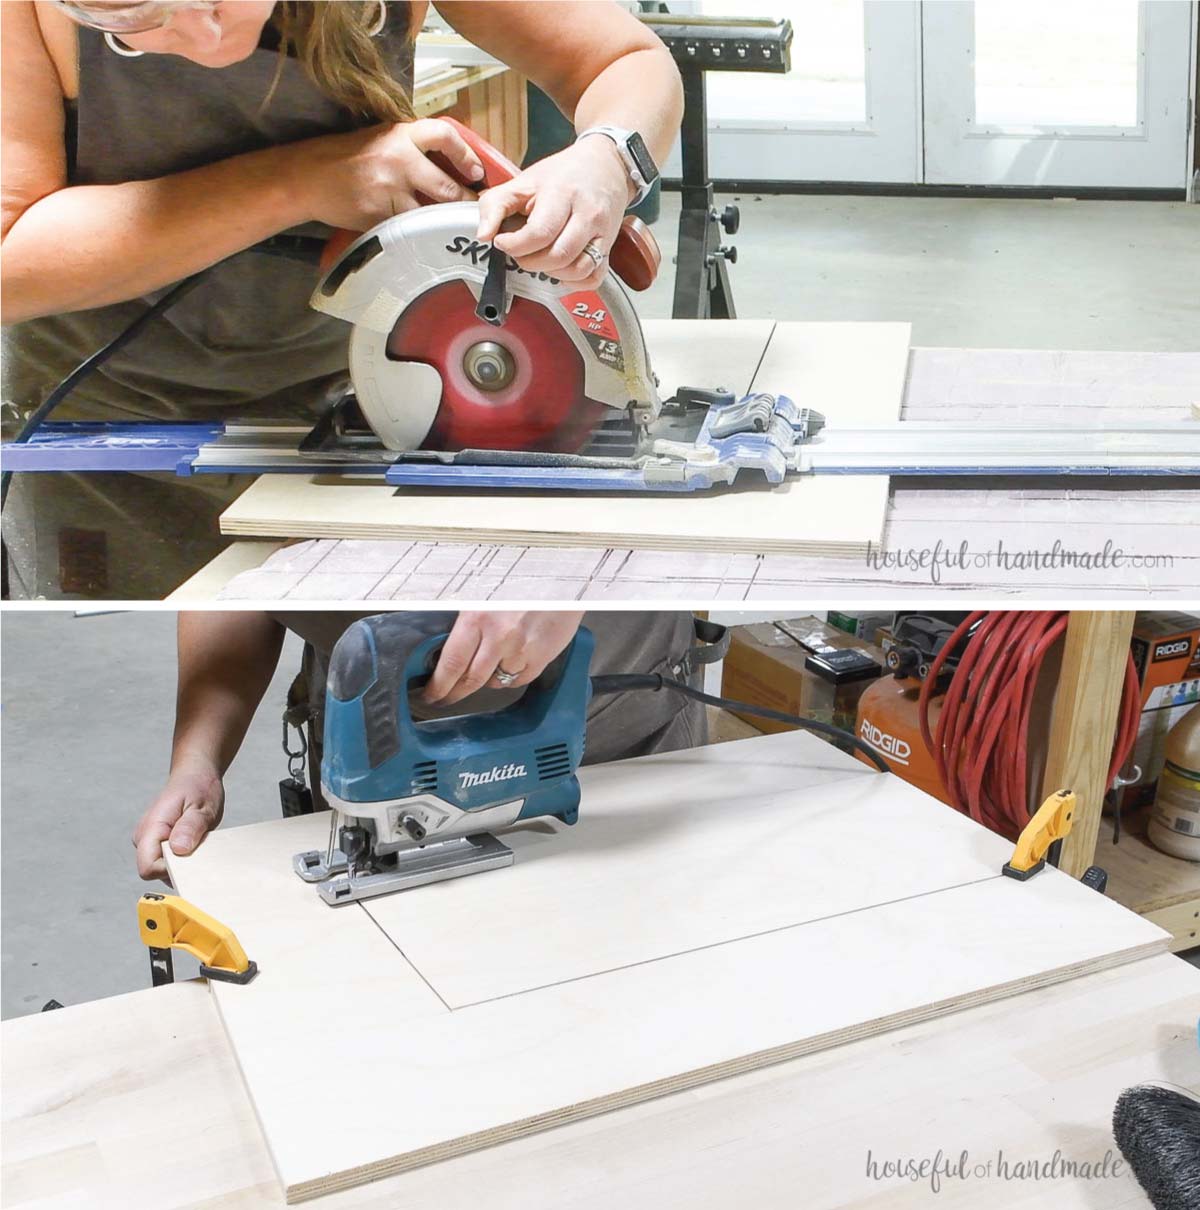
To cut windows, drill a hole inside the window area to allow you to insert jigsaw.
Use jigsaw to cut out the window openings.
Move the jigsaw toward the corners and then stop and come to the other side of the corner from the other side of the window. This will ensure a square corner.
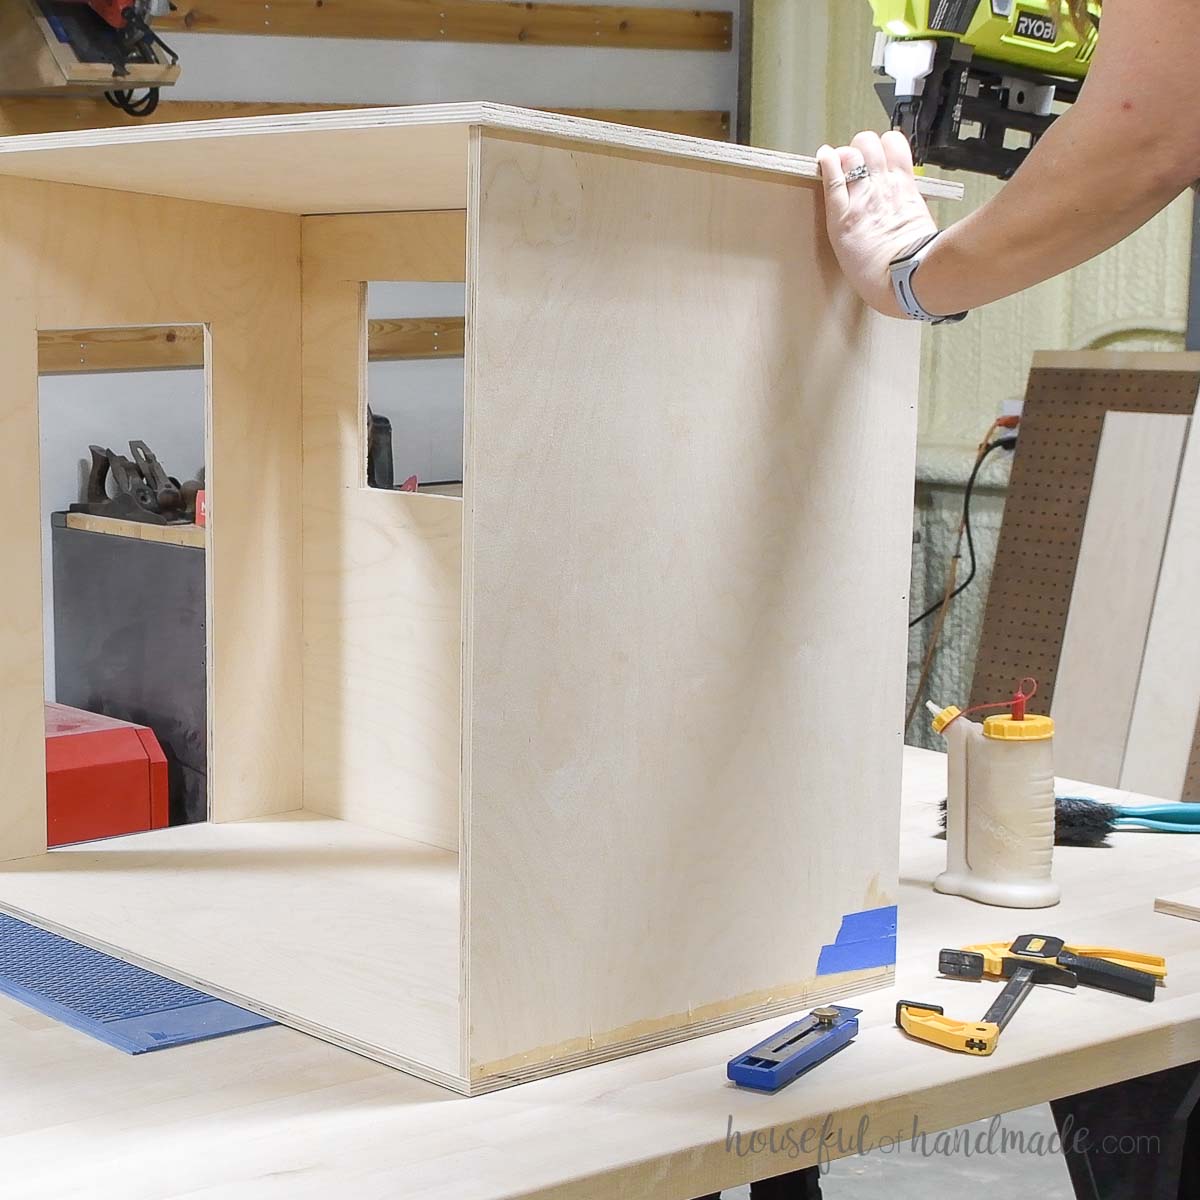
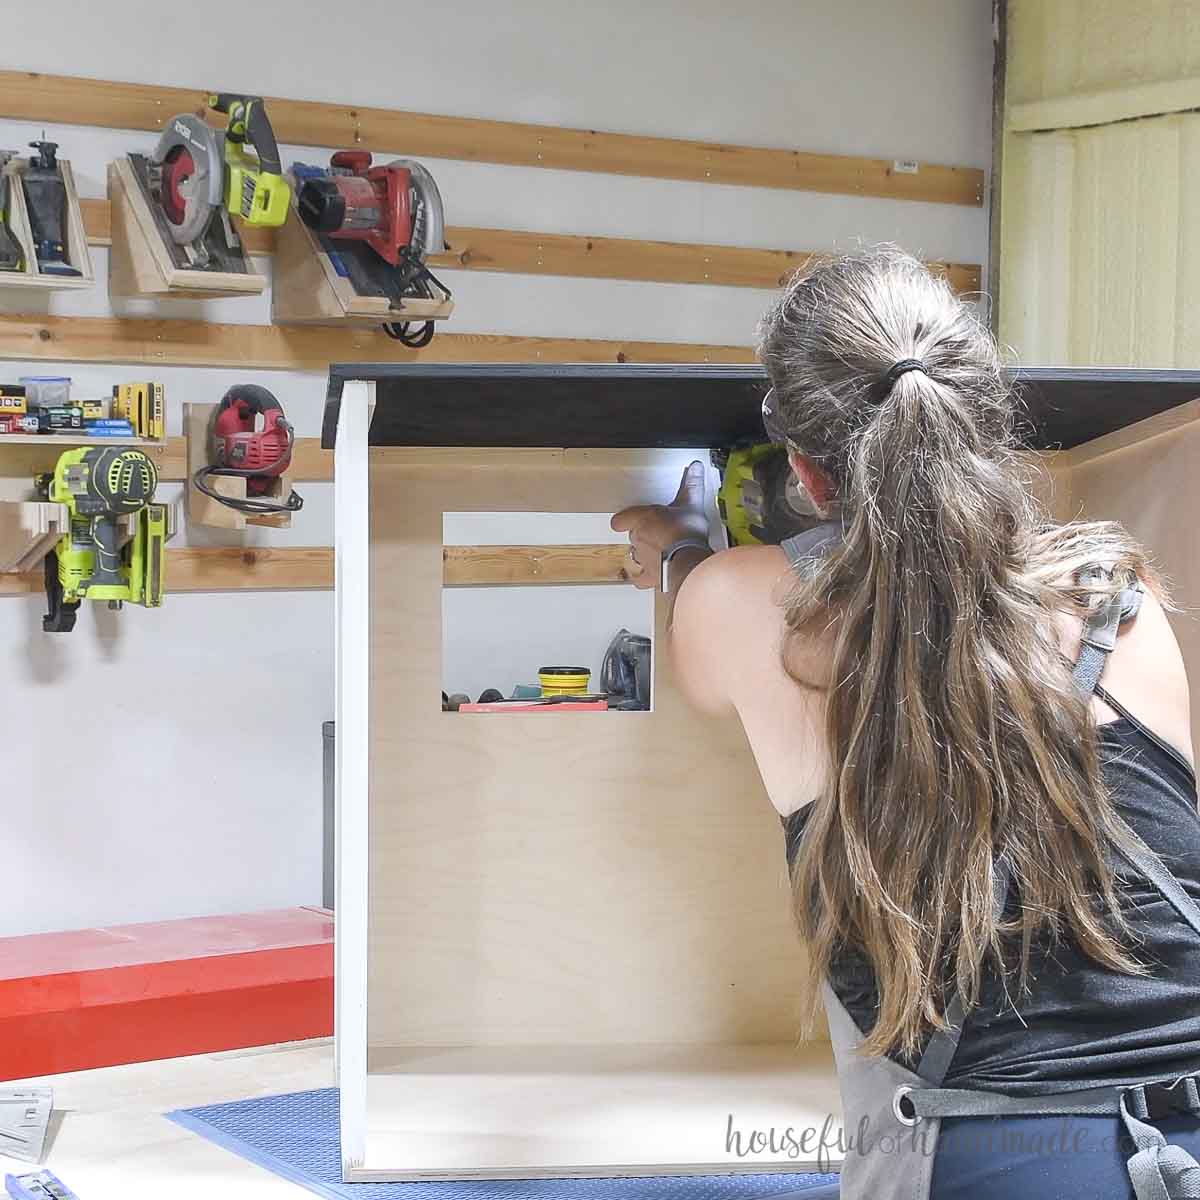
STEP 2- Build the dollhouse
Line the side pieces up on the sides of the wall.
Attach with wood glue and 1 1/4” finishing nails so they are flush with the outside of the wall and bottom.
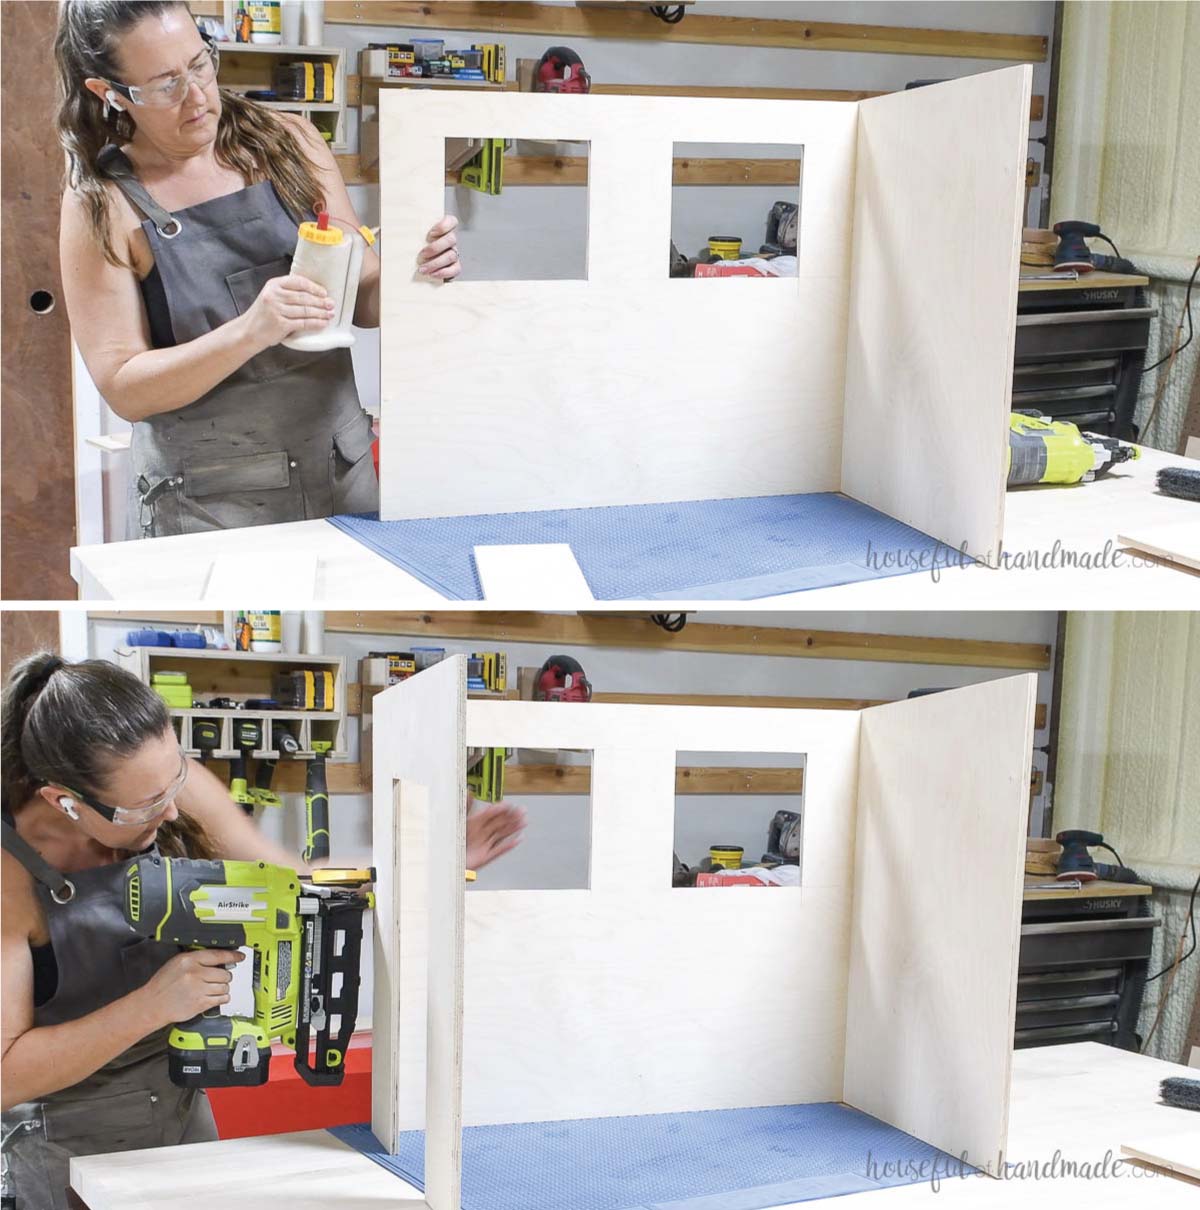
Attach the bottom to the underside of the wall and sides so it is flush around the perimeter.
Secure with wood glue and 1 1/4” finishing nails.
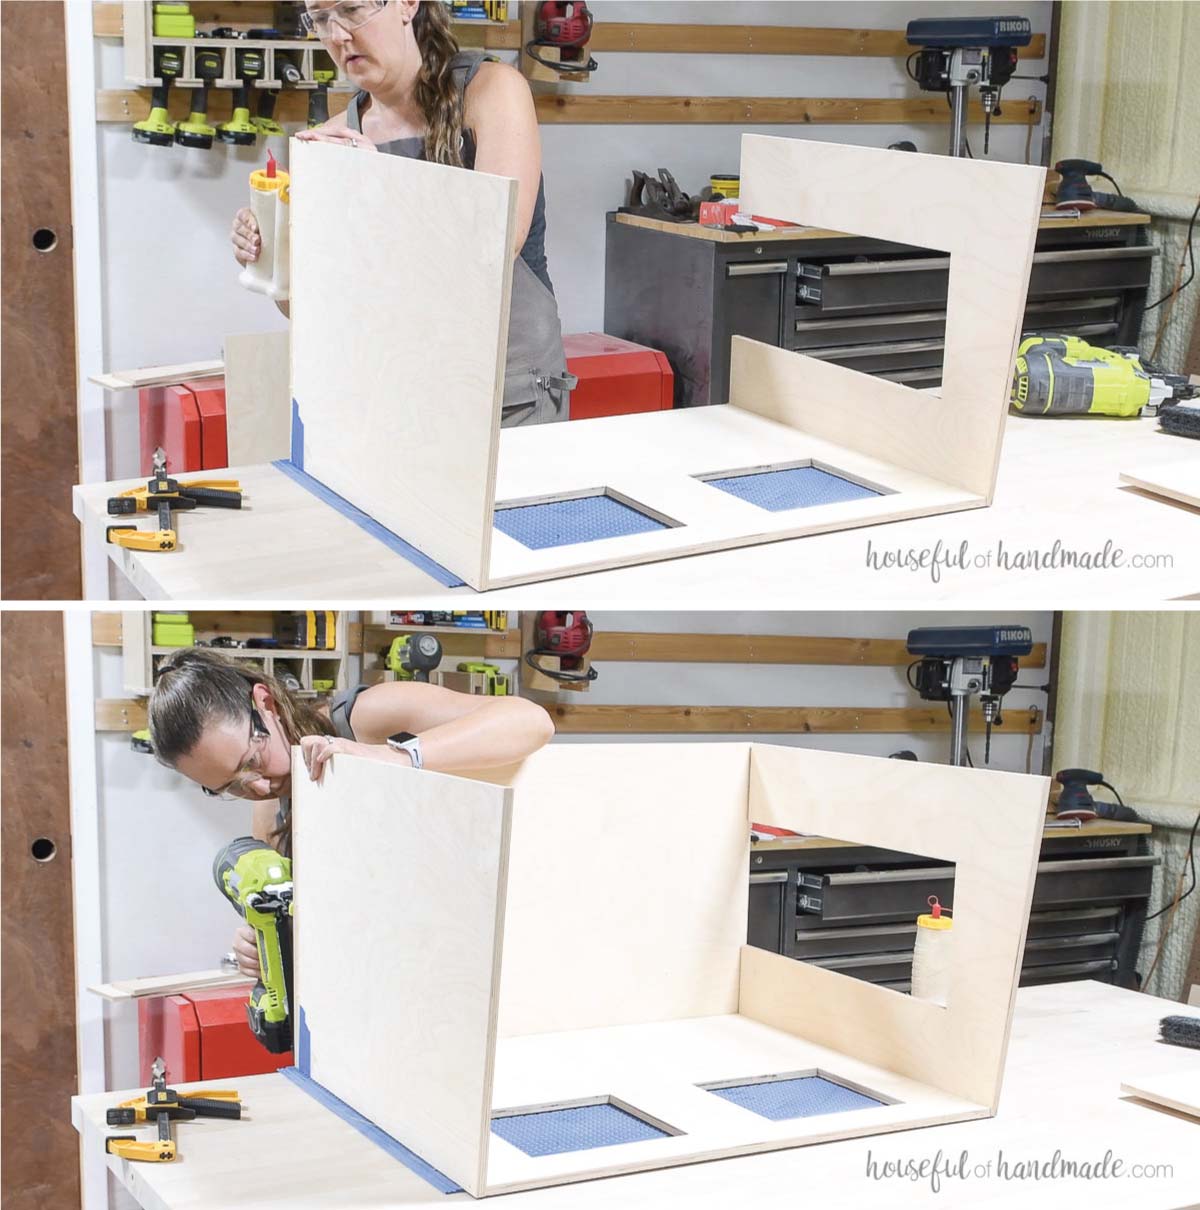
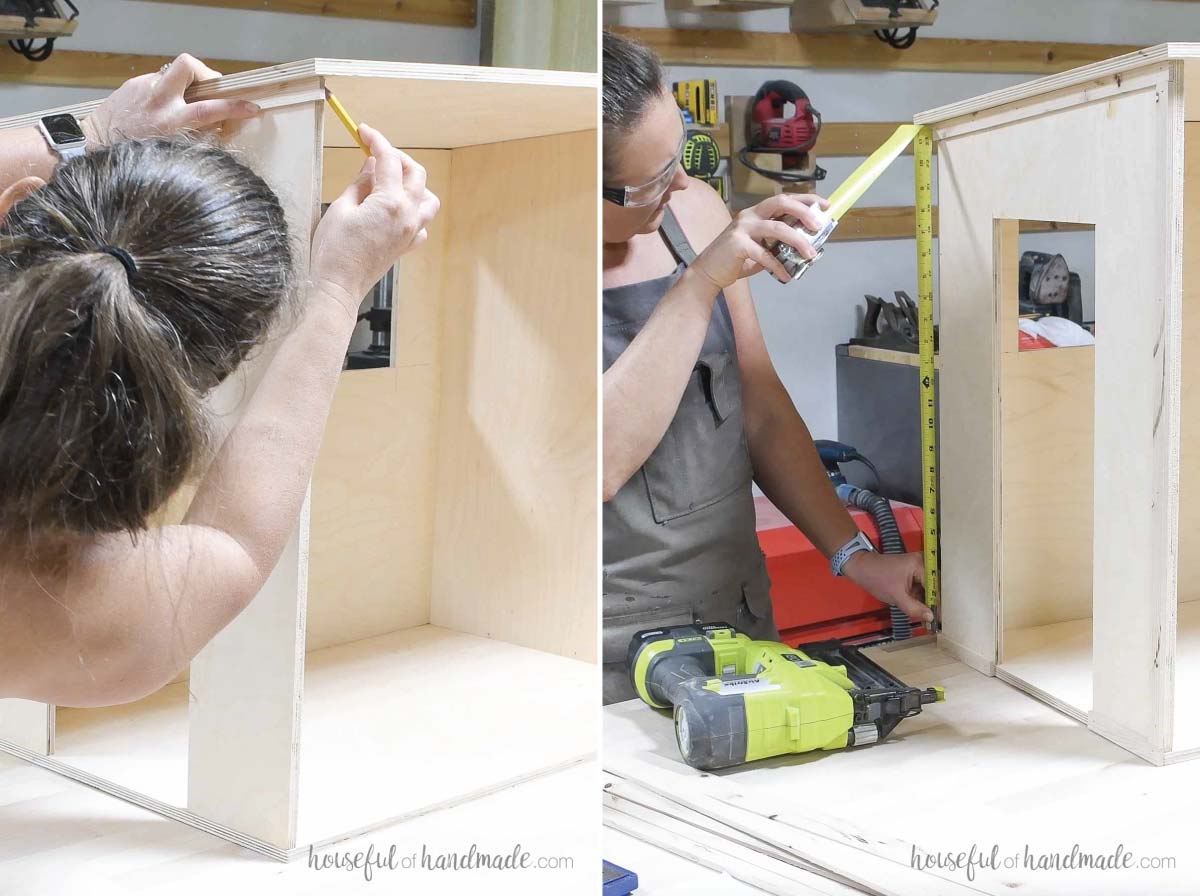
Center the roof on the sides and wall. There will be a approximately 3/4″ overhang.
Mark the line of the sides and back wall on the top of the roof.
Secure with wood glue and 1 1/4” finishing nails using the line on top as a guide.
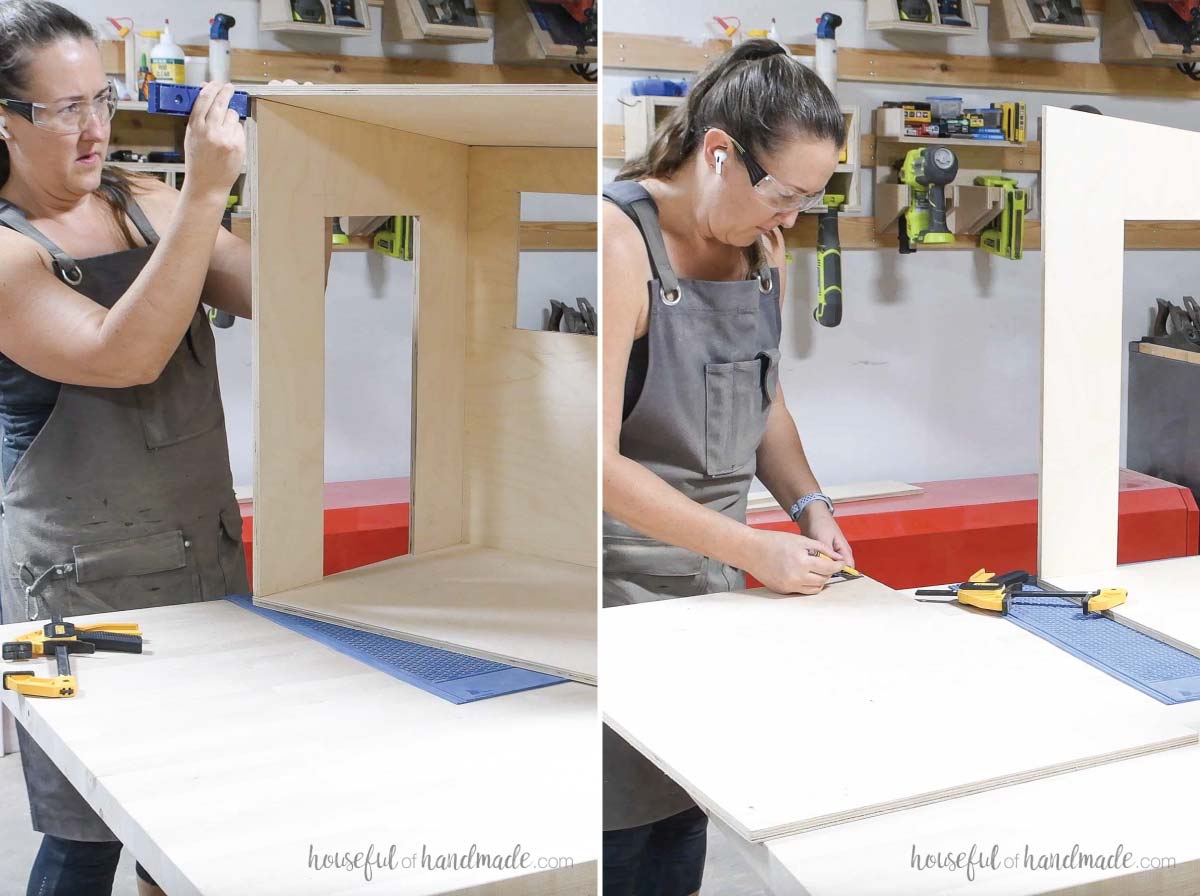
STEP 3- Add decorative trim
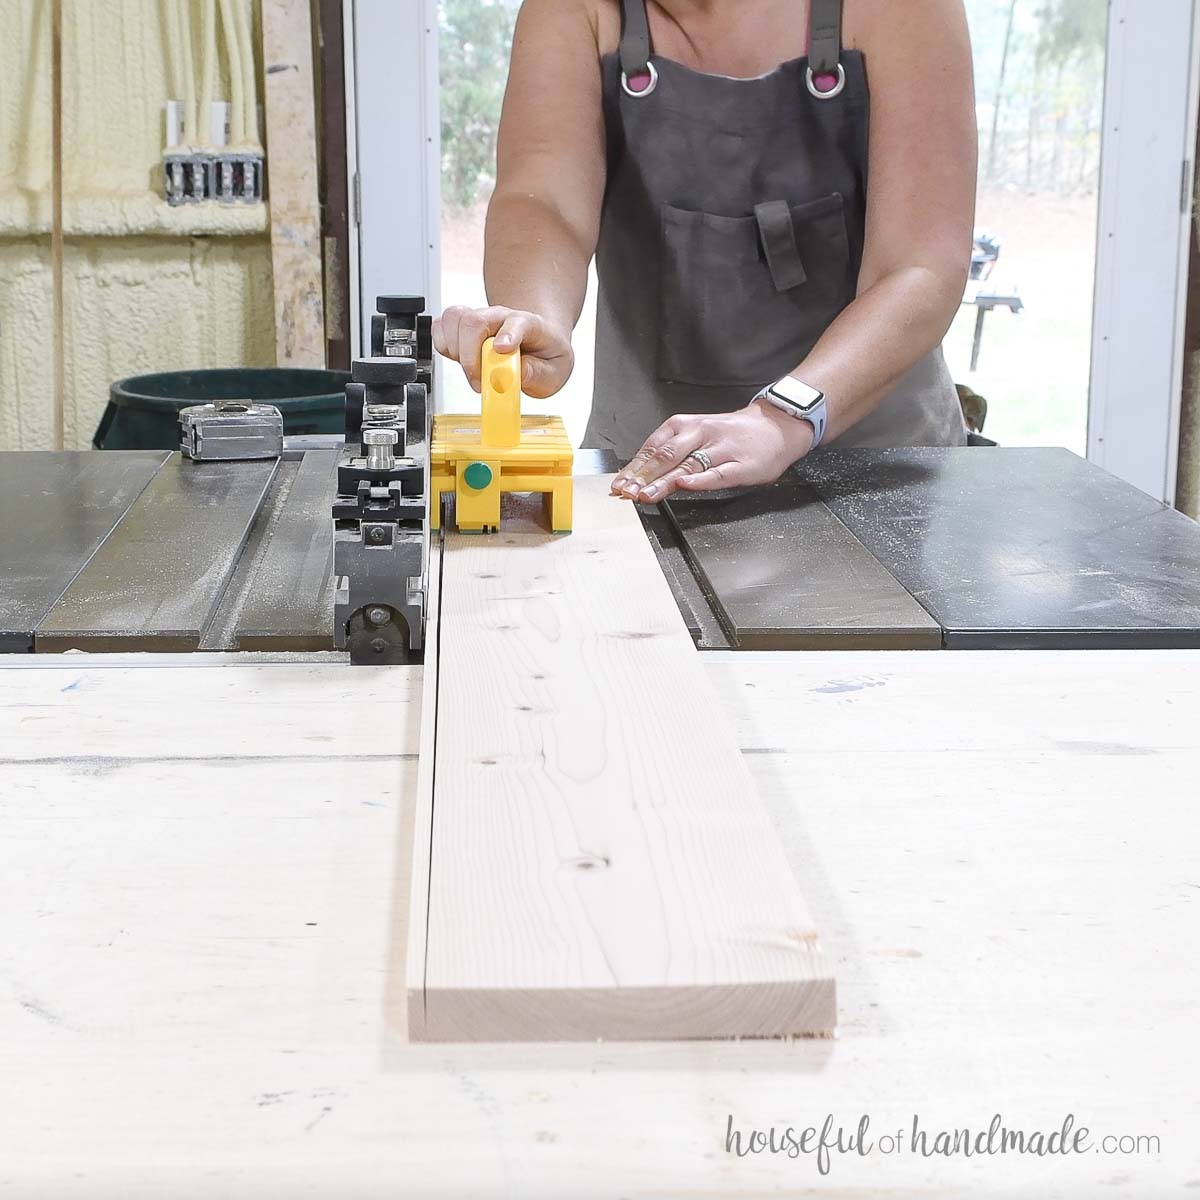
Cut 1/4″ thick strips from 1×4 boards so you have 1/4″ x 3/4″ trim pieces.
If you do not have a way to rip down boards, you can purchase trim pieces, but it will be more expensive.
Add trim to the side walls first. Detailed diagrams of the placement can be found in the PDF woodworking plans.
Lay the trim over the area on the side it will go and mark the cut angle on the back with a sharp pencil. Cut the thin trim with either a miter saw or handheld saw.
Start with the horizontal trim pieces at the top and bottom.
Then add the side vertical pieces on the sides. The trim in the corner should be flush to the back wall.
Attach to the sides with wood glue and 5/8” nails.
Finish with trim pieces around the door and in the center of the walls.

Add trim to the back wall next.
Start with the horizontal trim just under the roof and around the base. Then add vertical trim to the corners.
The trim in the corners should be flush to the trim on the sides, hiding the plywood completely. Secure with wood glue and 5/8” nails.
Add a vertical trim piece to one side of the window, then add all the horizontal trim pieces to it. Use a 1×3 scrap of wood to space the boards below the window.
Then add the vertical piece on the other side of the window, butting it up to the horizontal pieces.
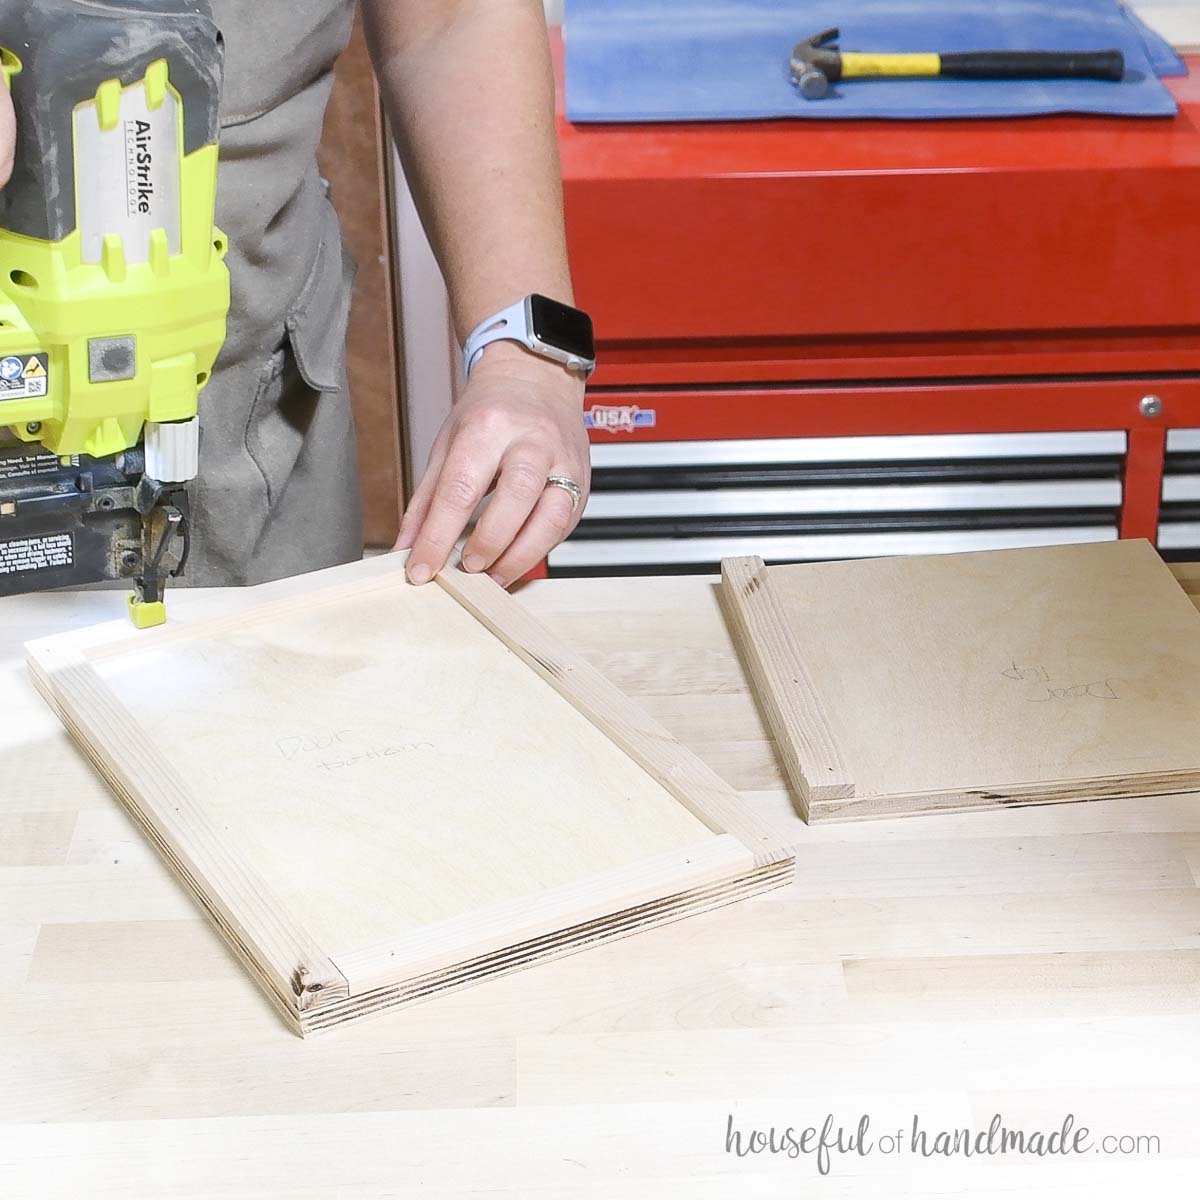
STEP 4- Build the door
Cut the door piece into 2 pieces for the dutch door according to the diagram in the build plans.
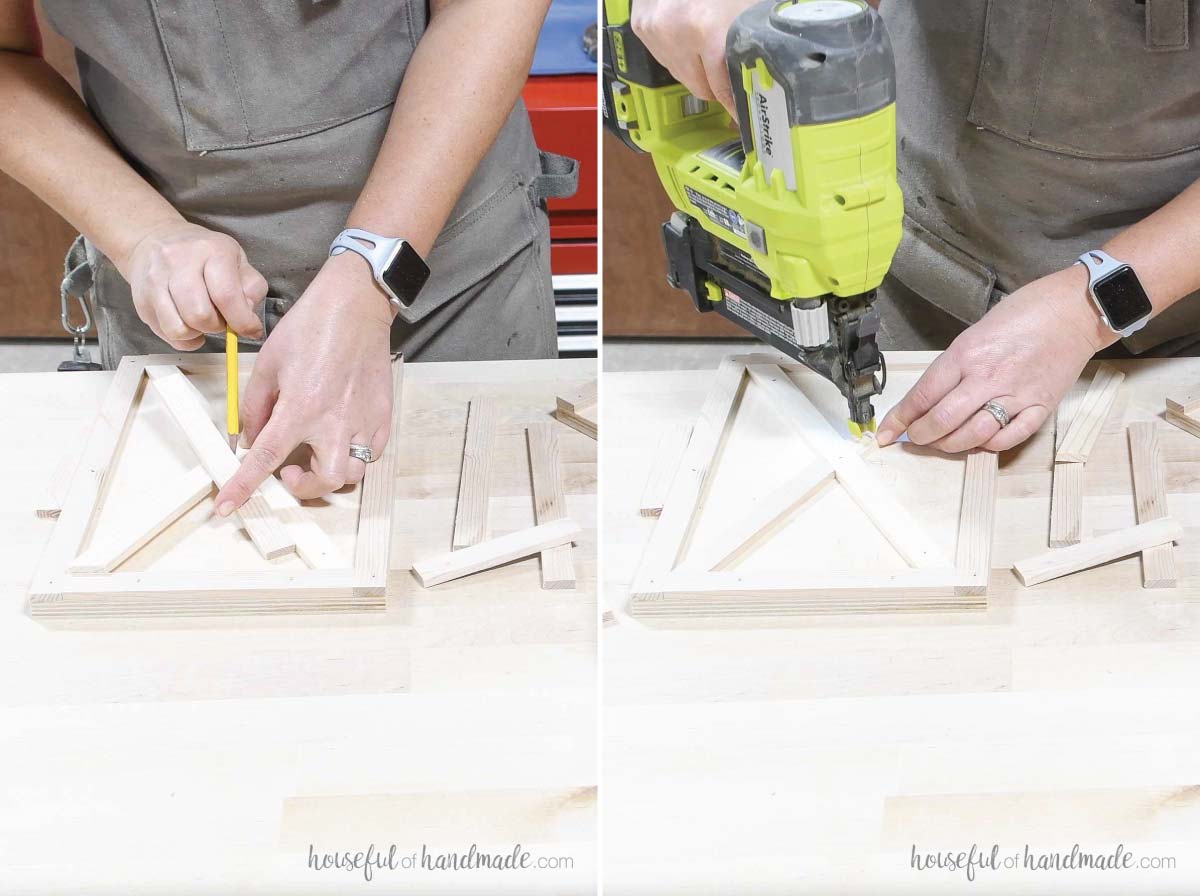
Add trim to the door. Start by adding trim around the perimeter of the door pieces. Make sure the trim does not go past the edge of the plywood.
Then place a trim piece up where the first part of the X will go and mark the cut lines.
Attach with wood glue and 5/8” nails.
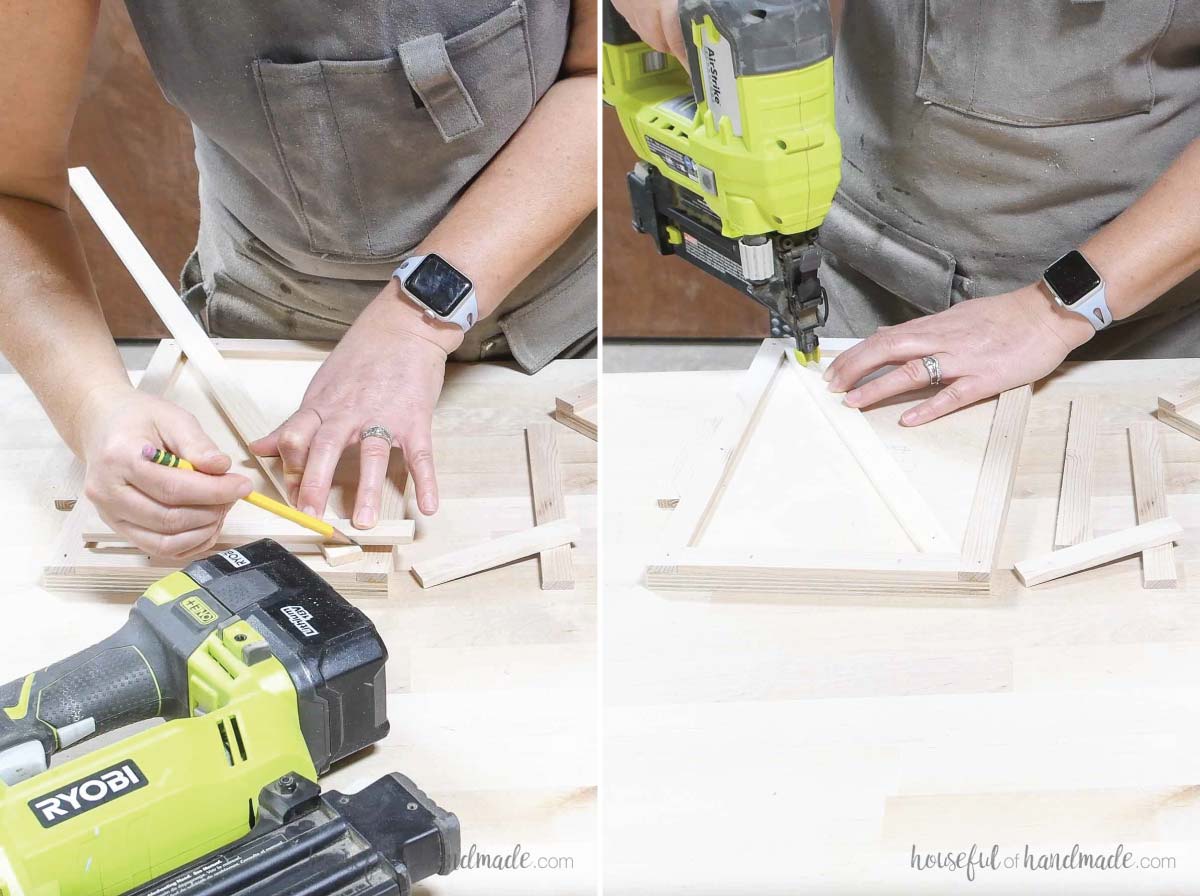
Line the second X piece up against the door and mark the cut lines at the ends and where it crosses the other trim piece in the center.
Cut and attach these pieces completing the X detail. Repeat for the second door piece.
STEP 5- Add finishing touches
Sand and stain or paint the stable, door pieces, fence, and shelf pieces. Finished stained areas with sealer or wax.
I used black stain for the roof and door and painted the outside white. The inside was left the natural wood color.
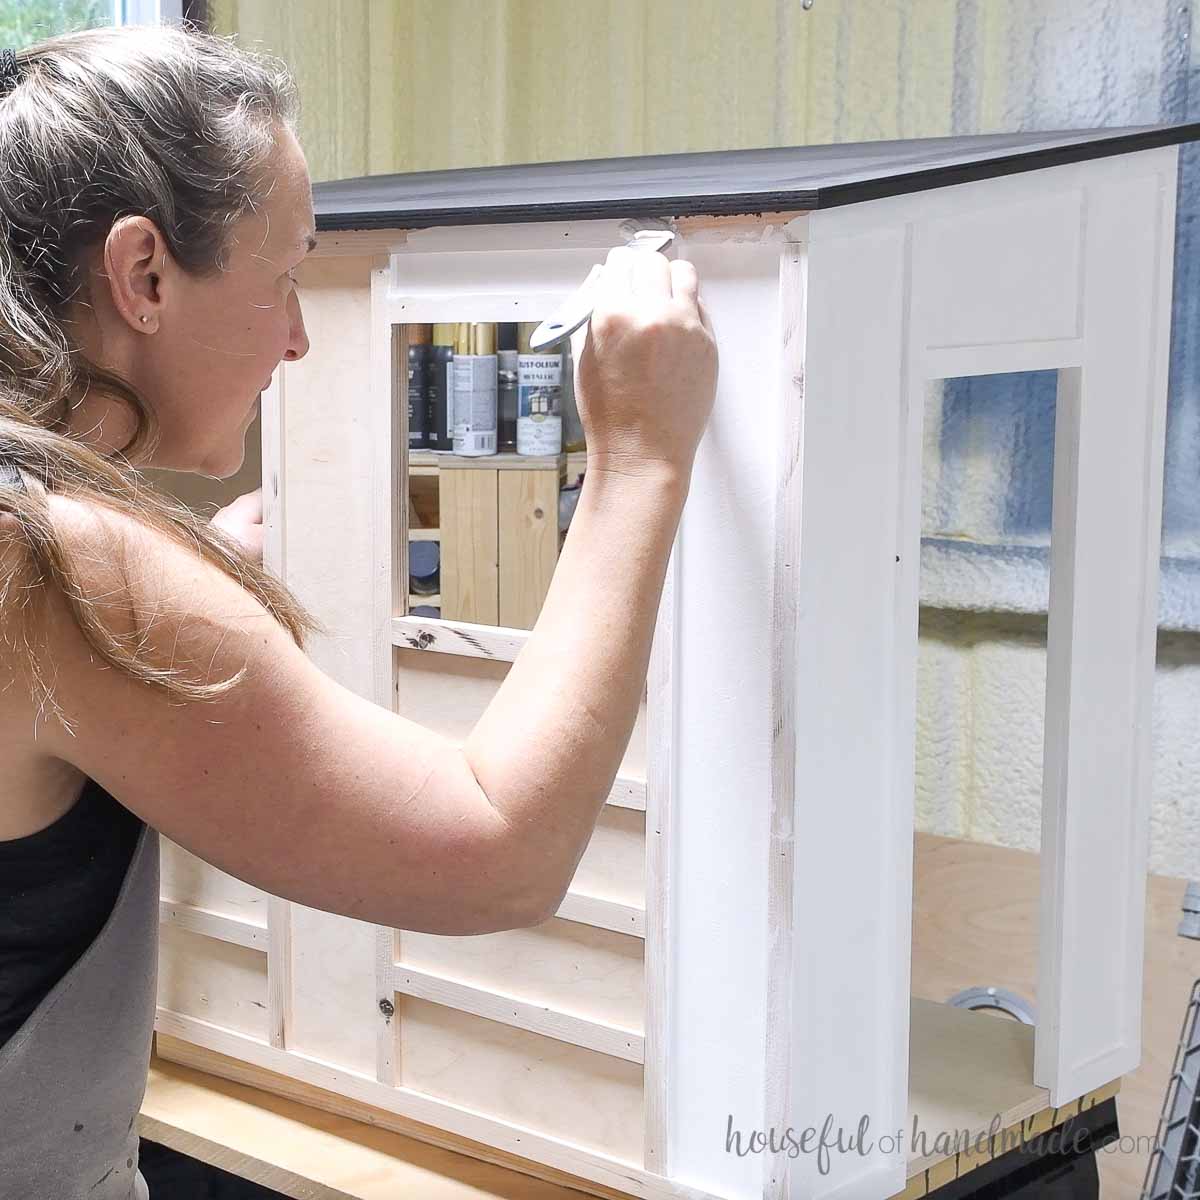
You can add trim to the inside of the dollhouse under the roof if desired.
My black stain bled through the tape so the trim helped cover it up.
Cut 1/2” angled dog ears off the top of all the fence post boards.
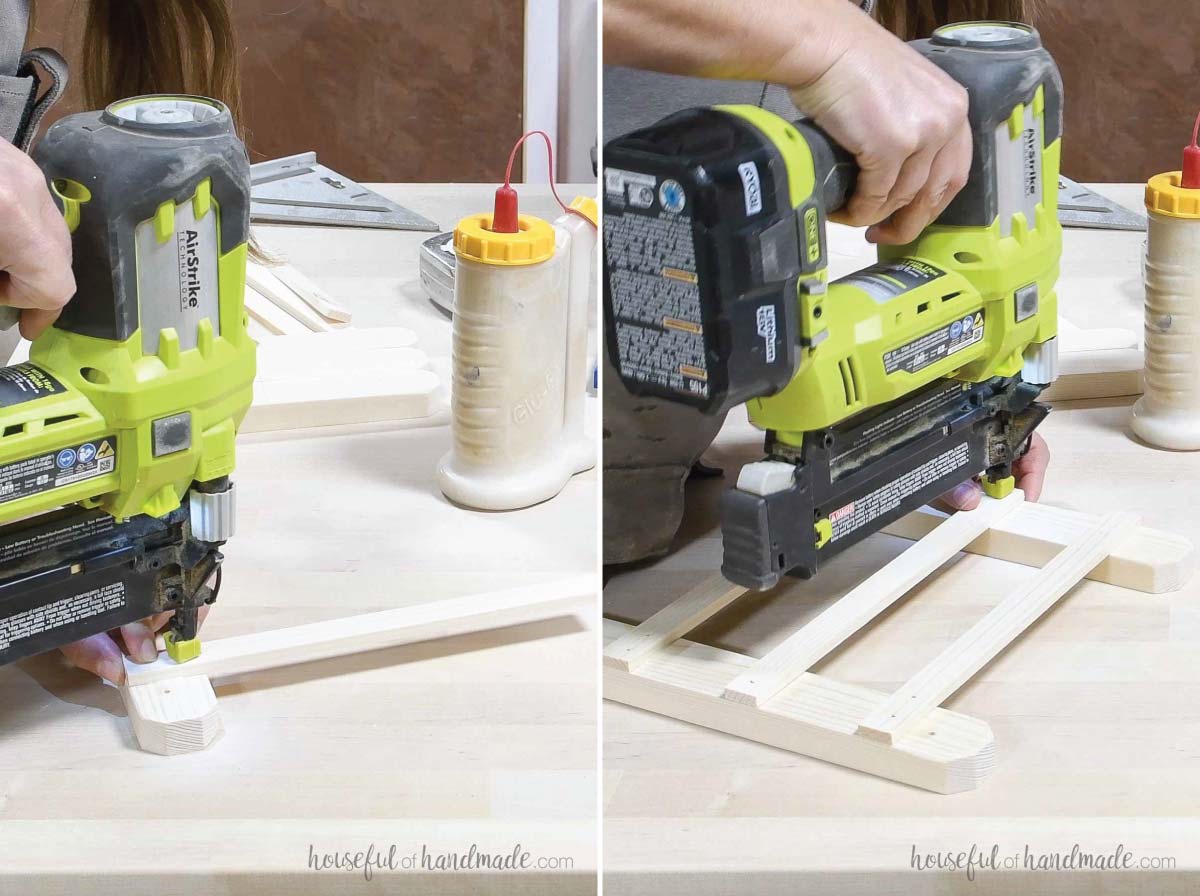
Attach 2 fence posts together with three 10” pieces of trim. Add the first 2 1/4” up from the bottom and space the others 2 1/4” apart.
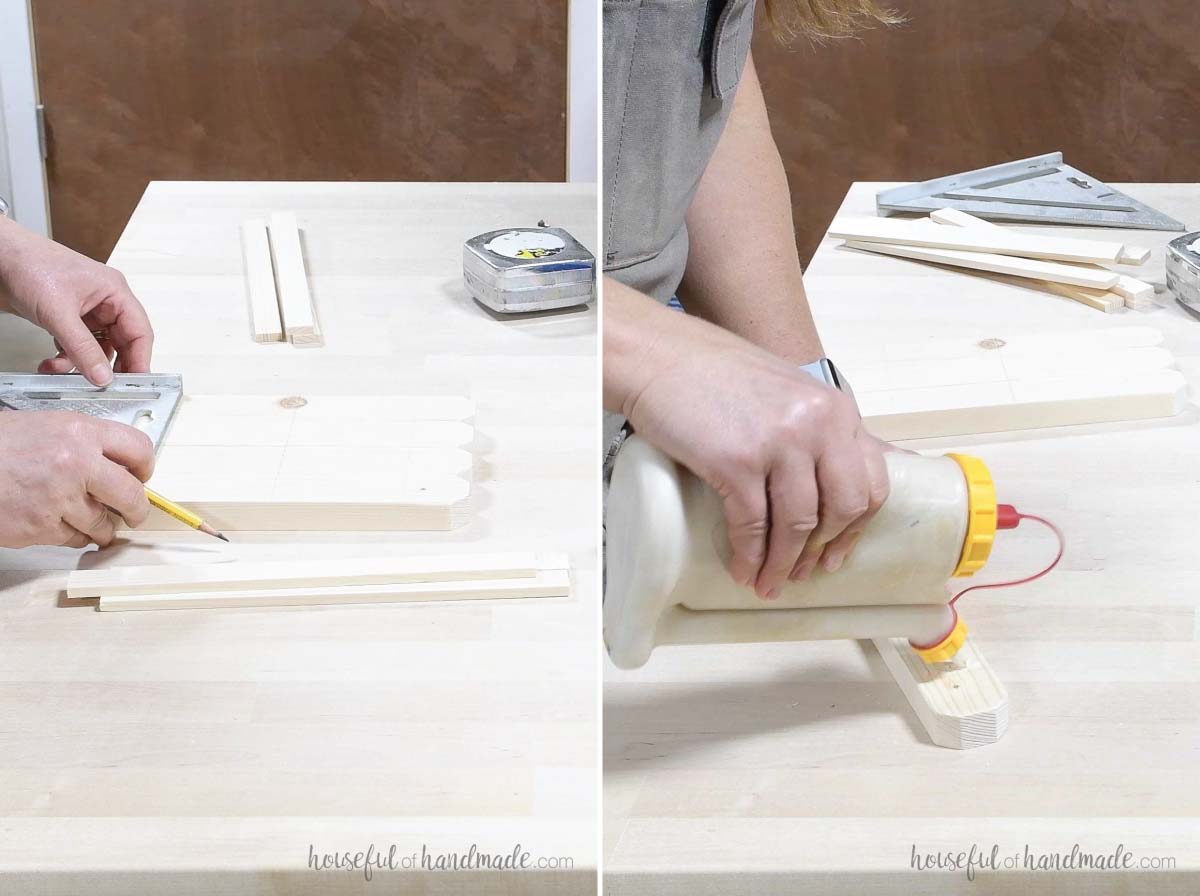
Attach the trim pieces to the fence posts with wood glue and 5/8” nails.
Use 2 nails where each trim piece crosses a fence post to prevent twisting. Let dry completely before staining/painting.
I stained my fence with a medium stain color to contrast the natural color of the stable interior.
Attach the fences so the side is flush with the side of the stable and the inside is attached to the base only. Secure with glue and 1 1/4” nails.
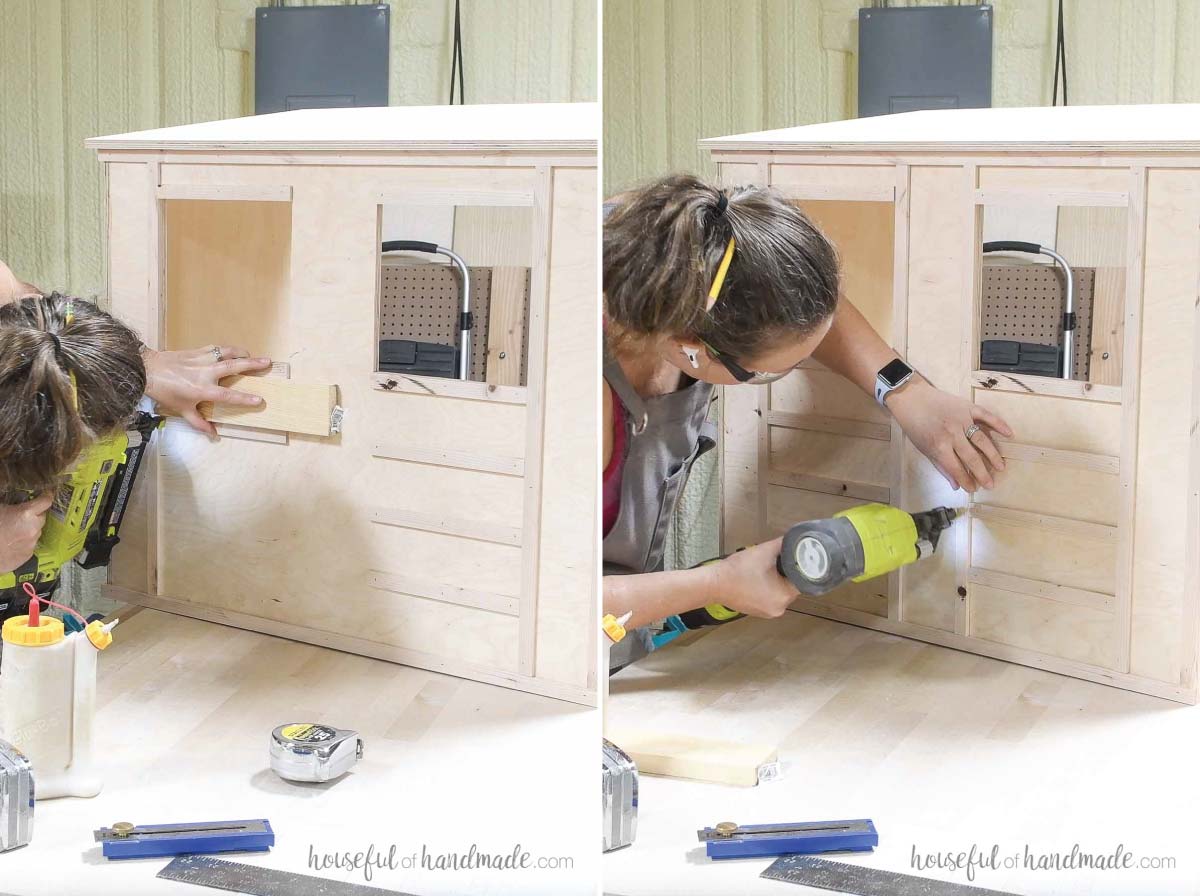
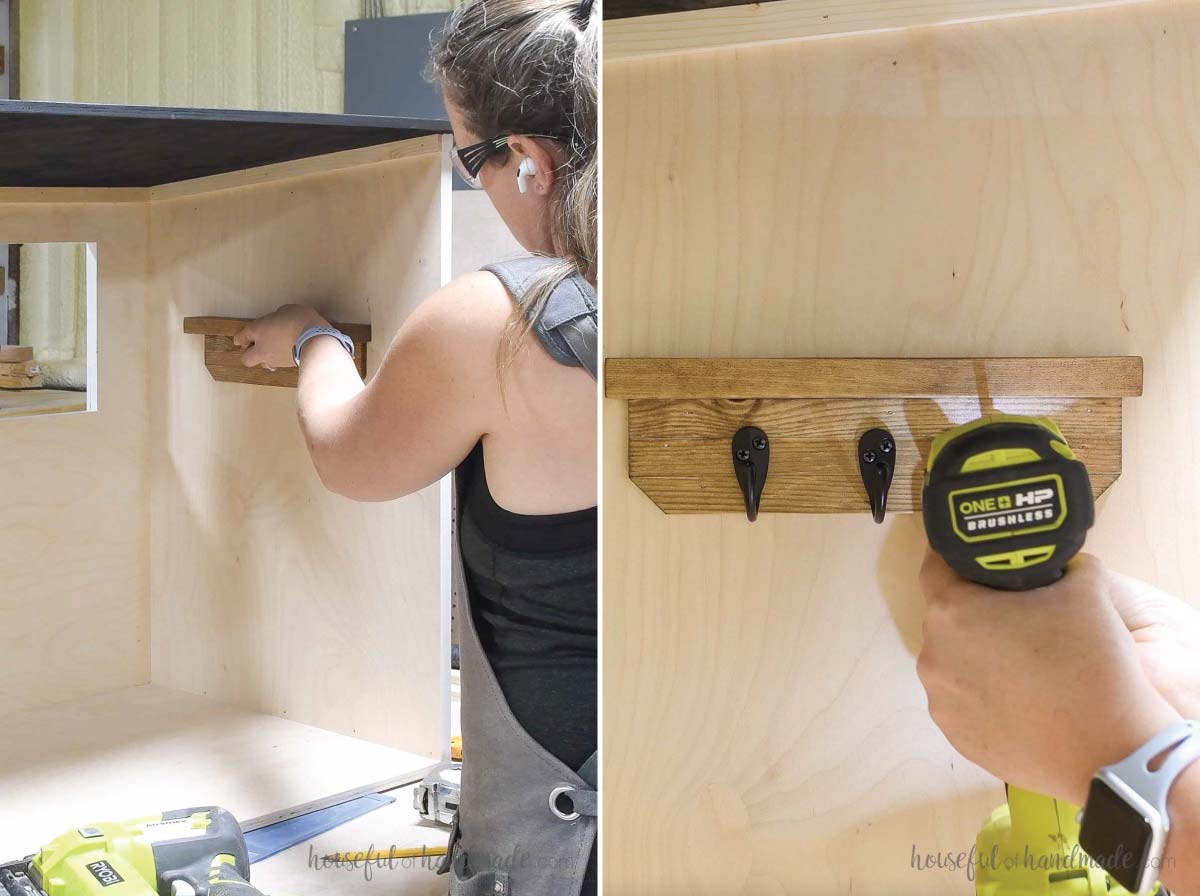
Attach the shelf to the inside wall with 1 1/4” finish nails and glue through the outside wall.
Add strips of trim below it for decoration if desired.
Secure the hooks to the trim below the shelf.
Attach the door with hinges. Use 2 hinges on each section of door.
You may have to chisel out where the hinges connect to the door and/or barn depending on your blade kerf.
Test the fit and adjust as needed.
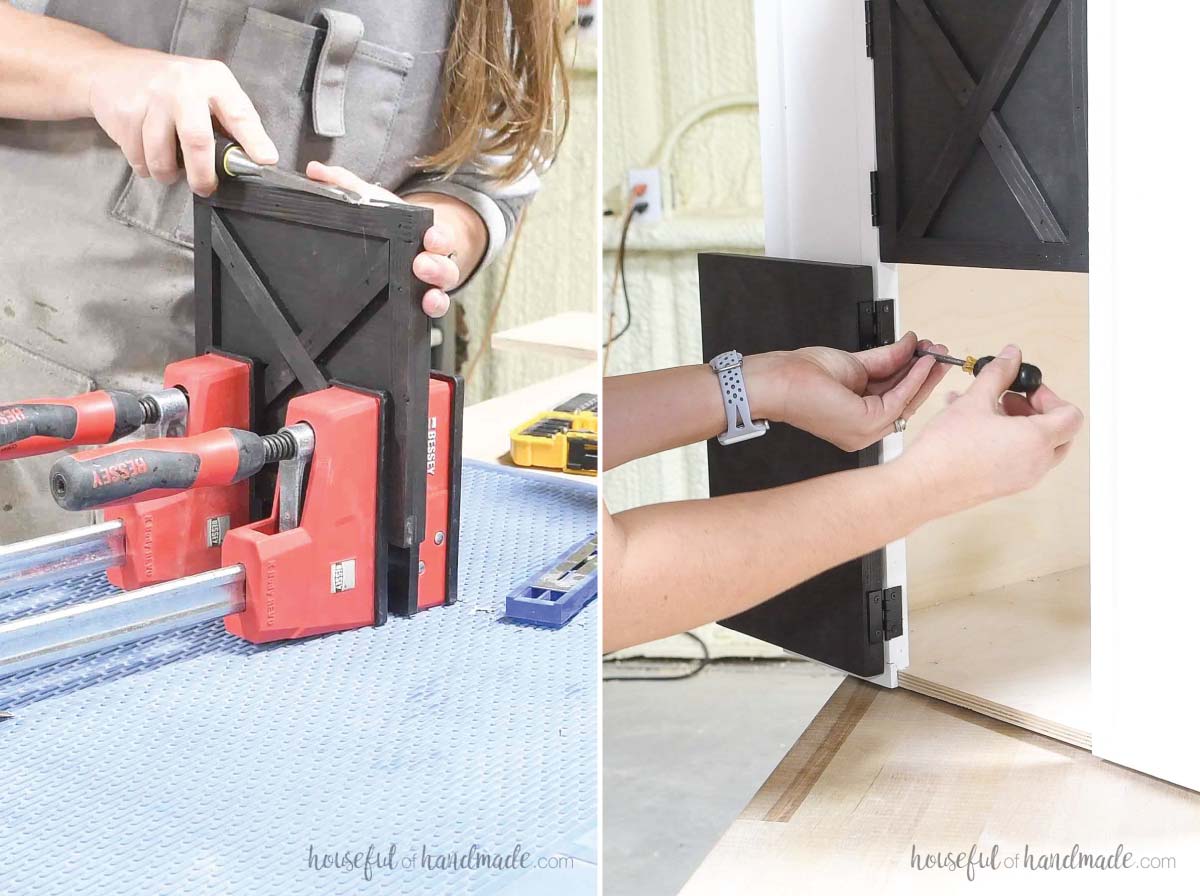
Add barrel bolts to the door to secure it.
Attach the bolt to the door where the trim is and the corresponding catch on the trim around the door opening.
I put the both bolts toward the center of the dutch door.

Now you are ready to make someone’s day!
Premium plans include:
- Recommended Tools
- Shopping list
- Easy to read cut list table
- Cut diagrams
- Step-by-step instructions with 3D renderings
- Helpful resources
- BONUS: 3D SketchUp file
Get ready for your child to enjoy many hours of creative play with their new toy stable. Have fun making tack and storing it away.
My daughter has already been super creative adding all kinds of accessories and I know she is not done ;).
Happy building!
