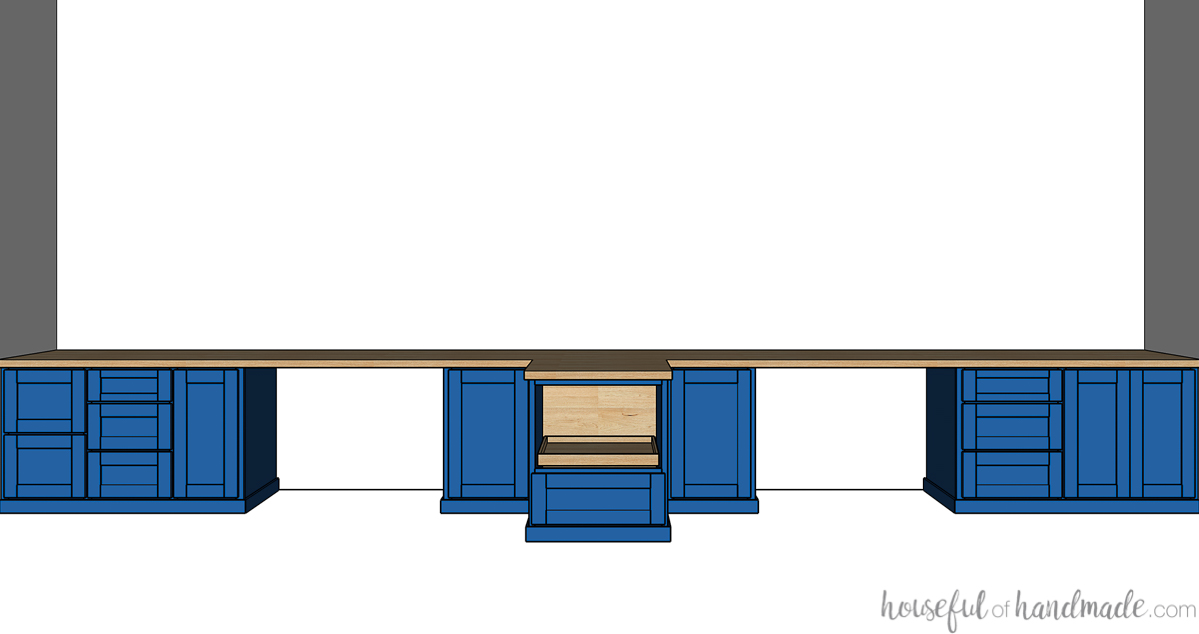
Create the perfect place to work with a new DIY built in desk.
Nothing says productivity like a beautiful built in desk with loads of storage! And making your own DIY built in desk might sound hard, but it is not.
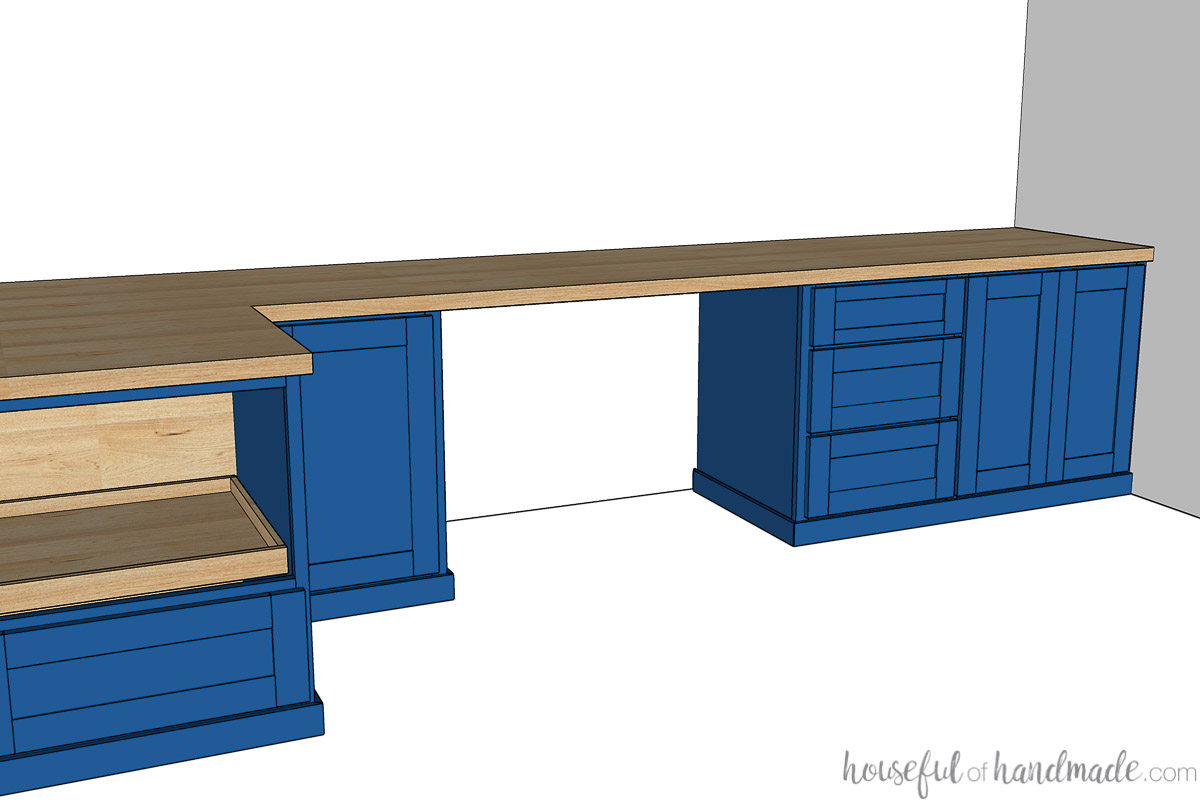
A built in desk is just a series of desk cabinets with a space between them for you to sit at. And building cabinets is as easy as making boxes. Everything is done with 90 degree cuts.
So to start of the New Year with lots of productivity, I partnered with Kreg Tools to use their Hardware Installation Kit to create the perfect built in desk for my new office.
This post may contain affiliate links. As an Amazon Associate I earn from qualifying purchases. Click here to read my full disclosure policy.
The Kreg Hardware Installation kit includes the concealed hinge jig for installing doors, the cabinet hardware jig for easy installation of knobs and pulls, two 3″ face clamps for making perfect face frames and cabinet doors, and the 310 pocket hole jig for easy pocket holes.
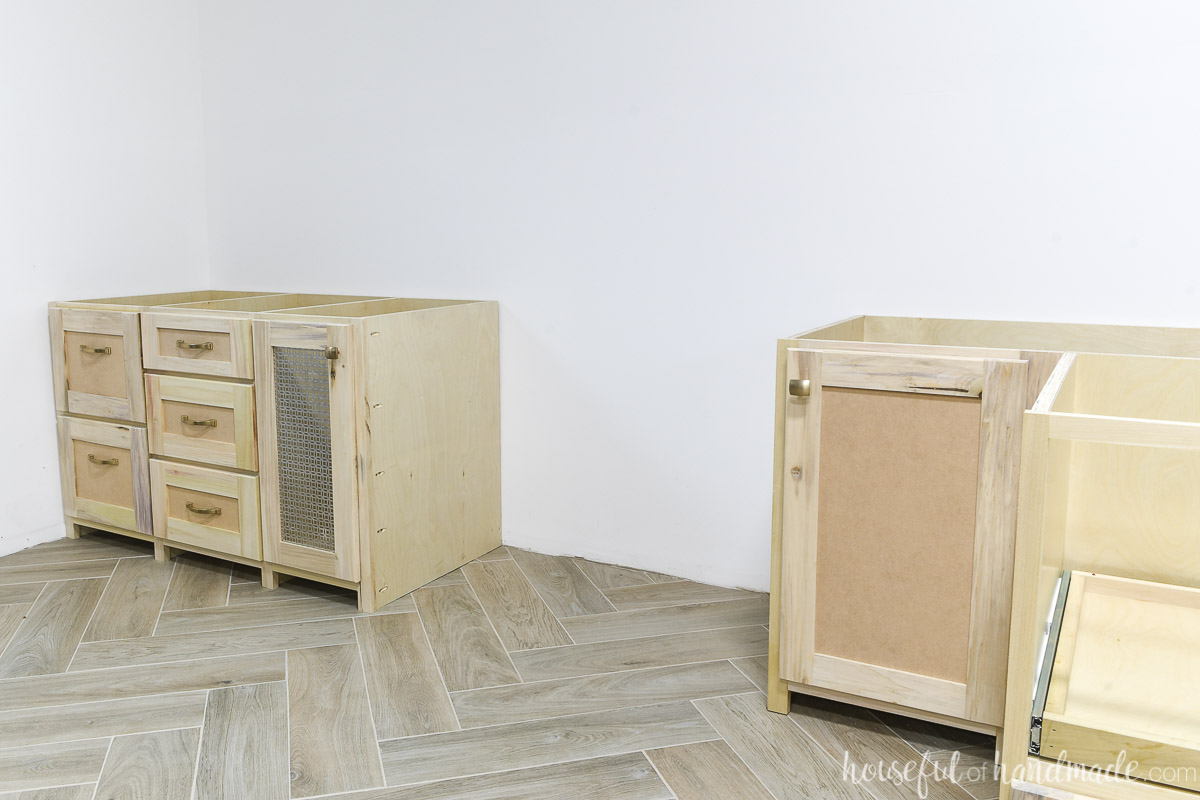
Built in Desk Cabinets
A built in desk is a series of cabinets with a space between for you to sit. Then a desk top is placed along the top of the cabinets and the gap.
The cabinets can be any configuration you want depending on your needs. Some typical desk cabinets might include:
- Drawers for office supplies
- Filing cabinet drawers
- Book shelves
- Cabinet to hide a computer stack (use a decorative metal sheet as the door panel for airflow)
- Printer cabinet to keep the printer off your desk
Building cabinets for a built in desk is slightly different than building cabinets for a kitchen or bathroom vanity. But a lot of the same principals apply.
I recommend you start by reading this how to build cabinets post for lots of general cabinet information.
How tall are desk cabinets?
A standard desk is typically 28-30 inches tall. This includes the desk top.
When figuring the height of you built in desk cabinets, figure out the final height you want your desk and the thickness of you desk top. Then subtract the desk top thickness from the total height.
You will probably need to raise your monitor on your desk top (with something like this easy DIY monitor stand) to bring it to the right height. The desk height is based on a comfortable height for your keyboard and mouse.
How deep are desk cabinets?
Most traditional desks are 24-36″ deep. But with modern computers being smaller, you can get away with a shallower desk.
If you have the space, I would not recommend going shallower than 24″ deep for your built in desk. But if you are tight on space, you could get away with an 18″ deep desk.
Just make sure you have enough space for your legs under your desk without hitting the wall.
With a 24″ deep desk top, you want your cabinets slightly shallower. You want a 1/2″-3/4″ overhang on your desk top. Plus if you have overlay cabinet doors, subtract the thickness of the cabinet doors.
For my built in desk cabinets, I cut the plywood sides 22 1/2″ wide. Then added a 3/4″ thick face frame for a cabinet depth of 23 1/4″. The cabinet doors are 3/4″ thick totaling a 24″ deep final cabinet.
I will build the desk top 24 1/2 to 25″ deep to give it a slight overhang.
How much space is needed between cabinets for a desk?
For an adult, you want to leave a gap of 30-40″ between the desk cabinets for you to sit at. For a child’s desk, you could go slightly smaller.
It’s a good idea to measure the width of the chair you plan to use at the desk to make sure it will fit in your desk area.
Face frame or frameless cabinets?
You can use either type of cabinet box to create your built in desk. You can read all about the pros and cons of each in this cabinet building post.
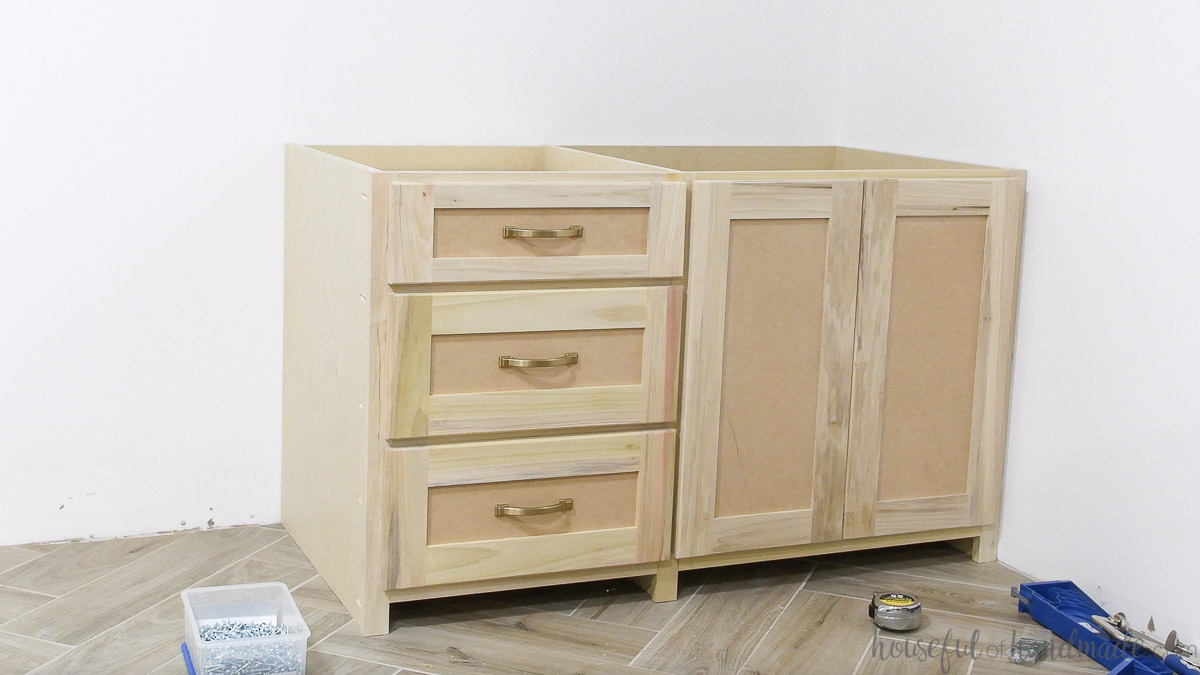
For my built in desk I chose to make face frame cabinets. This allowed me to build each section of cabinets as 1 unit with a shared face frame and shared inner walls.
Building my desk this way saved me money because I did not need as much wood. Instead of two sides per cabinet, I used a shared center wall. And instead of two stiles on the face frame, I used a shared stile.
Plus this way of building the desk cabinets meant I was able to use every inch of space.
Typically when you build cabinets, each cabinet is its own box. Then you attach the pieces together when you install them. For a large bank of cabinets this is necessary since you cannot move or get large sections of cabinets in and out of doors.
But for the built in desk where each section of cabinet was small enough to move as a single unit, it was a great solution.
How to make a Built in Desk
Here is everything you need to know to build your own built in desk cabinets. I am not sharing exact measurements for my cabinets because it is unique to my space.
Instead I am sharing how and why I did things the way I did so you can design your own DIY built in desk to work in the space you have.
To finish off your desk you will need a top. I installed a butcher block countertop on our desk build and it looks amazing!
Tools needed:
- Miter saw
- I recently upgraded to this larger sliding miter saw (watch for it to go on sale), but all my projects before were built with this inexpensive miter saw that I loved.
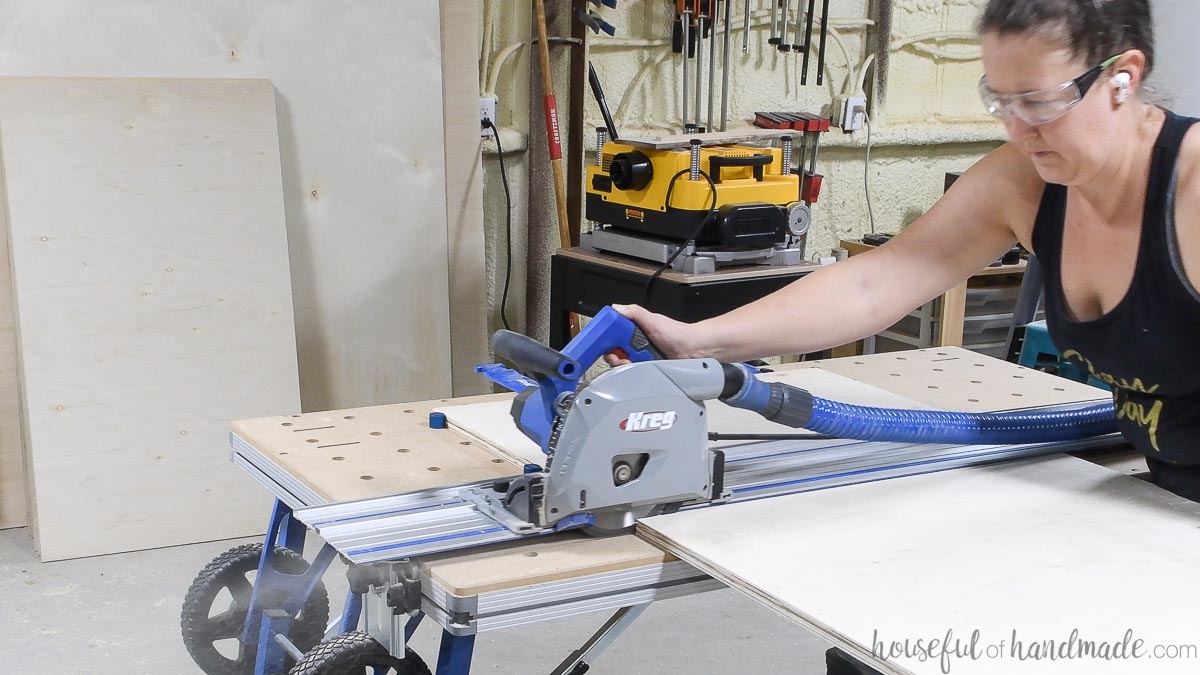
- Saw for cutting plywood (table saw, circular saw with guide tracks, or plunge saw)
- Pocket hole jig
- I use the Kreg 720 since I do a lot of builds, but you can build your entire desk with the 310 jig included in the hardware installation kit.
- Drill and impact driver
- Measuring tape
- Squares
- Clamps
- Hardware installation kit
- Includes concealed hinge jig, cabinet hardware jig, 310 pocket hole jig and 2 face clamps for 25% off. Available through Feb 28, 2022.
- Optional: Router
- I used the router for the cabinet doors, but you can also make cabinet doors without it. Read about 3 different ways to build cabinet doors here.
Supplies:
- Wood products
- 3/4″ plywood for cabinet box
- Use prefinished plywood so you don’t have to paint or seal the inside of your desk cabinets after assembly.
- 1×2 boards for face frames
- 1×3 boards for cabinet doors
- 1/4″ plywood or MDF for cabinet door panels
- 1/2″ plywood for drawer boxes
- Again, use prefinished plywood for quick drawer boxes.
- 1/4″ plywood for drawer bottoms
- 3/4″ plywood for cabinet box
- 1 1/4″ pocket hole screws for cabinets
- 1″ pocket hole screws for drawer boxes
- 1/2″ overlay hinges
- Drawer slides
- Drawer pulls and knobs
Build the face frame
Since we are building each cabinet section as one cabinet, start by building the complete face frame. Then you can build the cabinet onto the face frame.
Since 3/4″ plywood is not actually 3/4″ thick, each base piece is measured and cut to fit. This will ensure the cabinet is lined up properly to the face frame.
EXPERT TIP:
Take the extra time to true up your saw blades to a perfect 90 degree angle. This will ensure you have perfectly square cabinet boxes and face frames.
Cut out the pieces
Cut all the pieces for the face frames. These do not need to be cut to fit.
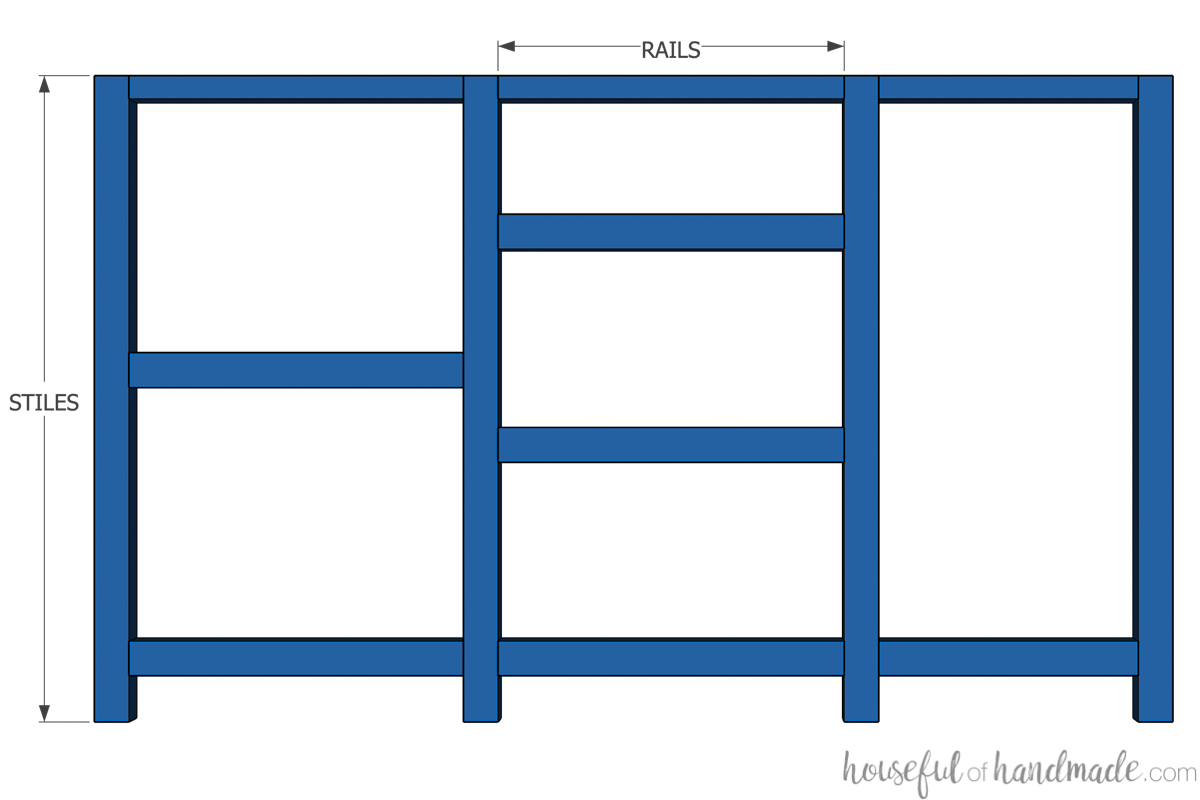
The vertical pieces of the face frame are the stiles and they are cut the full height of the desk cabinet.
The horizontal pieces of the face frame are the rails and these are cut to the width of the cabinet/drawer openings.
For more information on figuring cut lists make sure to check out the how to build base cabinets and how to build drawer base cabinets posts.
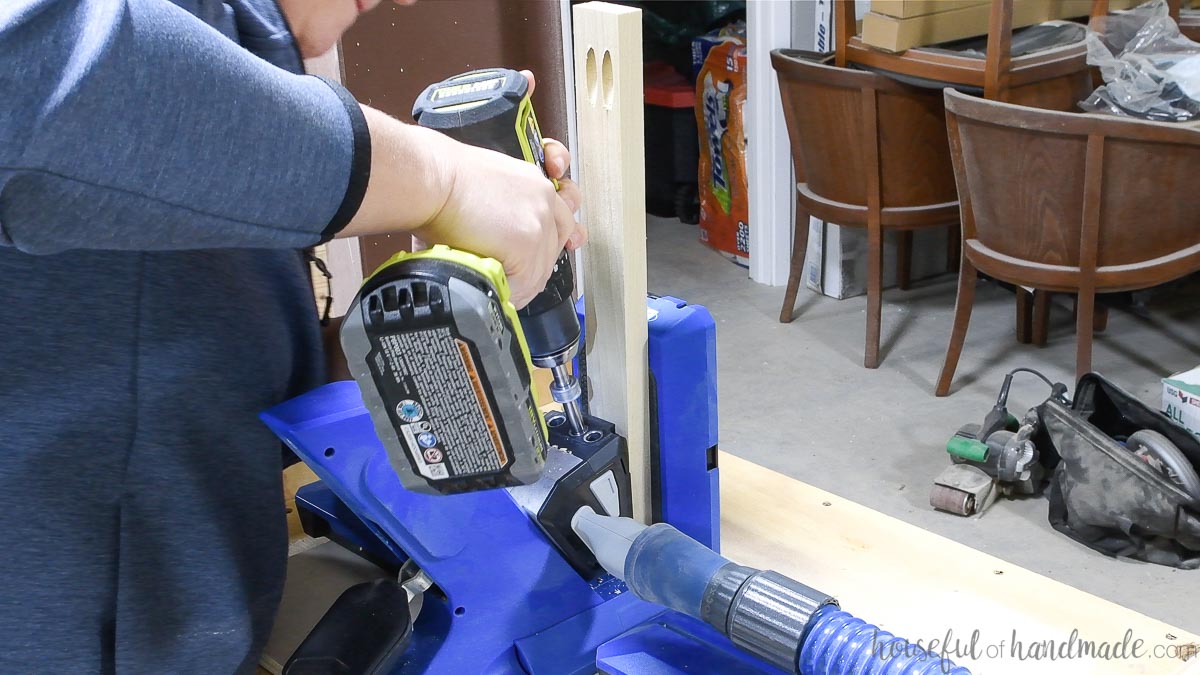
Drill pocket holes
Set your pocket hole jig to use with 3/4″ thick material.
Drill two pocket holes in each end of the face frame rails.
Assemble the face frame
Measure out the location of the rails on the stiles and mark on both sides.
Since there is no toe-kick needed for the built in desk, the bottom will be covered up with a baseboard. So lift the lower rail up from the bottom of the stiles the height of the baseboard minus 1/4-1/2″.
For drawers, mark where the rails will be between the drawers.

Add wood glue to the edges of the rails and clamp them in place on the stiles with the face clamp.
The face clamp will make sure the face frame stays flush on the front and back.
Secure with 1 1/4″ pocket hole screws.
EXPERT TIP:
When attaching the rails to the ends of the stiles, always attach the screw closest to the end of the board first. This will prevent you from splitting the wood on the edge of the stile.
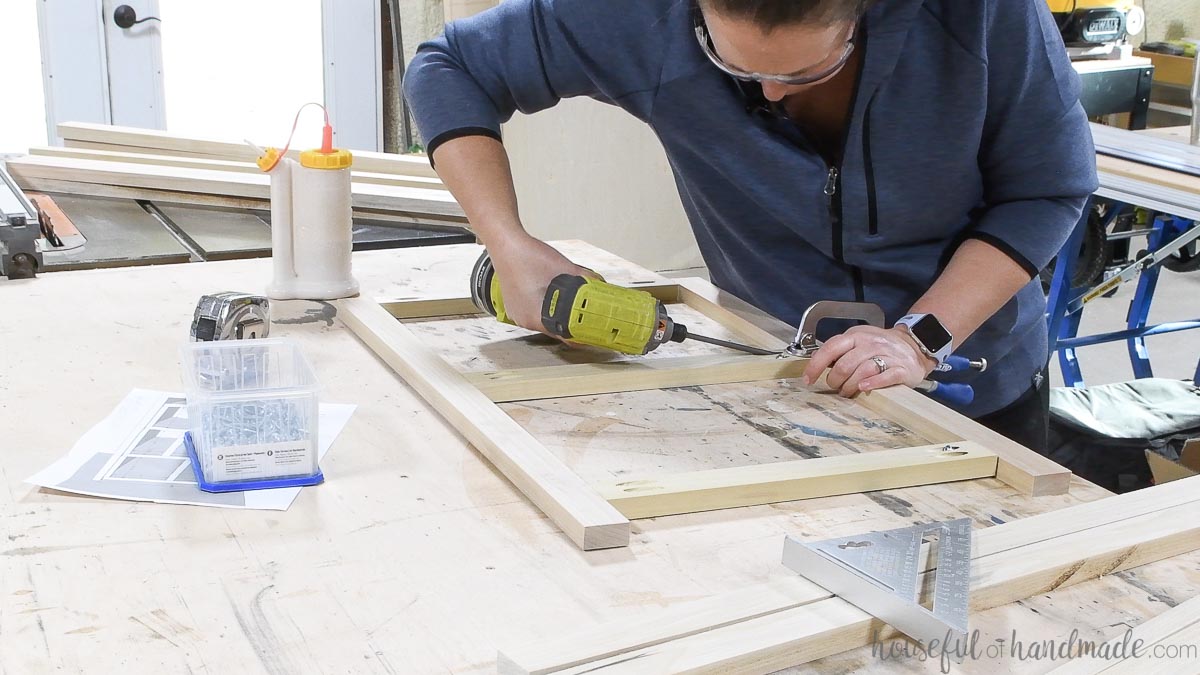
Attach all the rails to one stile first, then attach them to the next stile.
Continue attaching rails in between stiles until you have completed the entire face frame for that desk section.
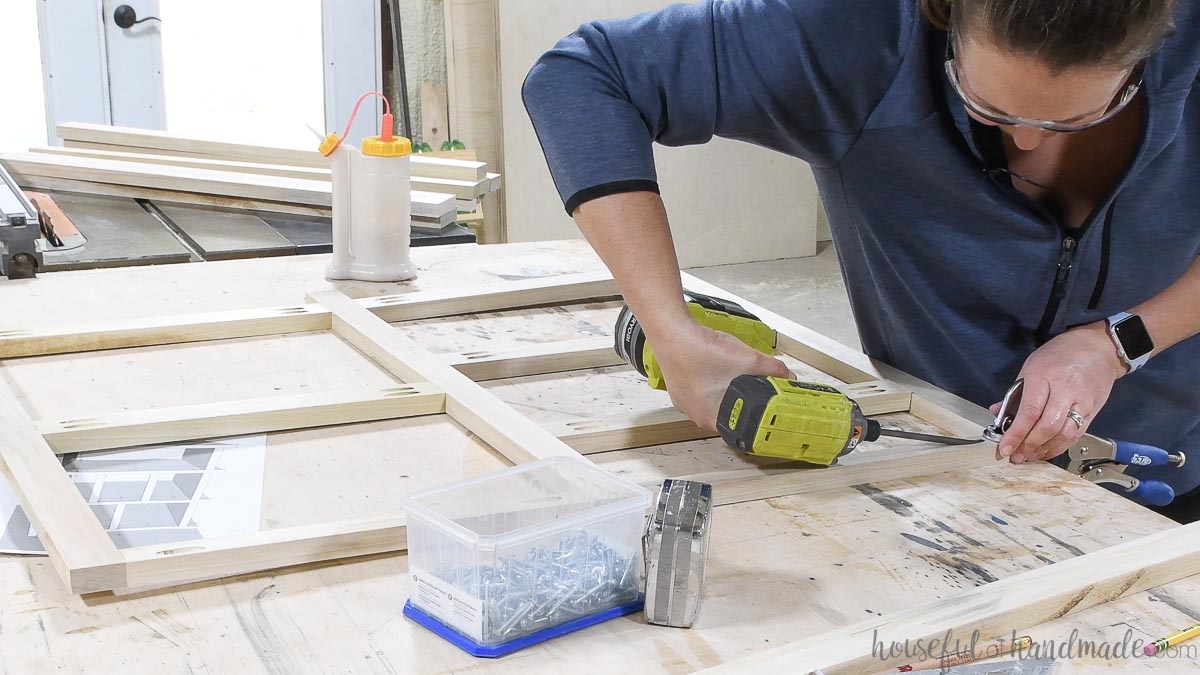
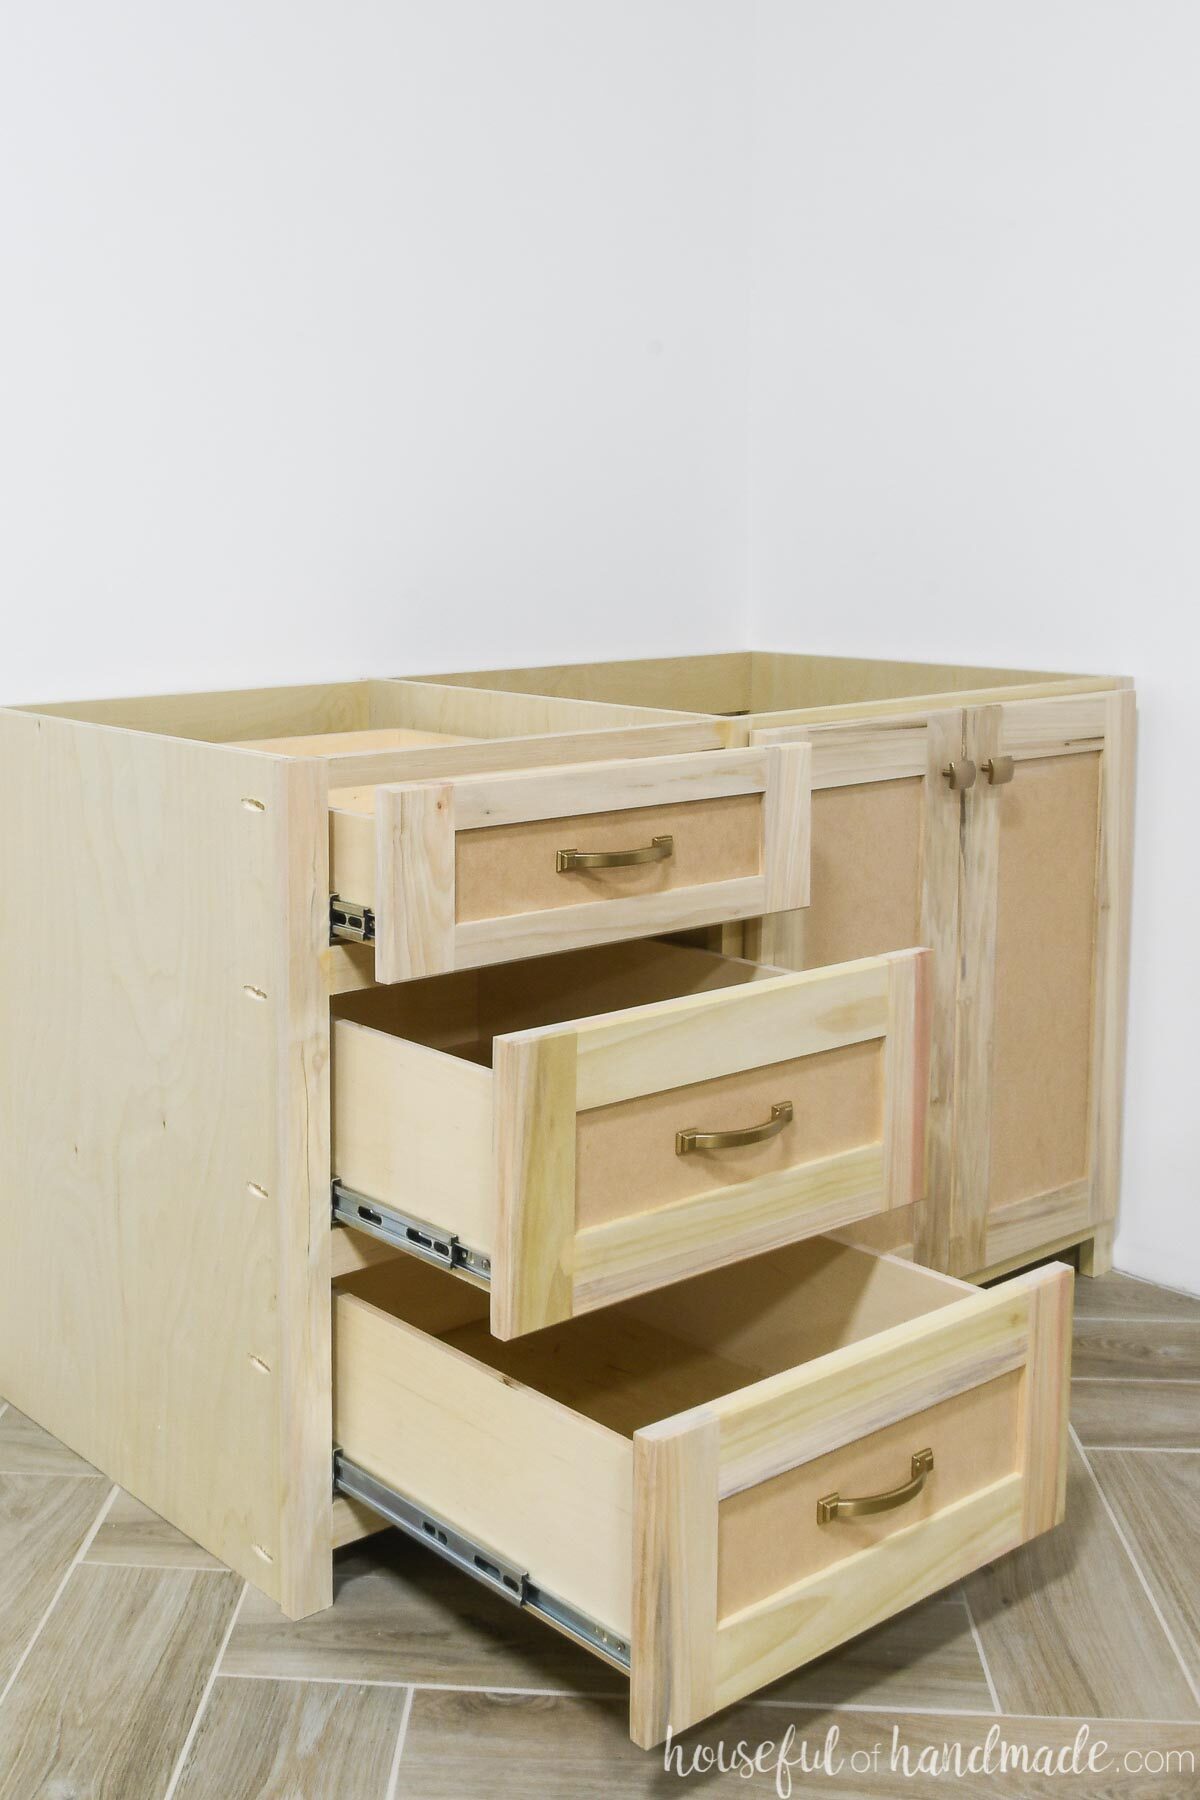
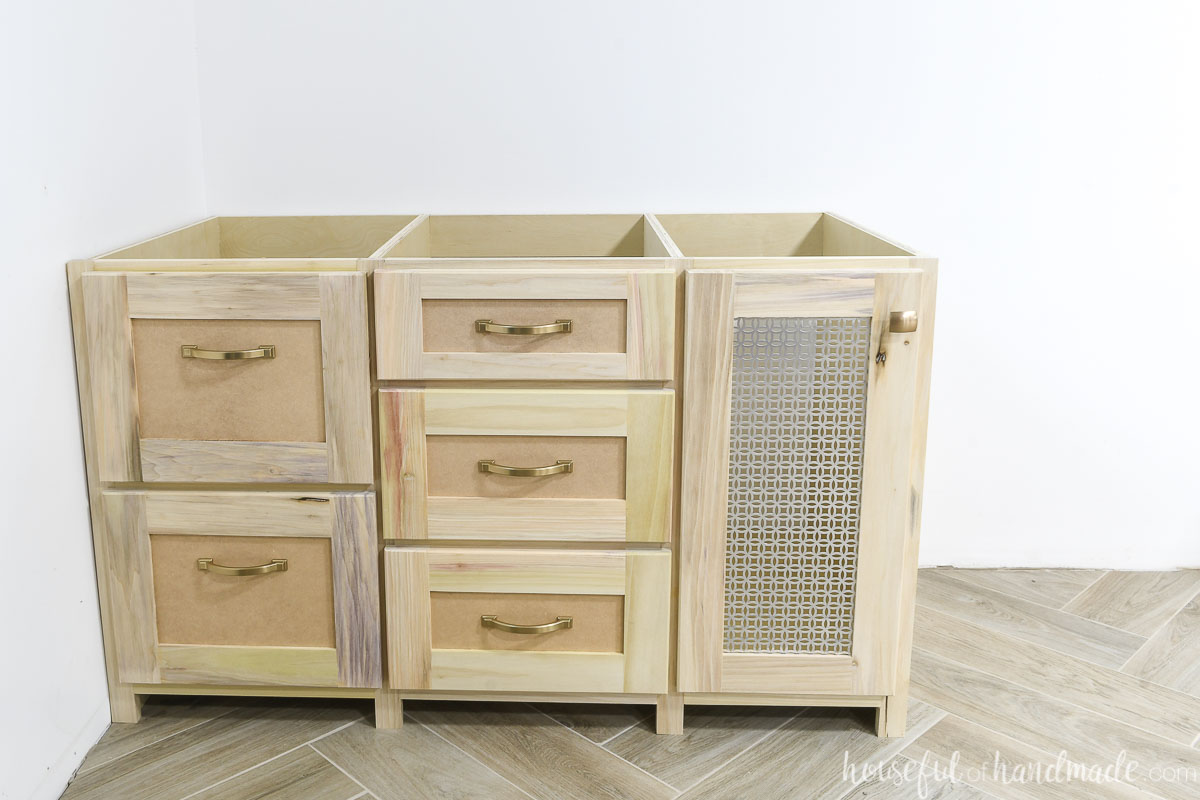
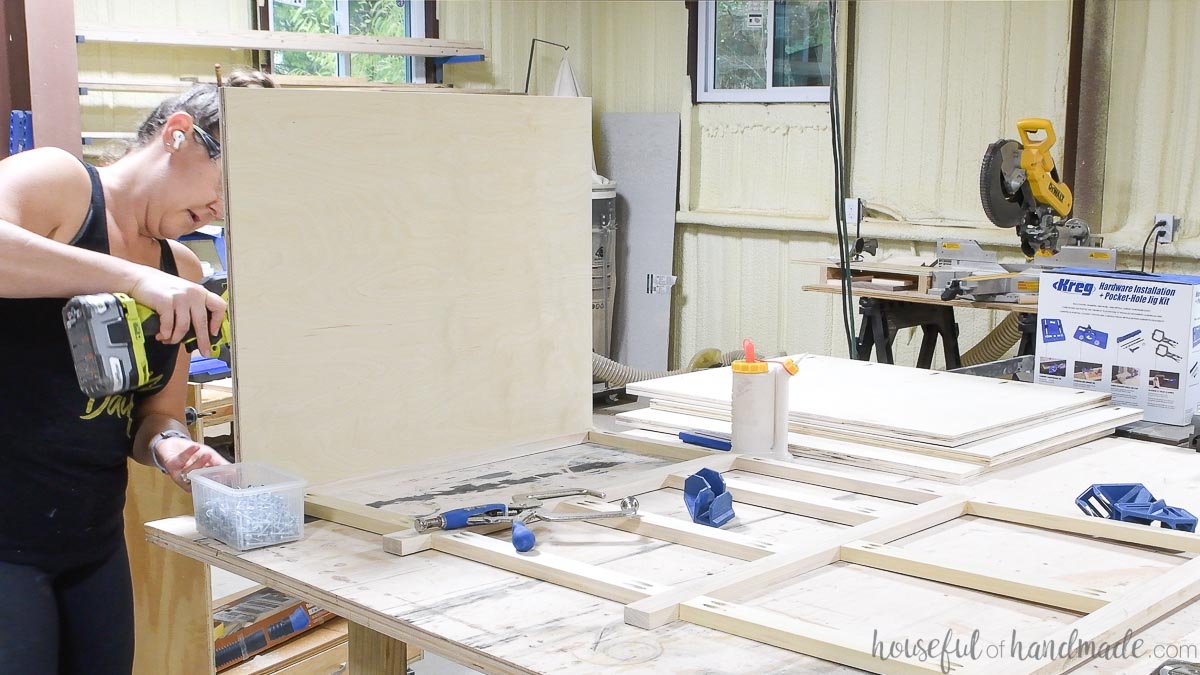
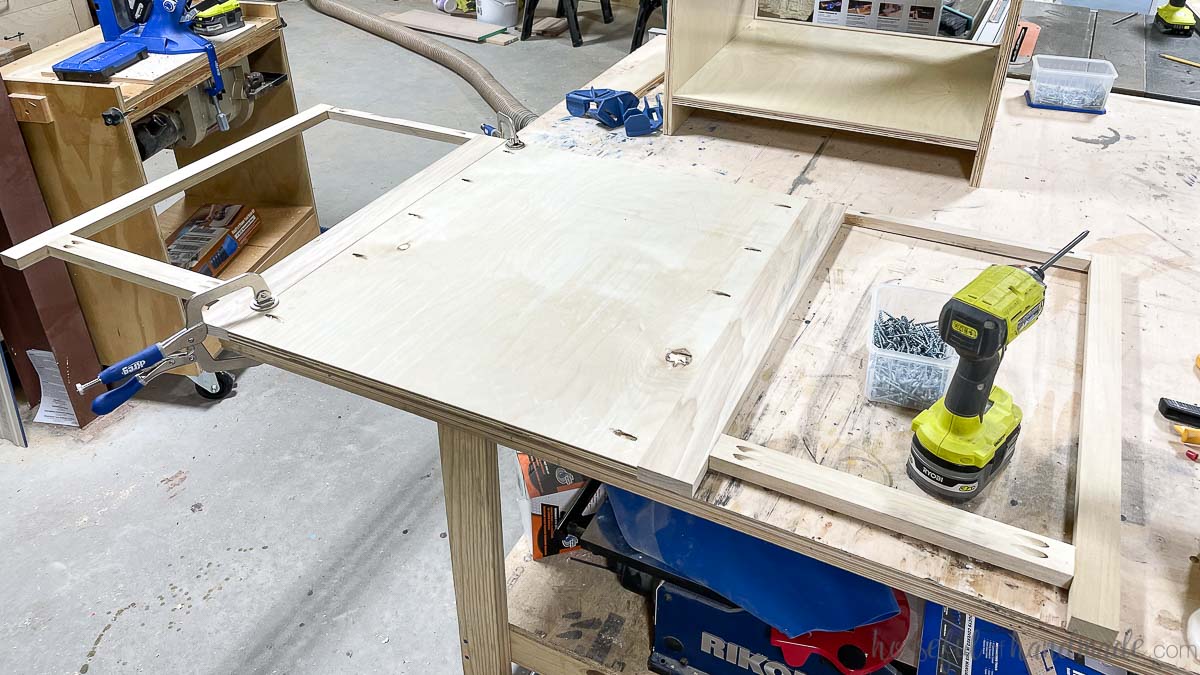
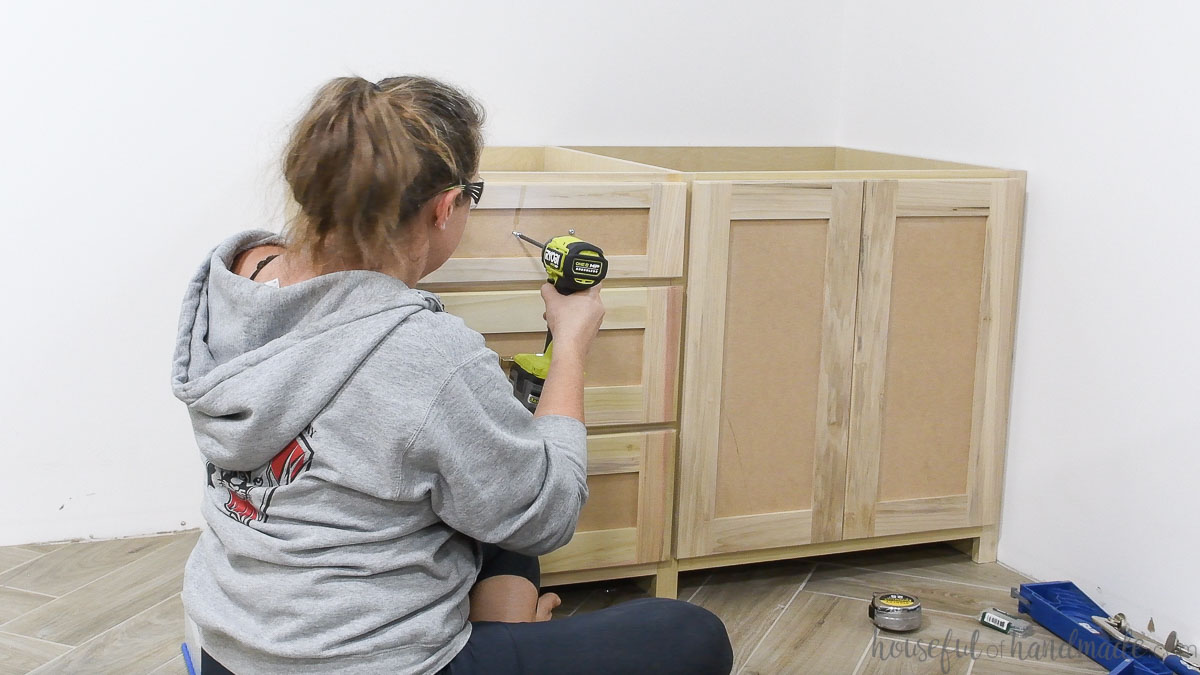
Build the cabinet box
Now that the face frame is finished, it is time to build the cabinet box onto it.
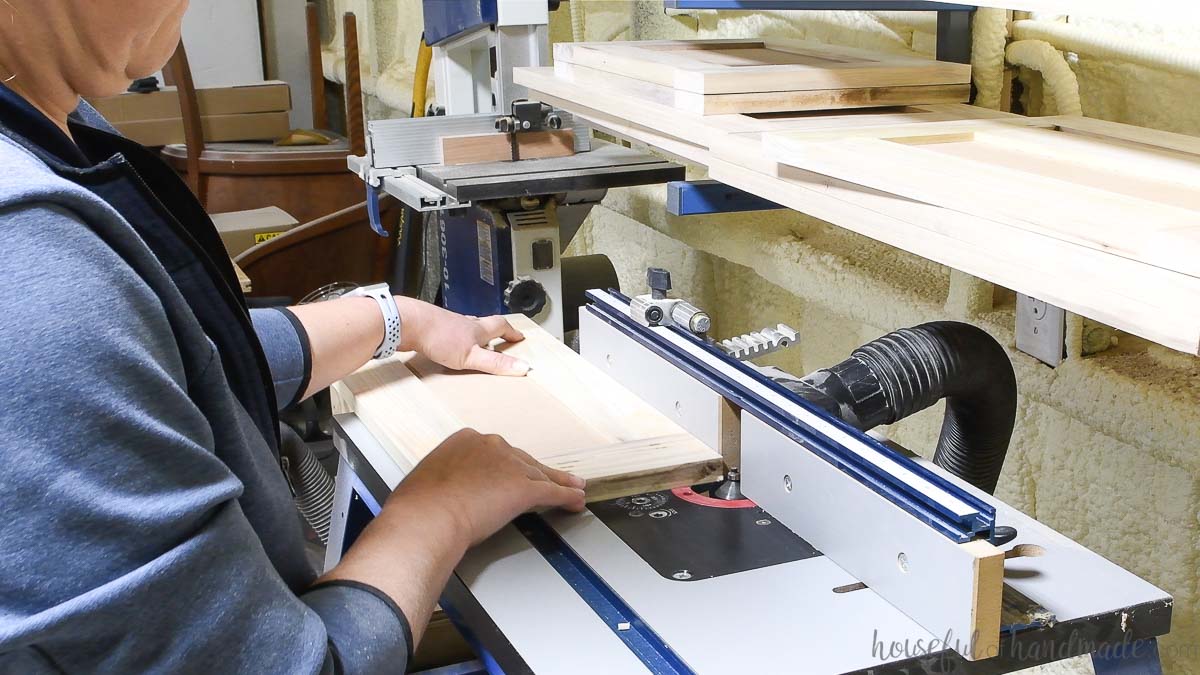
Cut the plywood
Start by cutting all the side pieces from the plywood. They should all be the same size.
Do not cut the pieces for the bottom of the cabinets yet. These will need to be cut to fit as you assemble.
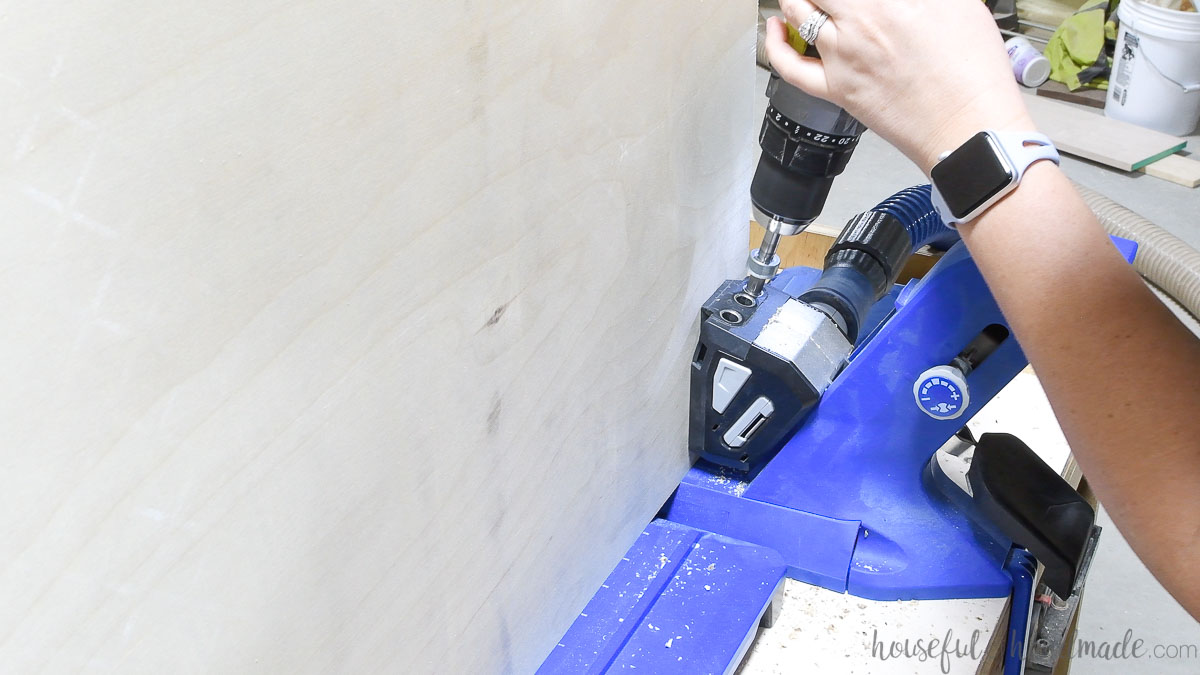
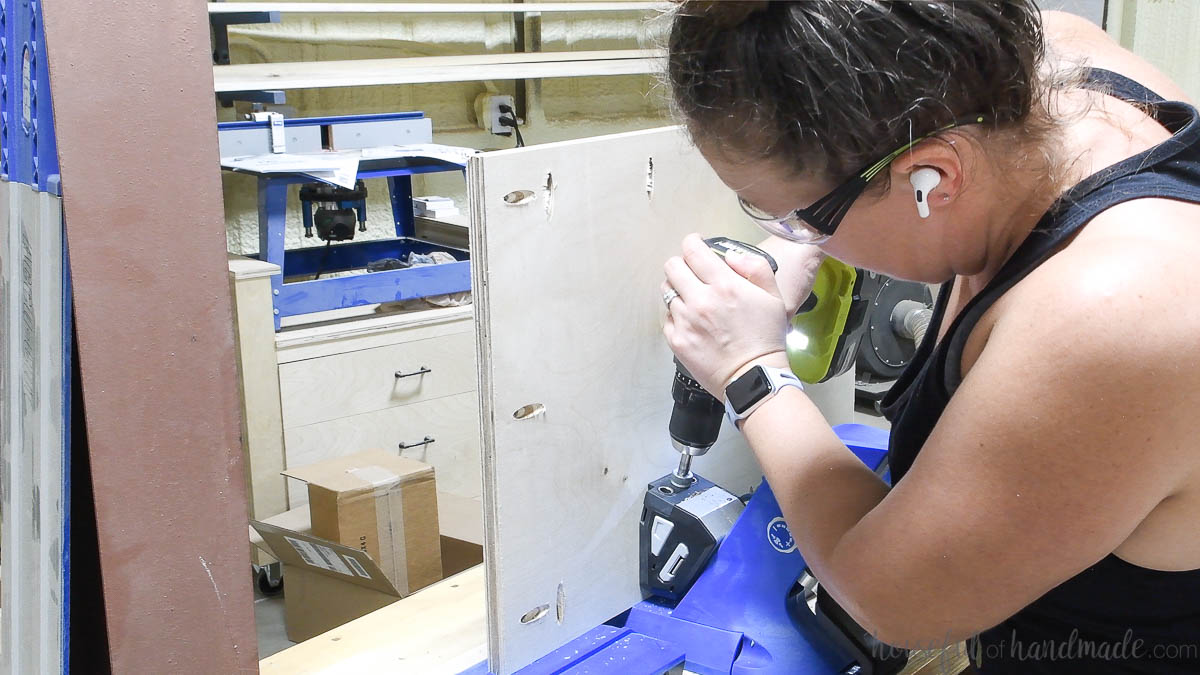
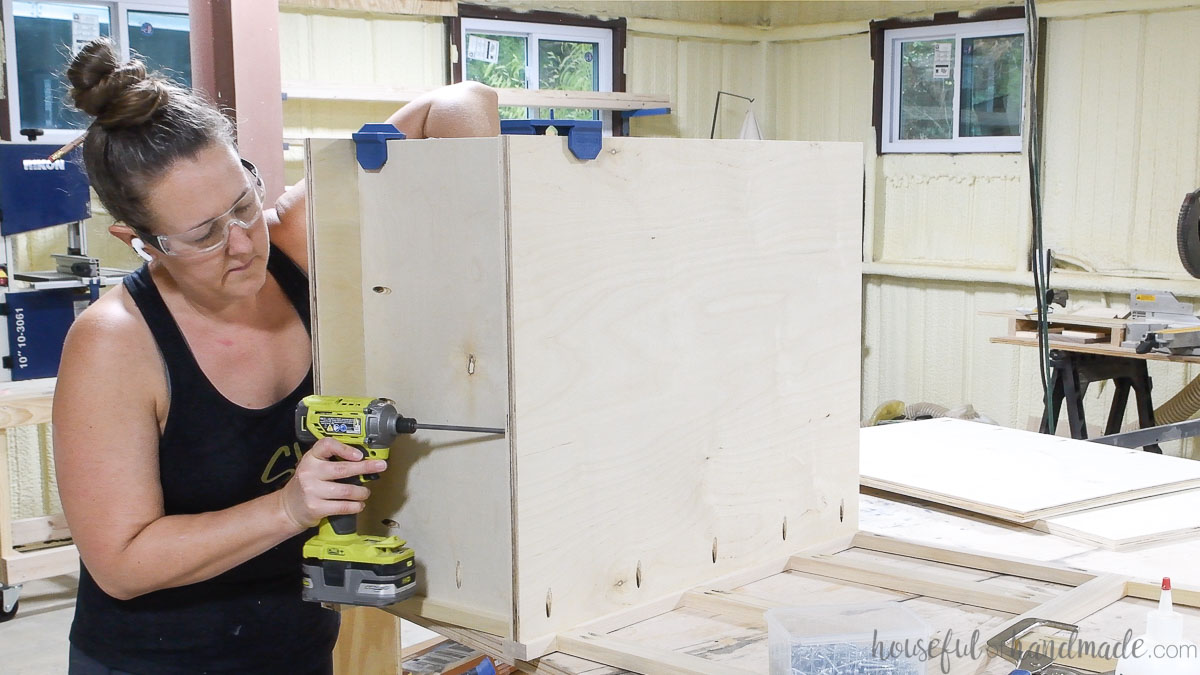
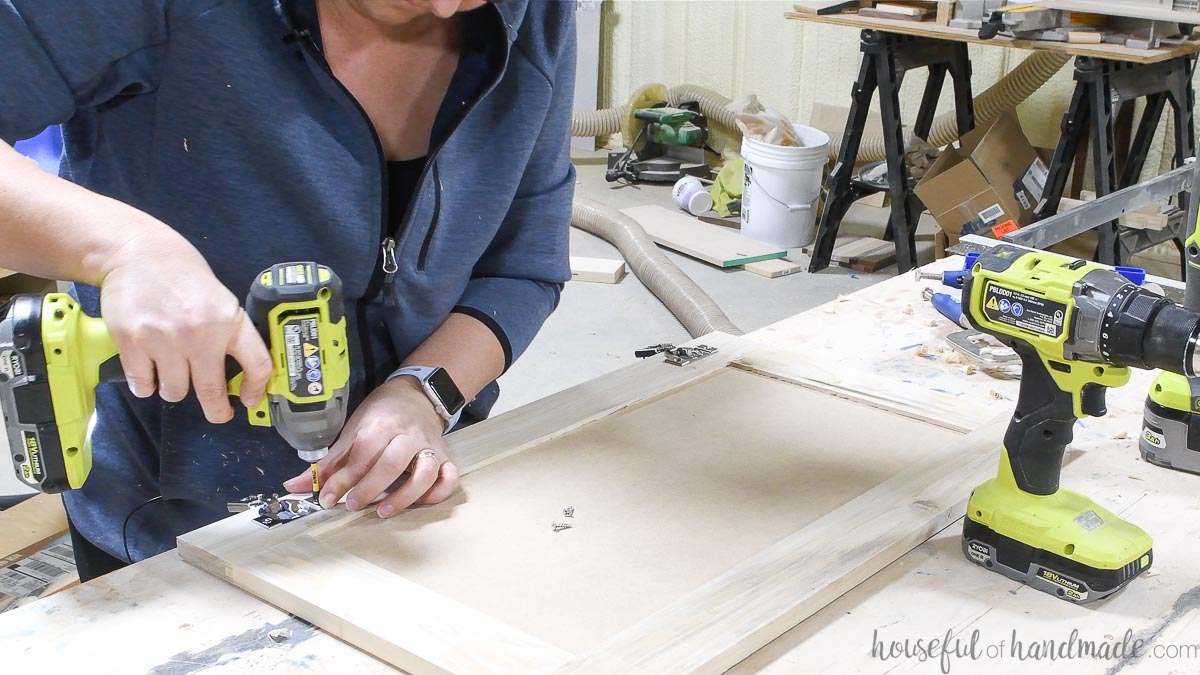
Add pocket holes
With your pocket hole jig set for 3/4″ thick material, drill pocket holes in one side of all the side panels. This is where you will attach the side panel to the face frame.
Space the pocket holes 4-6″ apart for a strong cabinet box. For my 28″ tall cabinet I used 5 pocket holes on each side panel.
Assemble the cabinet
Attach the side to the stile of the face frame. Face the pocket holes to the outside of the cabinet.
Secure with wood glue and 1 1/4″ pocket hole screws.
If you are attaching the side to the end of the cabinet that will be up against the wall, set it in 1/4″-1/2″ so you have space to scribe the face frame to line up with the wall.
If you are attaching the side to the end of the cabinet that will be next to the gap for the chair, you can set it flush with the edge of the face frame. You will want to face the pocket holes into the cabinet.
Or if you used prefinished plywood you will want to add a paintable/stainable panel to the end of the cabinet. This is done with 1/4″ thick plywood (which is not actually 1/4″ thick).
So you will want to set the side piece in from the edge the thickness of your end panel. And position the pocket holes so they are on the outside of the cabinet.
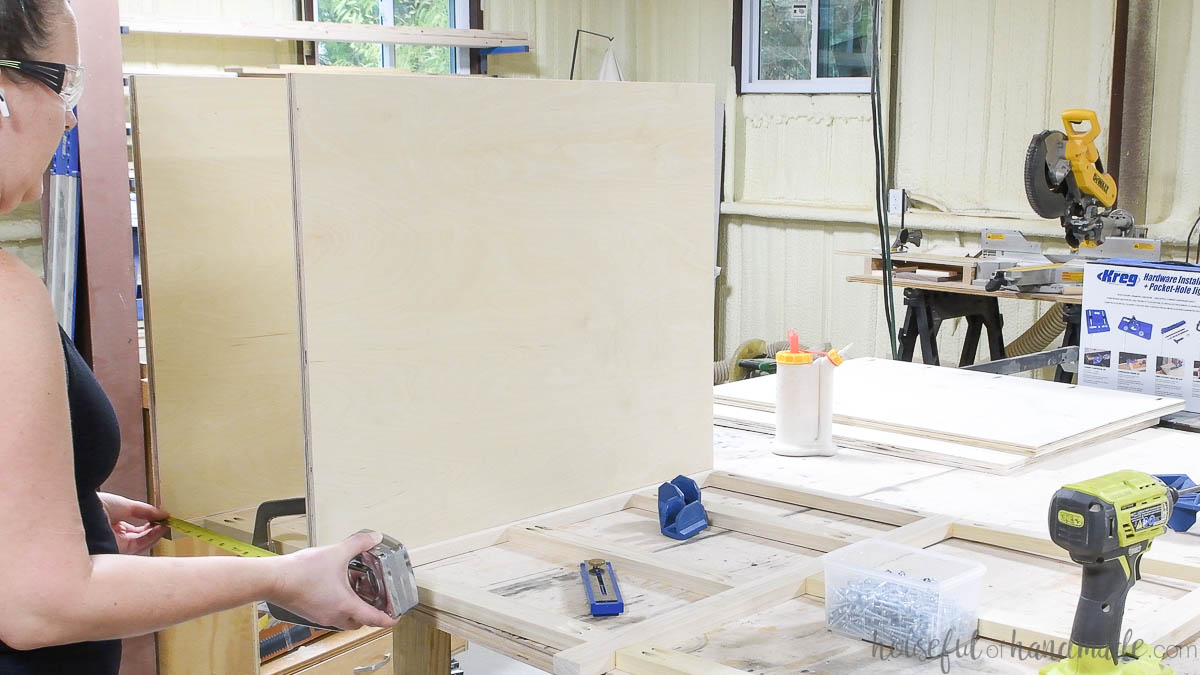
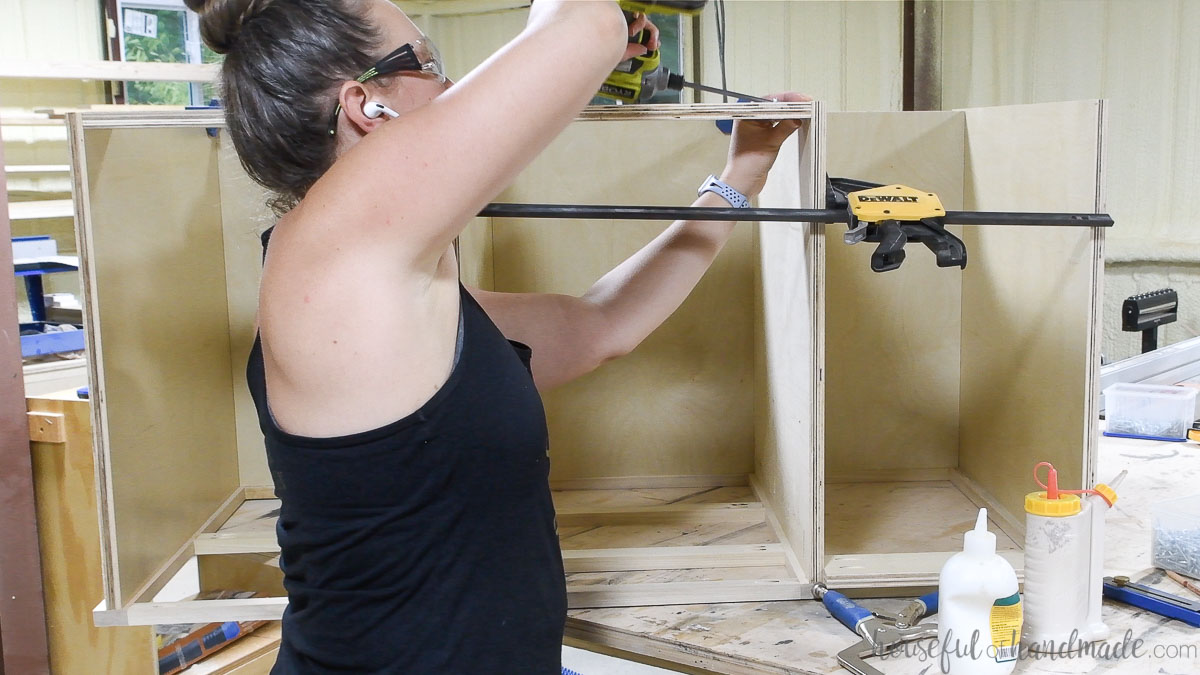
Clamp the second side panel into place, then measure the distance between the two pieces.
Cut your bottom piece to fit this measurement. Also cut a 3″ wide scrap piece the same width for a support piece at the top back of the cabinet.
Drill pocket holes on both sides of the plywood bottom and on the front.
Attach the bottom piece to the one side that is already attached and the face frame. Secure with wood glue and pocket hole screws.
Then attach the other side piece to the face frame and the bottom.
Make sure to keep things square as you attach the pieces together.
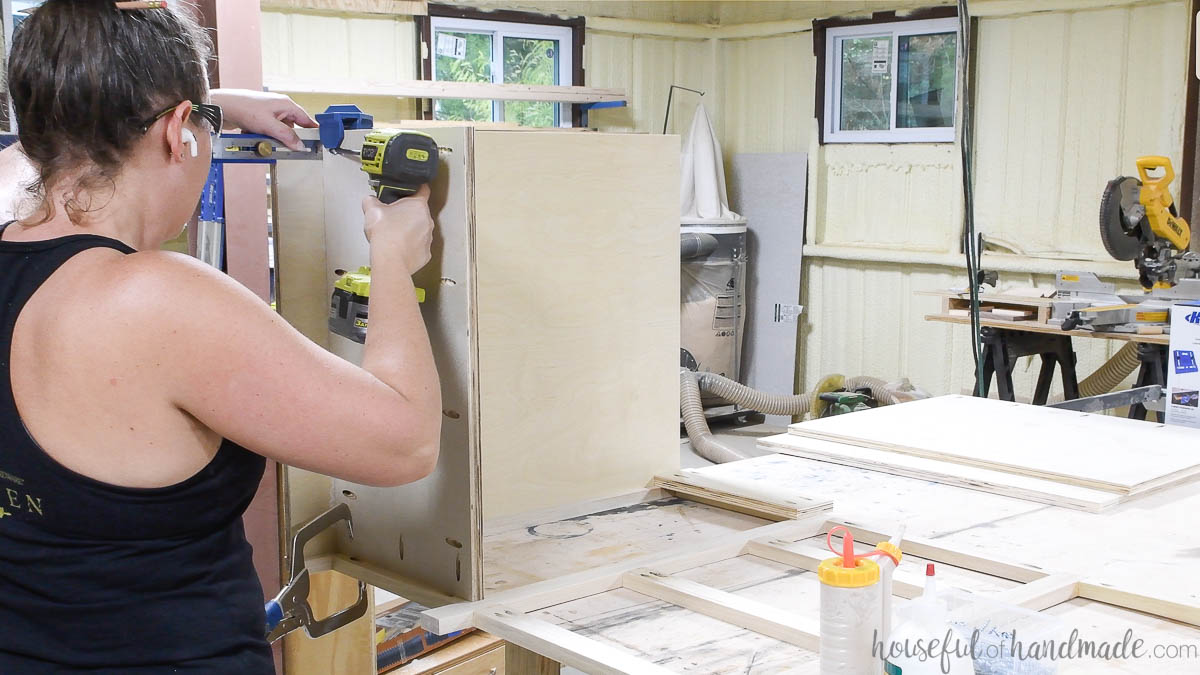
Continue attaching sides and bottom pieces until you have the entire cabinet section assembled.
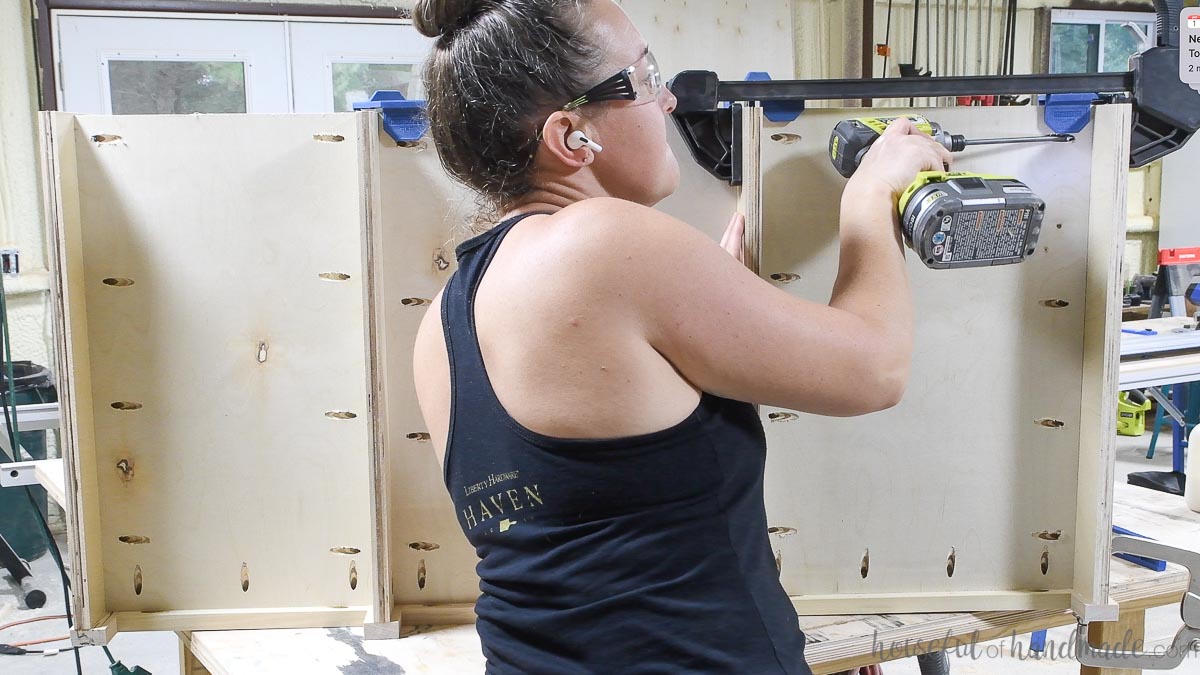
Add the support pieces to the top back corner of the cabinet boxes to keep the upper parts square.
This support piece also give you a place to attach the cabinet to the wall to secure it.
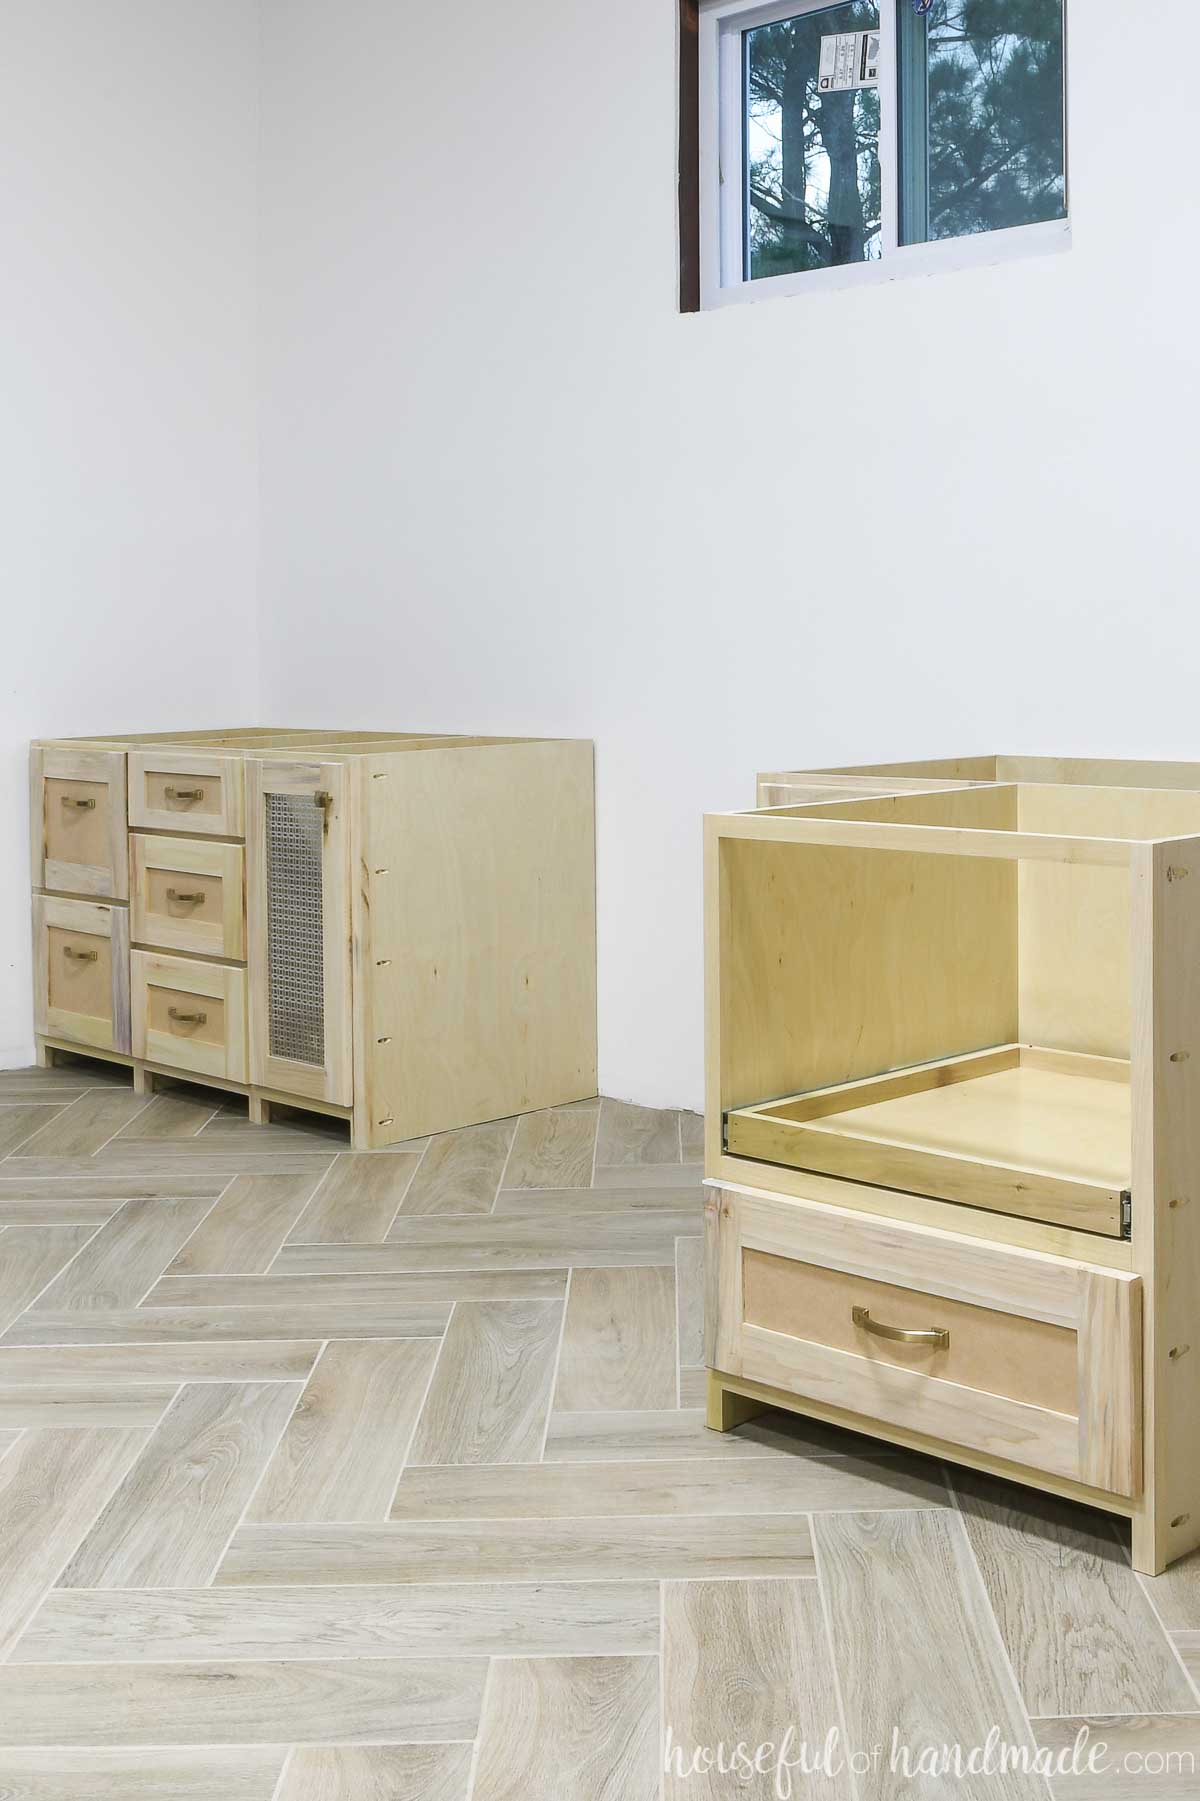
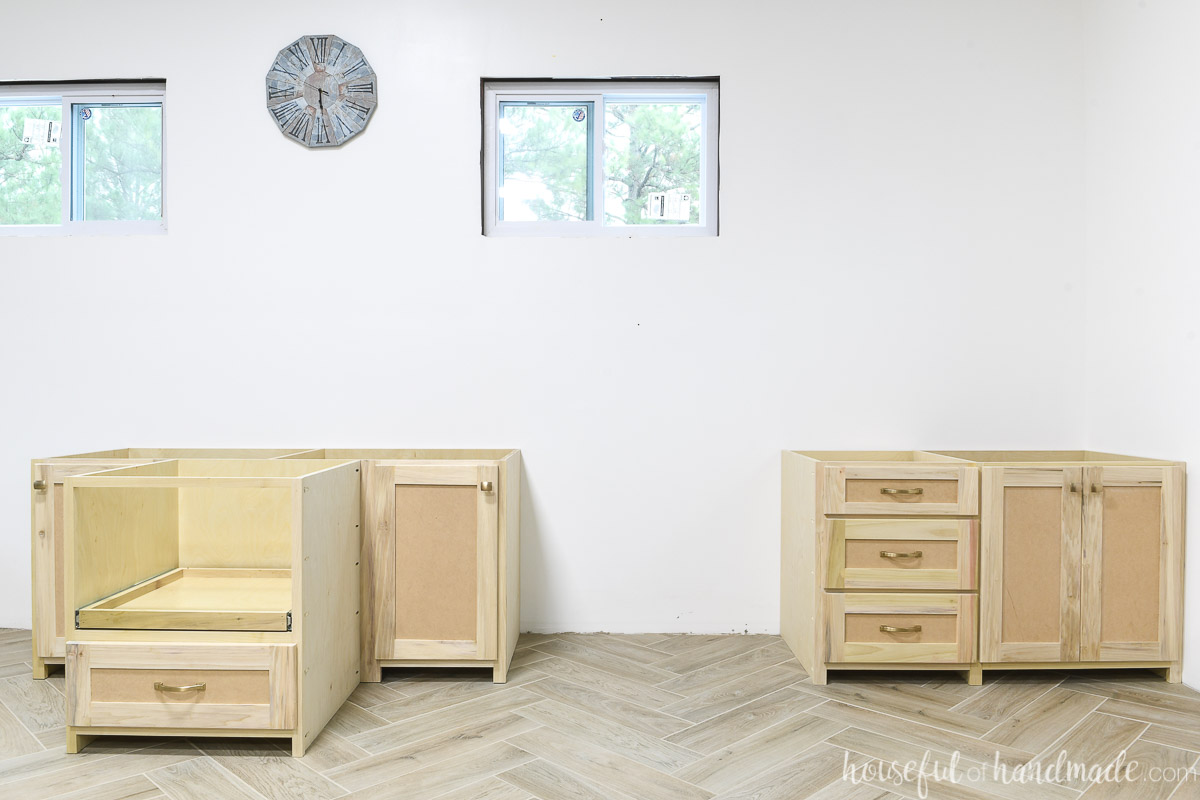
Now your first desk cabinet is done. Repeat for any other pieces.
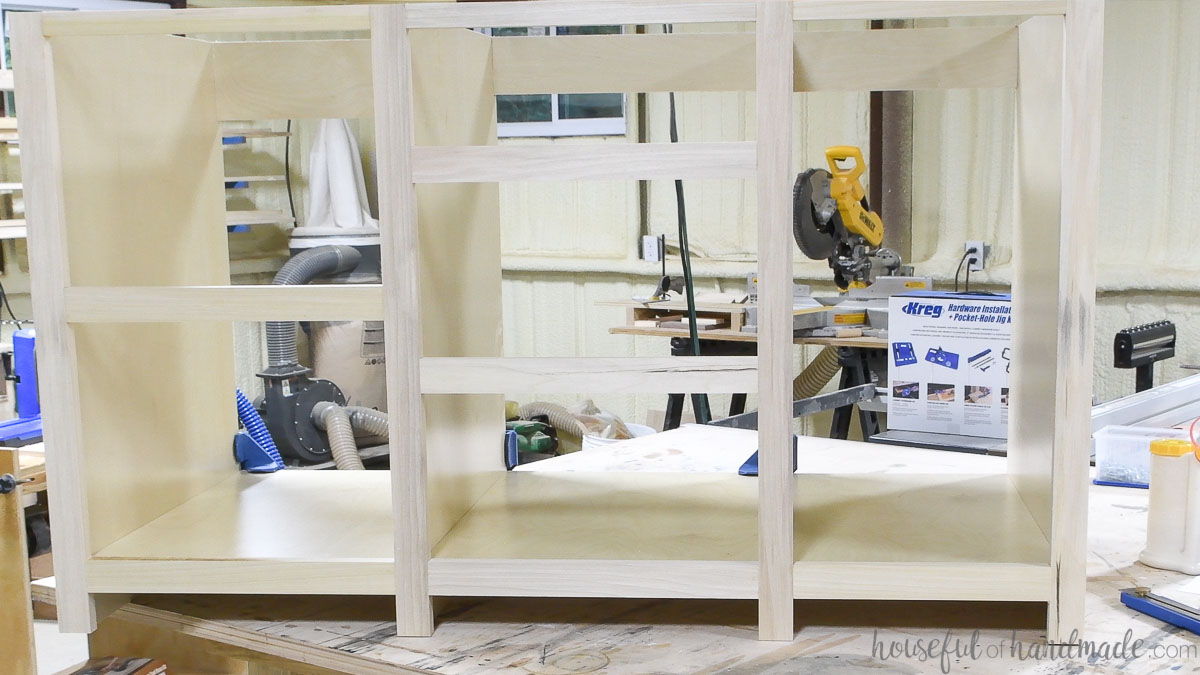
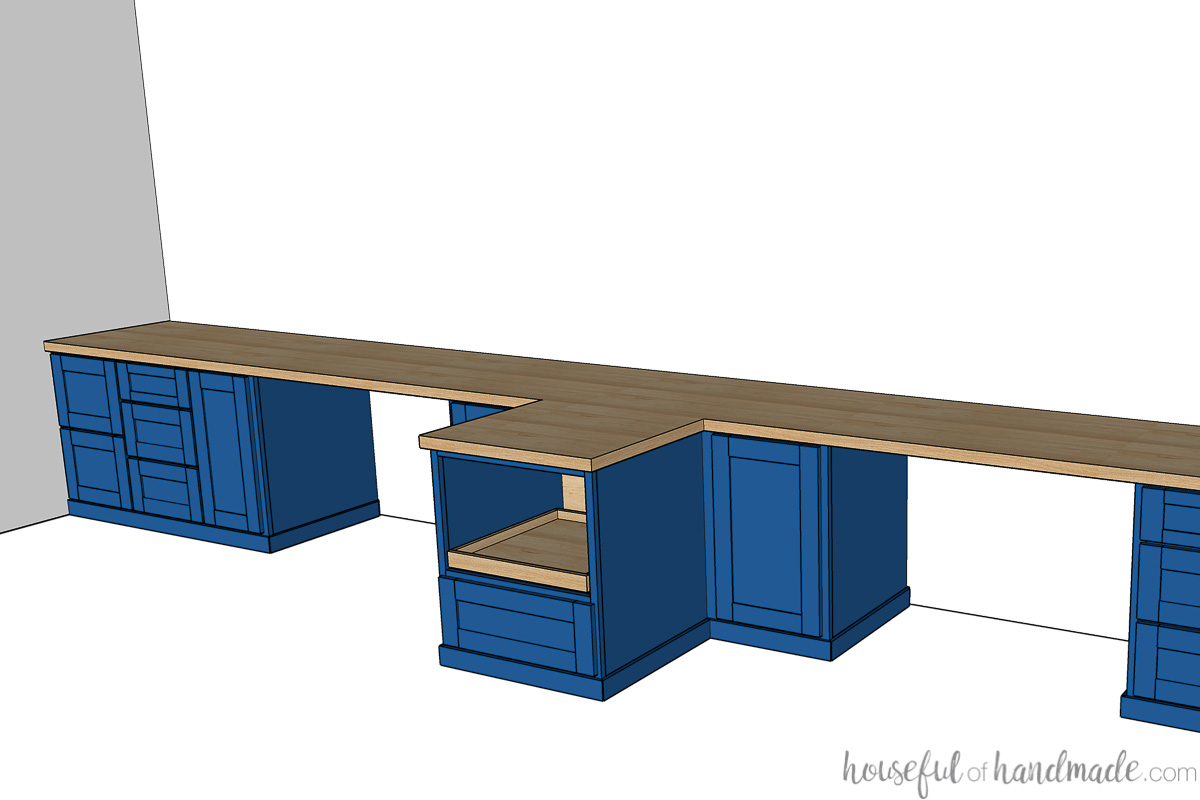
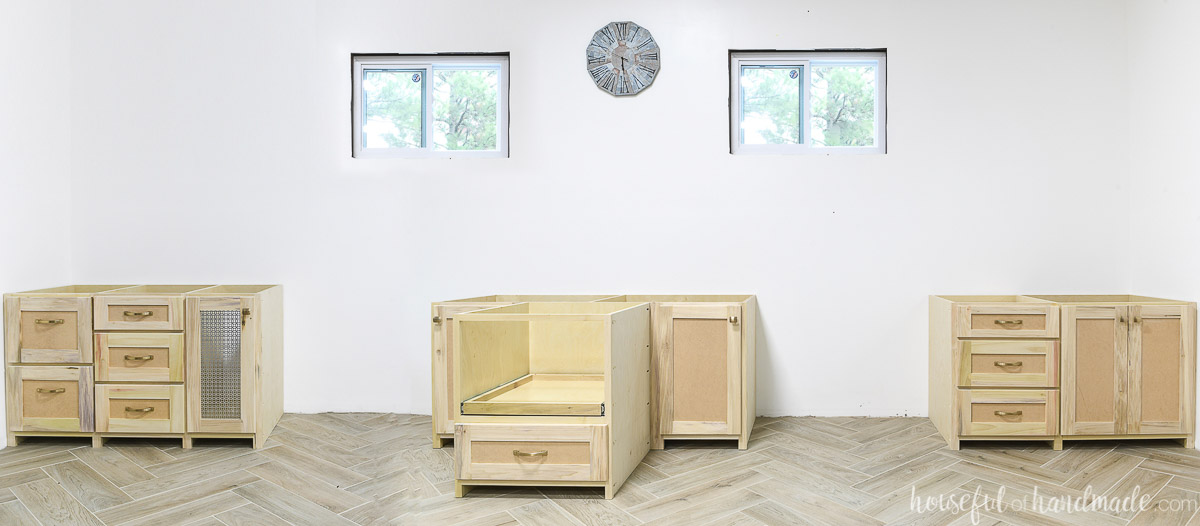
T-shaped Cabinet
For our center section I have a T-shaped cabinet.
The front cabinet will house the printer on a pull out shelf and the back area has two blind corner cabinets for lots of storage.
To build the face frame for the blind corner cabinets, a piece of plywood was cut the exact width of the assembled printer cabinet back (which is set in just under 1/4″ for the side panel).
The two face frames for the corner cabinets were attached to the edges of the plywood piece.
Then the rest of the cabinet was assembled on this face frame the same as the other cabinets.
Pocket holes were added on the back of the printer cabinet sides so once installed in the room, it could be attached to the back cabinet.
It will line up perfectly with the plywood piece between the face frames, which will also become the back of the printer cabinet.
Side panels will be added after install to hide the pocket holes and any visible seam where the two cabinets attach.
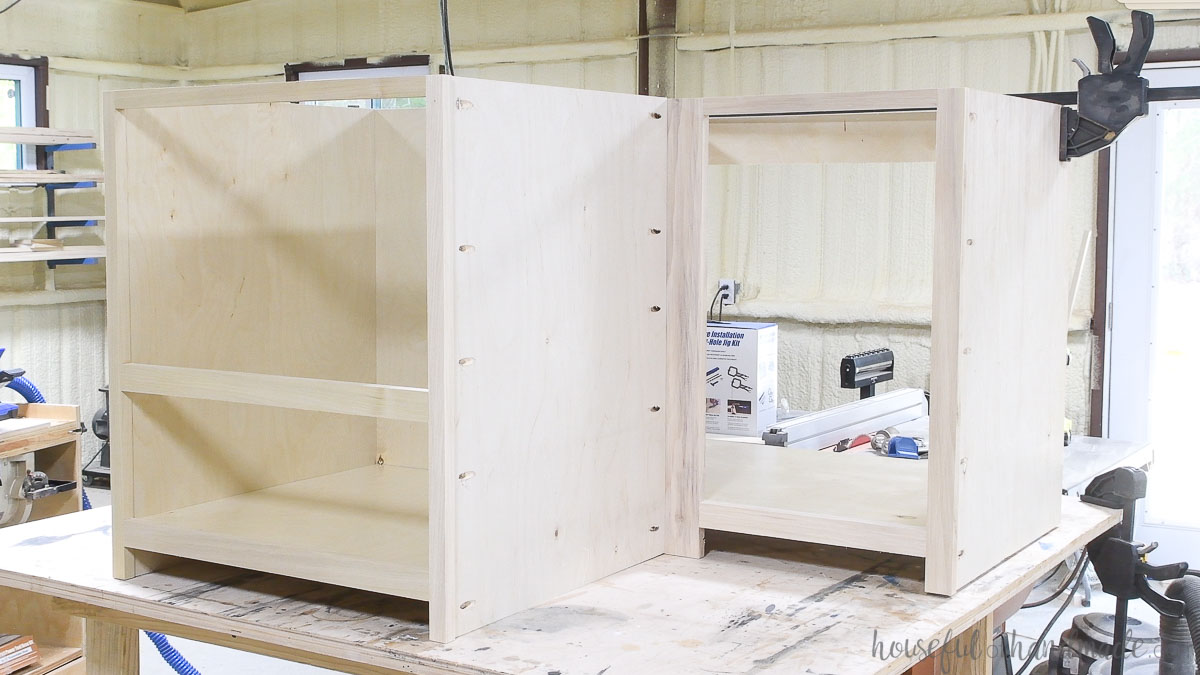
One note, any shelves added to the blind corner cabinet will need to be added to the cabinet before the desk top is installed. Otherwise it might be too challenging to get the large shelves inside the smaller opening.
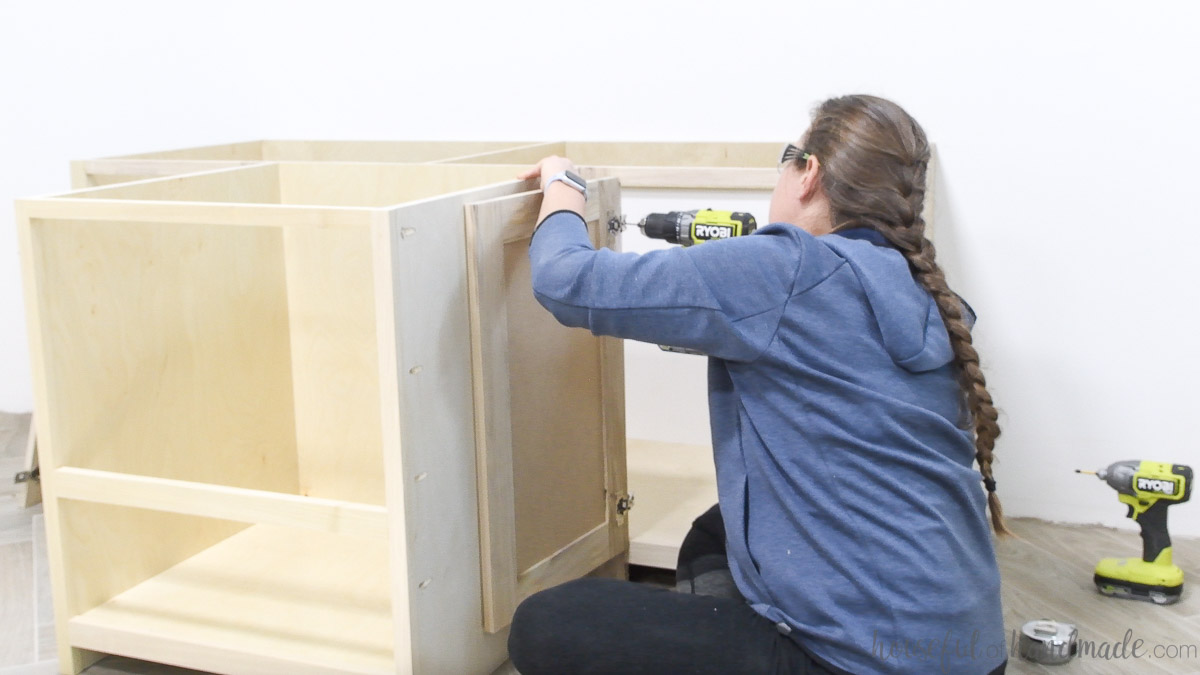
Install Desk Cabinets
Move the cabinet boxes into the space. Use shims to level them as needed.
If your walls are not straight (as most are not), scribe the face frame that touches the wall to get a clean fit. Or you can cover any gap with a corner trim piece.
Attach the cabinets to the wall through the support piece into wall studs.
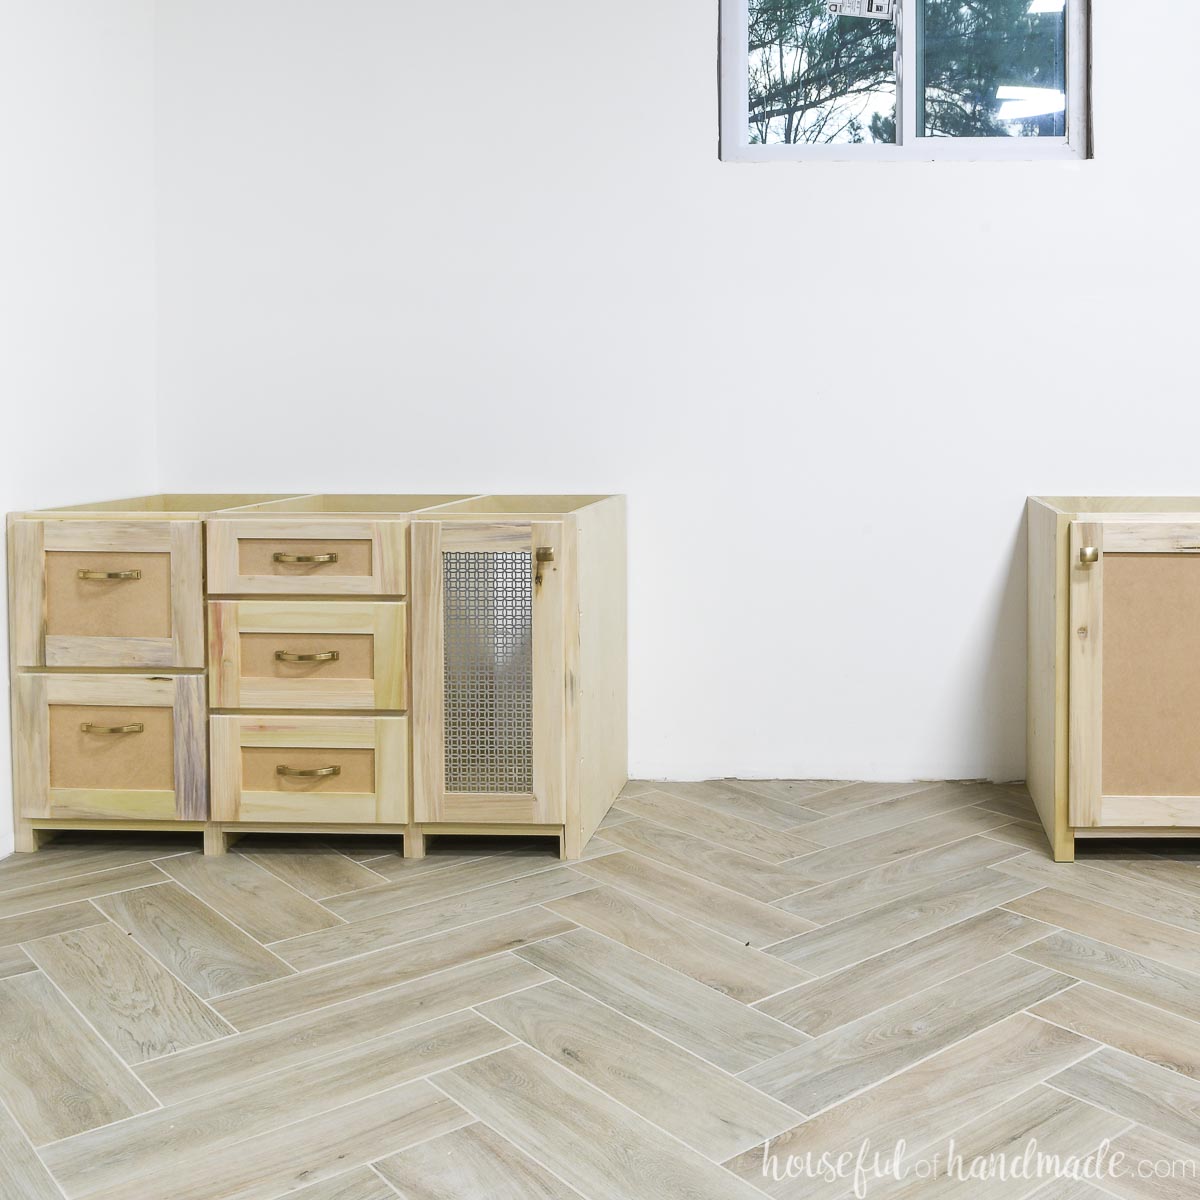
Build cabinet doors and drawer fronts
You can build you cabinet doors and drawer front however you want. I went with a simple shaker style drawer. Learn how to build easy DIY drawers here.
Since I am painting my drawers I use pocket holes to hold the drawer rails and stiles together with a 1/4″ MDF center panel installed in a routed out groove.
The face frame for the desk cabinet is 1 1/2″ so I used a 1/2″ overlay on all my cabinet doors and drawer fronts. This also made figuring out the door sizes easy, each one was exactly 1″ wider and taller and the cabinet opening.
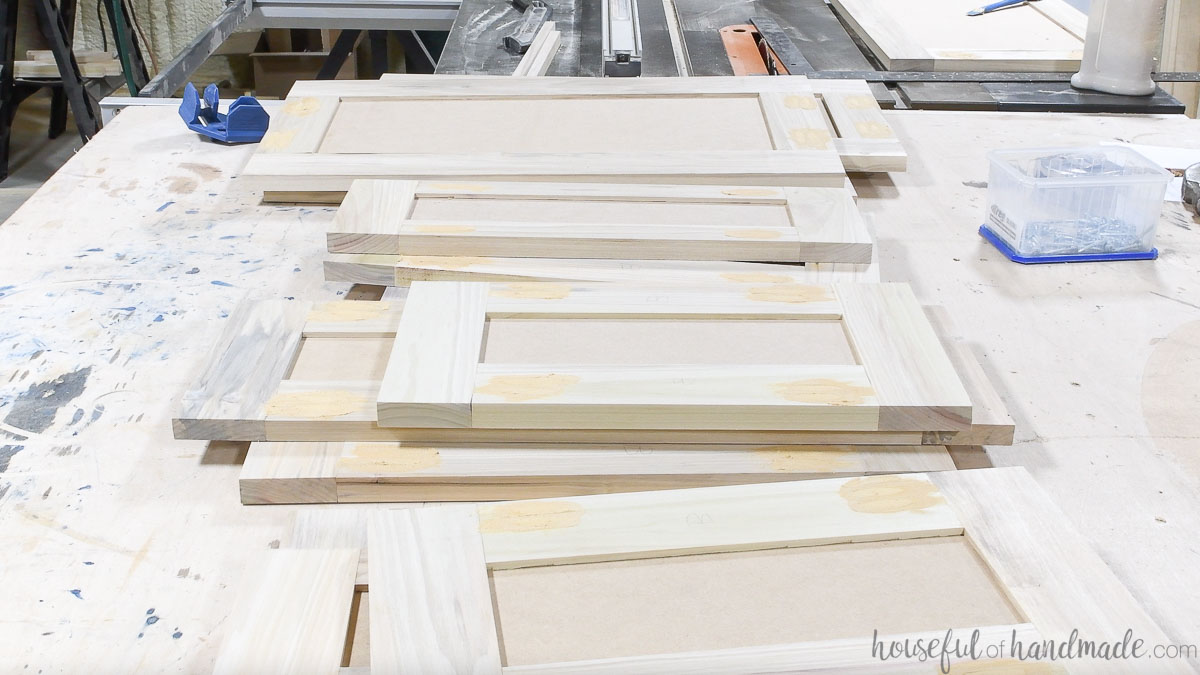
You do not need to have a router to make cabinet doors, my first cabinet doors for my mission style bathroom vanity were made with 1/2″ plywood and pocket holes.
I will not go into detail about how to build cabinet doors in this post, Check out the post detailing 3 ways to DIY cabinet doors, including the way I built them here and the no-router option.
After sanding the completed cabinet doors, I also added a small chamfer to the edges to give it a nice finished look.
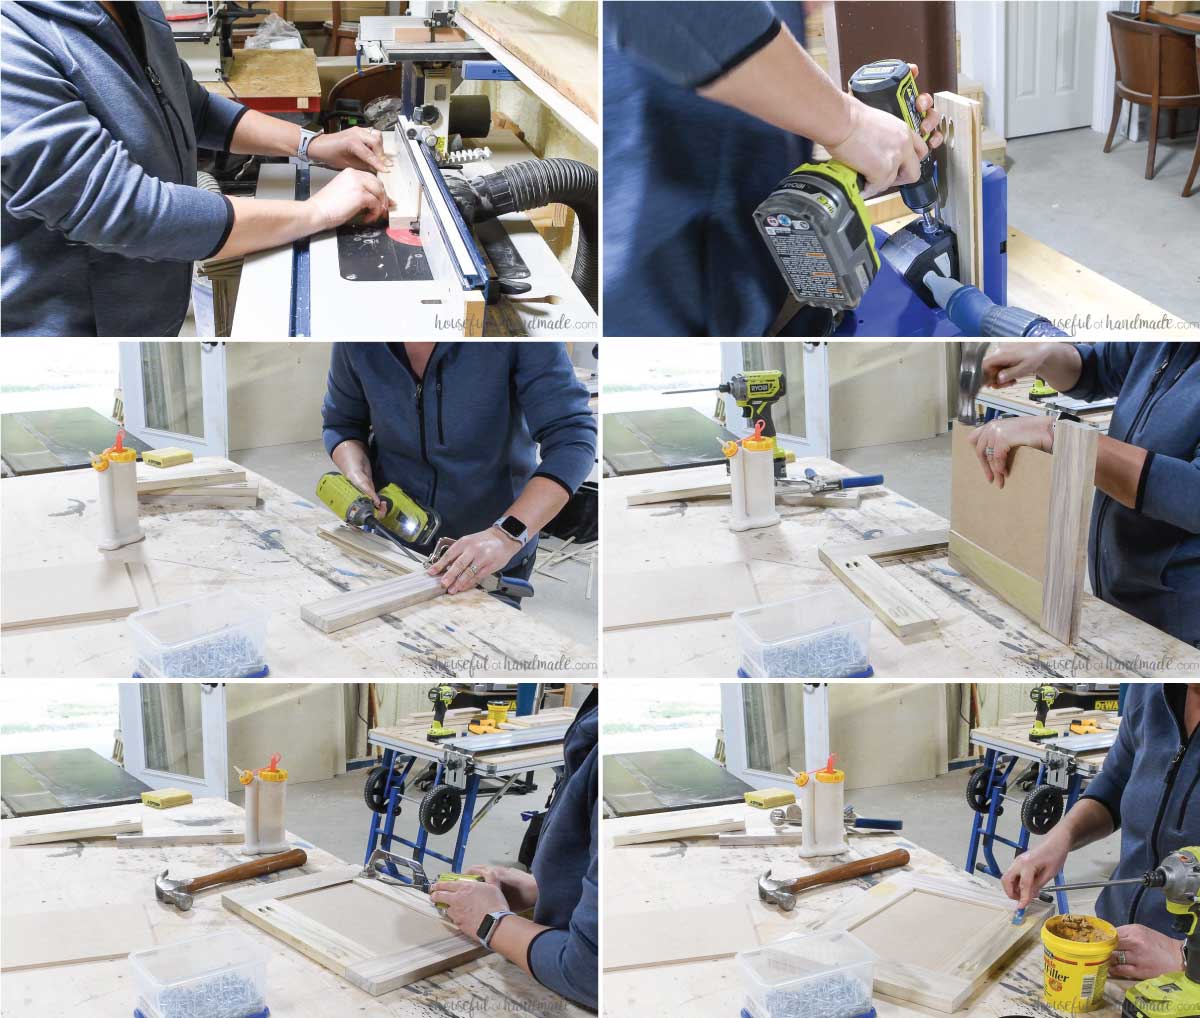
Add concealed hinges to cabinet doors
The Kreg concealed hinge jig makes adding concealed hinges so easy. All you need is a drill and the jig.
Set the gray depth stop on the edge of the jig to match the distance needed between the edge of the cabinet door and the hinge pocket according to your hinge instructions.
The numbers on the depth stop are in millimeters. Mine was set to 3mm for the 1/2″ Blum overlay hinges I used.
Clamp the jig to the cabinet door. Line up the measurement marks on the edge with the edge of the cabinet door at the distance you want. Mine was 3″ in from the edge.
With the drill bit in your drill, clip it into the jig and drill out the hole until it stops.
Unclip the drill bit but do not unclamp the jig yet.
Before unclamping, drill pilot holes in the holes on the jig for the hinge screws.
Then unclamp it and repeat for the other hinge.

Remove the sawdust from the pocket and place the hinge inside.
Secure with the screws into the predrilled holes.
Install doors and drawer fronts
To install your doors, measure and mark where the hole needs to be be predrilled to attach the cabinet door hinge.
With a 1/2″ overlay door and a concealed hinge set 3″ in from the edge of the door, the hole needs to be 2 1/2″ down from the cabinet door opening.
Then attach the door with the screw provided. And repeat for the bottom hinge.
Use the screws on the hinge to adjust your cabinet door.
Set the Kreg hardware jig for the spacing you want for your cabinet knobs.
For mine I chose a classic alignment. The knob is centered on the stile and in line with the bottom of the rail.
Drill the hole. Then attach the knob.
Repeat for all cabinet doors.
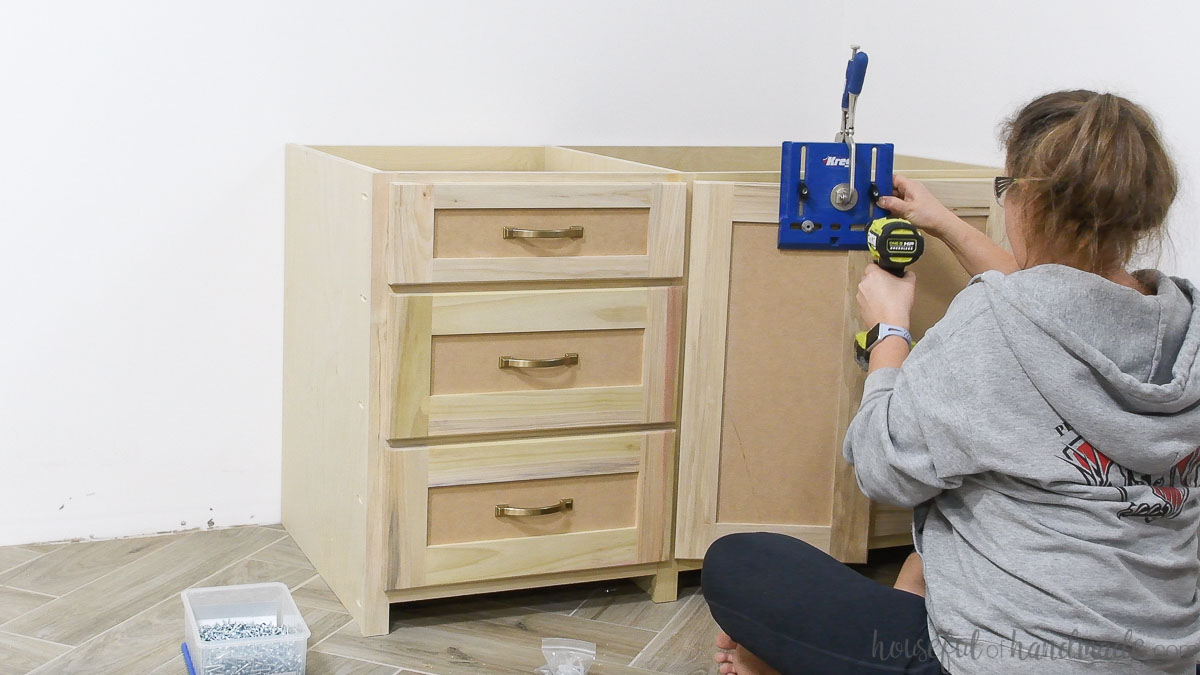
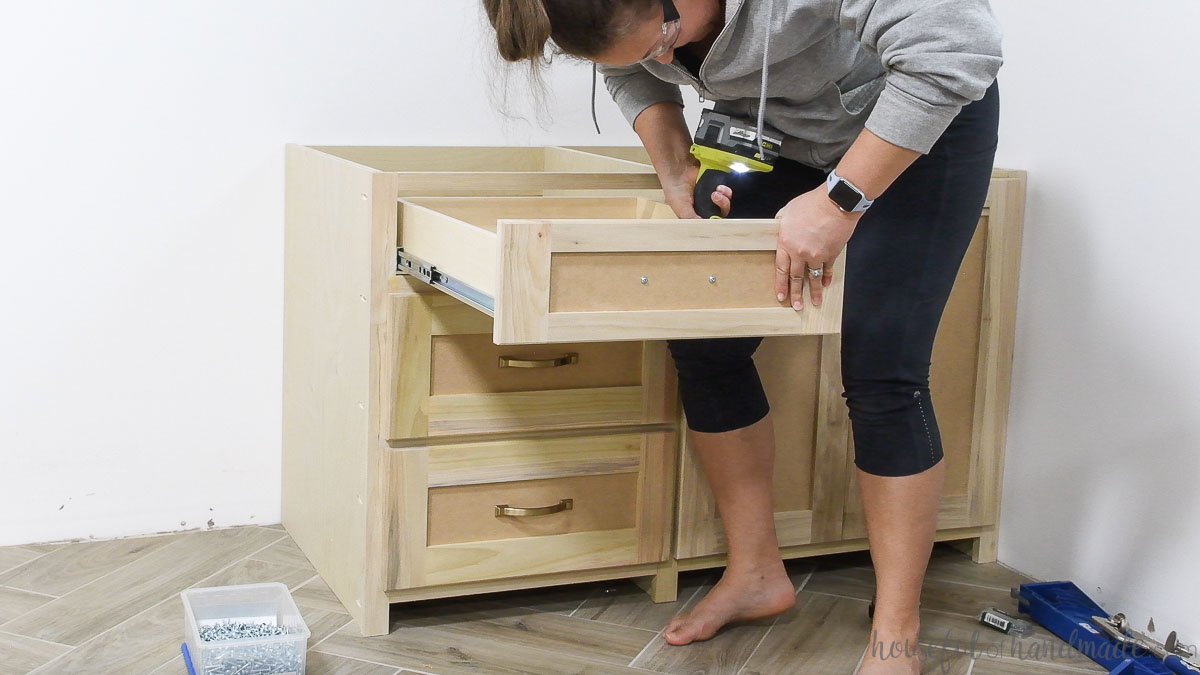
How to line up and install drawer fronts
Install the drawer boxes. You can read this post for tips and tricks on how to install drawers with ball bearing slides.
It can be a challenge to get perfectly lined up drawer fronts. But using the Kreg cabinet hardware jig can help!
Set the jig so the holes are the same width as the holes on your cabinet pulls. Set the depth to the desired depth. I like to center mine on my drawer fronts.
Clamp the jig centered on the drawer front . With the drill bit in your drill, drill a tiny indent to mark the placement of the hole, but don’t drill all the way through yet.

Line the drawer front up on your cabinet. Make sure to check the reveal all the way around the drawer.
Attach the drawer front to the drawer box with 1″ long screws through the indents that you made with the hardware jig. I like to use the Kreg pocket hole screws cause they are self-tapping.
With the drawer now attached and still perfectly lined up, open the drawer and attach the drawer front to the drawer box with four 1″ screws.
Make sure the screws go into the stiles of the door fronts since the center panel is too shallow.
Remove the two screws from the front of the drawer.
Reline up the hardware jig and drill holes through the drawer front and the cabinet box.
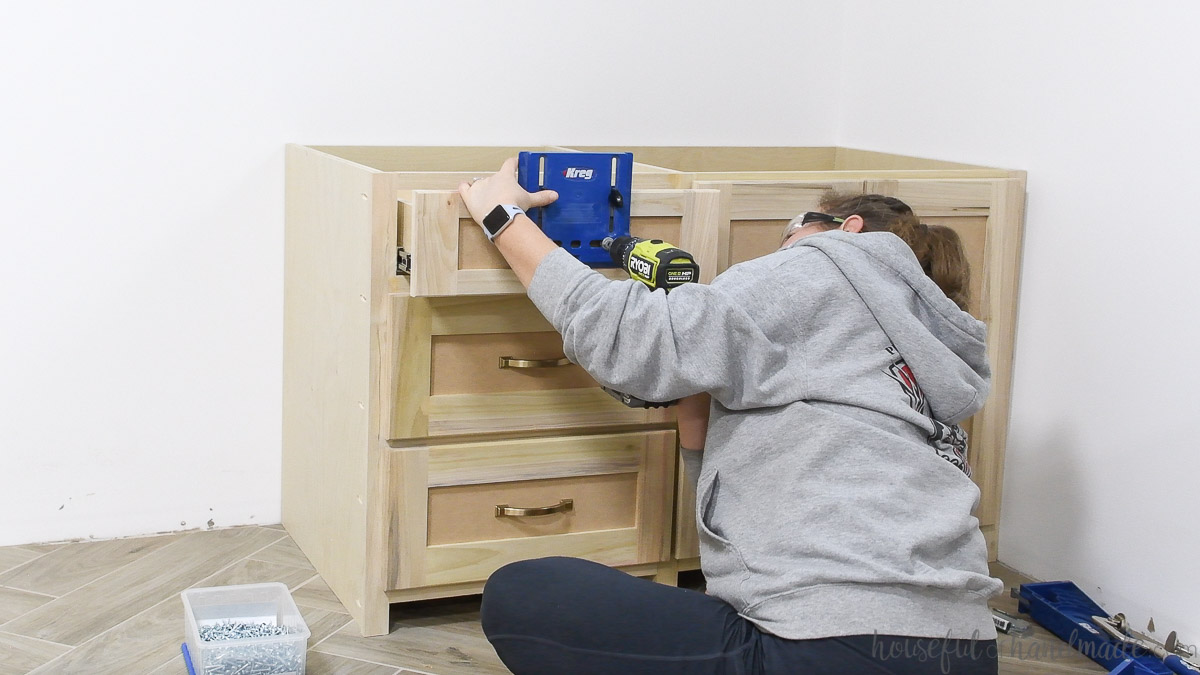
Attach the drawer pulls through these holes.
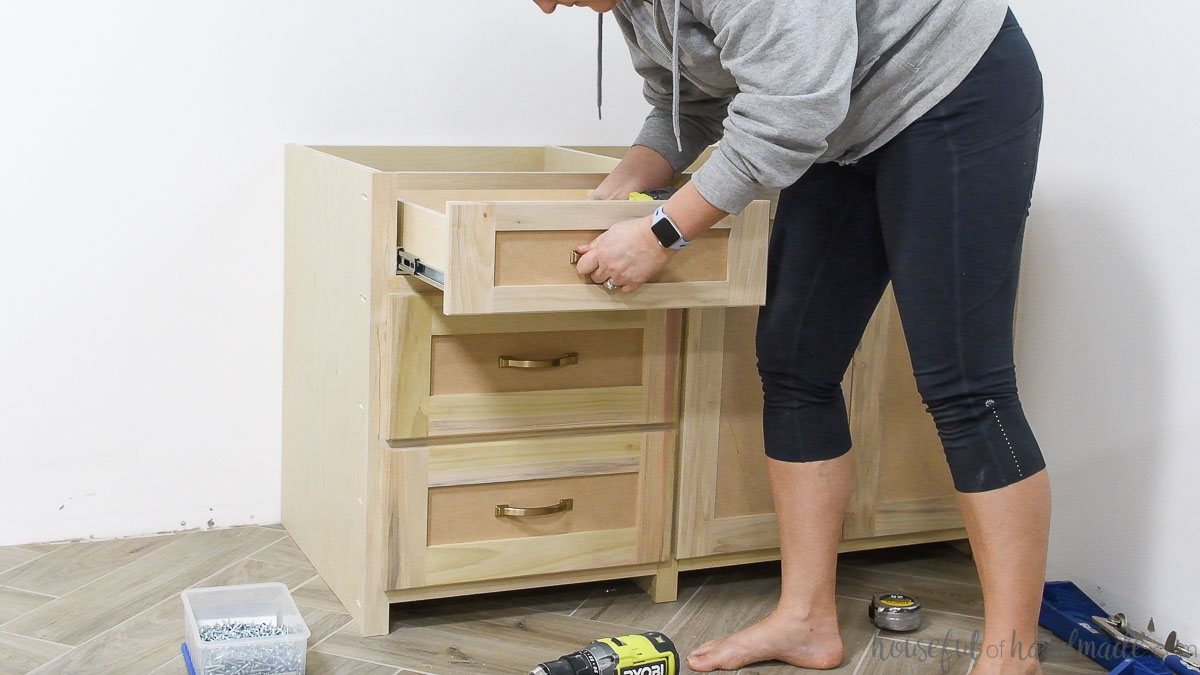
And now you have perfectly lined up drawer fronts.
This will work for any drawer, whether it is an overlay or inset drawer front. Whether is has a large or small overlay.
Now I know the desk is not finished. I need to cut panels for the sides of the desk cabinets to cover the exposed pocket hole screws.
And then I have to do the hard part… which is to decide what color to paint it and what kind of desk top I want. I can’t decide if I want to go classic white or go dark with a navy or charcoal???
You can use any countertop as the desk top. I am thinking of doing a wood desk top like I did for this DIY wood countertop in our kitchen or a very functional laminate countertop.
I will make sure to share no matter what I choose. You can sign up for my newsletter to be the first to see the final reveal.
But I wanted to get this post out to you fast so you can start working on your own DIY built in desk for the New Year too!
Happy Building!

Thank you to Kreg Tools for sponsoring this post. I only recommend products that I use and love and all opinions are 100% my own. Click here to read my full disclosure policy.