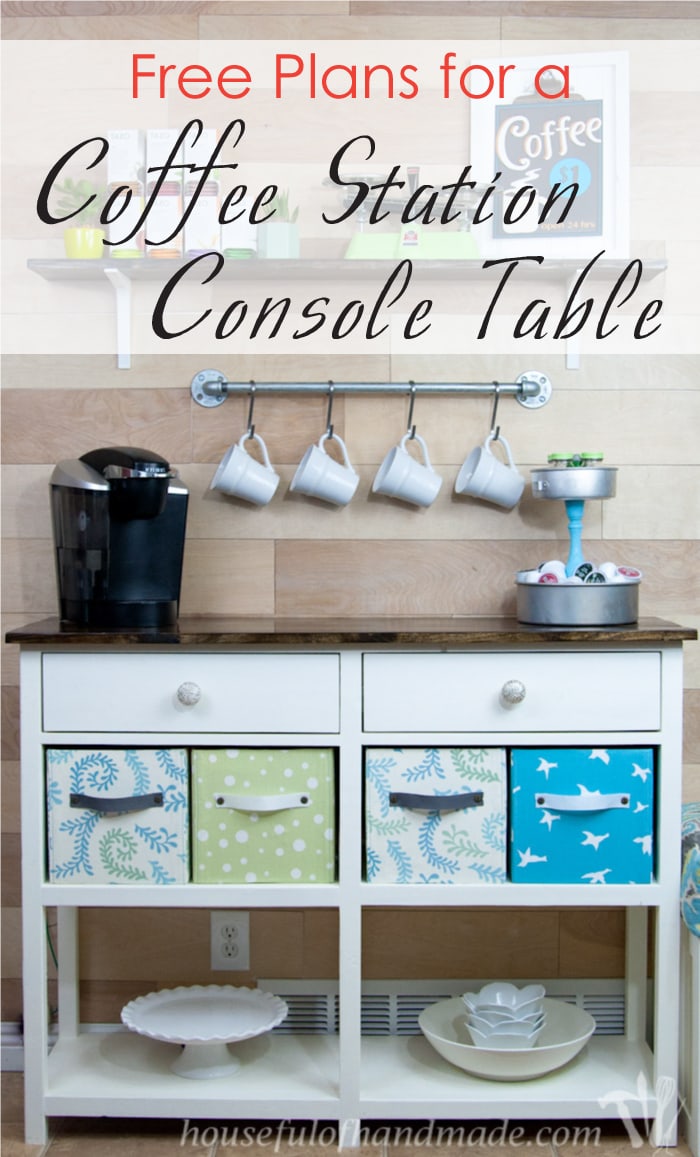
Add a coffee station to your kitchen with these easy coffee bar table woodworking plans.
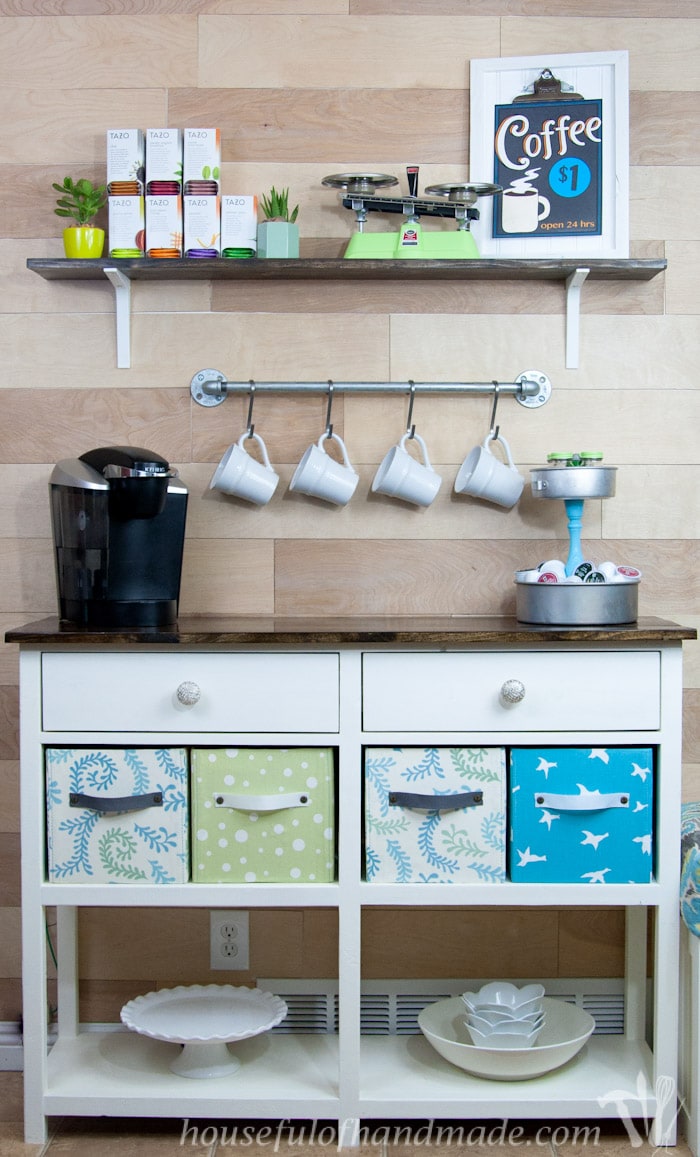
Creating a coffee bar instantly made our kitchen feel fancier! And it makes mornings easier because everything I need to wake up is in one place.
The heart of our coffee bar is the easy coffee bar table that I built myself. This was one of my first bigger builds. It is great for a beginner and will test your skills a little.
But when you are done, you will have an amazing console table that you can use anywhere in your home. I definitely suggest a fancy coffee station in your kitchen!
This post may contain affiliate links. As an Amazon Associate I earn from qualifying purchases. Click here to read my full disclosure policy.
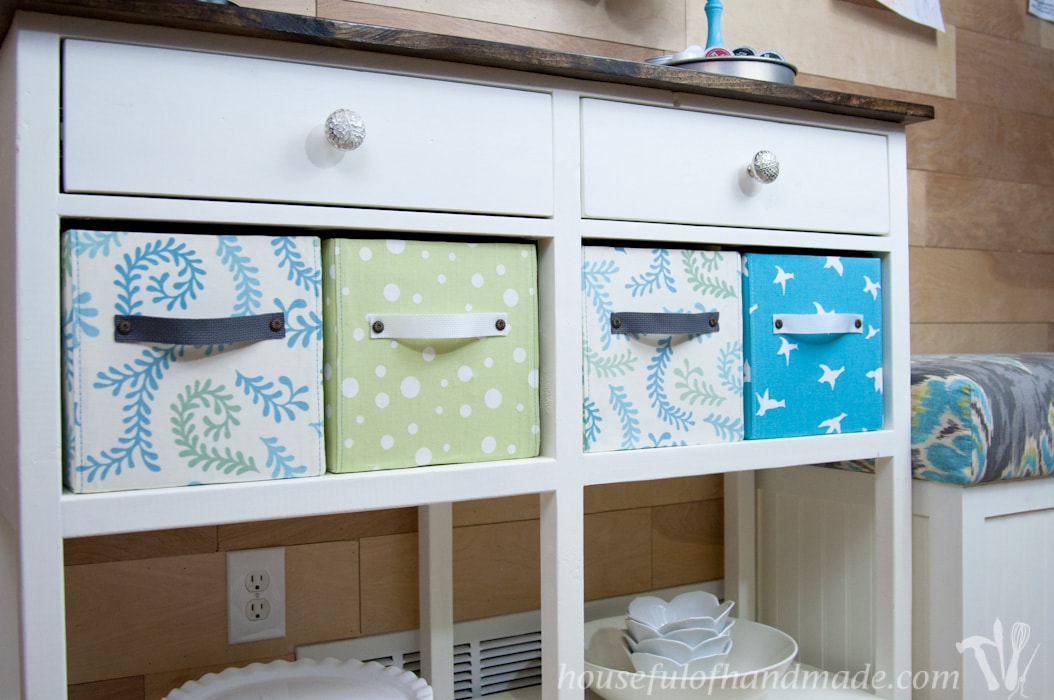
Console Table with Drawers
Adding storage to our coffee bar table was important! We needed a place to store all the coffee station accessories and more.
At the top of the coffee bar table are 2 drawers. These are perfect for holding extra K-cups, utensils, and more.
If you are new to making your own furniture, don’t stress about these drawers. I have a post on how to make and install drawers to help you succeed!
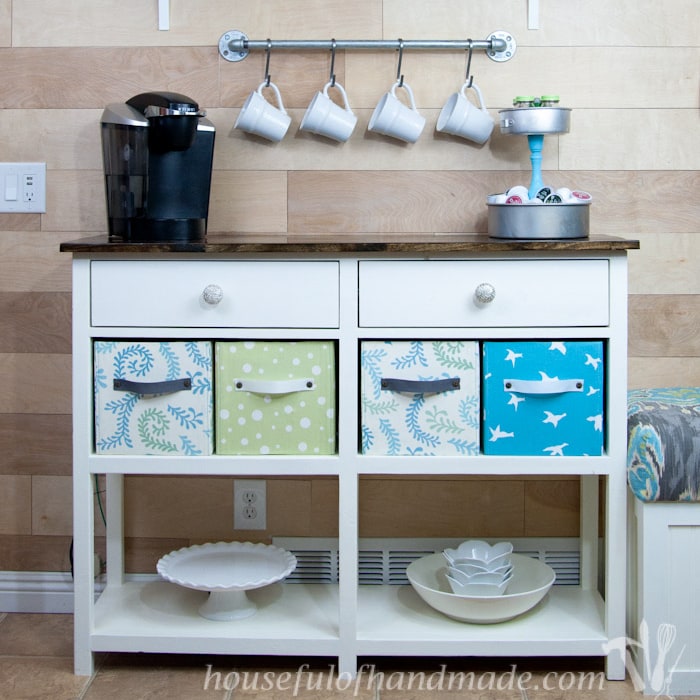
Coffee Bar Table with Lots of Storage
Under the drawers, I created even more storage on the top shelf with DIY fabric storage boxes. I cut down the boxes so they fit perfectly into the console table.
These pretty boxes add even more storage to the coffee bar! We buy our K-cups in bulk (I never want to run out of coffee) and can store it all here for easy refilling.
And there is still room for overflow storage of lesser used kitchen items.
On the bottom of the console, there is an open shelf. Perfect for displaying dishes, decor and more!
We just love this console and all the storage it offers in our dining room.
How to Build a Coffee Station Table
Tools Needed:
- Miter saw
- I recently upgraded to this larger sliding miter saw (watch for it to go on sale), but this project was built with this inexpensive miter saw that I loved.
- Circular saw with straight edge or guide track
- Pocket hole jig
- Kreg Adaptive Cutting System (ACS)
- Drill
- Impact driver (optional, but I love not having to switch bits with the drill)
- Finish nailer
- Sander
Supplies:
- Wood products-
- (5) 8′ long 2×2 boards
- (1) 8′ long 1×2 boards
- (2) 8′ long 1×6 boards
- (2) 8′ long 1×12 boards
- (2) 8′ long 1×4 boards
- 2′ x 4′ piece of 1/4″ plywood
- 1 1/4″ pocket hole screws
- 2 1/2″ pocket hole screws
- 2″ finishing nails
- Wood filler
- (2) 12-Inch Full Extension Drawer Slides
- (2) Drawer knobs or pulls
You cannot buy 2×2 boards in the whitewood boards at the big box hardware store, only the cheaper furring strips. I bought the furring strips and I ended up fighting them the entire time.
They did work out (as you can see) but next time I need 2x2s I will buy 2x4s and rip them down to size with my table saw. Then I can guarantee straight boards with nice corners instead of the rounded corners of the furring strips.
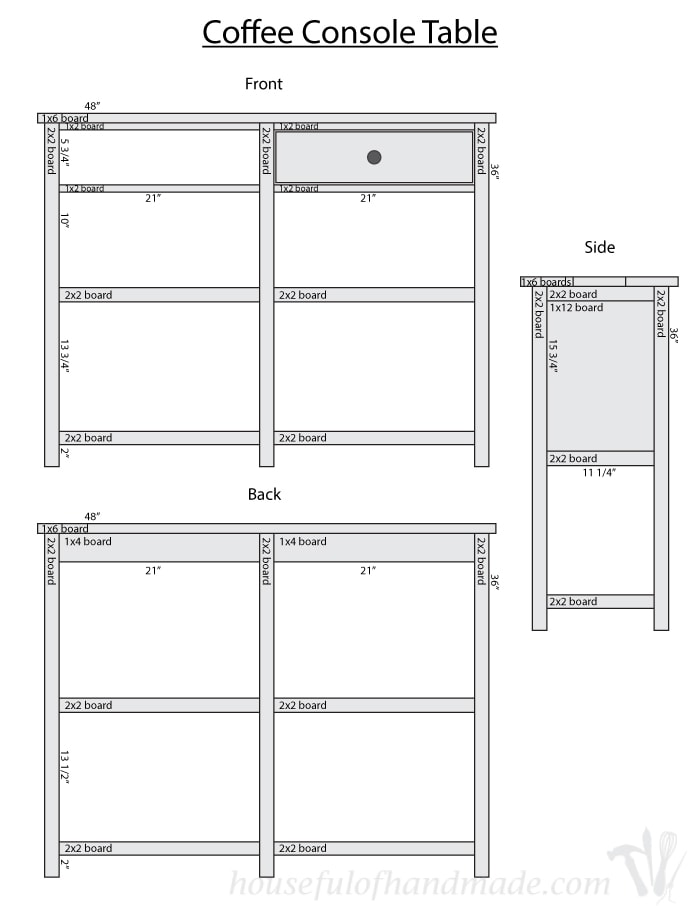
Cut List:
- From the 2×2 boards cut-
- 6 @ 36″ long for the legs
- 8 @ 21″ long for the shelf edging front & back
- 6 @ 11 1/4″ long for the shelf edging sides
- 1 @ 11 1/4″ long for the drawer slide support
- From the 1×2 boards cut-
- 4 @ 21″ long for the front supports around the drawers
- From the 1×4 boards cut-
- 2 @ 21″ long for the back supports
- 4 @ 18 1/2″ long for the drawer box front/back
- 4 @ 12 1/4″ long for the drawer box sides
- From the 1×6 boards cut-
- 3 @ 48″ long for the console top
- 2 @ 20 3/4″ for the drawer fronts
- From the 1×12 boards cut-
- 2 @ 43 1/2″ long for the shelves
- 2 @ 15 3/4″ long for the sides
EXPERT TIP:
I do not recommend cutting all the pieces before you start building. It is better to cut as you go and double check your measurements before cutting. Boards are not always exactly the size they are suppose to be.
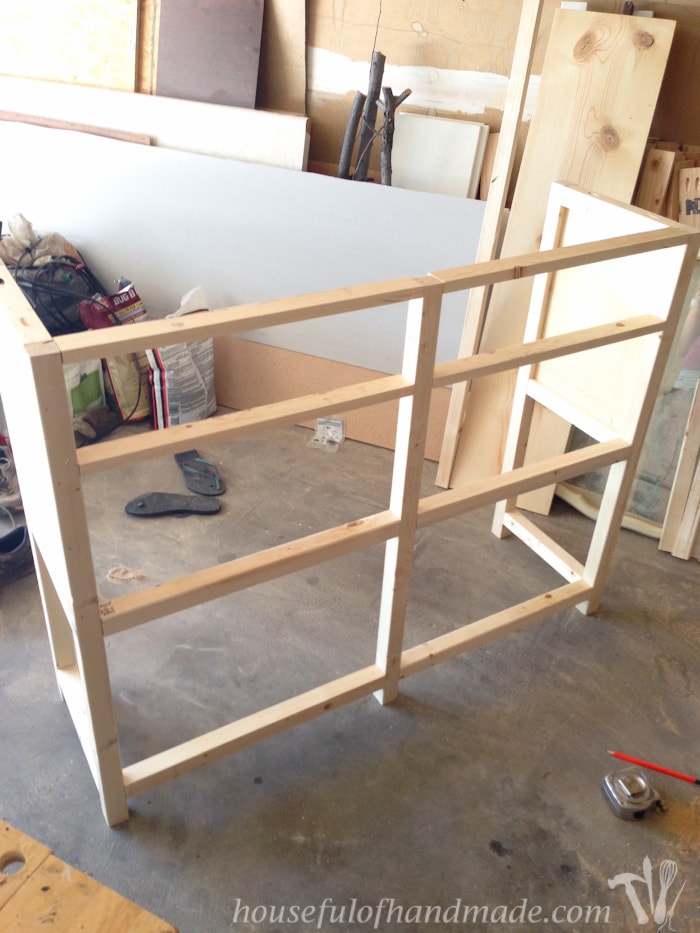
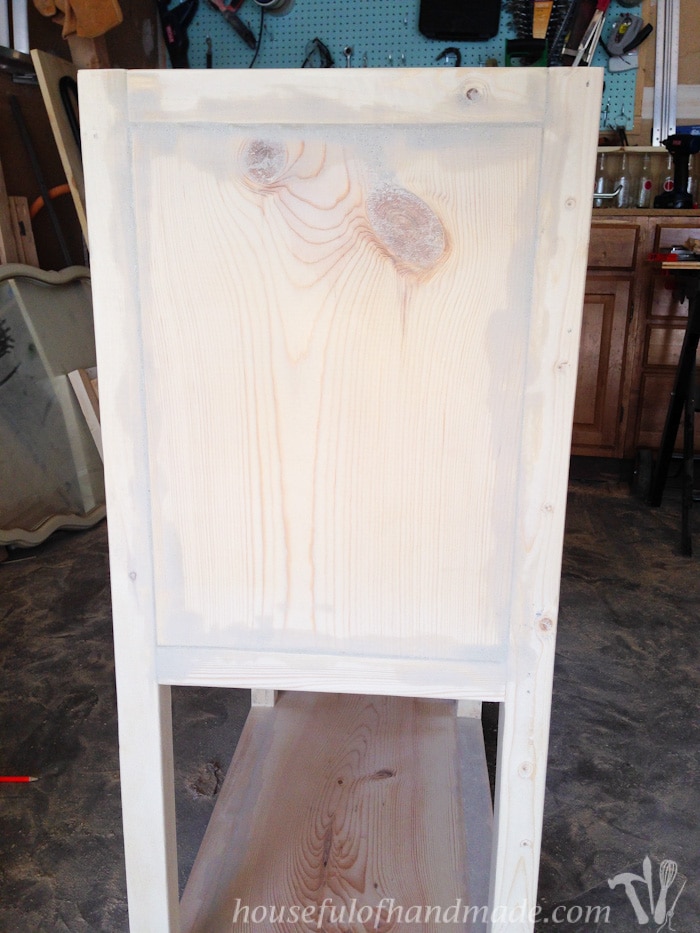
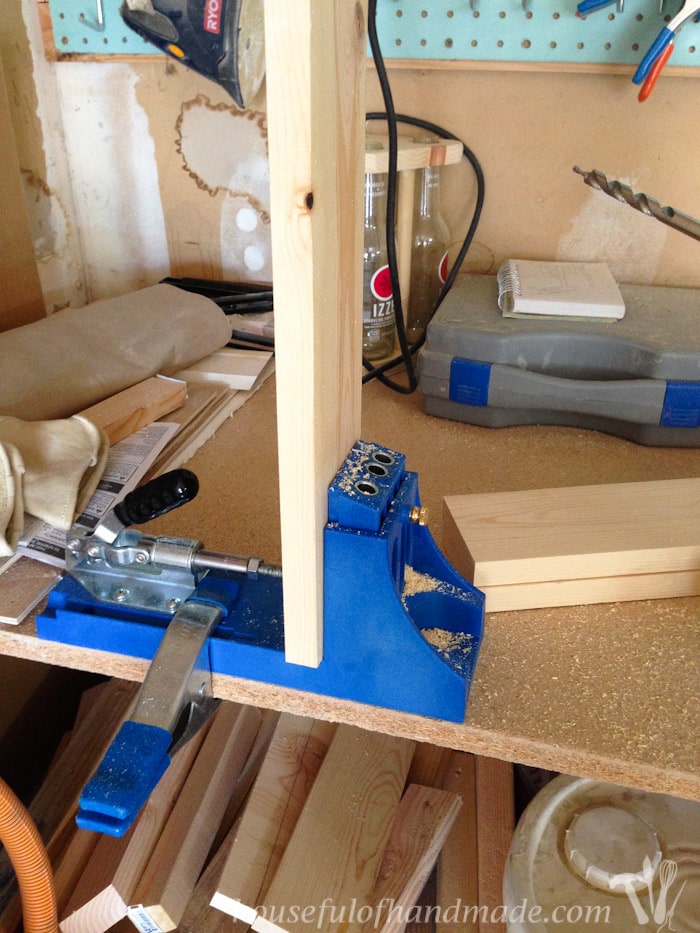
STEP 1- Build the sides
Set your pocket hole jig for 1 1/2″ thick material. Drill pocket holes on each end of the shelf edging side boards.
Using wood glue and 2 1/2″ finishing nails, secure a shelf edging side board between two leg boards to the top.
Fit the 1×12 side piece in between the legs and flush with the top piece. Secure with wood glue and finishing nails.
I made the outside of the console flat by pressing the 1×12 board flat to the outside, I would not recommend this because I had to put additional boards inside the console to secure the drawer glides. And the outside will look nice without it being flat too.
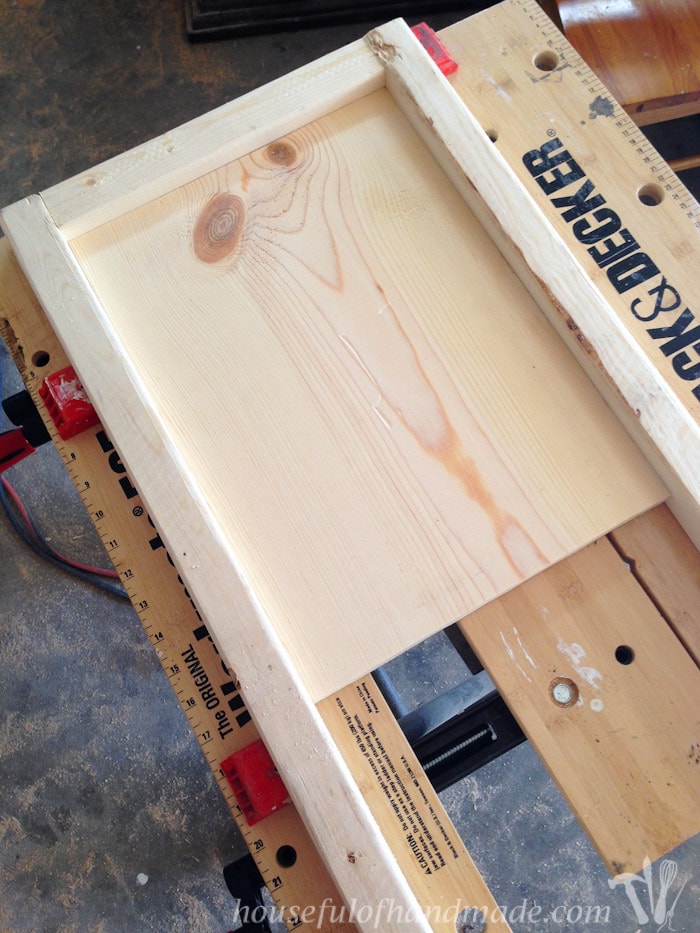
Add another shelf edging board flush with the 1×12 side board and secure with glue and 2 1/2″ pocket hole screws.
Then measure 2″ from the bottom and secure the remaining shelf edging board so the bottom is at the 2″ mark. This will give you a 2″ gap under your console table. Adjust if you want a large space.
Then repeat so you have two matching sides.
At this point you may want a second pair of hands. I did not and ended up like this! I also would not recommend building furniture in flip flops.
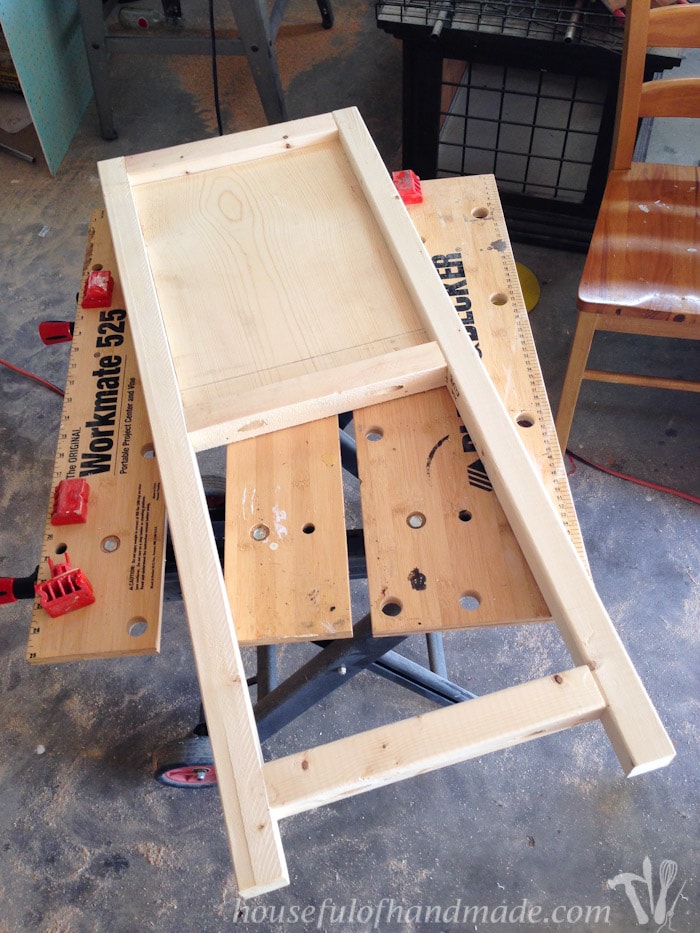
STEP 2- Build the front frame
Set your pocket hole jig for 3/4″ thick material. Drill pocket holes in both sides of the front supports around drawers pieces.
Attach two front support pieces to a leg piece so they are flush with top creating a T. Secure with wood glue and 1 1/4″ pocket hole screws.
Measure down 5 3/4 inches from the bottom of the top boards. Secure two more front support pieces so the top is at this mark. Secure with glue and 1 1/4″ pocket hole screws on the under side of the 1×2 boards .
Then attach the other side of the front support pieces to the side pieces. Secure with 1 1/4″ pocket hole screws and glue.
Next drill pocket holes set for 1 1/2″ thick material in the sides of the shelf edging front pieces.
Attach the boards so they line up with the boards on the sides. Use 2 1/2″ pocket hole screws on the underside of the 2×2 boards to secure.
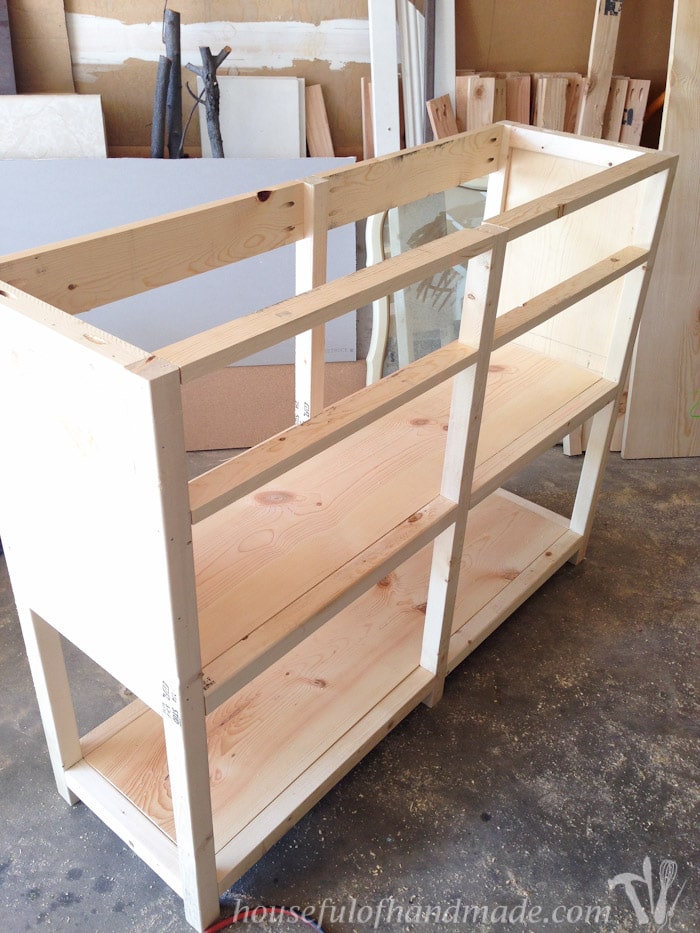
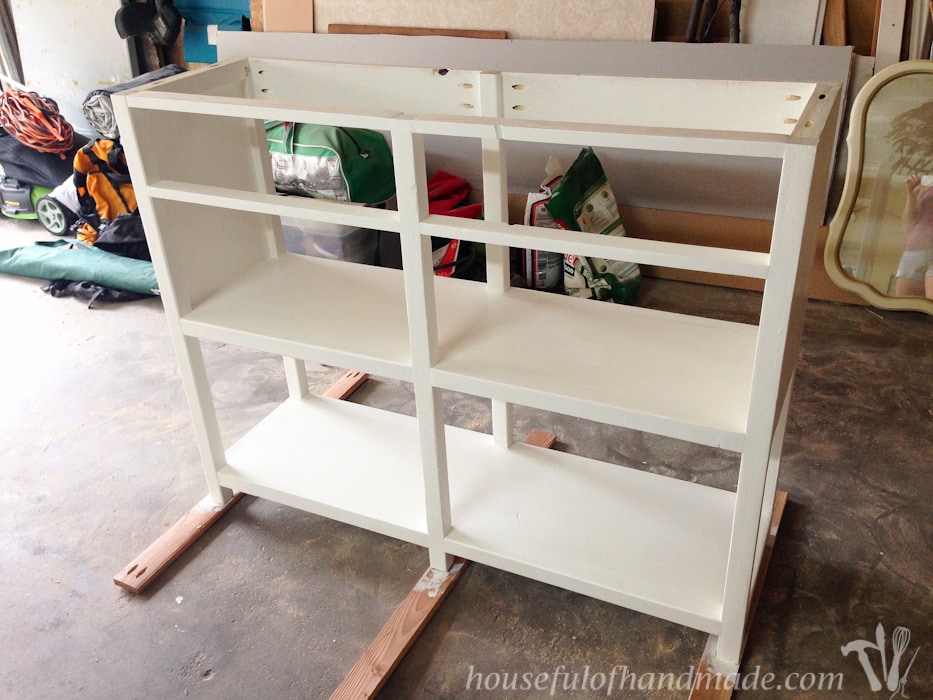
STEP 3- Attach the shelves
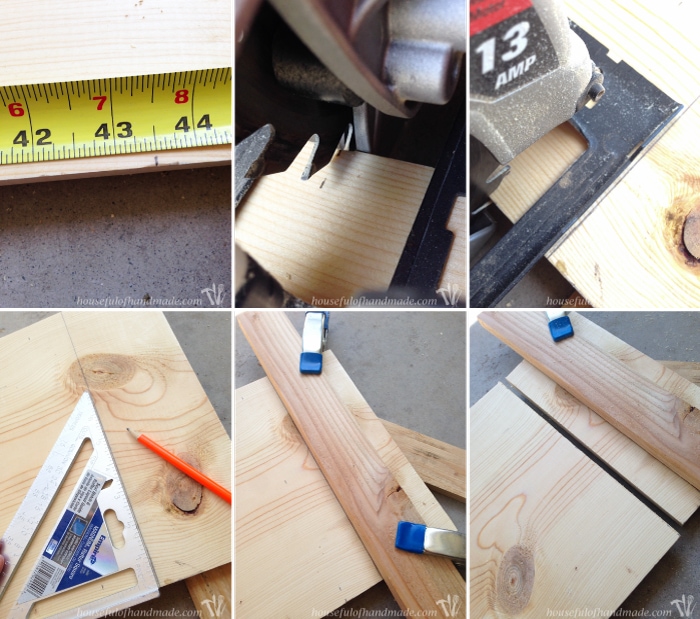
Use a circular saw to cut the 1×12 boards for the shelves.
Getting straight lines with a circular saw can be a headache, especially to someone new to woodworking. This is how I like to get perfectly straight lines:
- Start by marking your measurement.
- Then line up your blade on the line that you need to cut on. I always line the blade up to the outside of the measurement mark so I don’t end up slightly shorter because the saw cuts out the width of the blade (called kerf).
- Once the blade is lined up, draw a line on the side of the saw guide.
- Draw a perfectly straight line on the new line you marked. I use a carpenters square to help with this.
- Then clamp a straight board to the line.
- Cut the board by using the clamped wood as a guide for your saw. Now you have a perfectly straight line!
Drill pocket holes set for 3/4″ thick material around the perimeter of the shelf boards.
Attach the shelves so they are flush with the top of the 2×2 shelf edging boards. Secure with wood glue and 1 1/4″ pocket hole screws from underneath the shelves.
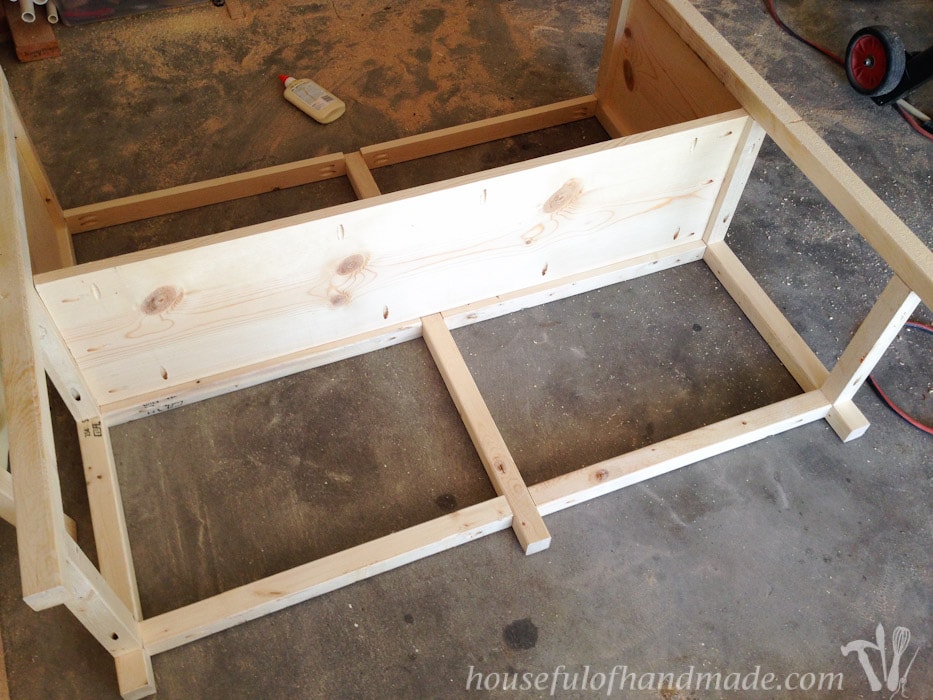
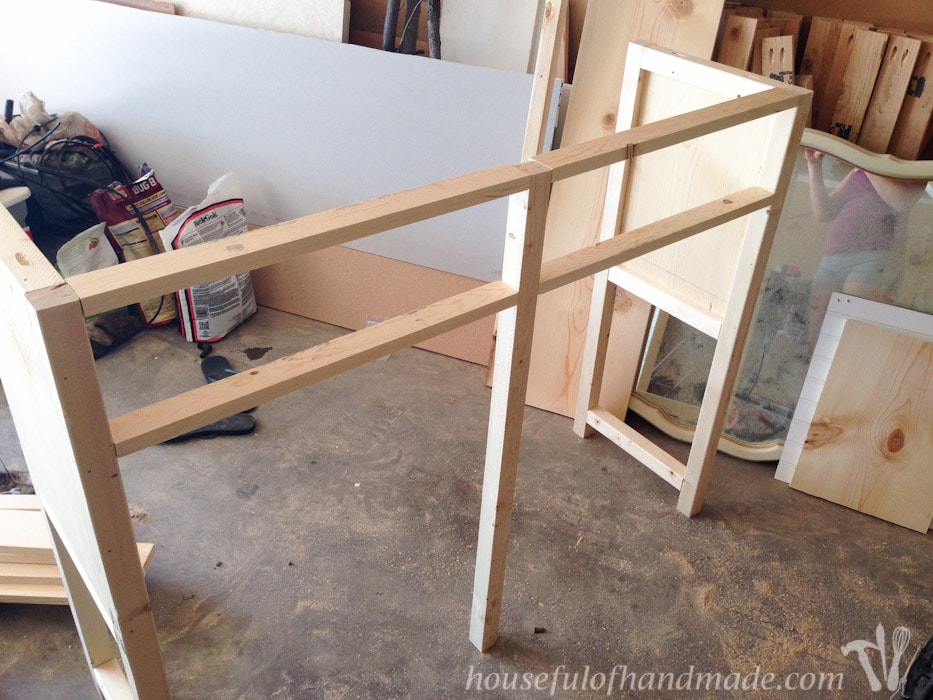
STEP 4- Finish off the back
Once you’ve got both shelves secured, you can stand the console up again and add the back.
Drill pocket holes set for 3/4″ thick material in both edges of the back support pieces.
Attach these to the top of the last leg piece so they are flush with the top and the back of the leg. Secure with 1 1/4″ pocket hole screws and glue.
Then secure them to the sides the same way.
At this point you also will want to attach the drawer slide support 2×2 board between the two center legs in the center of the drawer opening. This is needed to be able to attach the drawer slides. I did not do this and had to secure it later.
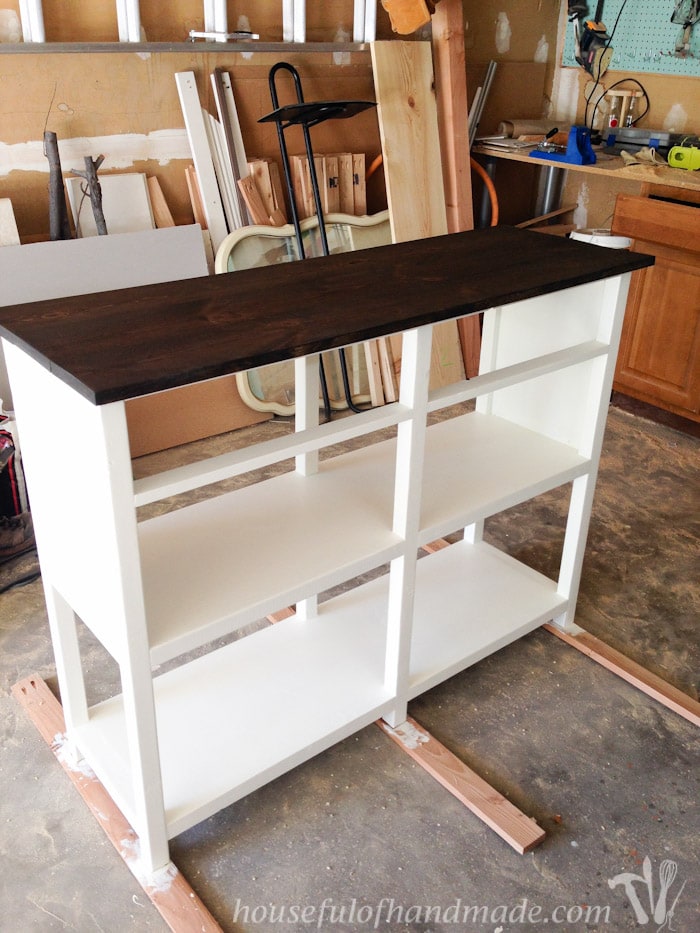
STEP 5- Finish the coffee bar table
Now it is time to fill any nail holes and visible pocket holes with wood filler.
I also decided to fill the grooves that were left on my shelves and the sides of the console because my 2x2s had curved corners. You can save yourself a lot of hassle by using better 2×2 boards!
Once all the wood filler is dry, give it all a really good sanding. For rougher boards, start sanding with a 60 or 80 grit sandpaper. Then step down to 100, 150, and finish with 220.
The extra sanding can make your cheap wood look great once painted!
Now you can paint your new coffee station table. I applied 3 coats of a soft white paint, the same color I painted our built in bench.
I have learned a lot about finishing my pieces since this project. You can read about how to get a smooth professional paint finish to really make your new project shine.
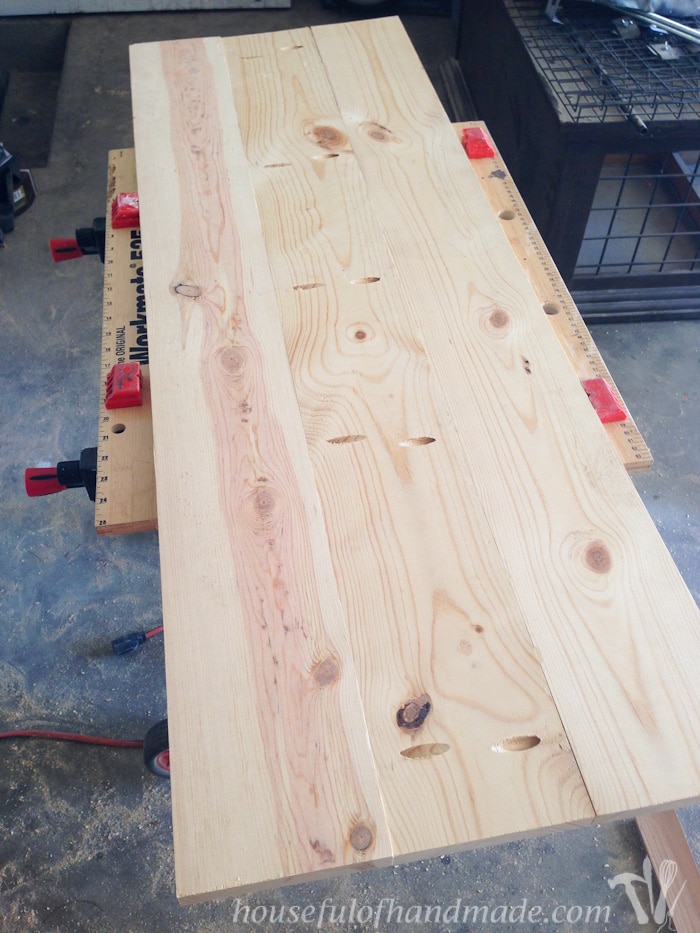
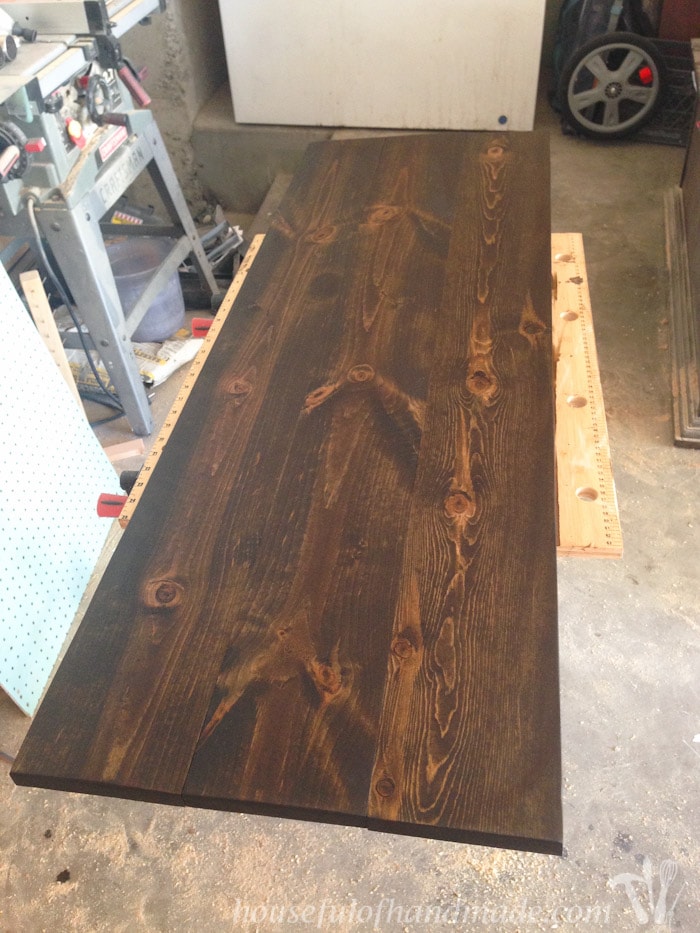
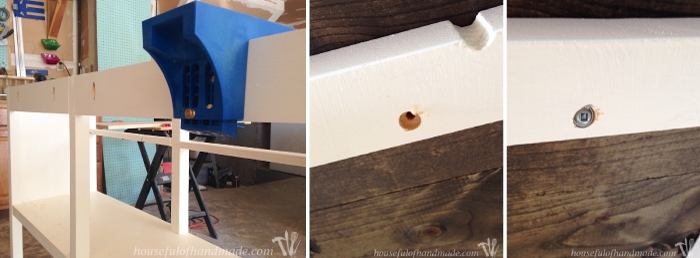
STEP 6- Build the table top
While the paint was drying, it was time to build the top. I chose to built the top, and stain it before attaching it to the console.
Drill pocket holes set for 3/4″ thick material on both sides of the center top board. You need pocket holes every 6-8 inches for a secure top.
Add wood glue along the sides. Clamp the boards flat when securing them so the top comes out smooth.
Then sand and apply the wood stain.
Once the stain is dry, protect the top (especially important around water like out coffee bar) with polyurethane. I added 1 coat on the entire piece (top/bottom/sides) before attaching it to he base.
Drill a couple pocket holes set for 3/4″ thick material on the back of the 1×4 back boards boards. Also drill a couple counter sunk holes in the 1×2 drawer support boards.
Center the top on your coffee bar table and secure with screws.
Apply the remaining 2 coats of polyurethane on the top and sides of the top.
I wouldn’t recommend less than 3 coats of polyurethane for something that is used in the kitchen.
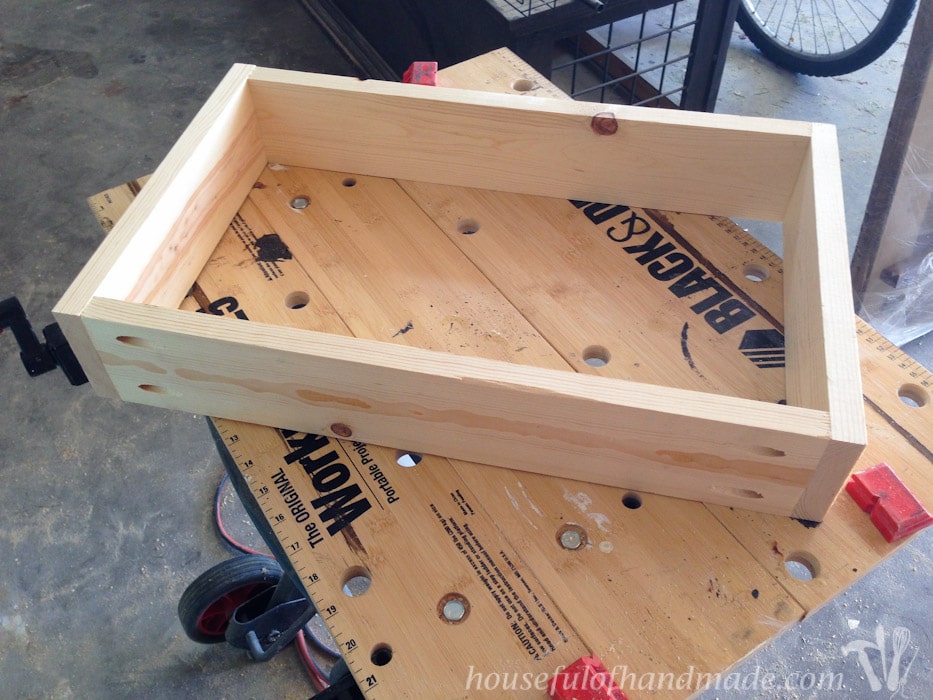
STEP 7- Build the drawers
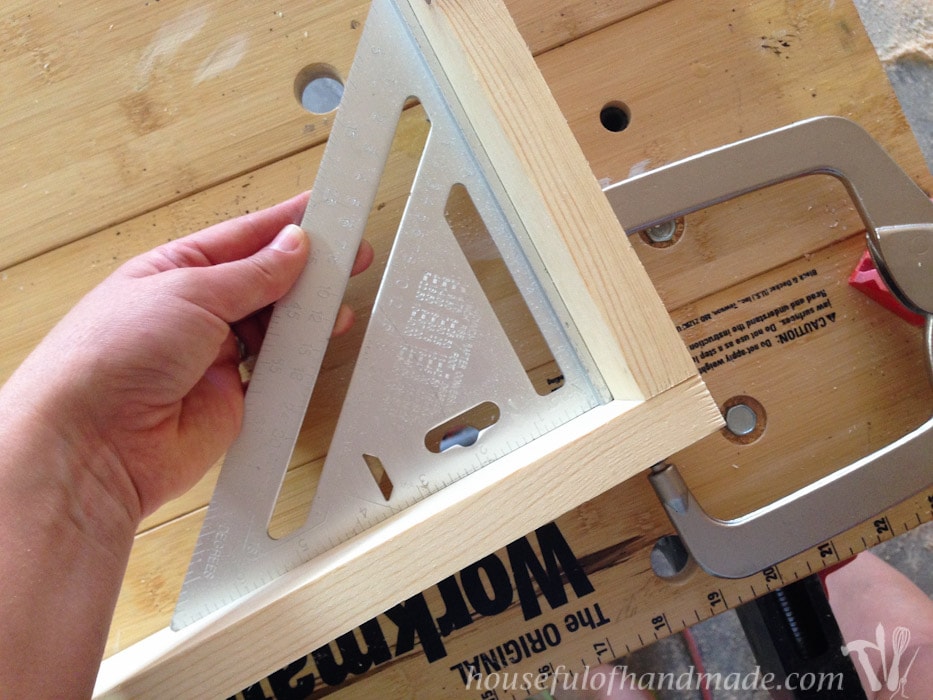
The most important thing to know when building a drawer box is you need it to be square. Take the time to set up your saw blades to make perfect 90 degree cuts.
EXPERT TIP:
Cut both side piece and both front/back pieces for your drawer box at the same time so they the exact same length. This will help keep your drawer box square.

Drill 2 pocket holes set for 3/4″ thick material on each end of the drawer box front/back boards.
To help hold the boxes square, use a Right Angle Clamp designed to be used with the Kreg pocket holes when assembling the drawers. Clamps are not cheap, but they are a lifesaver when building.
Attach the two side boards to the front/back boards with 1 1/4″ pocket hole screws and wood glue. Double check for square with a 7-inch Speed Square.
Put the pocket holes on the outside of the drawer box. They will be hidden by the drawer front or on the very back of the drawer inside the furniture piece so you never see them.
Repeat for the other drawer box.
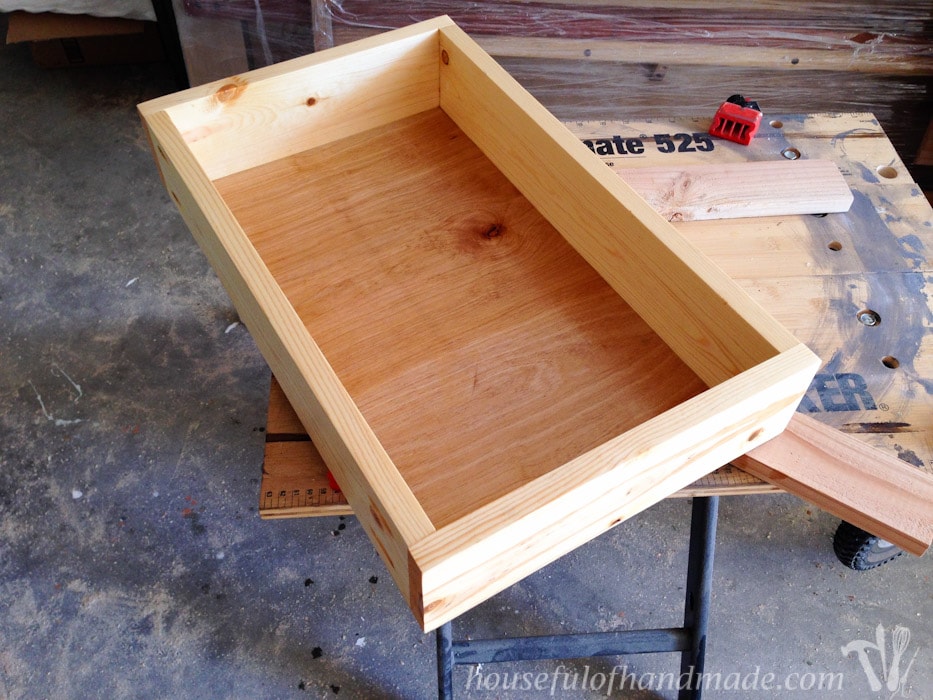
Cut the 1/4″ plywood so it is 1/4″ smaller all around. Secure it to the bottom of the drawer with wood glue and finishing nails.
I will not be using these drawers to hold heavy items so these simple to build drawers will work great (and have held up years).
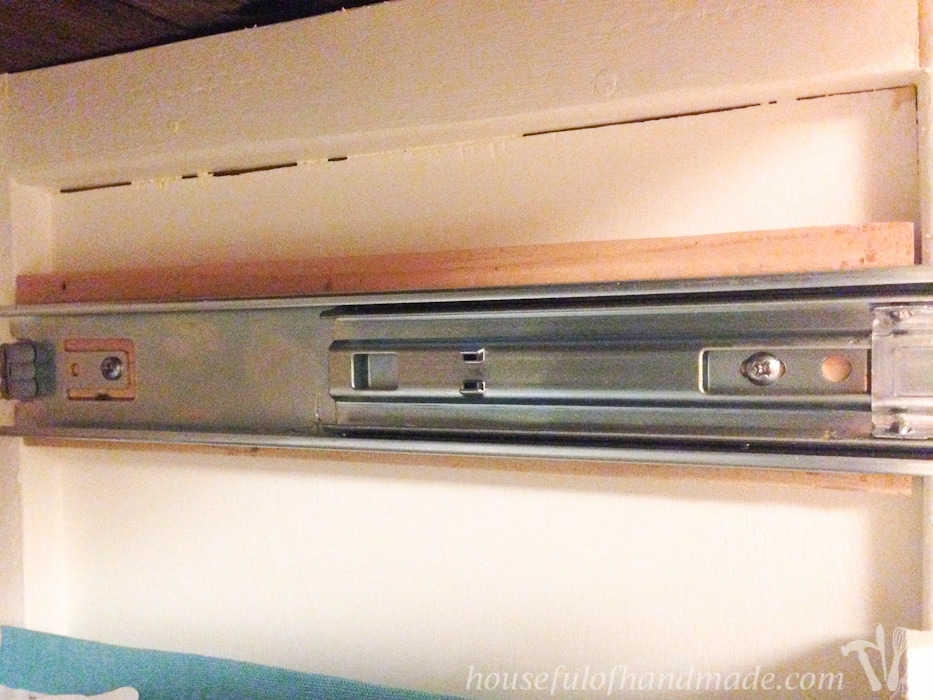
STEP 7- Install the drawers
The drawer boxes are designed to be used with ball bearing drawer slides that require 1/2″ clearance on either side.
You will need to add a 3/4″ piece of blocking inside the side pieces if you left he sides flush with the outside of the 2×2 legs (like I did). If you pushed the sides flush with the inside, you don’t need any.
Read how to install drawers with ball bearing drawer slides for detailed instruction and tips.
Center the drawer front piece in the opening.
Attach the drawer fronts temporarily. Then secure permanently from the inside with a couple wood screws.
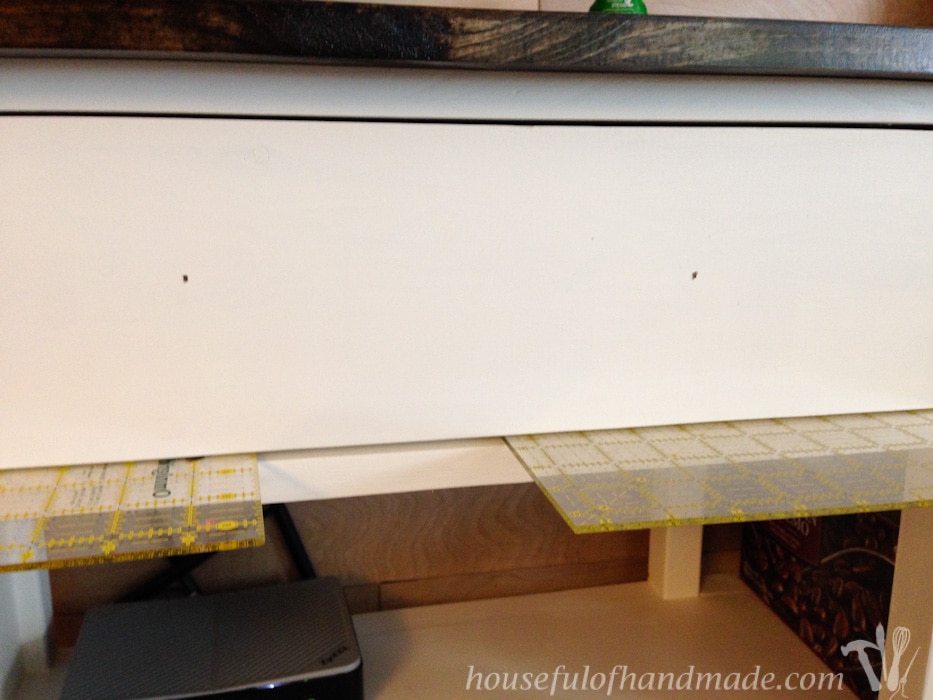
Filled the nail holes and touch up the paint. Then I add knobs or pulls.
I found these fun knobs at World Market and they look great on our coffee bar table!
Now your coffee station table is done! You can enjoy decorating it for the perfect coffee bar or using it as a console table anywhere you need some additional storage.
And make sure to check out the final coffee car reveal, with all the coffee accessories and storage options! It is one of my favorite places in our house.
Happy building!