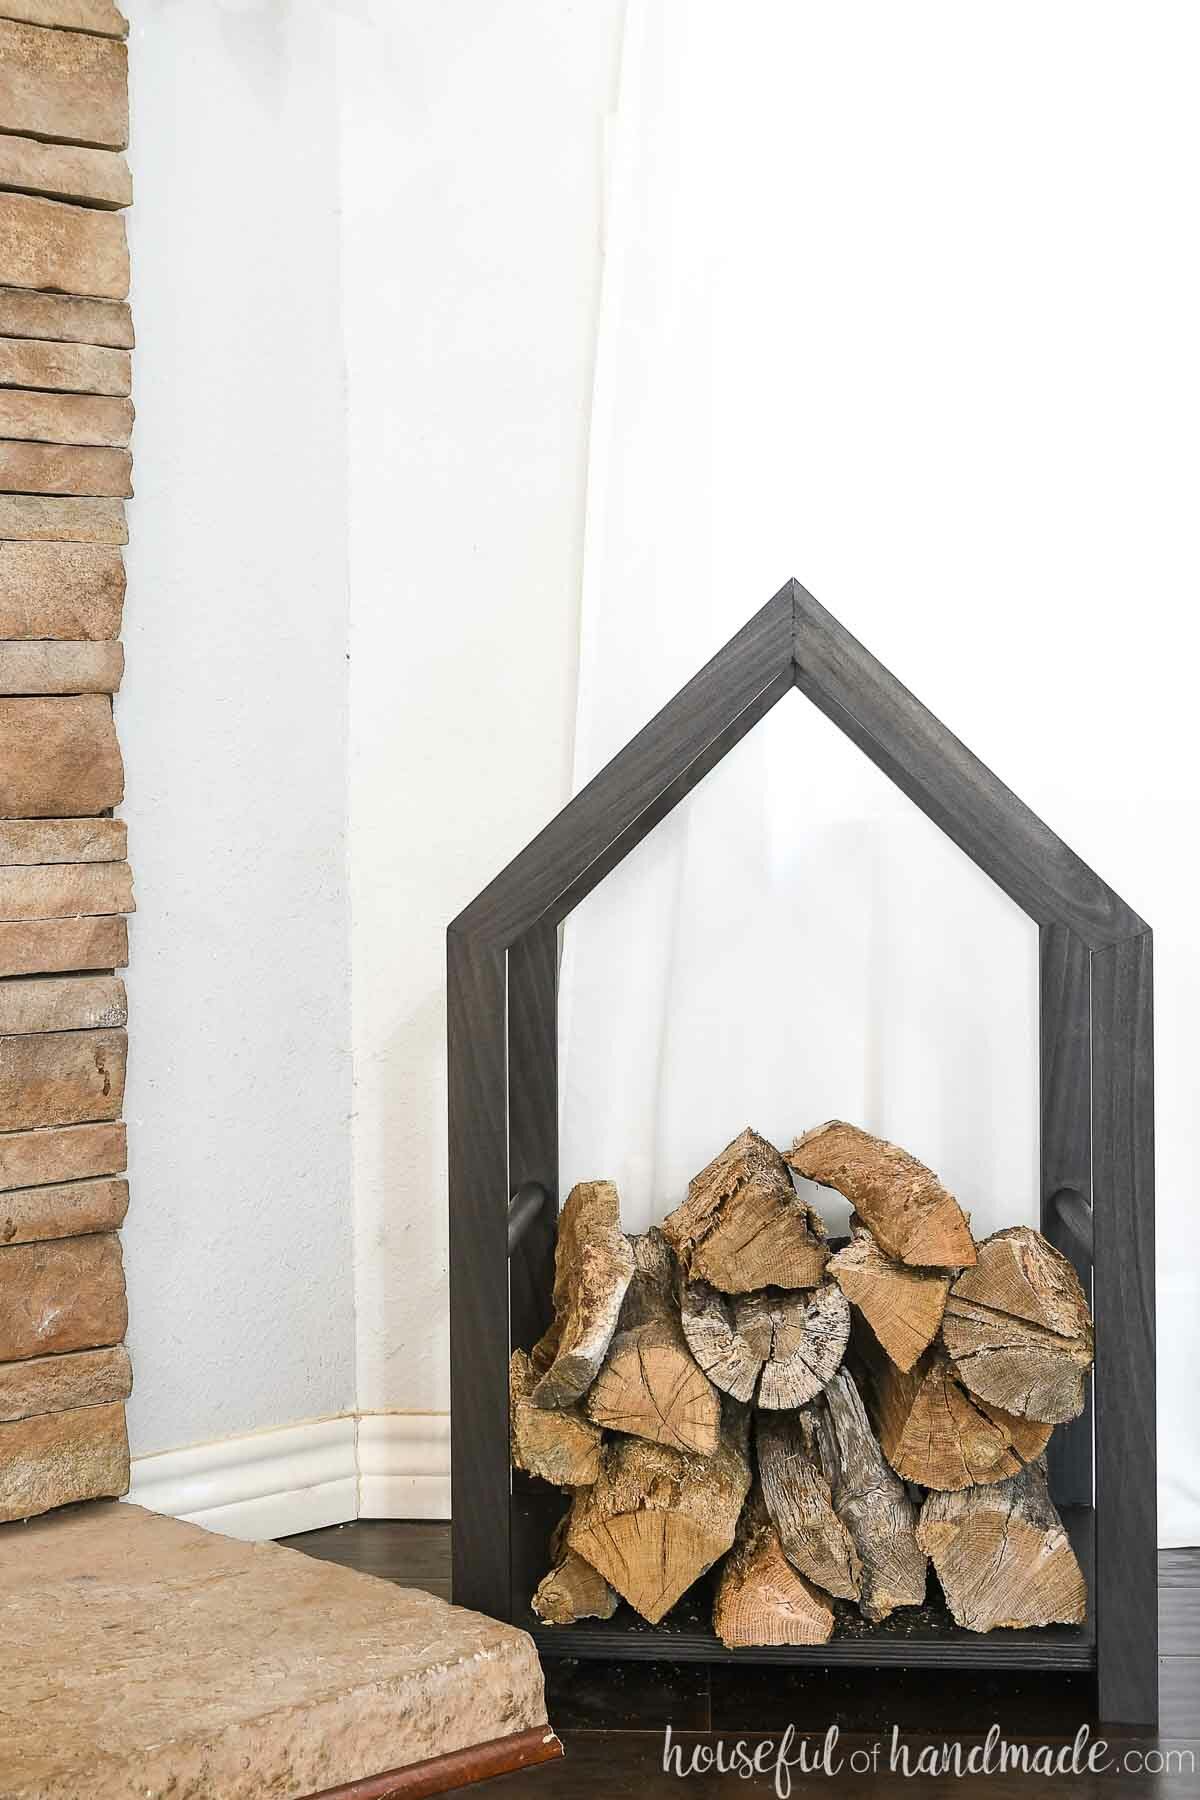
With the cold weather comes my favorite part of winter… sitting by a roaring wood fire!
But I do not like running outside to gather the firewood. Or having a sloppy pile of wood on my fireplace hearth.
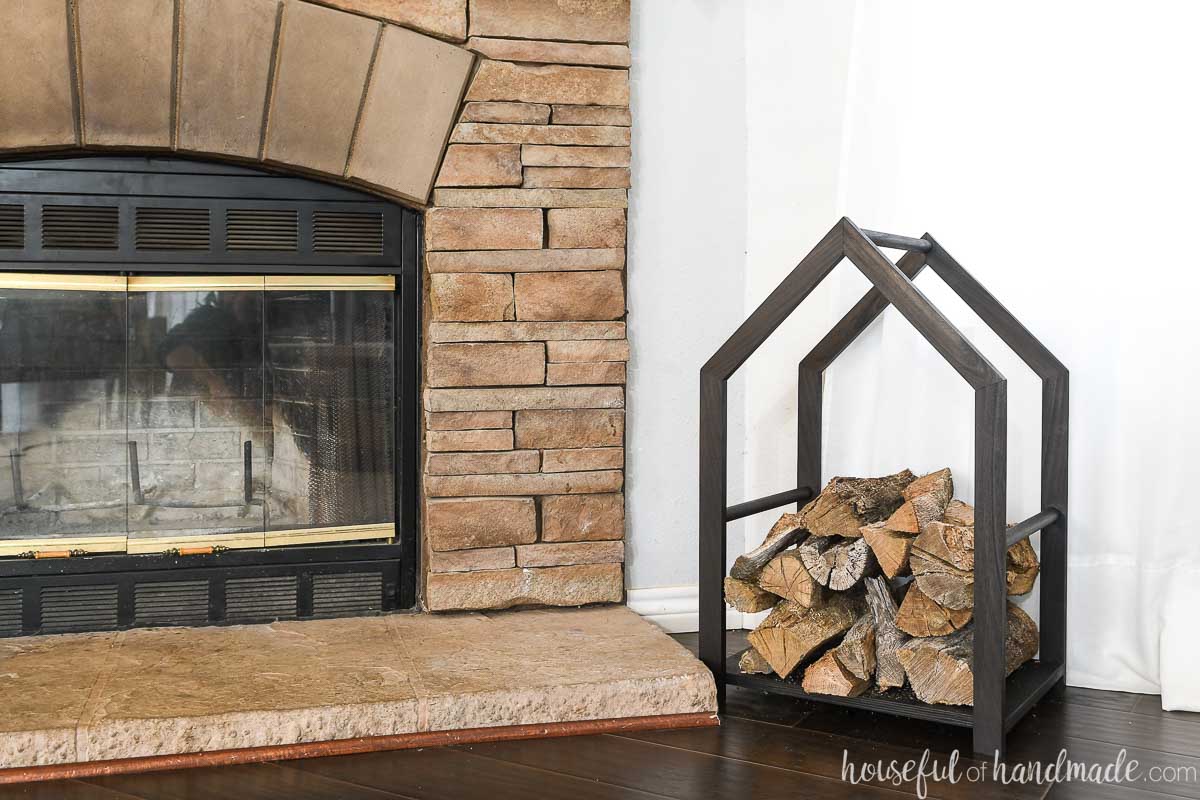
So I took an afternoon to create this gorgeous firewood holder. It is small enough to tuck away next to your fireplace, but large enough to store enough wood for quite a few roaring fires.
This post may contain affiliate links. As an Amazon Associate I earn from qualifying purchases. Click here to read my full disclosure policy.
And it is an easy build needing a limited amount of tools. Have some fun and make the perfect firewood storage at the same time.

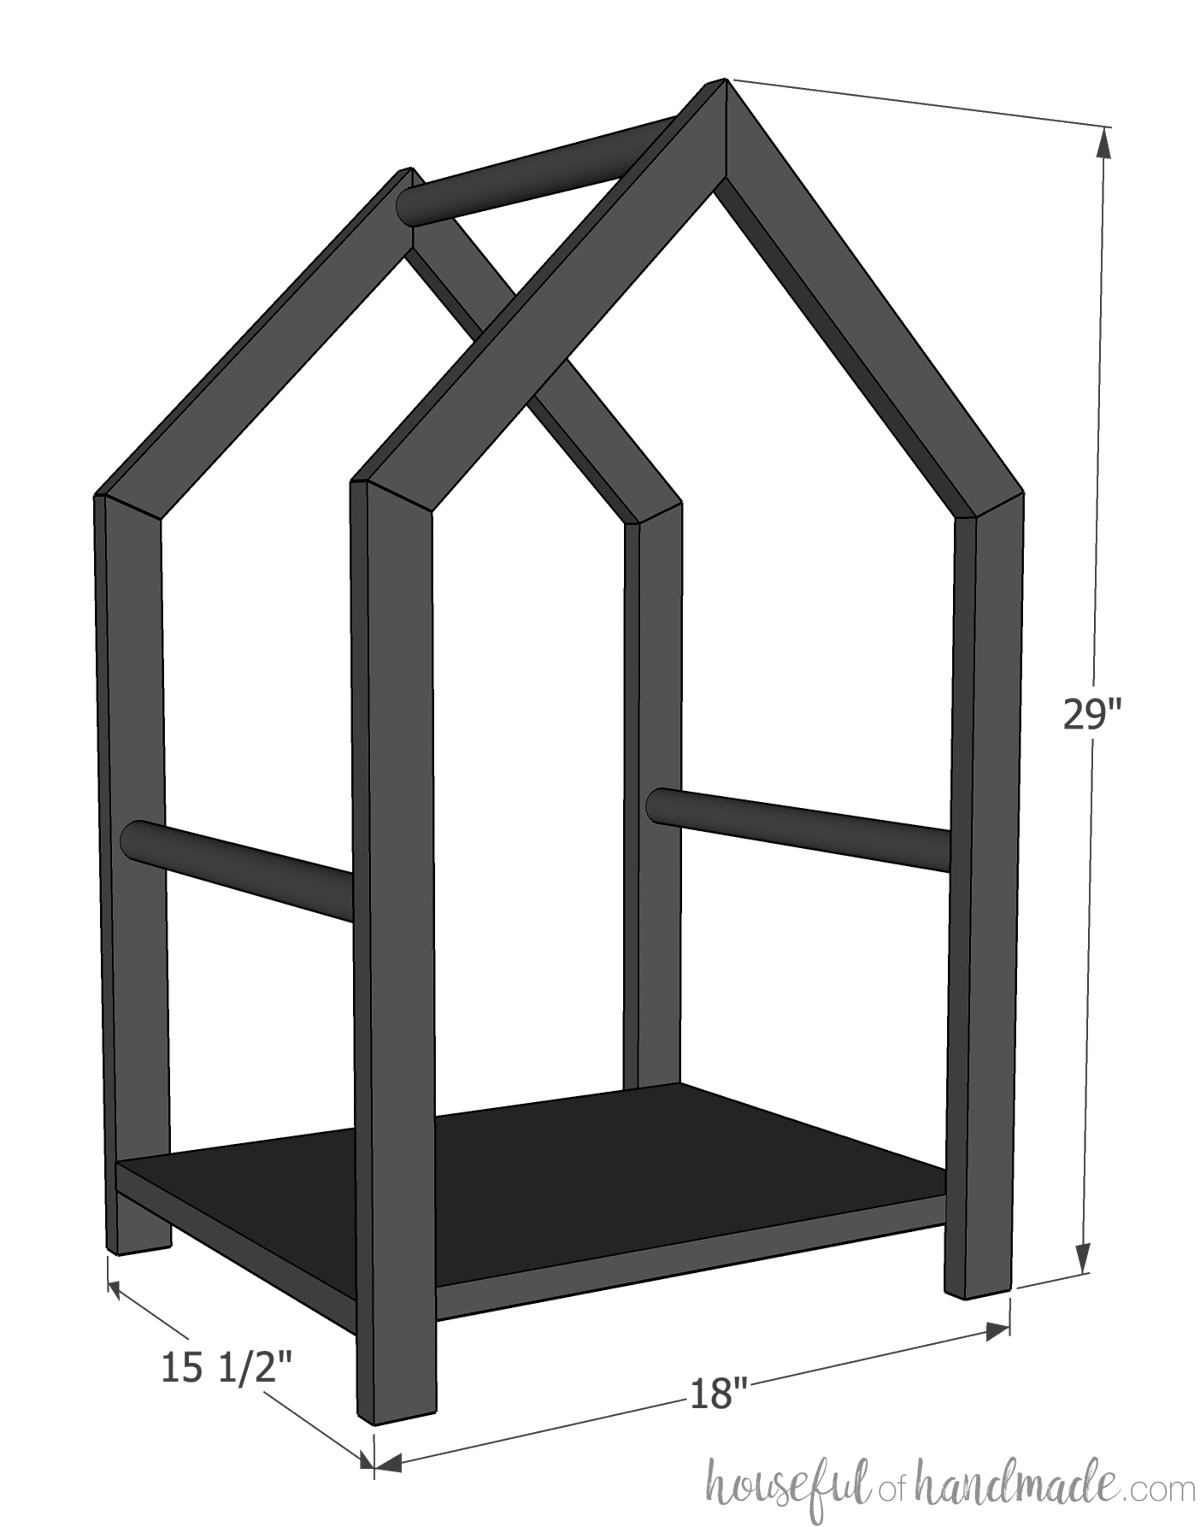
House Shaped Log Holder
My favorite part of this firewood holder is the house shaped peak on top. It makes a boring log holder into something beautiful.
And you may be thinking, those angles look complicated or hard… but they are not! The simple house peak is made with standard 45 and 22 1/2 degree angles.
If you do not have a miter saw, you could cut these standard angles with a miter box and saw. And since the frame is made from 1×2 boards, it is easy to cut these by hand that way.
So whether you are a seasoned woodworker, or someone who is just getting started, this could be a fun project that will be very useful this winter.
More Cozy DIYs
Stay warm with these fun DIYs for winter to help you make room for blankets or warm by a cozy fire.

How to Build a Firewood Rack
Tools & Materials
Recommended Tools:
- Miter saw
- I recently upgraded to this larger sliding miter saw (watch for it to go on sale), but all my projects before were built with this inexpensive miter saw that I loved.
- Drill
- 90 degree drill adapter
- Doweling jig
- Drill press or Drill guide
- Clamps
- Sander
Supplies:
- Wood products
- (2) 1×2 boards, 8′ long
- (1) 3/4″ thick plywood, 14″ x 18″
- (1) 1″ dowel, 4′ long
- 1/4″ x 1 1/2″ wood dowel pins
- Wood glue
- Blue painters tape
Overall Dimensions:
The firewood holder is 29″ tall by 18″ wide and 15 1/2″ deep.
There is a 15″ wide by 15 1/2″ deep by 17″ tall area to hold firewood before the house shaped peak on top. Perfect for holding a couple days worth of wood next to your fireplace.
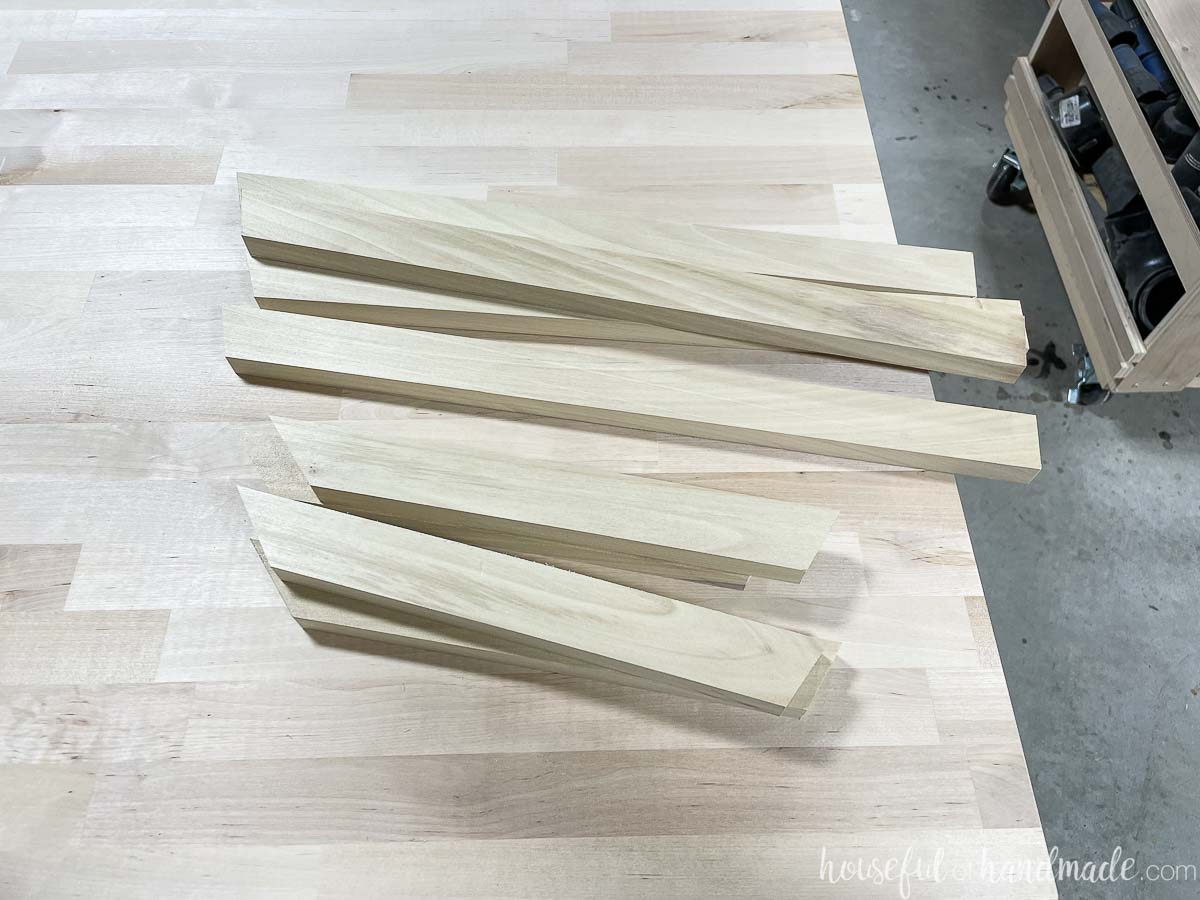
Cut List
Cut the pieces out according to the cut list table in the premium PDF plans.

The leg pieces are cut with a 22 1/2 degree angle on one end.
The roof pieces are cut with a 45 degree angle on one end and a 22 1/2 degree angle on the other.
STEP 1- Build the frame
The entire firewood holder is put together with dowel pins. The dowels are necessary for holding the frame together so you do not have screws in the way of the holes used to attach the large dowels later.
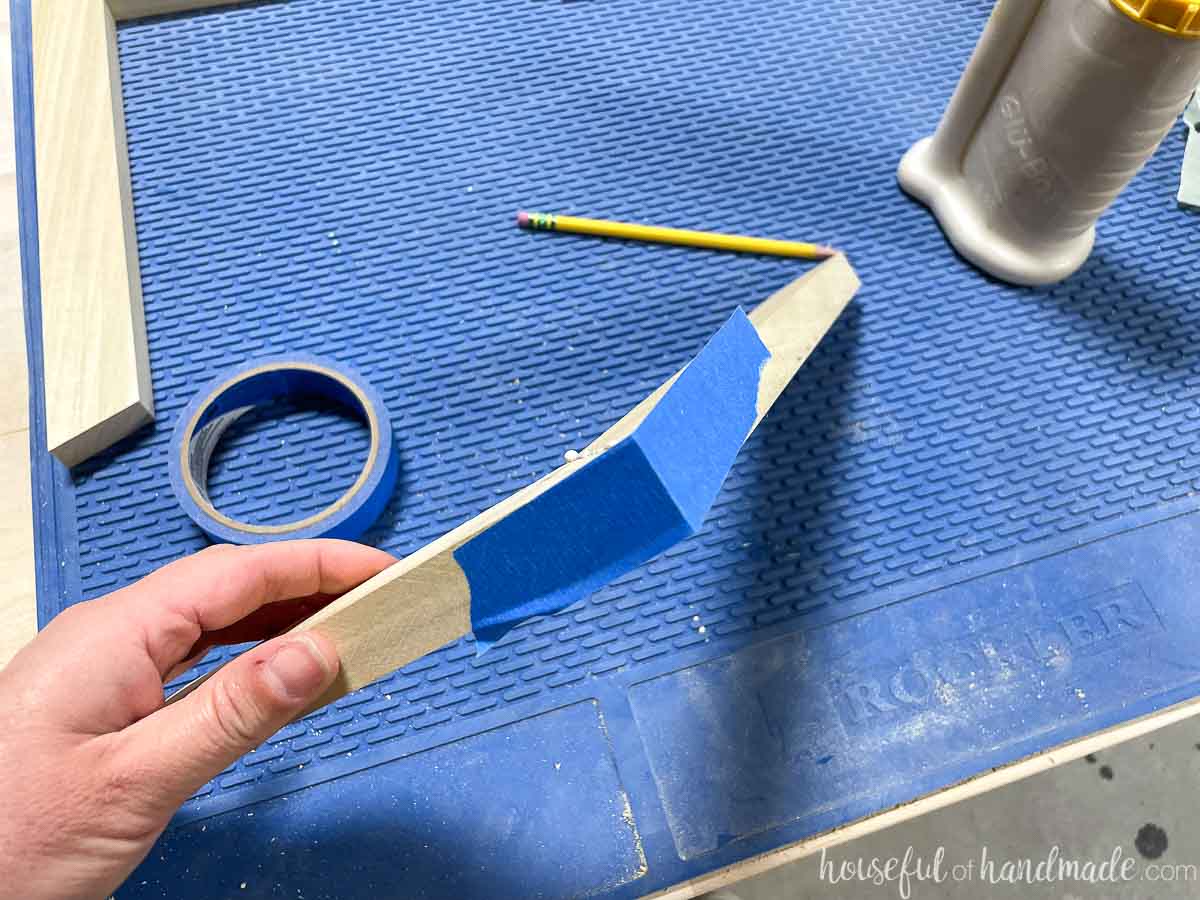
To add a dowel to a mitered corner, line the two pieces up. Then draw 2 lines across where the boards meet. These will be the center point of your dowel pins.
EXPERT TIP:
Make sure the lines where you want your dowel pins to go is not too close to the edge. You need to have at least 1″ on either side of the joint to hold your dowel.
Then line your dowel jig up with the 1/4″ drill guide.
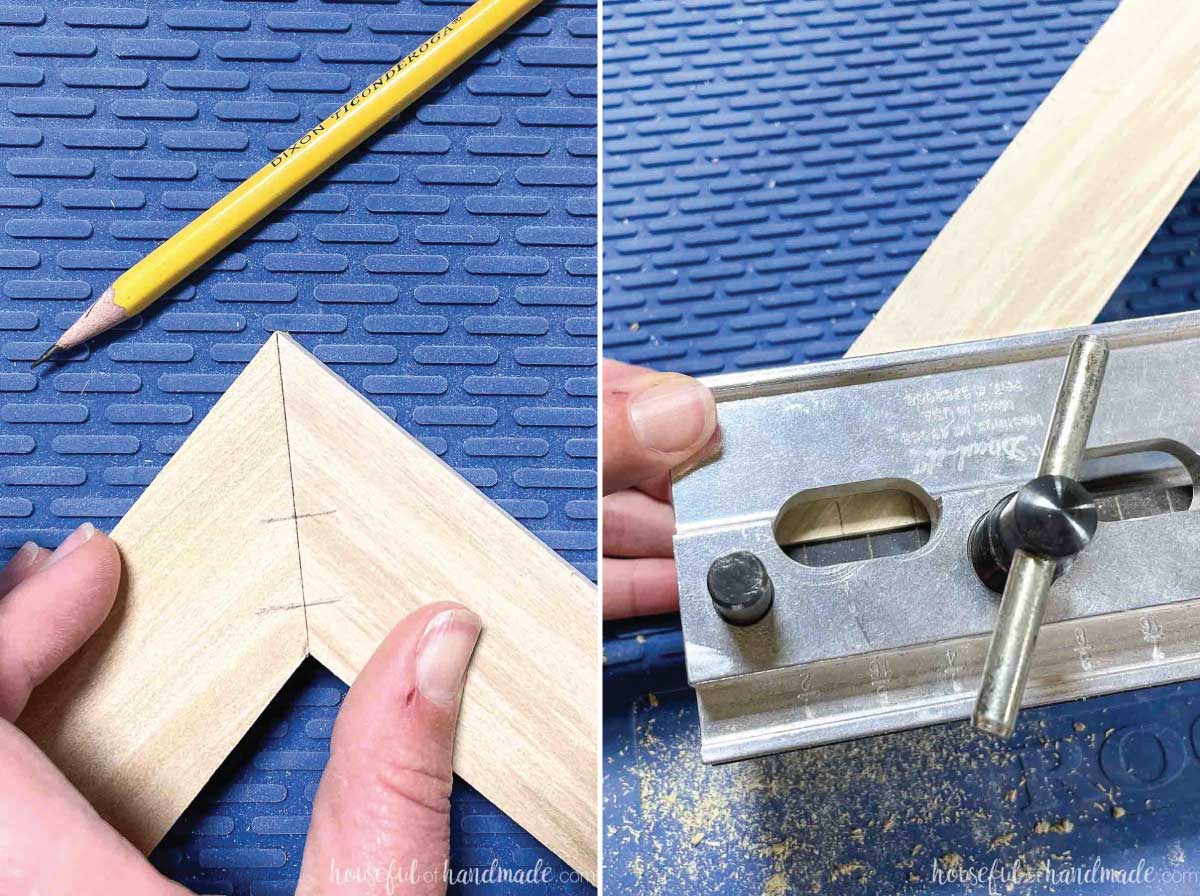
Drill a 3/4″ deep hole into the wood (that will allow half of the 1 1/2″ long dowel to go into it).
Repeat for the other lines on both boards.
EXPERT TIP:
Dry fit the dowels before glueing them in to make sure your holes are properly spaced deep enough. Use a pair of pliers to pull out tight fitting dowels so you can glue them in after a successful dry fit.
Add wood glue to the holes and the joint on one board. Press the dowels into the holes.
Then add glue to the holes on the other board and press the dowels into them to join the two boards together.
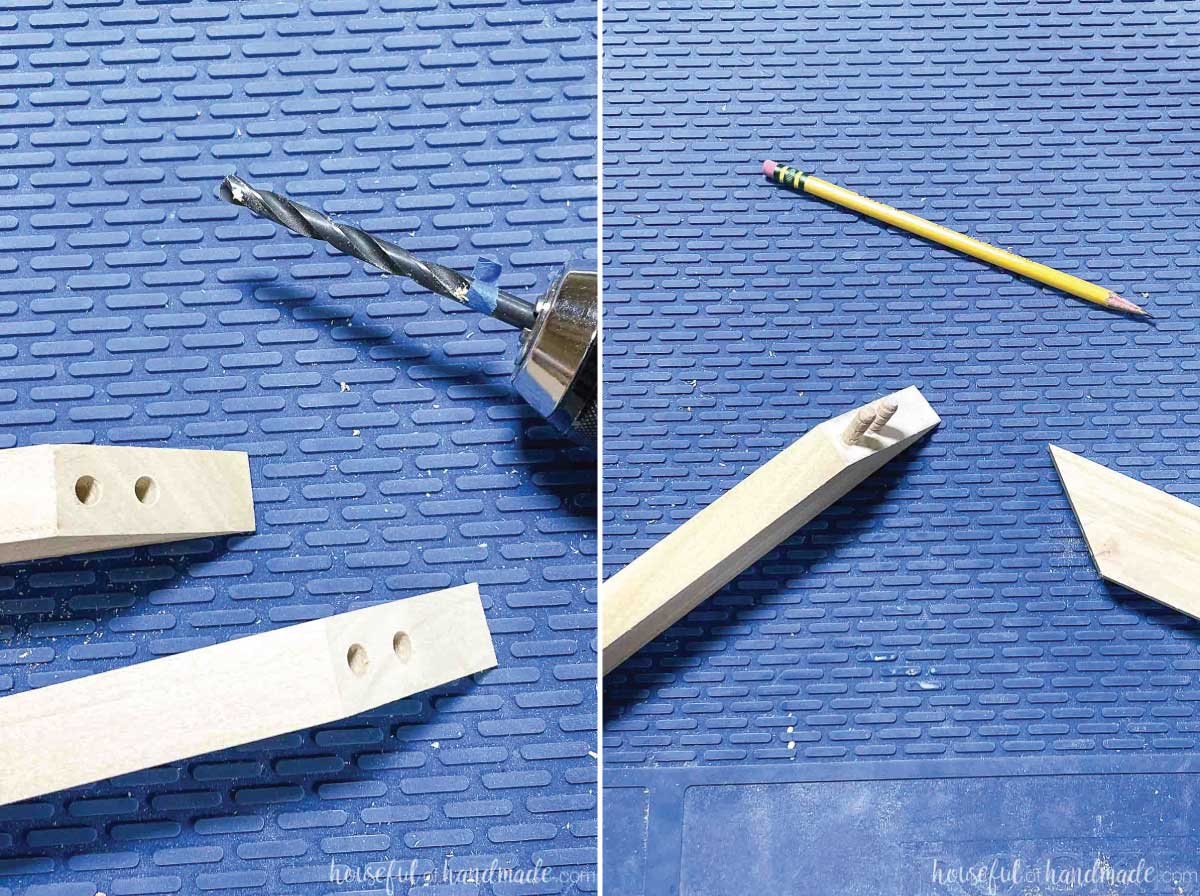
Since this is a tough angle to clamp, use some blue painters tape to hold the boards tight while the glue dries.
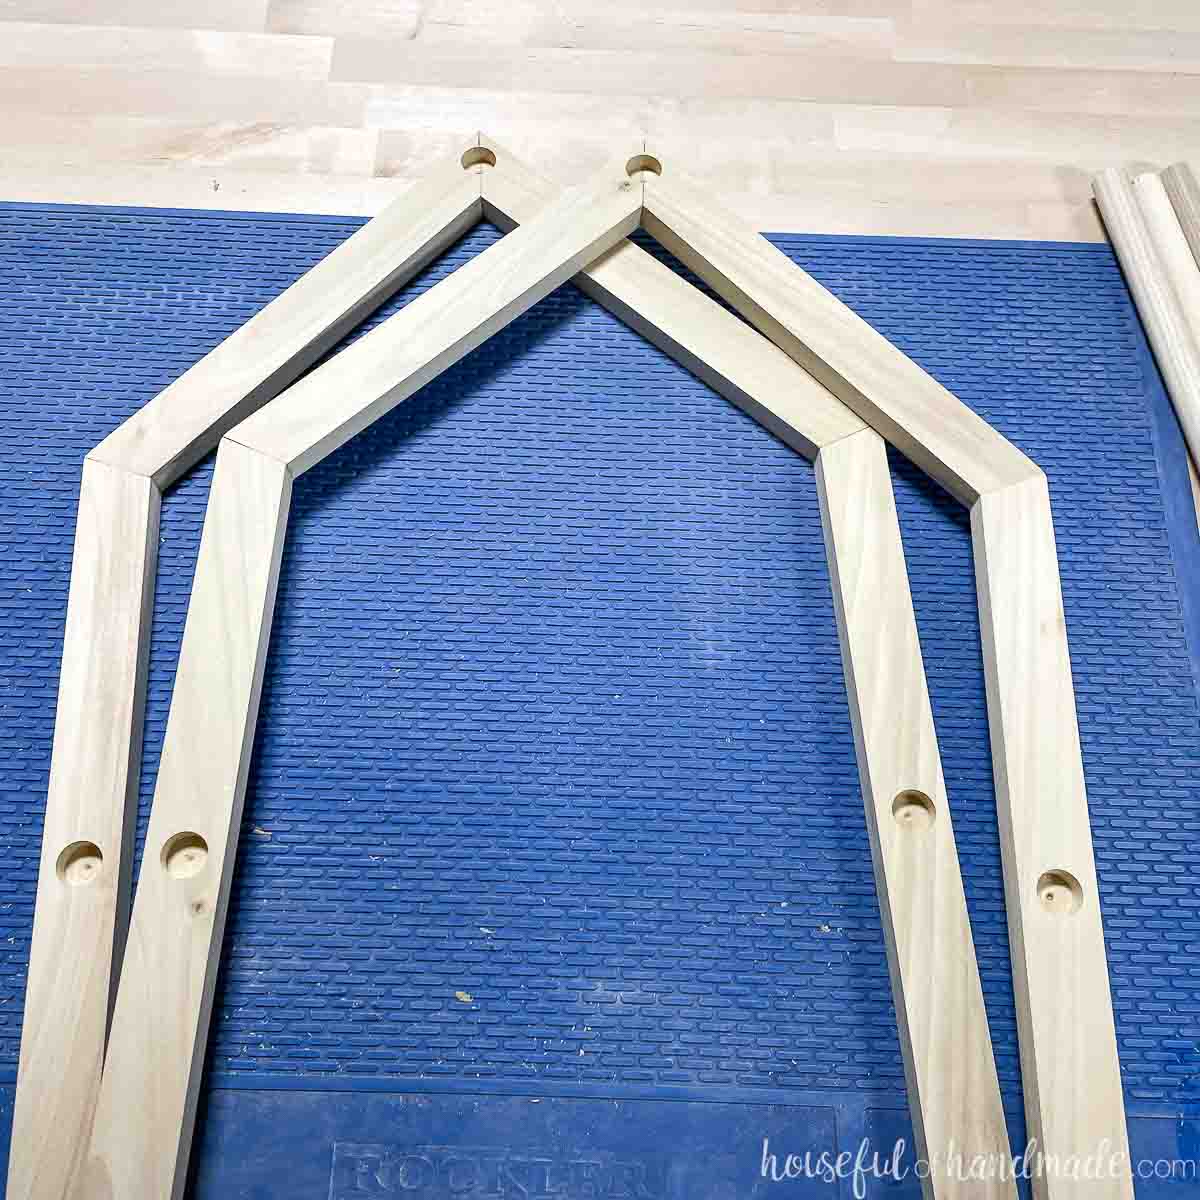
Repeat for the other two pieces so you have two assembled roof tops.
Then repeat the process on the leg pieces to attach them to the sides of the roofs. These corners will be on the 22 1/2 degree angle cuts.
Let the glue dry on all the corners, then remove the painters tape. Sand the assembled frame pieces smooth.
STEP 2- Drill holes in the frame
Measure up from the legs on the inside according to the diagram in the plans and the center of the 1×2. Also measure the center of the seam on the top roof peak.
Drill a 1/2″ deep 1″ wide hole at each of these points.
EXPERT TIP:
Use a forstner bit to drill your holes so the end of the hole is flat. This will make it easier to glue the dowels into them later.
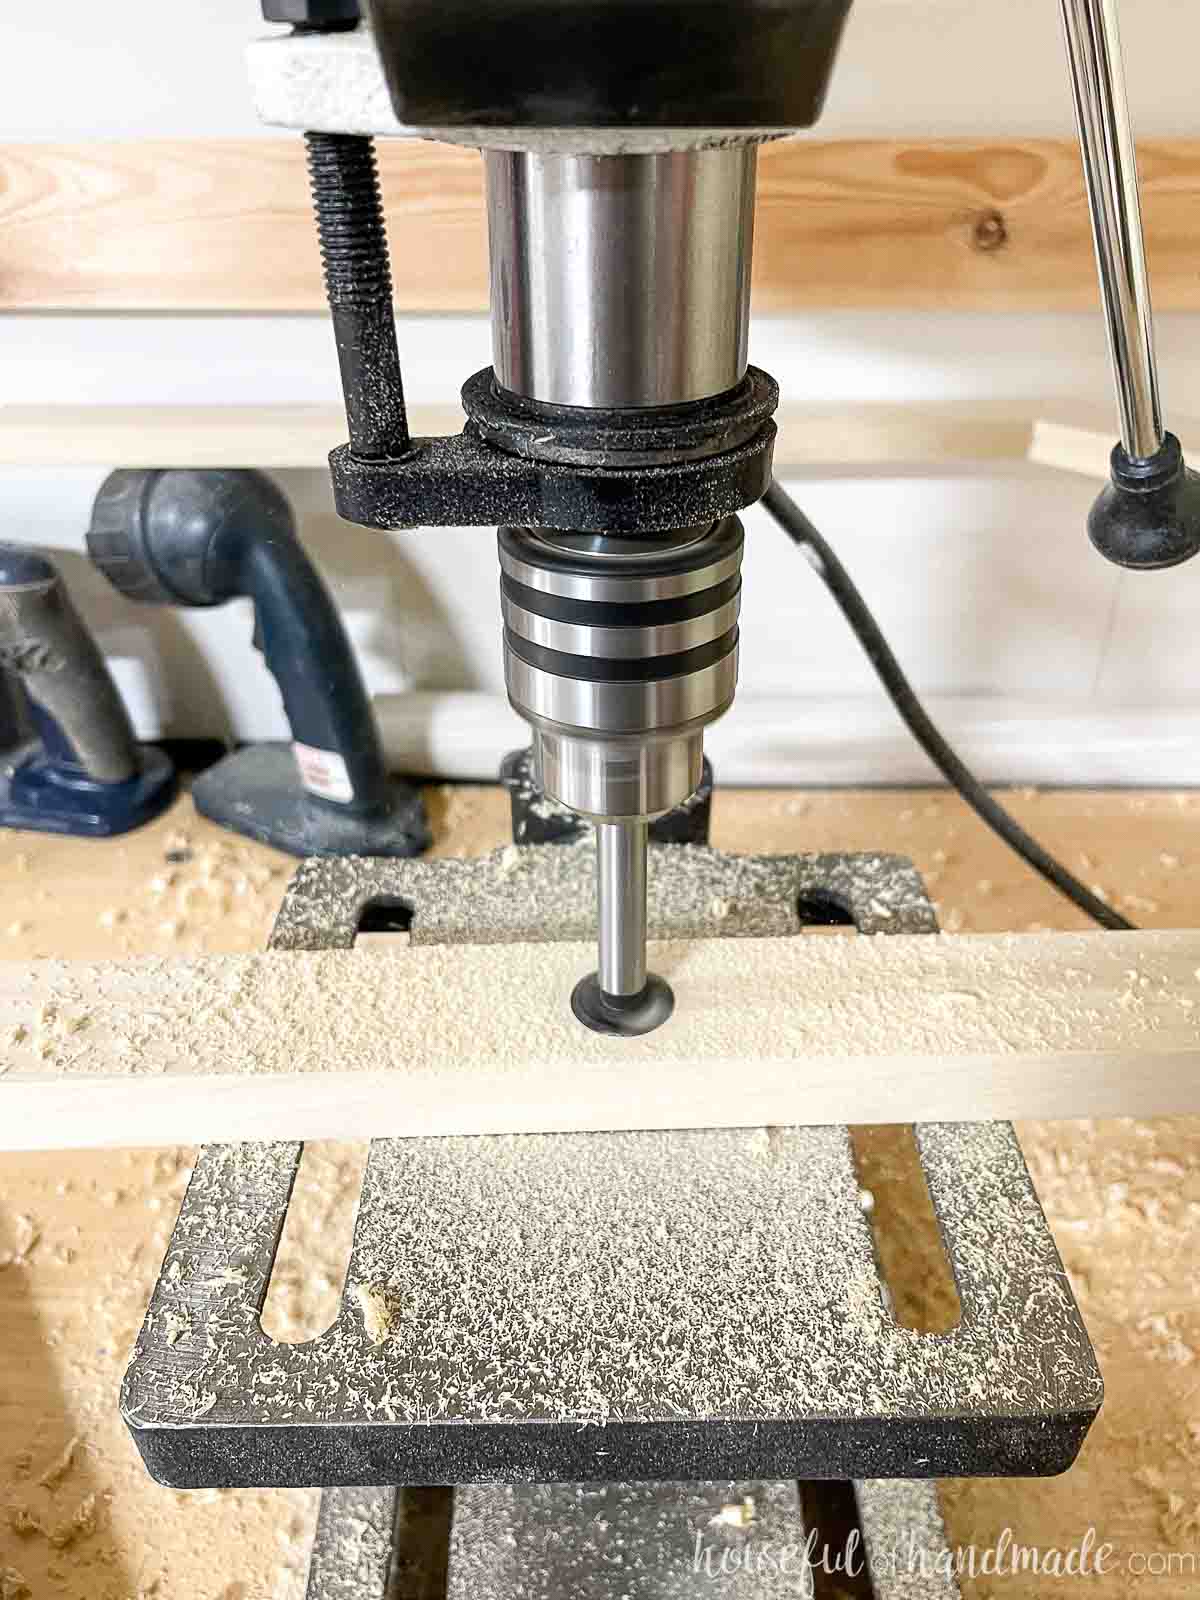
You can use a drill press or drill guide to keep your drill bit perpendicular to the board.
Repeat for the other assembled frame piece so they are identical.
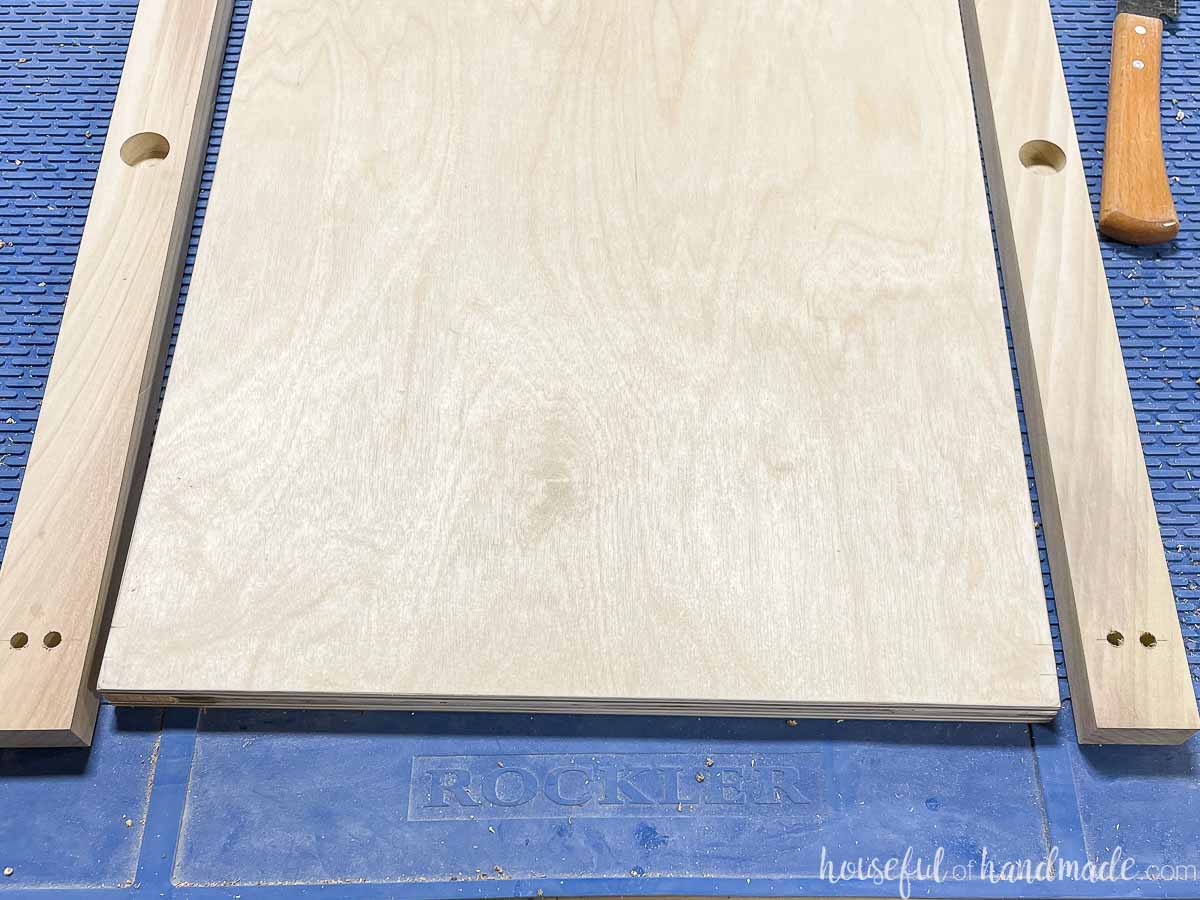
On the inside (the side with the holes already), mark out where you will be attaching the plywood base.
I measured 1 3/8″ up from the bottom so that the plywood was 1″ off the floor and 1/2″ in from each side (so 1/2″ between the two marks).
Then mark the top of the plywood 1/2″ in from the edge and 1″ in from the edge (so there is 1/2″ in between the two marks like on the frame).
These marks will be the center of your dowel pin holes.
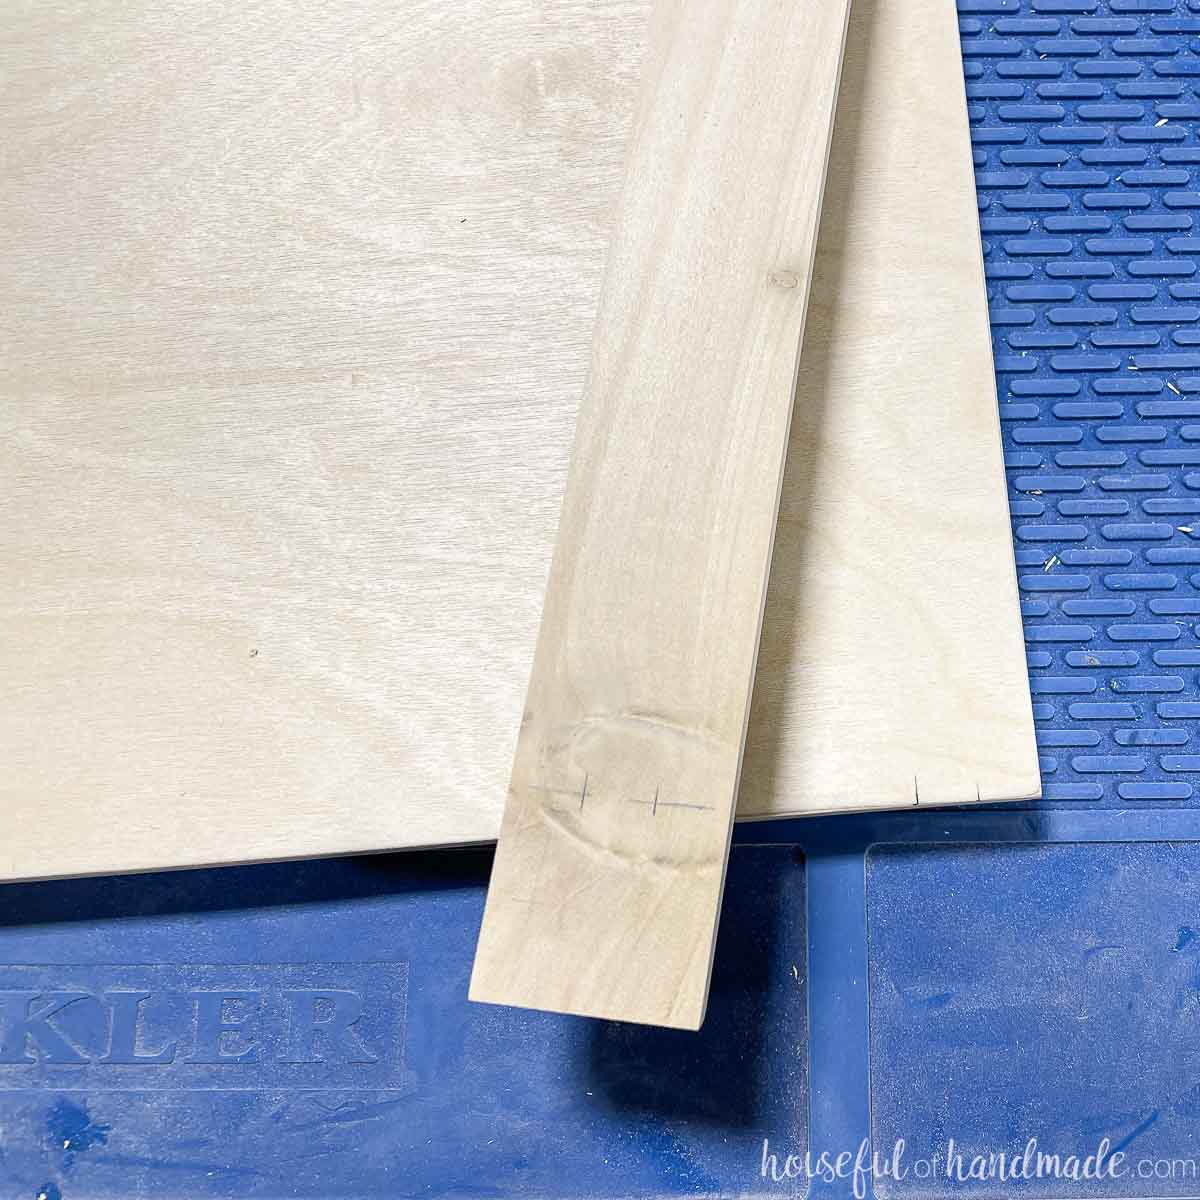
With your doweling jig, drill a 1″ deep hole in edge of the plywood at these two marks.
With your drill press or drill guide, drill a 1/2″ deep hole at the marks on the frame.
Repeat for both sides of the plywood and both frame pieces.
STEP 3- Attach the two frame pieces together
Glue the dowels into the plywood the same as you did for the frame.
Then press it firmly onto the frame piece to secure. Clamp it together.
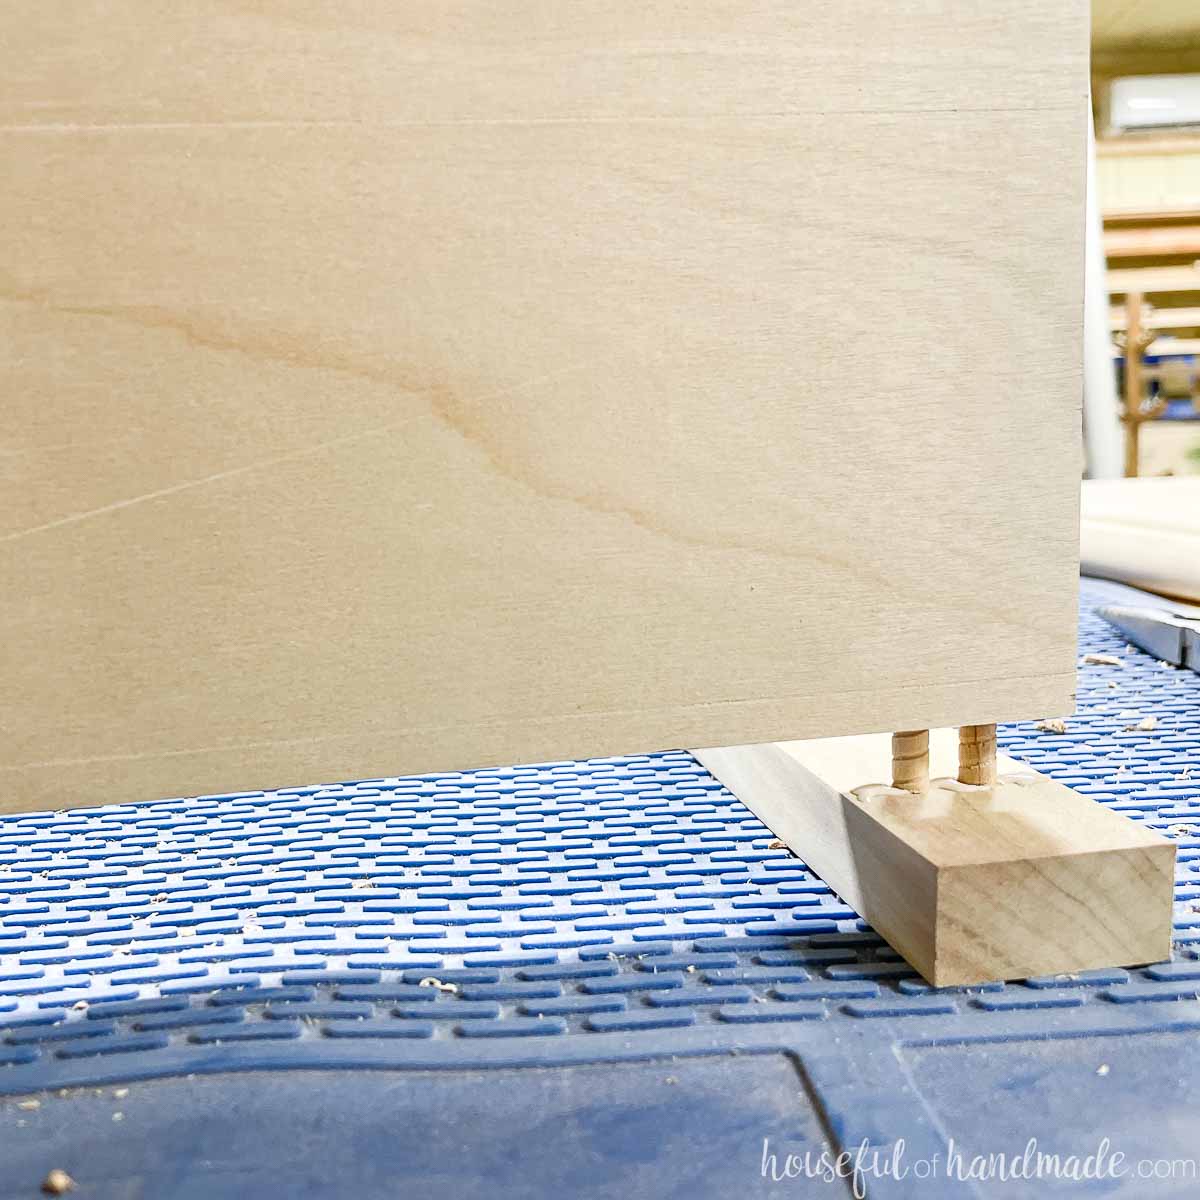
Cut three pieces from your dowel.
Add glue to the inside of the larger holes and press your dowels into them. They should fit tightly so you may need to tap them in with a hammer.
EXPERT TIP:
Use a scrap piece of wood between your hammer and your dowel when tapping the dowels into the holes to prevent the dowel from damage.
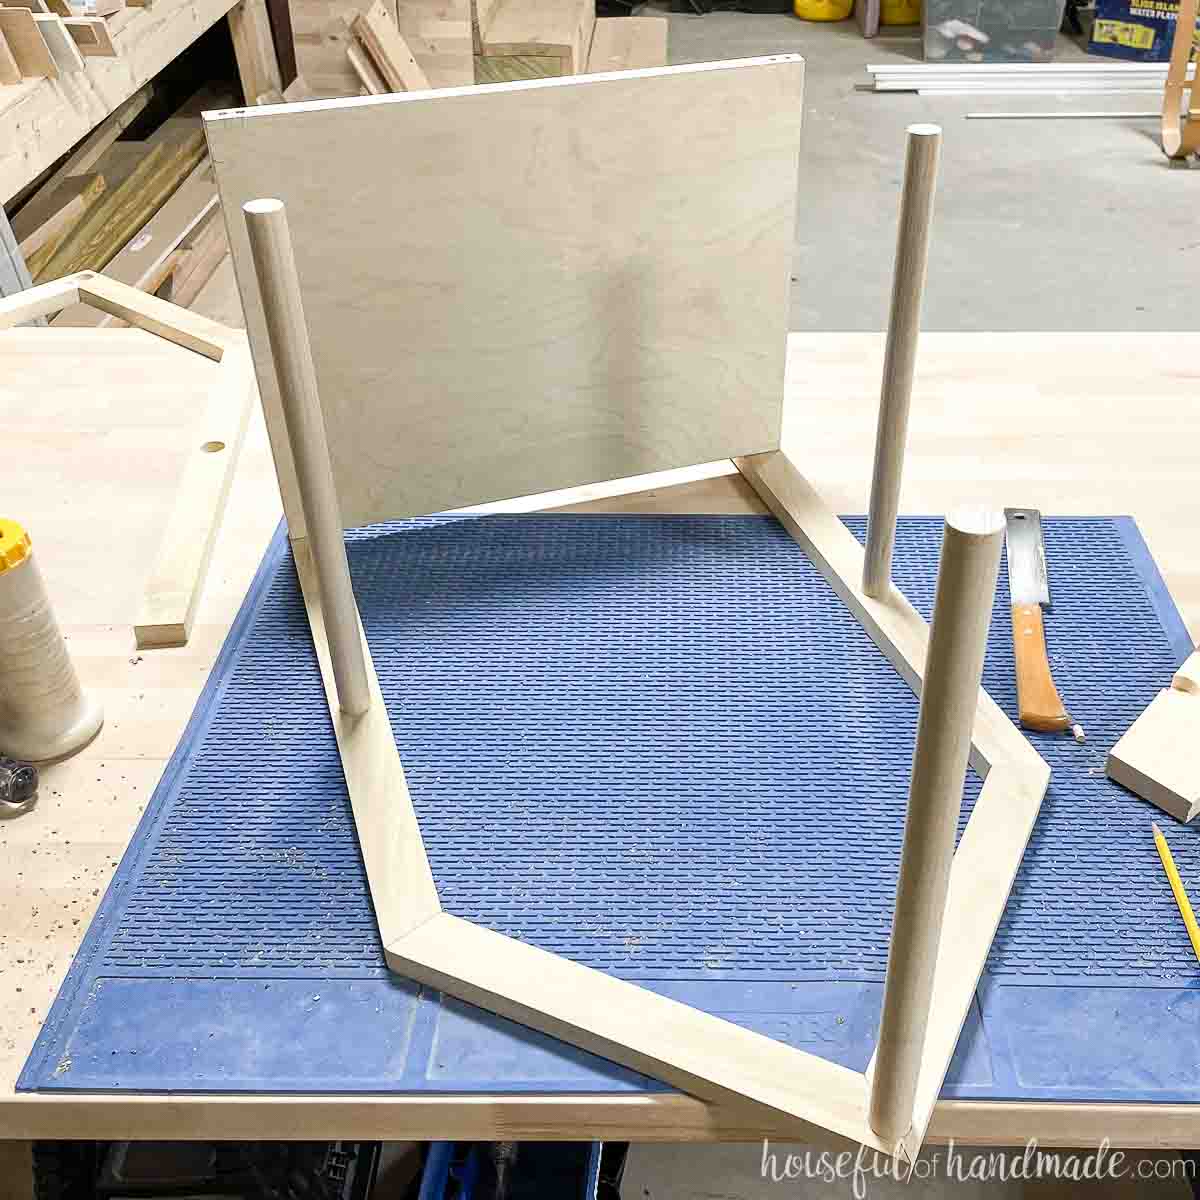
Then add glue to the holes on the other frame and place it on top.
Maneuver all the dowels and dowel pins into their holes. Use your hammer (with scrap wood) to tap things fully into the holes.
Clamp everything tight while the glue dries.
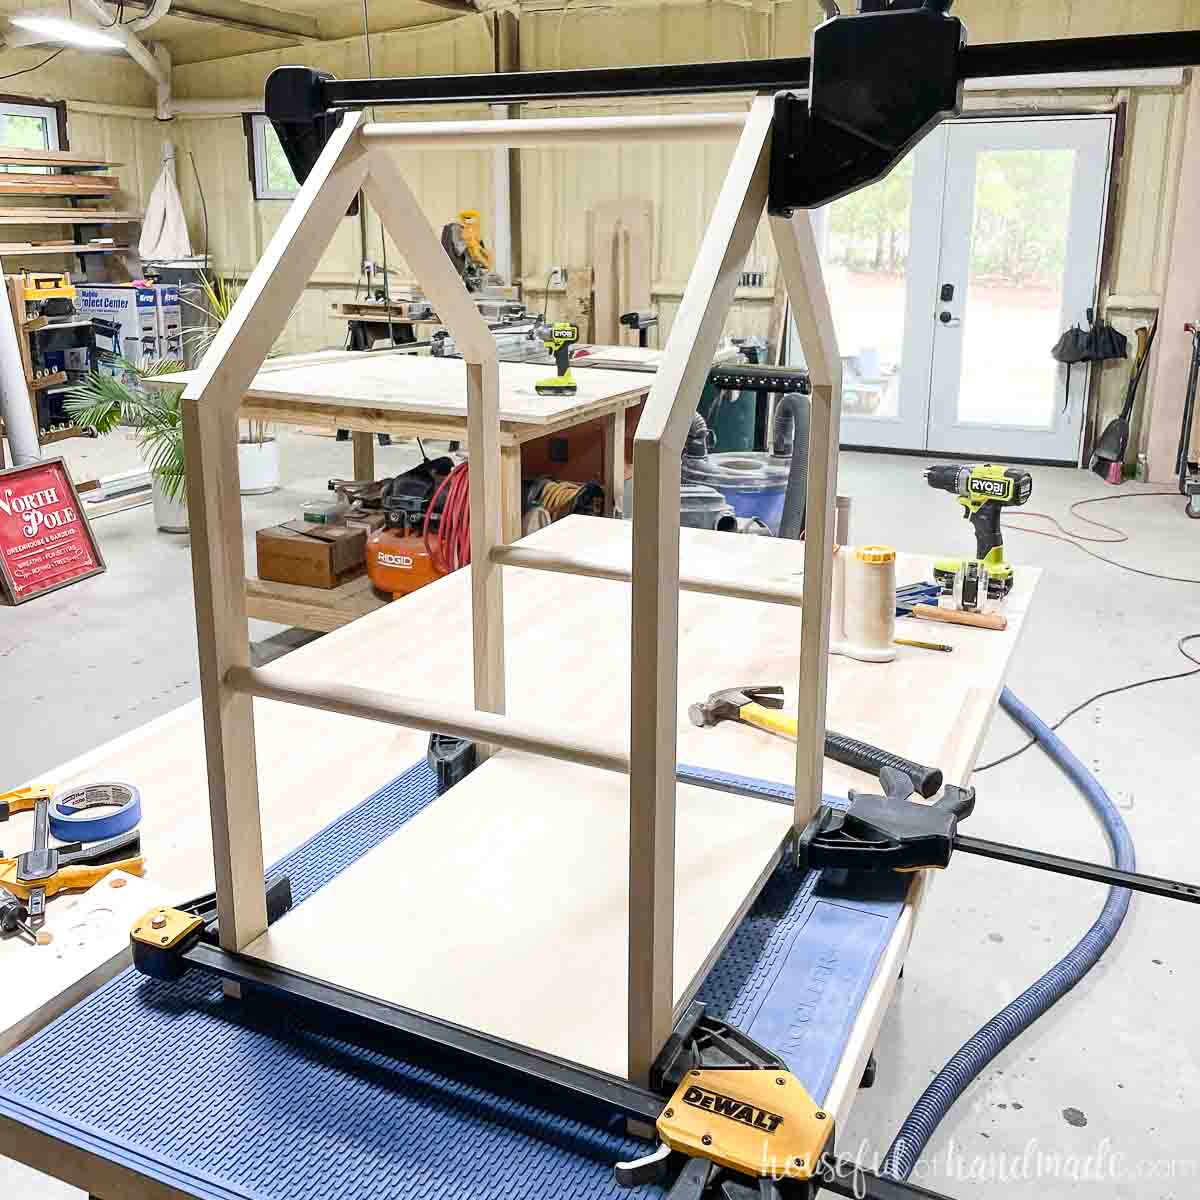
STEP 4- Sand and finish
Use a chisel to remove any glue squeeze out. Then sand your log holder smooth.
Stain or paint it the color you want. I used True Black by Minwax for a nice deep black stain color.
Seal the wood as desired.

And you are done!
Premium plans include:
- Recommended Tools
- Shopping list
- Easy to read cut list table
- Cut diagrams
- Step-by-step instructions with 3D renderings
- Helpful resources
- BONUS: 3D SketchUp file
Now you are ready to load up your new firewood rack with logs for the fire.
The logs never looked so good sitting next to the hearth. Or if you have a larger hearth or if it's flush with the floor like in our tiled fireplace hearth in the last house, you can place the log holder right on it.
This is the perfect accessory to the fireplace this winter. Now I can keep enough wood in the house to stay warm on those cold days.
Enjoy your warm fires!
