Our DIY Playhouse: The Deck

by

Kati

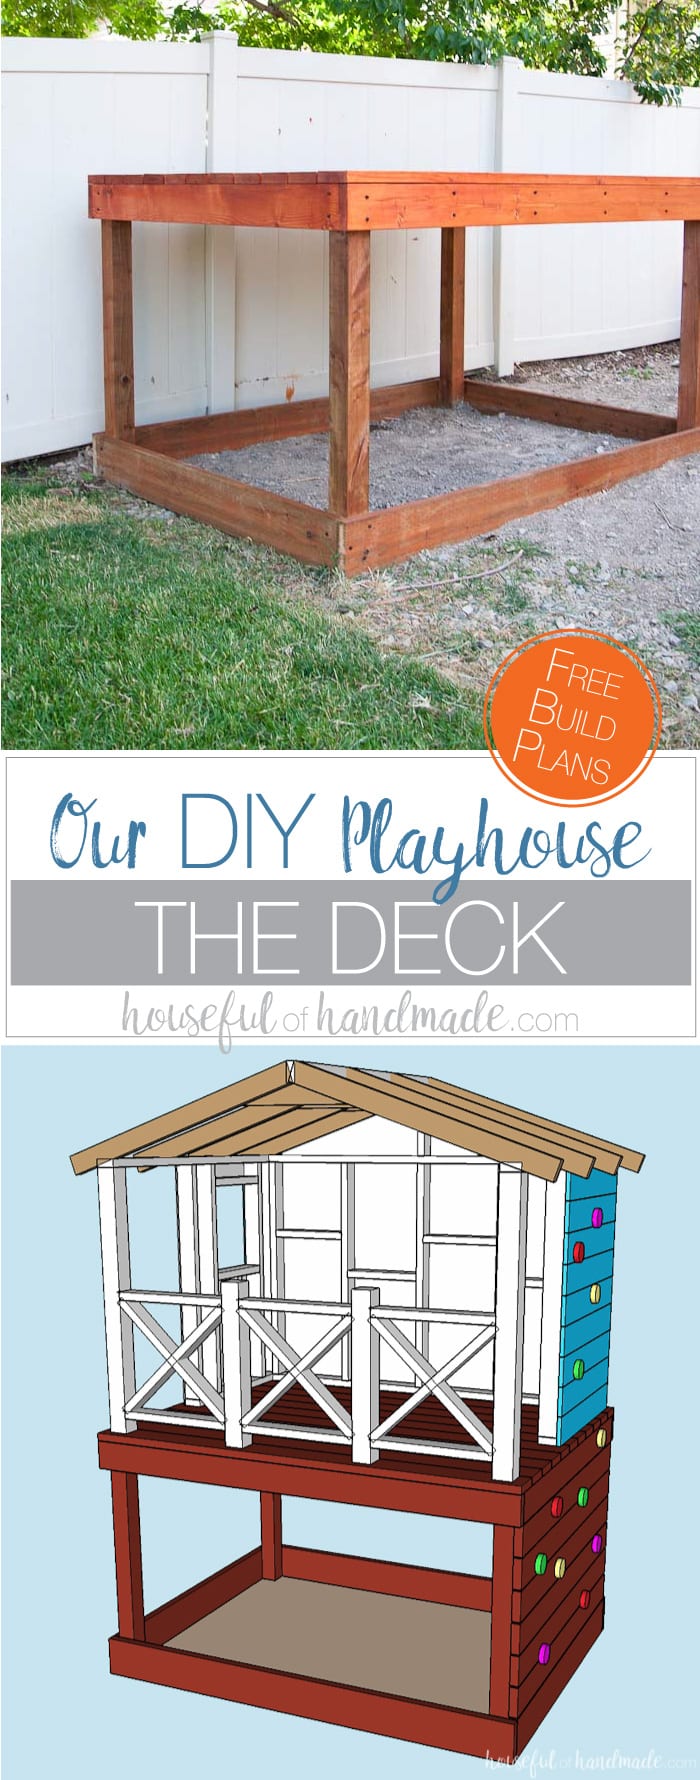
Build a small DIY playhouse for your kids. This week we cover how we built the deck with sandbox.

I’ve wanted to give my kids a DIY playhouse for way too long. They love playing outside and I know they would love it even more with a place just for them.

But I kept putting it off because our yard is small. We only have a tenth of an acre (ouch) with a 23oo sq ft house on it. I try really hard to fit half an acre of fun into our small yard but a playhouse just seemed like it would take over the space.

Well, I decided I just needed to build a playhouse and I am so excited we are finally doing it!
This post may contain affiliate links. As an Amazon Associate I earn from qualifying purchases. Click here to read my full disclosure policy.

Even though our yard is small, we decided we still needed a DIY playhouse. Check out how we built the small playhouse for our kids, on a budget, starting with the deck. This project was so easy and now we can see the playhouse starting to take shape. Housefulofhandmade.com | How to Build a Playhouse | DIY Swing Set | Small Playhouse | Playhouse Build Plans

I have been drooling over the Handmade Hideaway from The Handmade Home for a few years now. How wonderful is that fort!?! It’s everything that kids dream about. I can only imagine how much imaginative play goes on in that hideaway.

I have wanted to give my kids one for the so long, but… tiny yard! So I keep trying to not want to build a DIY playhouse for our kids.
Even though our yard is small, we decided we still needed a DIY playhouse. Check out how we built the small playhouse for our kids, on a budget, starting with the deck. This project was so easy and now we can see the playhouse starting to take shape. Housefulofhandmade.com | How to Build a Playhouse | DIY Swing Set | Small Playhouse | Playhouse Build Plans

Even though I thought our yard was too small, I spent a year dreaming and measuring and planning… and measuring some more. I sketched out ideas, and even the beginnings of a plan.

But then I thought it would be too big. Or take over the entire yard. So I measured and planned and measured some more. Then I put the idea to rest (or so I thought).
Even though our yard is small, we decided we still needed a DIY playhouse. Check out how we built the small playhouse for our kids, on a budget, starting with the deck. This project was so easy and now we can see the playhouse starting to take shape. Housefulofhandmade.com | How to Build a Playhouse | DIY Swing Set | Small Playhouse | Playhouse Build Plans

As the snow started melting, the kids were playing out in the yard more and more.

They would spend hours in our tiny yard together. They would drag all kinds of toys outside, create forts or spaceships or castles. They even dug holes in my not so fabulous patio area (which is just road base right now).

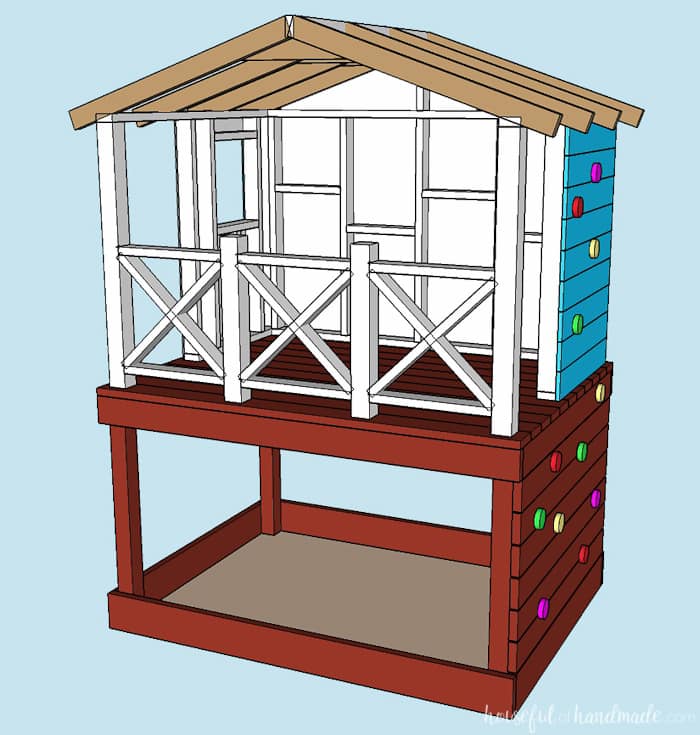
Even though our yard is small, they loved it. So finally this spring I decided it was time to stop planning. Our kids needed a place to play, we have a yard so the kids can play! So I designed the perfect small playhouse…
Even though our yard is small, we decided we still needed a DIY playhouse. Check out how we built the small playhouse for our kids, on a budget, starting with the deck. This project was so easy and now we can see the playhouse starting to take shape. Housefulofhandmade.com | How to Build a Playhouse | DIY Swing Set | Small Playhouse | Playhouse Build Plans

Now that it is finally happening, I couldn’t be more excited. Maybe even more excited then the kids (and they are really excited).

I am so excited to finally give our kids a special place that is all theirs. Somewhere they can play for hours and hours, with no TV or tablets or computers. Someplace to let their imagination fly. Someplace for them to be kids!
Even though our yard is small, we decided we still needed a DIY playhouse. Check out how we built the small playhouse for our kids, on a budget, starting with the deck. This project was so easy and now we can see the playhouse starting to take shape. Housefulofhandmade.com | How to Build a Playhouse | DIY Swing Set | Small Playhouse | Playhouse Build Plans

And I am also super excited to share the entire process with you. Even though this is not a little build, it is relatively easy.

No fancy tools are needed, so far we have used a saw (could be circular or miter saw) and an impact driver. Except when I pulled out the drill to fix a little mistake I made. And the rest of the plans should only use these tools as well.
Even though our yard is small, we decided we still needed a DIY playhouse. Check out how we built the small playhouse for our kids, on a budget, starting with the deck. This project was so easy and now we can see the playhouse starting to take shape. Housefulofhandmade.com | How to Build a Playhouse | DIY Swing Set | Small Playhouse | Playhouse Build Plans

I will also be sharing our supplies total with you so you can see the total investment as we go. I know we will be saving so much money over store bought playhouses and swing sets, but this is not a cheap build.

And most importantly, I hope to maybe inspire you to someday take on a DIY playhouse too! So let’s get started!

 And don’t miss the rest of the posts in the series. Click the links below for the rest of the playhouse build.

THE WALLS || THE RAILING || THE SLIDE & CLIMBING WALL || THE ROOF

Printable PDF Plans

Prefer to print the instructions?

Grab the complete build plans (from all 5 posts) in one easy to follow printable PDF here. The plans include:

  • List of recommended tools
  • Detailed supply lists
  • Easy to read cut list table
  • Step-by-step instructions with diagrams & pictures
  • BONUS: 3D SketchUp file

Material and cut lists include the totals for the entire build, as well as a break down for each step. Makes it easy to buy all at once or purchase as you go. 

Click the link below for everything you need to build your own playhouse and so you can get the kids outside playing for hours on end!

Button to buy playhouse PDF build plans.

How to Build a DIY Playhouse Deck

Tools:

Supplies:

Building the deck is easier with 2 people. My husband helped me get the base built and leveled, then I added the joists and deck boards by myself.

It took us 2 hours together to get the base built, in place and leveled and it took me 4 hours on my own to finish everything except adding the sealer (I still haven’t done that because it was super windy).

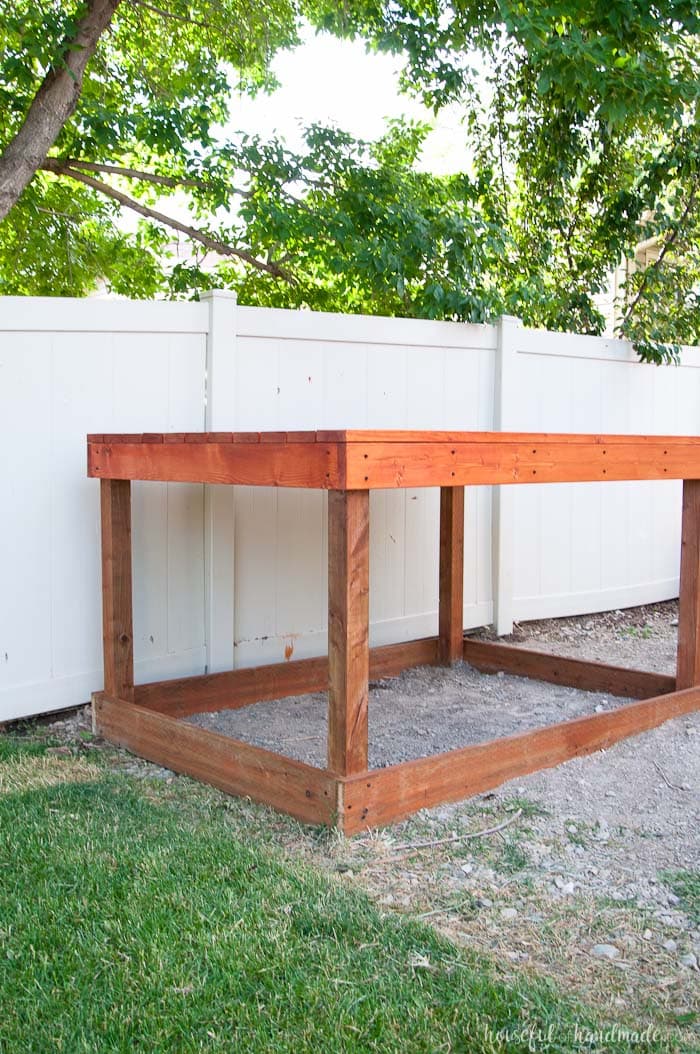
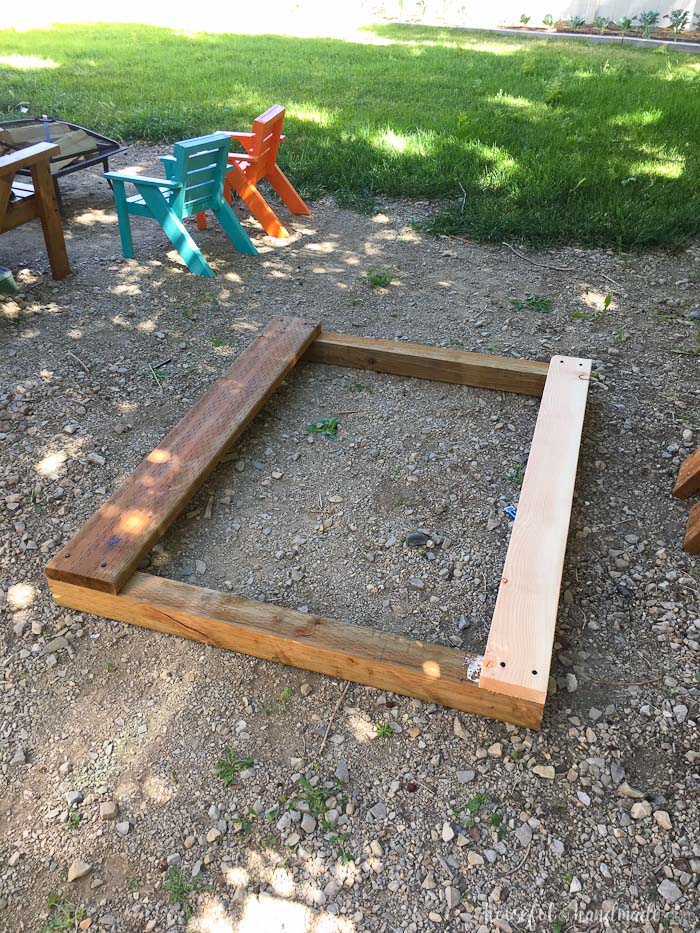
To build the base, start by cutting the 4×4 boards in half so you have (4) 4′ boards. Then cut the 10′ 2×8 board and (1) 10′ 2×6 board in half so you have 2 5′ boards of each.

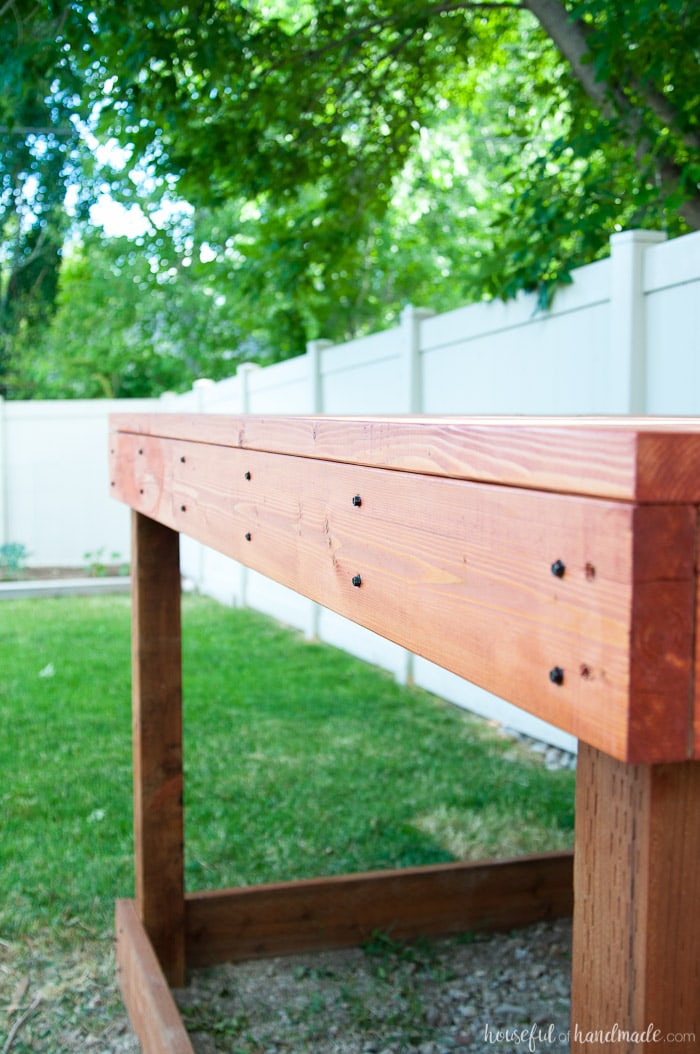
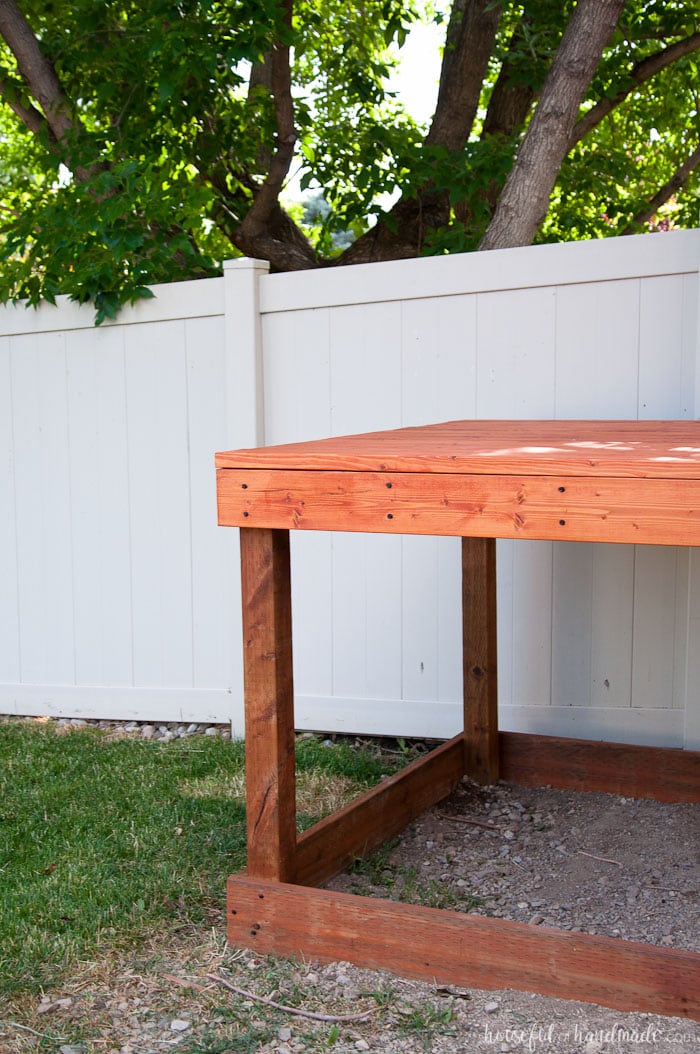
Attach one of the 2×8 boards on the bottom of 2 of the 4×4 boards and one 2×6 board on the top using (2) 4″ Trex screws on each edge. Repeat so you have 2 of these.
Even though our yard is small, we decided we still needed a DIY playhouse. Check out how we built the small playhouse for our kids, on a budget, starting with the deck. This project was so easy and now we can see the playhouse starting to take shape. Housefulofhandmade.com | How to Build a Playhouse | DIY Swing Set | Small Playhouse | Playhouse Build Plans

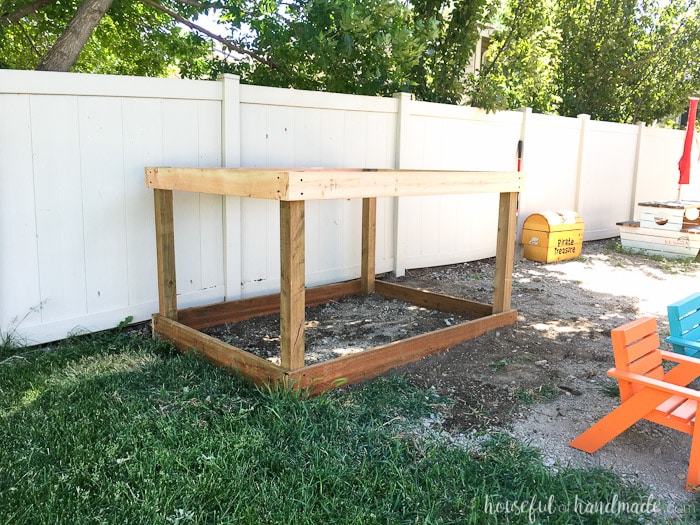
Next cut the 8′ 2×8 boards and (2) 8′ 2×6 boards to 7′. Join the two sides together with the 2×8 boards on flush to the bottom and the outside of the 5′ boards and the 2×6 boards at the top with the 4″ TimberLOK screws.
Even though our yard is small, we decided we still needed a DIY playhouse. Check out how we built the small playhouse for our kids, on a budget, starting with the deck. This project was so easy and now we can see the playhouse starting to take shape. Housefulofhandmade.com | How to Build a Playhouse | DIY Swing Set | Small Playhouse | Playhouse Build Plans

At this point we moved the deck in place and got it leveled, which was a mistake. You want to add the joists first in case you cannot access the back of the deck like me.

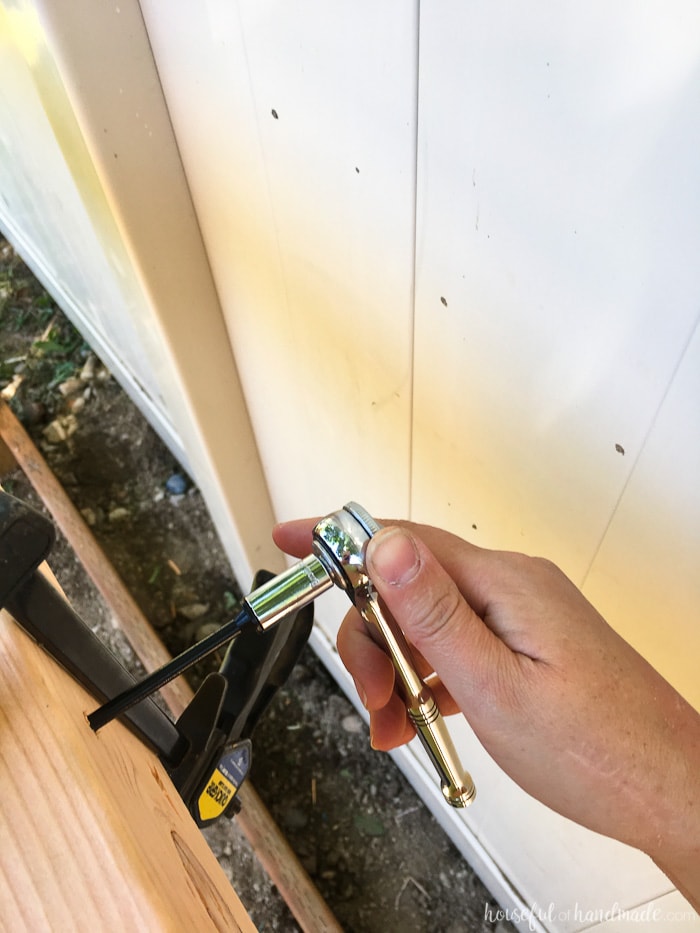
I was able to use my drill to pre-drill holes into the 2×6 boards. Then with a wrench managed to get in between the fence and the deck and manually drive in the 4″ screws. It wasn’t too hard, but definitely not as easy as doing it before the deck was in place next to the fence.
Even though our yard is small, we decided we still needed a DIY playhouse. Check out how we built the small playhouse for our kids, on a budget, starting with the deck. This project was so easy and now we can see the playhouse starting to take shape. Housefulofhandmade.com | How to Build a Playhouse | DIY Swing Set | Small Playhouse | Playhouse Build Plans

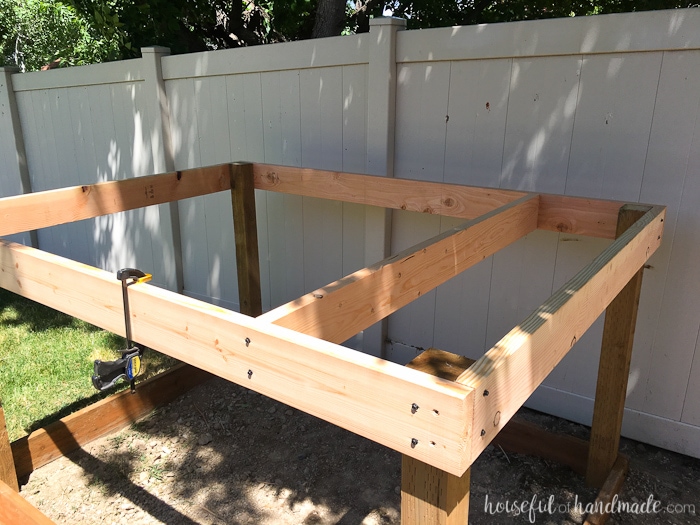
To add the joists, cut (2) 10′ 2×6 boards in half so you have (4) 5′ boards. Space the boards evenly between the outer boards. They will be about 16 1/4″ apart on center.

Secure so they are flush with the top with 4″ screws.
Even though our yard is small, we decided we still needed a DIY playhouse. Check out how we built the small playhouse for our kids, on a budget, starting with the deck. This project was so easy and now we can see the playhouse starting to take shape. Housefulofhandmade.com | How to Build a Playhouse | DIY Swing Set | Small Playhouse | Playhouse Build Plans

Now it’s a good time to position and level the deck. Our yard is pretty sloped so we had to dig out about 4″ at the one end. Dig and level, dig and level until everything looks great.

Luckily I had my hubby for this part because the deck is HEAVY! Two people could move it easily, but to do that on my own it would have taken me forever.
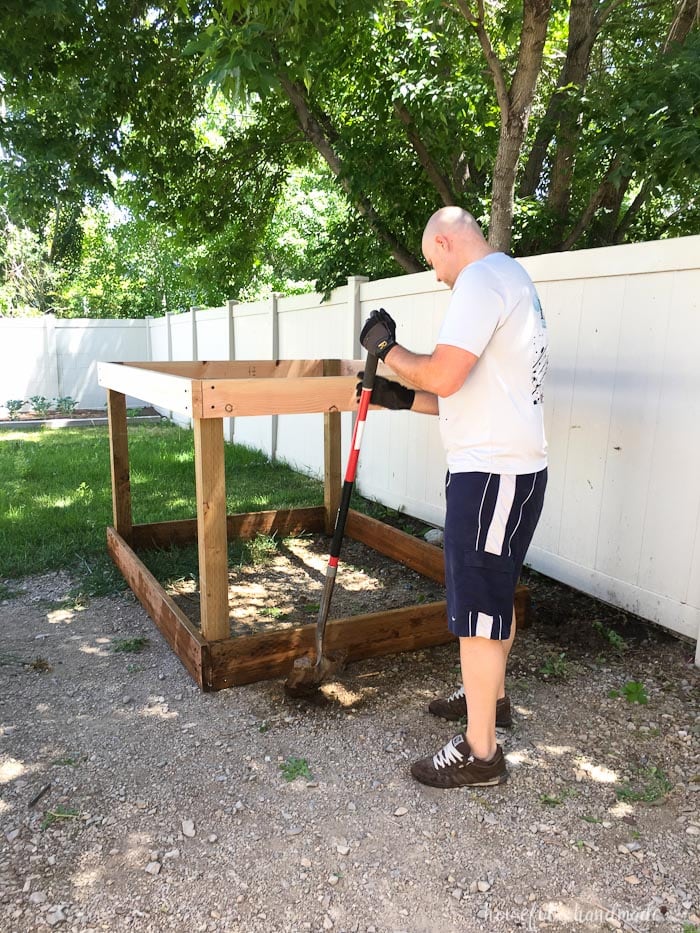
Even though our yard is small, we decided we still needed a DIY playhouse. Check out how we built the small playhouse for our kids, on a budget, starting with the deck. This project was so easy and now we can see the playhouse starting to take shape. Housefulofhandmade.com | How to Build a Playhouse | DIY Swing Set | Small Playhouse | Playhouse Build Plans

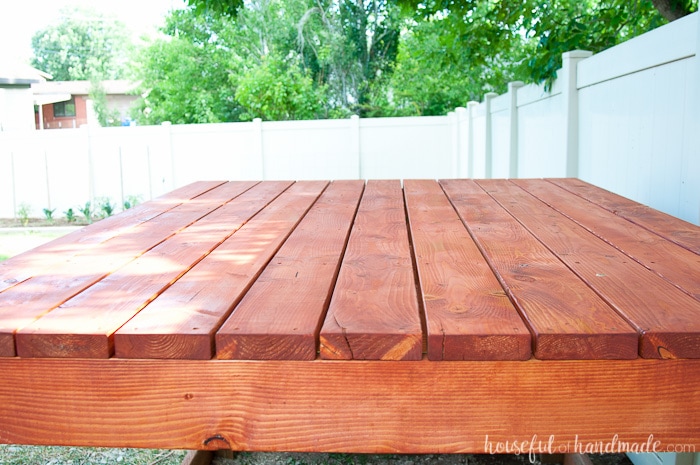
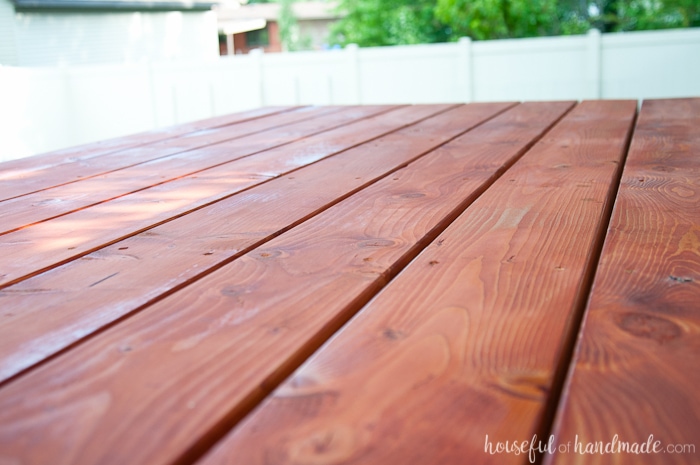
Once everything was level, I cut the rest of the 8′ 2×6 boards to 7′ for the deck. I decided to get them sanded and stained before putting them on the deck (I also quickly stained the deck and joists). It was easier then trying to make sure I got the stain in between all the boards.
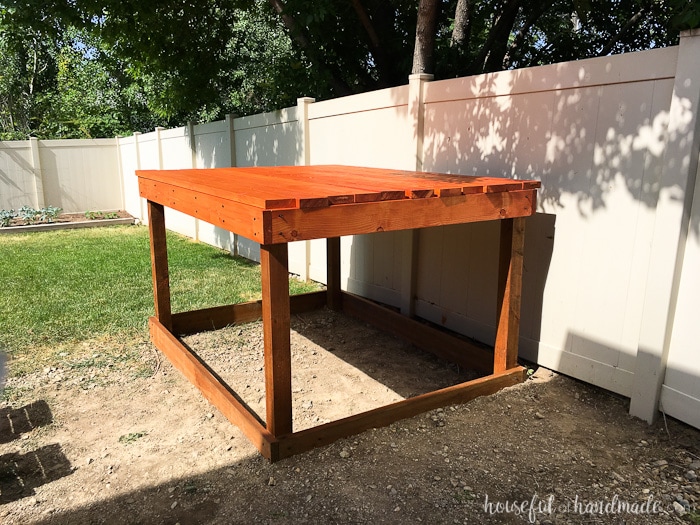
Even though our yard is small, we decided we still needed a DIY playhouse. Check out how we built the small playhouse for our kids, on a budget, starting with the deck. This project was so easy and now we can see the playhouse starting to take shape. Housefulofhandmade.com | How to Build a Playhouse | DIY Swing Set | Small Playhouse | Playhouse Build Plans

Then I laid out the deck boards, there was about 1/4″ between them.

I used 2 1/2″ decking screws to secure them. Use 2 screws in each joist. Some of the screws caused slivers of wood to poke up, so I gave the entire top a quick sanding and then a second coat of stain.
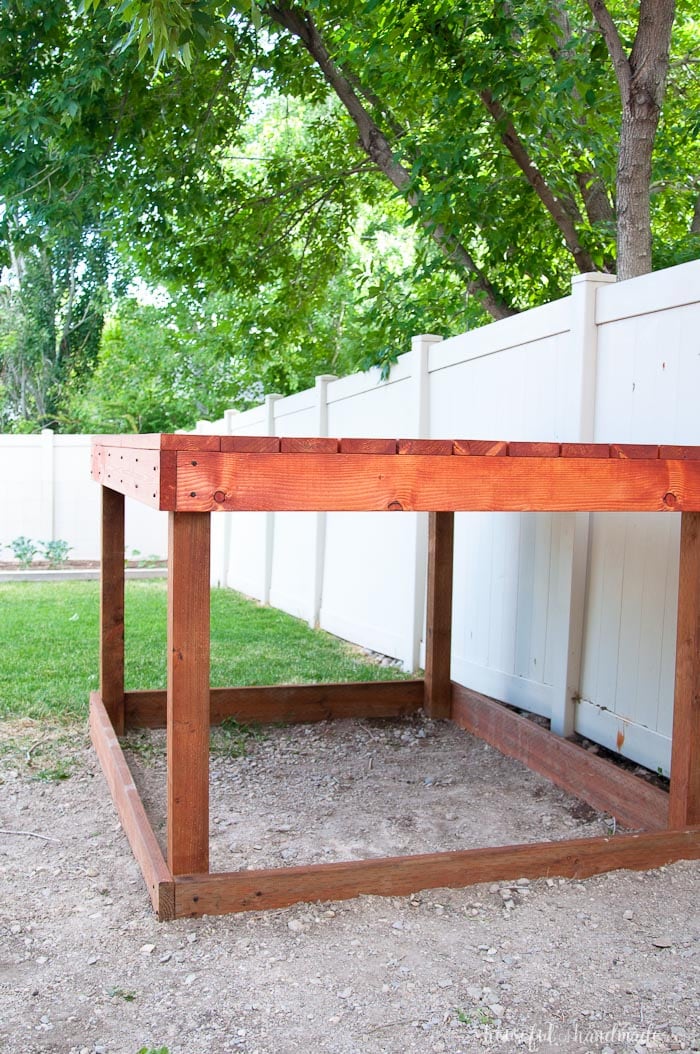
Even though our yard is small, we decided we still needed a DIY playhouse. Check out how we built the small playhouse for our kids, on a budget, starting with the deck. This project was so easy and now we can see the playhouse starting to take shape. Housefulofhandmade.com | How to Build a Playhouse | DIY Swing Set | Small Playhouse | Playhouse Build Plans

Finally, protect the deck with an outdoor wood sealer. I am planning on using spar urethane when the wind dies down. Most of the deck will actually be protected by the roof of the playhouse, but I want the playhouse to last for years and taking the extra steps to protect it will help that.

So now I am super excited for some good weather next week. I cannot wait to build the walls and install them. Then it will actually look like a DIY playhouse and not just the perfect stage for my daughter.

And now for the $$$. Here is what we have spent so far:

  • (2) 4×4 8′ boards = $19.94
  • (2) 2×8 8′ boards = $22.34
  • (1) 2×8 10′ board = $13.98
  • (13) 2×6 8′ boards = $78.65
  • (2) 2×6 10′ boards = $15.00
  • (2) 1lb boxes 2 1/2″ decking screws = $18.74
  • (52) 4″ TimberLOK hex screws = $28.31
  • Glue (already had)
  • Stain (already had a gallon from a clearance sale, only used about 1/5 of it).
  • Sealer (already had but it’s about $18 for a quart)

Total: $196.96

I also ordered a slide ($100) and pulls for a climbing wall ($20). I estimate we about 1/2 way through the total budget. If I am estimating correctly, we will end up with a DIY playhouse for about $600. That is really amazing considering the swing sets start at about $600 and they have nothing on this!

Even though our yard is small, we decided we still needed a DIY playhouse. Check out how we built the small playhouse for our kids, on a budget, starting with the deck. This project was so easy and now we can see the playhouse starting to take shape. Housefulofhandmade.com | How to Build a Playhouse | DIY Swing Set | Small Playhouse | Playhouse Build Plans

But now I need to get back to work! This playhouse is not going to build itself.

-Kati with picture of blog author Kati
Even though our yard is small, we decided we still needed a DIY playhouse. Check out how we built the small playhouse for our kids, on a budget, starting with the deck. This project was so easy and now we can see the playhouse starting to take shape. Housefulofhandmade.com | How to Build a Playhouse | DIY Swing Set | Small Playhouse | Playhouse Build Plans

Would you like to save this tutorial?

I'll email this post to you, so you can come back to it later!

62 thoughts on “Our DIY Playhouse: The Deck”

  1. Hi, Kati! I just purchased your build plans for the treehouse yesterday. Thanks for making this available. It’s very thorough!
    Just wanna double check with you that there are 2 types of wood thickness being used for the deck build – 2″ and 4″ thick. Or is it 1.5″ thick, not 2″?

    • I just read your answers to other posts and found out that the actual lumber sizes are different to how they are labeled in the store. I understand the discrepency now. It’s 1.5″ thick not 2″. Thank you!

  2. This is a very cool project, just be prepared for wood to be on the rise. I cant wait for the prices to go down so I can finish this. We have the deck going right now! Thank you for this project, it so cute!

  3. Hi,
    I’m hoping to build this for my son! Did you secure the playhouse to ground at all such as with cement? Curious about stability with kids jumping off.

  4. We got the plans yesterday and are planning to start the base ASAP! Couple of questions…
    1. it says we should use 52 4″screws, but I only see using 48…
    2. it says we need 13 boards for the deck, but the visual only shows 11…

    • Hi Molli. The other 2 boards for the deck go on the front and back of the posts. Then you have 11 on top. As far as the screws, I may be including the screws I used in the next step, its hard for me to remember.

  5. Thank you for posting!! I found this plan and started the base last night. Going 7x7ft and 5 ft tall so we can do more under it! Going to use your plan as a foundation and add some customizations.

    THANK YOU!

  6. Great work on the playhouse! I’m using it as a guide for one I want to build my daughter.
    I plan on building this to be 8ft x 8ft so will definitely adjust the measurements and materials accordingly.
    Question #1: Do you think it would matter using 2×8 for the deck boards instead of 2×6?

    Question #2: Do you have any overhang with the deck boards? Or did you have the 5×7 dimensions in mind for it to align perfectly?

    I am trying to see between 2×4, 2×6 and 2×8 which one would be less expensive. Thanks!

    • Yes 2×8 boards would be fine for the deck. There is no overhang, but you could definitely add one. just make sure the walls of the playhouse are over the base so it is fully supported.

  7. Hi.
    Thanks for the plans! I am so excited for this project!. I am already done with the platform and moving into the walls. I have a question, for the siding, do you have a link of a product i should be looking for? Ita my firstbtimw doing a project like this and when i search at homedepot, per say, i get a lot of different stuff that i dont know what to hoose.
    Thanks a lot

    • Just make sure the siding you choose is for outdoor use and the sheets are 4×8. Otherwise, you can choose whatever style you like (or that fits in your budget).

  8. How has the clubhouse held up over the years. I’ve started building it but concerned about securing it to the ground. I know it’s heavy but did you have any stability issues?
    I live in IL where wind and storms are obviously a factor.

    Thank you for sharing.

    • There have been no stability issues with us. We do have winds, but not strong winds very frequent. One other thing we did, makes sure not to orient the playhouse so the winds (they tend to usually come in the same direction) travel up the side of the roof instead of coming right into the front of the playhouse. If you are worried you could create cement footers in the corners to attach it.

  9. This absolutely what I’ve been searching for! We have an insane amount of scrap wood that we’ve been collecting from around our neighborhood due to all the house flipping that has been going on. We have a lot of 2×4’s and I was wondering would that be a problem to use for the deck instead of the 2×6’s? Will it effect how well it will support the complete playhouse?

    • Yes you could use 2x4s for the deck. They will be very slightly less stable, but since the playhouse sits on top of the posts and deck joists it should be fine. You may have to adjust the size of your deck to accommodate the different sized boards though.

  10. Did you not use a stain with a sealer in it already? I’m kind of confused on why you would be putting a wood sealer on top of an exterior stain with sealer already in it? This is my first time and I’m reading that you shouldn’t put a sealer on top of stain that already has sealer in it.

    • I just used a wood stain. I like to seal it with polyurethane or spar-urathane (for outdoors) after I seal for a glass like protection layer. I used Minwax sealer and have no issues with it with the top coat.

  11. is the wood glue necessary? Where are you using the wood glue? Also did you have anywhere in your directions what you did for the sand pit underneath the deck?
    Thank you!

    • I use wood glue anywhere there is a wood-on-wood joint. The wood glue gives you extra strength on your joints because it helps to basically fuse the two pieces together. I might not be necessary, but it’s cheap and easy to add so I love using it for extra strength. For the sandbox, we had road base underneath the sand because it was already there. We did not put down landscaping fabric, but I have to pull up grass that comes in a couple times a year. We bought a truck load of dirt from a landscaping place for $35 and that was more than enough to fill it.

      • How did you secure this to the ground? Is it steady ? It’s windy where I live I’m afraid wind will take it.

        • It is not secured to the ground, it is very heavy. If you are worried about winds, you could dig post holes in the corners and fill with cement. Then top those with a way to secure the deck. But it is more like a shed than something that winds could pick up.

  12. Thank you for sharing this with the world! I love it! So is the base 5’x7’ I’m trying to figure this thing out! Thank you!

  13. Hi I´m from germany and my children love your Playhouse.
    Can you tell my if you work with inches or zoll. I have some problems to identify how long the woods must be. For example 10´ 2×6. Is it 10 inch or feet long and 2×6 zoll or 2×6 inches.

    Thanks a lot and all the best from germany.

    Jens

  14. Hi, i would love To work on this project, but i was wondering where are you from ? So i can figure out if thé cost will be around yours or not.

    Thanks, and i am from around montreal.

  15. So my husband and I are starting this project and I’m so excited!! I do have a question about staining and sealing the wood. Did you stain and seal the pressure treated wood? Thanks so much for sharing this amazing playhouse!!

    • I did add some stain to the pressure treated wood to help it to match the other wood. However, I did not seal it. Good luck with your build!

  16. After typing up shortened directions, shopping around, and several days of construction, we finally got it built and put together.

    We did make some alterations, and we wanted the kiddos to have a swing, so we married other plans to this one. Overall, we’re very please with the final product.

    We did discover some issues with the directions though, and can’t stain/seal it yet, as we need the treated wood to dry out first. If you’re interested in correcting any of the issues, let me know.

    Overall, thank you very much for your detailed and thorough plans. Our kids are already LOVING their new play set.

    Also, if you’re interested in seeing our final product with the alterations, let me know. I’d be happy to show off our hard work!

    • I am so glad your kids are loving their playhouse! My daughter would love to have a swing addition, but our yard is just too small. I would love to have you share any issues you saw, I love to keep things updated here for everyone to benefit from! And I would love to see your final playhouse. If you share it on social media, you can always tag me @housefulofhandmade or send me an email. Thanks Will!

  17. Would you mind sharing a ballpark of how much you spent on this project? Just on materials. It’s so adorable!

    Thank you!

  18. I’m so grateful I found this tutorial on Pinterest! Definitely plan on (making my dad) make it soon. Quick question – you didn’t place any support in the ground with concrete. Is that just not necessary, or do you think that step should or could be added to make it even more sturdy? Thanks!

  19. This is so fun!!! I want my husband and I to build one this week for the kiddos!

    I am curious why you cut the boards down a foot. Is that because you wanted that particular size or is there another reason? I’m not much of a woodworker, so I’m sorry if this is a dumb question!

    • I cut them down because we have such a small space. I know 1′ less isn’t too much but it was what we needed for our tiny yard. If you go bigger, you will need to readjust the walls and roof dimensions to make it fit properly.

  20. Hi Katie, what do you use the outdoor glue for? I see it listed as a supply, but no direction for use in the tutorial. Love this playhouse! Thanks for sharing 🙂

    • I use glue on all my joints when building. Wood glue will make the entire thing sturdier. The only time I don’t use glue for the playhouse is putting the deck boards on top of the frame. But it wouldn’t hurt there.

  21. Hello,

    Great plans and excited to build this myself. One thing to comment on, it looks like you shorted the 10′ 2×6 boards by one in your plan. I’ve read this through and mapped it out a few times to make sure I’m not crazy, but you said you need 1 2x6x10′ board for the base (sides) and 2 2x6x10′ boards for the joists. My daughter said 1+2=3, but your supplies only list 2 2×6 10′ boards :). Thanks for the plan, looks great!

    • Thanks for catching that! Sometimes my brain has a hard time when I am trying to not forget anything. I’ll update it in the plans. Have fun building!

      • I know how that goes!!

        So far so good. We built ours 5 ft high and 8 ft across to give a little more room and so we didn’t have to cut 1 ft off. Have the deck done and slide on. Doing stairs instead of a rock wall and waiting for the stair material before moving forward.

  22. Hi
    Amazing playhouse..
    Is it possible to build the deck a bit higher? For example 5′ or 6′?
    Will it still be stable?

    • You could build the deck a bit higher, but then if you want to add a slide, you will need a larger slide. The slide I used said to mount it between 40″ and 50″. If you are worried about stability, you can also add supports at a 45 degree angle on the open sides of the deck. But the slats added for the climbing wall really help add a lot of support to the deck. Hope this helps!

Comments are closed.