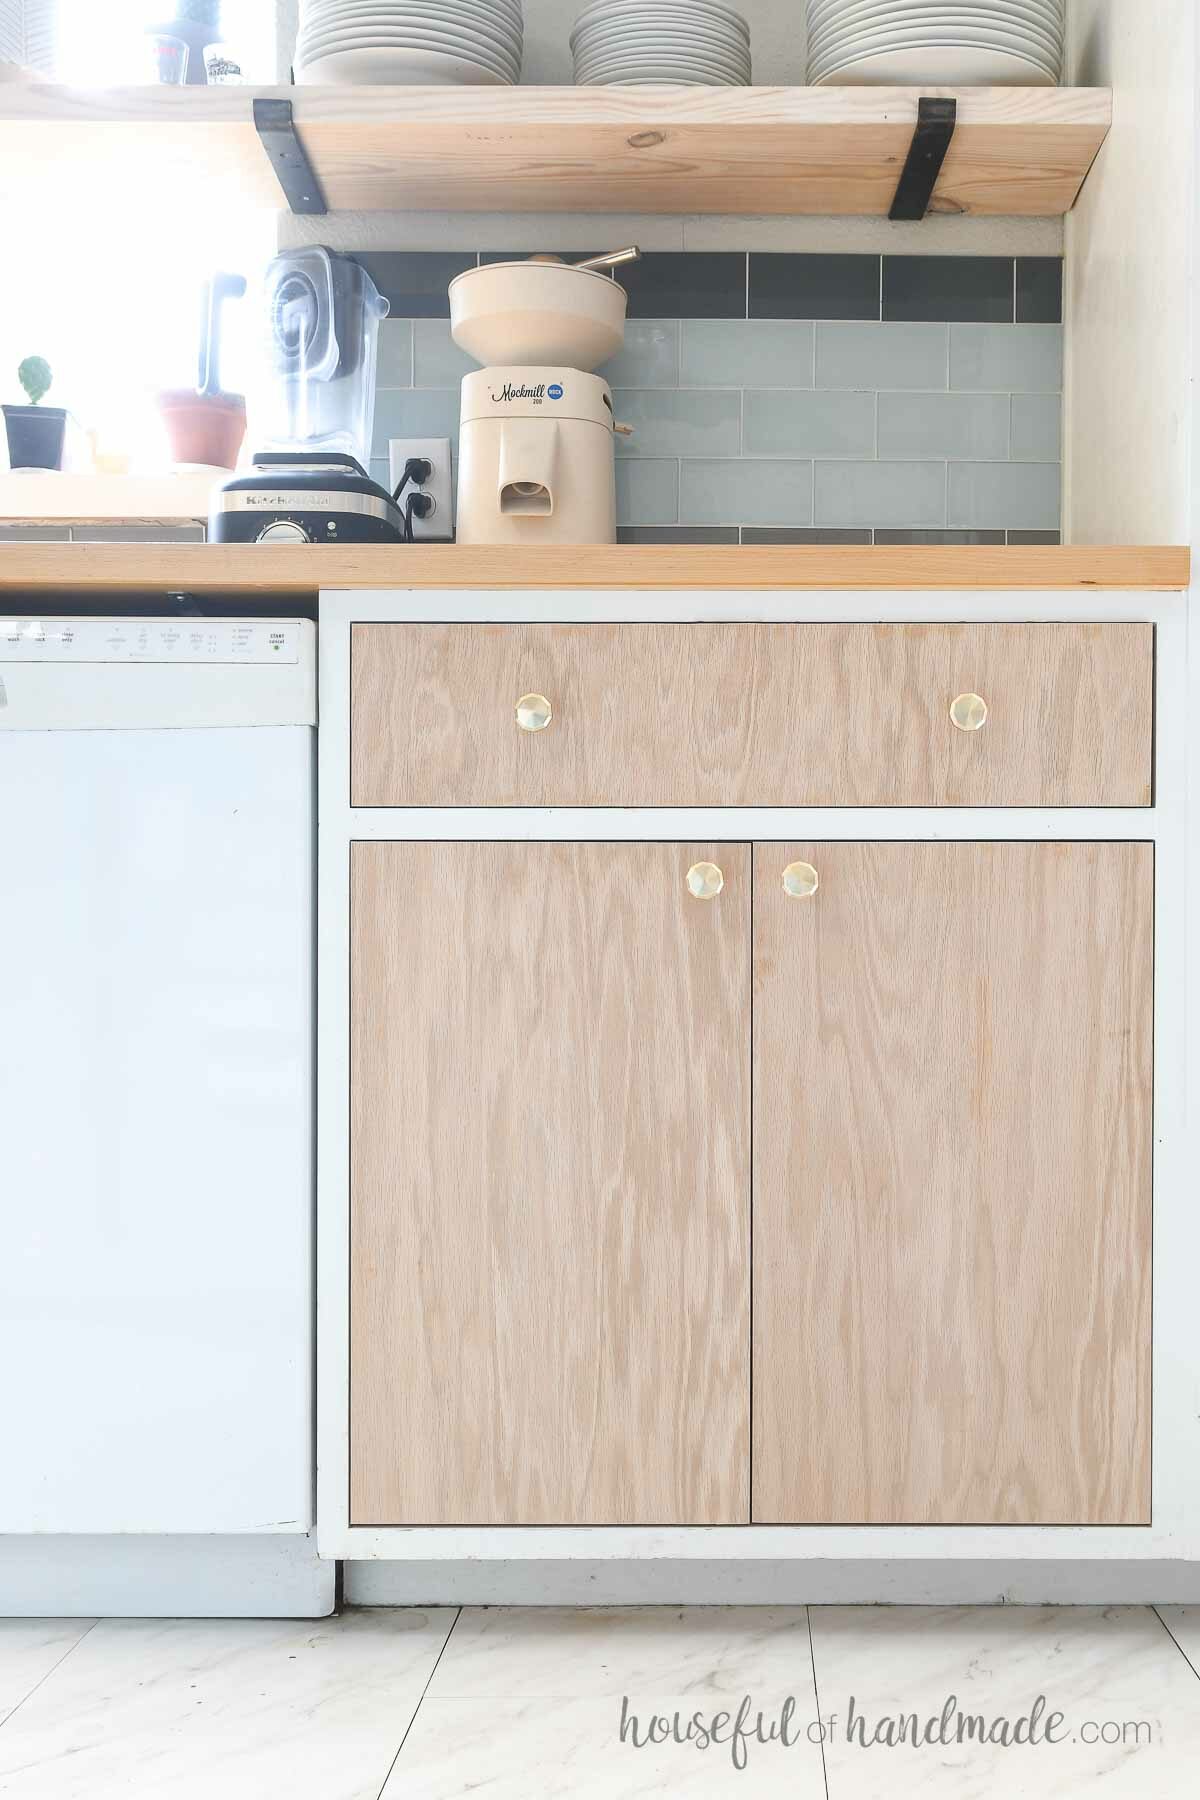
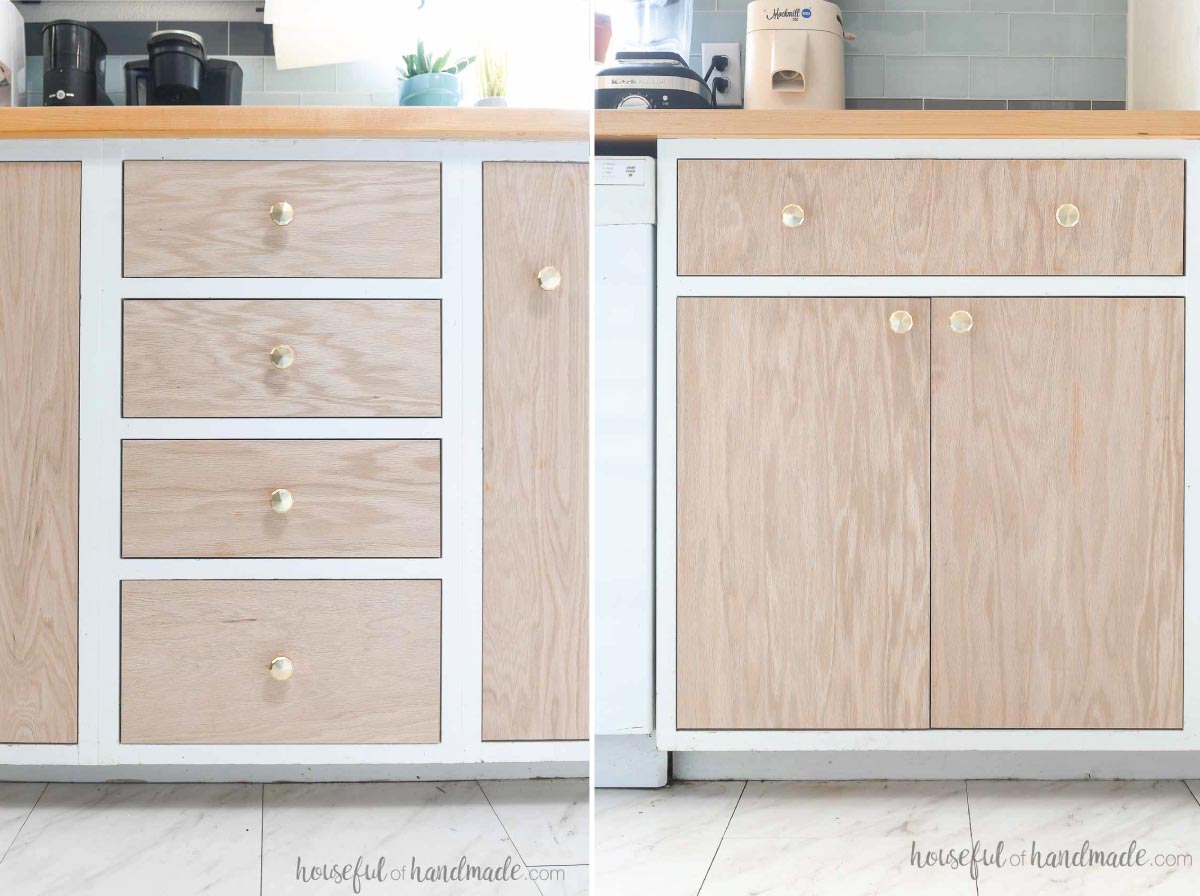
Slab cabinet doors are flat panel doors that have no frame or detailing. Instead the entire cabinet door is flat.
These types of cabinet doors a great for modern kitchen, cabinets or furniture. But can even be used in a more traditional style kitchen like I did with inset cabinet doors.
Either way, my favorite part of plywood kitchen doors, is they are easy to make and are very cost effective!
This post may contain affiliate links. As an Amazon Associate I earn from qualifying purchases. Click here to read my full disclosure policy.
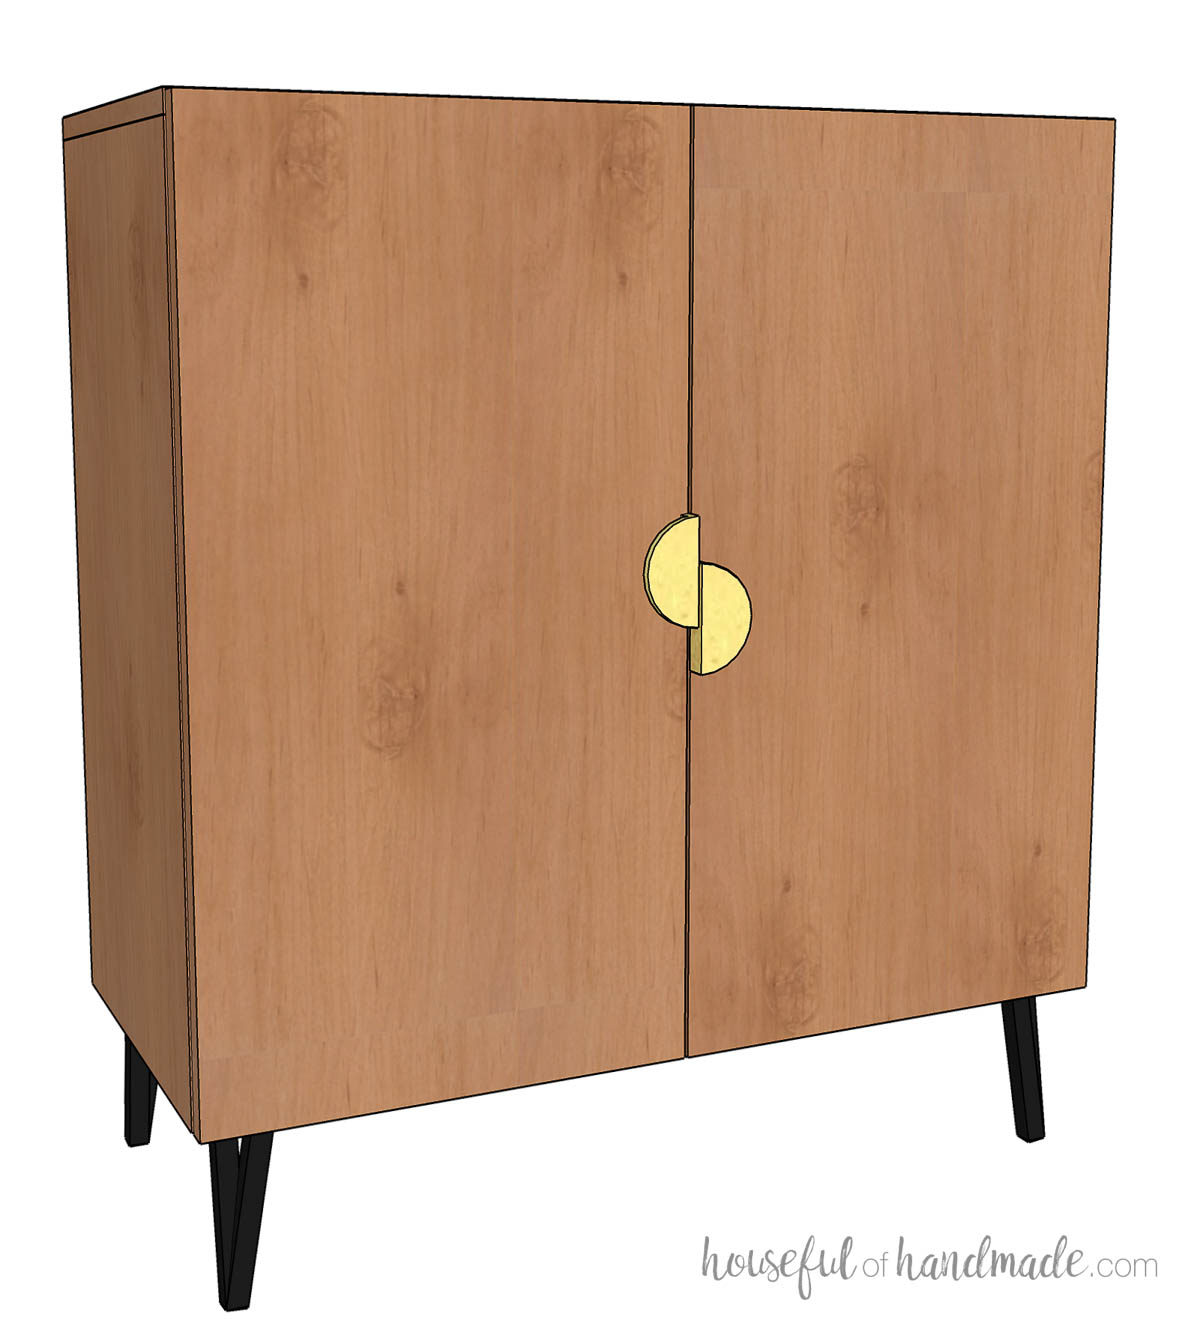
Use them to replace your old cabinet doors, on new DIY cabinets, or for any DIY furniture you are building.
Best plywood for cabinet doors
You can use any quality plywood to build your cabinet doors. Low quality plywood can have a lot of voids or larger voids in the layers, which can create weak spots in your doors.
Plus voids in the door where you drill the holes to attach hinges can be problematic.
I suggest visiting a lumber yard that specializes in wood for cabinet makers. They will usually have really nice plywood in many different species.
Even with spending $20-$40 more per sheet of plywood, DIY slab cabinet doors are a very inexpensive option. I got all the doors for my kitchen out of 2 sheets of plywood (I do not have any upper cabinets though).
If you are going to paint your doors, it does not matter what species of veneer is on your plywood. Pick a smooth surface species.
For plywood cabinet doors that are stained/sealed, you want to pick a species the color and grain that you want.
Then you will need to buy iron on edge banding to cover the cut edges of your plywood doors. Match the edge banding to the species of plywood.
Sizing Your Doors
If you are replacing existing cabinet doors, all you have to do is measure the old door. This will work for any replacement cabinet door where you are using the same hinges.
If you want to change the look of your kitchen or are building new, you will need to know the following before you can figure out the size of your door:
- Type of cabinet (face frame or frameless)
- Inset or overlay doors
- What hinges you are using
I go into detail about how to size your cabinet doors here with everything you need to know for perfect slab cabinet doors.
How to Make Plywood Cabinet Doors
Tools & Materials
Recommended Tools:
- Circular saw with guide track
- Make sure to use a plywood saw blade for clean cuts.
- Drill
- Impact driver (optional, but I love not having to switch bits with the drill)
- Optional: Table saw
- The table saw fence makes repeating cuts faster, but it is not necessary.
Supplies:
- 3/4″ thick plywood
- Plywood edge banding
- Concealed door hinges
- Make sure to pick the right hinges for the style of cabinet doors.
Helpful Definitions
If you are newer to woodworking, these terms may be confusing as your read through the instructions. Take a minute to familiarize yourself with them so you can be successful with your DIY plywood door project!
Kerf: Kerf refers to the void made by the saw when cutting. Different saw blade have a different sized kerf based on the thickness of the blade.
When planning cuts in your plywood you need to account for kerf so that you have enough material to get an accurately cut door.
Cross Cut: Cross cut refers to making cuts across the grain.
Rip Cut: Rip cut refers to making cuts with the grain of the wood.
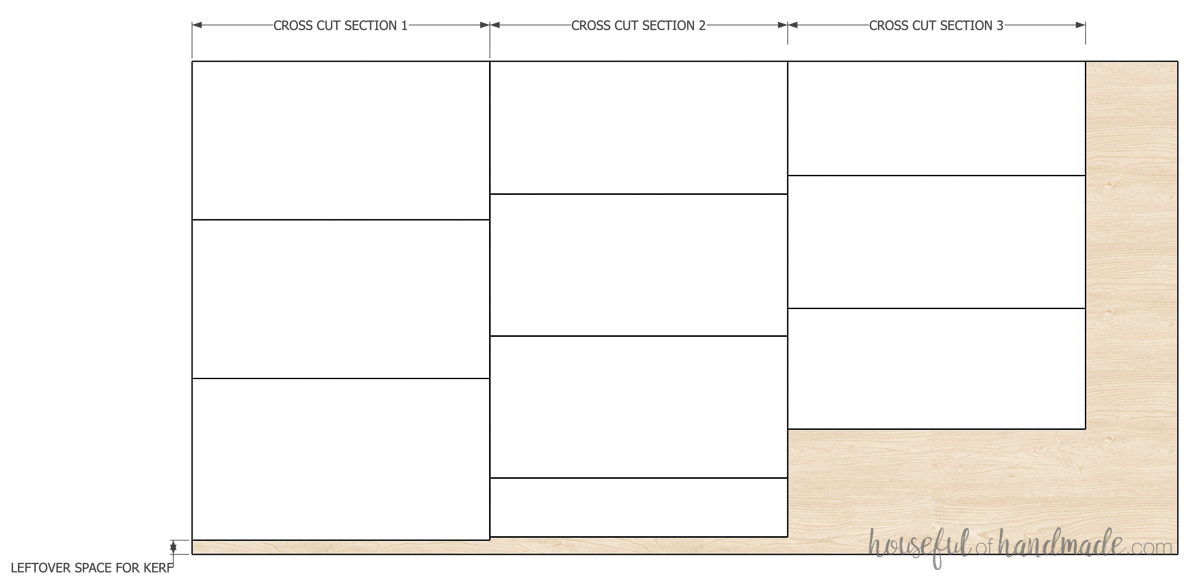
STEP 1- Create a plywood cut diagram
Before knowing how much plywood you need to buy, I like to create a quick plywood cut diagram to see how to best fit all my pieces, with the least amount of waste.
You can use whatever easy art program you like, or even do this by hand. Since I am super familiar with SketchUp, it is what I use. But you do not need a 3D program.
Create a square the size of your plywood sheet (48″ x 96″). Then create squares for all the plywood doors you will be cutting out.
Then you can place the pieces into the plywood sheet like a puzzle.
Don’t ever plan to use the entire 48″ or 96″ length. You need to leave around an inch to allow for kerf. The more cuts on a piece, the more leftover space needed.
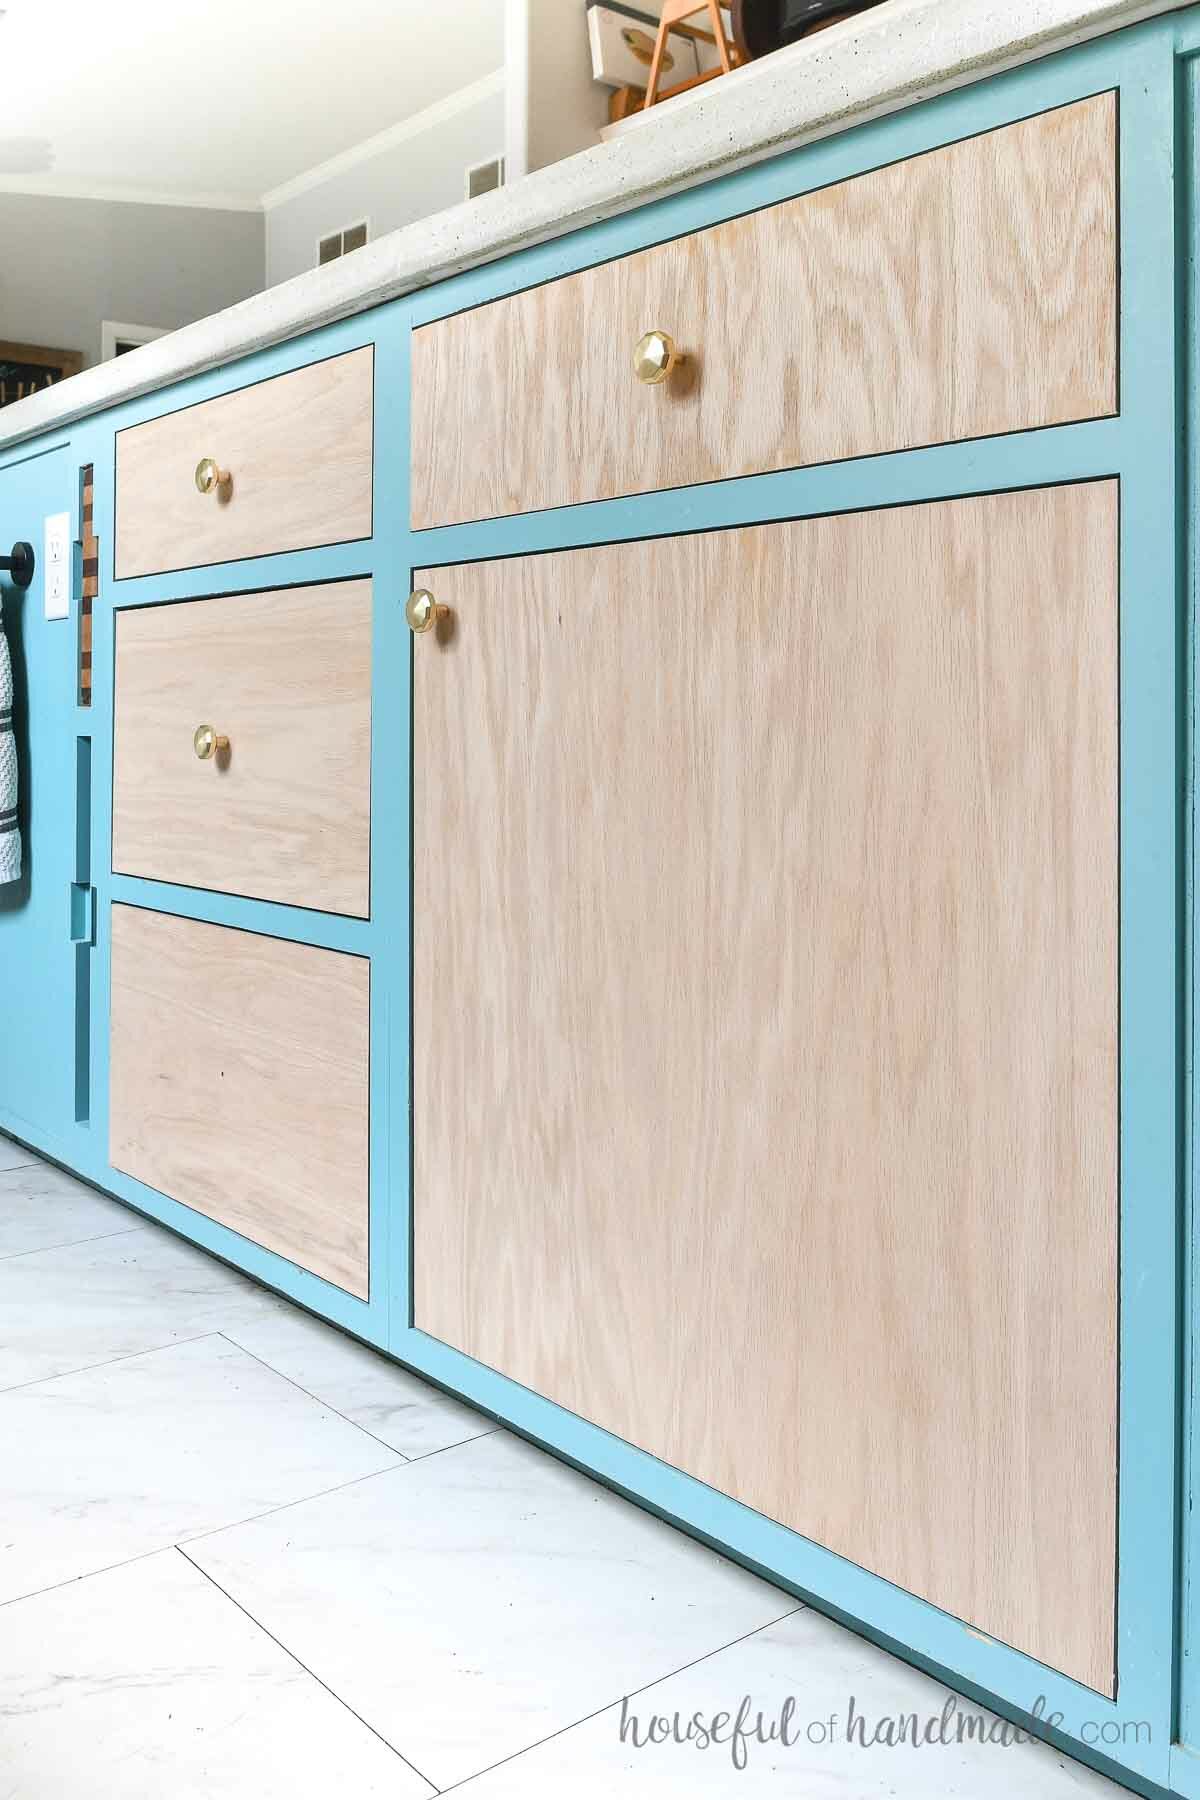
When arranging the door pieces on the plywood sheet, make sure to take into account the grain direction if you not painting your cabinet doors.
Typically the grain is run vertically for slab cabinet doors. But you can chose any direction you want.
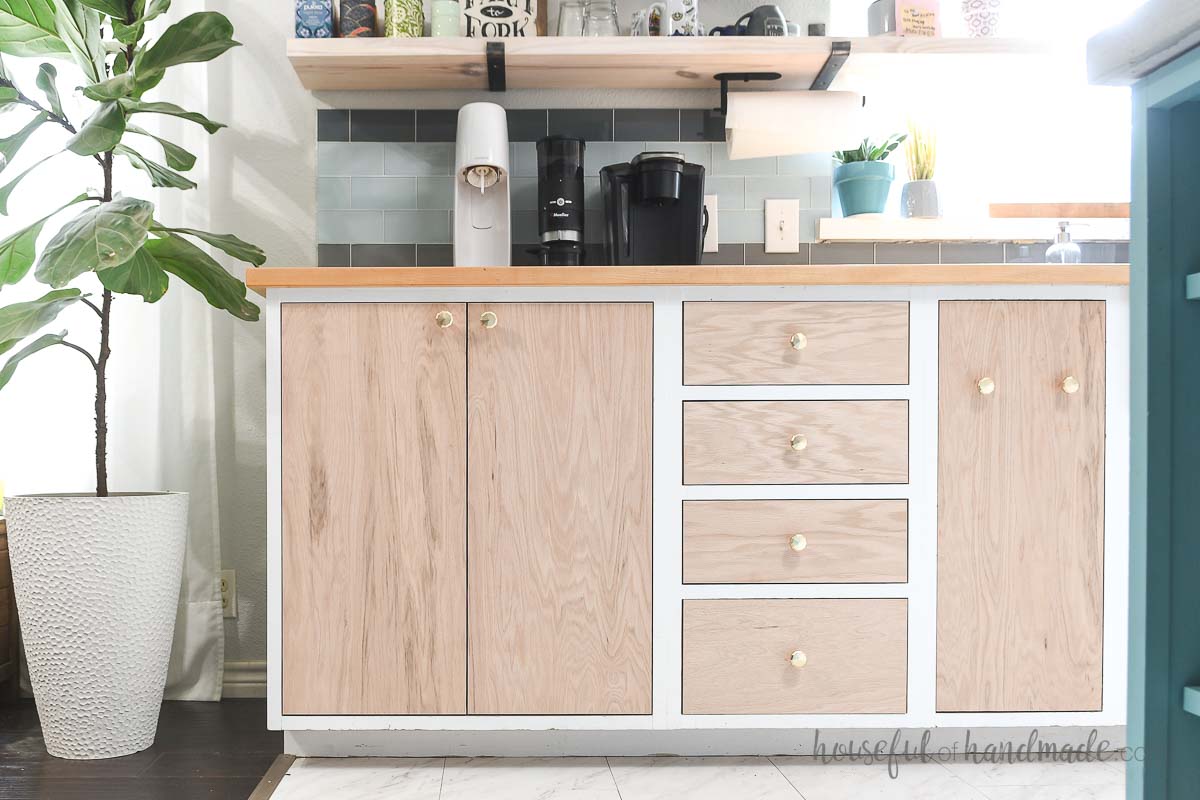
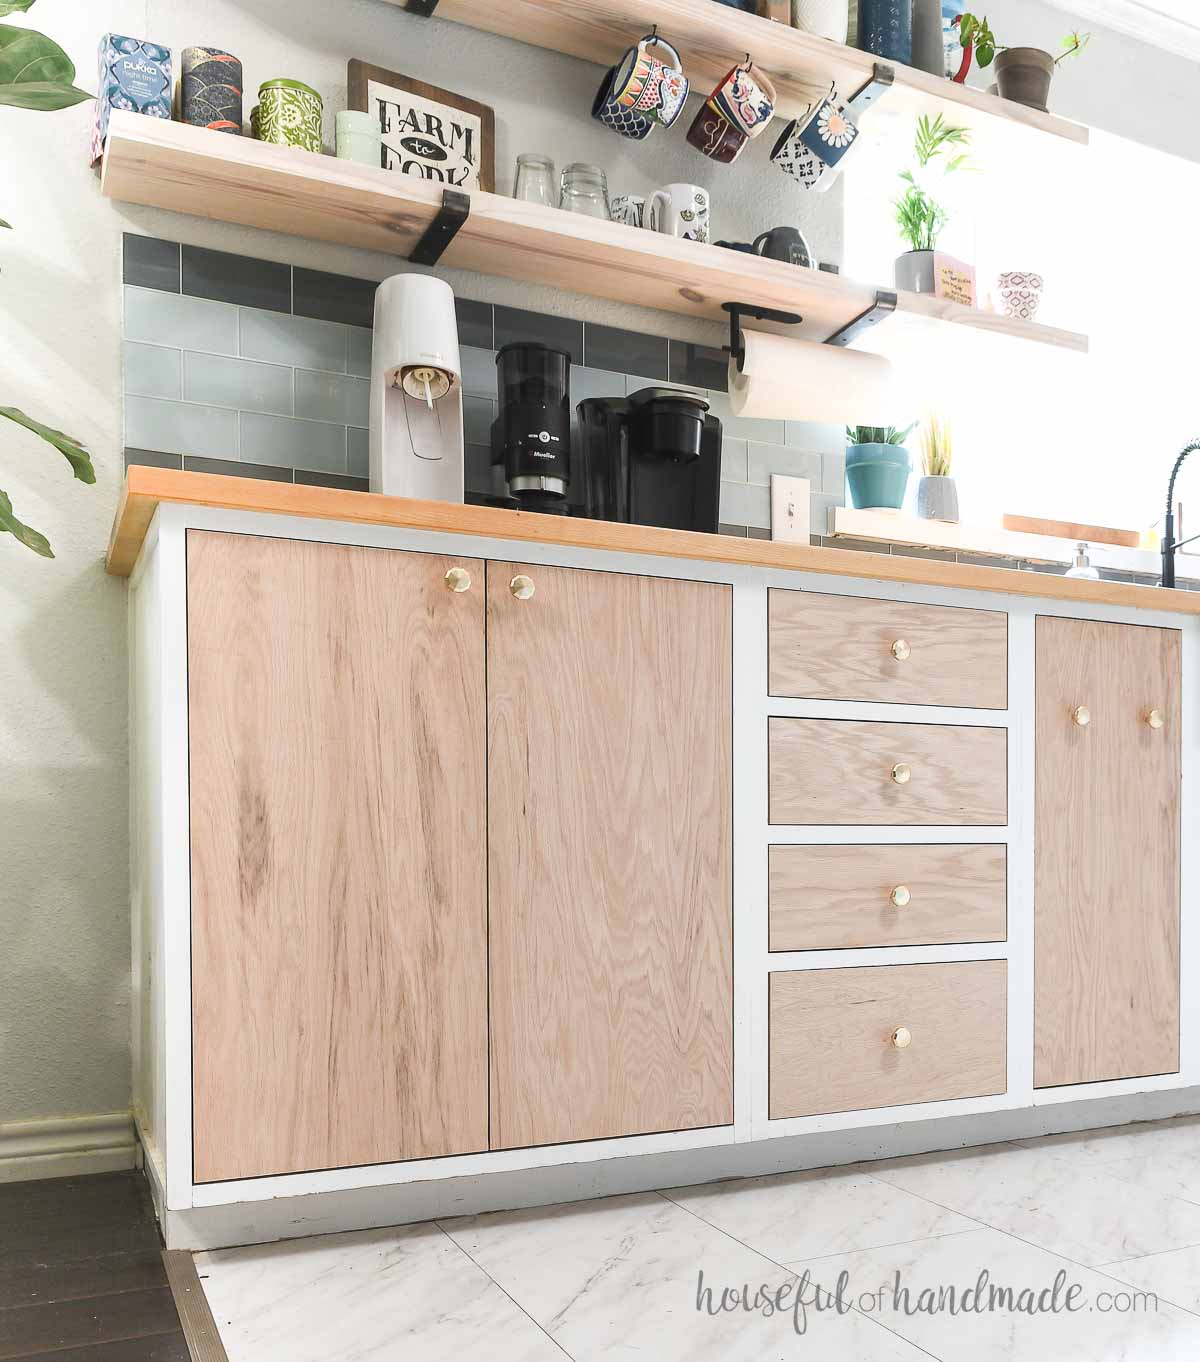
You can also change the direction of grain for the drawers, or leave them vertical. It depends on the look you want. Because I am going to paint my doors, I installed some drawers horizontal and some vertical to show what it each looks like.
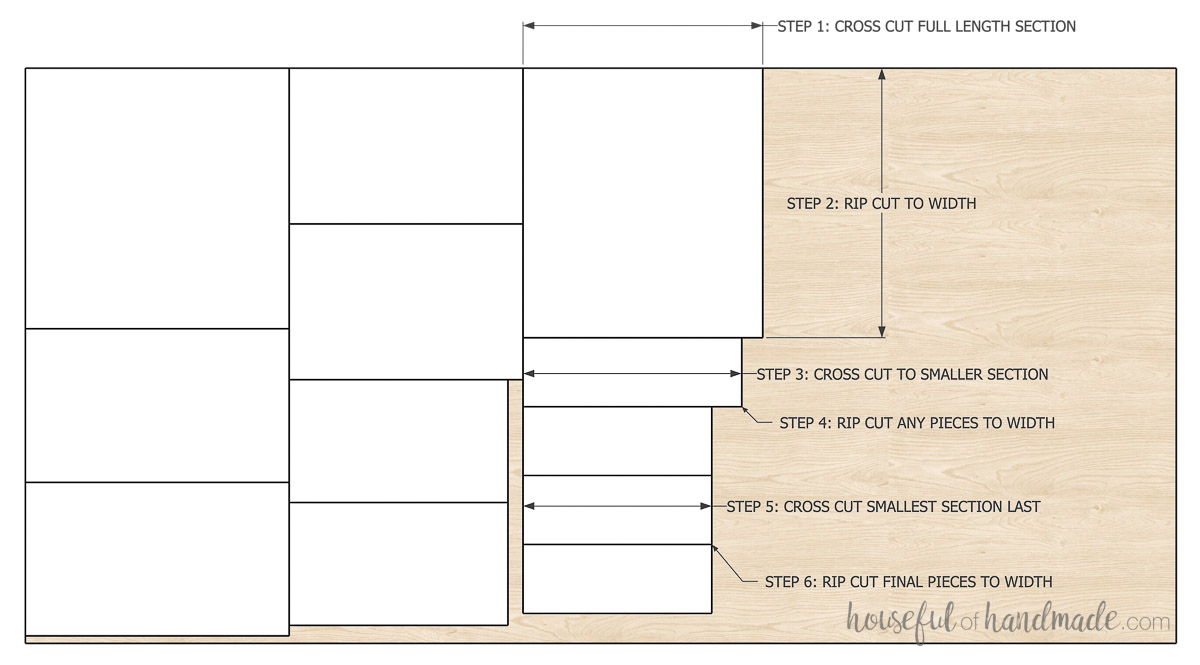
Line the pieces up so all the same length doors are together. This allows you to cross-cut the plywood into a piece equal to the length, then rip cut the smaller piece to the final door widths.
If you have have to include shorter doors next to longer ones, always line them up on ones side. This way you can still cross cut the longest length, then rip cut any long doors.
Then cross-cut the remaining piece to the shorter length before rip cutting them to their final size.
STEP 2- Cut your plywood
Make sure you are using a plywood cutting blade with 60 to 80 teeth in your saws when cutting plywood to minimize tear out (especially problematic when cutting across the grain).
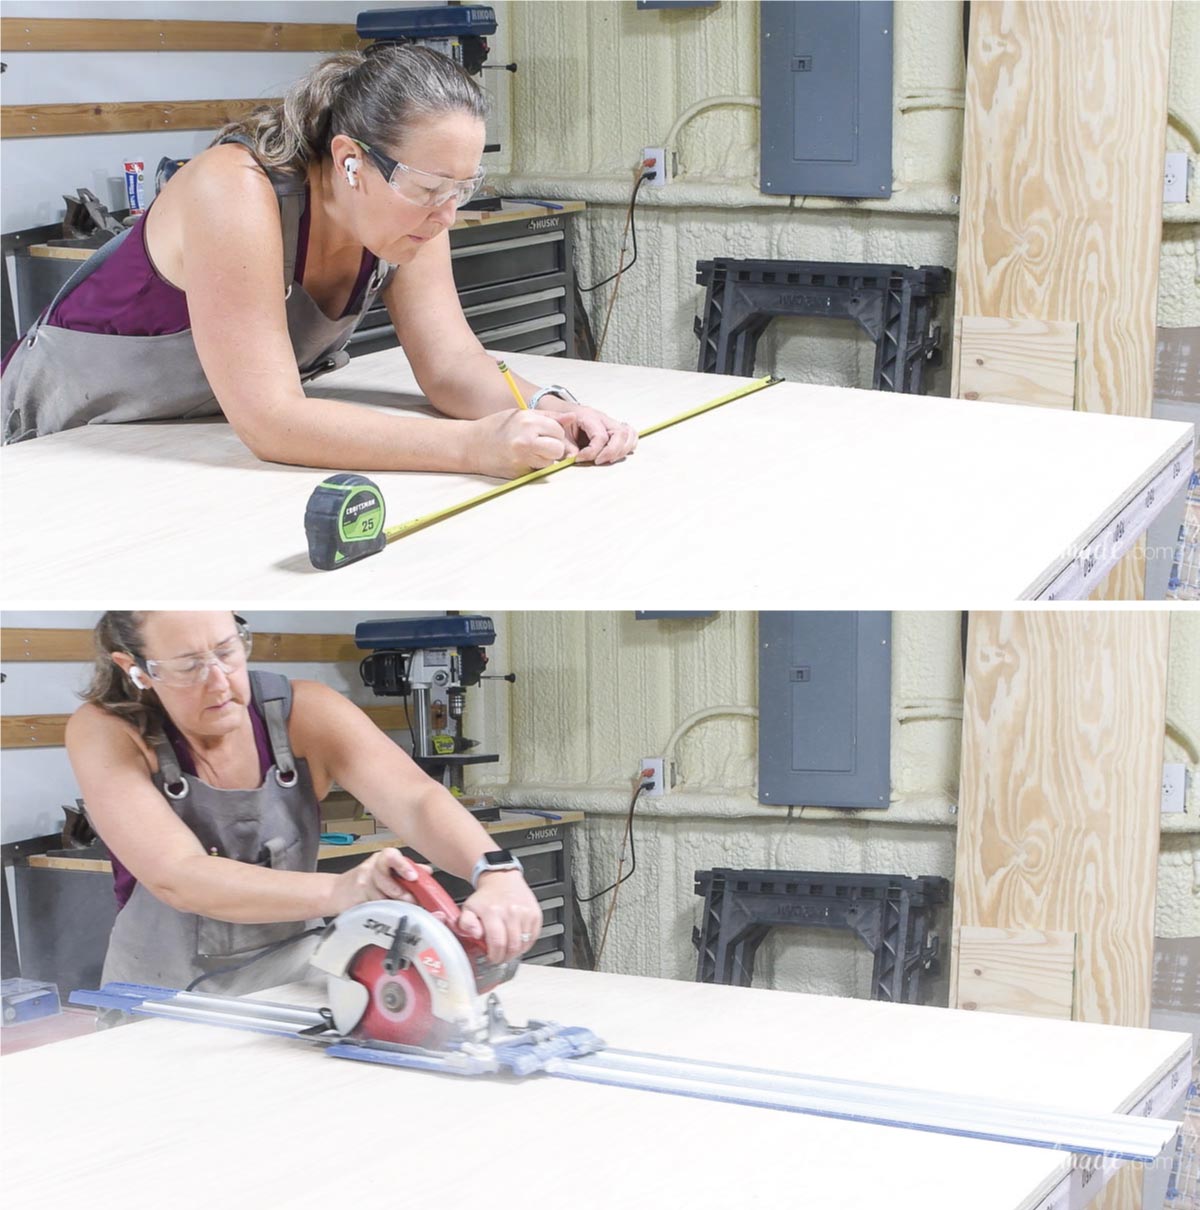
Before cutting your first section, you will want to square off the short edge of your plywood.
I use a large square and press it up against the long edge of the board. Then draw the line about 1/4 to 1/2″ in from the edge.
Cut along this line with circular saw using a guide track to ensure you have straight cuts.
EXPERT TIP:
Lay your plywood on a sheet of 2″ rigid foam when cutting. It fully supports your plywood sheet so you do not have pieces flexing and pinching the blade. Plus it can help minimize tear out because the plywood is up against the surface while cutting.
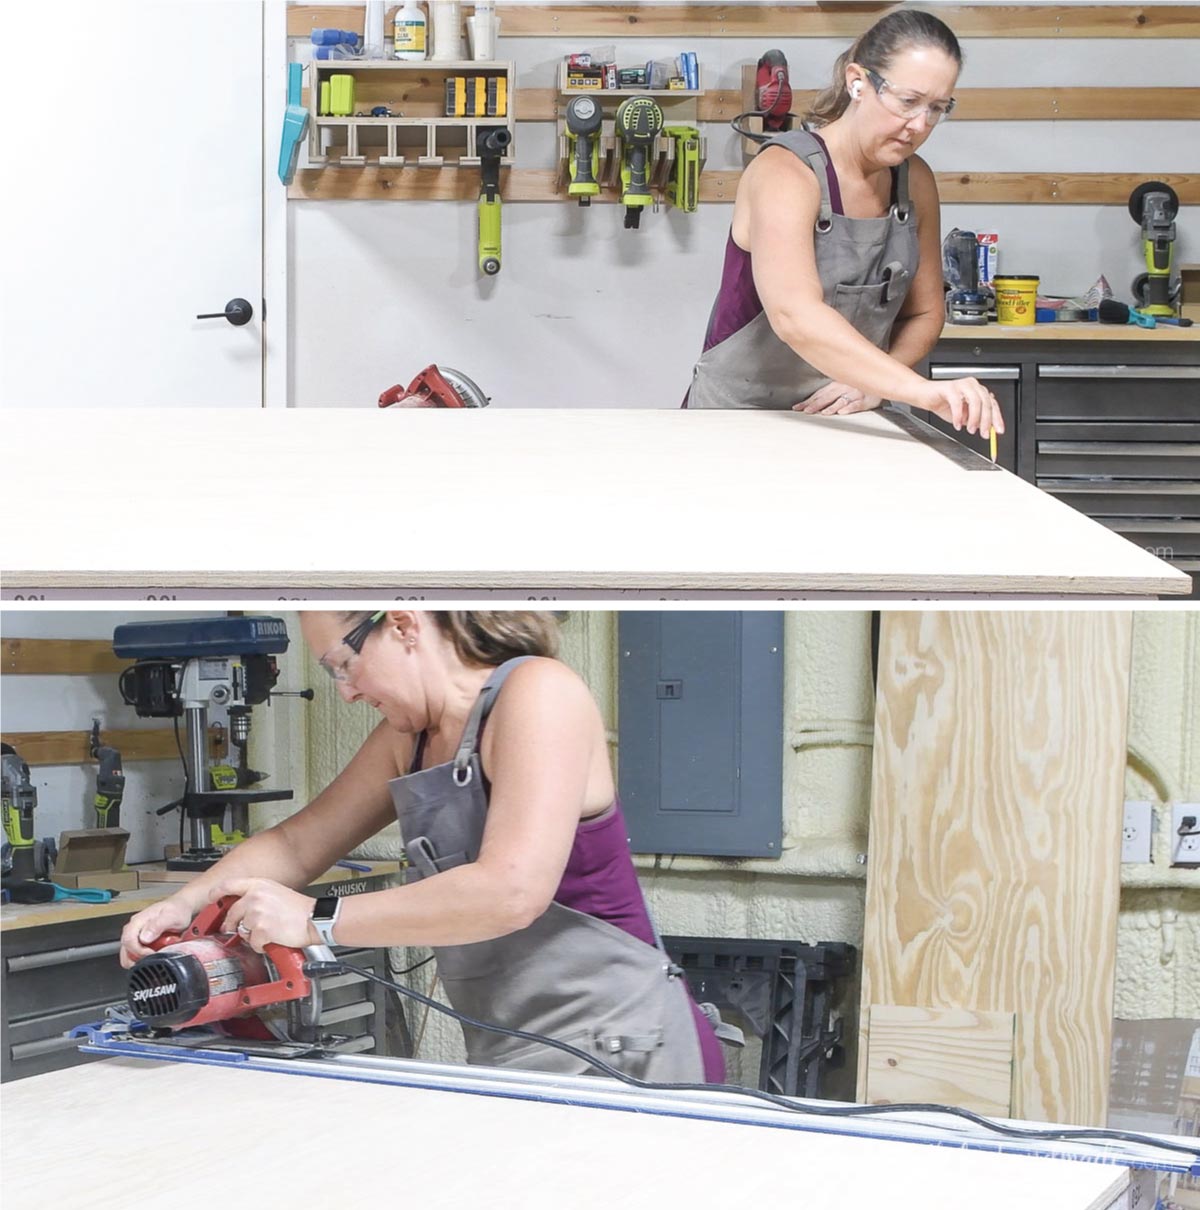
Measure from the new squared edge over and mark the first section you are cross cutting from your cut diagram.
I place 3 marks along 48″ of plywood: one close to the bottom, one in the middle, and one close to the top.
Then lay the guide up so you are cutting with your blade to the outside of the measured area. Cut along the guide.
From this new cut line, measure and mark your next section width.
Again, line the saw up so the blade cut just to the outside of the measurement. Cut this section.
Then repeat for all other sections on your cut diagram.
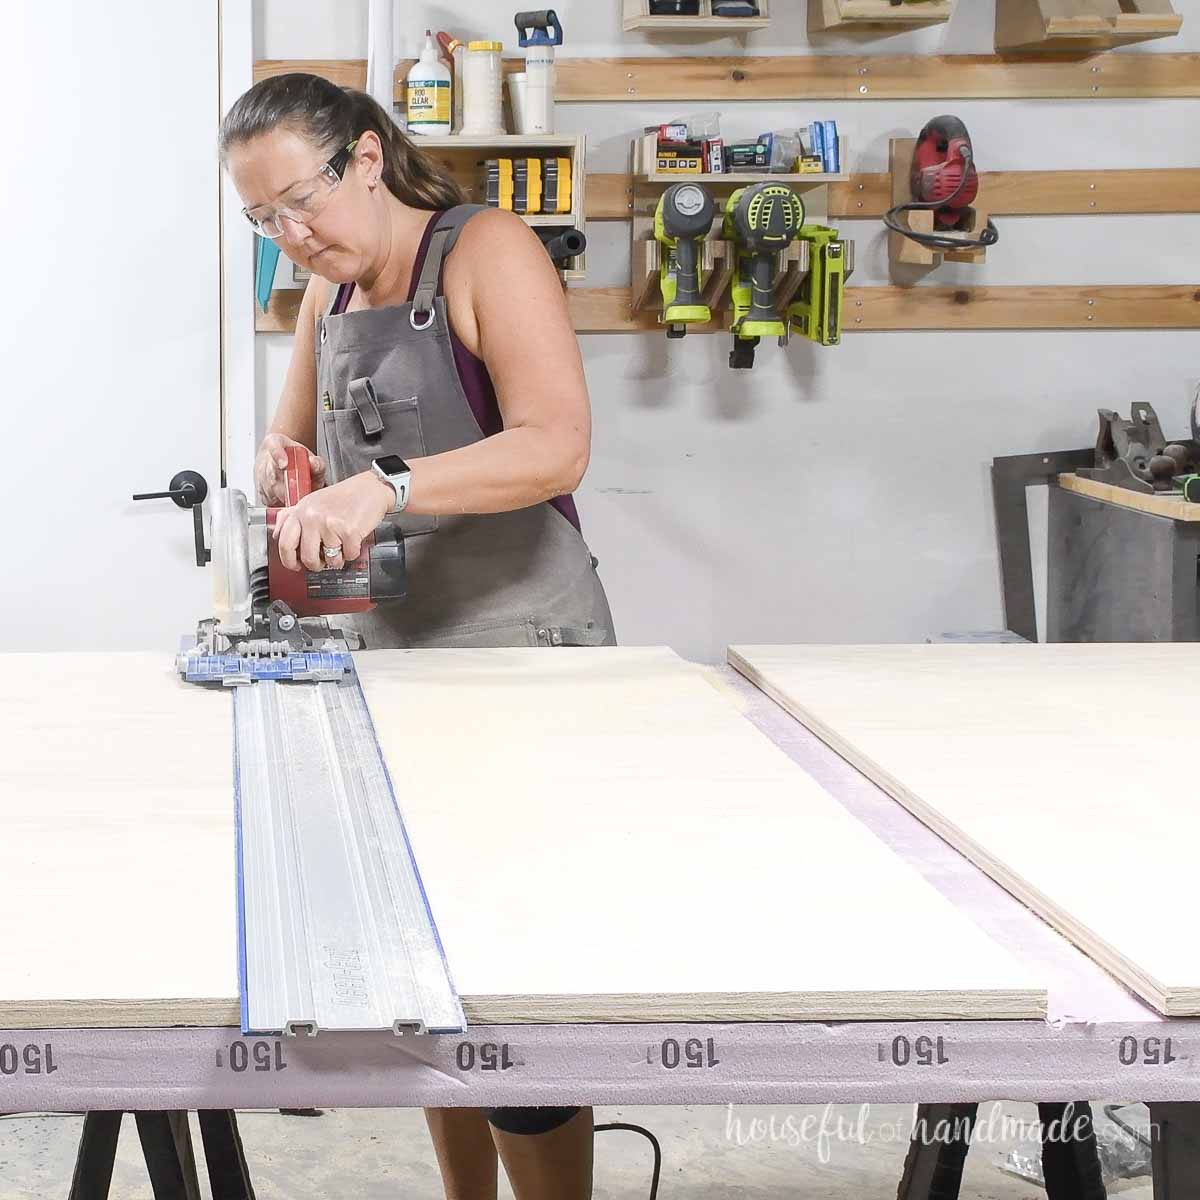
Once all the cross-cutting is done, you can rip cut the boards to their final width.
I like to cut the factory edge off the end so I have a nice straight cut to start with. Then cut the pieces to final size from there.
If you have a table saw, you can use it to make it faster to cut multiple pieces the same size. If not, use the circular saw the same way you did the cross cuts.
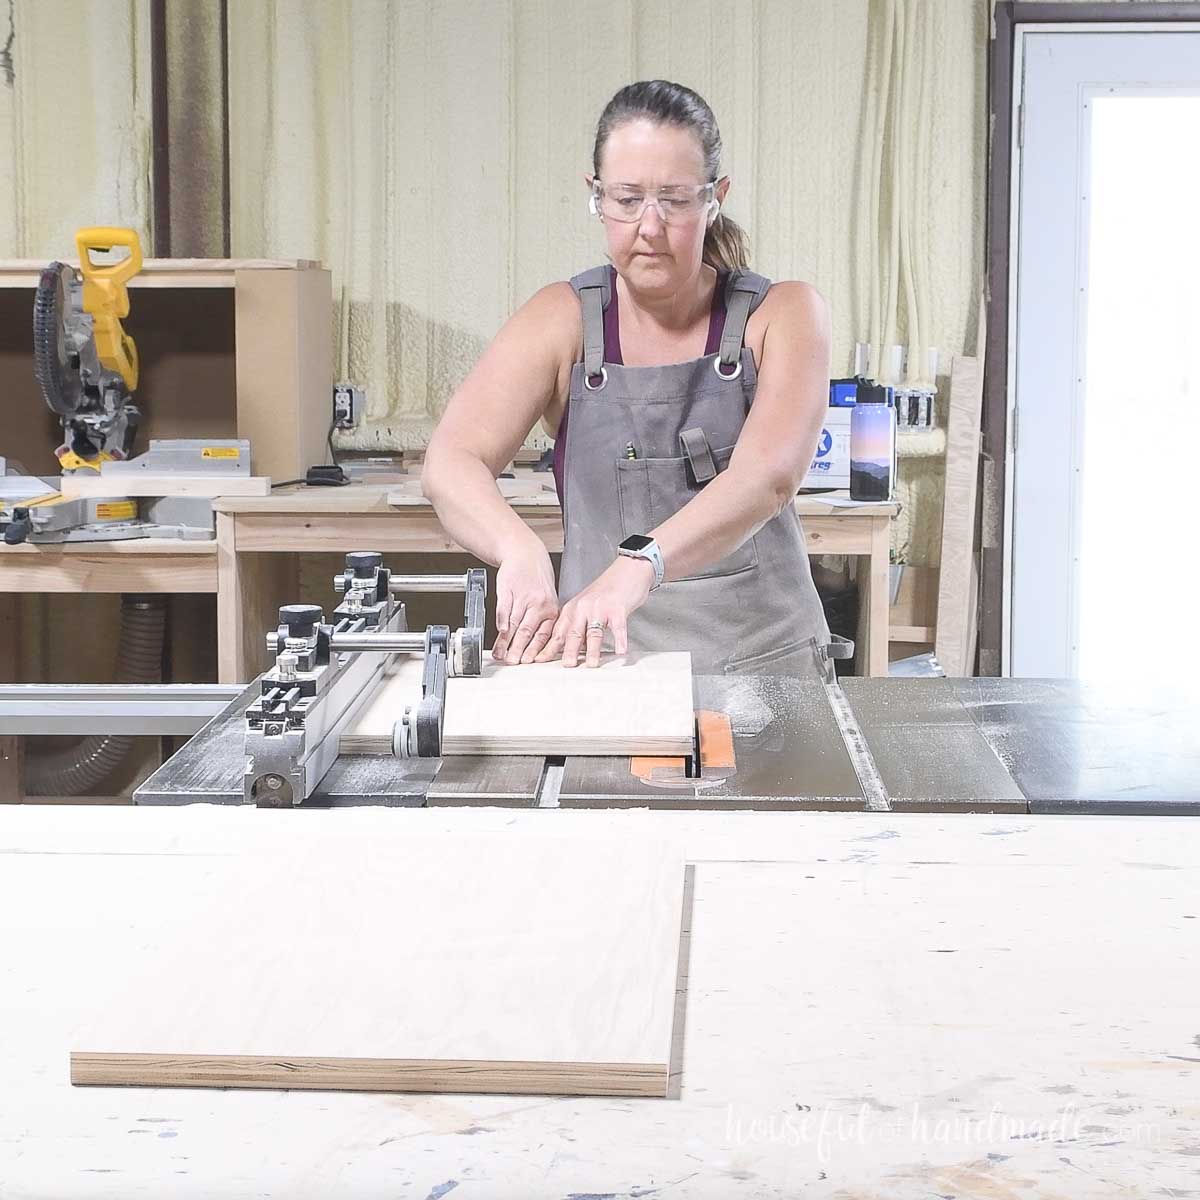
Repeat for all plywood sheets until you have cut out all your cabinet doors.
STEP 3- Add edge banding
To make adding edge banding to the taller doors easier, I attached a 2×3 board (left over from making this simple mission style bed the week before) to the underside edge of my work table.
The board was easily attached with some wood screws through the top of the table. I countersunk the screws so they will not be in the way when using the table.
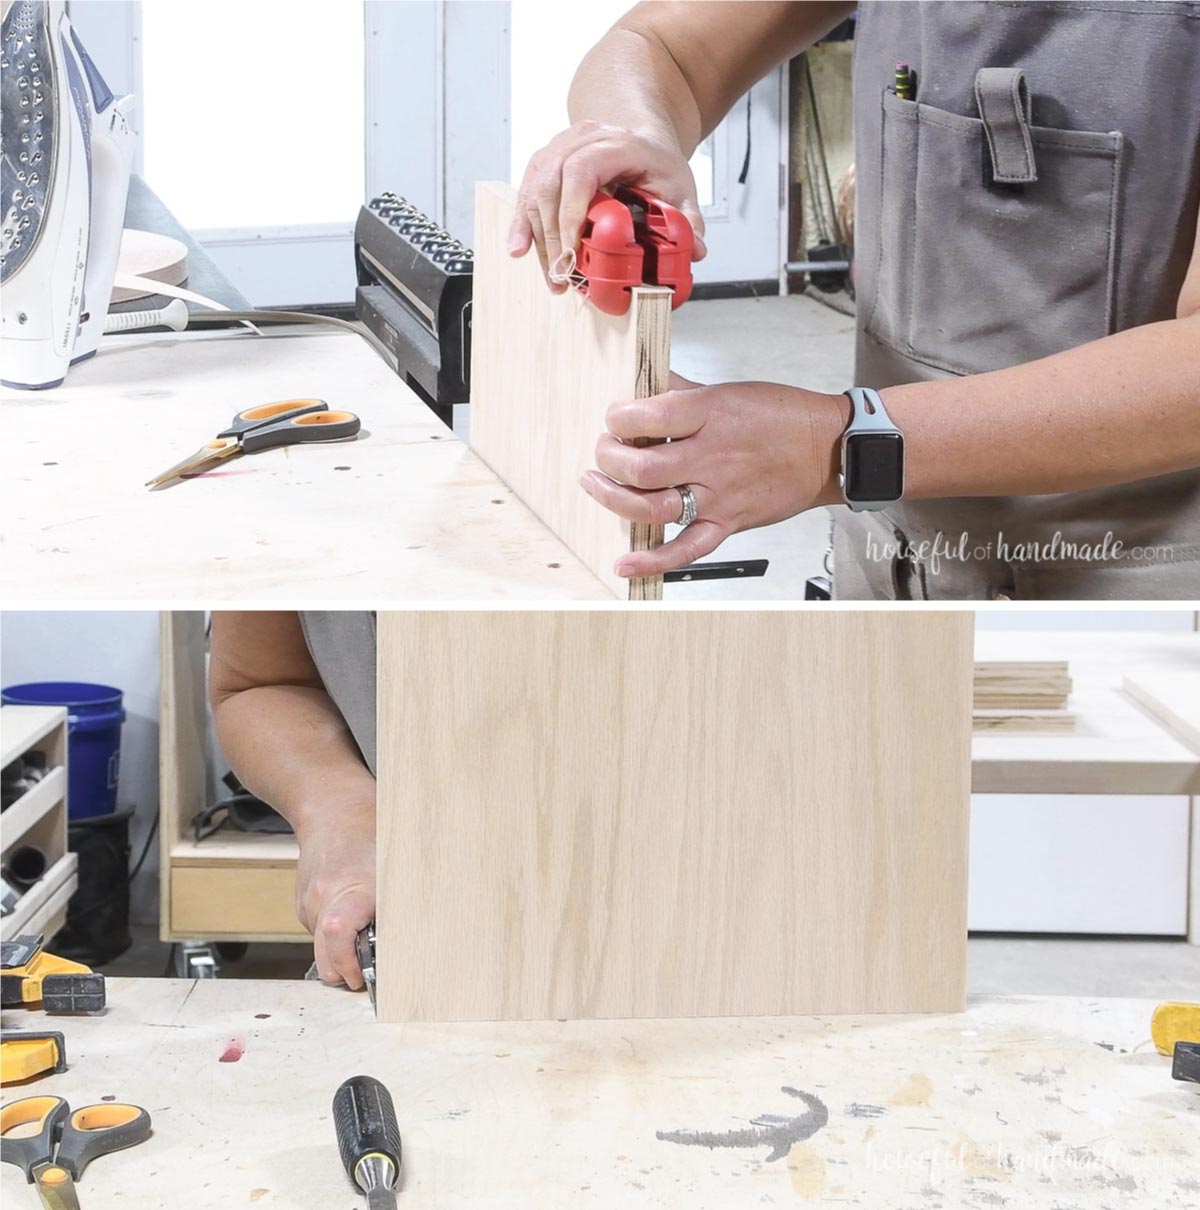
Then I can easily clamp the plywood doors to the board to hold it upright while I attach the edge banding.
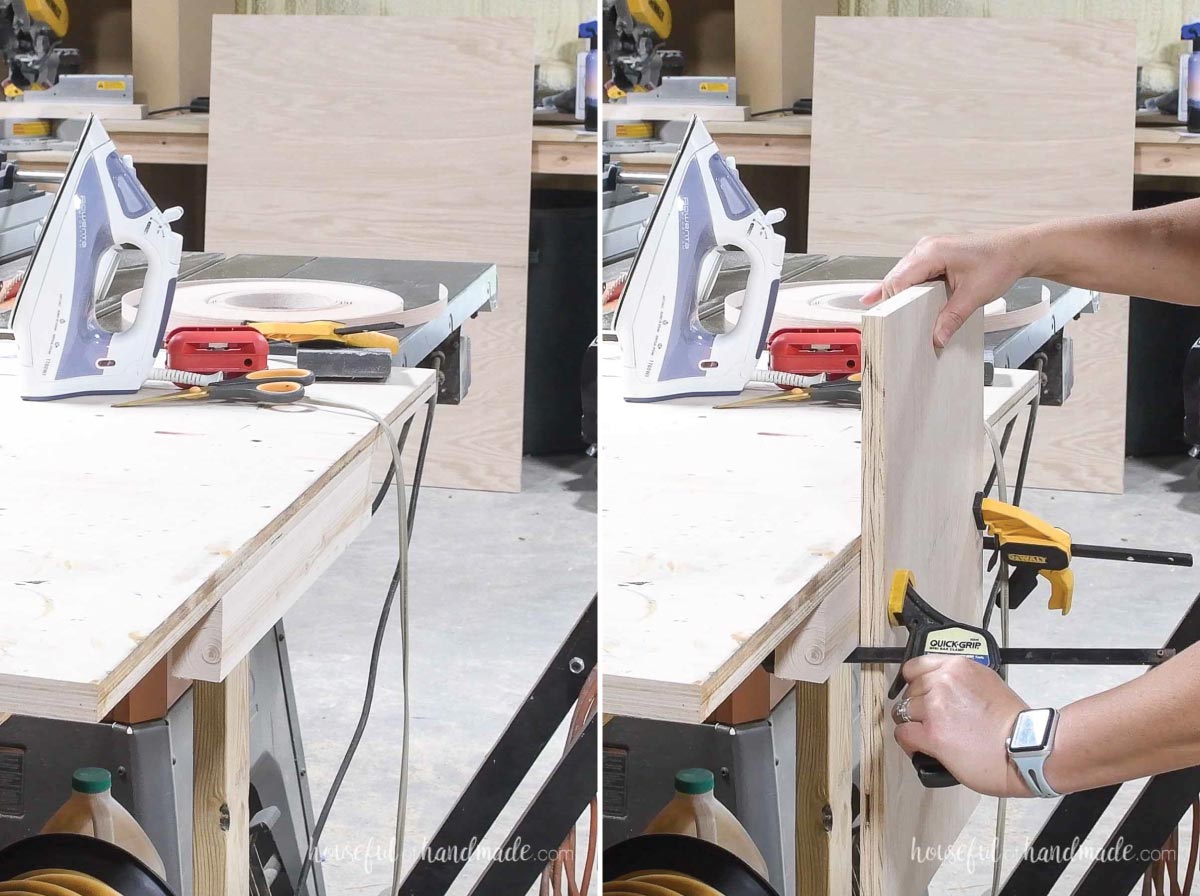
I applied edge banding to the less visible edges first (sides for the base cabinet doors & drawers, top and bottom for the wall cabinet doors).
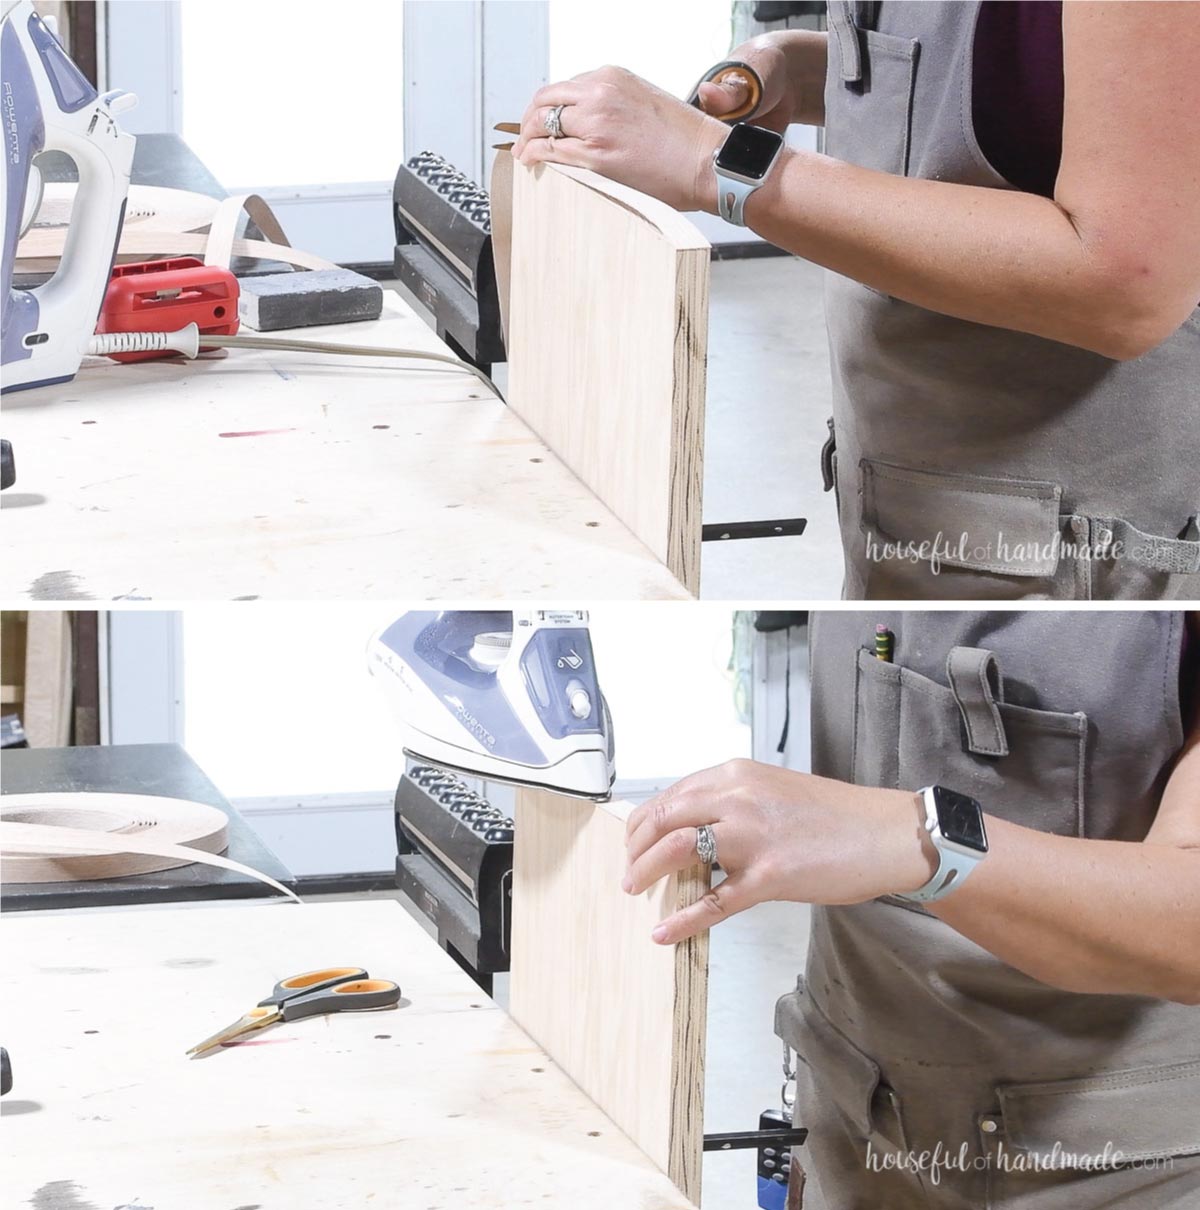
With the door clamped into place, cut a piece of edge banding slightly longer than the first side.
Then using a hot iron, slowly run it along the edge banding to heat the glue and attach it to the plywood edge.
Make sure to keep the edge banding centered as you iron it on. Once done ironing but before it cools, I like to rub the top with a hard surface to ensure it is fully stuck down (the side of the edge banding trimmer works).
Let the glue fully cool down, then trim the sides of the edge banding so they are flush with the plywood.
I love this edge banding trimmer, but you can also use a utility knife or sharp chisel.
Then unclamp the board and lay the edge banding down on your table. Trim the edge banding on the sides of the door.
Repeat for the opposite side as the first.
Next you will repeat the same process adding the edge banding to the last two sides.
These will be the most visible edges of the door. You want to do these last so that the edge banding is fully covered all the way on these visible sides.
Iron on, rub, let cool, then trim on both sides.

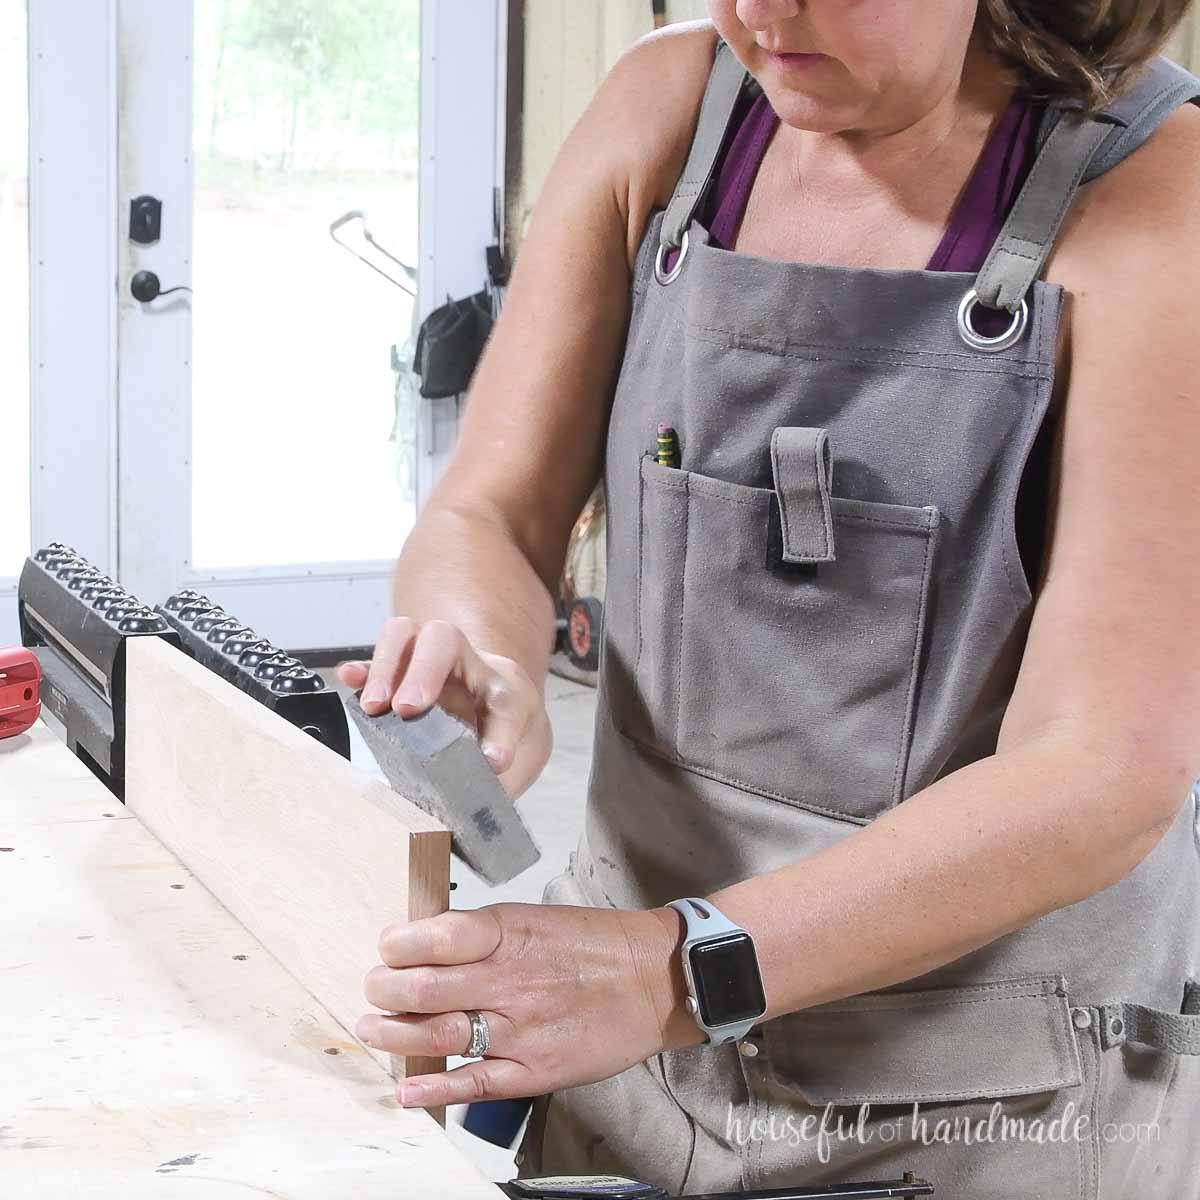
With all 4 sides edge banded, grab a fine grit sanding block and give the edges a quick sanding to remove any splinters.
This will prevent the edge banding or plywood veneer from possible pulling off from accidentally snagging a little splinter (ask me how I know).
If you have any tear out on your plywood, you can fill the small holes with wood putty.
Make sure to use a wood putty that matches the tone of your wood and is stainable if you plan to stain/seal your doors instead of painting.
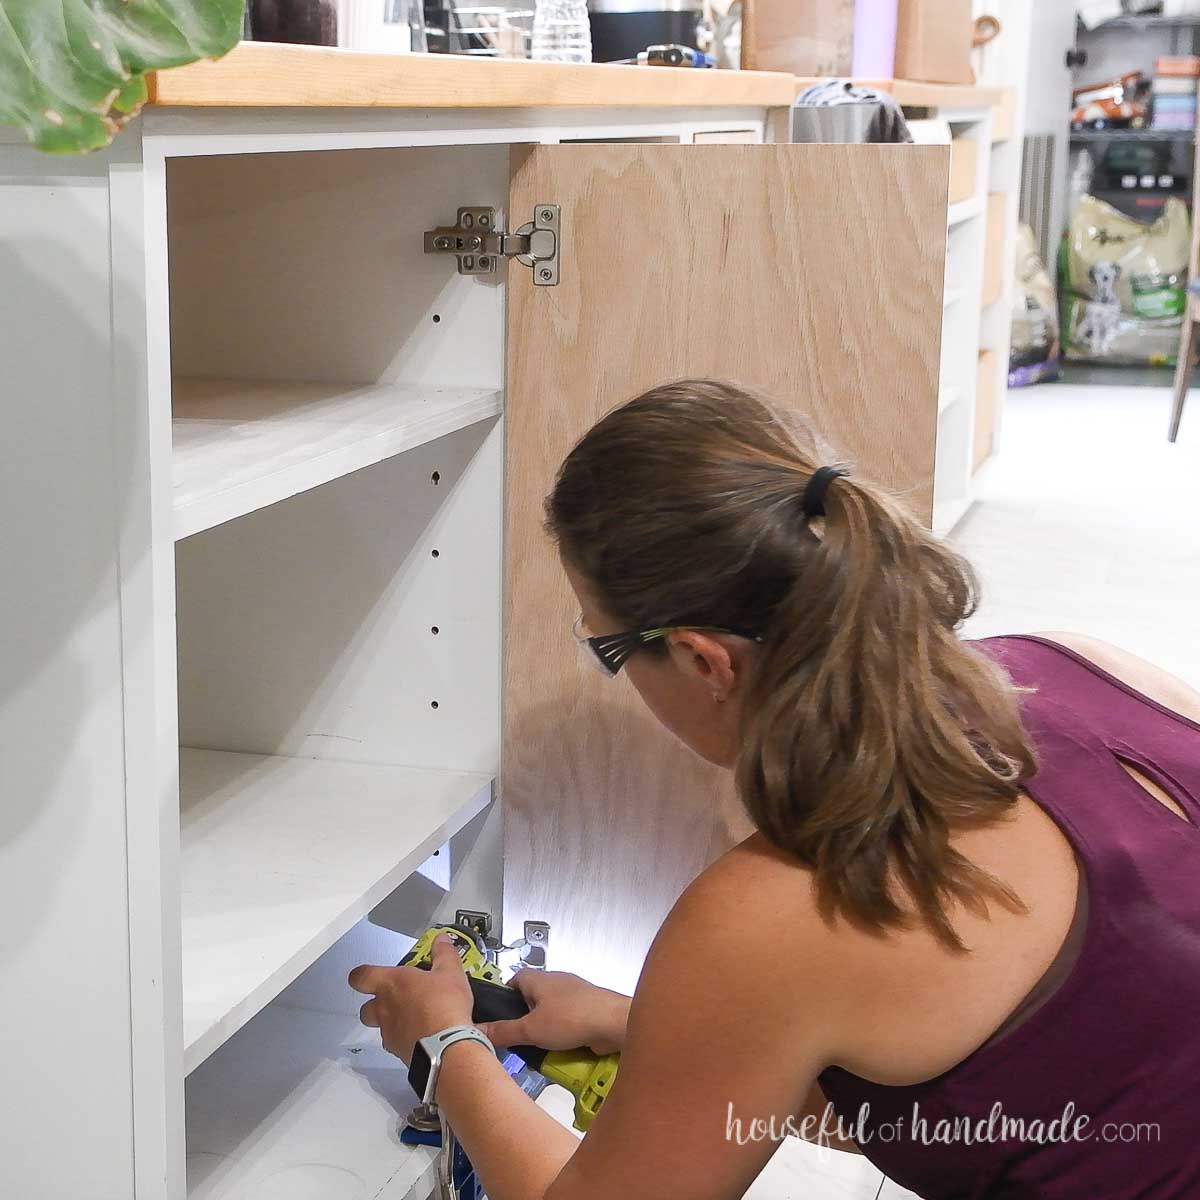
STEP 4- Install doors
I like to install my doors before finishing. If you need to make an adjustment to the size, it is way better to do that now then having to cut into a perfectly finished door.
For concealed hinges, you will need to drill holes in the door for the cup of the hinge to sit in. Learn how to install doors with concealed hinges here.
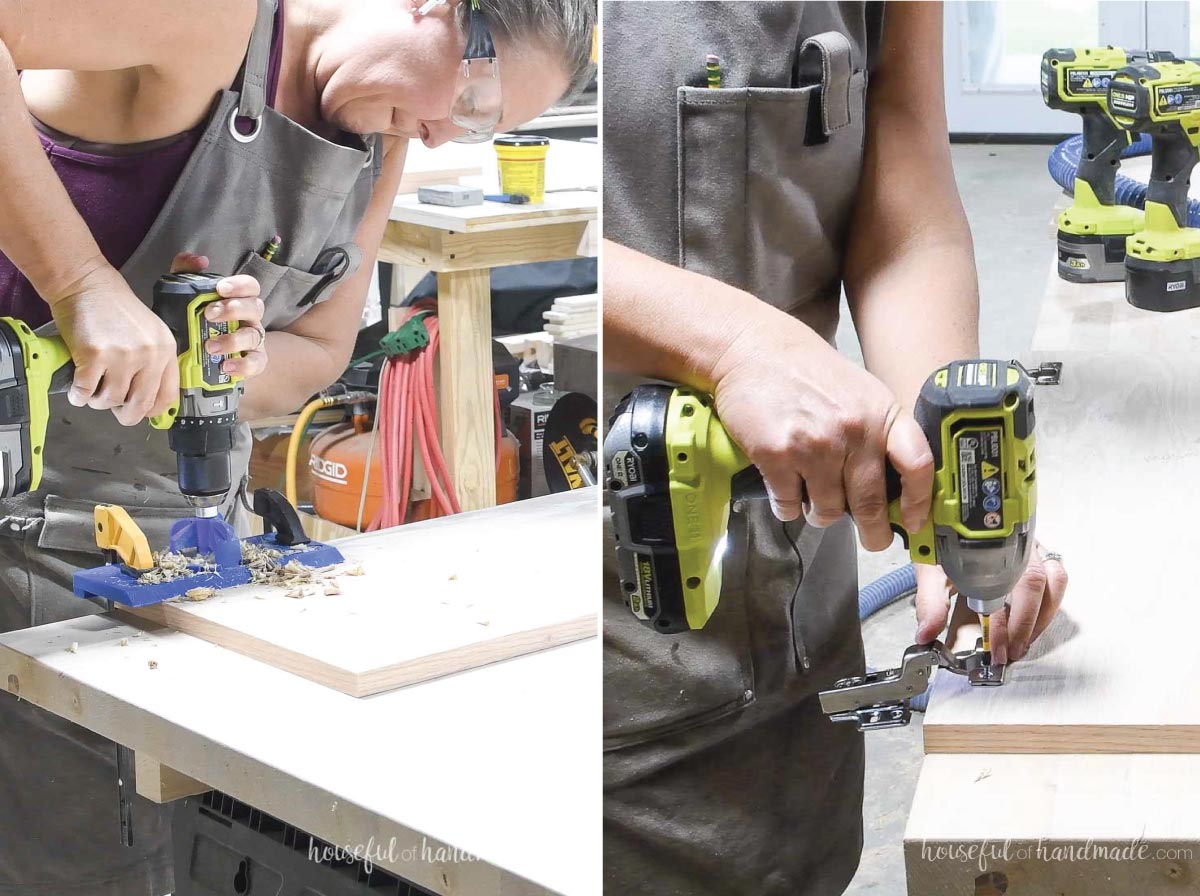
Once your hinges are attached to your door, you can attach them to your cabinet according to the directions on your hinges.
For my slab kitchen doors, I installed them with inset hinges into frameless cabinets for a more traditional look.
STEP 5- Finish the doors
Now that your doors are all properly fitted, you can remove them and finish. Sand and stain/seal/paint them as you want.
Then reinstall the doors and quickly adjust the reveal with the hinge screws as needed.
Add hardware to your cabinet doors.
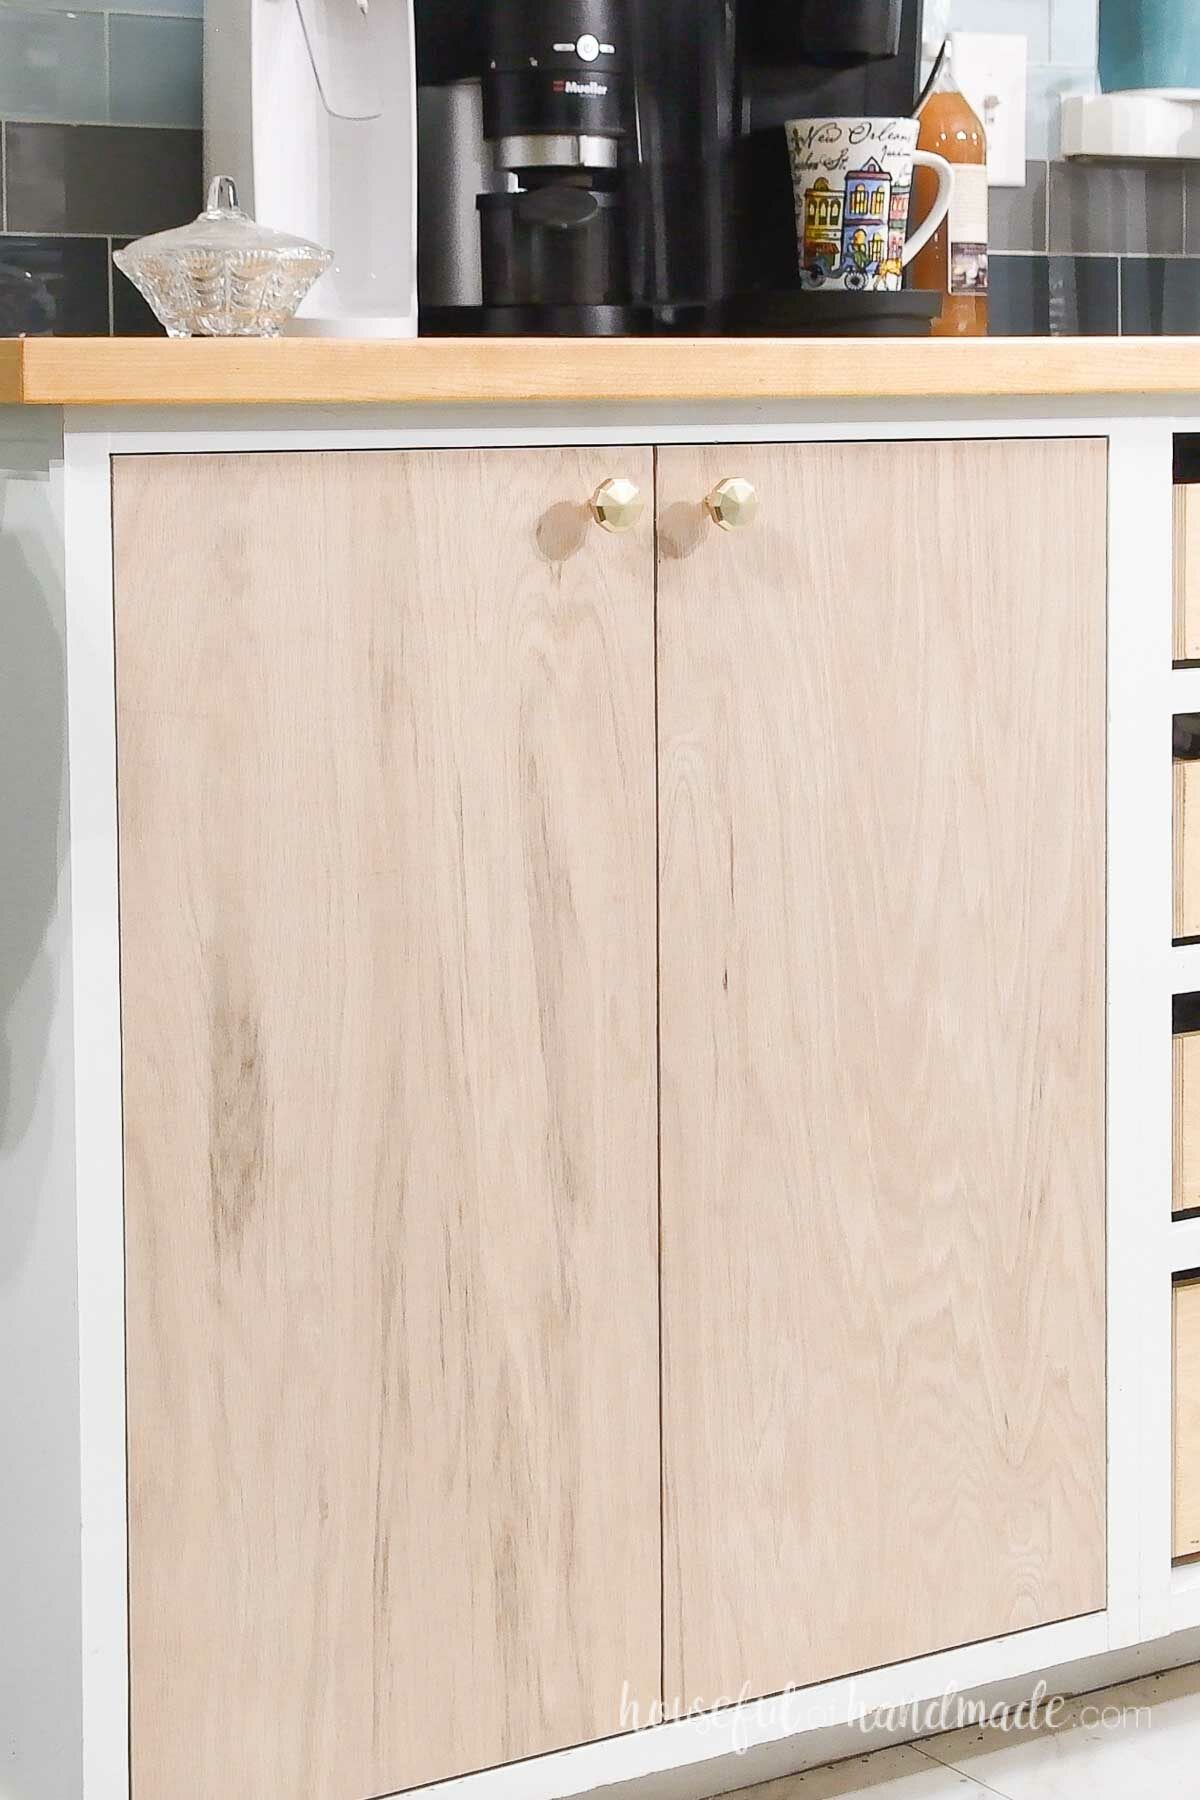
You did it!
I absolutely adore how my new kitchen cabinet doors look. I do still need to paint mine, but couldn’t wait to share these beautiful and easy doors.
Happy building!
