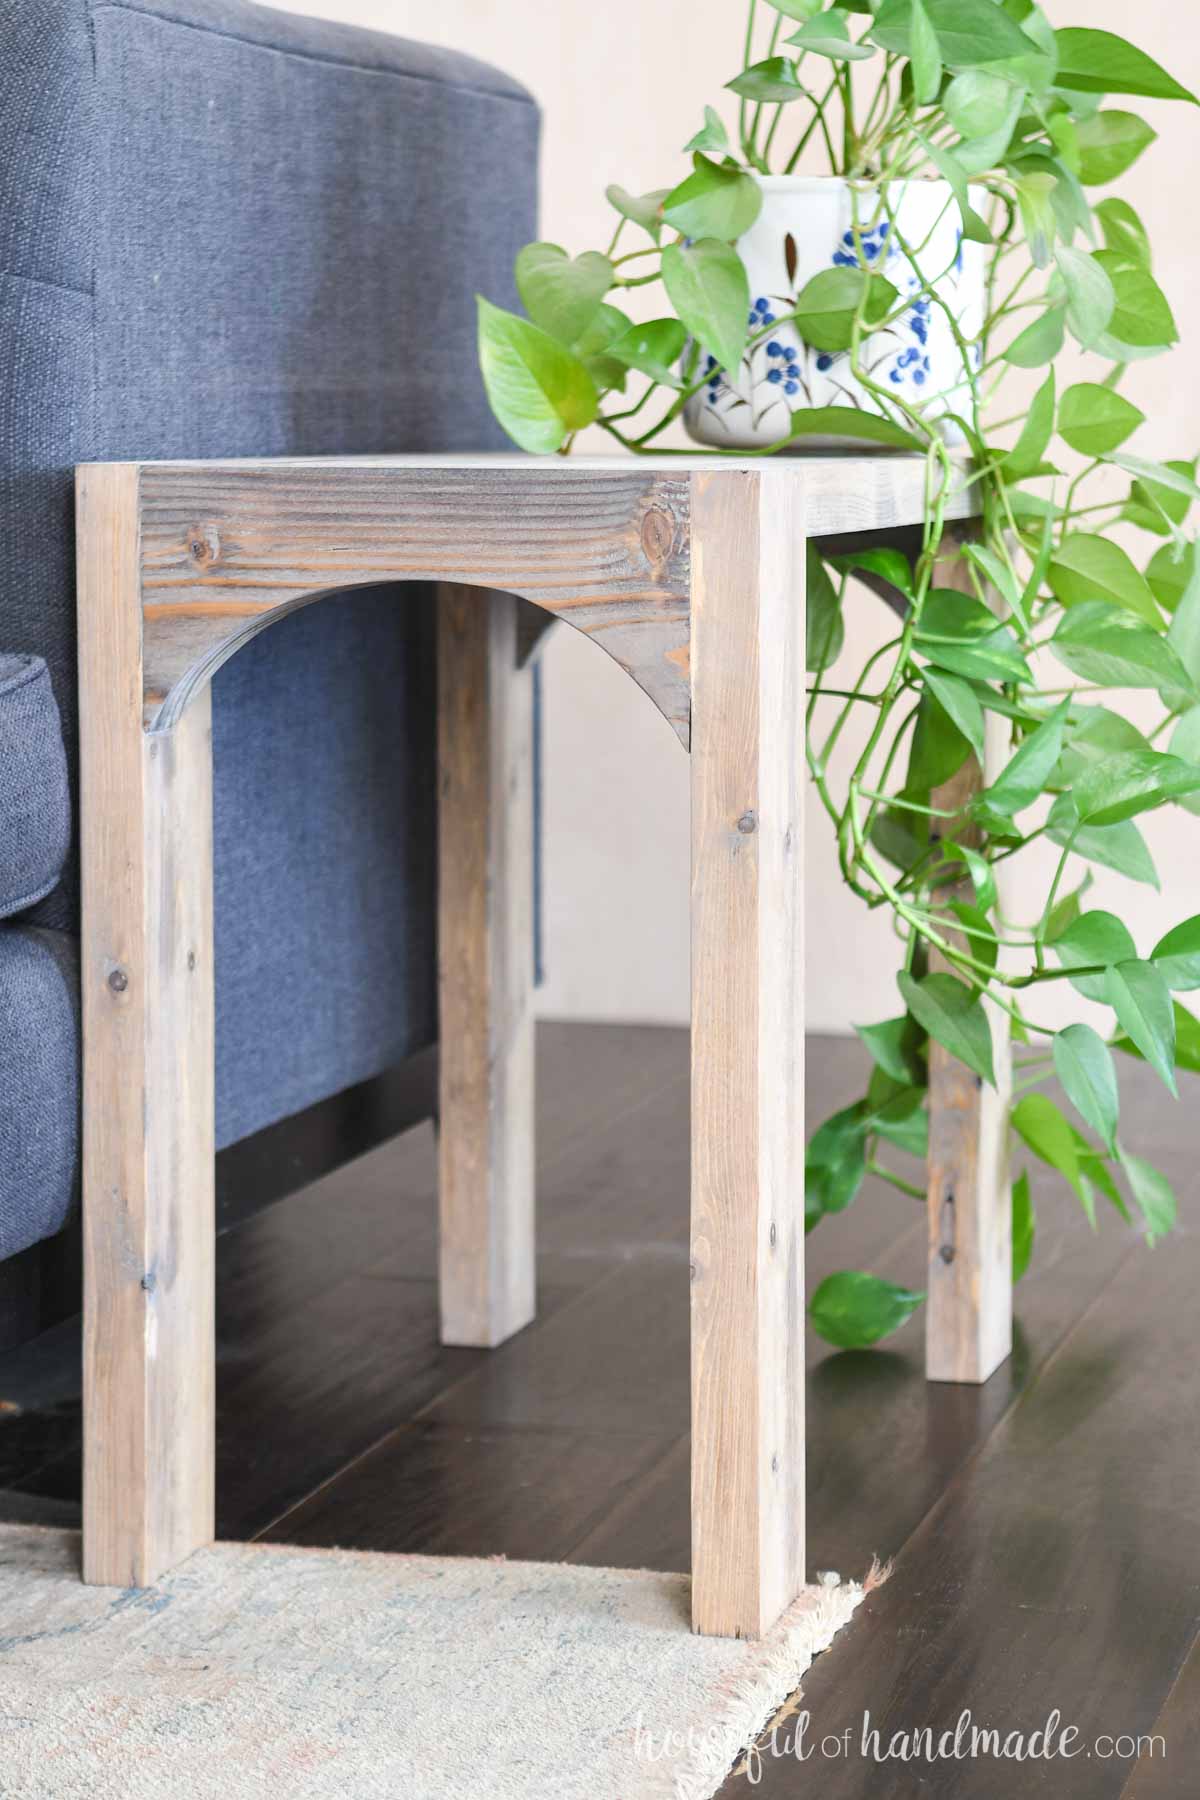
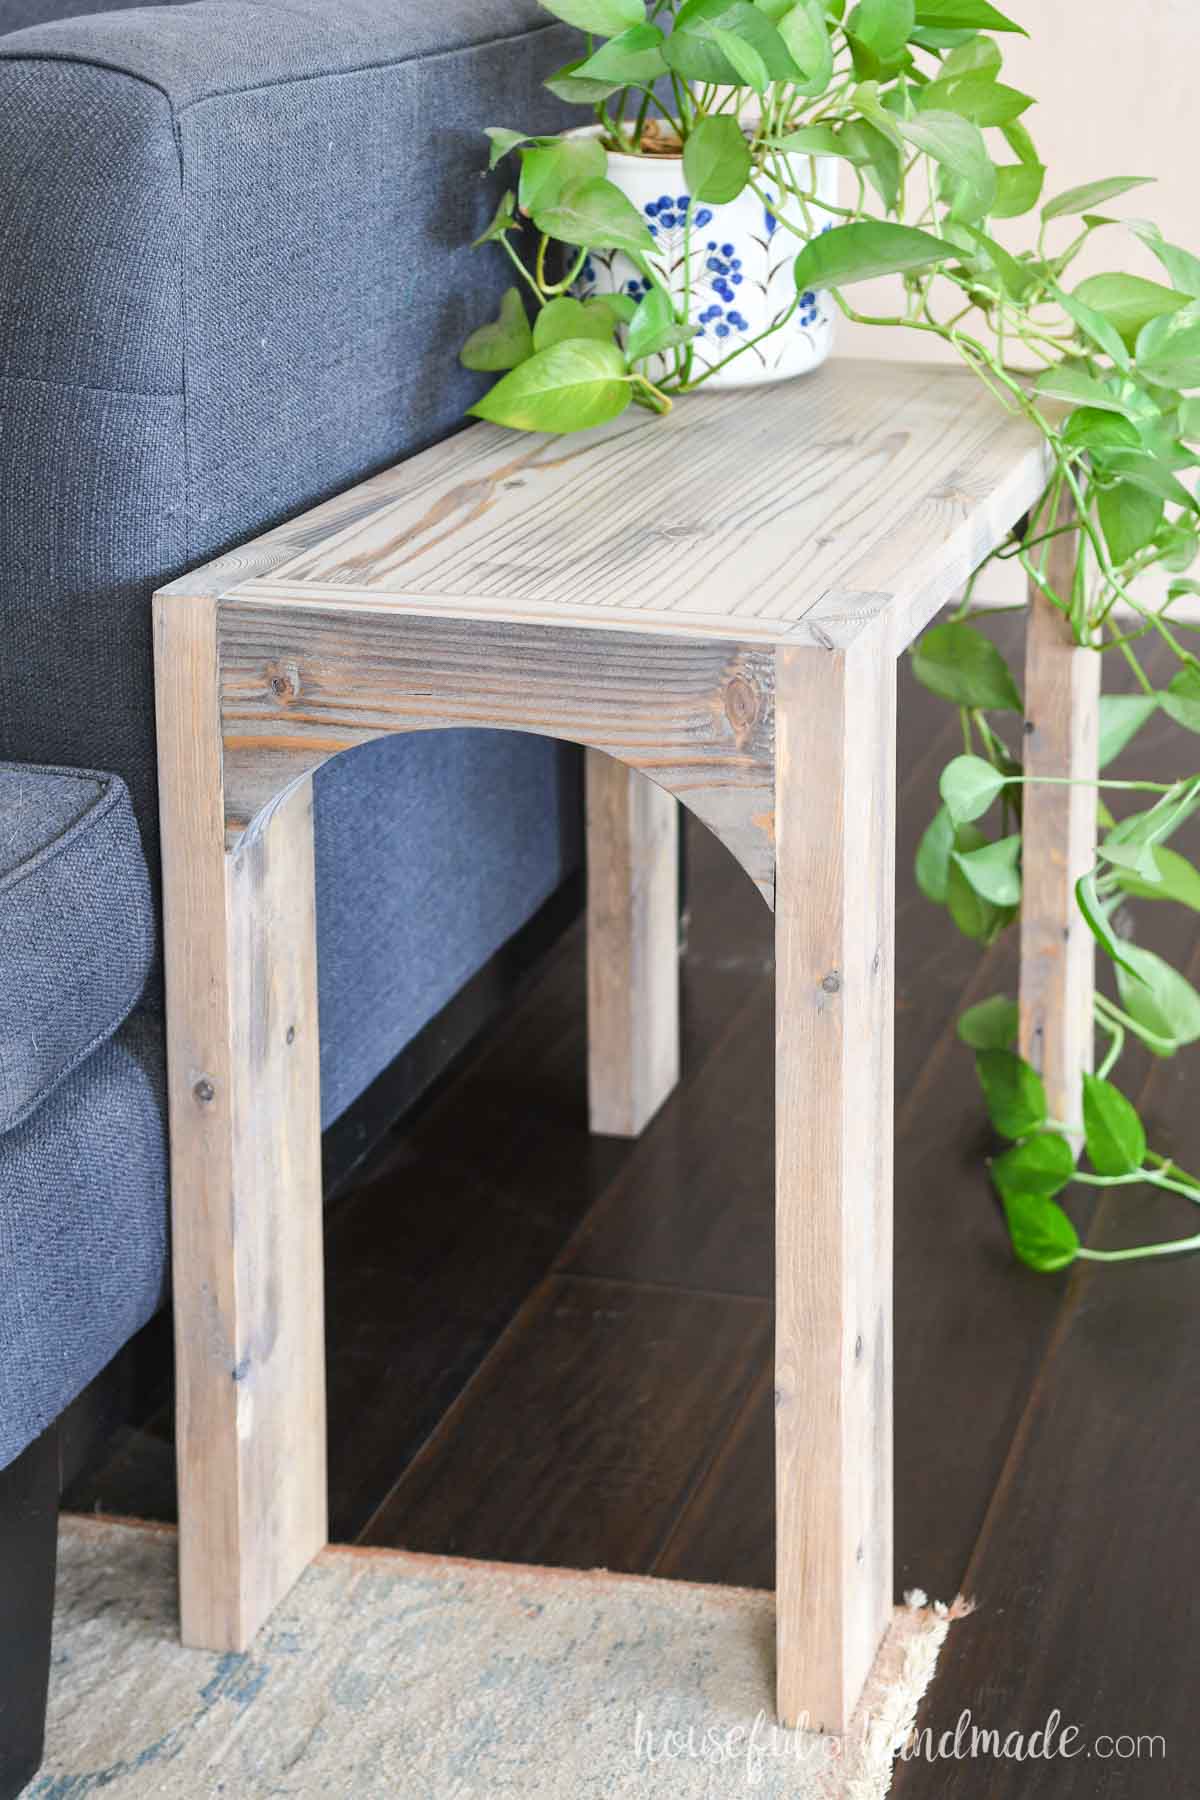
Side tables, or end tables as some people may call them, are super useful. But more importantly, really fun to build!
They are a small and easy project, perfect for a beginner who wants to try their hand at building their own furniture. But also fun for a seasoned DIYer to build a simple, yet beautiful, project in an afternoon.
And I partnered with Kreg Tools to make these chunky side tables an even simpler build using pocket holes.
This post may contain affiliate links. As an Amazon Associate I earn from qualifying purchases. Click here to read my full disclosure policy.
End Table from 2x Boards
One of my favorite things about this side table is that I built it from inexpensive 2x boards.
Just one 2×4, 2×6 and 2×2 board is all that is needed. And you will have lots of left over for another project, or to start on a second side table.
I loved the way it looked so much that I also made a matching chunky coffee table from inexpensive 2x boards and 4×4 legs.
I did use a planer to remove the curved edge of my 2x boards.
This made my boards closer to 1 3/8″ thick instead of the standard 1 1/2″. But did not affect the build.
This is not necessary and the slight divot in between the boards can give your table a beautiful rustic look.
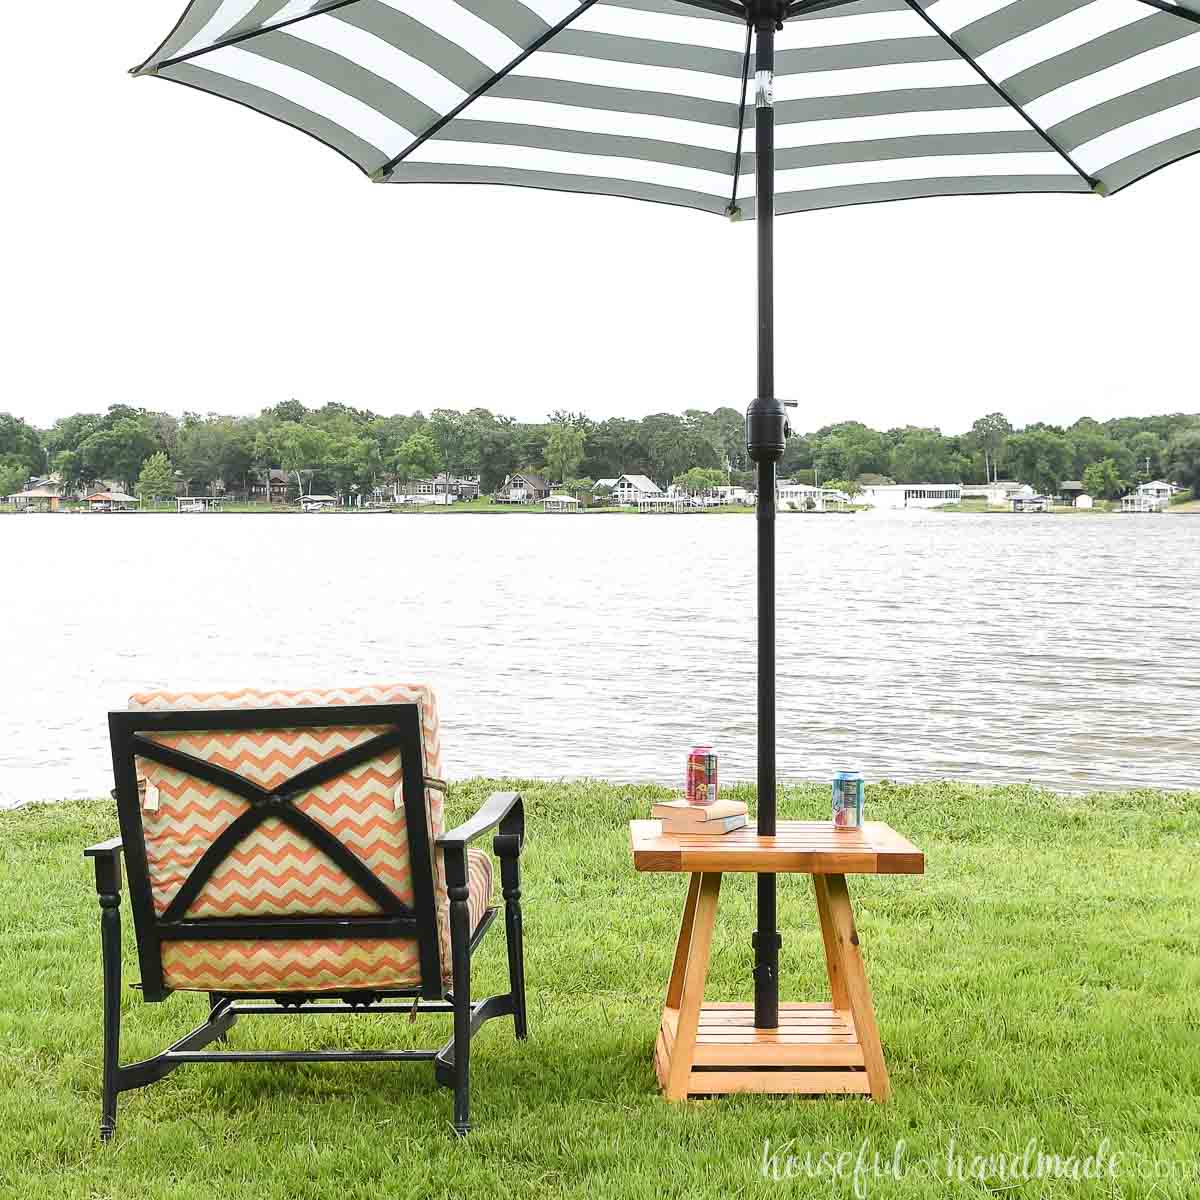
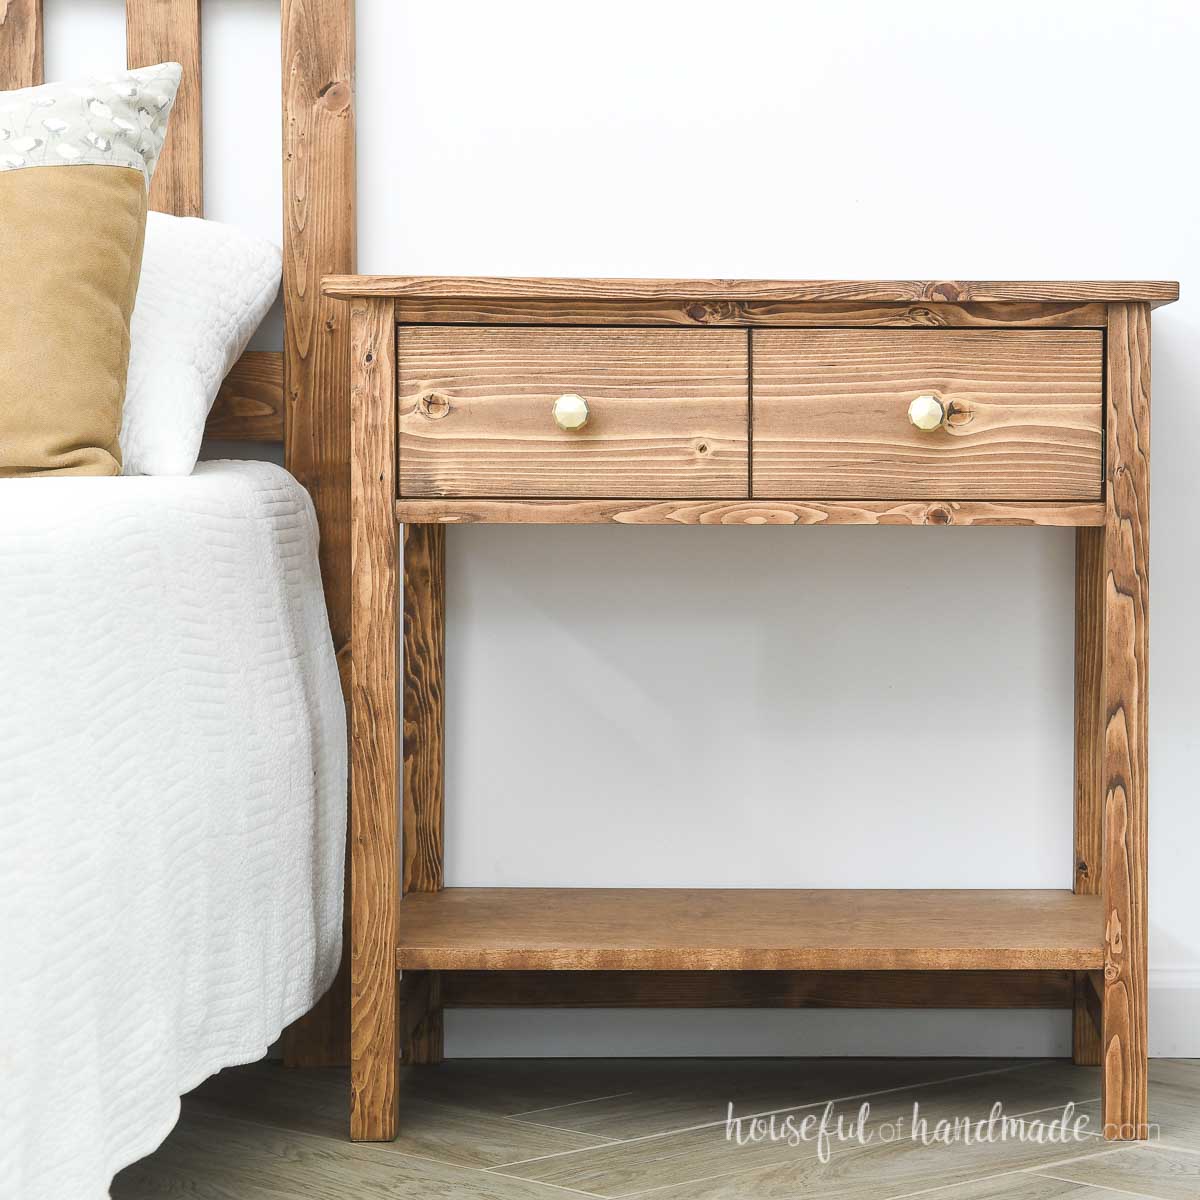
More Side Tables to Build
Can’t get enough end tables? Check out these other plans to build for your home.
How to Build a Rustic End Table
Tools & Materials
Recommended Tools:
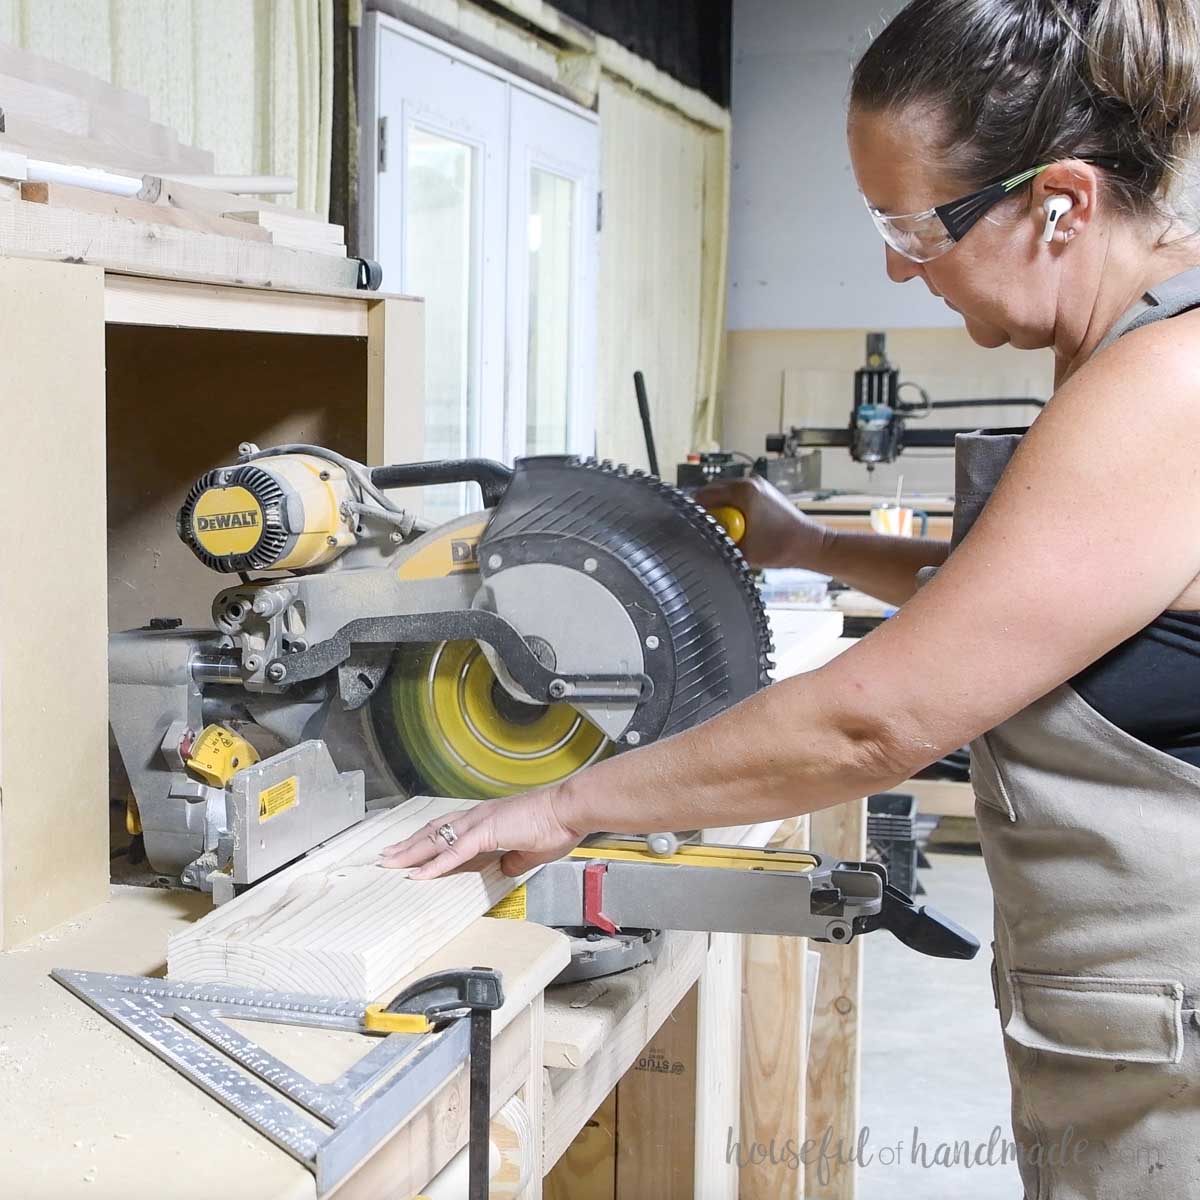
- Miter saw
- I recently upgraded to this larger sliding miter saw (watch for it to go on sale), but all my projects before were built with this inexpensive miter saw that I loved.
- Jig saw
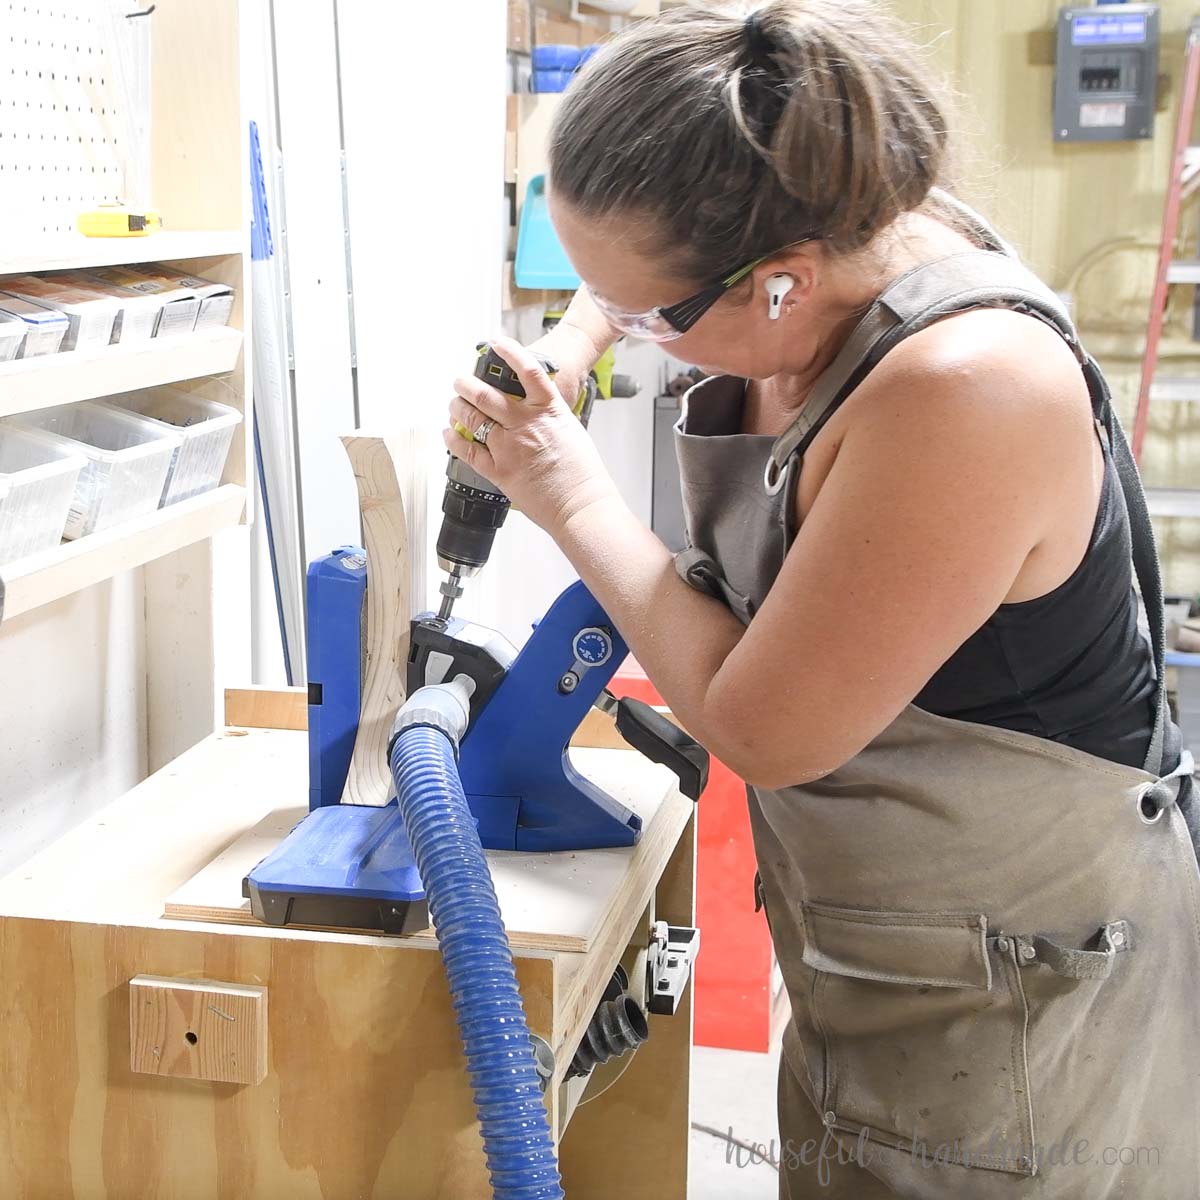
- Pocket hole jig
- Drill
- Impact driver (optional, but I love not having to switch bits with the drill)
- Multi-mark measuring tool
- 90 degree drill adapter
- Right angle clamp
- Face clamps
- Sander
Supplies:
- Wood products
- (1) 2×4 board, 8′ long
- (1) 2×6 board, 6′ long
- (1) 2×2 board, 3′ long
- 2 1/2″ pocket hole screws
- Wood glue
Overall Dimensions
This finished end table is 14″ wide x 24″ deep and 22″ tall.
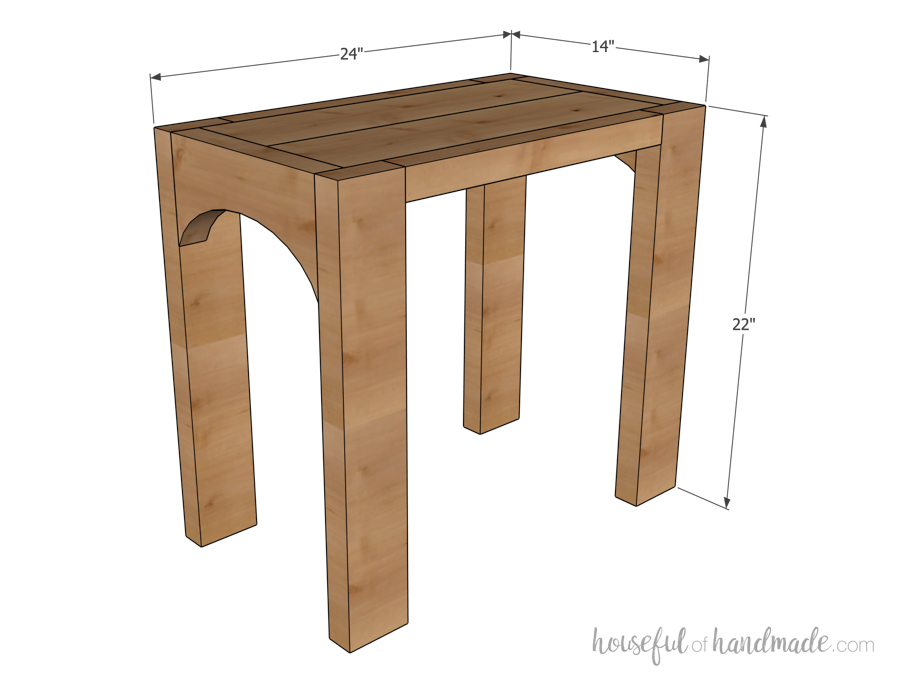
Cut List
Cut out the pieces according to the cut list in the PDF plans on KregTool.com.
EXPERT TIP:
Before cutting the arched end boards, press the two top center boards together and double check your measurement. Adjust your length for the arched end to match the actual measurement.
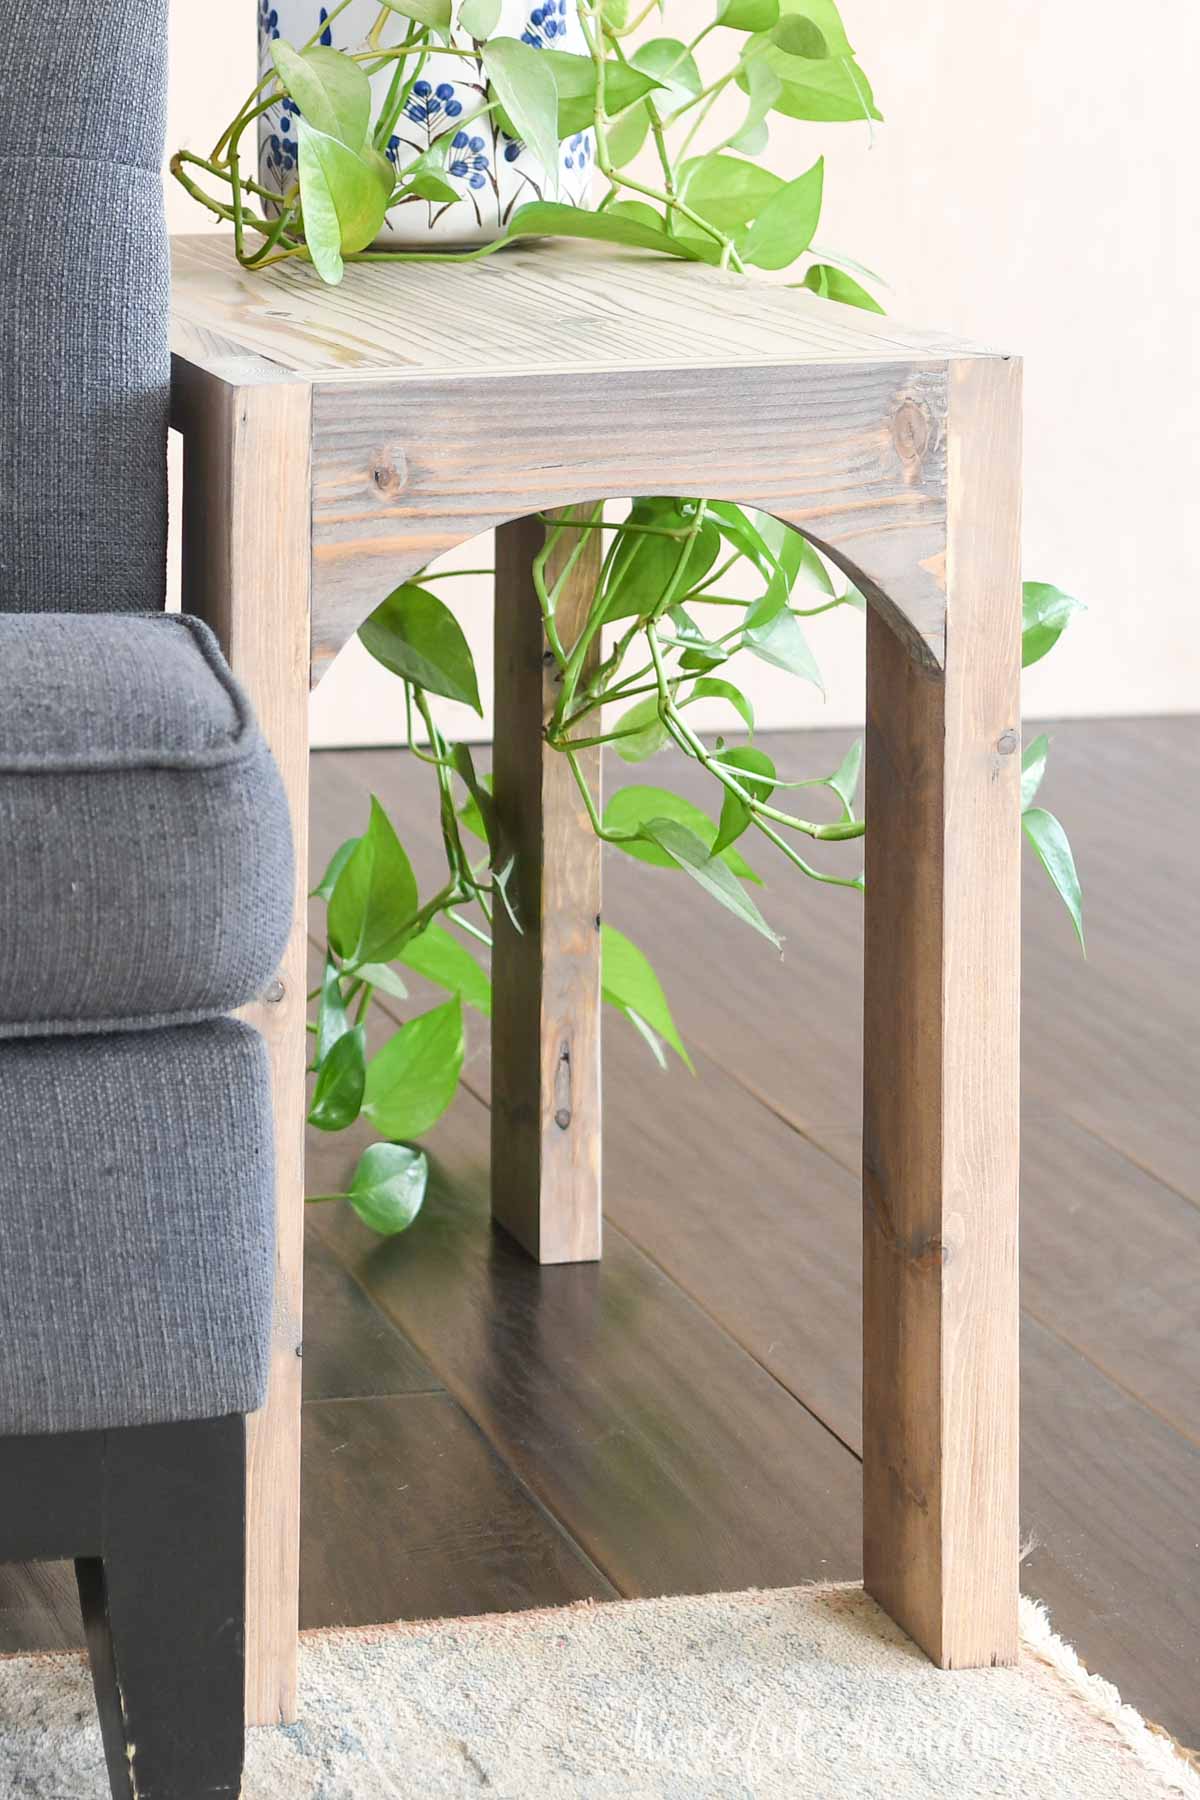
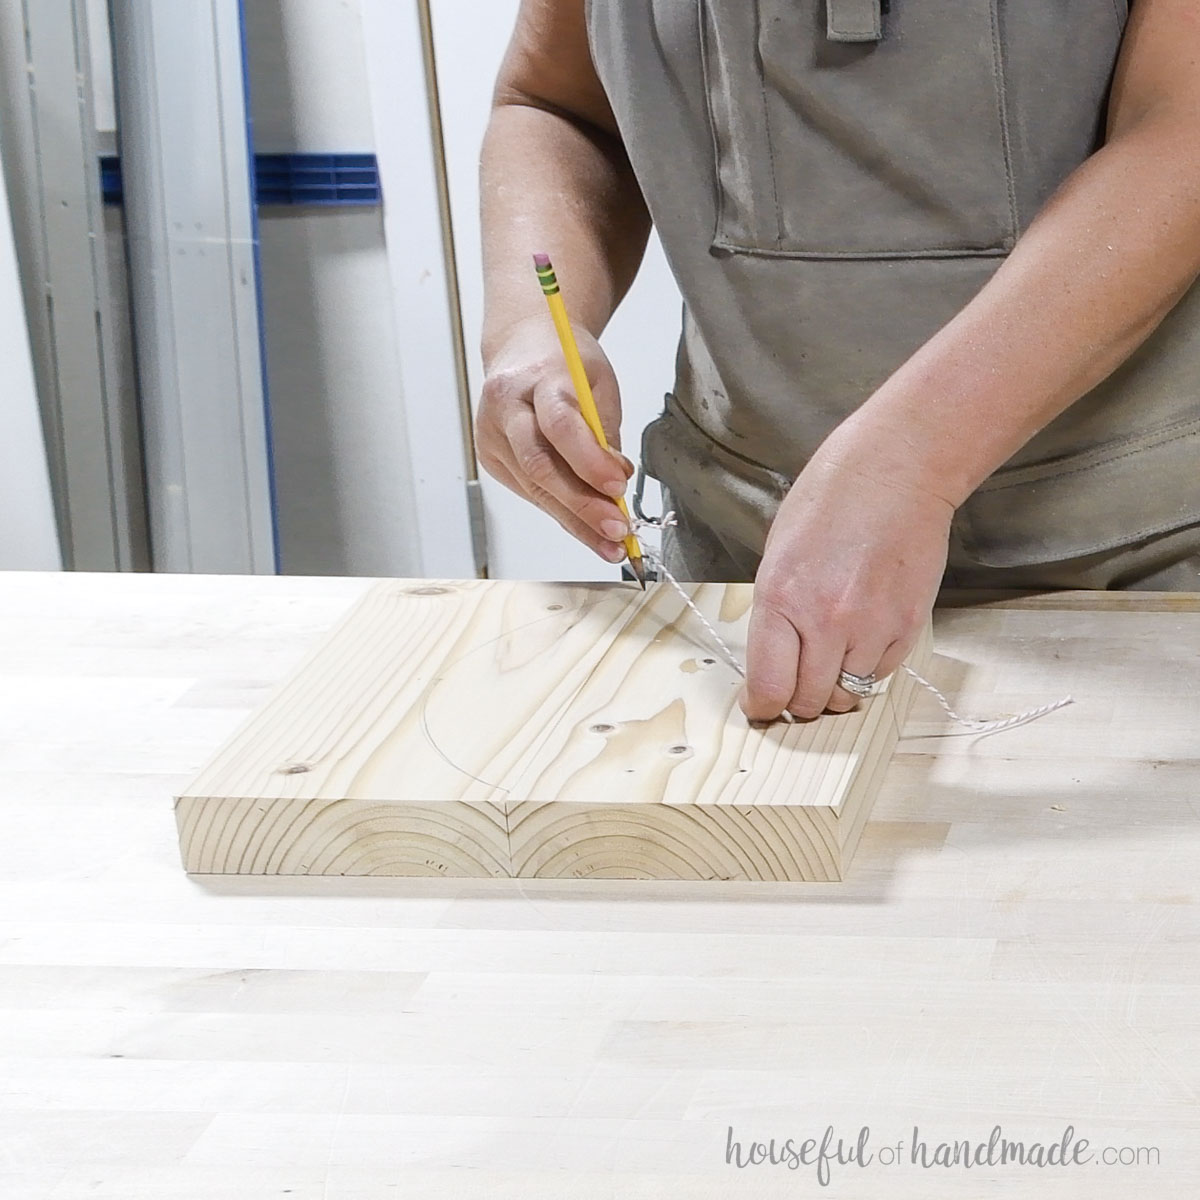
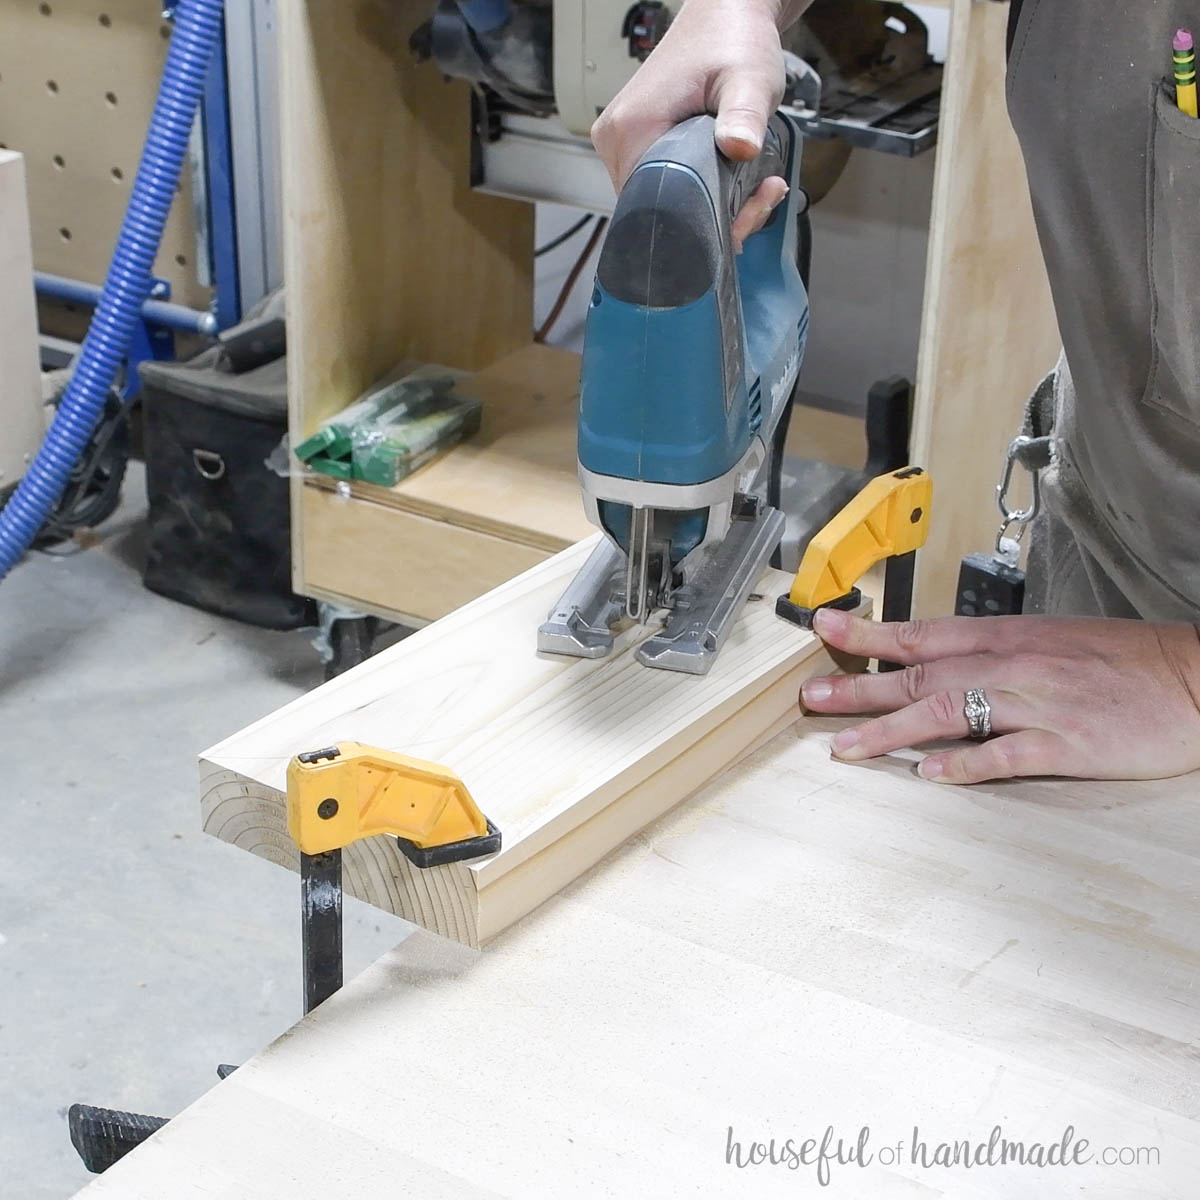
STEP 1- Cut arches
Draw a line across the center of the arched end boards. Draw an arch in the lower half of the boards that goes from one side to the other and touches the center line.
I used a string tied to a pencil to sketch out my arch.
Cut the arch out of the board with a jig saw.
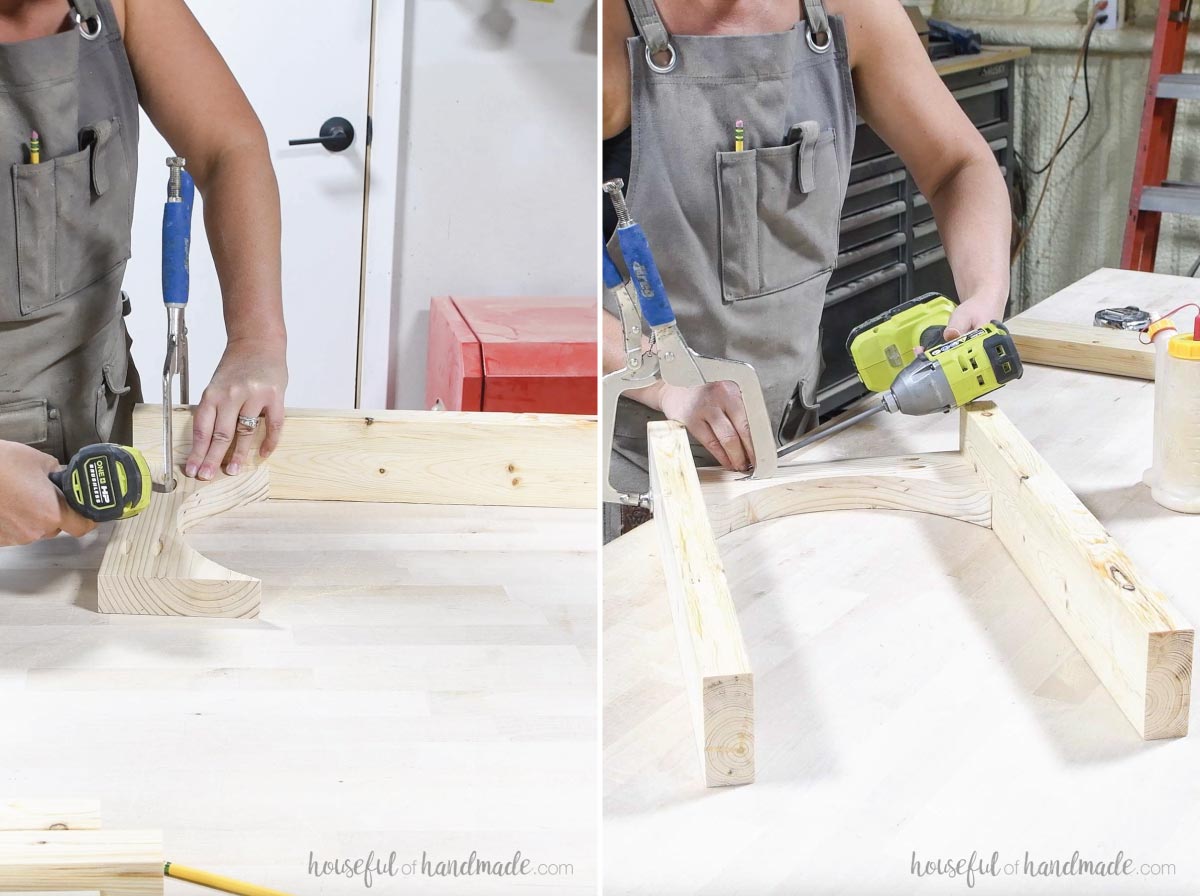
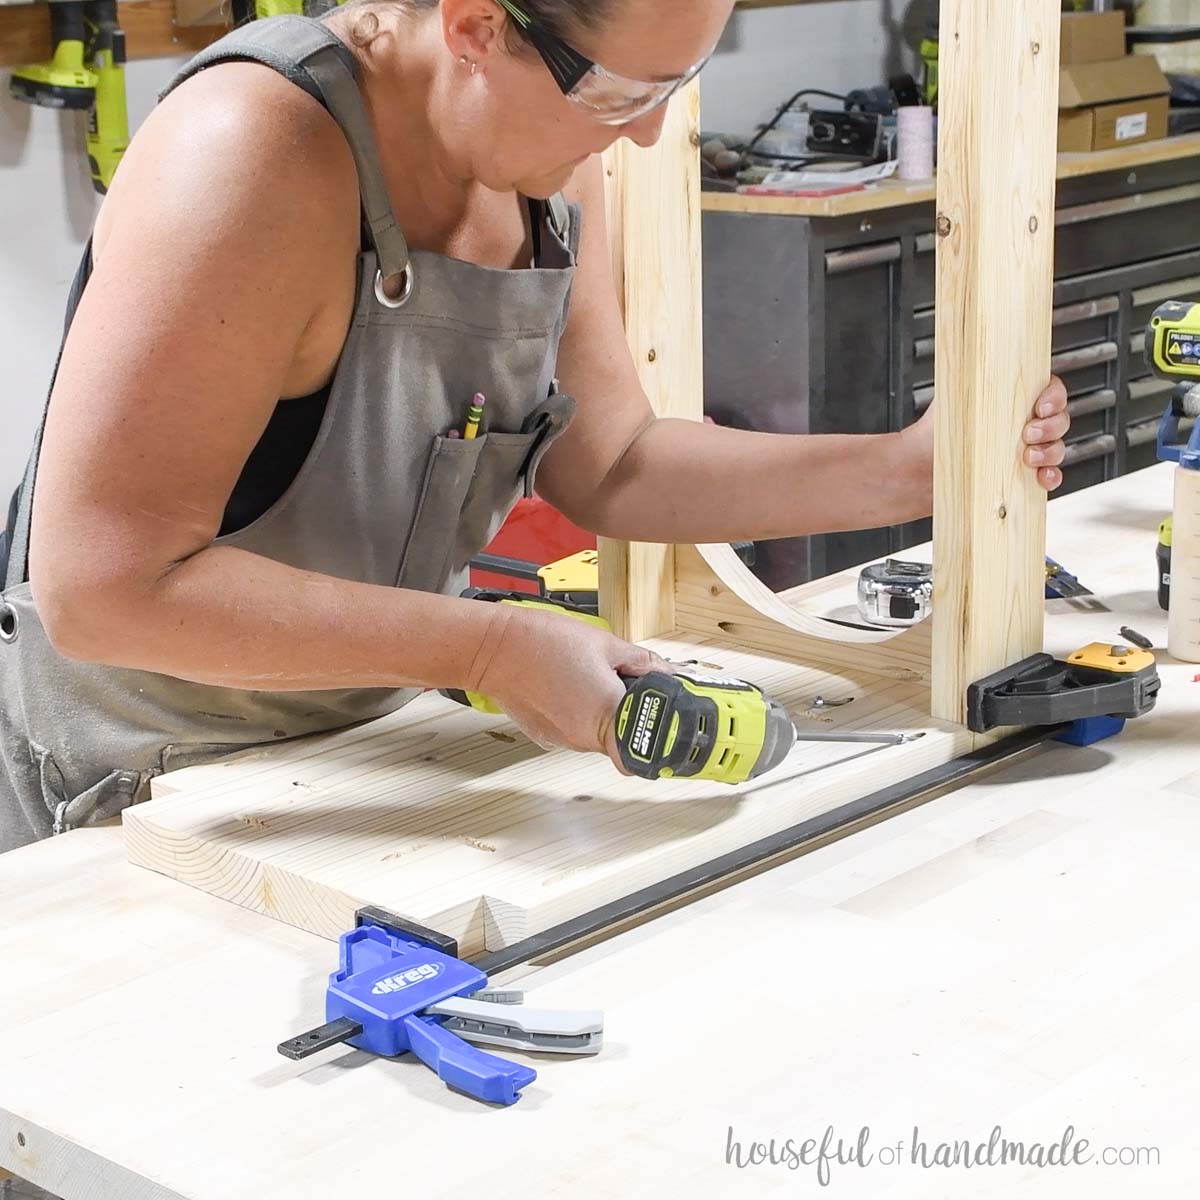
STEP 2- Assemble sides
Set your Kreg pocket hole jig to drill holes in 1 1/2″ thick material.
Drill 2 pocket holes on the ends of the arched boards in the top half.
Attach the arched boards between two leg boards so they are flush to the top and the front edge of the boards. Secure with 2 1/2″ pocket hole screws and wood glue.
Repeat for the second side.
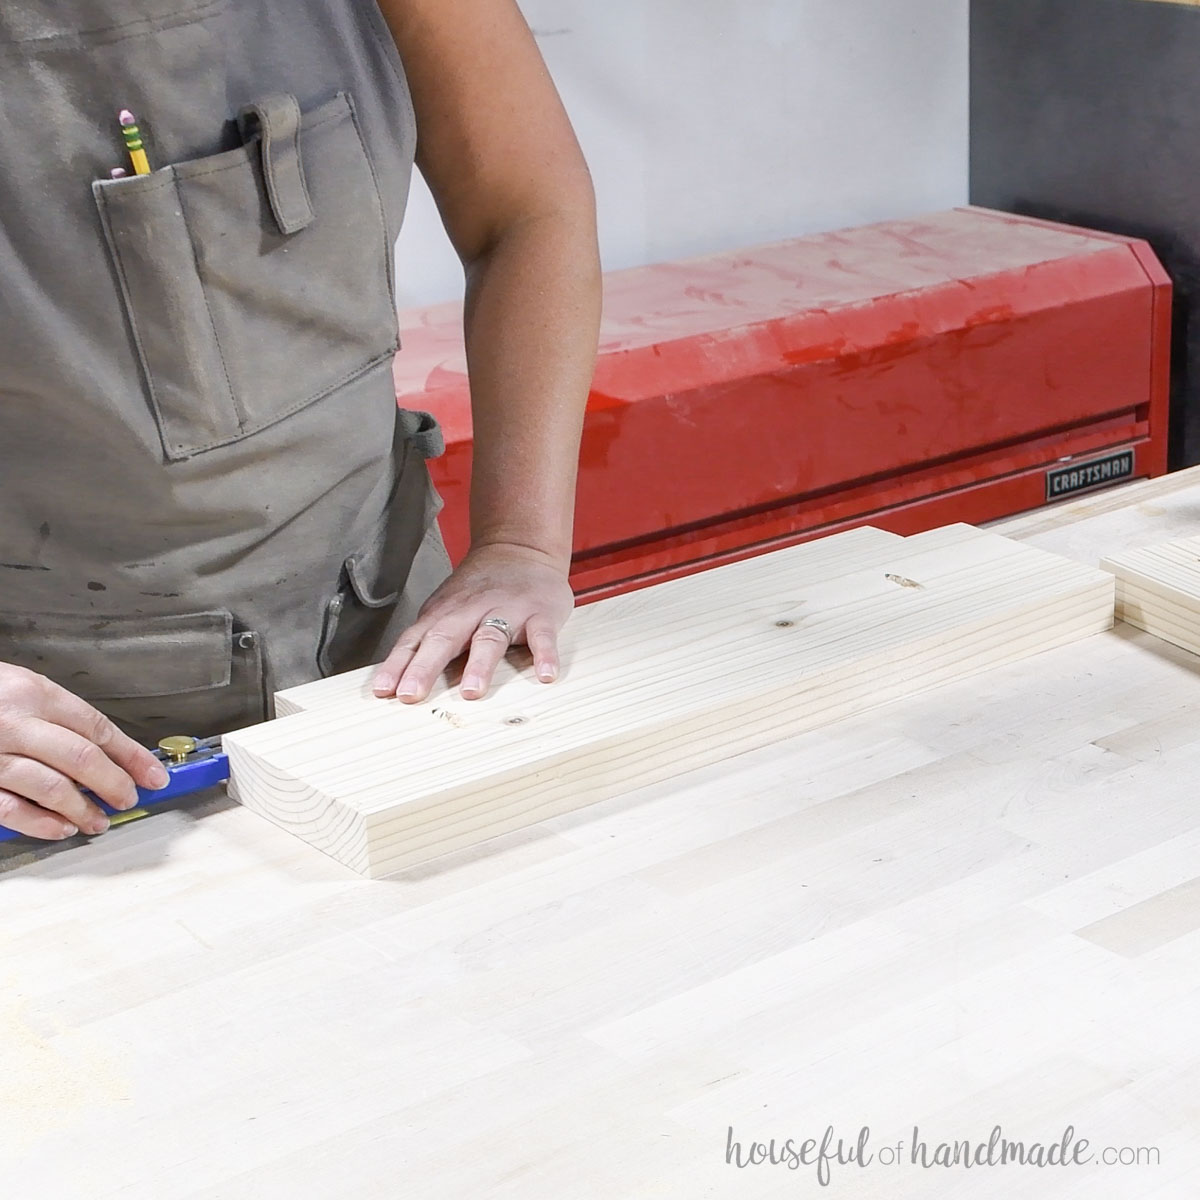
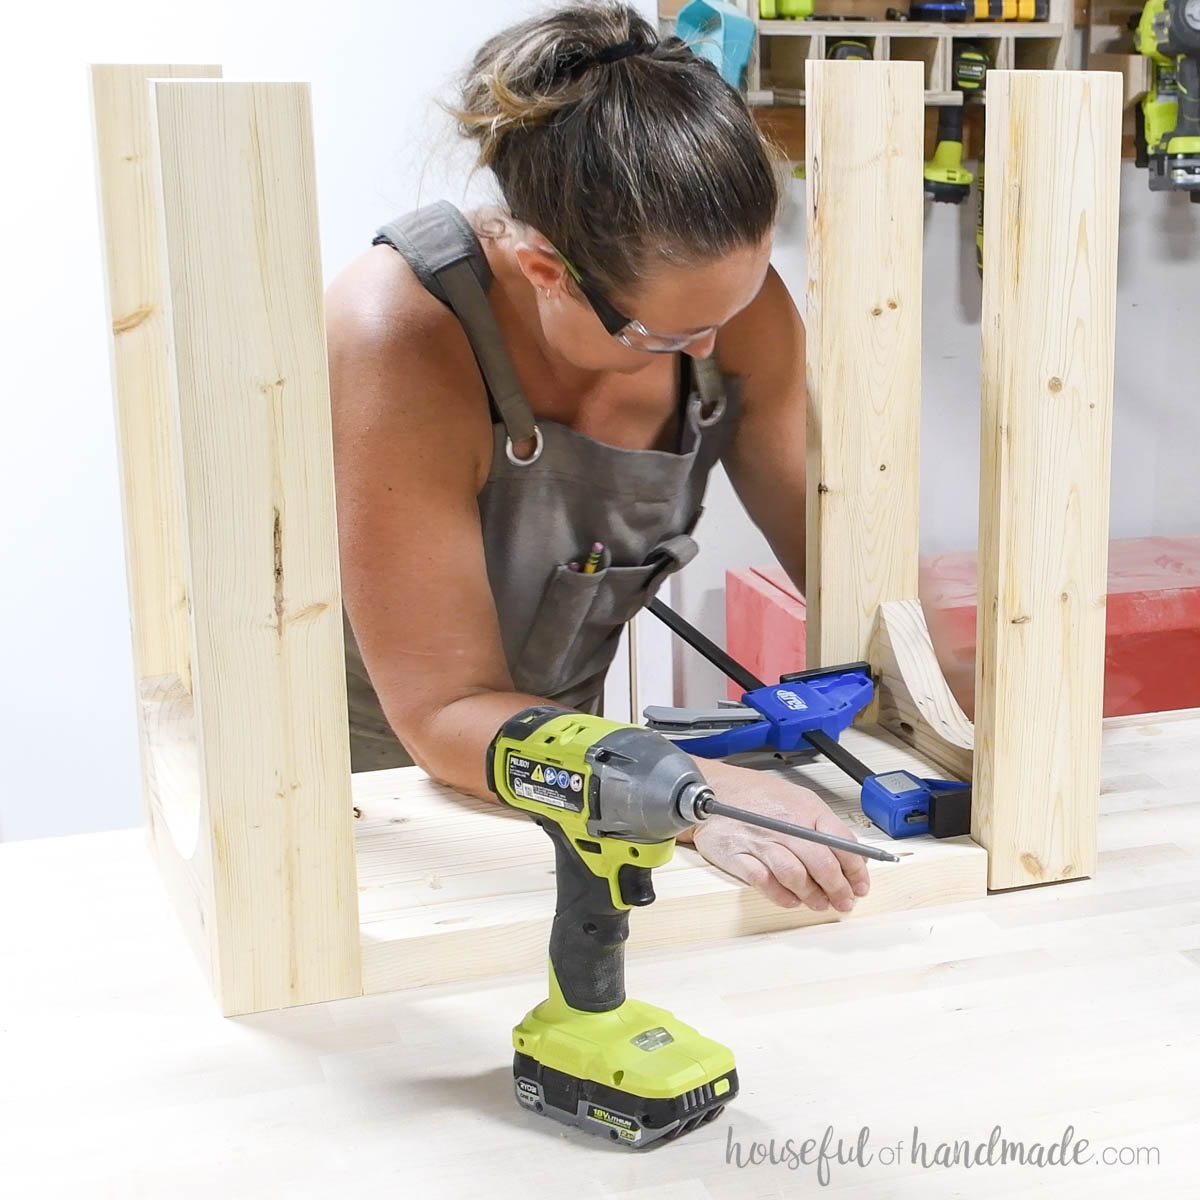
STEP 3- Assemble top
Before cutting the top edge boards, place one of the cut top center boards in between the two legs and clamp firmly together. Measure the area between the legs and cut your 2×2 top edge boards to that measurement.
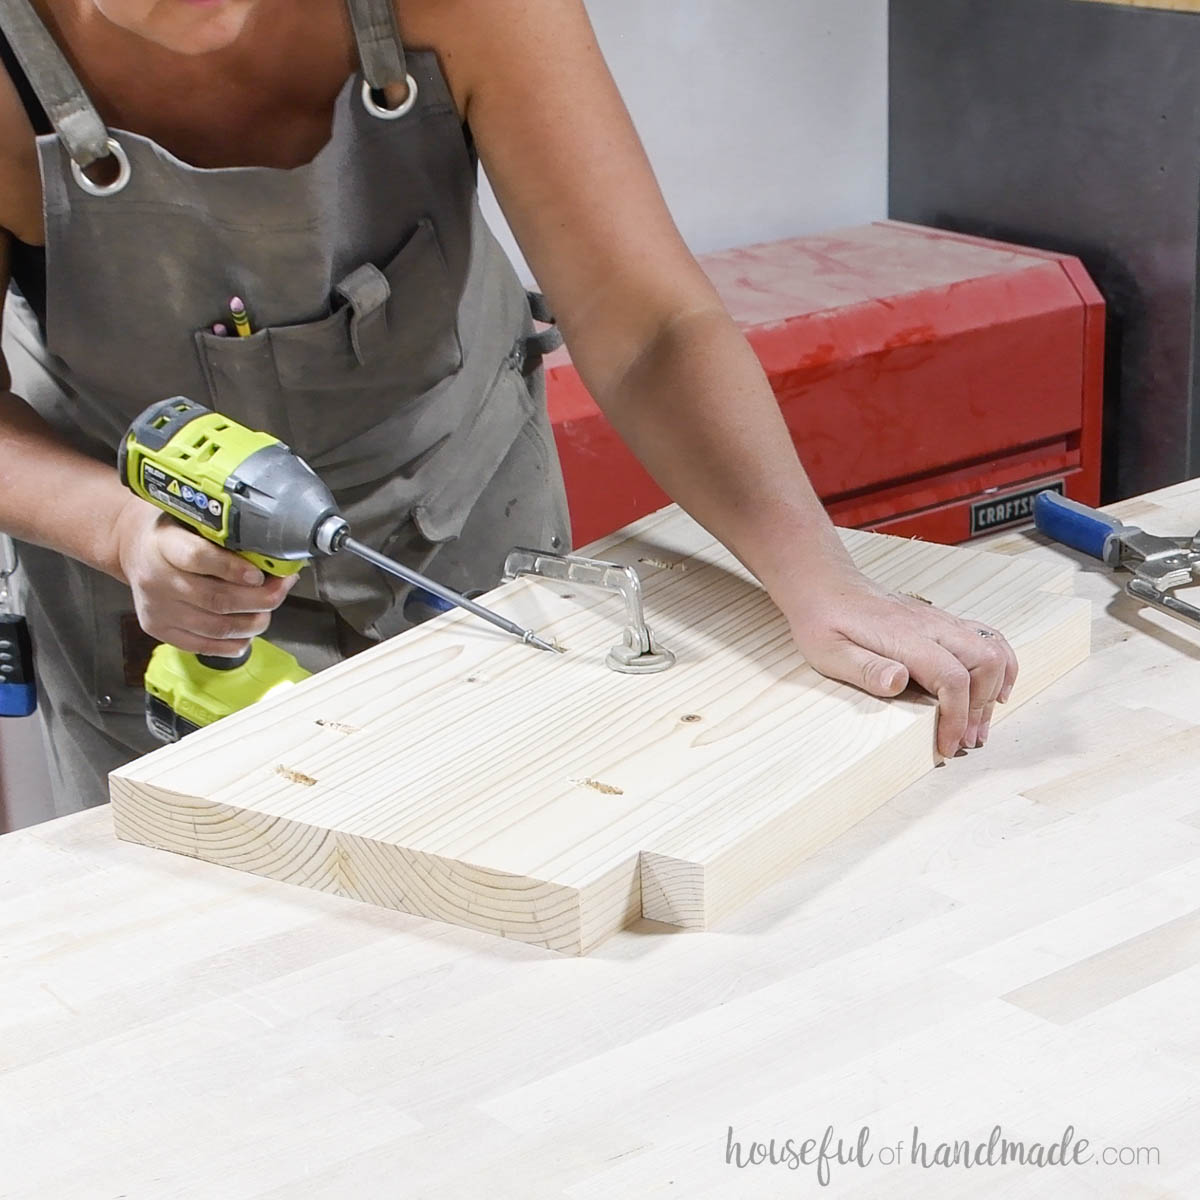
With your pocket hole jig still set for 1 1/2″ thick material, drill pocket holes in the top boards according to the diagram in the plans.
Carefully measure where the edge board will go so it fits nicely in place.
Add glue to the seams and attach the boards so they are flat to the top/bottom.
Use project clamps to keep them flat as you secure with 2 1/2″ pocket hole screws.
STEP 4- Attach top
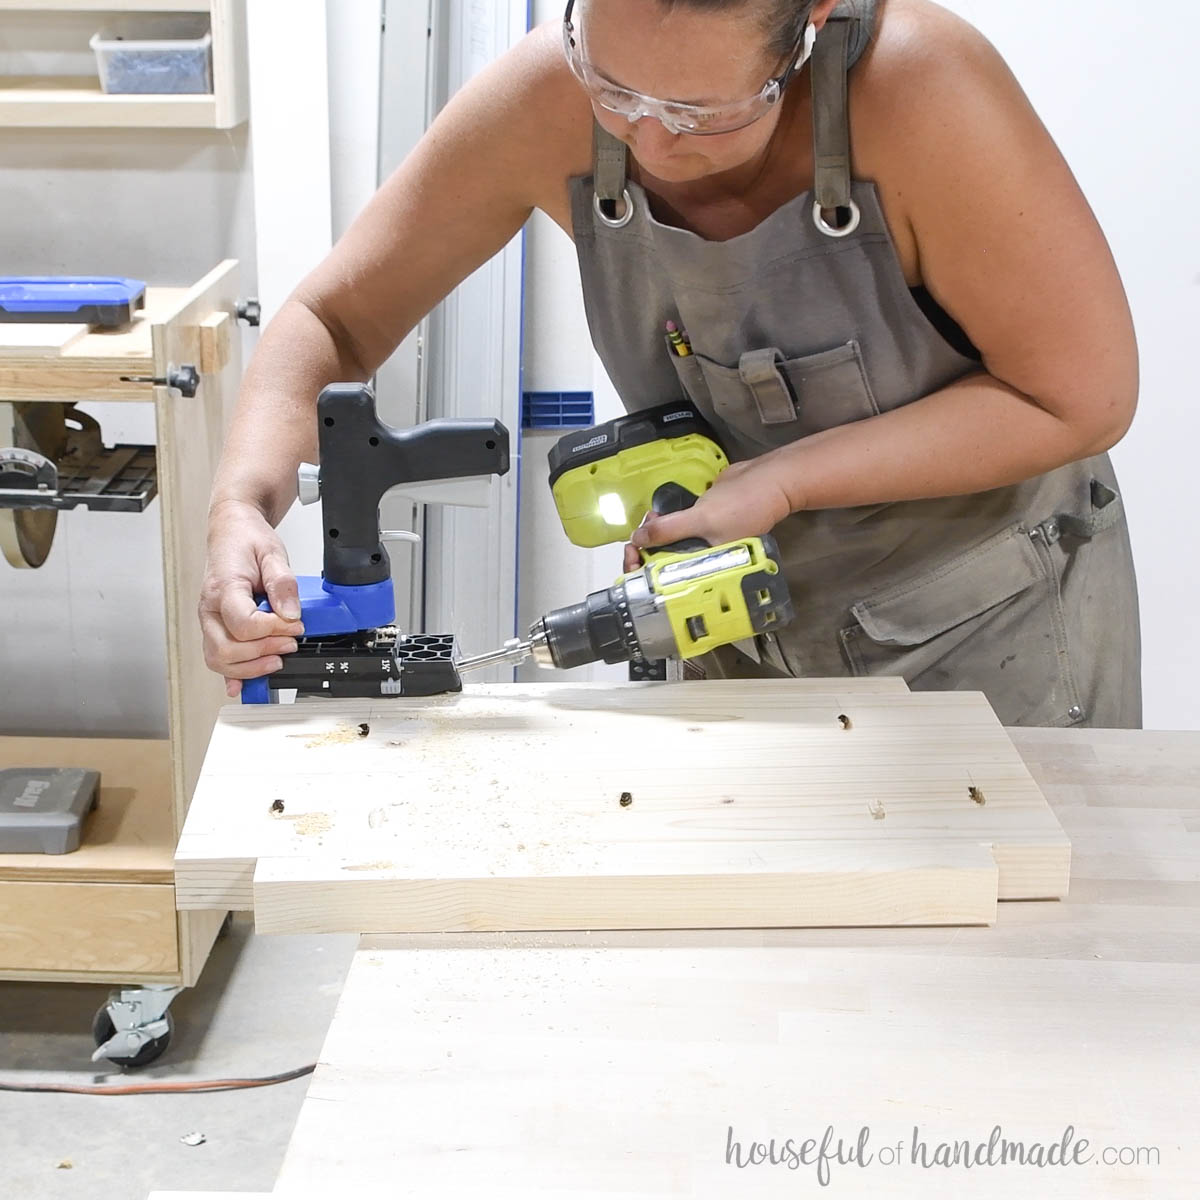
Drill pocket holes set for 1 1/2″ thick lumber in the center edge of all the top boards.
Place the top between the legs. Make sure it is flush with the top of the legs/arched boards.
Secure with 2 1/2″ pocket hole screws through all the white pocket hole positions from Step 3.
If the legs are too tight to get the top inside, use a clamp as a spreader to carefully open the legs so you can slide the top in place.
STEP 5- Finish
You did it!
Now all that is left is to sand and finish your new side table!
I stained my table with 2 different stains to get the look I was going for. I started with a coat of Chestnut stain by Minwax, then finished it with a coat of Antique White stain by Varathane.
I love the warm understated color.
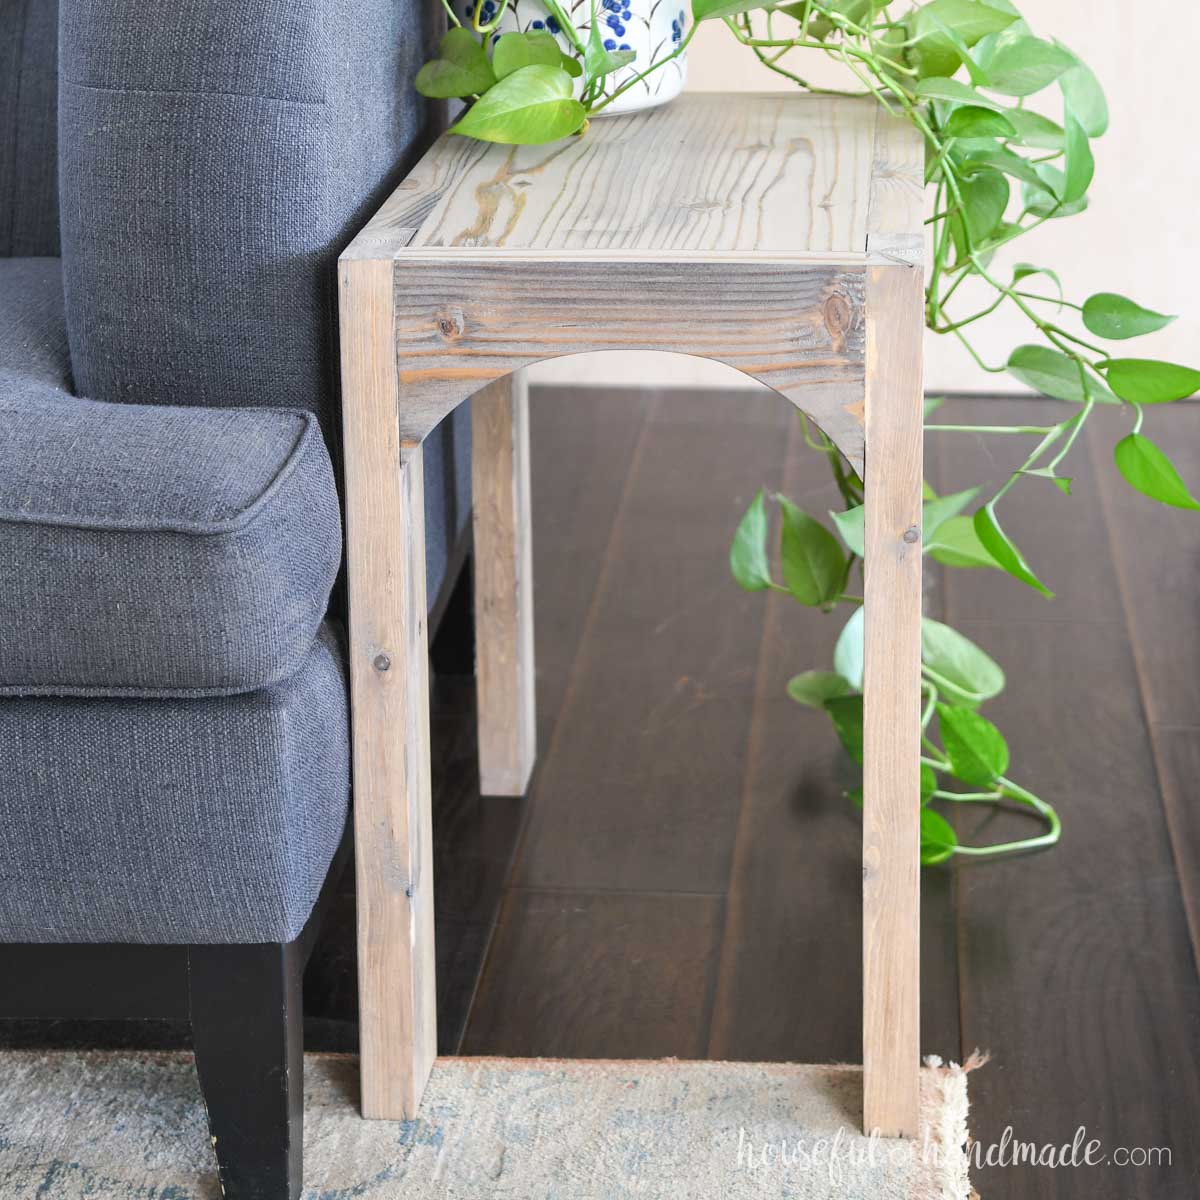
Now you can enjoy your beautiful end table.
Happy building!
