I know cabinets seem hard, but I am here to tell you they are not! And these closet cabinets are even easier.
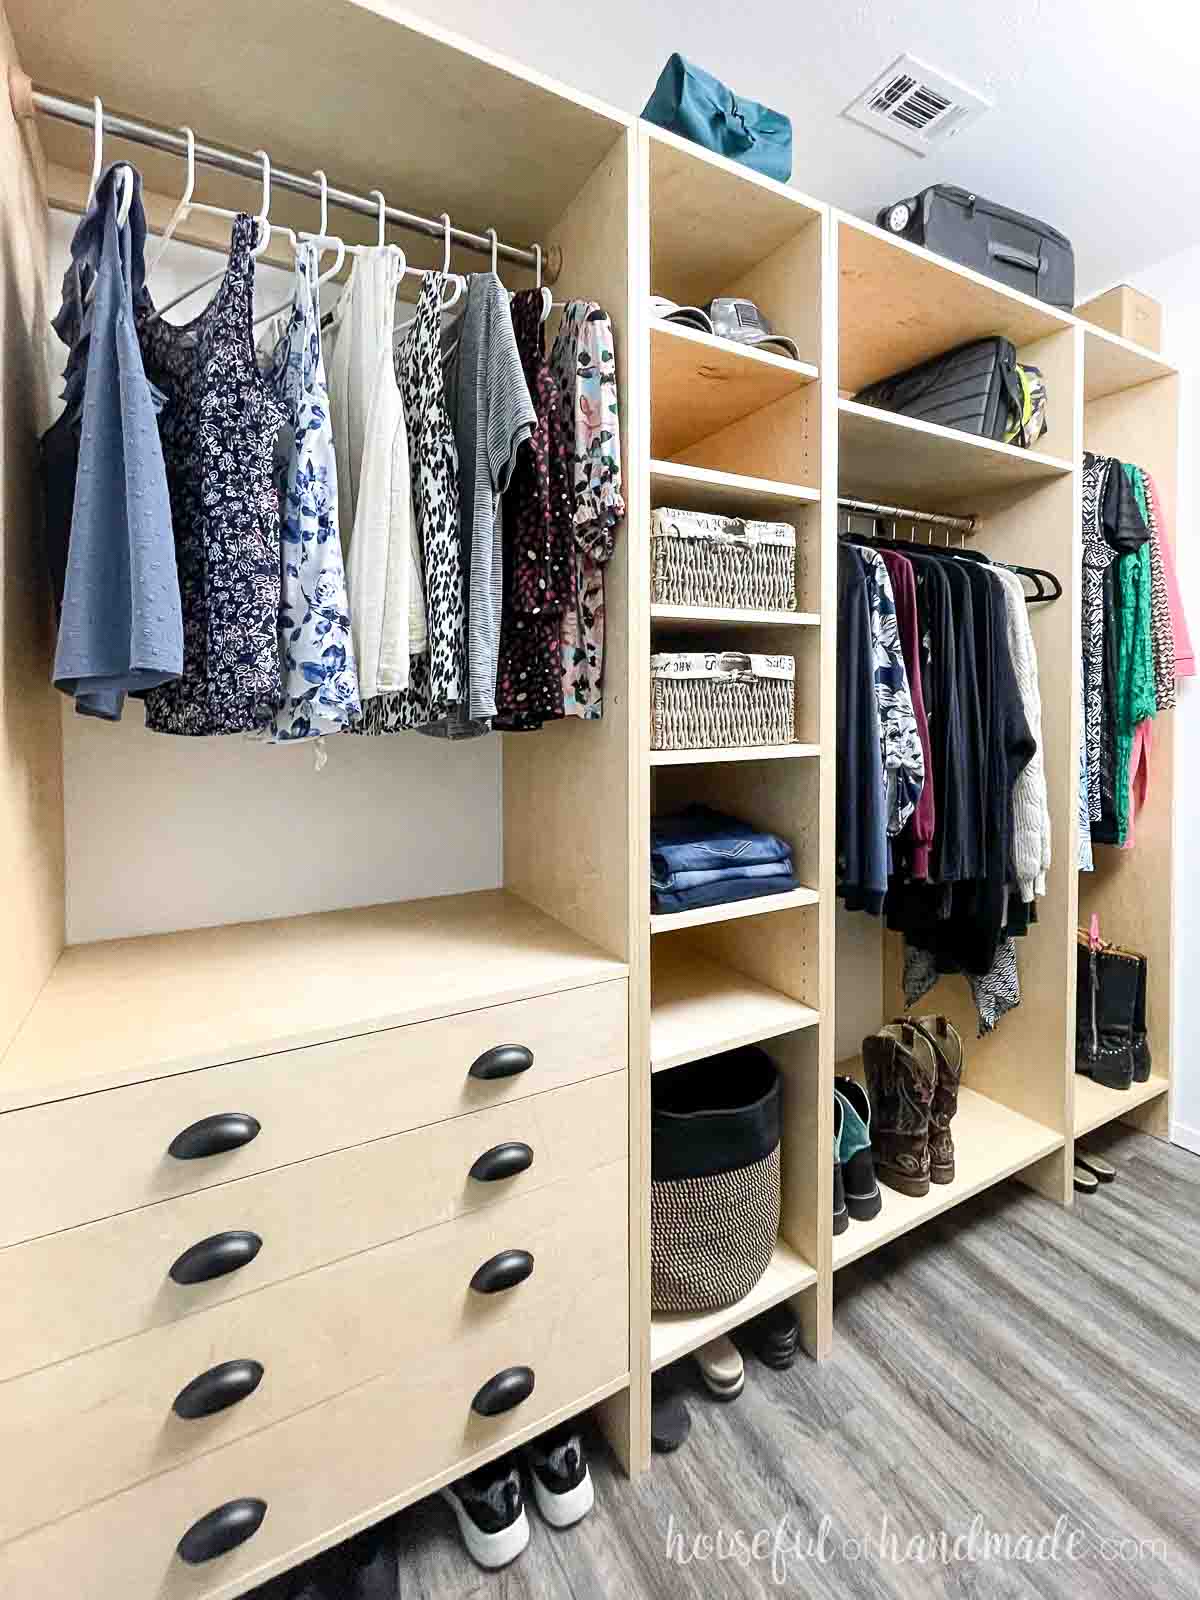
For this closet organizer, I created 4 different closet sections. Each was small enough for me to build on my work table, but you can also build on the ground (I’ve done that many times).
Pick the sections that work for you, or build them all! Either way you will create a beautiful custom closet that creates so much storage in a small space.
This post may contain affiliate links. As an Amazon Associate I earn from qualifying purchases. Click here to read my full disclosure policy.
Wood Closet Organizer with Drawers
Drawers are the most versatile storage solution! There is no better way to create easily accessable storage, even in deep areas.
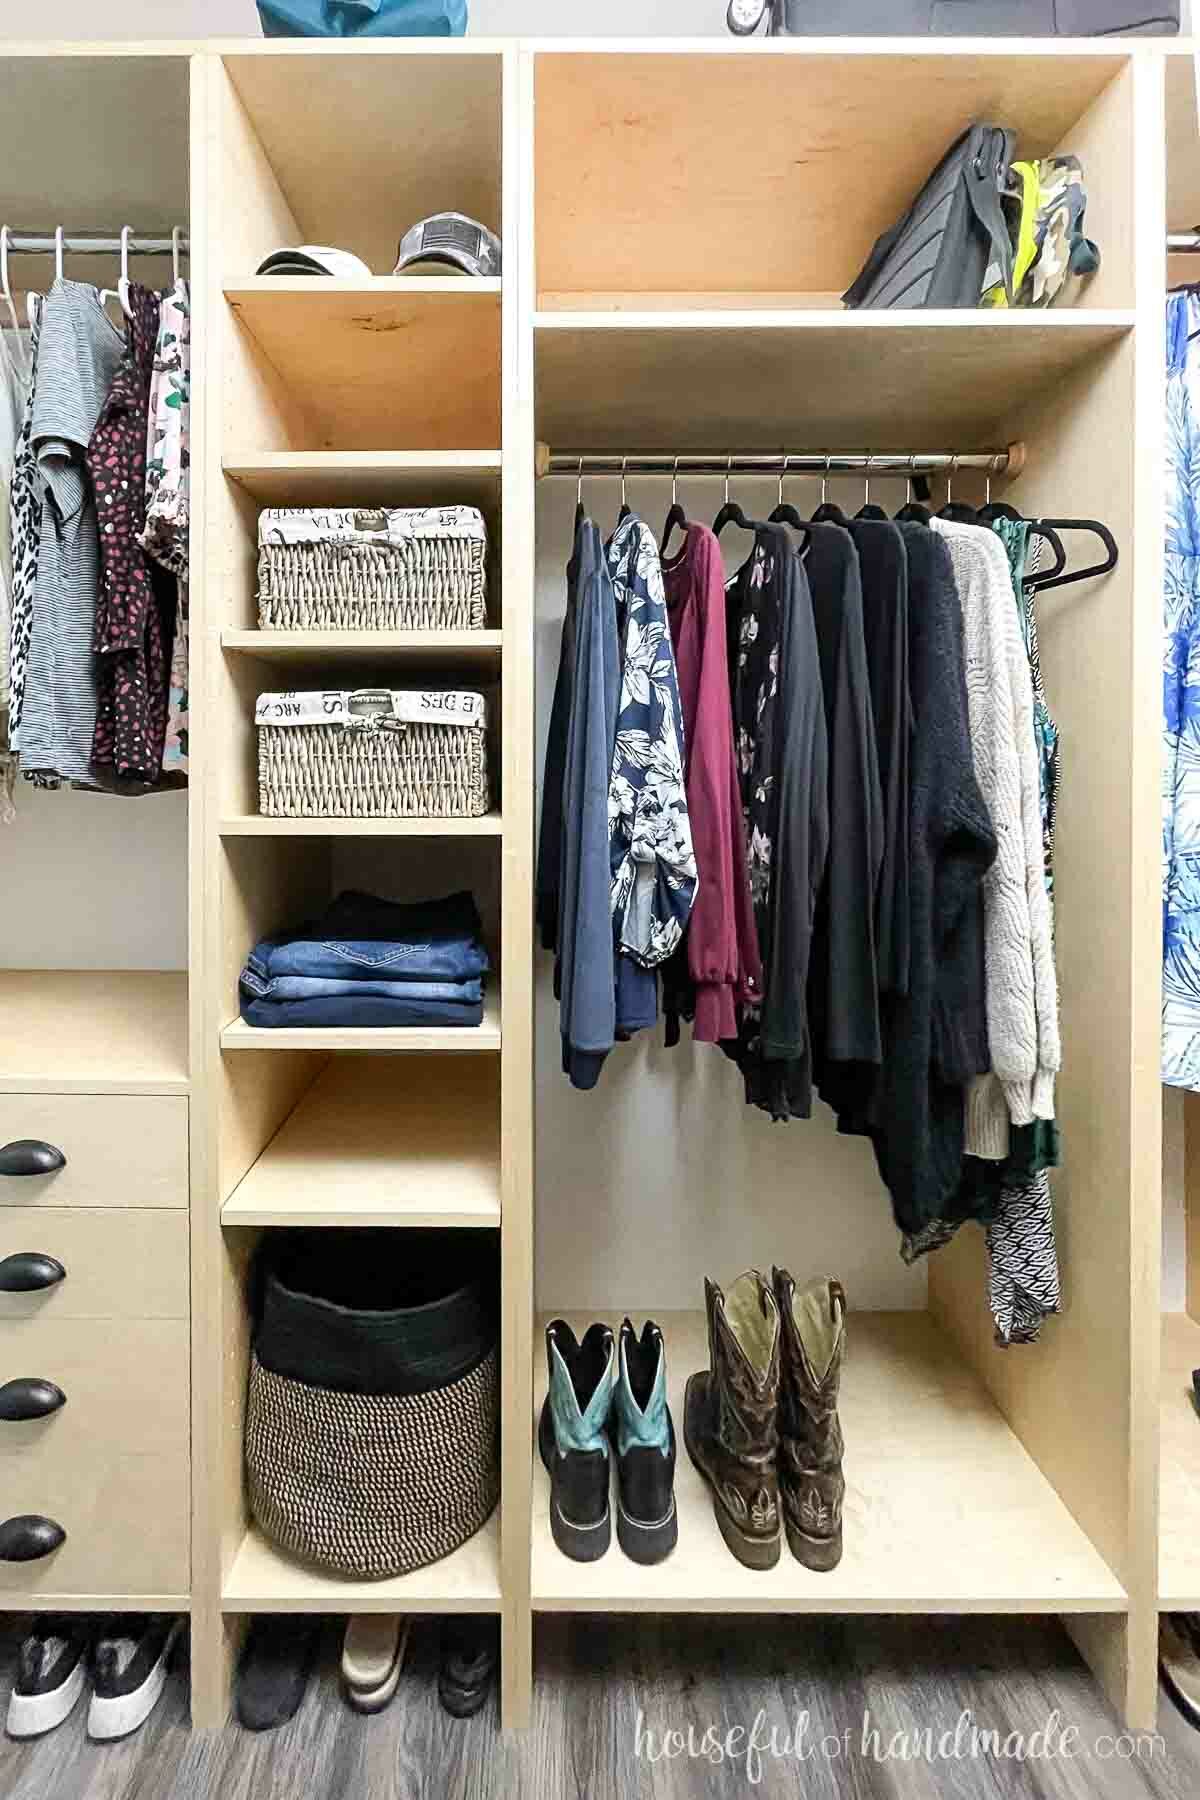
So I definitely needed one area of the closet with drawers. The 4 large drawers are 18″ deep and just shy of 30″ wide.
The lower drawers are deeper for larger clothing items. And the upper drawers are shallower for smaller or more delicate items (yeah, it’s an underwear drawer).
Or you can use the drawers for accessories. Add drawer dividers to really take the storage up a notch.
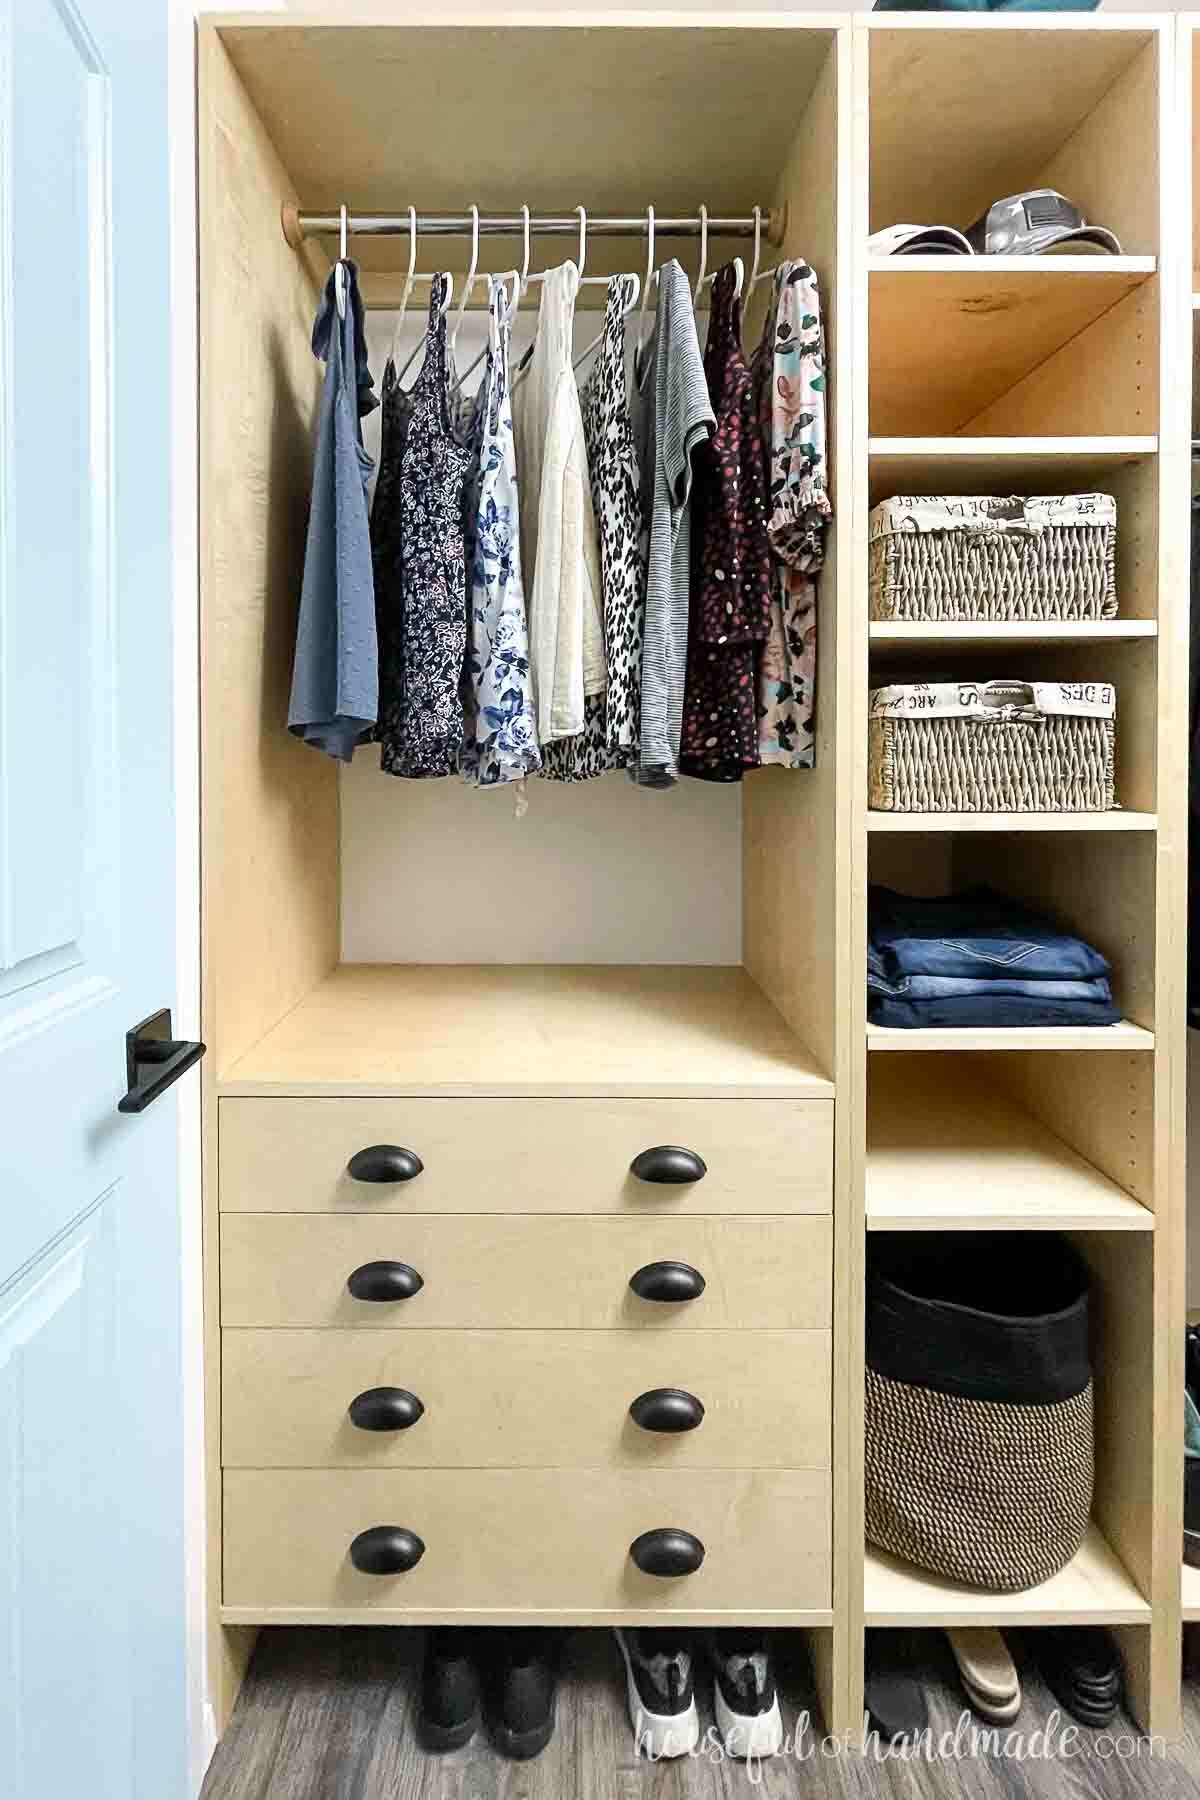
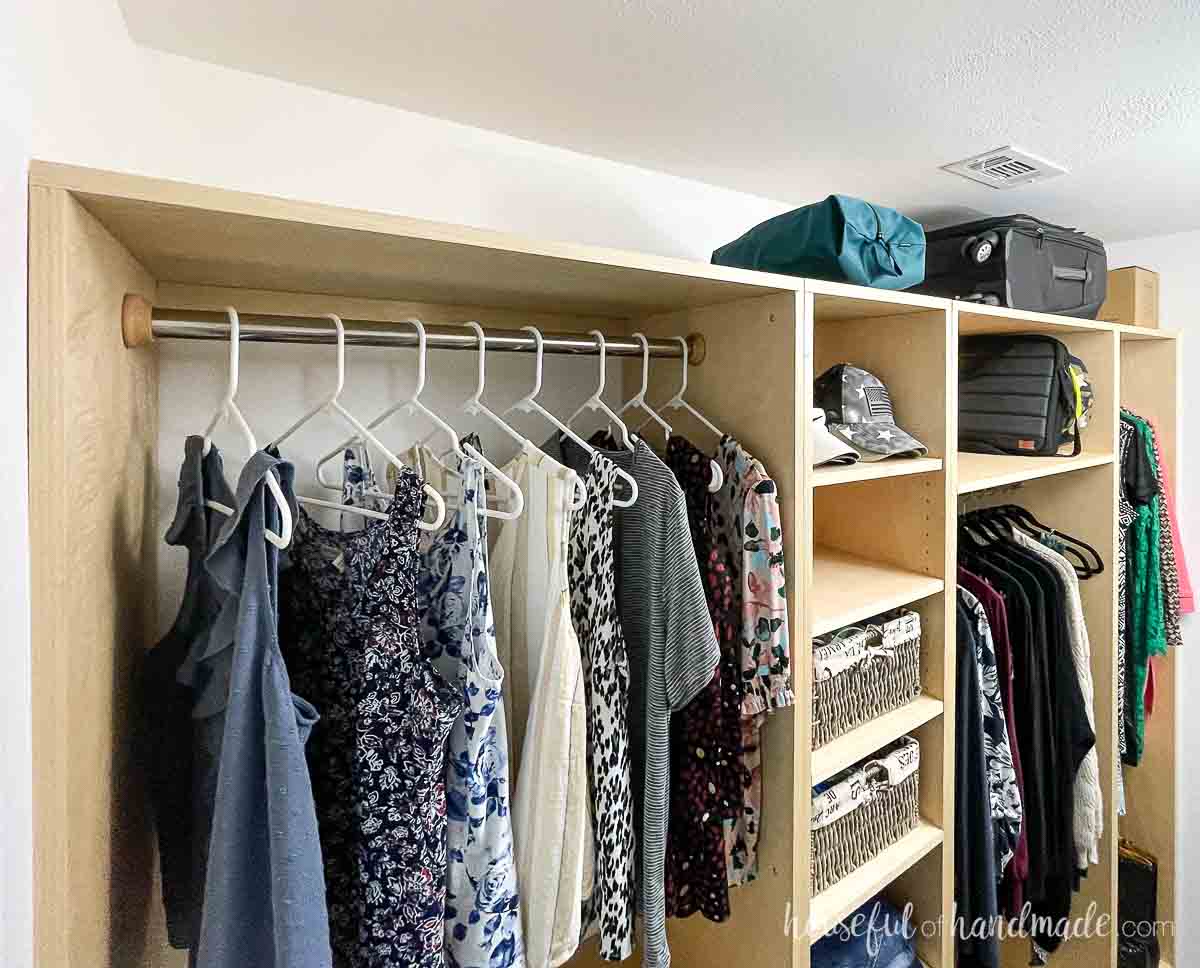
Above the drawers you still have plenty of room for hanging items.
This closet is for my mother-in-law and she is tall. And there is still plenty of room for hanging longer items.
You can also add another shelf to the section with the scraps of plywood to get even more storage.
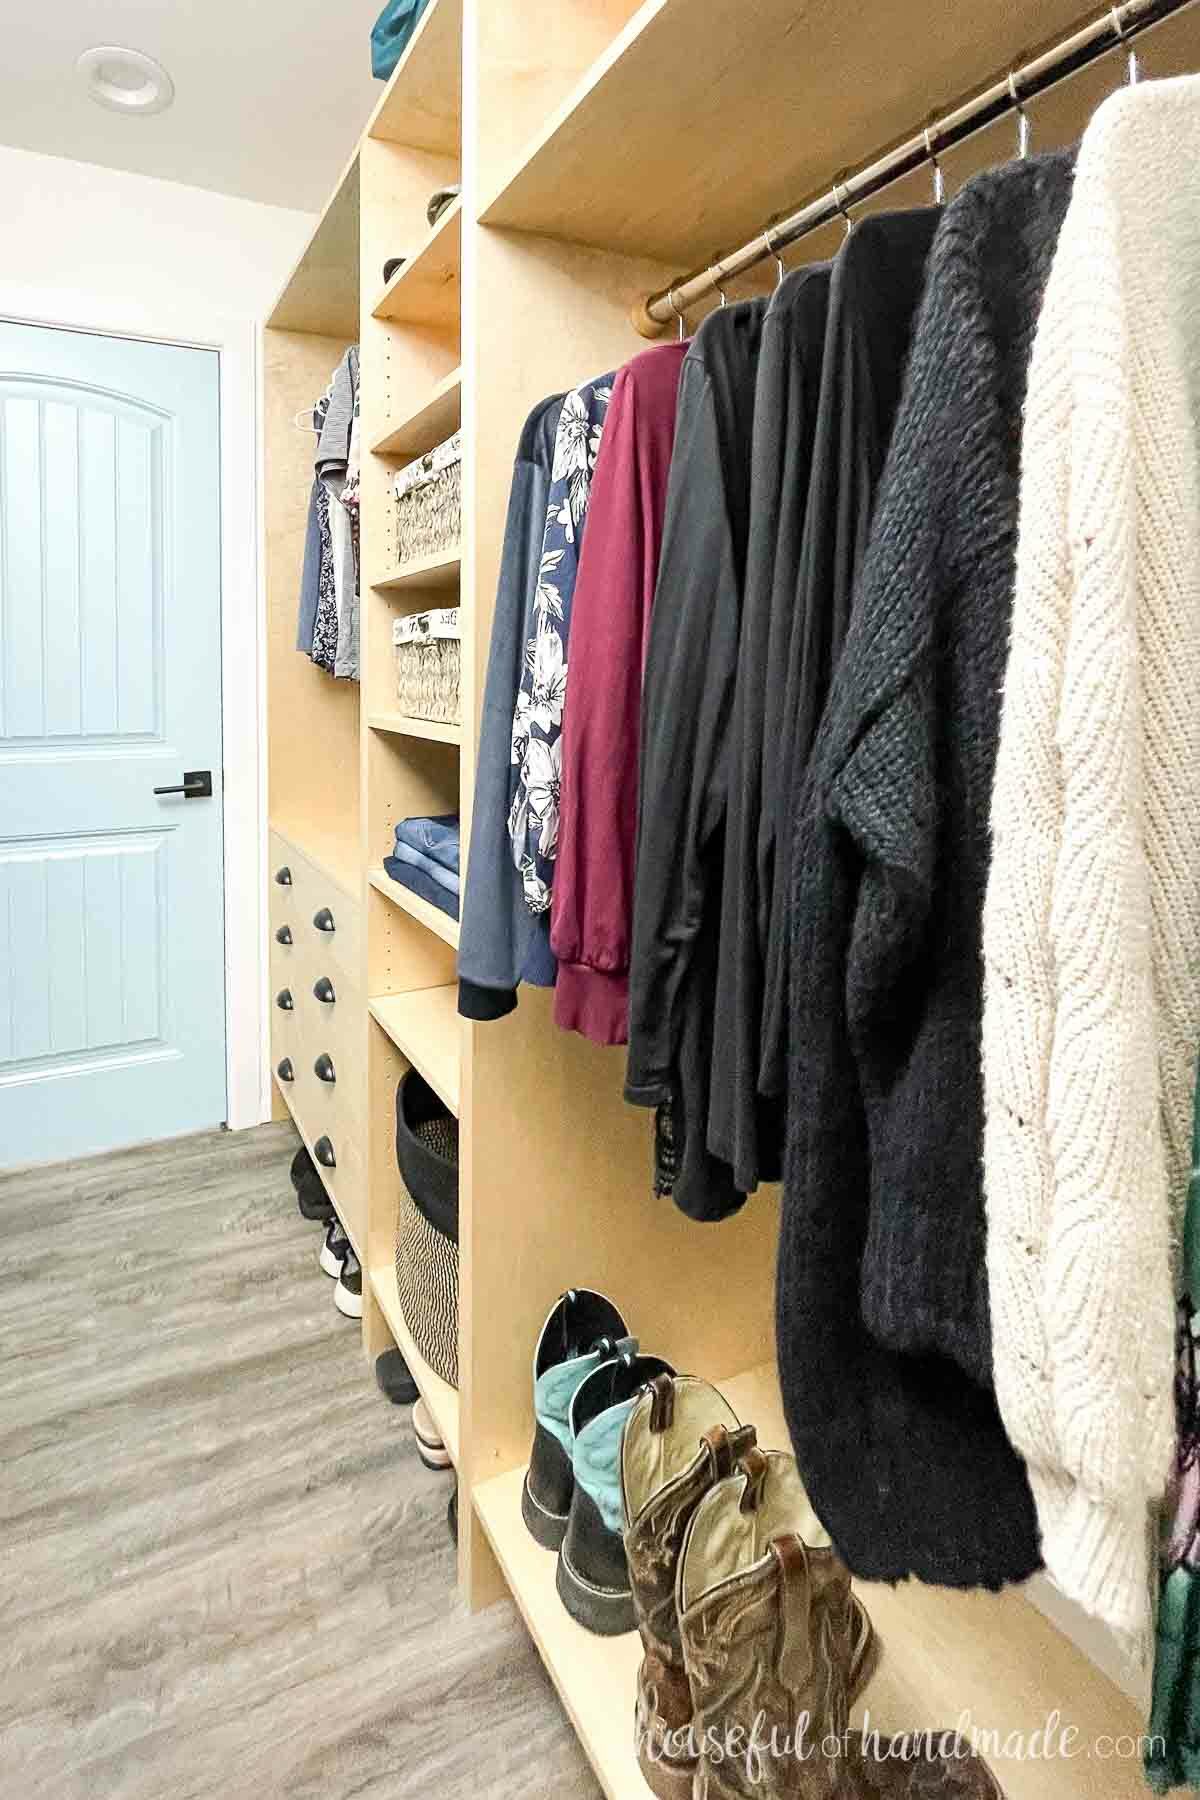
Shoe Storage in Toe Kick
Shoe storage was a request when designing the closet. But she didn’t want to give up a lot of clothing storage for shoes.
So instead, we added the most simple shoe storage ever!
By lifting the toe kick up a couple inches and making it deep, you can quickly kick off your shoes to tuck under the closet system.
And the toe kick has a board stopping the shoes from going too deep so you don’t have to worry about them getting lost.
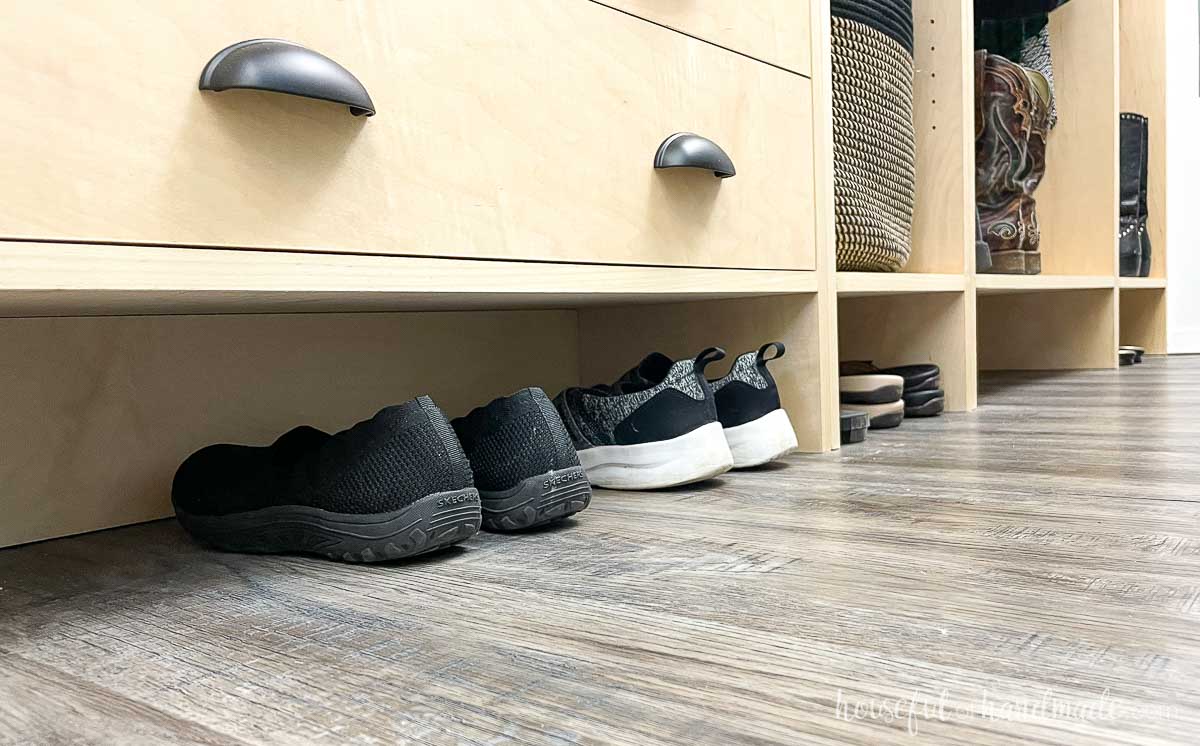
She also requested storage for her boot collection. So we left plenty of room under the other closet rods to easily tuck the boots away in.
But if you do not need this additional shoe space, there are enough plywood scraps left over to add another shelf or two to these sections.
Put the shelves at the top or bottom, depending on what items you wish to store away.
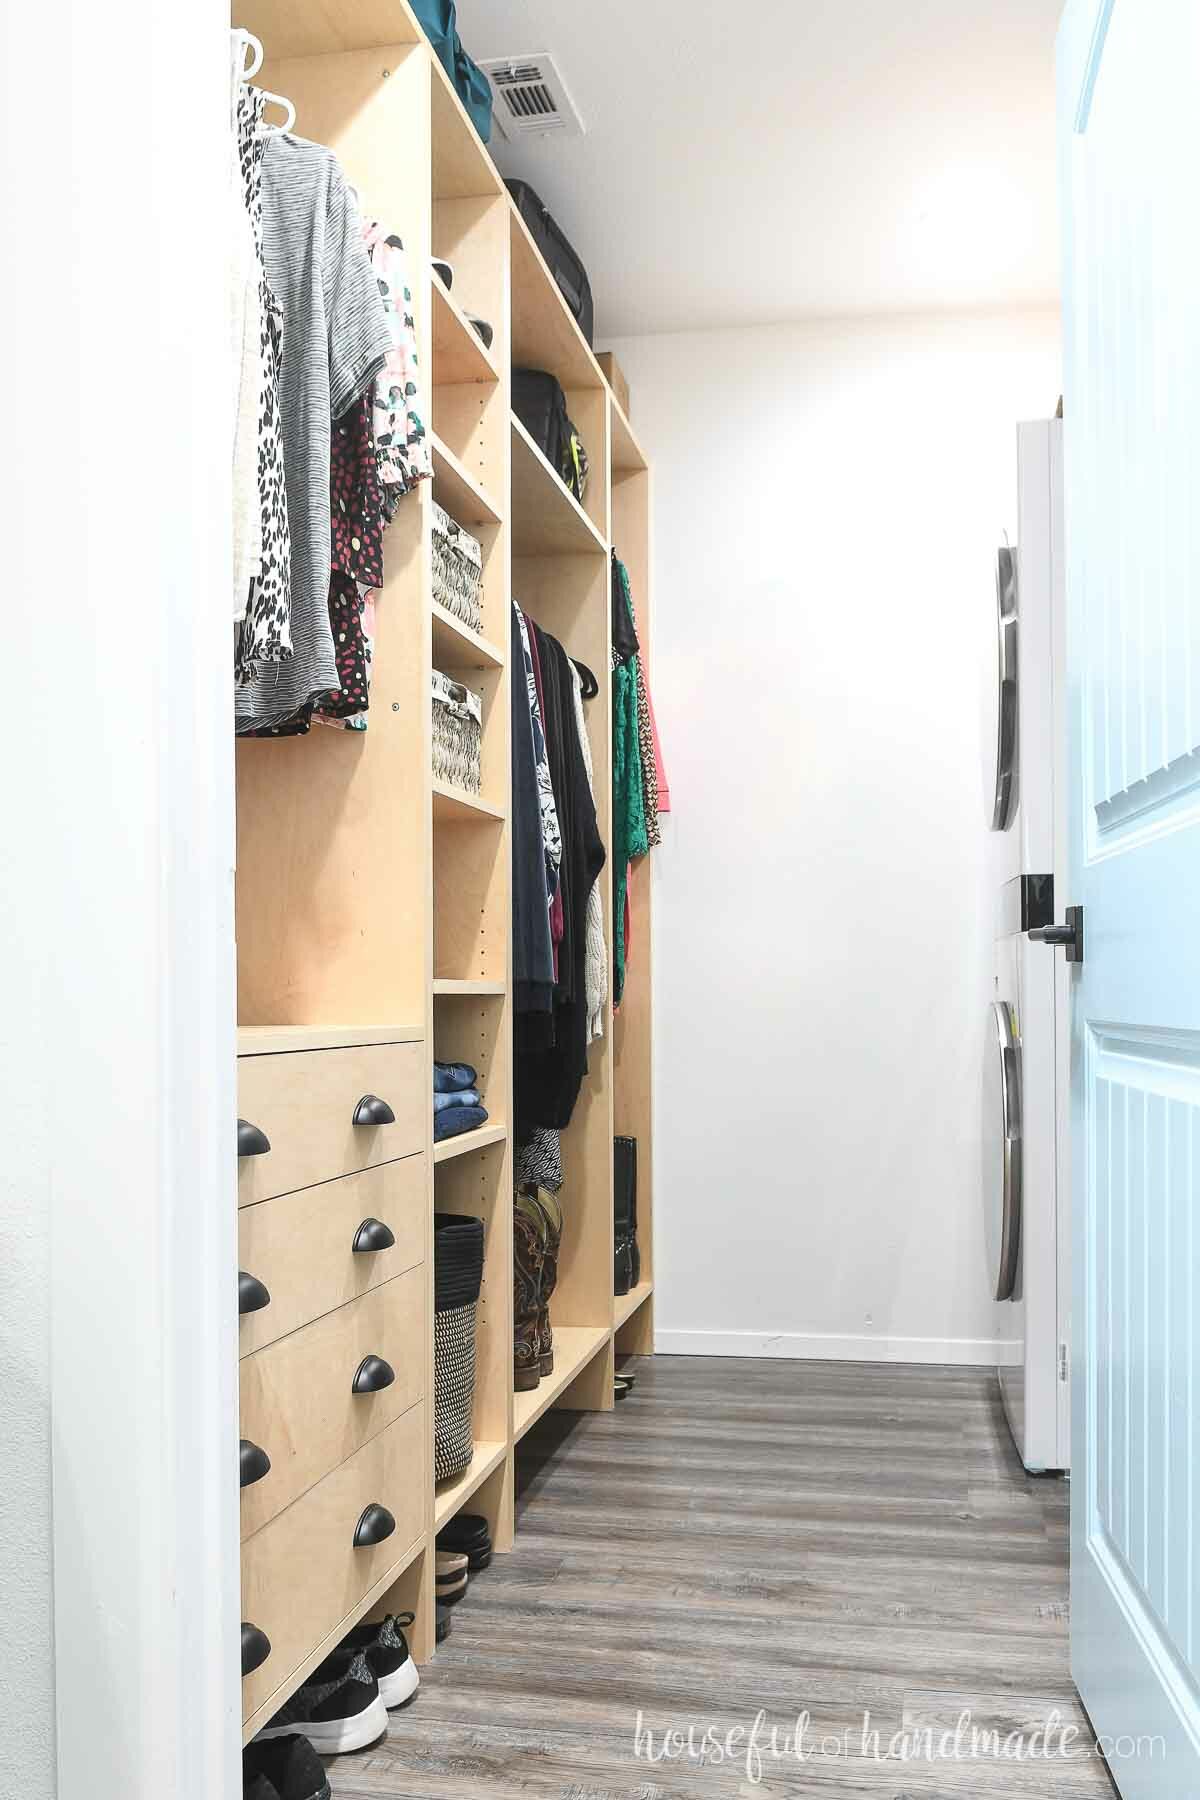
Room for Storage on Top
In order to build and install the closet organizer cabinets easily, they needed to be shorter than the ceiling.
But we turned this into a positive! The top of the closet system is the perfect place to move seasonal items to free up closet space.
It also has enough space to store away smaller luggage items. This is a carry-on bag and it doesn’t even take up the entire space.
For more cabinet building tips, check out my cabinet building guide.
How to Build a Custom Closet
Tools & Materials
Recommended Tools:
- Circular saw with guide
- I used a combination of this rip guide and this cross gut guide
- Pocket hole jig
- Drill
- Impact driver (optional, but I love not having to switch bits with the drill)
- Speed square
- Finish nailer
- Trim router
- Shelf pin jig
- Sander
- Level
Supplies:
- Wood products
- (6) 3/4″ plywood, 4×8 sheets
- (1) 1/4″ plywood, 4×8 sheet
- (125′) 3/4″ edge banding
- Shims
- 1 1/4” finish nails
- 5/8” finish nails
- 1 1/4” pocket hole screws
- 1 1/4” pan head wood screws
- 2 1/2” wood screws
- Wood glue
- 96” closet rod
- (3 sets) Closet rod brackets
- (4 pair) 18” drawer slides
- Drawer pulls
- Shelf pins
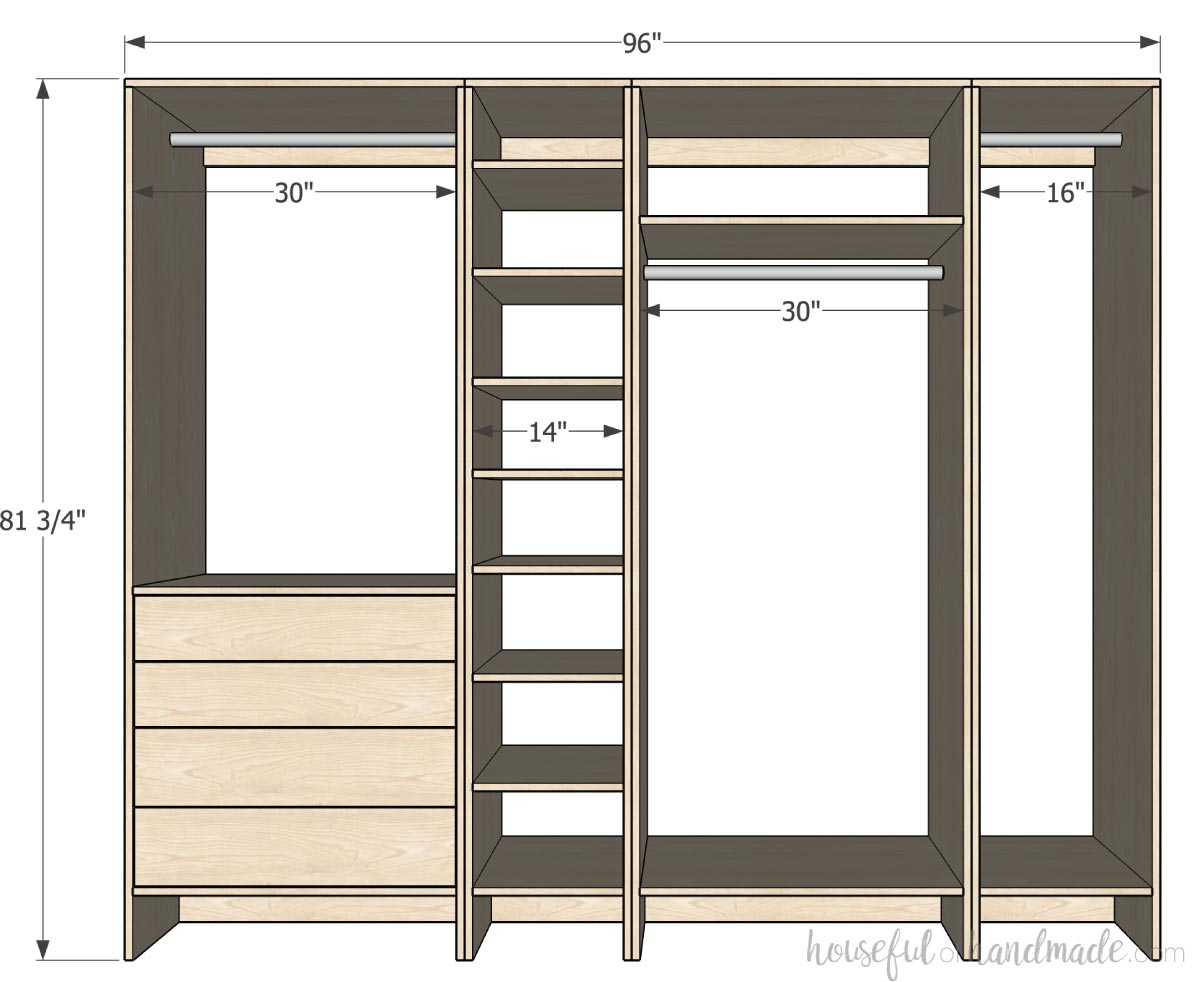
Overall Dimensions
The finished closet organizer is 8′ wide by 20″ deep and 81 3/4″ tall with 76″ of closet rod for hanging storage.
The cabinets leave approximately 16″ of storage above the closet for additional storage and make it so you can easily move the cabinet into place.
You can adjust the width of each section easily to fit your own closet space.
Cut List
Cut out the pieces according to the cut diagrams and tables in the PDF plans.

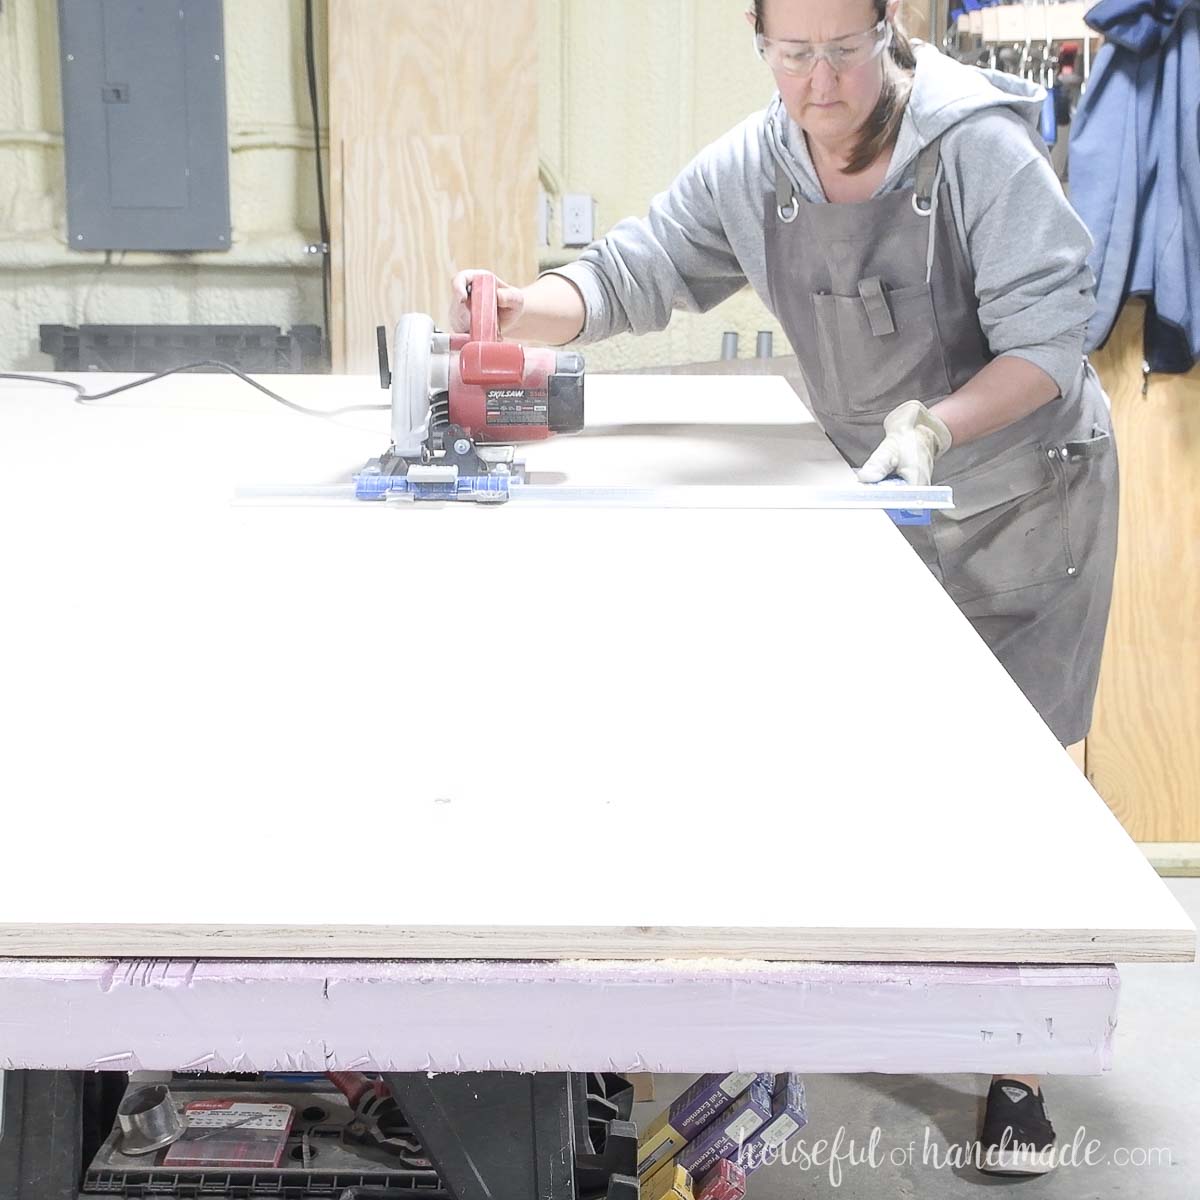
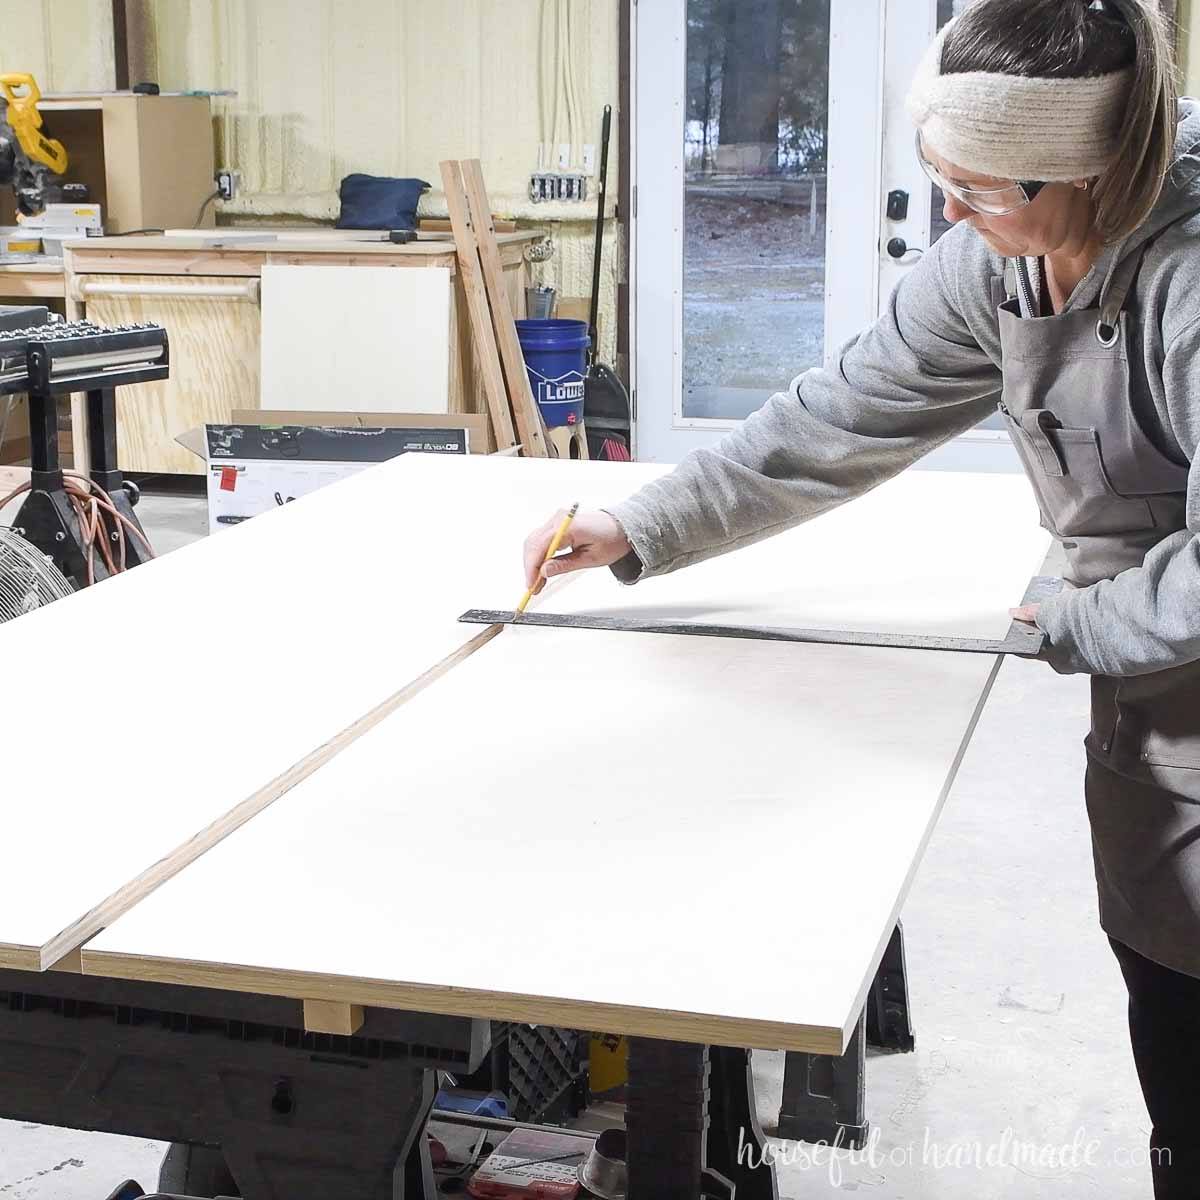
Start by ripping the sheets of plywood into two 20″ wide strips. I love the Kreg Rip Cut for this.
Then cross-cut the pieces to size.
Learn my tricks for easily breaking down a sheet of plywood with a circular saw here.
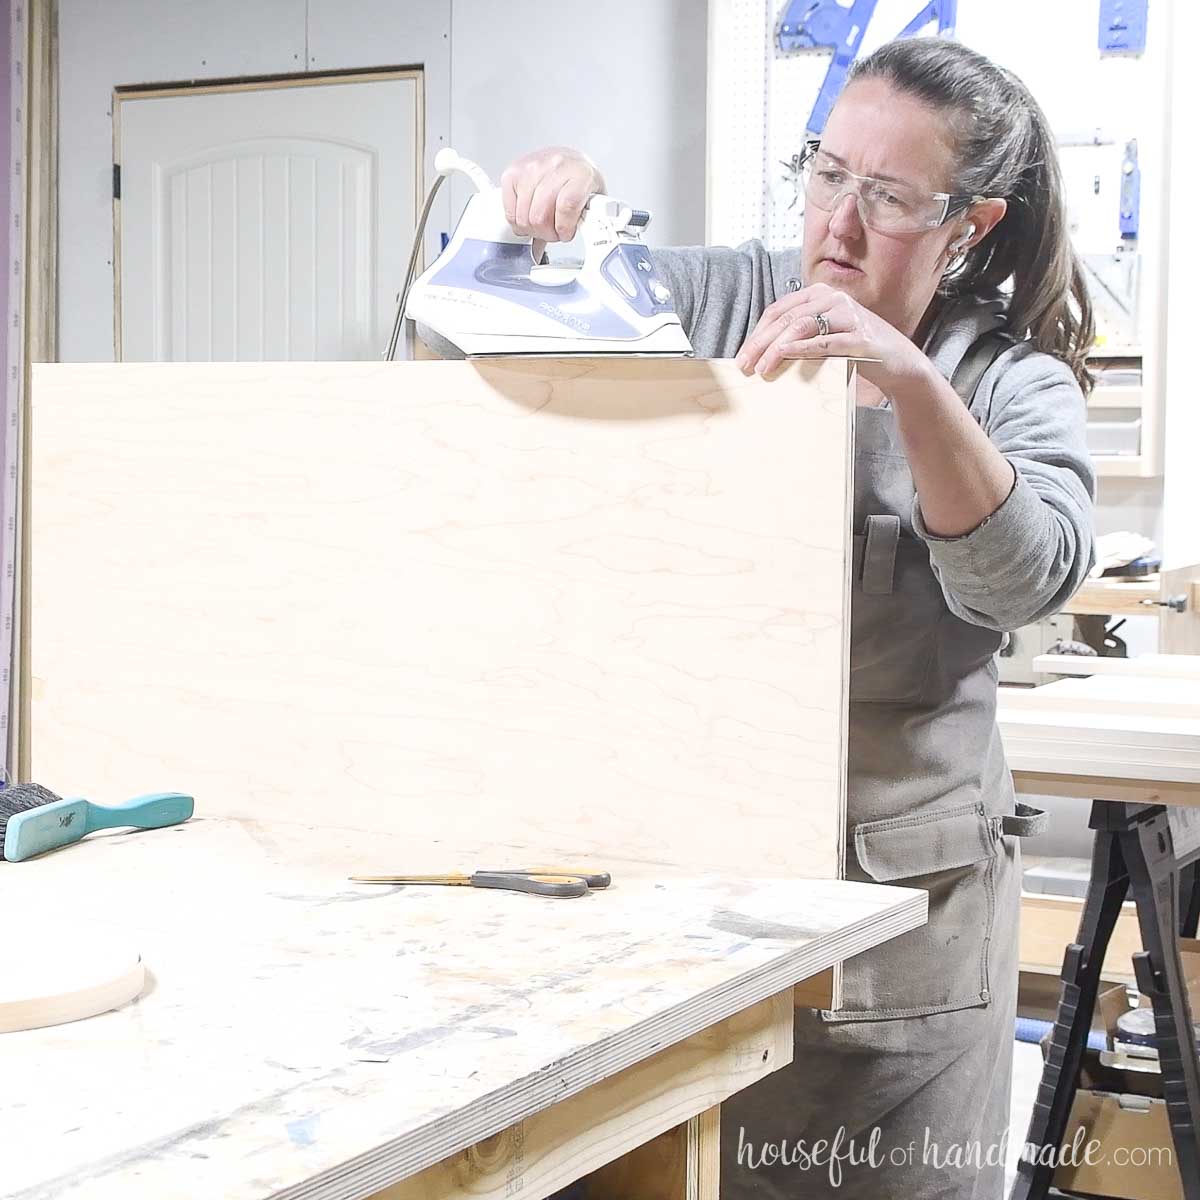
Before assembly, iron edge banding to the front all all the cabinet pieces except the toe kick pieces. Then trim to fit.
Don’t forget to add edge banding to one long side of the support pieces since it will be visible in the back of you closet.
STEP 1- Build toe kick and bottom
Drill pocket holes set for 3/4” thick material in the top of all the toe kick pieces.
Attach them to the corresponding bottom piece so they are set back 12” from the front (adjust if desired for more or less shoe room).
Secure with wood glue and 1 1/4” pocket hole screws. Make sure the pocket holes are on the back of the piece once assembled.
On the side pieces, mark out where the center of the toe kick and bottom pieces will be.
Also, mark out the center of any stationary shelves.
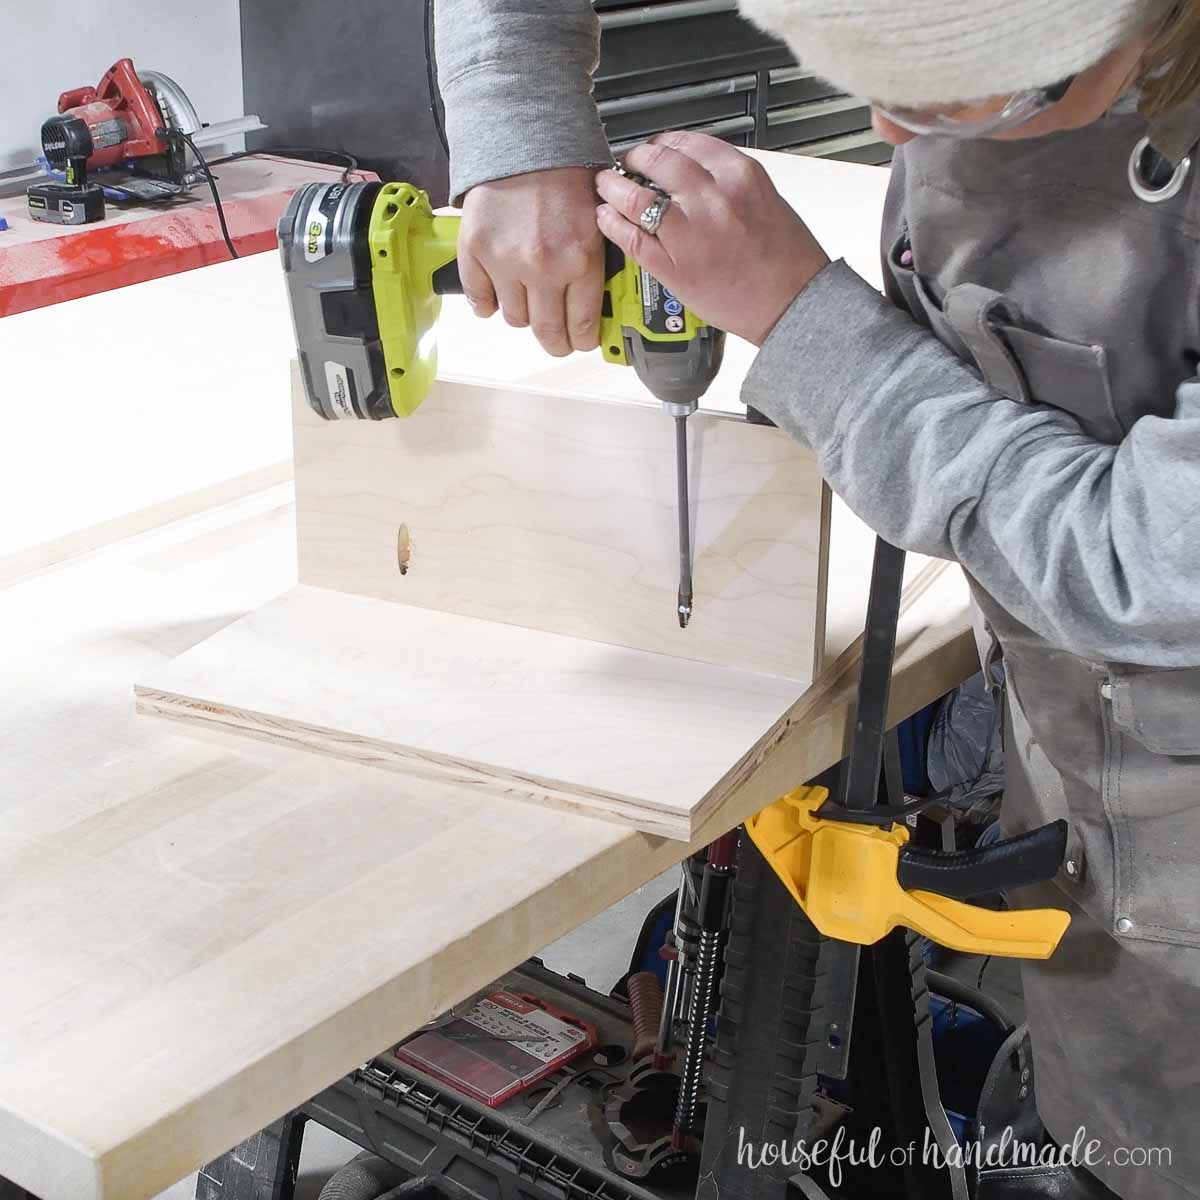
Add wood glue to the side of the assembled bottom/toe kick piece. Then line it up against one side board so it is flush with the front and the bottom.
Temporarily secure them with 1 1/4” finish nails.
Drill countersunk holes for screws in the side on your line. Then permanently secure the pieces with 1 1/4” pan head screws (I used the pocket hole screws).
Repeat for all the bottom/toe kick pieces.
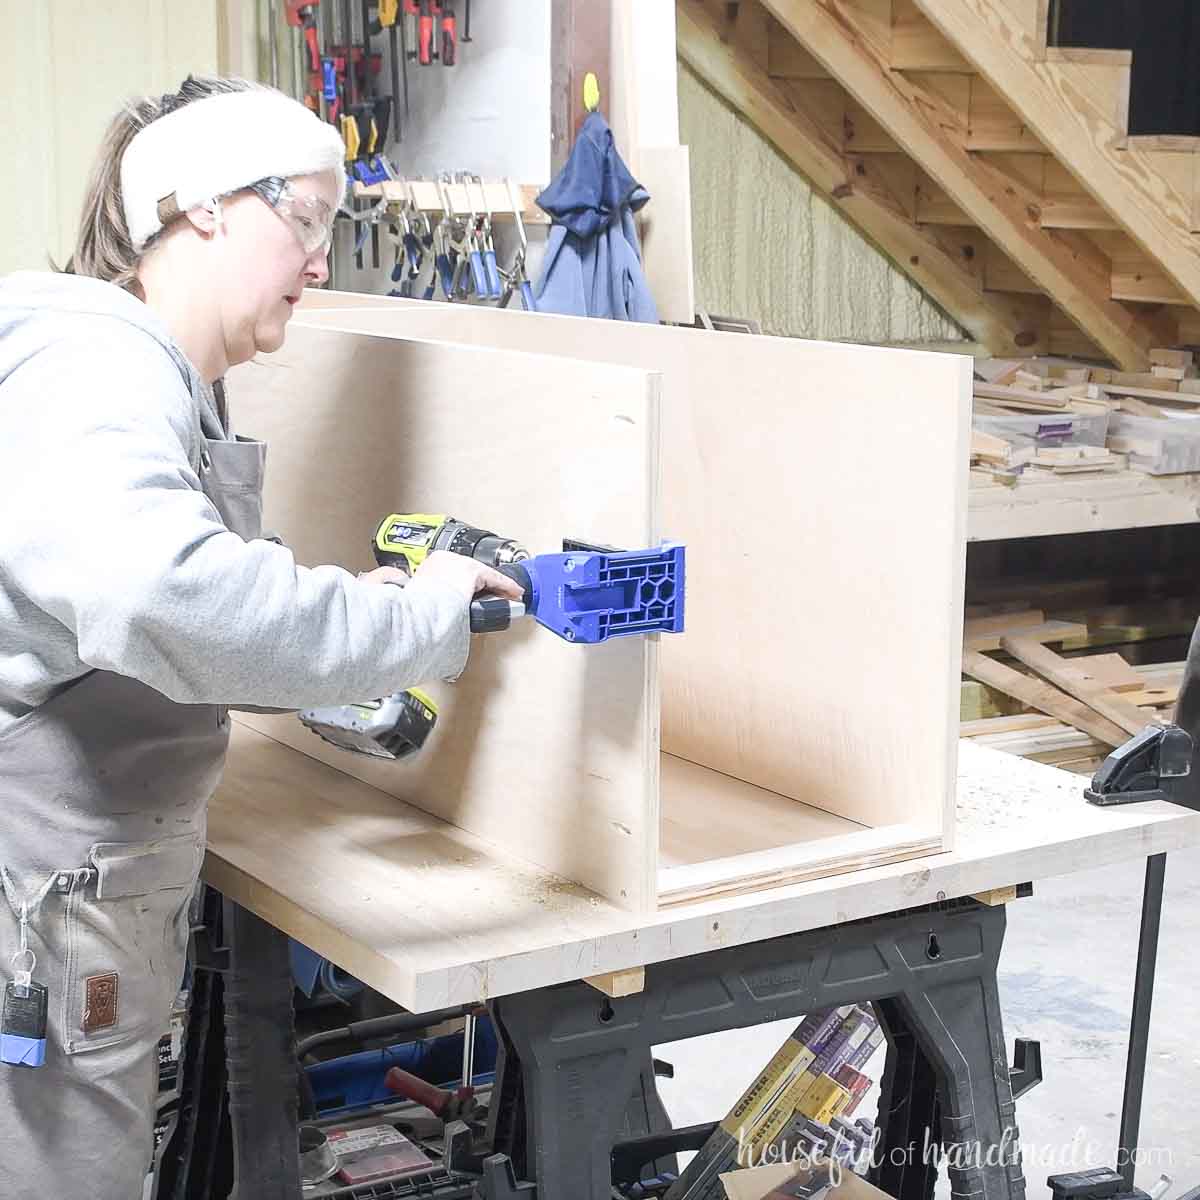
STEP 2- Attach stationary shelves and other side
Attach the stationary shelves to the two 30” (inside dimension) sections and the 14”(inside dimension) section the same way you did the bottom/toe kick piece.
For the drawers as sized in these plans, the one 30” section shelf needs to be 27 1/8” up from the bottom.
The other shelves can be attached wherever you want them. The diagram in the PDF plans shows you where I attached them for my closet.
Also, if you want, you can add a stationary shelf to the 16” (inside dimension) section as well using the plywood scraps.

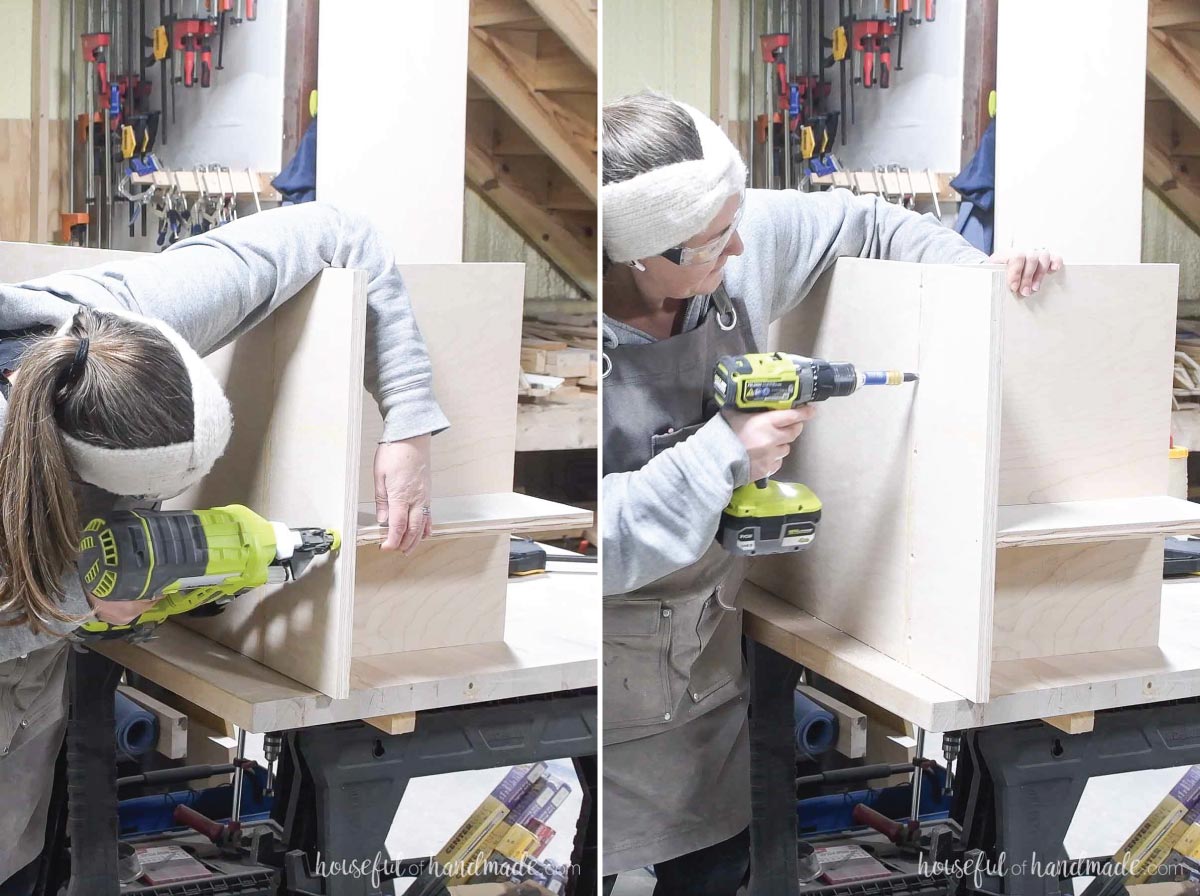
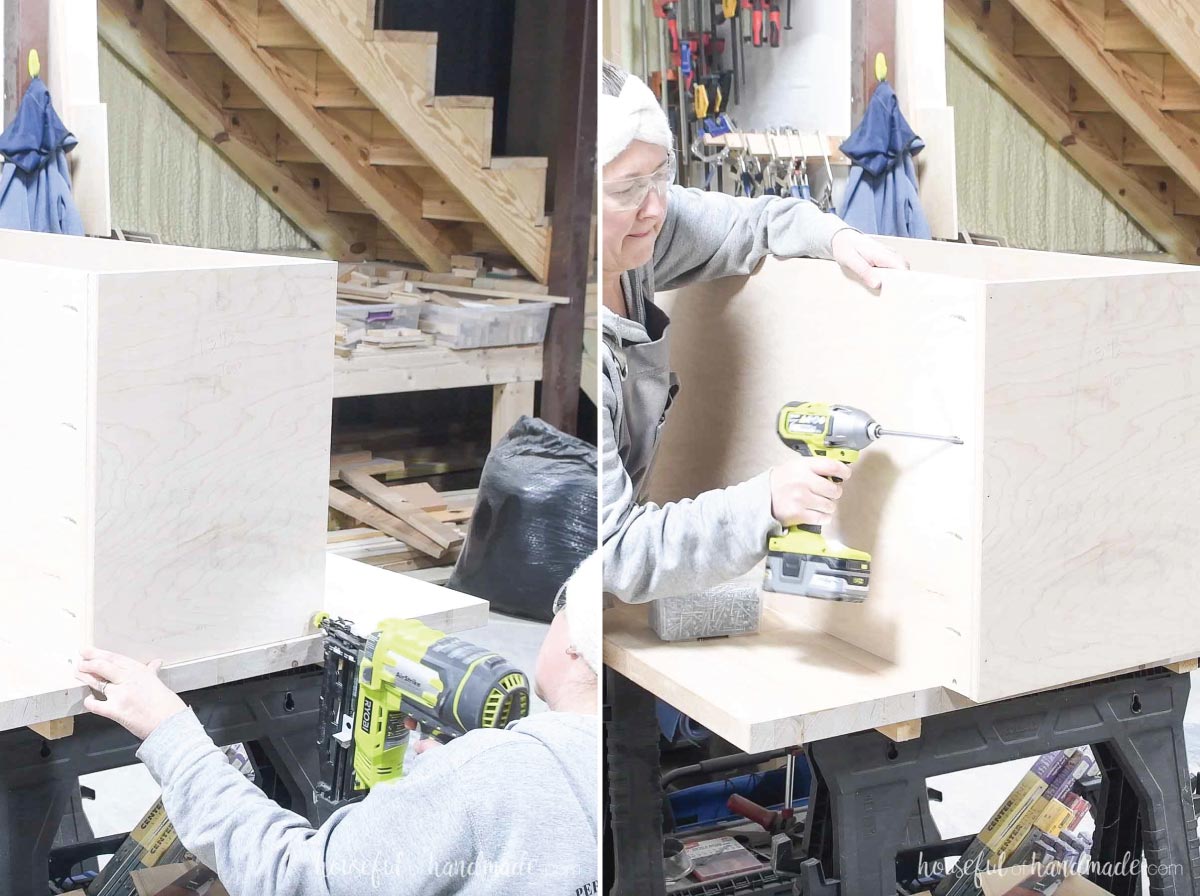
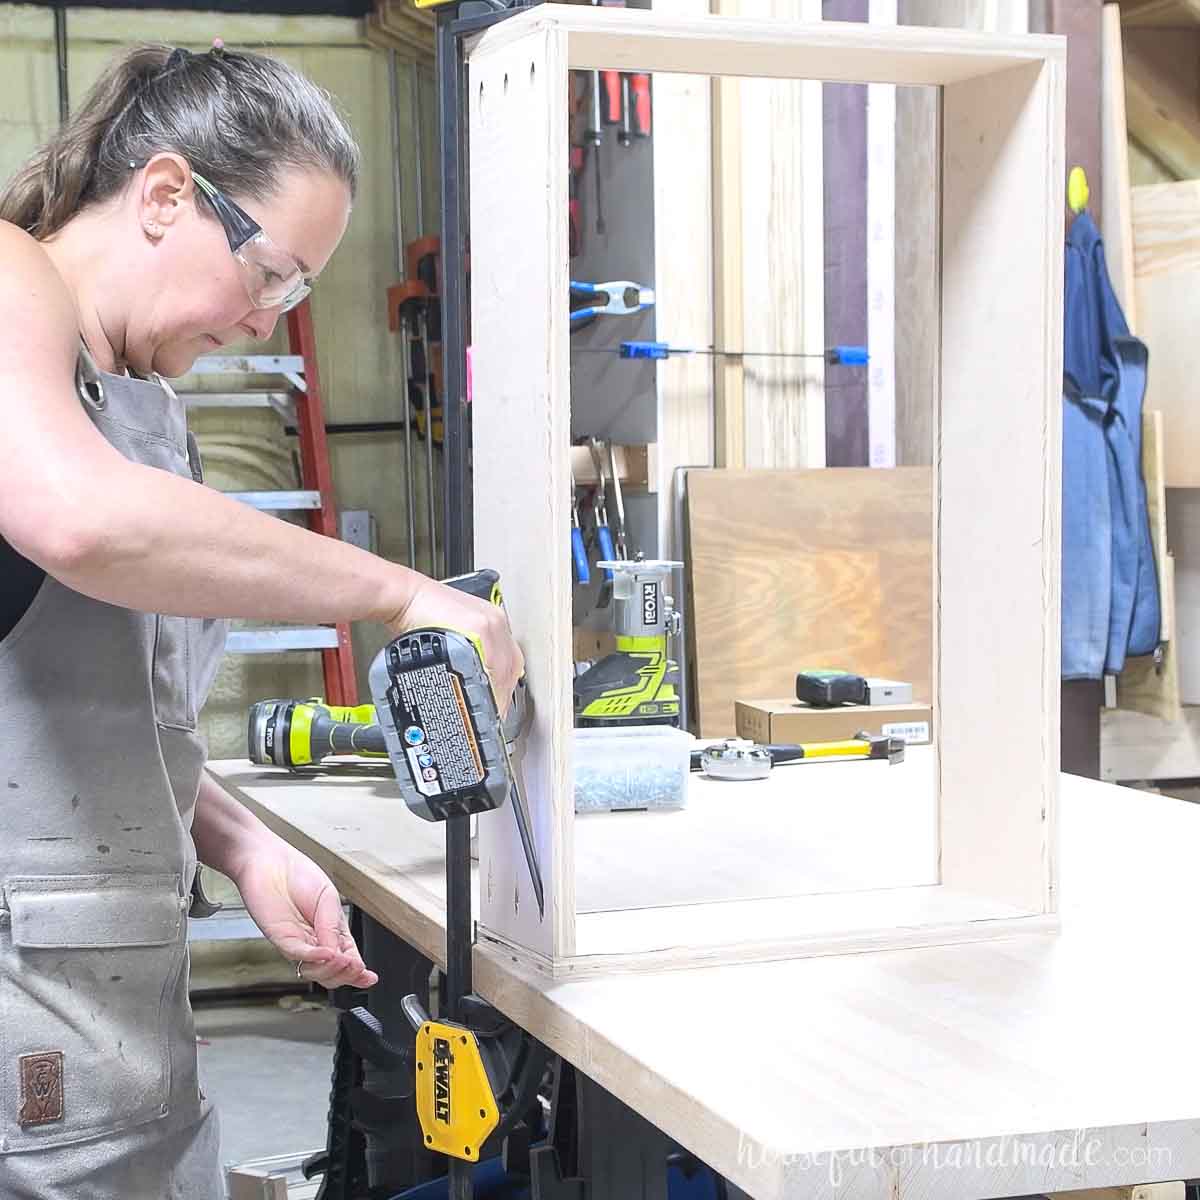
Roll the cabinet box over so the attach side is down on your work table or floor. Add wood glue to the top of the bottom/toe kick and permanent shelf pieces.
Then line the second side up on top of them. Mark the center of the boards on the outside.
Secure the side piece to the bottom/toe kick and shelf the same as you did before: first with brad nails, then with countersunk 1 1/4” screws.
Repeat for all sections. For sections with no support on the top end, you can place the back or front of the cabinet flat on the work surface.
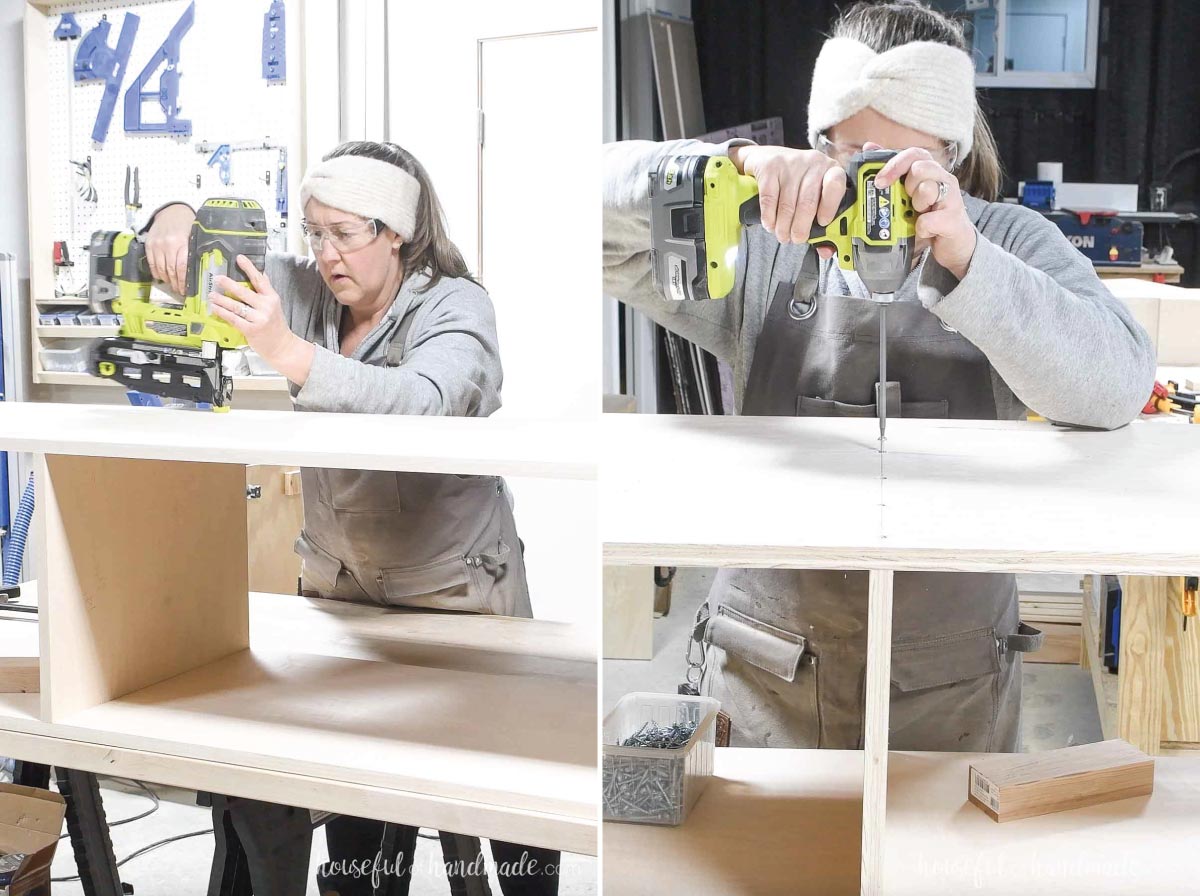
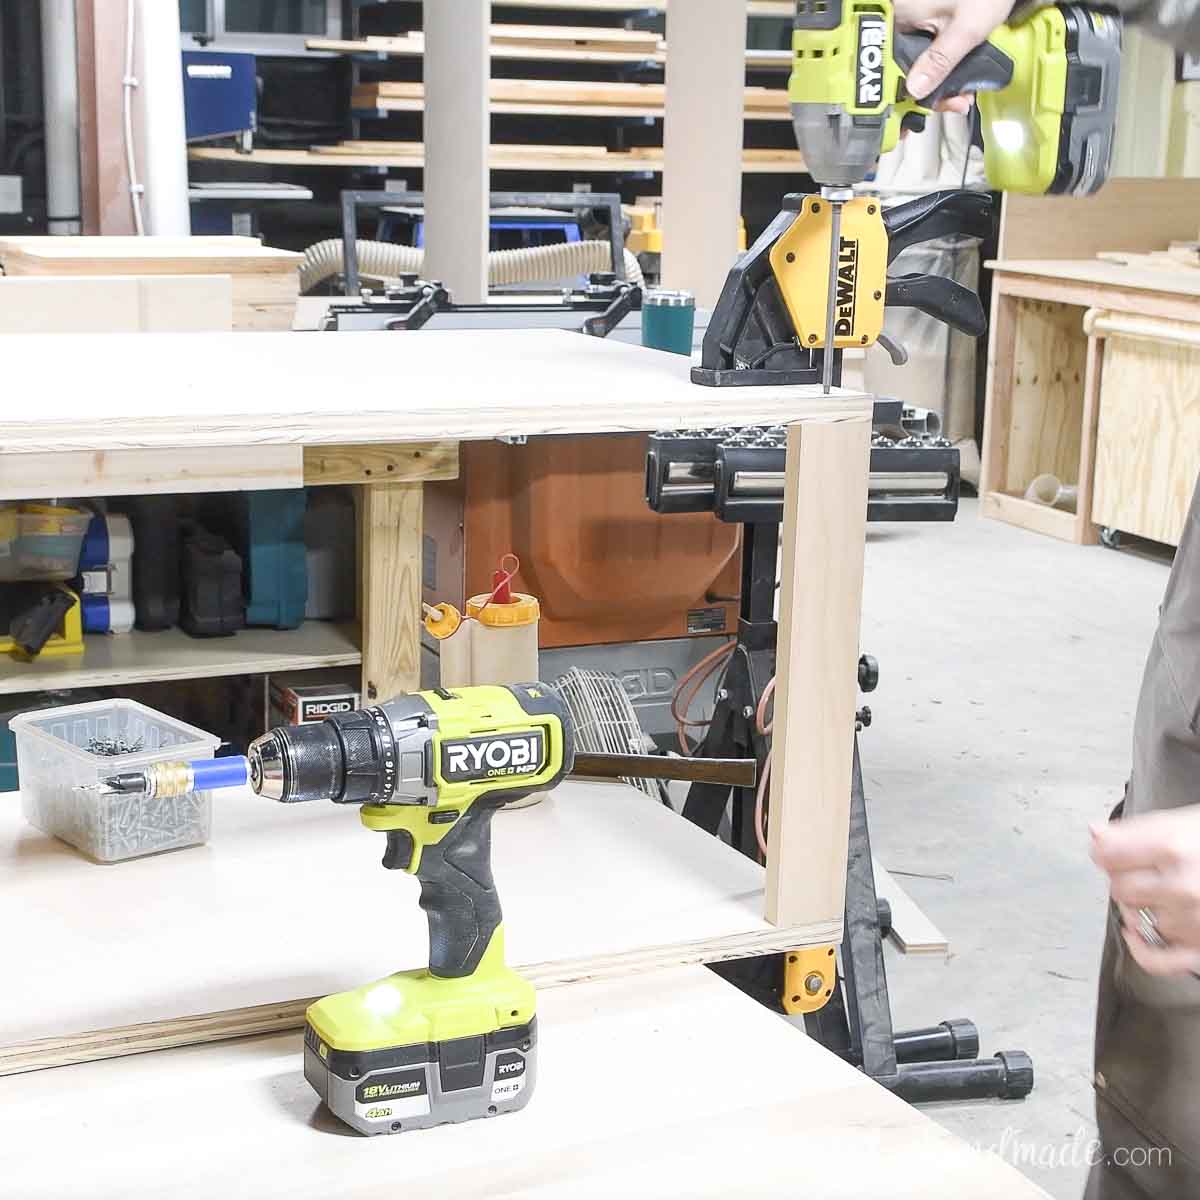
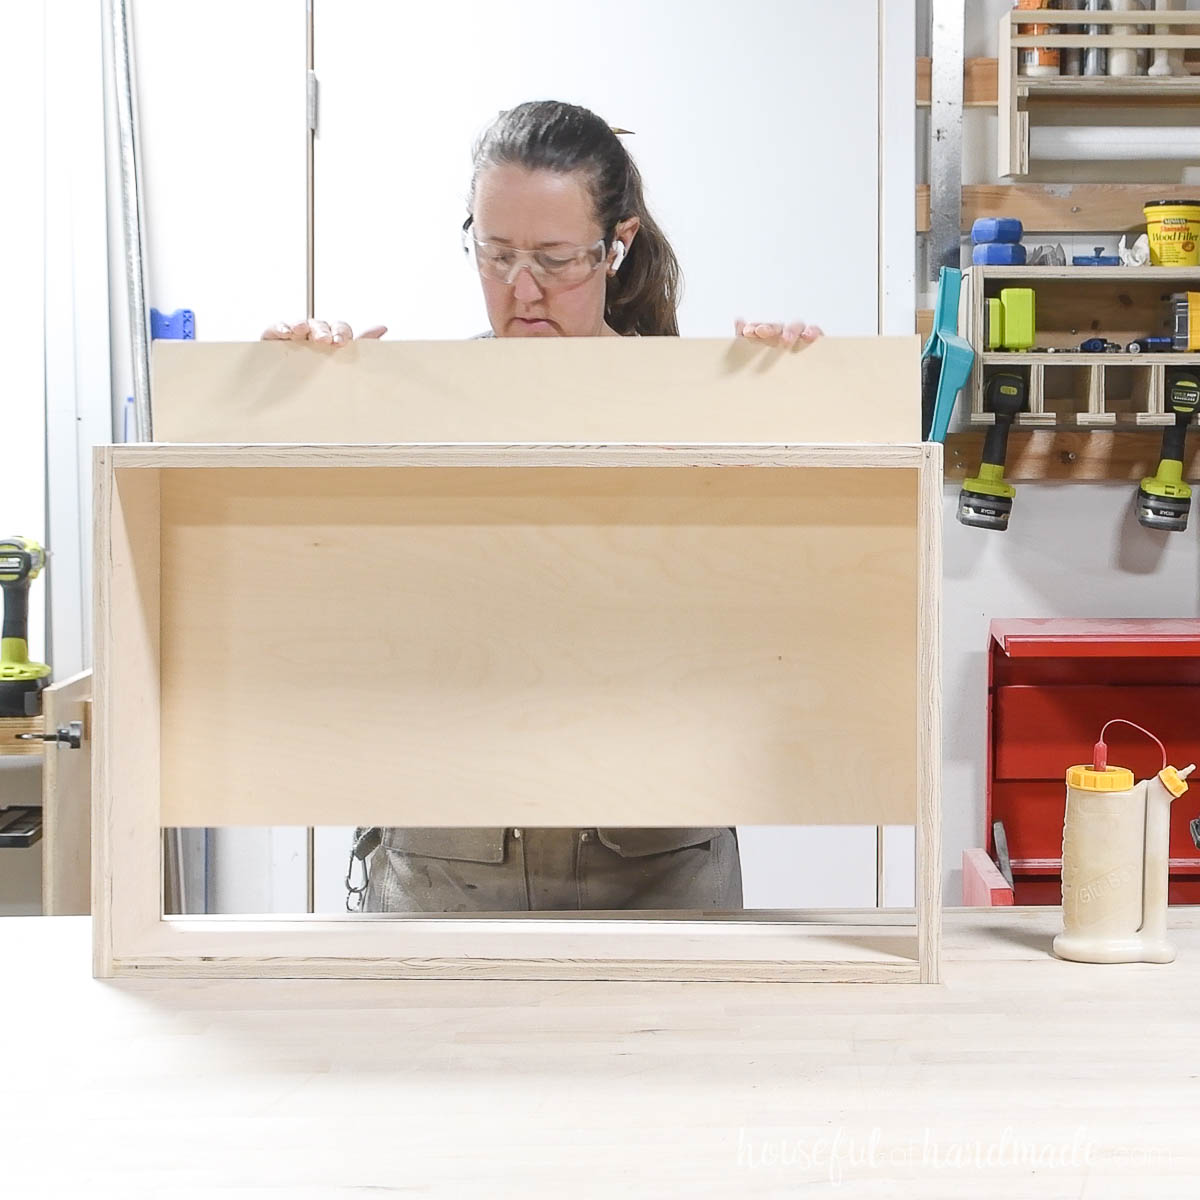
STEP 3- Attach top
Supports are needed to secure your closet organizer to the wall.
Slide the support between the two sides on the very top and back of the cabinet. Make sure the edge with the edge banding is facing down.
Secure with two countersunk 1 1/4” screws into each side.
Repeat for all closet sections.
Drill pocket holes set for 3/4” thick material in the top outside of the side pieces.
Add wood glue to the top of the boards. Line the top piece up so it is flush all around the edges.
Temporarily secure with brad nails, then permanently secure with 1 1/4” pocket hole screws.
Repeat for all closet sections.
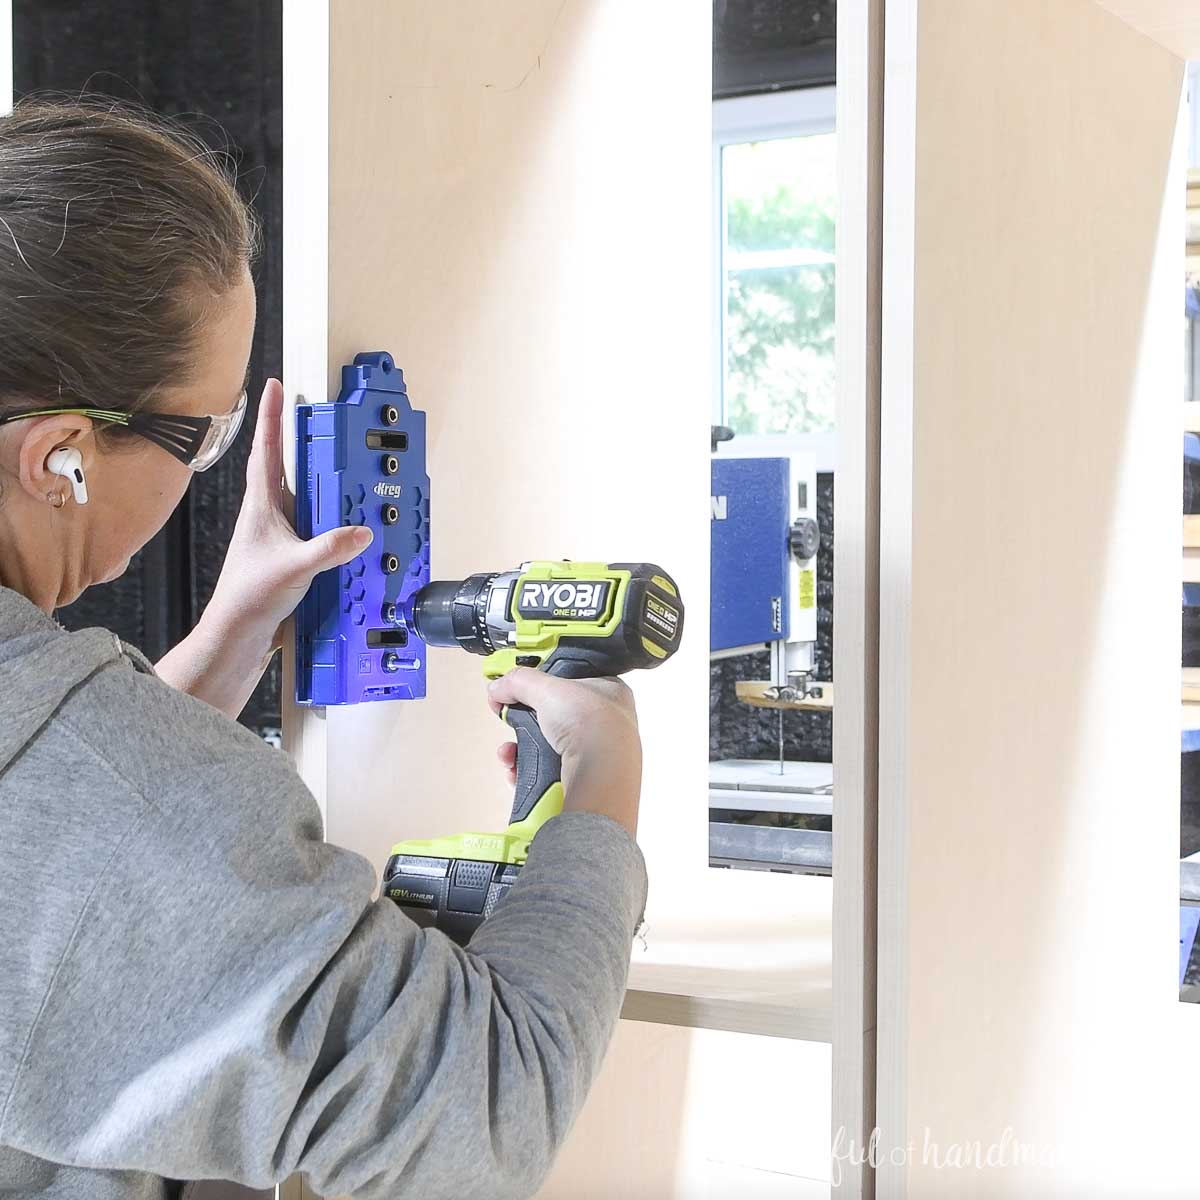
For any areas you want to add adjustable shelves, use a shelf pin jig to drill holes toward the front and back of the both sides.
Cut your shelves to fit snuggly between your shelf pins. Add edge banding to the front of the shelf boards.
STEP 4- Install closet boxes
Remove the baseboard from your wall where the closet will go.
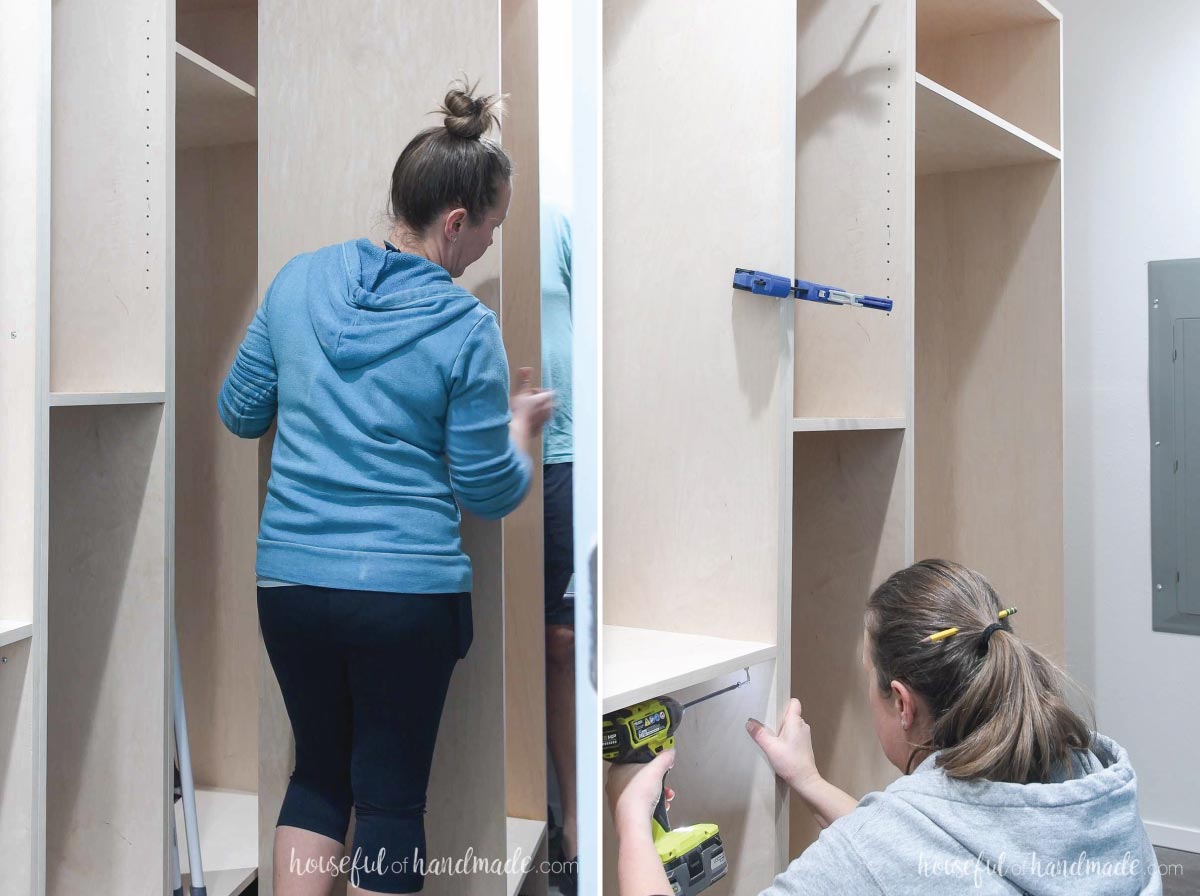
Move the closet sections into place. You may need a second set of hands for this.
Line the sections up in the order you want. Then clamp the side pieces together so they are flush at the front and on top.
Secure the sections to each other with (4) 1 1/4” pan head screws (again I used the pocket hole screws). Use two on either side toward the top and two toward the bottom.
Check your boxes for plumb.
Use shims as needed under the sides and toe kicks to get them to plumb.
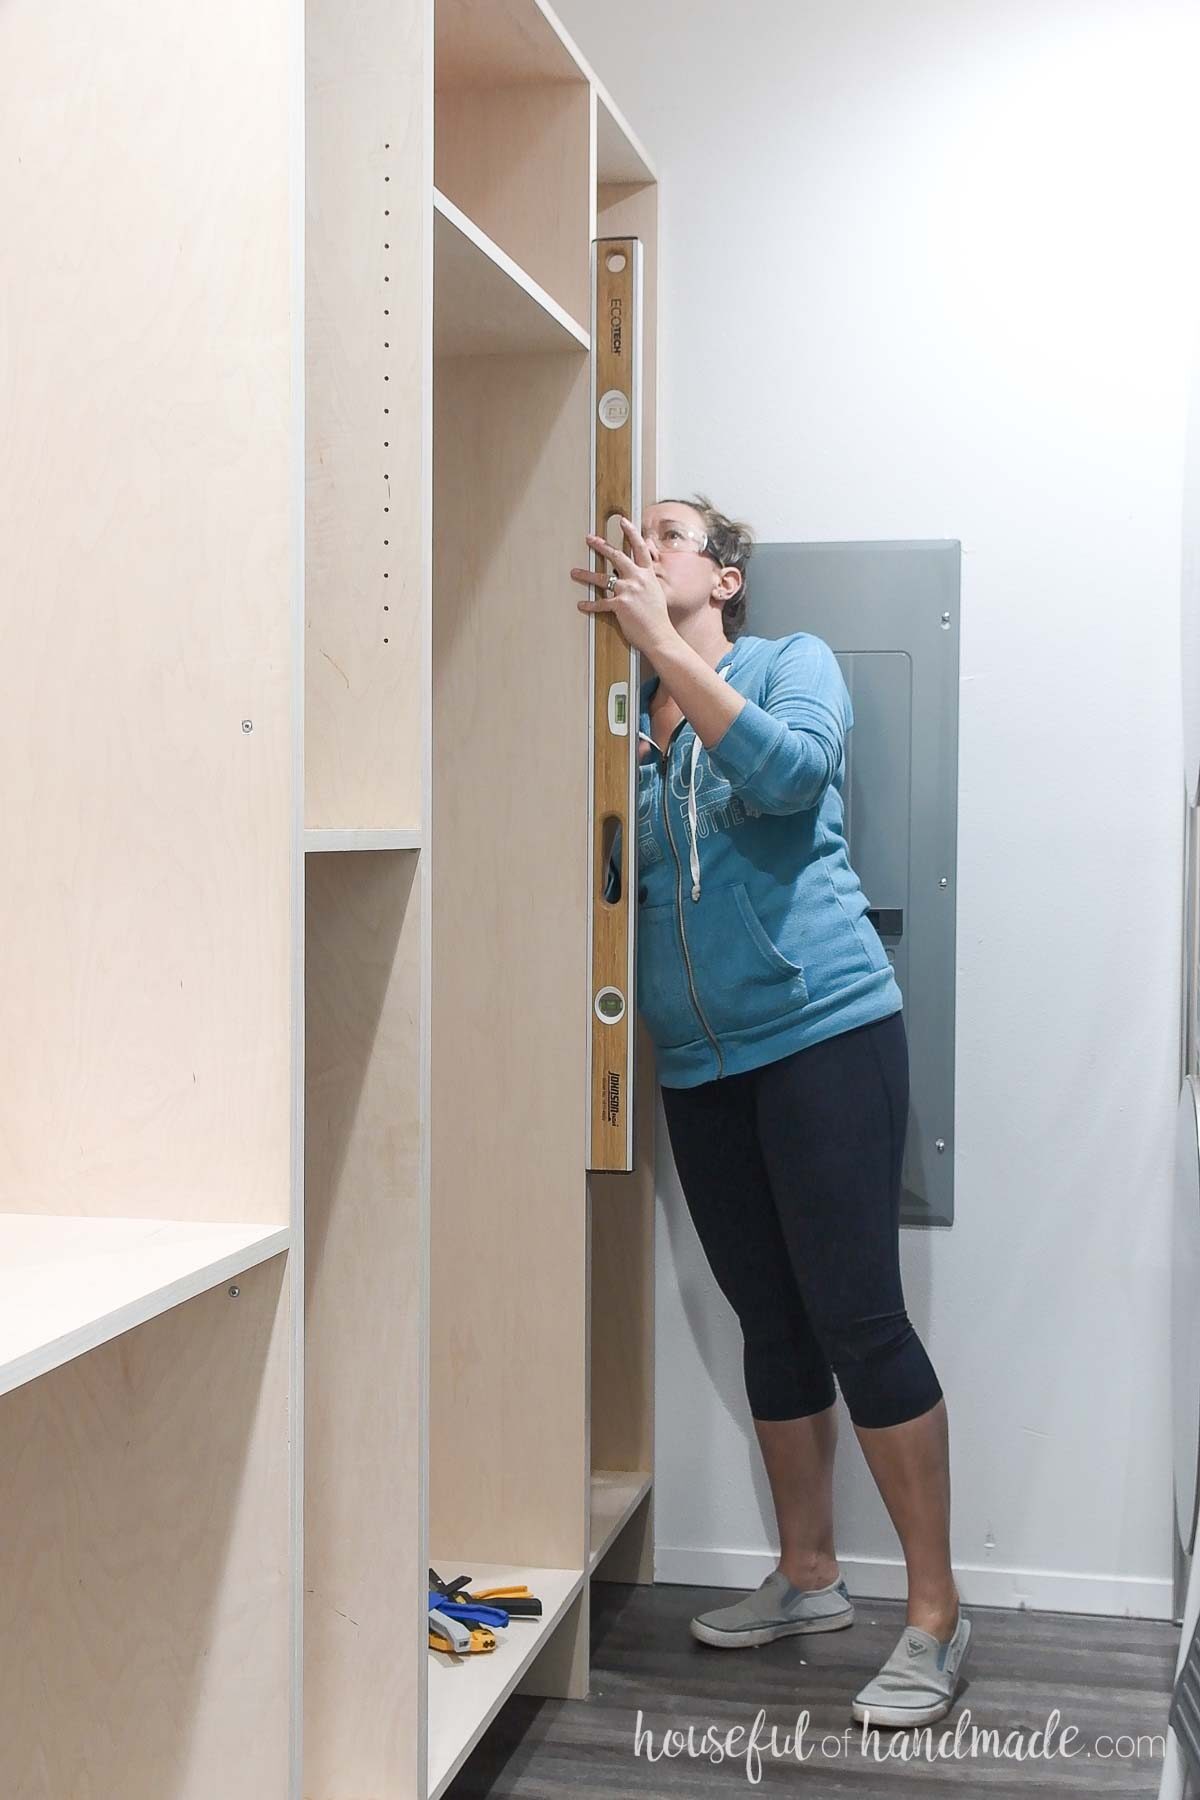
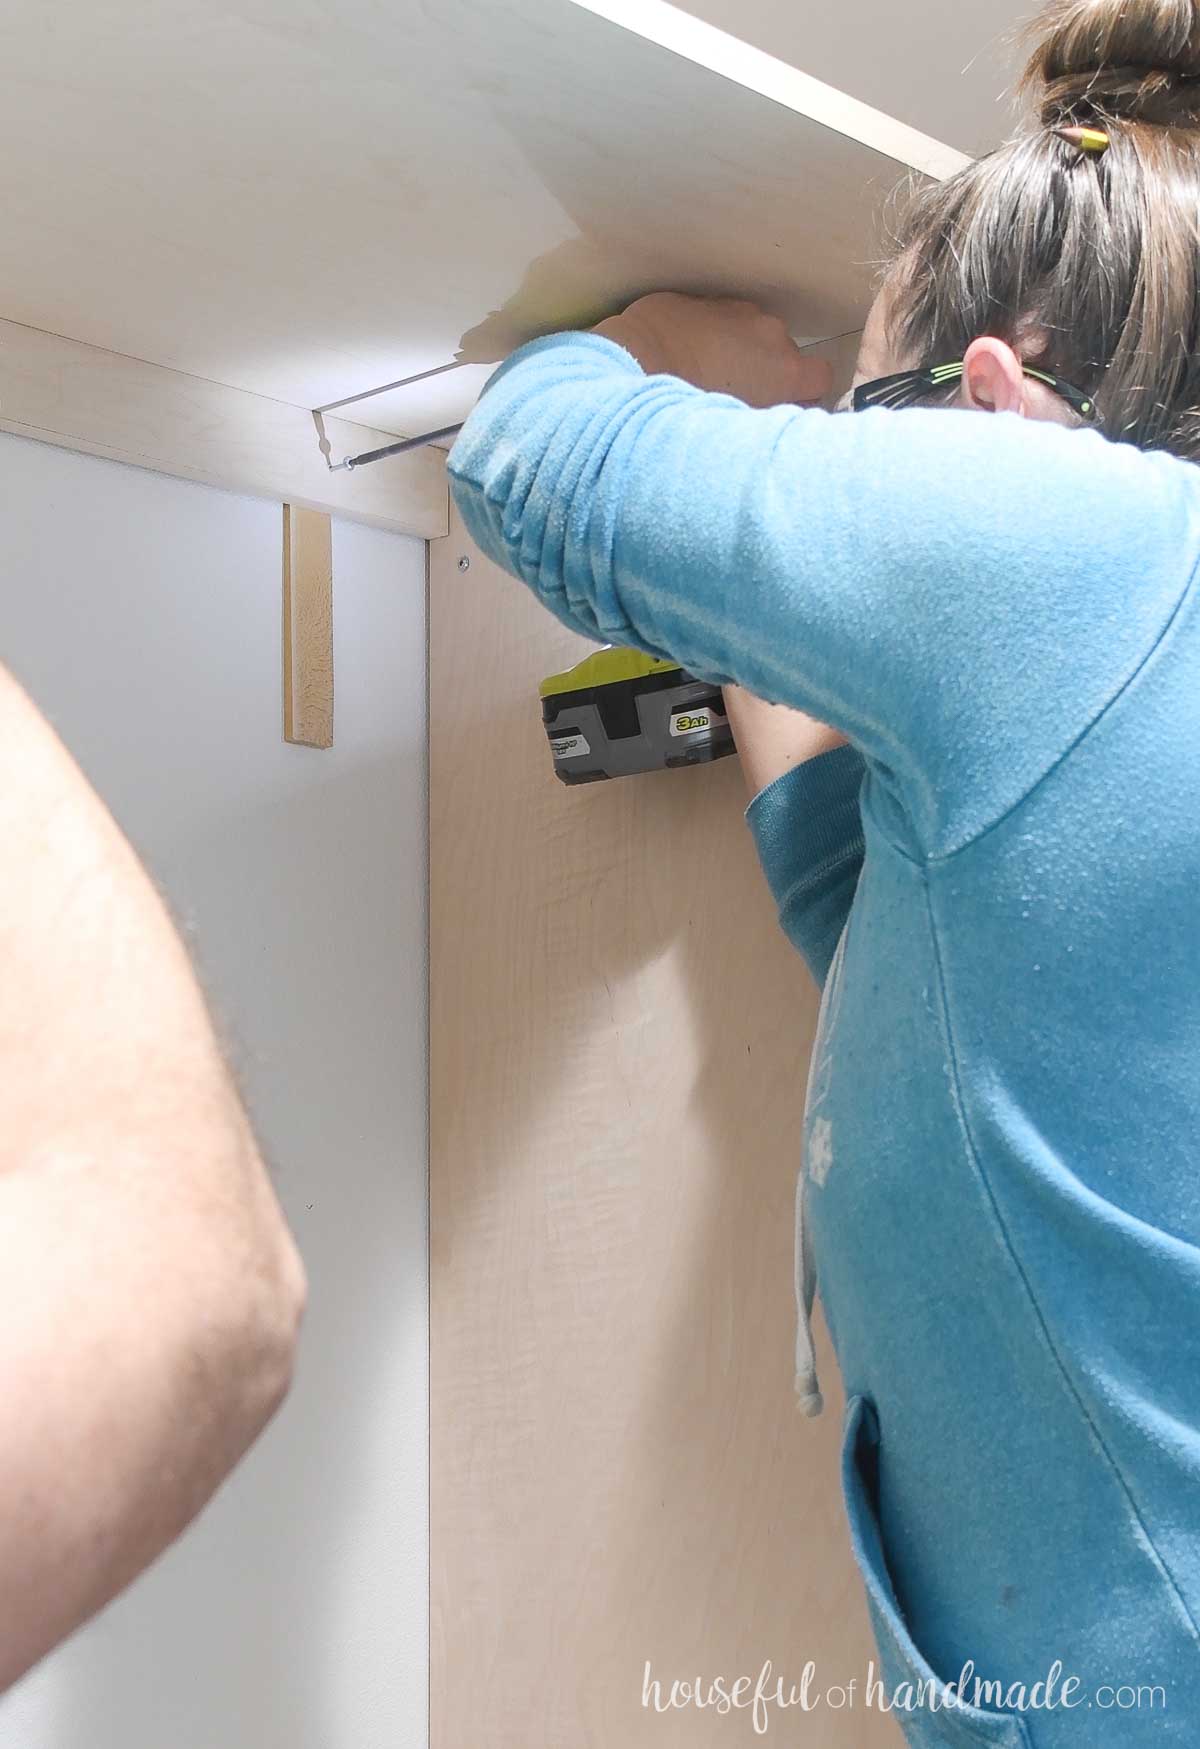
Then secure them to the wall with 2 1/2” screws, through the supports, into wall studs. Use shims behind the supports if there is a gap.
Then trim the shims to the edge of the support to hide them.
Cut the closet rod to fit between your brackets. Cut your rod about 1/8″ shorter than the full width between the brackets to give you some wiggle room.
I used a metal closet rod which was easy to cut to proper length with a hack saw with a metal blade.
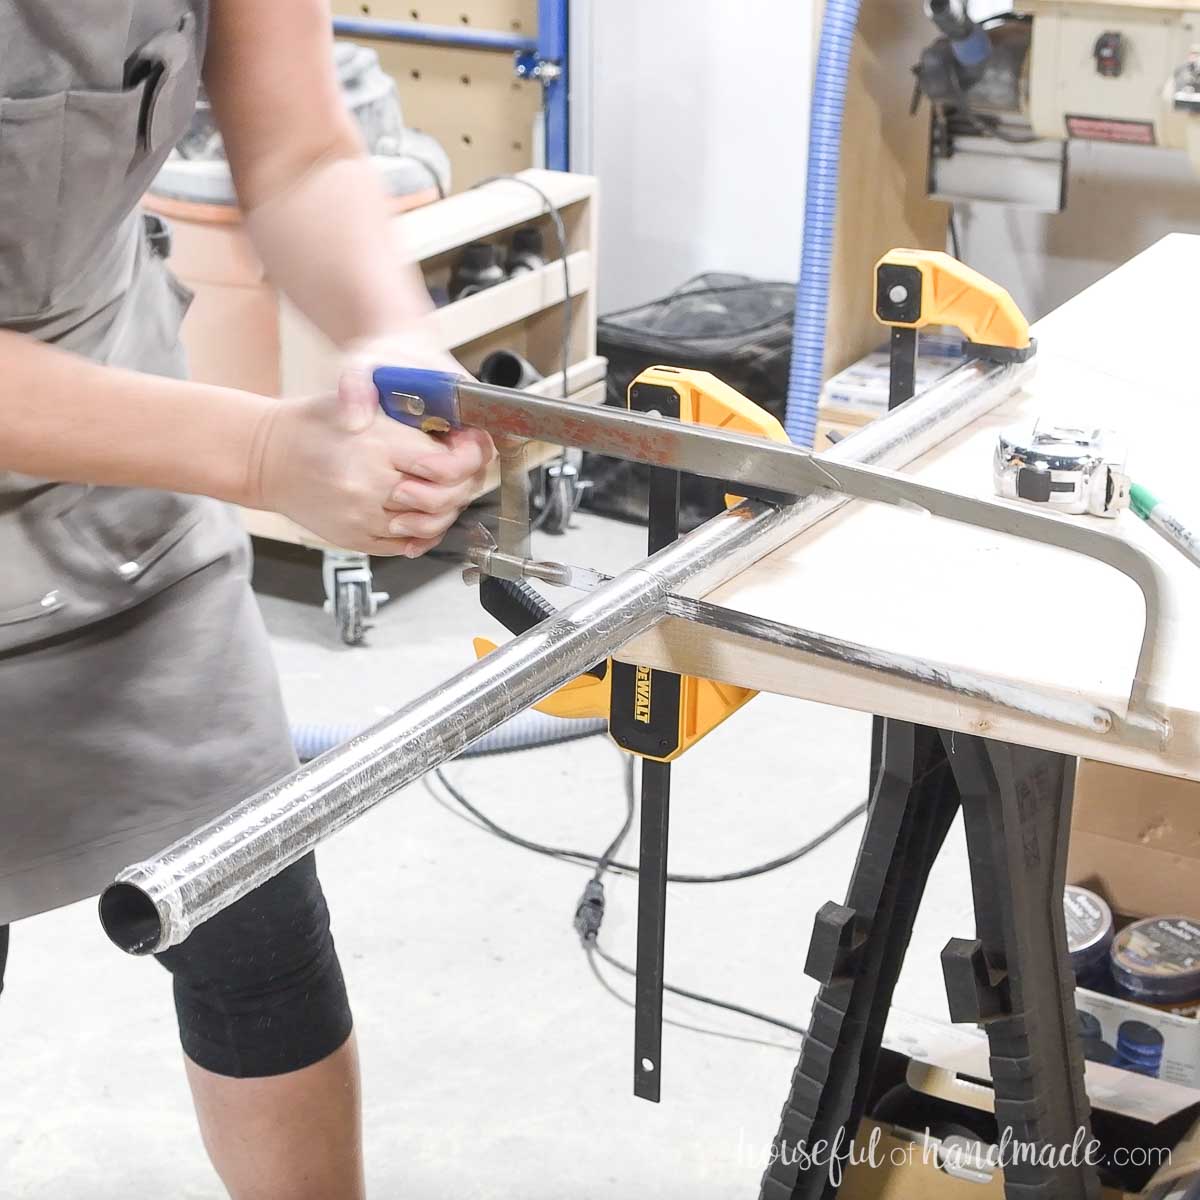
Install the closet rod brackets. Then slide the cut closet rods into place.
The bars should be 10 1/2” away from the back and 2” down from any shelf.

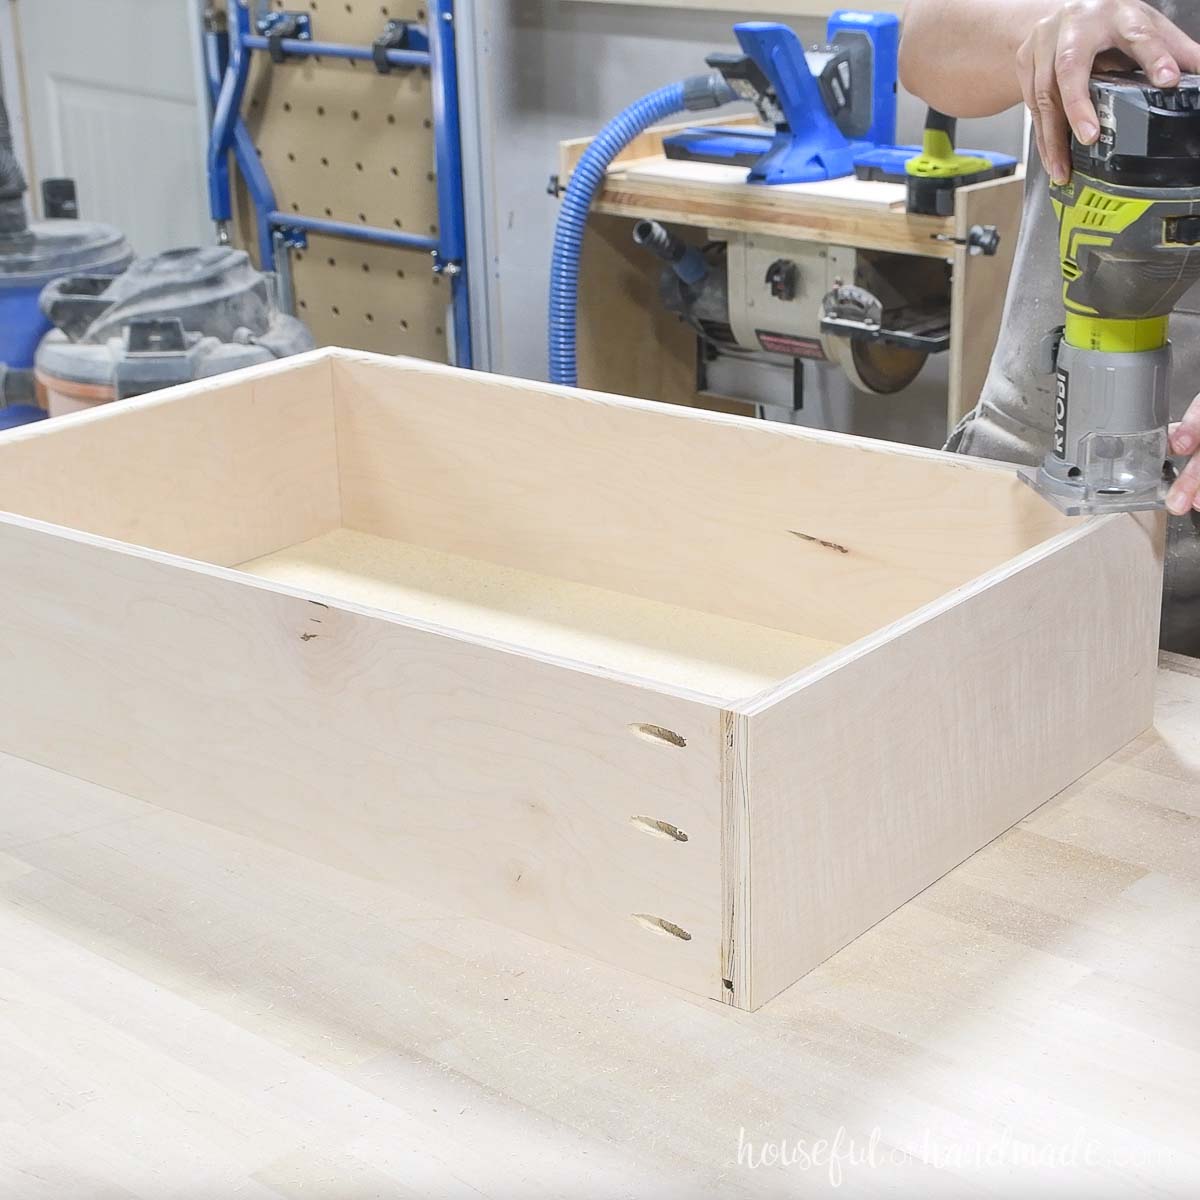
STEP 5- Build drawers
Cut a 1/4″ wide by 1/4″ deep groove in the inside of the front and side drawer box pieces 1/4″ up from the bottom. You can cut the groove with a table saw, circular saw, or router.
If you do not have a way to cut a groove, learn different ways to build drawers here.
Drill pocket holes set for 3/4” material in the back and front pieces (in the side opposite the groove).
Attach the front between the sides. Then attach the back pieces between the sides so the bottom is flush with the top of the groove.
Secure with wood glue and 1 1/4” pocket hole screws.
Slide the bottom under the back piece and into the groove on the sides and front.
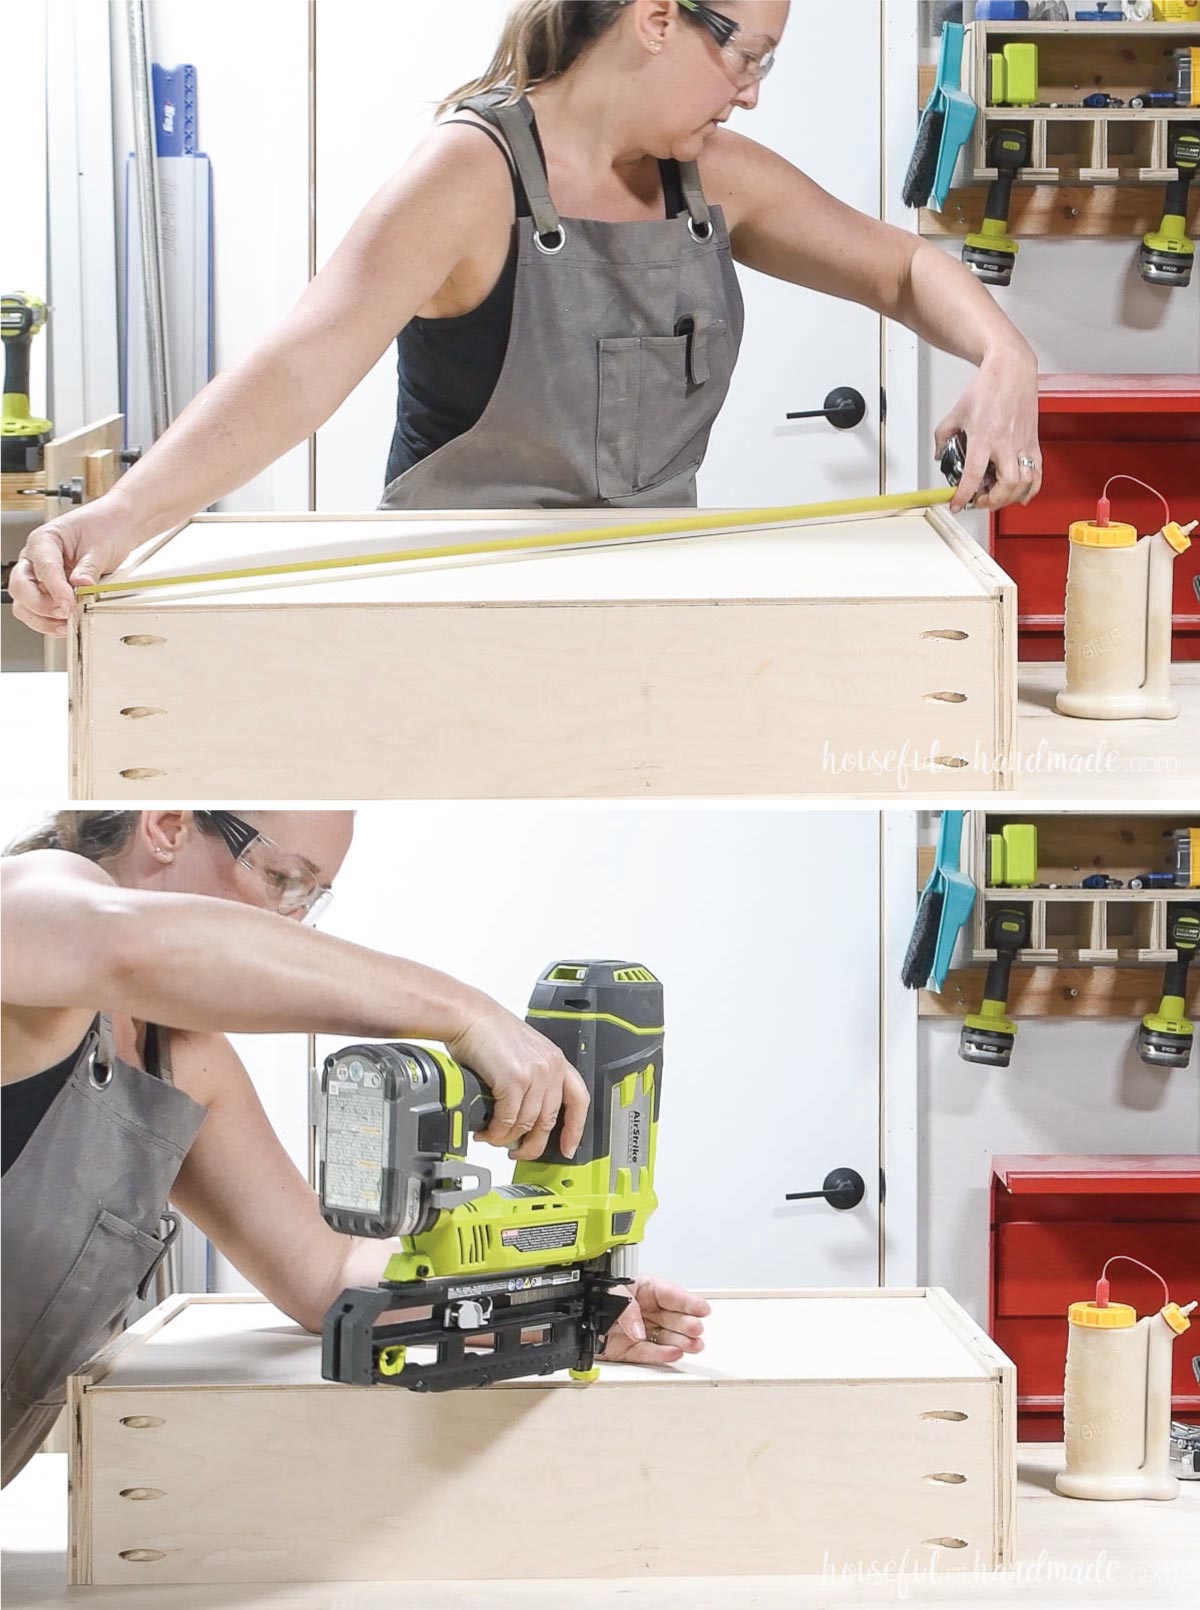
Ensure the drawer box is square and adjust as needed.
I like to measure corner to opposite corner, then repeat for remaining corners. If the measurements match, the box is square.
Then secure the drawer bottom to the back piece with 5/8″ nails.
To make the edges less sharp, I ran a trim router with a round over bit around the inside edge of the drawer box. You could also do this with a sander if you do not have a router.
Repeat for all 4 drawer boxes.
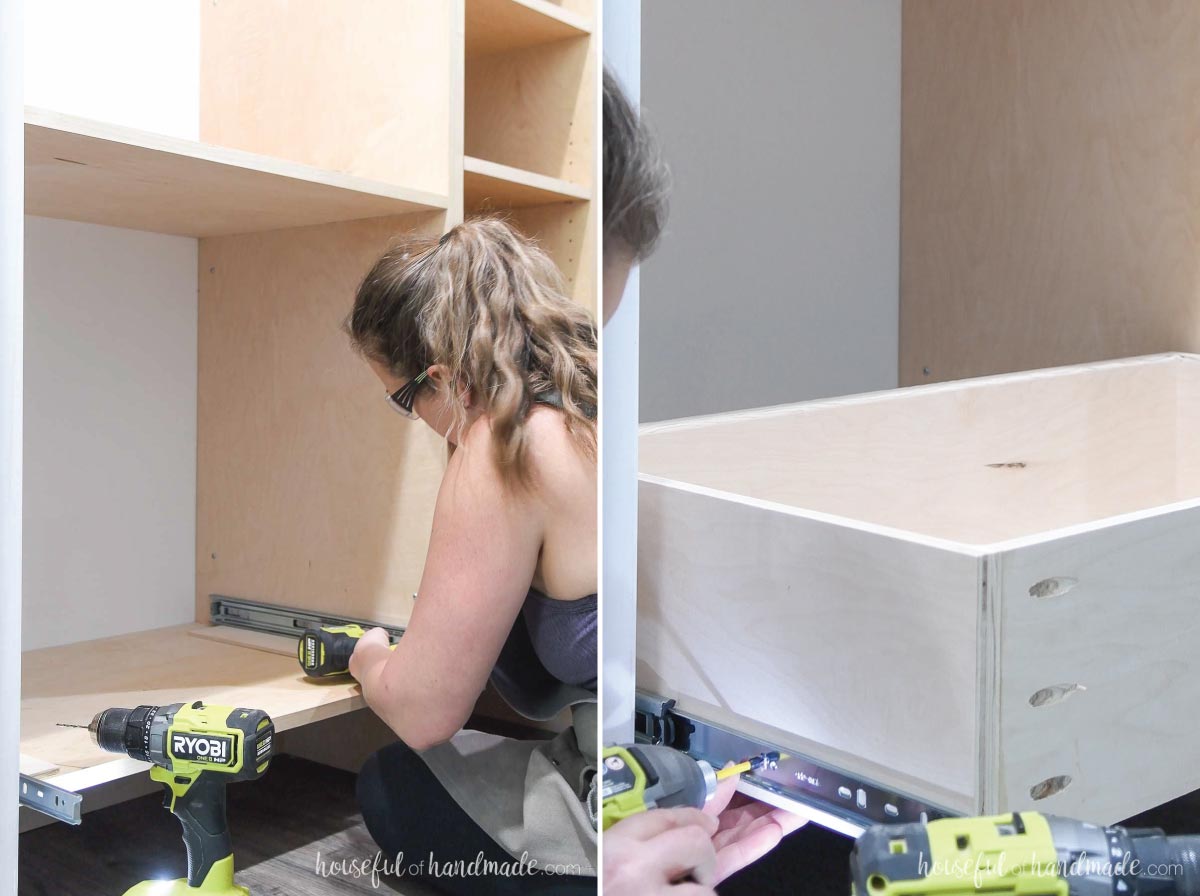
STEP 6- Install drawers and shelves
Install the drawer boxes into the 30” section with side drawer slides that need 1/2” clearance on each side. Learn how to install drawers here.
The bottom drawer box should be 3/8” up from the bottom piece. There should be 1 1/8” between the drawer boxes, which leaves 7/8” gap on the top.
The drawer boxes should be set back 3/4” from the front of the cabinet.
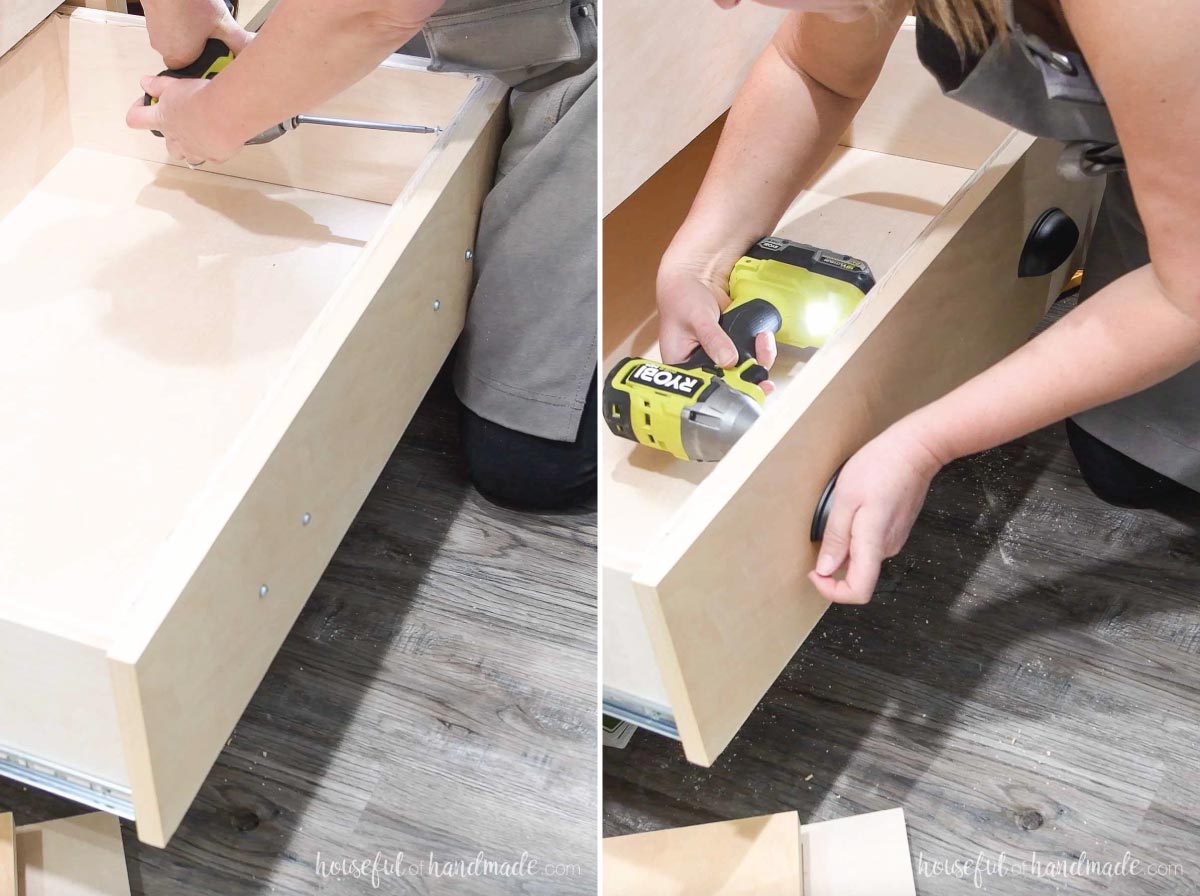
Add edge banding to all sides of the drawer front pieces.
Attach the drawer fronts so they are inset and there is an 1/8” gap on each side and between each drawer front. Learn my easy hack to attach drawer fronts here.
If the side of your closet is going to be visible, you will want to fill the holes with wood filler.
Alternately, you could use pocket holes to attach the bottom/shelves on the side that is visible. However, then they might be visible inside the closet.
Sand and then stain or paint your new closet. Caulk along the edges where it meats the wall if desired.
How much does a closet organizer cost?
Everyone wants to know how expensive it is to build something. So I thought I would break down what I paid for this closet.
PLEASE NOTE: These prices are what I paid, costs vary by location and prices can change all the time. Use this as a guide to get you started.
I used paint grade maple plywood from my local hardwood supplier (not a big box store). And the closet was sealed with homemade wipe-on polyurethane (50/50 poly and mineral spirits).
- $390 for Plywood ($65 per sheet for 3/4″, $20 for 1/4″)
- $40 for Edge banding
- $26.50 for Drawer slides ($66 for the 10 pack, I used 4)
- $16 for Screws
- $5 for Shelf pins
- $30 for Closet rod
- $9 for Closet rod brackets
- $24 for Sealer
So the total spent was $560.50. Not bad for a beautiful custom wood closet with drawers, shelves and lots of storage.
Premium plans include:
- Recommended Tools
- Shopping list
- Easy to read cut list table
- Cut diagrams
- Step-by-step instructions with 3D renderings
- Helpful resources
- BONUS: 3D SketchUp file
You did it!
Have fun organizing your new closet and enjoy all the space you now have.
Happy building!
