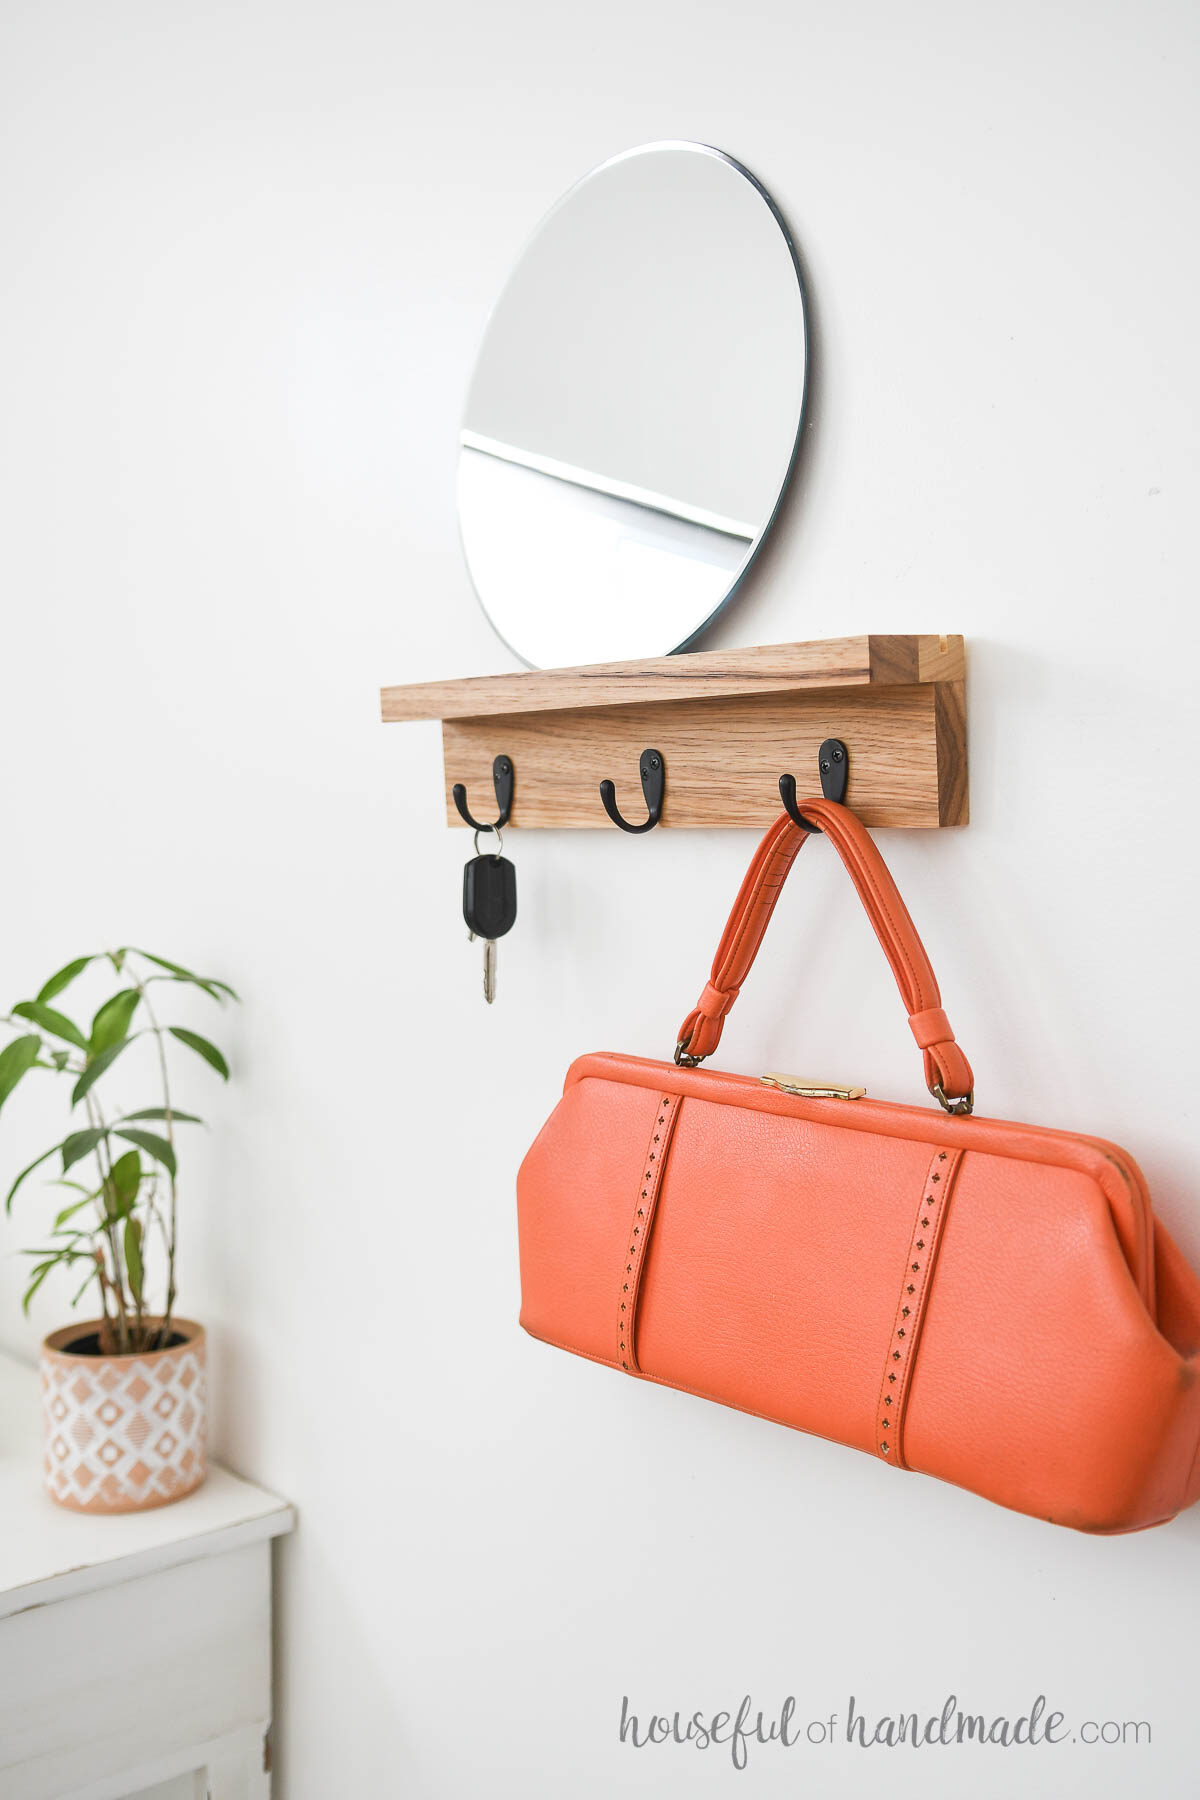
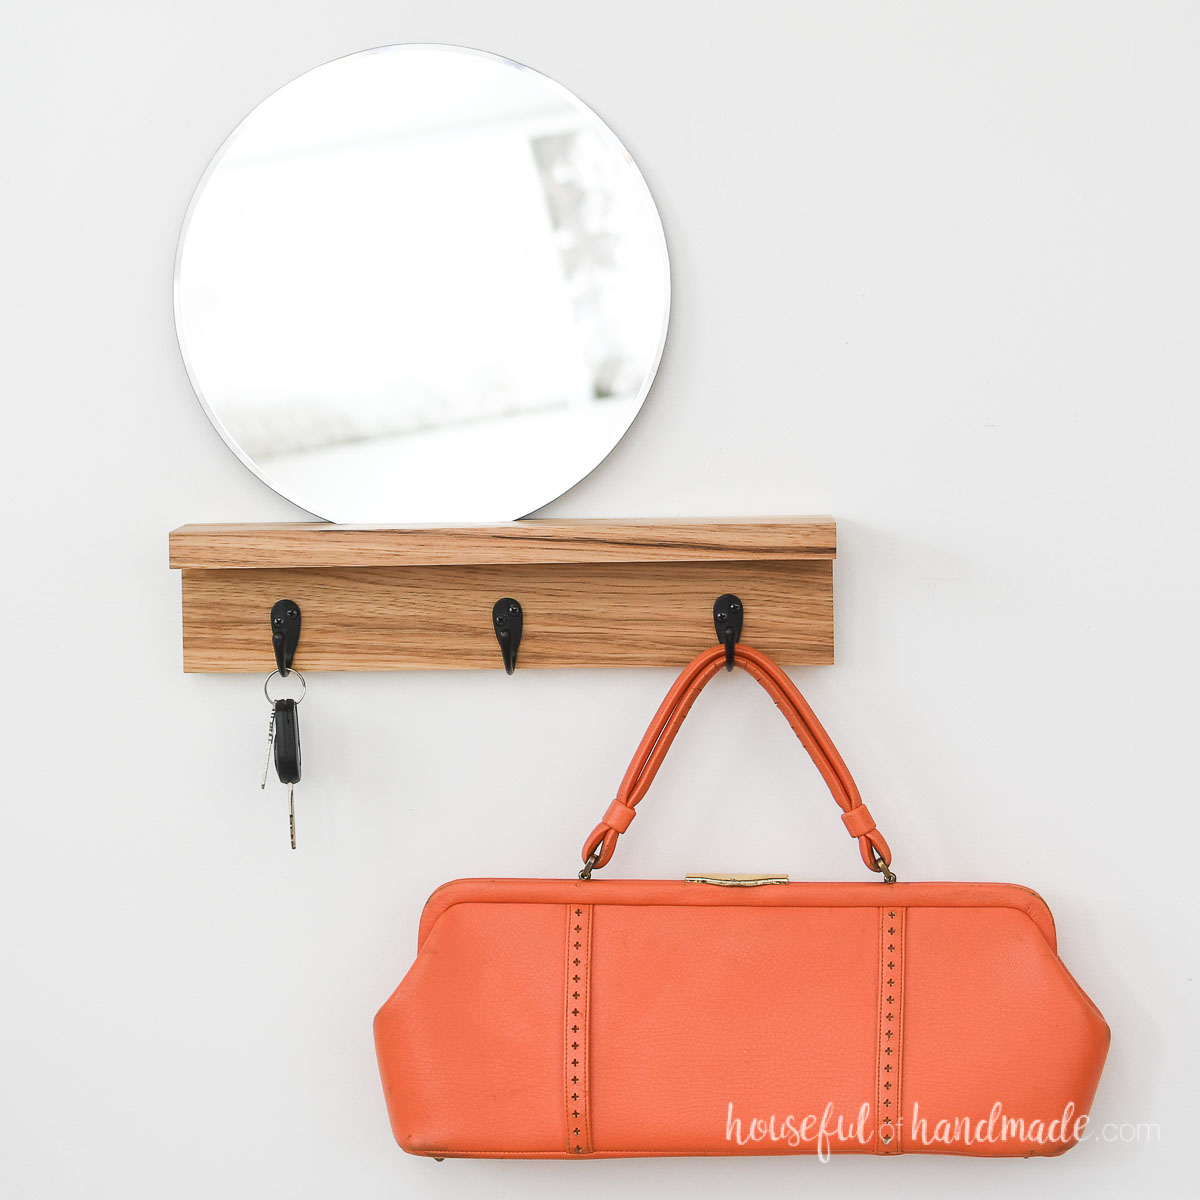
Having a place to place all the things is so important. That is why entryway shelves are the best!
You can drop your keys, hang a purse, and more as soon as you enter your home. Then they are ready for you to grab on your way out again.
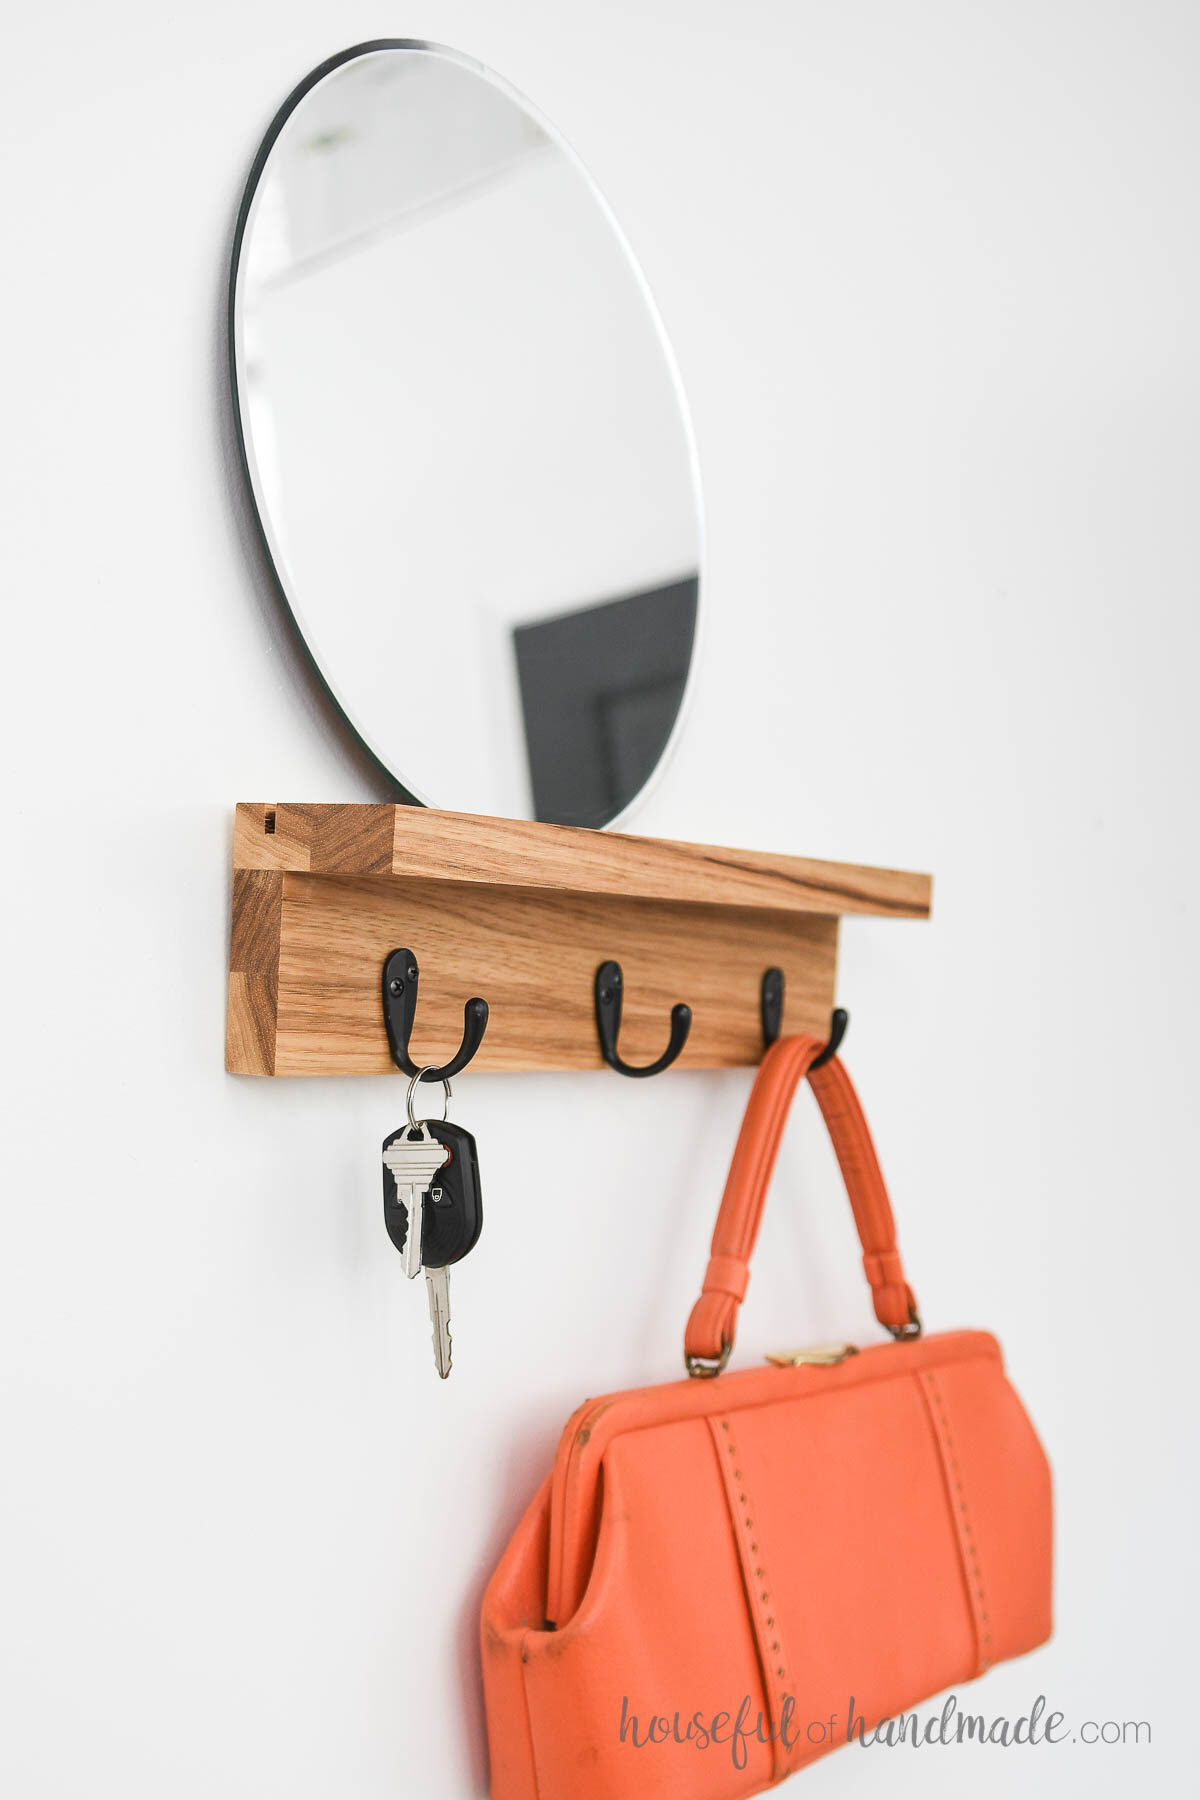
This simple floating shelf works for an entryway, hallway or mudroom. The top has just enough room to sit something down for later, but not enough to become a dumping place.
This post may contain affiliate links. As an Amazon Associate I earn from qualifying purchases. Click here to read my full disclosure policy.
But my favorite part, is the mirror! It’s perfect for taking a quick peak to make sure I always look my best when heading out the door.

Scrap Wood Shelf
This entry shelf is super quick and easy to build. And it can be built from scraps you might already have lying around.
I had 2 really narrow boards, left over from when I ripped pieces to the correct width for a project. But the wood was too pretty to toss.
I knew someday I would find something to make from them. They were too narrow to build the shelf (only about 1 3/4″ wide each), but I had a plan.
I took those thin strips of beautiful wood and glued them together to create one wider board. It came out to just barely wider than a 1×3 board!
And that board was exactly what I needed to build this beautiful entrance shelf.
So go rummage through your scraps to find those pieces too pretty to toss and make something useful with them instead!
How to Build an Entryway Shelf
Tools & Materials
Recommended Tools:
- Miter saw
- I recently upgraded to this larger sliding miter saw (watch for it to go on sale), but all my projects before were built with this inexpensive miter saw that I loved.
- Table saw or Circular saw
- Pocket hole jig
- Drill
- Impact driver (optional, but I love not having to switch bits with the drill)
- Multi tool
- Sander
Supplies:
- Wood products
- (2) 16″ long 1×3 or 1×4 boards
- 1 1/4″ pocket hole screws
- (3) hooks
- (2) keyhole hangers
- (1) 12-16″ mirror
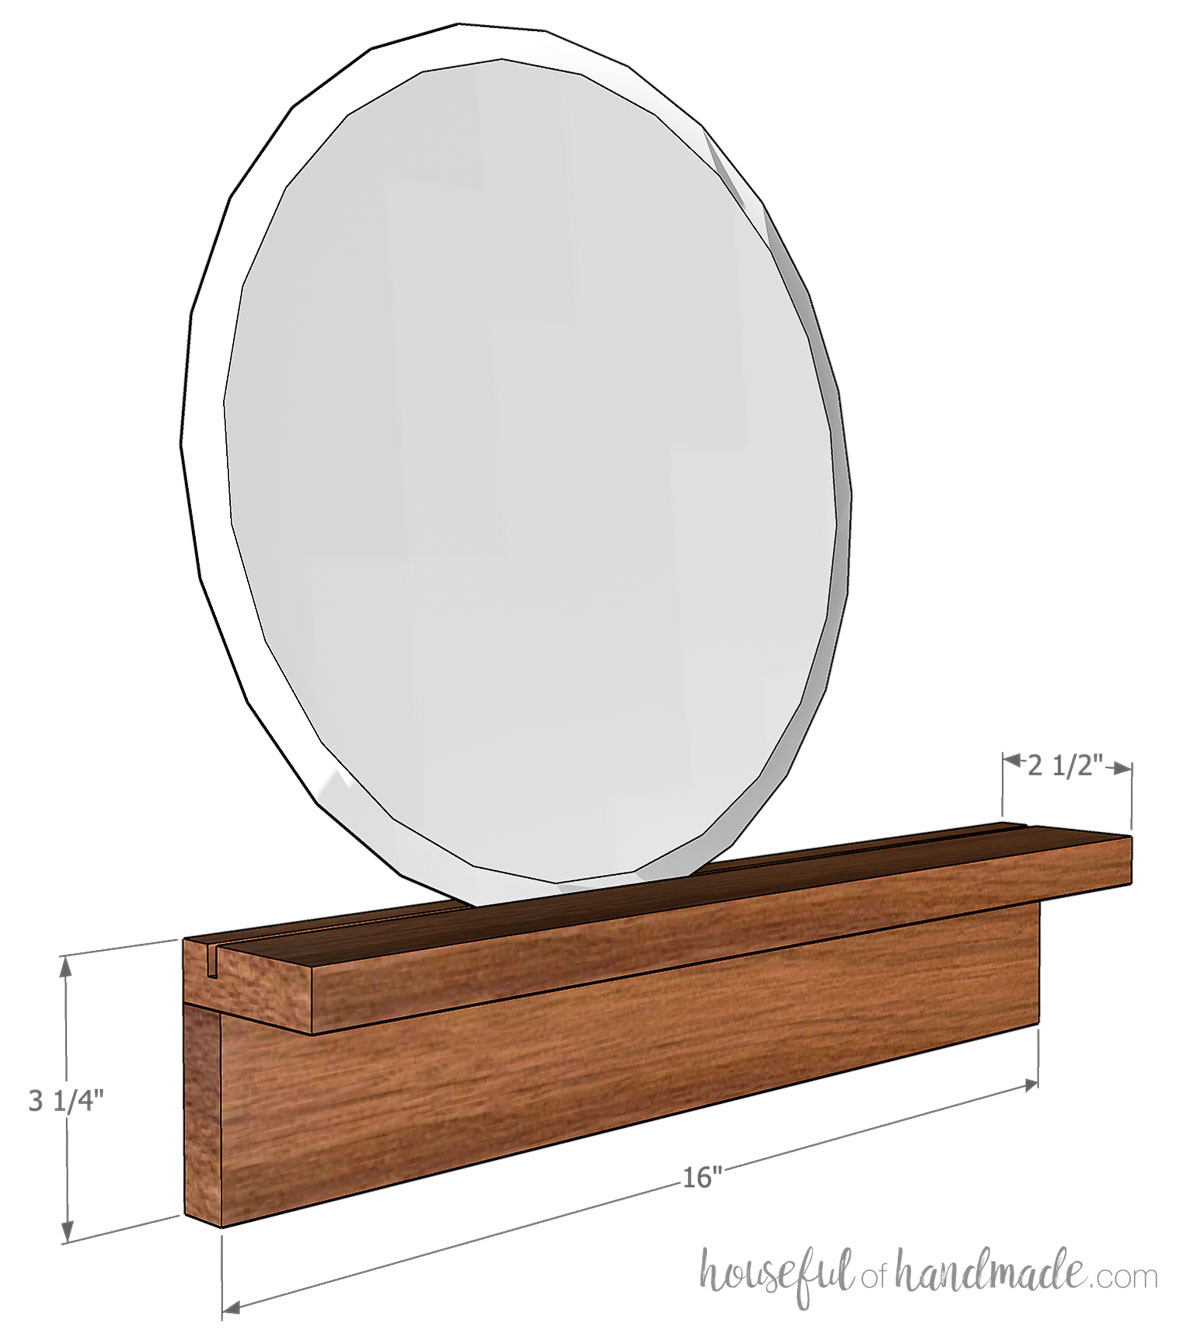
Overall Dimensions
You can build your shelf any dimensions you want! My shelf is 16″ long with a 12″ round mirror.
I used small scraps of hickory that I glued together to get a board that was 2 3/4″ wide (slightly wider than a 2 1/2″ wide 1×3).
For a deeper shelf, use a 1×4 board. For a similar sized shelf as mine, use a 1×3 board.
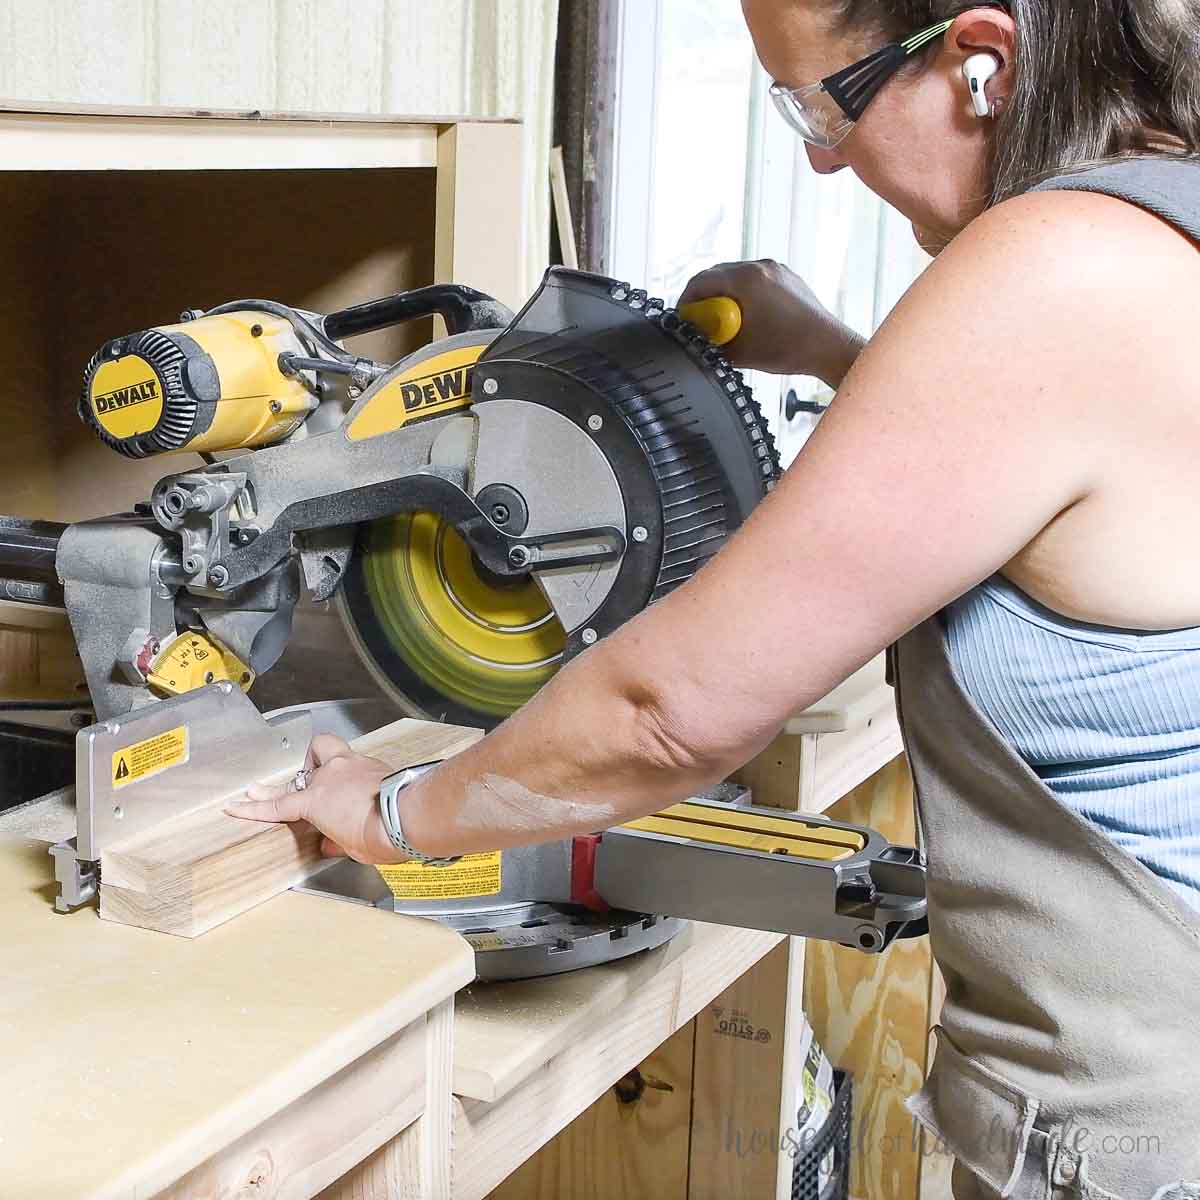
STEP 1- Cut the pieces
Cut two pieces so they are the exact same length.
I like to cut them stacked on top of each other so I can guarantee the two cuts are identical.
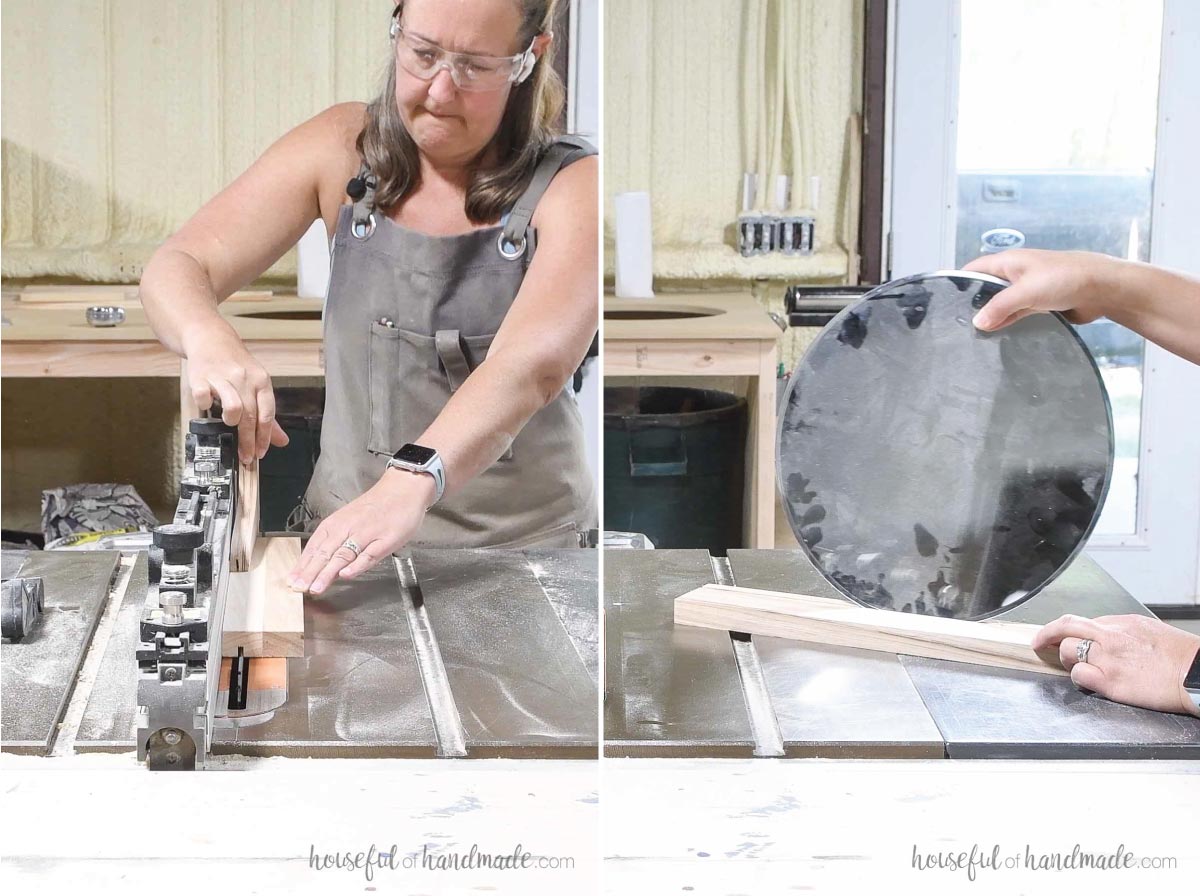
Next I added a groove to one of the pieces. This is the groove that the mirror sets into.
You can add a groove with either a table saw or a circular saw.
Set your saw blade to 3/8″ deep. Then cut a groove 1/2″ away from the back of the board.
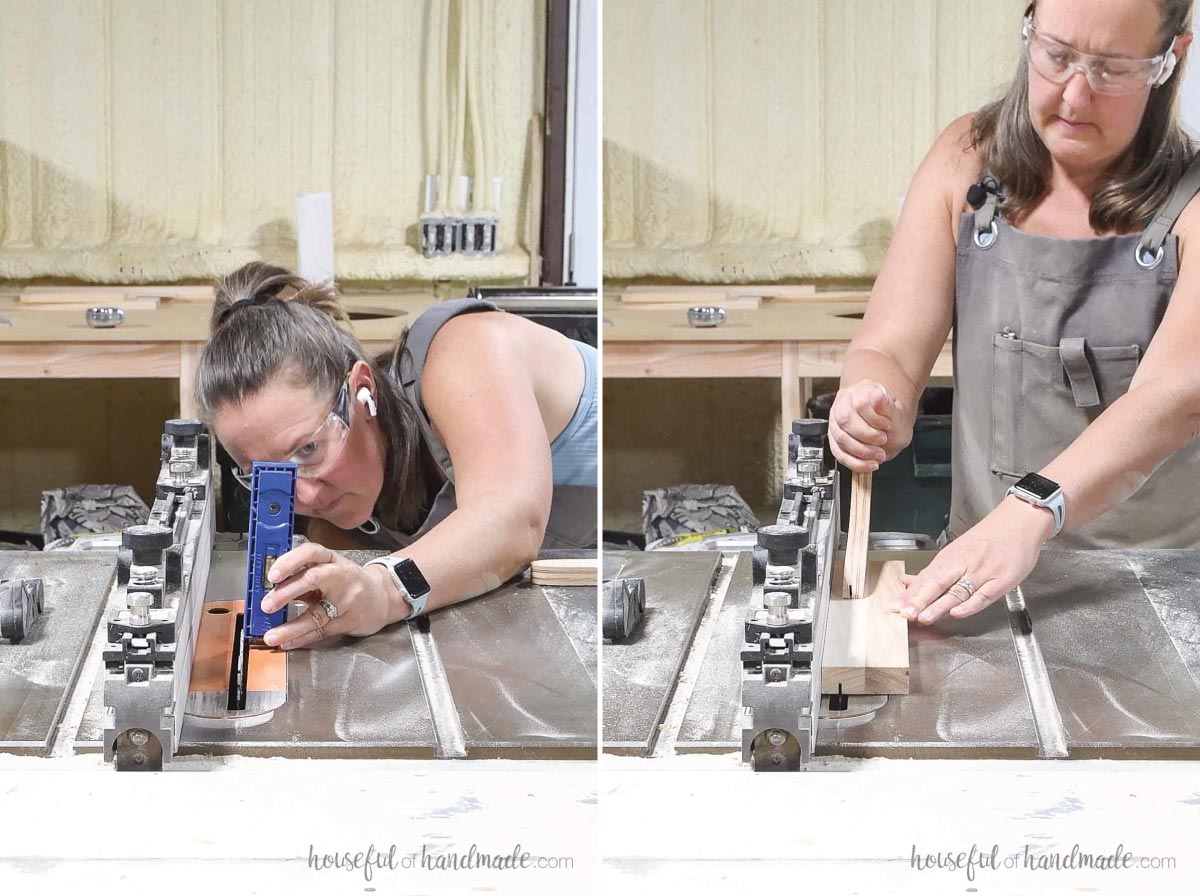
Check if your mirror fits into your groove.
If not, cut another groove right next to the first one to make it wider.
Then check that your mirror fits. It should be loose enough to lean up against the wall.
STEP 2- Assemble the shelf
Set your pocket hole jig to drill holes in 3/4″ thick material.
Drill 4 pocket holes along the top back of the board that does not have the groove in it.
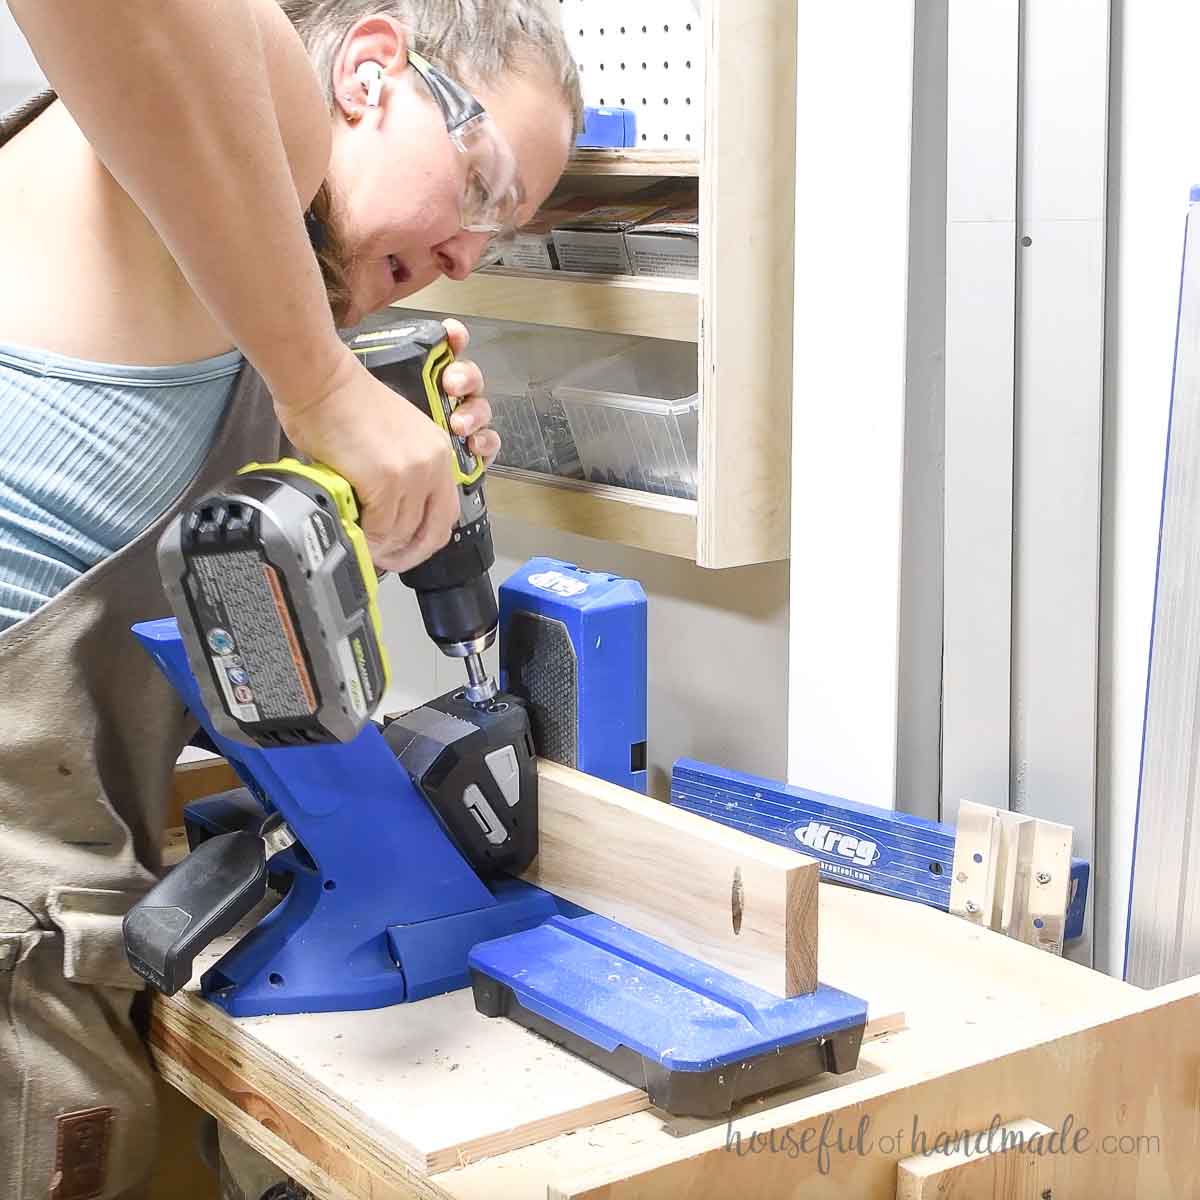
Attach this piece under the piece with the groove so they are flush on the back.
Make sure the groove on the top board is also toward the back.
Secure with wood glue and 1 1/4″ pocket hole screws.
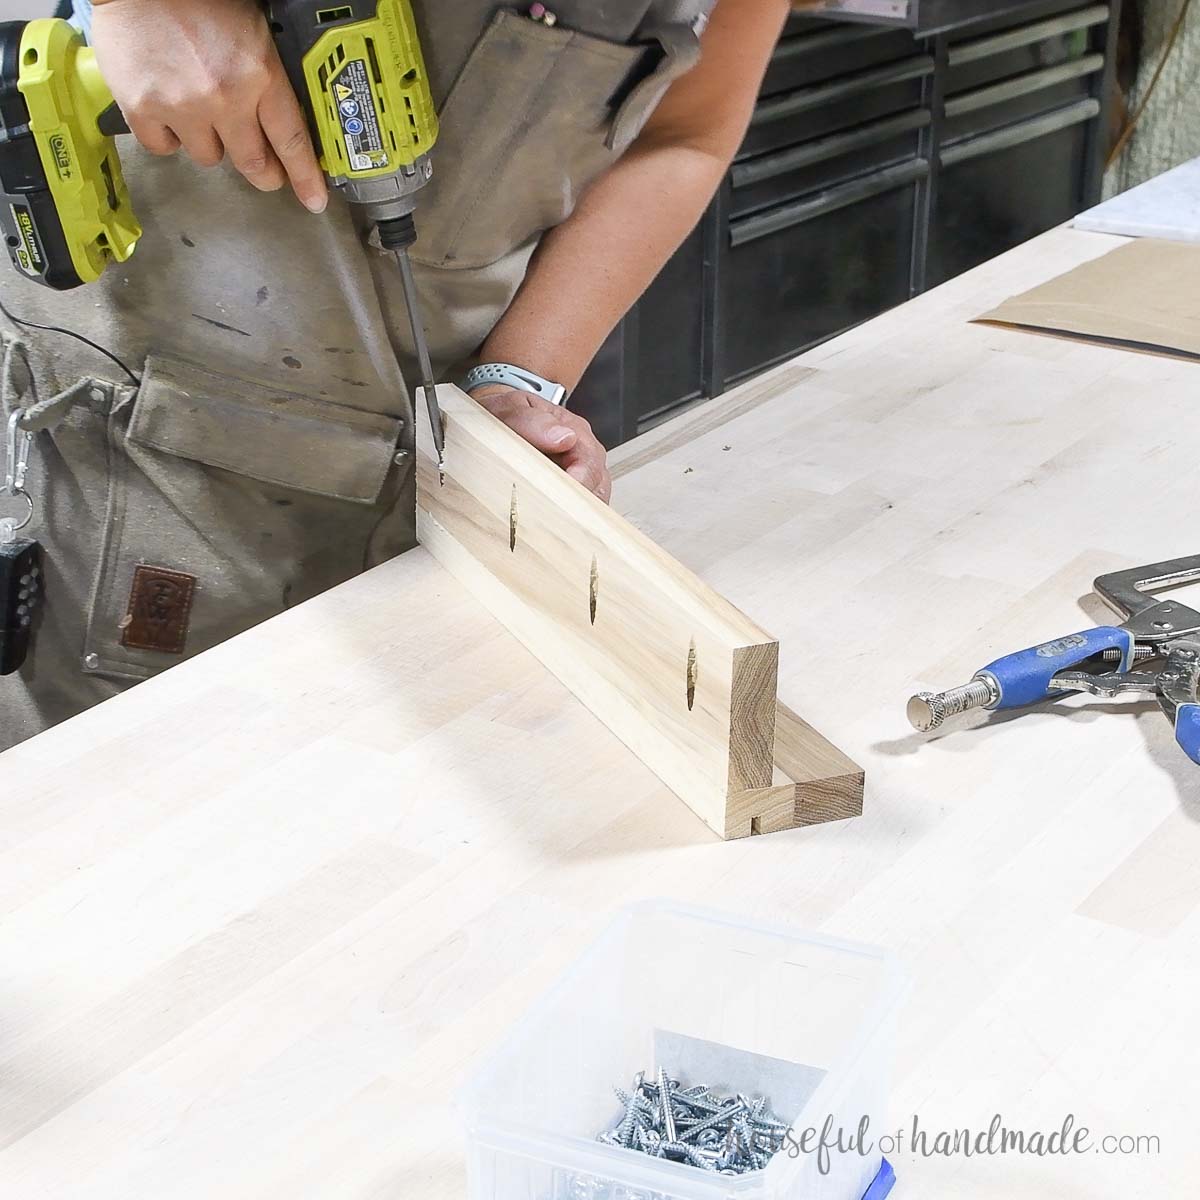
STEP 3- Finish the shelf
Sand and seal/paint your new shelf.
I just love how a simple sealer can make the grain of the wood look so amazing!
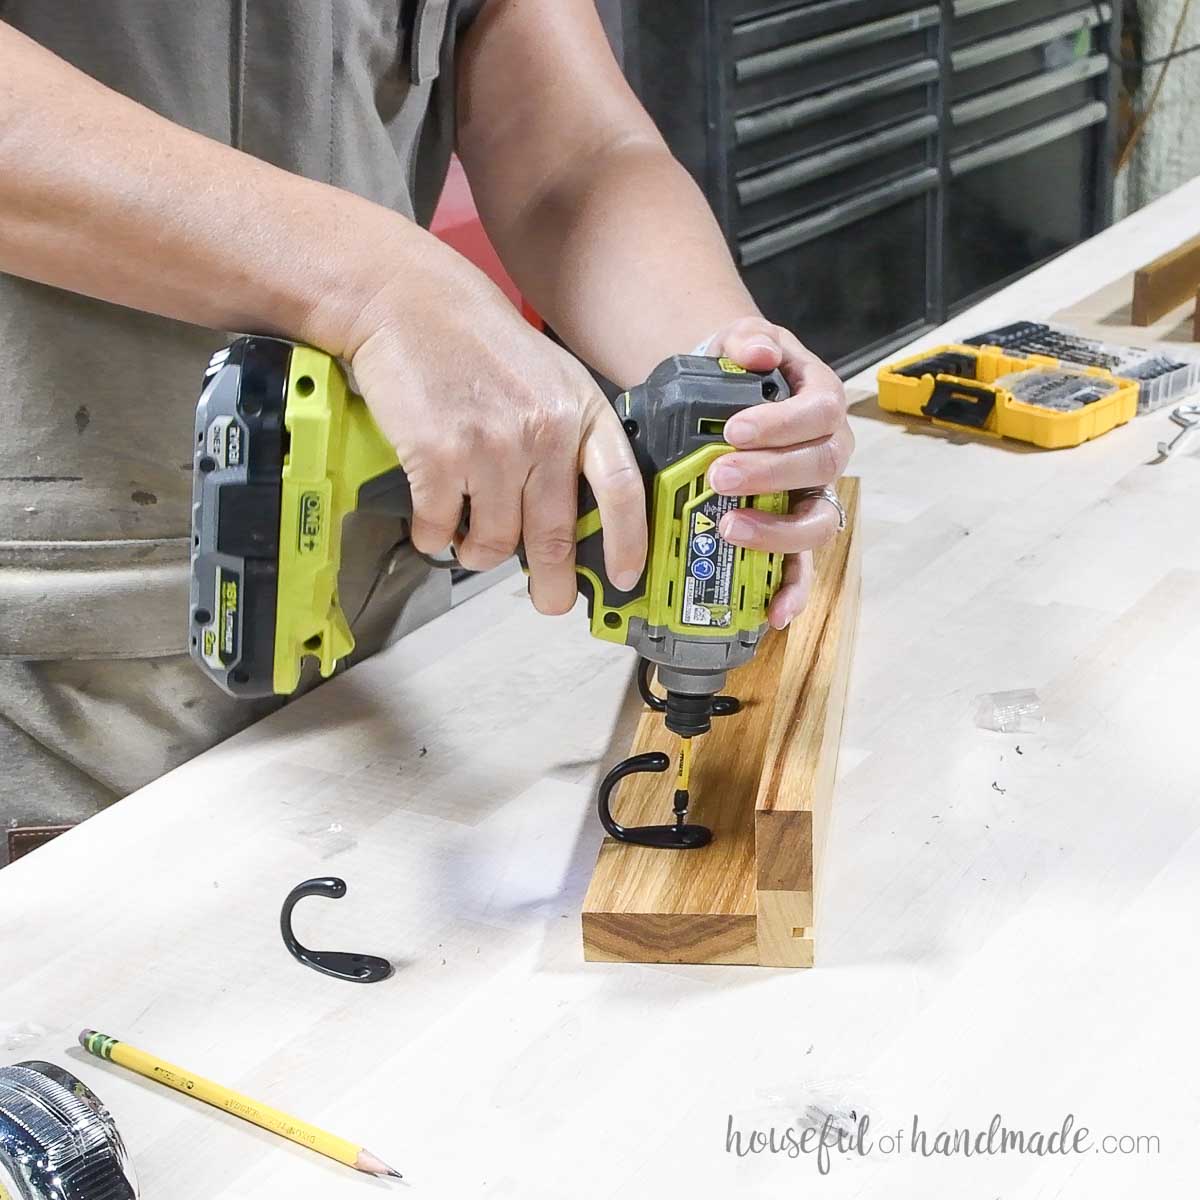
Then add your hooks to the front. Center the middle hook and set the outside ones in 2-3″ from the ends.
Make sure to pre-drill the holes to prevent wood from splitting and the decorative screws from stripping.
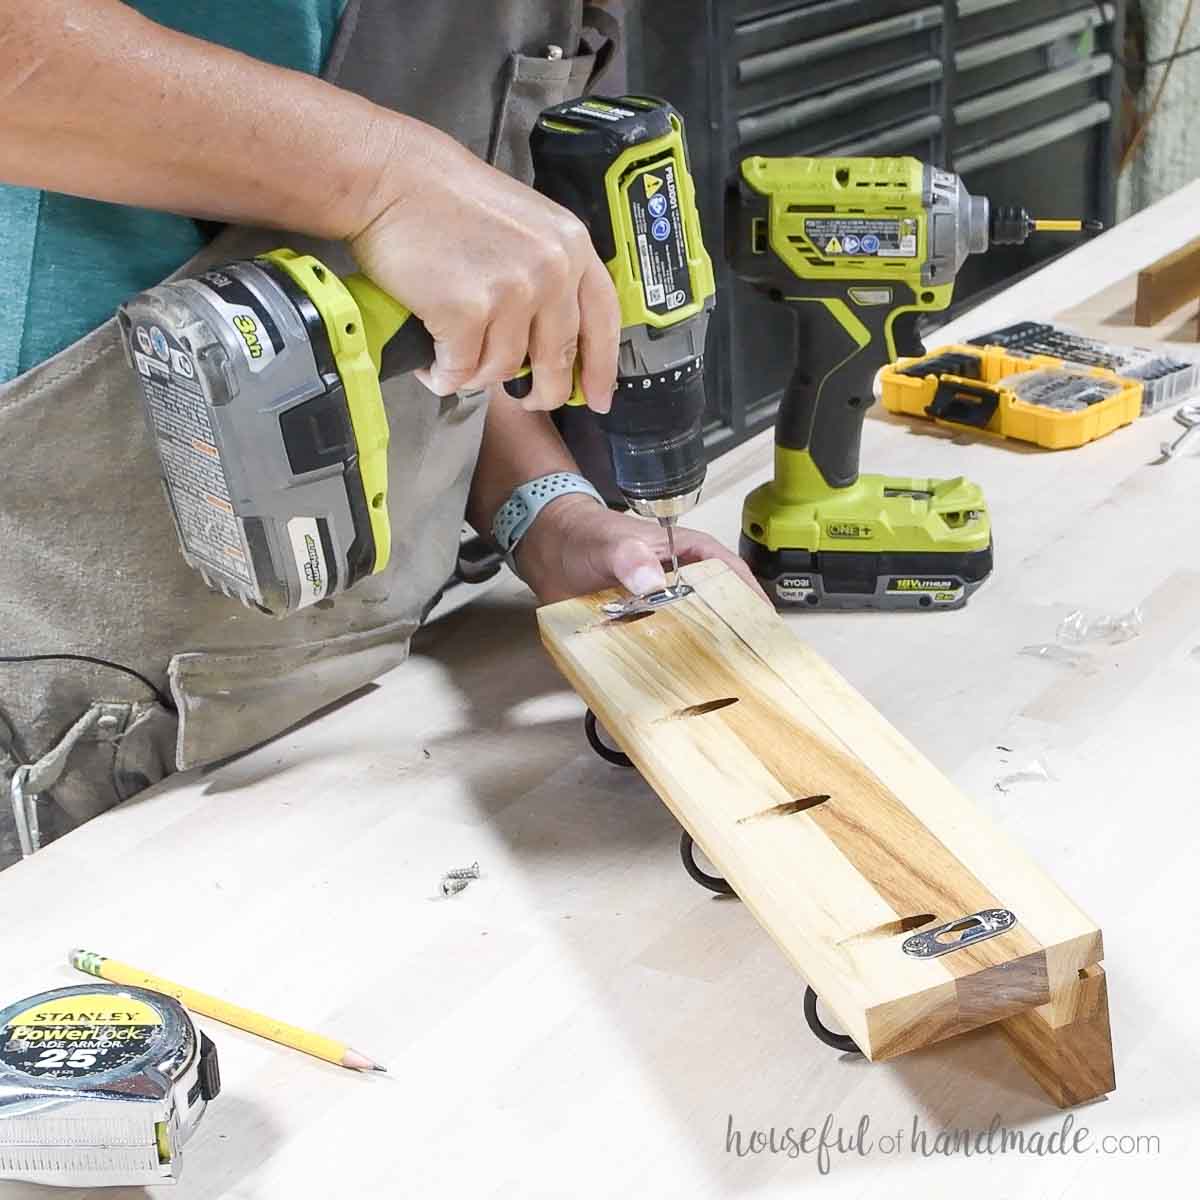
Add the keyhole hangers to the back of the finished shelf.
I added mine so they are flush with the bottom of the top shelf board.
You did it!
Now you can hang your new entryway shelf on the wall. Add screws that will line up with the keyhole hangers.
If the screws do not go into wall studs, use drywall anchors to support the weight of the shelf and anything you hang on it.
More Scrap Wood Projects:
Today is the first day of this years Scrap Wood Summer series!
Every week this month Woodshop Diaries and I will share a new scrap wood project. It’s the perfect time to clear out that scrap wood pile.
Check out any projects you may have missed below and come back every Tuesday in August for new builds.


Happy building!
