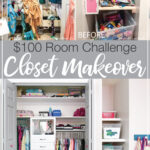
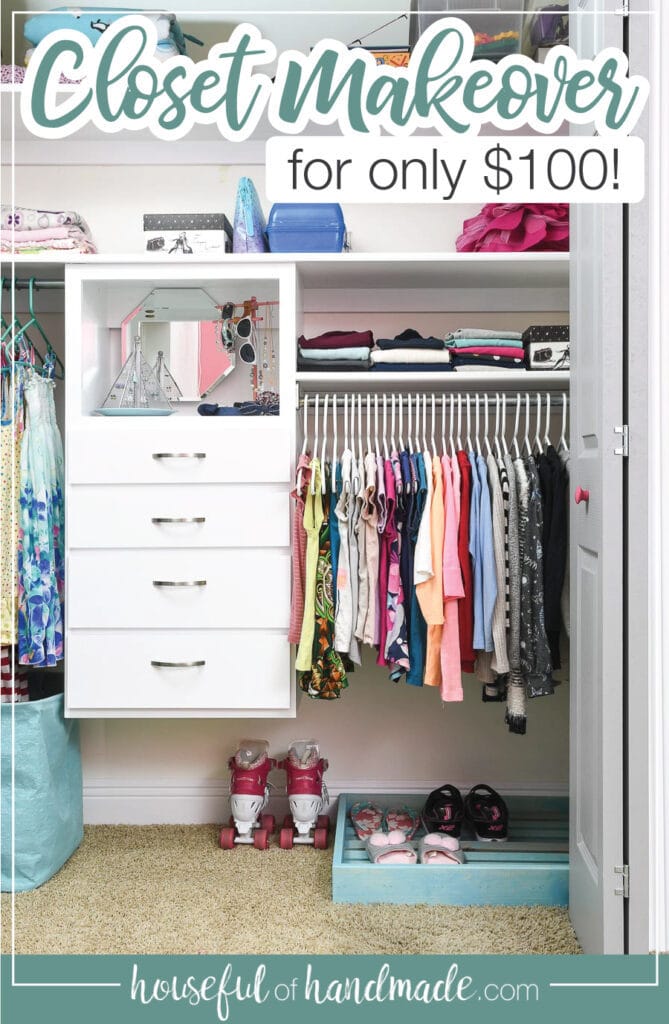
See how we gave my daughter an organized closet makeover for only $100 in just 1 month!
It’s reveal day for this month’s $100 Room Challenge!!! And this month I worked hard to give my daughter the perfect closet to keep her organized.
In case you haven’t been following along, the $100 Room Challenge is a fun challenge my friend Erin from Lemons, Lavendar, and Laundry hosts where you makeover an entire room for only $100. And you do it all in 1 month!
It causes you to get creative, use what you already have, and learn to think twice before just running to the store fore more supplies. This month I was able to turn piles of scrap wood into organized closet dreams.
This post may contain affiliate links. As an Amazon Associate I earn from qualifying purchases. Click here to read my full disclosure policy.
If you want to see the closet progress and projects, check out these posts:
- The Closet Plan {Week 1}
- Week 2 Progress
- Easy to Build Shoe Organizer Tray
- How to Build a DIY Closet Organizer
- How to Remodel a Room for $100 {Week 4}
- Easy DIY Earring Holder using no Power Tools
- Gorgeous DIY Necklace Holder from Wood Scraps
Plus I still have more DIY tutorials for projects to share soon. Make sure to subscribe to my emails so you don’t miss out!
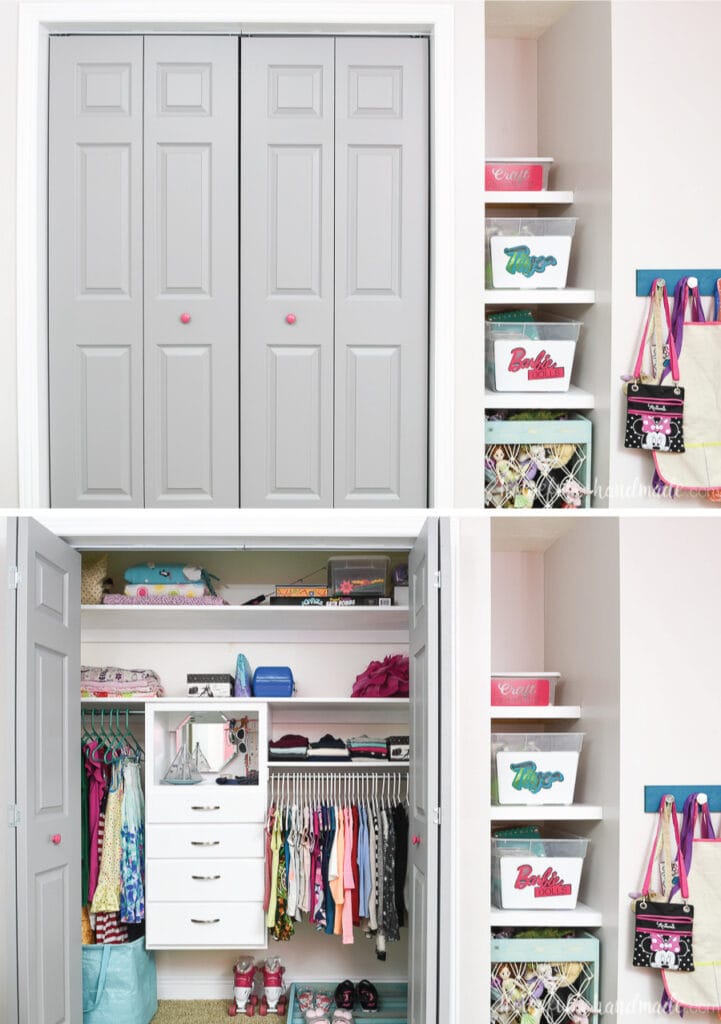
The Closet Before
Before I can share the final results of our organized closet makeover, I have to remind us what it looked like before.
Be prepared… it’s scary!
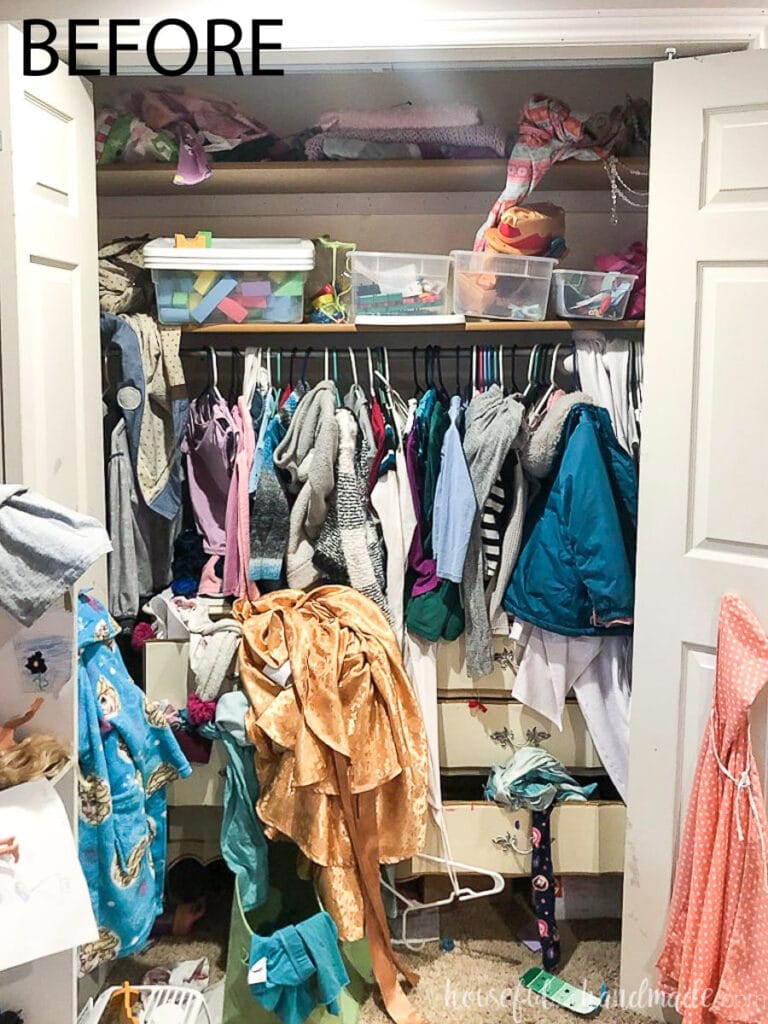
My daughter’s closet was a mess of clothes! Since her room was too small for the dresser, we put it in the closet… bad idea!
There was not enough room to properly hang her clothes over the dresser, so she just shoved them in there.

Plus the shelves next to her dresser were a lot of the same. She needed a plan, a place to put everything that she could keep up with.
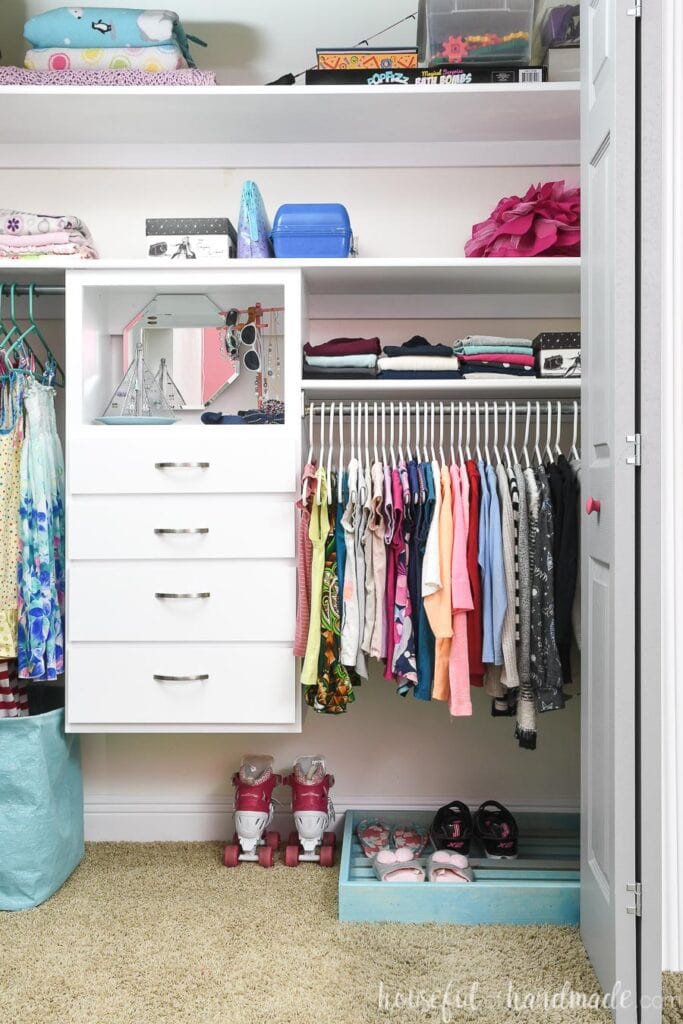
The Beautifully Organized Closet!
And that is exactly what we did!
DIY Closet Organizer
The main part of the closet makeover was the closet organizer I built. This was installed under the existing shelf, super easy!
And the closet organizer gave my daughter 4 drawers to hold her clothes, which eliminated the need for a dresser in her room.
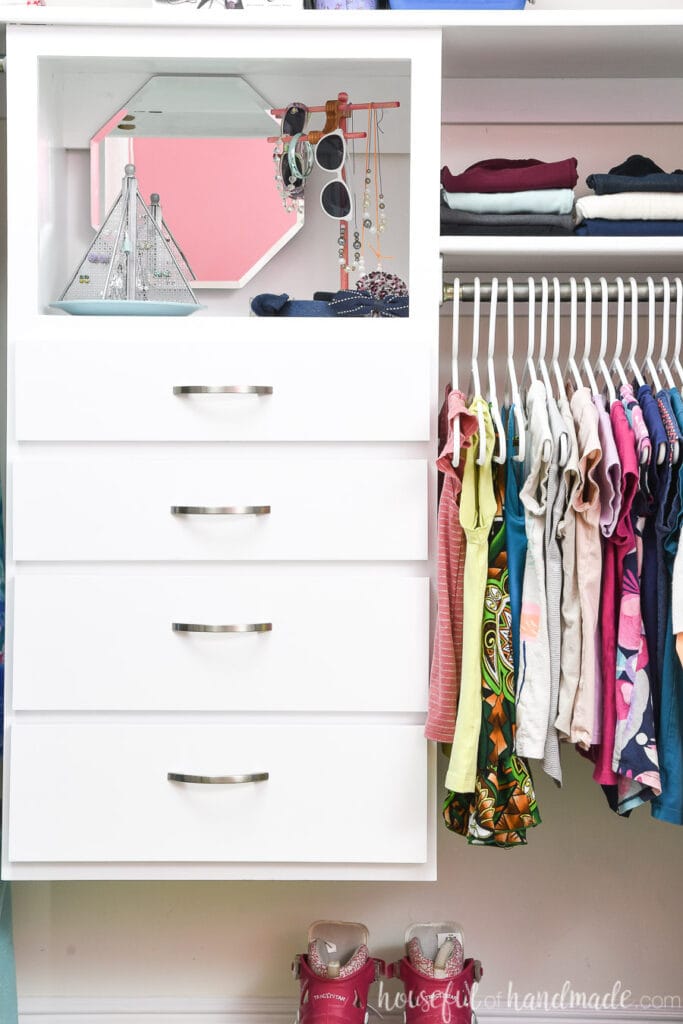
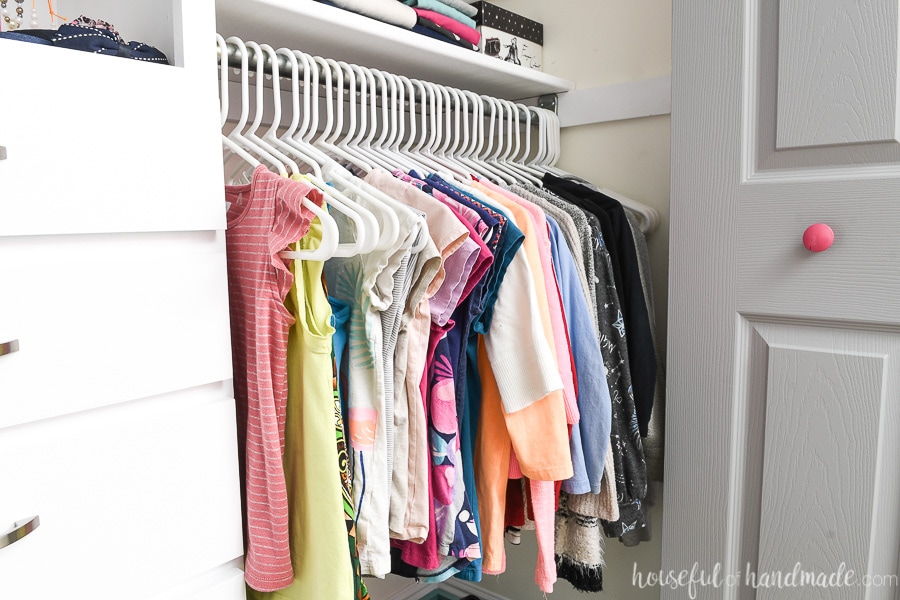
On one side of the organizer we added another shelf. This works perfectly to lower her closet rod to an easier to reach height for a young girl.
Plus the shelf above is now her pant storage area. She can easily see her pants and get’s ready way faster each day!
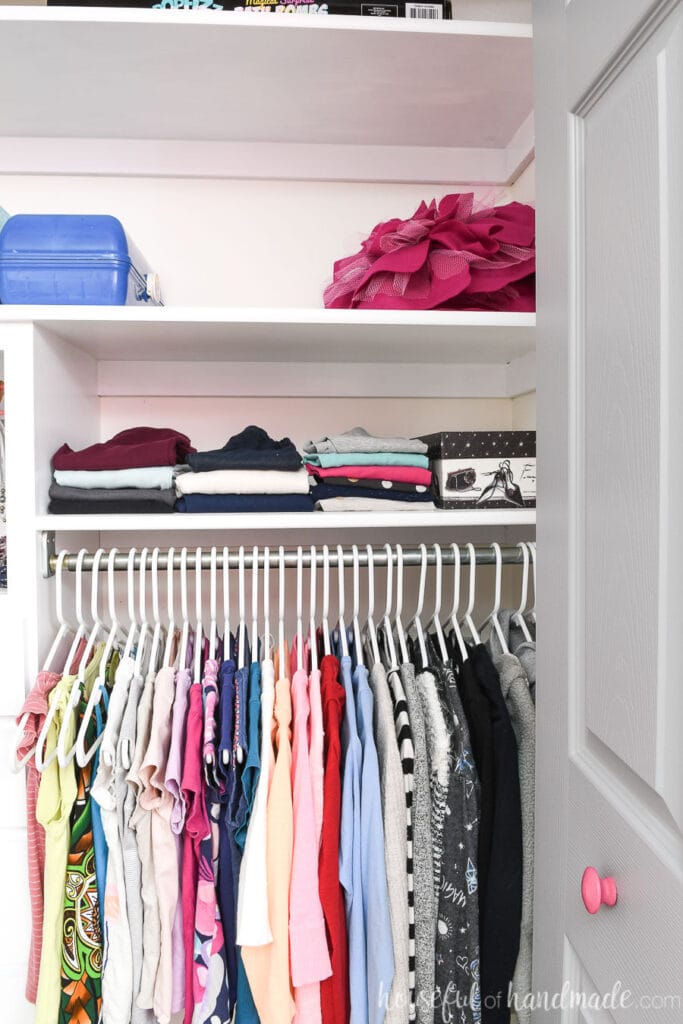
One trick I have for making a closet look cleaner instantly is to make sure all the hangers match. Before her clothes were hung on a collection of colorful hangers from who-knows-where.
Now they are all on inexpensive white hangers. And this didn’t actually cost me anything because I just sorted the hangers we already had. Her brother now has all the black hangers and she has white.
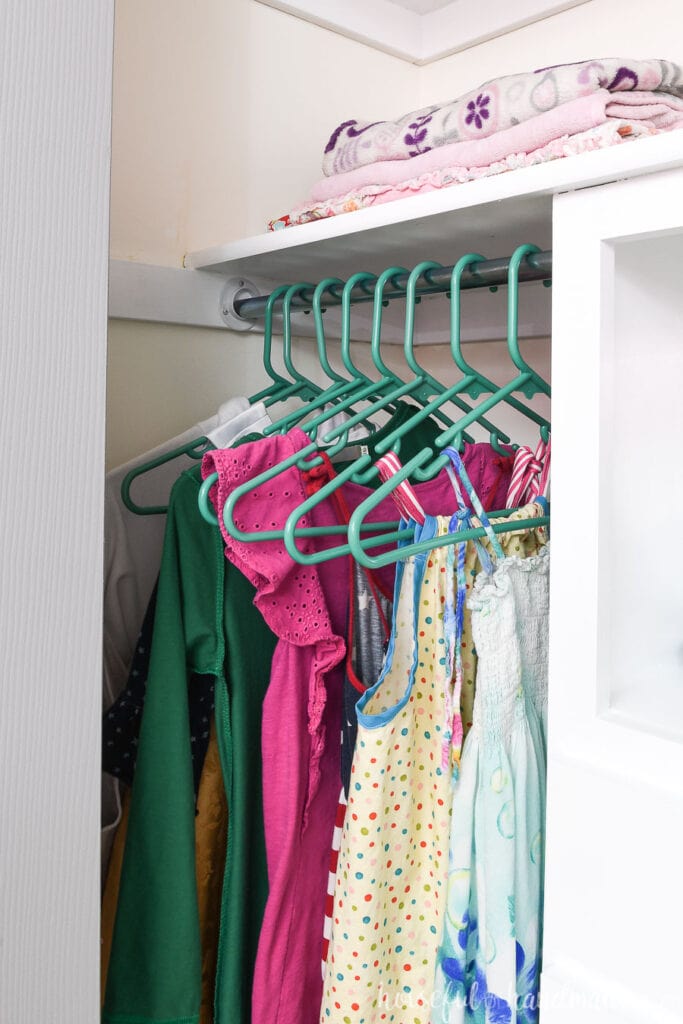
And since I didn’t have enough white hangers for all her clothes, I used teal ones (since they match the colors in her room) for the dresses.
The closet still keeps the same color hanger theme, just split into sections.
Organizing Girls Jewelry
My daughter loves jewelry! Me, not as much. But that is because she would leave it all over her room. Probably because she didn’t have a dedicated space for it.
Not anymore…
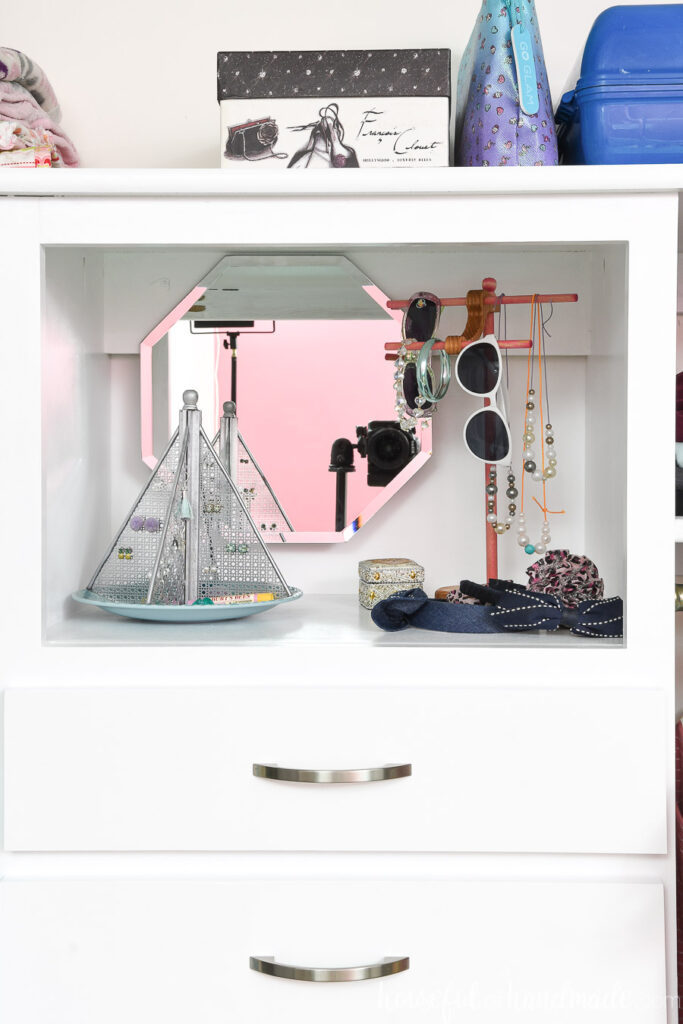
The top shelf of the closet organizer was turned into a vanity space. She has a mirror (that she loves!!!) and places to store her girly things.
To organize all her earrings, and hopefully keep her from loosing anymore, I made this pyramid shaped DIY earring holder. The base of it is a plate so it also works as a place to hold other small things like bobby pins and chapstick.
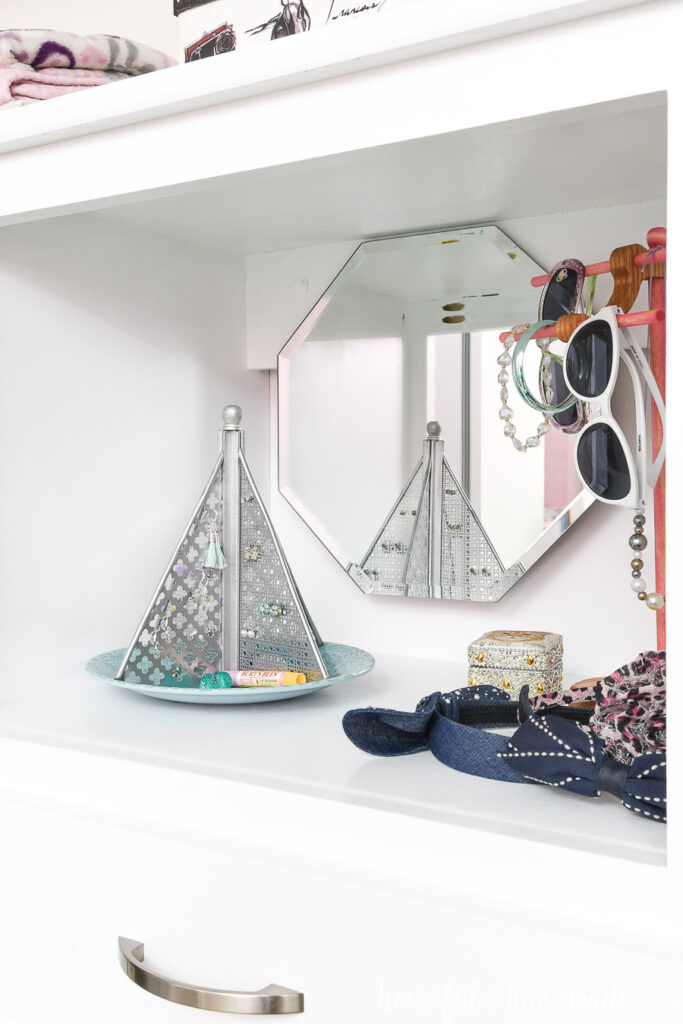
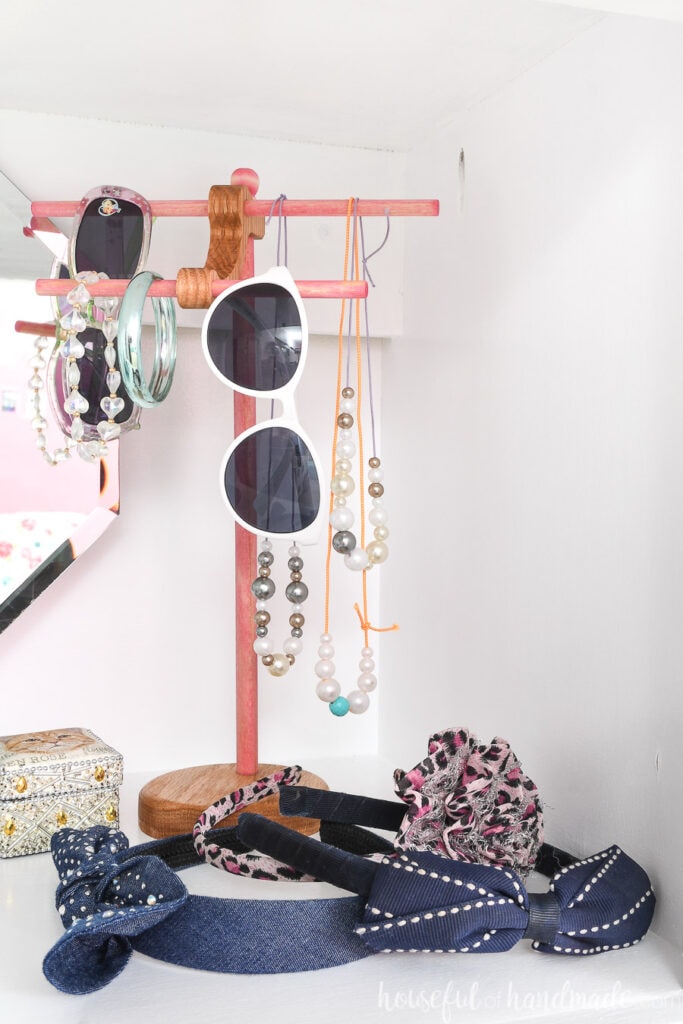
And the second jewelry stand is this beautiful wood one. With places to hang bracelets, necklaces, and more!
I had fun creating the jewelry organizers in using the colors of her bedroom. Now they not only match the space, but they give the closet some fun youthful style to it.
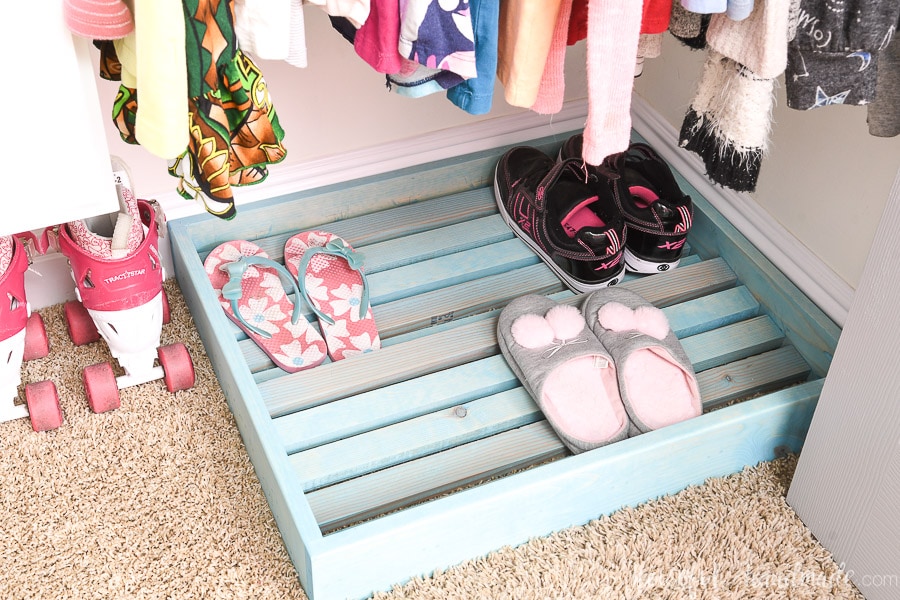
Shoe Storage
One of the other things the closet needed to address was shoe storage. My kids are really good at tossing their shoes in (or at least towards) their closets.
But then never being able to actually find their shoes later. Why is that???
So for my daughter’s closet, I built a simple shoe rack that doesn’t take up much space. But it creates a dedicated space for shoes to go.
I have been pleasantly surprised to find my daughter putting her shoes back properly on the tray every time! Sometimes all it takes is a defined place for them to put things to help them put things away.
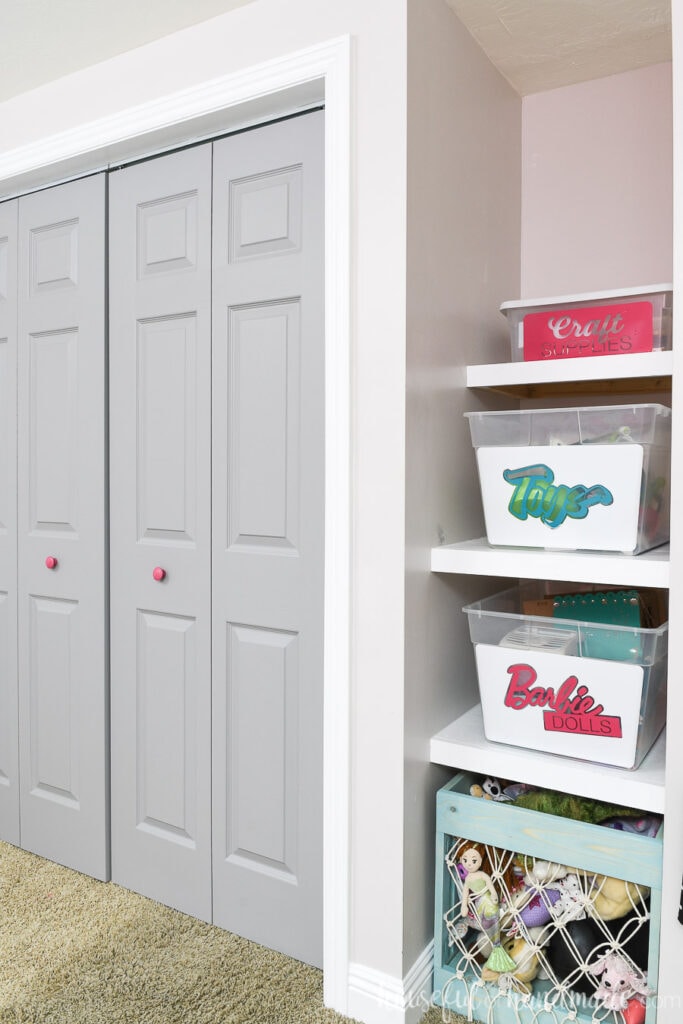
Organized Toy Shelves
Even though the shelves next to my daughter’s closet are not actually a part of the closet, I knew they needed to be addressed as part of this makeover.
The shelves are a great place to store all her toys, But without dedicated bins, things were getting out-of-control!
We started this part of the makeover by purging some of the toys. It’s always a good idea to sort through kids toys at least once a year. As they grow, there will be items they no longer want to play with that you can get rid of to make the space instantly cleaner.
Then we sorted the items into piles and made dedicated bins for each group.
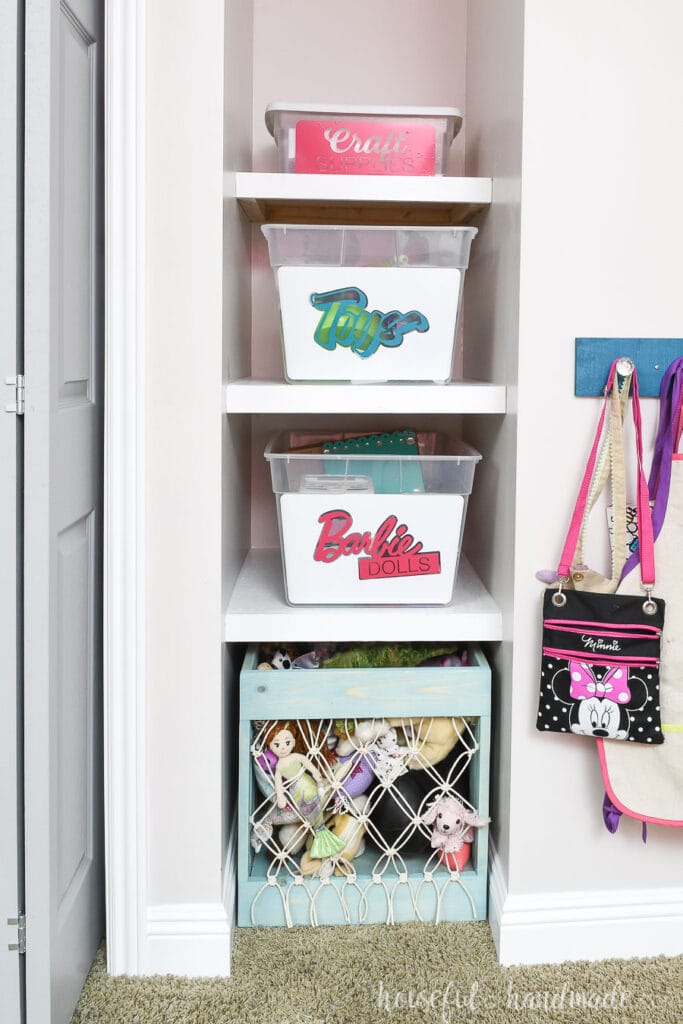
Toy Bin Labels
I used existing bins to hold most of the toys, but they are clear, which makes them look messy.
So I added large labels to help cover up the front of the bins. This makes the shelves look neat and clean, and also makes it easier for my daughter to remember what goes in each bin.

Stuffed Animal Storage
To say my daughter loves stuffed animals is an understatement! They are definitely her toy of choice and the ones she plays with the most.
So I knew I wanted to create something special for her stuffties (as she calls them).
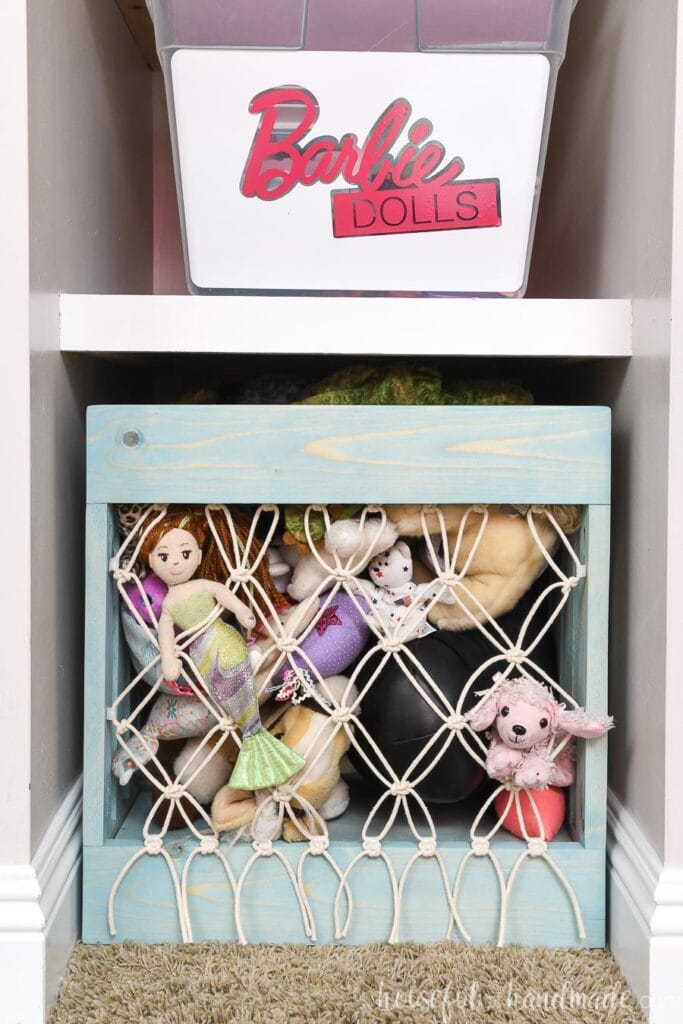
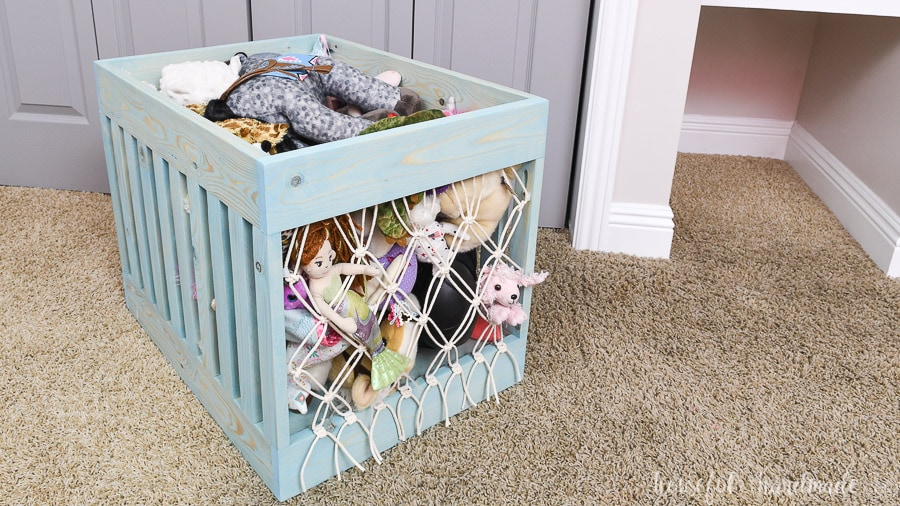
And I think this might be my favorite DIY of the entire closet! How cute is this macrame toy bin?
I built a box with inexpensive 1×4 and 1×2 furring strips. The box is on wheels, but they are hidden inside the box to make it look cleaner.
Then for the front and back of the stuffed animal bin, I used basic macrame knots to create a feminine net. It’s the perfect way to contain all her stuffed animals but still make them easy to see.
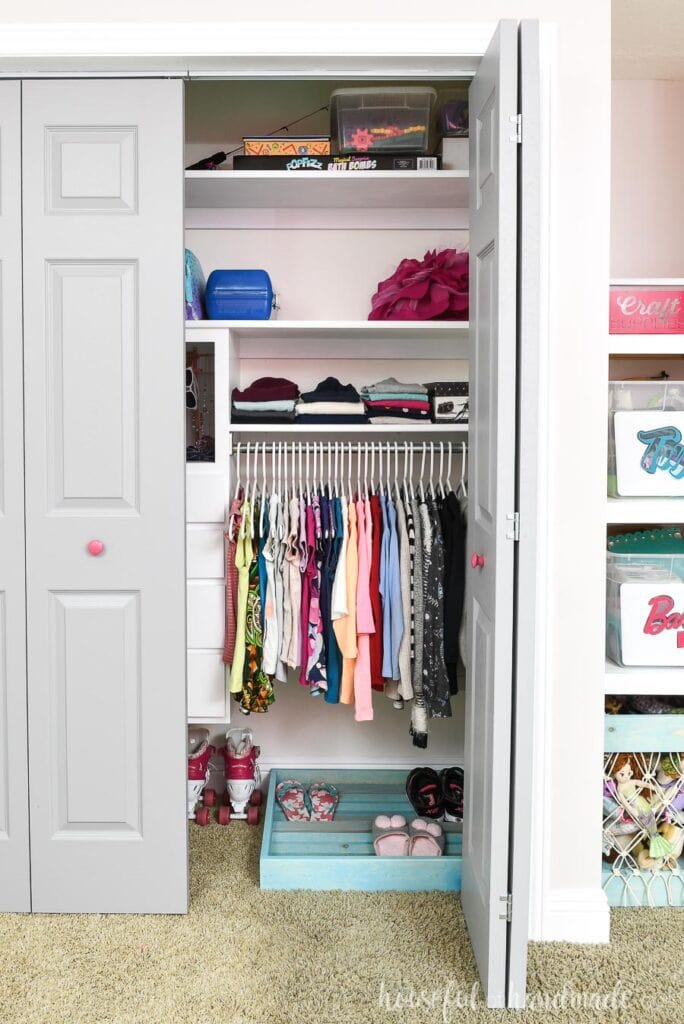
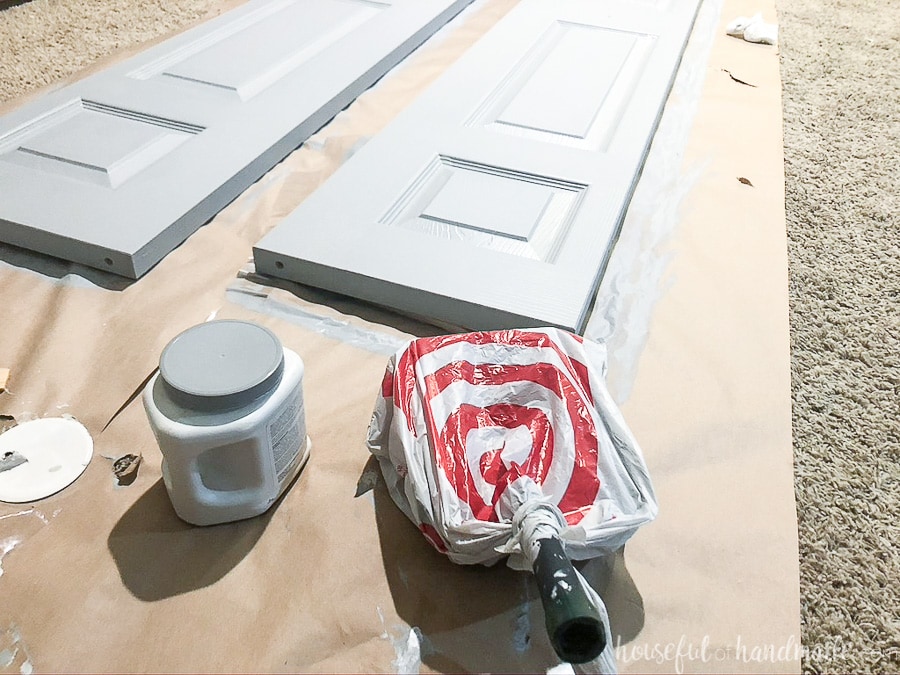
New Closet Doors
While it may look like we added closet doors, or have new ones, that it not the case!
One of the problems of our before closet was the bent track for the doors. Which caused one of the doors to always fall off. Half the time it was just leaning up against the wall instead.
So I promised my daughter I would fix it, and it was quite easy to do with a pair of pliers. Then we painted the doors with leftover paint that I mixed with a $4 sample of black paint to create a soft gray.
Now she has doors that work! And it’s amazing how much cleaner a room feels when you just take a few seconds to close the closet doors.
CLOSET MAKEOVER PLAN
So did we accomplish everything on our list to create the perfect organized closet makeover?
I would definitely say we did!
Sort clothes and get rid of what does not fit/wantSort toys and get rid of what she doesn’t play with anymoreMake closet organizer with drawersPaint closet organizer and shelvesFinish shelves in nook next to closetPaint nook shelvesPaint closet doorsMake storage solution for shoesMake storage boxes for toys & art suppliesMake storage bin for stuffed animalsMake storage solutions for earrings, hair accessories, and beauty suppliesFind a way to add color & style to the closet!
Total Budget Spent
So the big question is always, how much did it cost?
Part of the $100 Room Challenge it to use up what you have. Of course, what I have is different from what you have so if you repeat the same thing it might cost you more or less.
But try to use up what you already have and get creative to find ways to save a few extra dollars here and there!
How we spent our $100 Budget
- (1) gallon white paint – $32.00
- Sample sized black paint – $4.00
- Other painting supplies – already had
- DIY closet organizer – $34.50
- (1) 1×2 select pine board – $7.00
- Other wood – already had (see post for cost breakdown if you need to purchase wood)
- Edge banding – $6.00
- (4) drawer slides – $21.50
- (4) drawer pulls – came off kitchen island during kitchen remodel
- Closet pole socket – $3.00
- Shoe storage tray – $0.00
- Wood – reused wood from an old dog gate
- Screws/nails – already had (screws actually came out of the gate too)
- Stain – already had
- Stuffed animal bin – $24.75
- (3) 1x2s – $3.75
- (2) 1x4s – $4.25
- Castors – $6.00
- Macrame cord – $7.00
- Stain – already had
- Cable clips – $3.75
- Jewelry stands – $3.75
- Melamine plate – $2.50
- Finials – $1.25
- Metal – leftover from this jewelry cabinet build
- Dowels – used scraps
- Wood – used scraps
- Glue – already had
- Storage labels – already had vinyl
The total spent is $102! I know that is more than the $100 budget, but I bought a full gallon of white paint because I am planning on repainting all my baseboards and door casings this spring, but I only needed a quart for the closet.
So if you only include the cost of the items I used for the closet, I came in way under budget! And I love that my scrap wood pile is much smaller. I definitely need to do scrap wood projects more often.
Ways we Saved Money
Besides using what we already had, here are a couple of things that really helped save some dollars.
Painting Supplies
I already had 1 foam roller and tray in my garage. It came in handy when painting the shelves and closet organizer white.
But instead of buying a second one, I washed them both out. Then I used the same roller and tray to paint the closet doors gray. That saved me $5-10 dollars!
Also, I stored the roller in the tray and covered the entire thing in a plastic bag between coats. That way I was able to use the same one over and over.
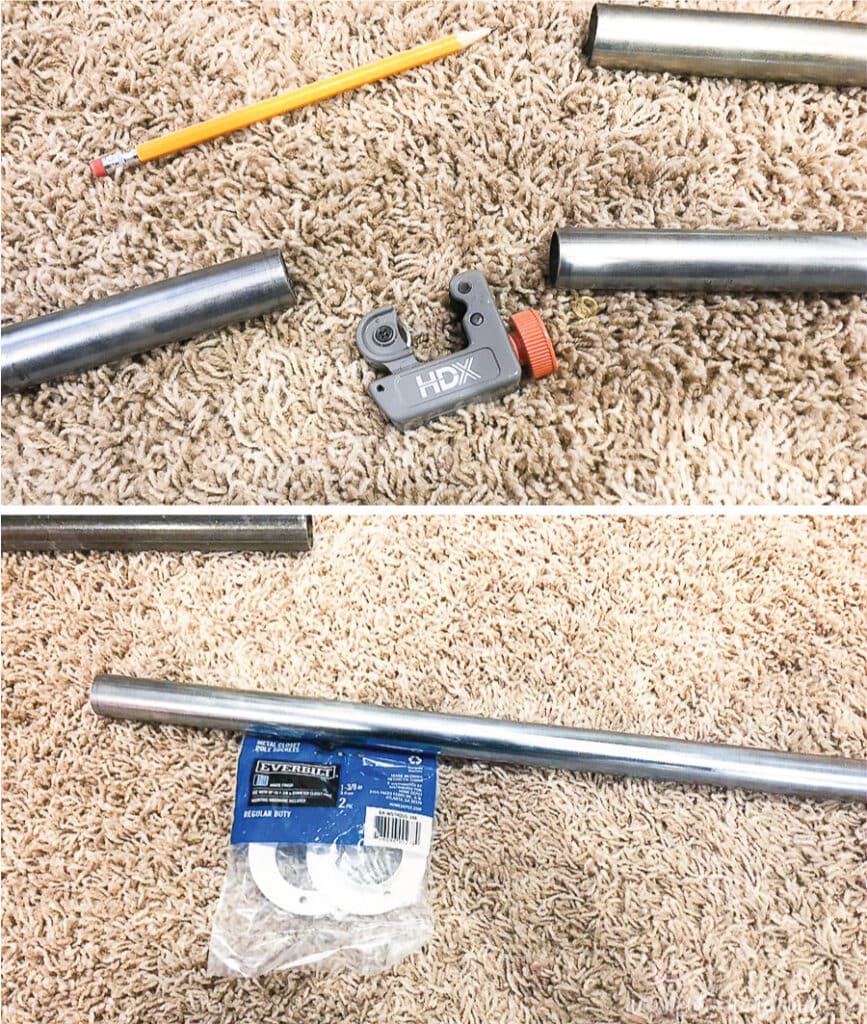
Closet Rods
I already had 1 closet rod spanning the entire length of the closet. But we wanted to create a closet with 2 rods.
Instead of buying a second closet rod, I cut the rod into 2 and then all I needed to spend was $3 to get a second closet pole socket.
Using Inexpensive Wood
As much as I love building with hardwoods, sometimes budget calls for less expensive options. And that is okay!
Even a piece you make out of inexpensive wood is still made of solid wood. That is better than the cheap furniture that is made from particle board and covered in melamine.
I have made many amazing furniture pieces that have lasted out of inexpensive furring strips, construction lumber, and common board. Just make sure to check out my beginners guide to buying lumber so you pick the perfect piece of wood for your project.
More $100 Room Makeovers
If you want to see more amazing budget room remodels, make sure to check out these other participants in the $100 Room Challenge:
