Learn to build a playhouse with sandbox, slide, climbing wall, and roof in your own backyard.
Welcome to our outdoor playhouse, aka: The Adventure Clubhouse!
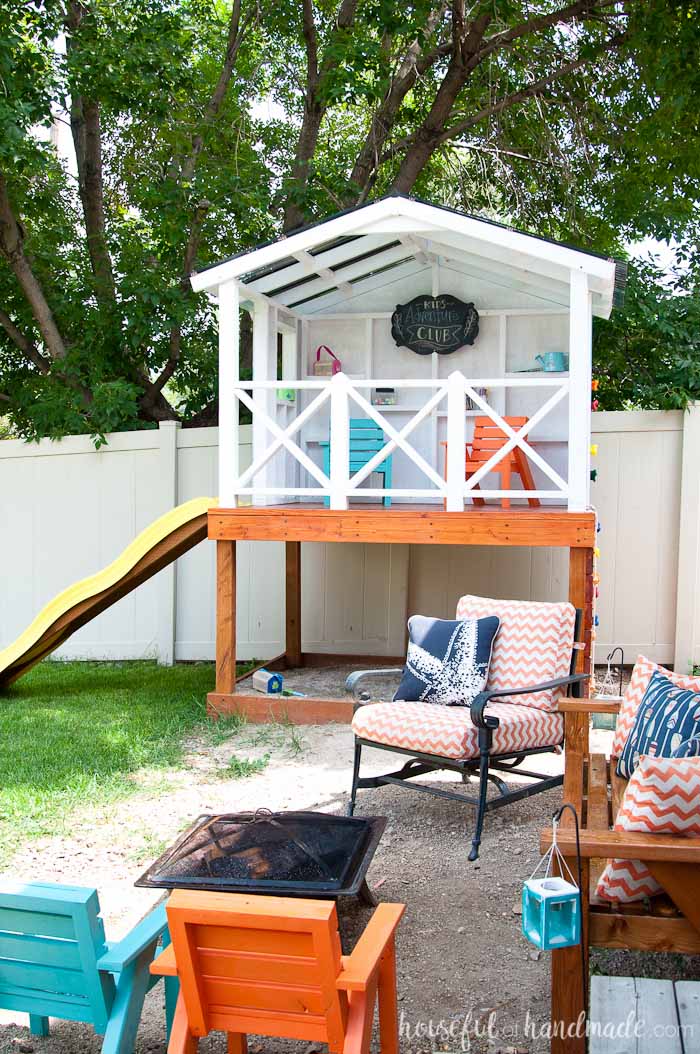
We were able to turn a corner of our patio into the perfect wooden playhouse for our kids this summer. Even though we do not have a large yard, the outdoor playhouse is full of fun.
The kids spend hours in the sandbox, host club meetings in the clubhouse, and climb all over the wooden playhouse.
This post may contain affiliate links. As an Amazon Associate I earn from qualifying purchases. Click here to read my full disclosure policy.
I can’t wait to share all the details of our playhouse build.
DIY Wooden Playhouse
If you have been following along, you may have seen some of the stages of our kids outdoor playhouse. We have been working on it over the summer.
I have wanted to build a playhouse for my kids for years now, but always figured our yard was too small for it.
This year I decided I needed to stop making excuses!
So we built the perfect small backyard playhouse for the kids.
Our outdoor wooden playhouse is only 5′ x 7′ but is perfect for our kids big imaginations!
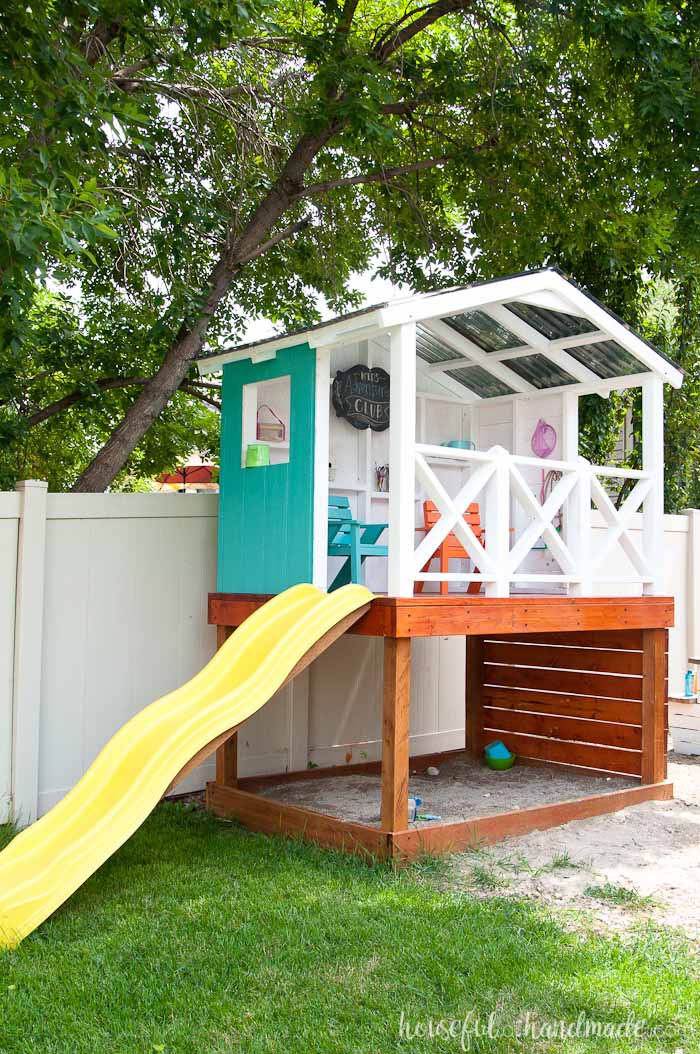
As soon as the walls were up, my daughter started an “Adventure Club”. She gathers anyone she can and they talk about nature, create, and have all kinds of fun.
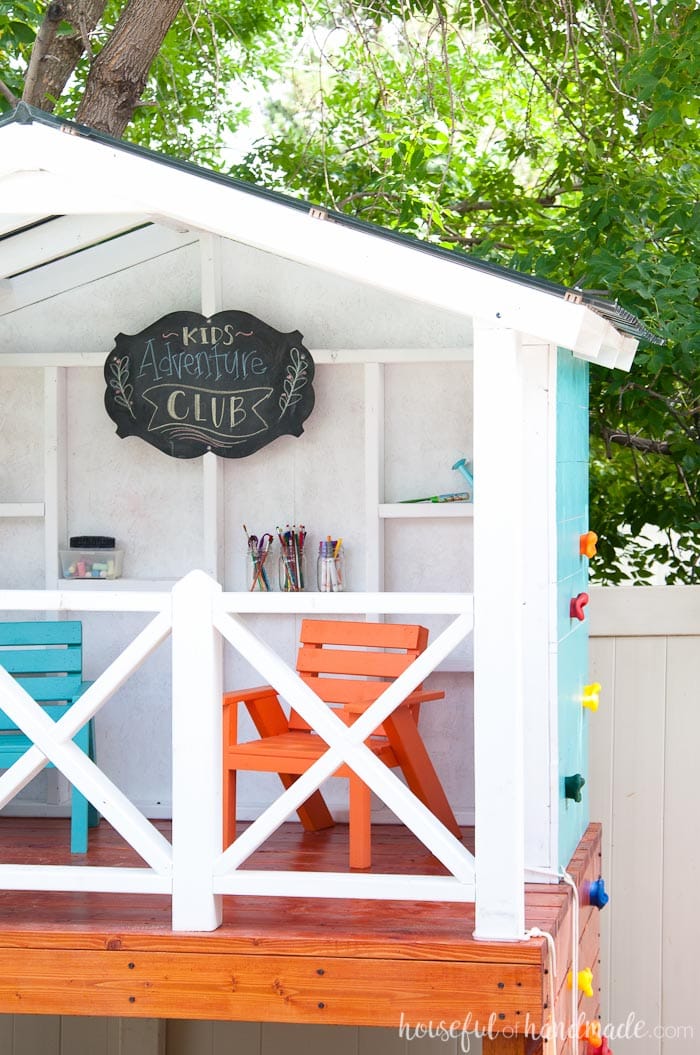
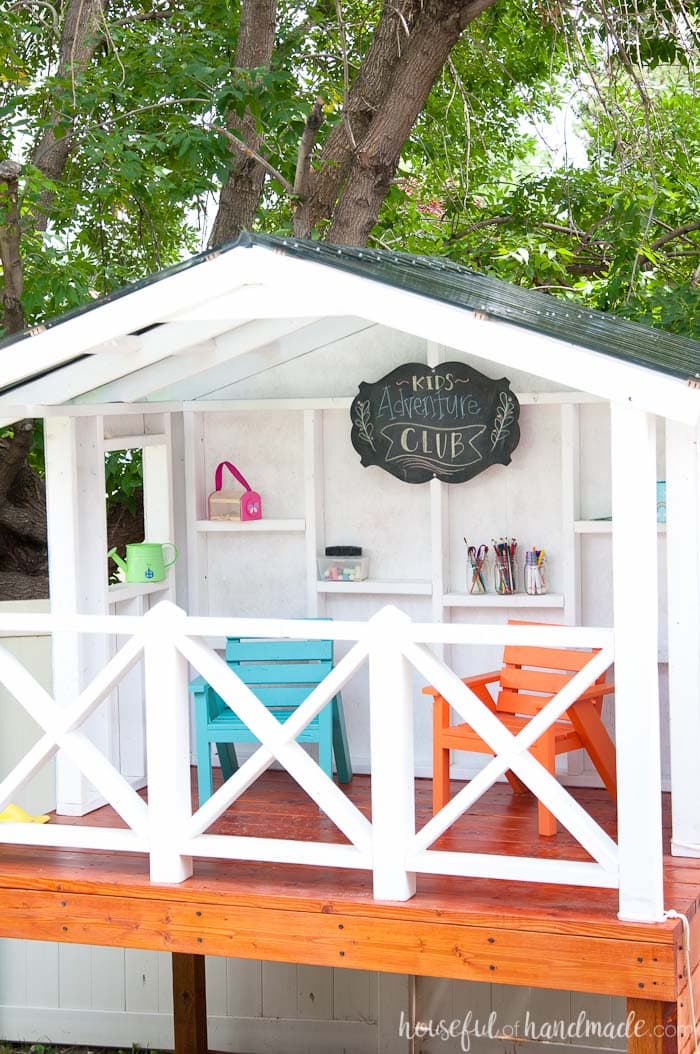
The outdoor playhouse is the perfect clubhouse. The covered loft makes it perfect for having meetings any time of the year.
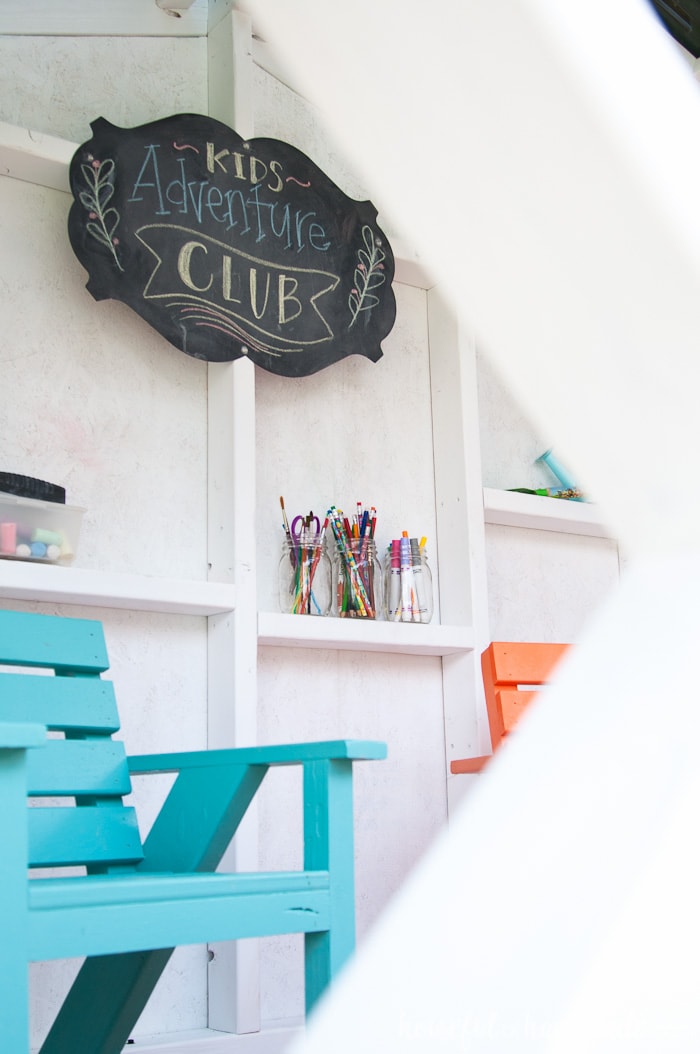
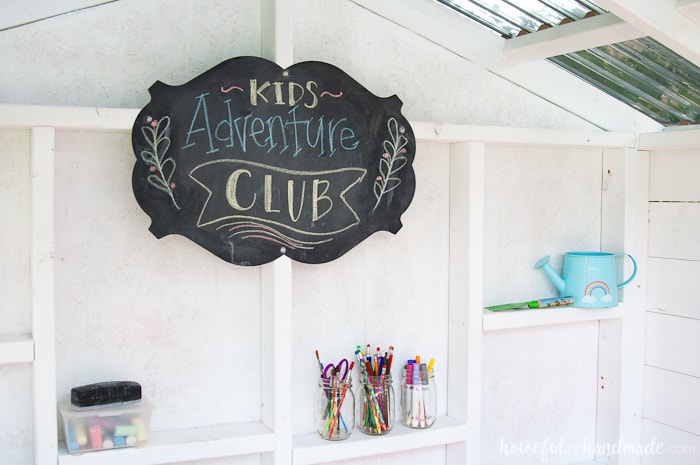
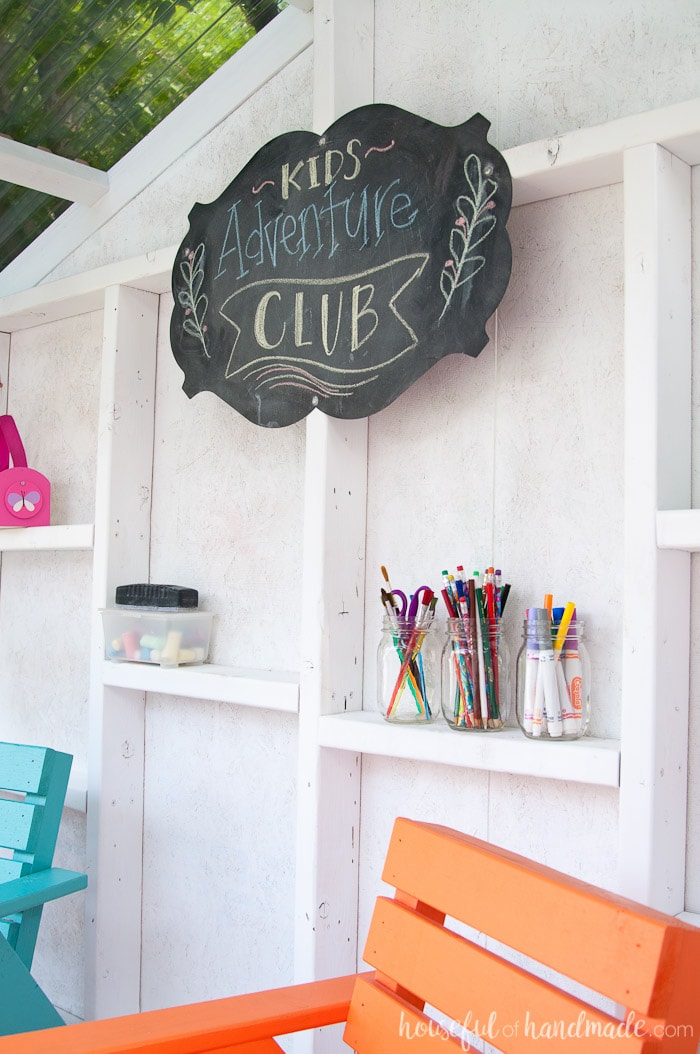
One of the requests my daughter had for their clubhouse was a chalkboard. It was very important to have a place to write on during meetings.
I found a magnetic steel chalkboard that can hold up to the elements outdoors. It was the perfect solution for the outdoor playhouse. And with a box of sidewalk chalk, the kids have used it for so many hours of fun.
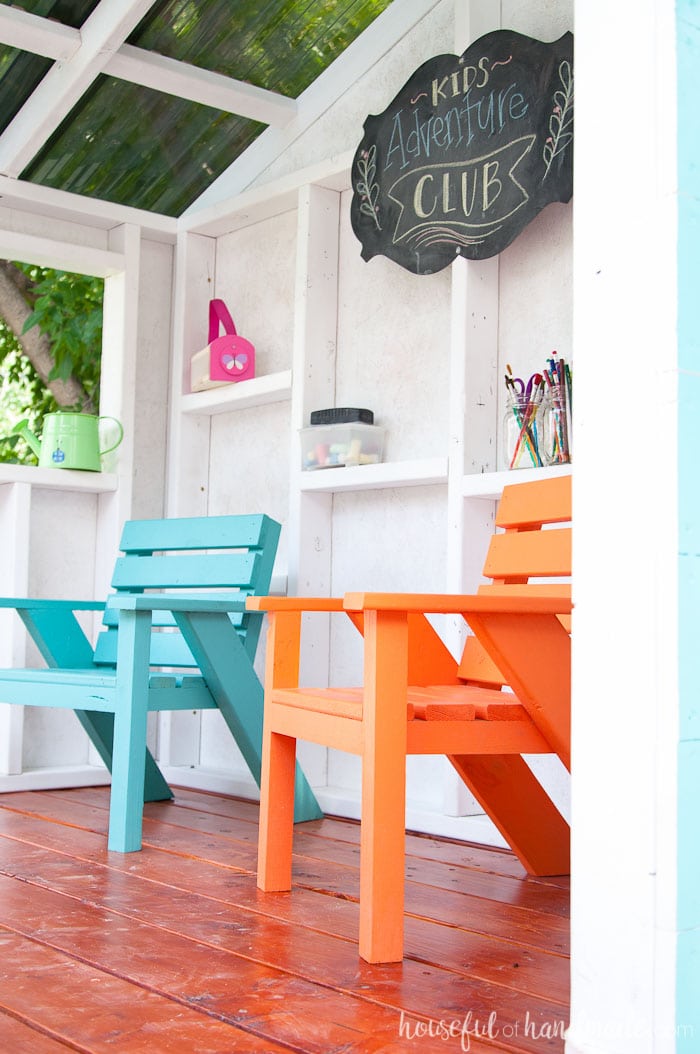
The clubhouse also needed some seating. I built 4 kids patio chairs earlier in the year, and 2 of them fit nicely in the kids wooden playhouse.
They love having a place to sit. And they have been enjoying eating their lunch in the playhouse all summer long. Which makes me happy because my floors have stayed much cleaner 😉
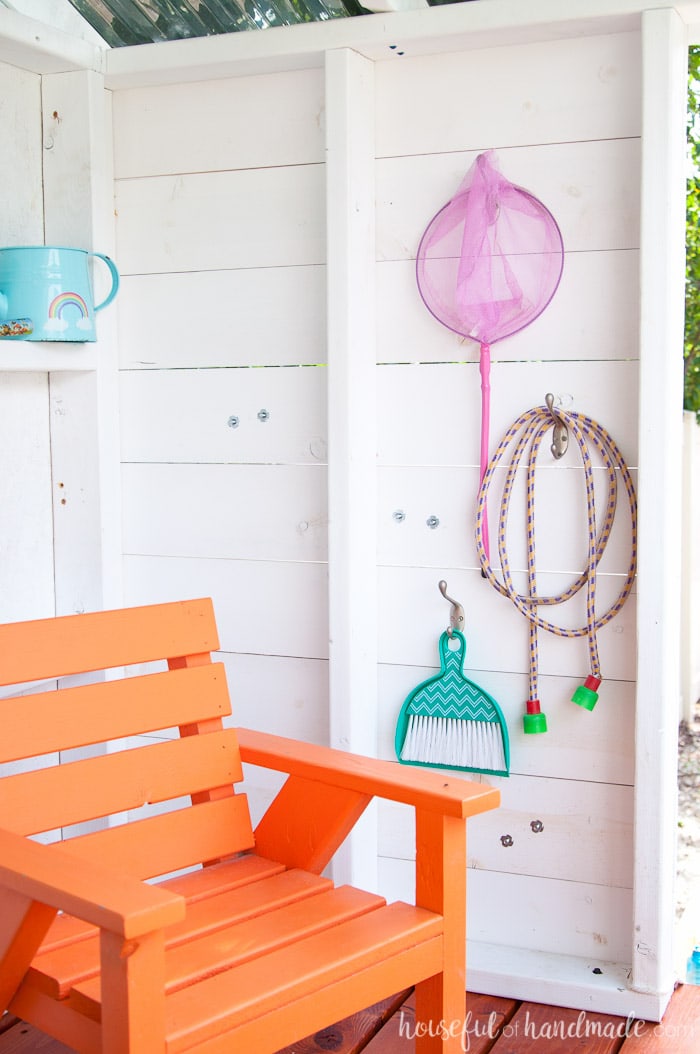
The open framework was the perfect background for adding some shelves to the DIY playhouse. This idea was one of my daughter’s favorite from our inspiration playhouse, the Handmade Hideaway by The Handmade Home.
Because my daughter is a bit of a hoarder, shelves to store all her knick-knacks was a must.
But don’t think I didn’t add a lot of fun things for our son to the playhouse too! He loves the climbing wall (and what boy wouldn’t).
It was also his request to add a rope ladder to the outdoor playhouse. Something about a rope ladder just spoke to him.
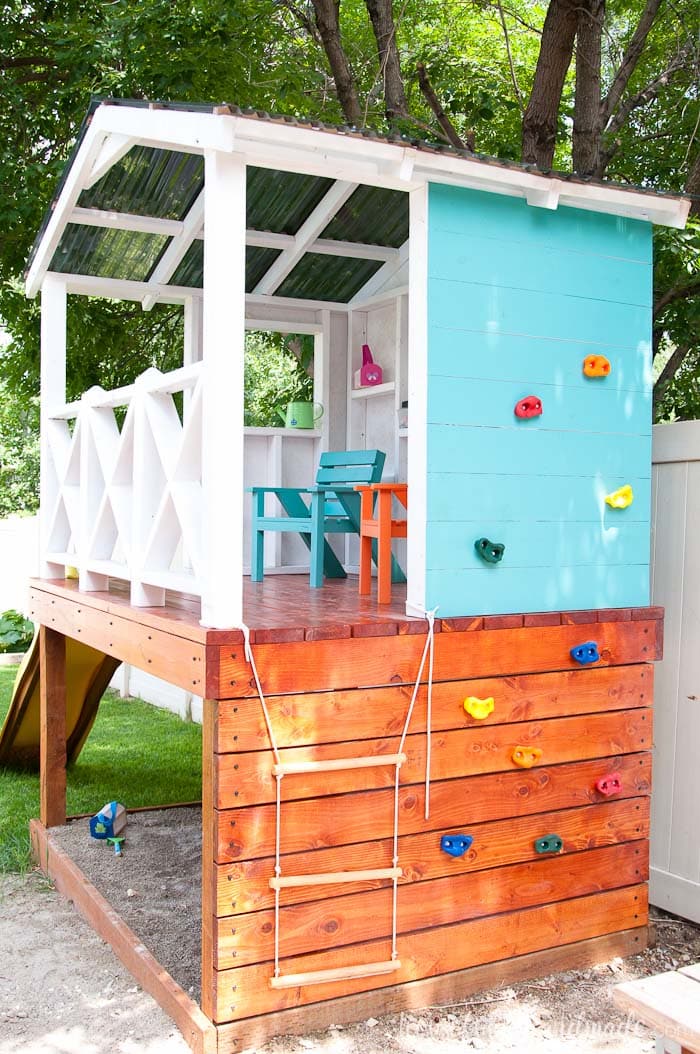
And let’s not forget to talk about the sandbox! I have a love/hate relationship with the sandbox.
I love that my kids play in it all the time… for hours. They love to dig and the new sandbox keeps them from digging where they are not suppose to.
However, their clothing is always covered in sand! They leave sandy footprints everywhere they go. And I have to sweep right inside the door to the backyard constantly.
But it’s a small price to pay for imaginative & active kids.
However, the absolute best part of our new backyard playhouse is that we built it for less than the cost of buying a boring swing set!
Now I do love a swing set. And my daughter is sad her playhouse did not come with swings. But they have a much larger footprint. We would have to loose most of our grass area to a swing set.
Instead we created the perfect playhouse, clubhouse, activity area and sandbox, complete with a slide, for under $775. And there is still plenty of room for the kids to run around in our tiny backyard!
So if I have convinced you that you also need a outdoor playhouse for the kids in your backyard, I have all the details on how to build one yourself.
The posts all include detailed tutorials, build plans, supplies lists, and cost breakdown. And everything was done with basic tools. Time to get building!
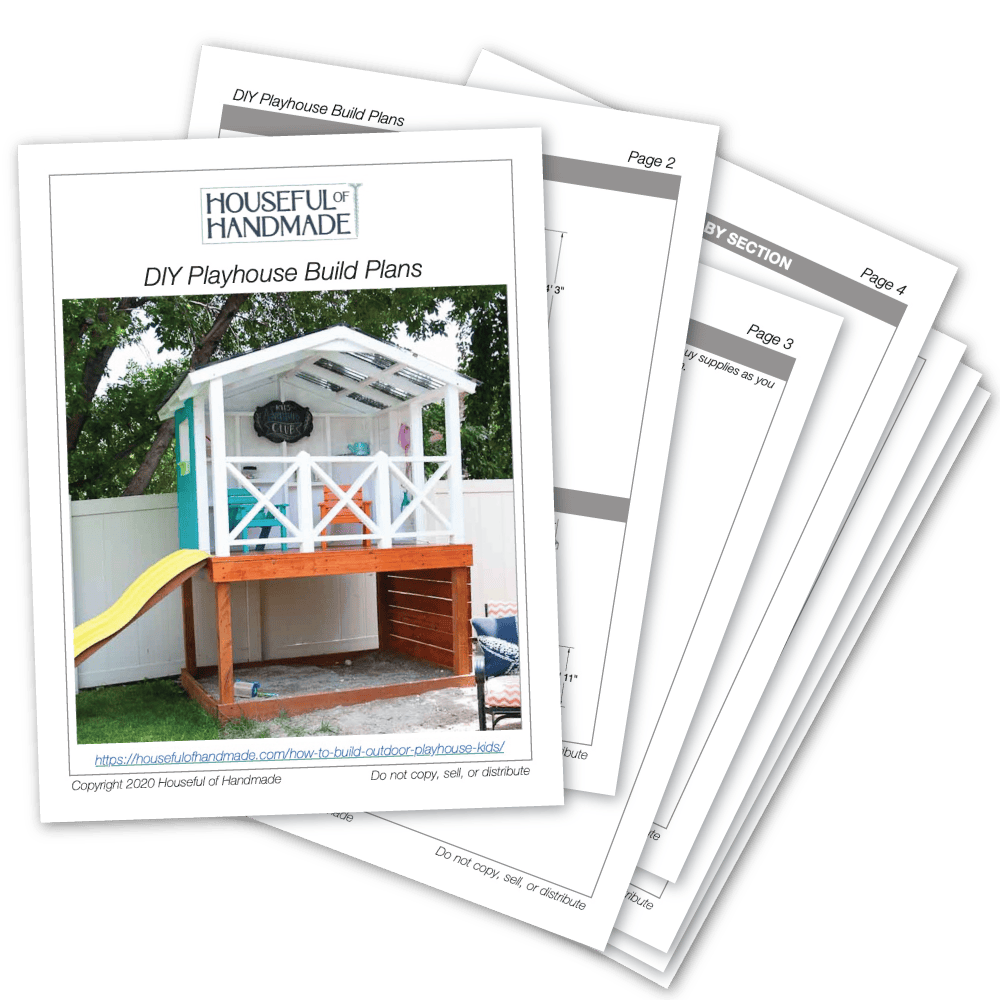
Printable PDF Plans
Prefer to print the instructions?
Grab the complete build plans (from all 5 posts) in one easy to follow printable PDF here. The plans include:
- List of recommended tools
- Detailed supply lists
- Easy to read cut list table
- Step-by-step instructions with diagrams & pictures
- BONUS: 3D SketchUp file
Material and cut lists include the totals for the entire build, as well as a break down for each step. Makes it easy to buy all at once or purchase as you go.
Click the link below for everything you need to build your own playhouse and so you can get the kids outside playing for hours on end!
How to build a kids wooden playhouse:
- Build the deck out of pressure treated lumber (deck plans here).
- Complete the 3 walls, including painting, then attach to deck (wall plans here).
- Build a railing on the open wall (railing plans here).
- Attach the slide and climbing wall for extra fun (slide & climbing wall plans here).
- Build roof rafters and attach roofing materials (roof plans here).
- Enjoy active kids all year long!
Like this post? Don’t forget to subscribe to my weekly newsletter so you never miss out on all the DIY goodness.
How to Build a Wood Playhouse
Get the kids outside by building them a playhouse! This small scale playhouse only has a footprint of 5'x7' (not including the slide) so you can fit it into any backyard.
Our DIY Playhouse: The Deck
It all starts with a sturdy playform. The deck is built to hold the playhouse and includes a sandbox underneath.
Our DIY Playhouse: The Walls
Next you install the walls! These walls are easy to assemble from 2x4s and are sheethed in a couple sheets of outdoor siding.
Our DIY Playhouse: The Railing
Add a railing to the front of the playhouse to keep it open, but also keep the kids safe. The beautiful X railing looks harder to build than it actually is.
Our DIY Playhouse: The Slide & Climbing Wall
Turn the unused walls into more fun for the kids by adding a climbing wall. The lower deck and upper wall make a the perfect place for you little monkey.
Our DIY Playhouse: The Roof
Protect your playhouse (and the kids) from the weather with a beautiful roof. The transparent material is perfect for letting in light, but keeping out harsh UV rays.
Do you know the stain color of the deck?
Hi! I love your playhouse and have been trying to build the courage to start on one of our own for my three kids. Curious if you might have any estimates on what it cost you to build this vs what you may estimate it would cost today with the price of wood being so much higher? I’m a total novice to building anything I just want to be sure I can actually finish this!
This looks like a fun project but I’m curious about how long it will take two people to build. Reading the comments it seems to take a month for most people but how many hours would it take. Basically can it be done within two or three days?
I do not believe you could do it all in 2-3 days. My husband and I worked on it every weekend for a month to get it done. And I painted it during the week. If you had one week, you could probably do it.
@Ryan Stutchman, I am pretty experienced and had my husband to help and probably took about 4 full days. Overall took one week.
Although I am waiting till fall to stain the deck.
Thank you for taking the time to put together such detail plans in the PDF. Makes putting this together soo much easier!
Glad you are enjoying it, I hope your family enjoys the finished product as much as we did.
What age are your kids? My son is almost 5 and wanting to build this in our backyard but wondering with the size how long kids might play in it. Trying to decide if worth it 🙂
My daughter was 5 and my son was 8 when I built it. My son only used it for another year, but my daughter used the playhouse a lot up until we sold our house when she was 8.
I’ve admired your playhouse for a long time! Since my grandchildren were born (5 yrs ago) I had an idea that I would like a playhouse in our backyard. They live nearby and I want them to come over often. My son works for a construction company and his job was shut down when Covid began. I talked him into helping me build the playhouse while he wasn’t working. We went all out for the first three weeks and then he went back to work so we worked on it occasionally on weekends. We live in Southwest FL so when the heat got too much for us we stopped for the summer, picking back up around the holidays. It is finally done! The kids are loving it! I added a few fun things like a (make-believe) telecope, a phone and a pulley system (which is a huge hit!). Thank you so much for sharing your plans and experience! (And to my son who gave up a lot of his time to build it – these kids are his nephew and niece).
If you want to see a few photos, you can go here:
https://photos.app.goo.gl/LyEBqiU2S86Gp5Fn8
Your playhouse turned out amazing! I love the colors you chose. I am sure the grandkids will never want to leave. Love the telescope and pulley idea. My kids kept asking for a pulley, maybe on their next playhouse…
This is soo fantastic. I live in germany and I want to know, if there a version of your plan with meters instead of inches? That would be great 🙂 Best regards André
No I don’t have a plan in meters since I work in inches.
Just finished building the playhouse. Your directions were perfect for a first time builder like myself. I modified the front railing to add a ladder which worked out great so now we can get up there with no problem. Working on your Adirondack chairs now!!
Any suggestions for adding a swing portion to this? Or do you have a plan that includes swings?
I just completed my own slightly tweaked build of this and both me, my wife and most importantly my daughter love it. Thank you for the inspiration and plans I bought.
The changes I made was that I dug a 1ft deep whole to place it in to keep the help down and thus hopefully not annoy neighbors. I also changed the roof to be slanted forwards. Together this allowed the back of the playhouse to not go above an 8ft high fence at the back of our property. The whole thing is mirrored because that fits better with our layout. Finally I added a climbing rope attached above the window.
Here are some pictures of the finished build
https://photos.app.goo.gl/kz2J7teQ4wBfvPqs8
Only thing left now is decorating the interior although my daughter has already started bringing her toys over.
Wow! It turned out amazing. Great job on making it work for your space. And I love the climbing rope you added. Such a fun idea.
Hello,
I live in Houston, Texas. The climate is hot and humid for almost 8 months.Which wood do you recommend to build the playhouse?
I would choose a wood that is made for severe weather. It is more expensive, but will last longer. We have been using it for outdoor projects in our new Texas home and it has been worth the money.
We just finished our build of a modified version of this! We had a new retaining wall put in and I thought a playhouse would go great on top of that! So we modified it to have a larger deck on top of the retaining wall (16 ft) and put the house in the middle. We made a ladder on one side and a climbing wall on the other with a fence around it to keep the kiddos safe.
https://photos.app.goo.gl/N3yWpNTHUiJnZTQi6
Here is a picture if you would like to see the finished product!
Thank you for the plans!
What a wonderful playhouse you made for your kids! Love the way you made it work in your own yard. I am sure they will get lots of use out of it!
Hi – love it!! Did you bury your posts below grade, or does the base sit on ground level? If it’s the latter, do you find it stable enough up top? Could an adult stand on the platform? Hoping to build something similar in my backyard, and really don’t want to put concrete in the ground if I can avoid it… thanks!
I would also like to know if you had to cement the posts into the ground? Thanks! Looking forward to making this for our little ones
No they are not buried and we have had no problems with it being stable. It is very solid! Yes an adult can stand on it, I did many times while building it. Just make sure the ground is leveled well when you put the platform on it.
How much of this required 2 people. I’m thinking of modifying for a 4×5 space with turf (already layed) as the base. But I’m a widow so if there is anything that is a two person step I’m SoL. Your design is beautiful – way better than a cookie cutter playhouse.
If you build it in place you can do it without help. I built the walls and deck and then moved them into place, they were heavy so I needed a second set of hands.
I’m wrapping up building my own slightly modified version of this and the only part where I needed help was carrying the back wall back (I also built the 3 walls separately and moved them in place). If you can just get a friend to come over and help for 10 minutes once you should be OK to do the rest of the work yourself.
That is great news! Since my husband was home each night I definitely relied on his strength 😉
About how many hours do you think it took to complete the entire project? I just bought the printable PDF plans
I break it down in each post, but I don’t have a total off the top of my head. I worked on it over about a month, with kids and only had husbands help on the weekend.
Hello, I am going to start building this for my daughter. Shes 8. Im excited. My only concern is winter. I live in Syracuse NY, one the snowiest places in the world. A roof will not prevent snow build up lol. Shld I get pressure treated wood for all of it or wld me sealing it like you did be good enough? Pressure treated wood is ugly. I was told I cant paint or stain for at least a yr? Did you do that for the bottom? Is that true? Thank you 🙂
I did stain the pressure treated lumber before a year, but Utah is very dry. Not sure if humidity will cause problems for that??? If you seal the wood with outdoor sealers it should be okay. But if you want to be extra sure, use cedar or redwood which are what most places use for decks because it handles the elements so well (but it is so much more expensive).
I would love to know what color blue that is? Does it hold up well outside? Thanks so much!
The blue is called Aqua Rapids from Behr. Make sure you buy an outdoor paint, those have UV protection so it will hold up to the elements.
What do you do for winter to keep this protected? We live in IL and we sometimes have harsh winters. Thanks! Liz
We do nothing to protect it in the winter. The roof keeps most of the weather out, however the snow gets in a little bit. But because the wood is sealed/painted it has been fine. You will need to treat it like any outdoor furniture/deck and reseal as needed.
We love this post, thank you for sharing!
This diy treehouse was my inspiration for my daughter’s playhouse, it was a bit smaller and I gathered surplus wood from the old house 🙂
I bookmarked this site and kept on looking at it while building our treehouse.
Here’s a somewhat video montage I made of the build ;p
https://youtu.be/YyYG_8Wwk6M
Super thanks again!
Awesome video! Thanks for sharing. Love the way you made it work for you.
This is fabulous and I’ve been scheming how to do this in our backyard! Thanks for the resources. Question: did you lay landscape fabric under the space where the sandbox goes? And also, have you found since using this for a while that the sandbox portion is ok left uncovered, or would you recommend putting a cover of some sort on it? Thanks again!
We did not put landscaping fabric under the sand, but it would be a good idea. I have to pull grass out a couple times a year. If you have animals, it would be a good idea to have a cover or fence around it. We added a make-shift fence later to keep our dog out of it.
Hi there – How high is the playhouse. I see the base is 5′ X 7′. How tall is it from the ground to the first level (where the slide is) and how tall is if from the floor level to the roof?
It is right around 10′ tall at the peak of the roof. The side walls are 4’3″ tall at the edges and about 5′ tall in the center.
Thanks for this! Followed the plans and it turned out great!
Yeah! I am so happy to hear. I’d love to see it, you can email me pics or tag me on social media.
Hi there. Love the playhouse and the plans you posted. Could you post the total dimensions (not including the slide? I’m also curious as to how much space you have underneath where the sandbox is. Thank you!!! Looking forward to building this soon.
The total floor plan is 5′ x 7′ without the slide. There are 48′ under the deck in the sandbox area. It will be less depending on how much sand you fill it with.
Me and my husband just finished this week on building it . It came out great we spent around $700 but that includes slide, rock climb accessories, telescope. We had to use most of pressure treated wood due to us living in Mass. We followed step by step and everything worked out great! The playhouse is completely solid and will last awhile .
Yay! I am so happy to hear the build went well. I’d love to see photos of the completed playhouse, you can email me or tag me on social media 😉
How much did this cost total? We are looking go build this for my son this summer
I include cost breakdowns of what I spent on each individual sections tutorial. Our grand total was around $750.
Just finished this project last night. I want to say thank you so much for doing the leg work in making the plans and materials lists and sharing them for others to enjoy. You did an awesome job of explaining step by step how to complete the playhouse and the photos were extremely helpful too. Was wondering how do I share a photo with you of the finished product? I will definitely continue to look for more fun DIY projects from your page. Thanks again!
I would love to see a photo! I am trying to figure out a way for you to share on my website, but don’t have a solution yet. You can always email me or tag me on social media!
Did you use satin or semi gloss for the ultra white and aqua rapids paint?
What type of wood did you use when you say “regular wood”, as in the untreated 2×6 boards? About to start this project for my 3 and 5 year old daughters. Thanks for your post!
Yes, I mean the regular kiln-dried stud boards. I only used the pressure treated for ground contact.
Thanks for the quick response! What I meant was, did you use Doug Fir or another species? I priced out several different types of wood and Doug Fir #2 premium was the only one that was even in the ballpark of the cost you were describing. The nicer woods like redwood came out to over $600 for the deck alone!
Sorry, yes I just used Doug Fir. I sealed/painted it well with outdoor products to help it last outside (plus it has a roof) and it is holding up great!
Ok, great. Thanks again for your replies and the project idea!
As your kids get older could you add a hammock for them to swing in since you couldn’t have a swing set?
Love this idea! Or a hammock for me to swing in 😉
This is fantastic! This is probably what our 3 boys are getting for Christmas! Do you have a set of complete plans? (Rather than 5 separate posts.) I’d love to have 1 big supplies list and try to negotiate some local deals for materials!!! Thank you!
The boys are going to love it Andrew! Such a great present. Unfortunately I do not have a compiled set of plans. I do plan on making all my build plans into printable PDFs but they are not there yet. Sorry!
This is adorable! I would love to make this even a little bit bigger and have it for the kids when they get older as a little escape place for when they fight or need a quiet place. Thanks for sharing! Love it!
Thank you Beth. It would be the perfect spot for an escape. Unfortunately we didn’t have room to make it larger, but I plan to build another one in the next house with more space. Someday….
After building it do you think you could disassemble and move? We want to build it and we live in a rental. Like you, I’m done waiting to make something like this for my kids. My son is going to be 7 next year and has been asking for something since he was 2!
You could probably just remove the top from the deck and move it in 2 pieces if you have 4 strong men to do it. I have not tried, but would guess it would be possible.
Kati, this is incredible! I imagine I would’ve spent countless hours in this playhouse when I was a kid. The slide and sandbox are perfect additions!
I agree! As I kid I would have ruled this playhouse. Sometimes I still play in it with them just because I can 😉
Kati- this turned out so, so good! I bet your kids love it! I really like how the roof is see through. Such a fun detail!
Thanks so much Ashley! The kids are loving it. They have piled the shelves with any toys I allow them to take outside and love showing it off to their friends. I know they will spend lots of time in the playhouse!