I think I am turning into my mom… or grandma. Over the years I have collected a variety of treasures.
Beautiful items that were purchased on vacations, at shops, etc. that need a place to live. My mom always had a curio cabinet. A place to display all the trinkets she loved.
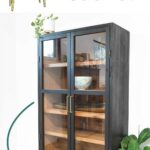
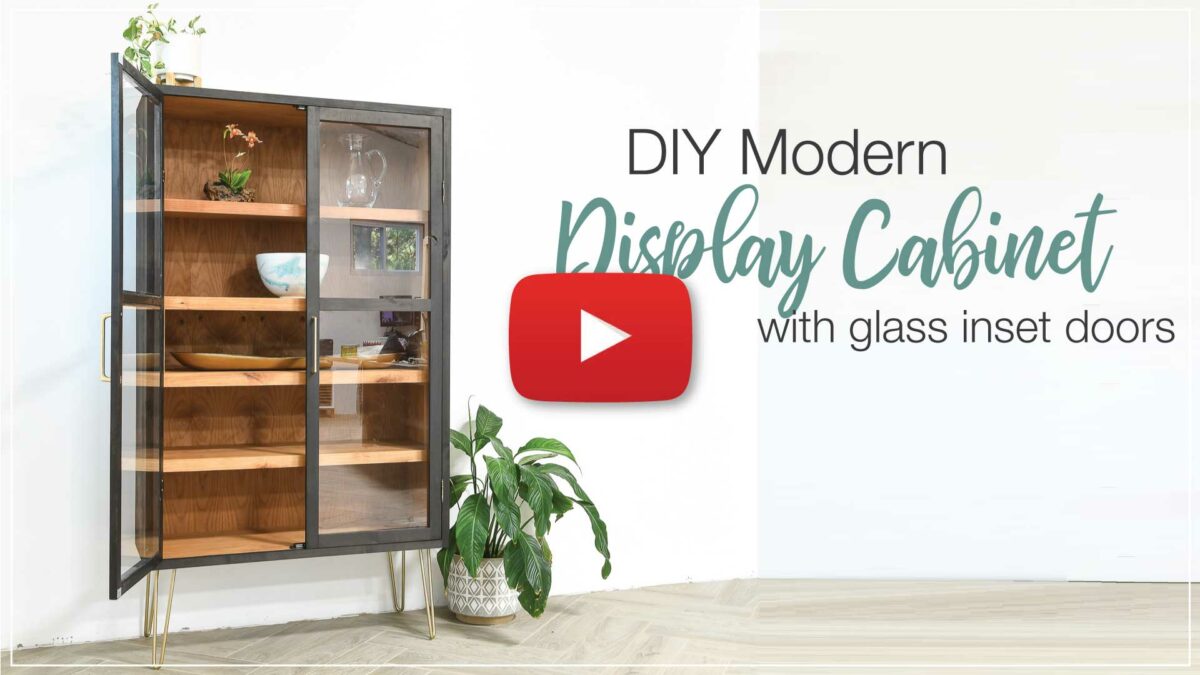
But I wanted something a little more modern than a curio cabinet, so I partnered with Kreg tools to build a modern display cabinet for my treasures.
This post may contain affiliate links. As an Amazon Associate I earn from qualifying purchases. Click here to read my full disclosure policy.
And I built the entire cabinet using only the Adaptive Cutting System (ACS) to make all the cuts.
If you do not have the Kreg ACS, don’t worry! You can still build this beautiful cabinet.
You will need a circular saw (preferably with a guide track for straight cuts) or table saw to cut down your plywood and rip some boards to width.
What is the Adaptive Cutting System?
The Kreg Adaptive Cutting System (ACS) is a complete cutting system. It would be a great tool for anyone working in a small space because it completely folds away for storage and could replace a miter saw, circular saw, and do a lot of the cutting of a table saw too!
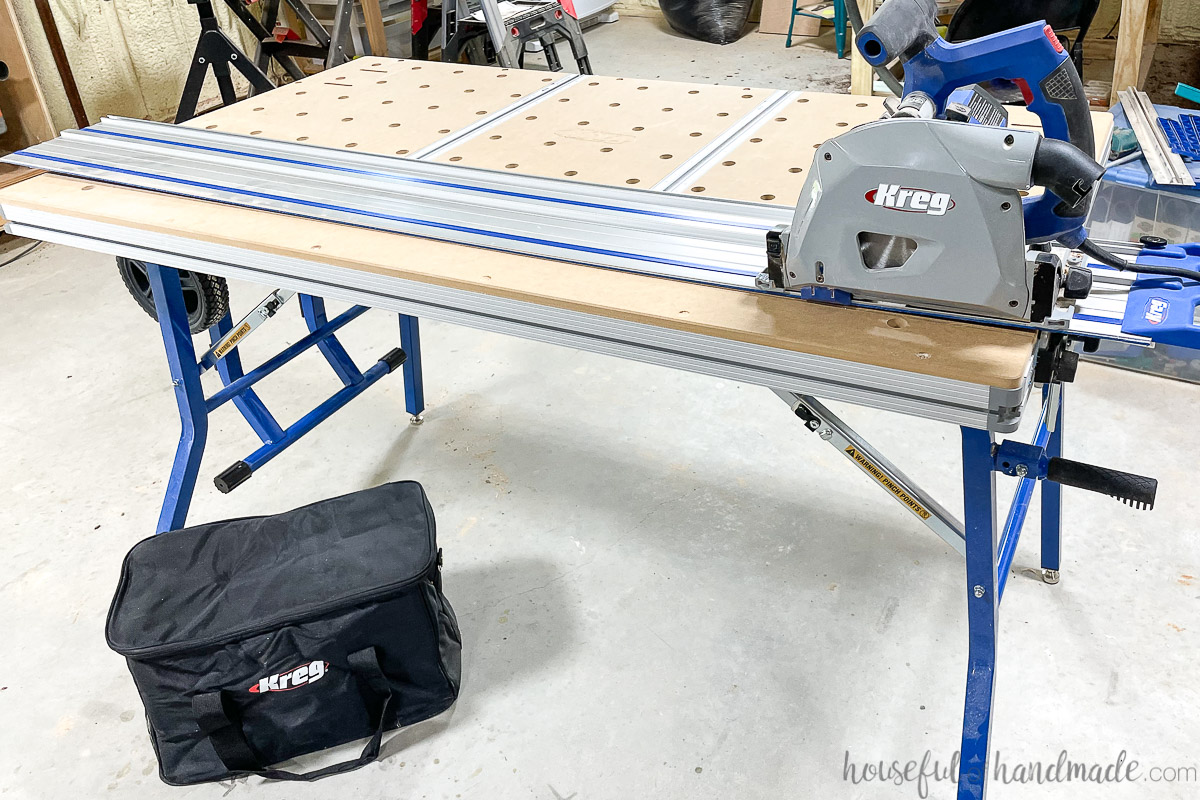
The ACS has 2 parts: the plunge saw with track and the table.
The plunge saw can be used with or without the table. There are even track extenders to give you more cutting length than the 62″ track that it comes with.
The plunge saw is a lot less intimidating than a table saw, circular saw or miter saw because the blade is inside the saw. You place it on the track and then plunge the moving blade out into the wood to cut.
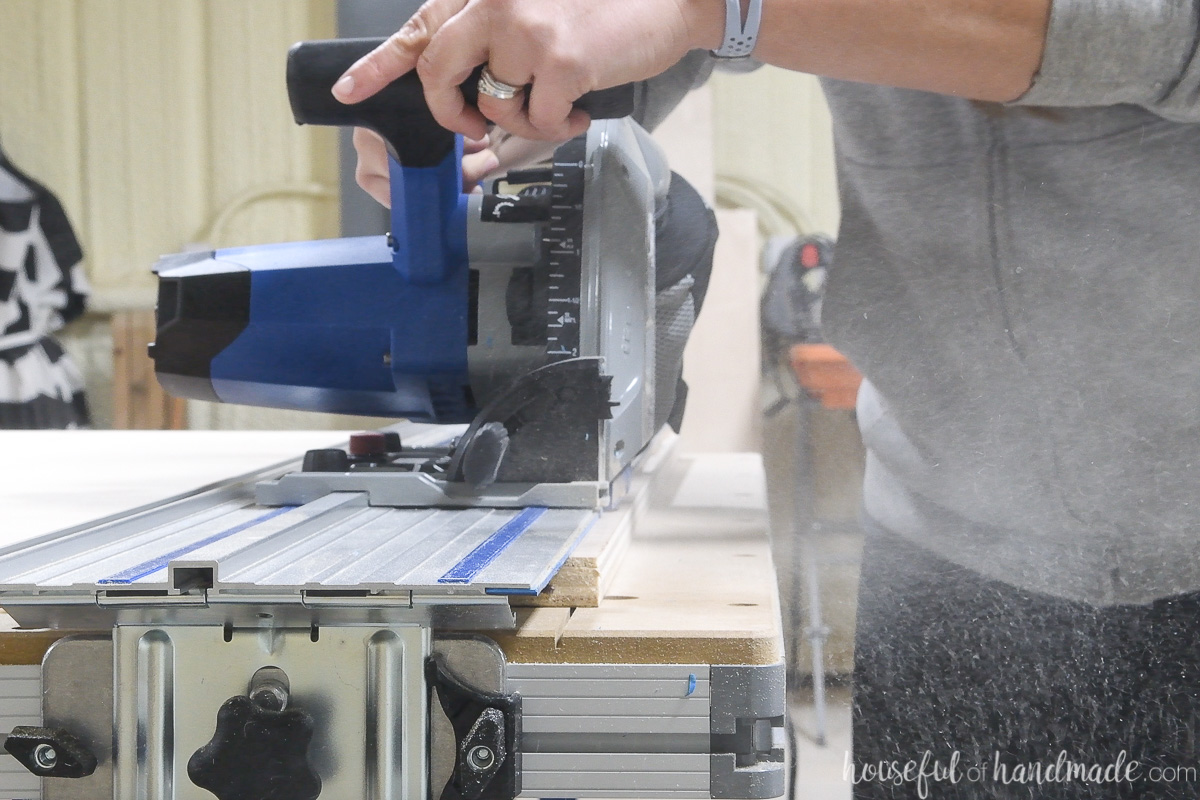
And the track gives you perfectly straight cuts. Plus you can use the blue edge to line up your cutting line because it is trimmed to the saw. So you get perfectly accurate cuts!
The table is great for setting up repeatable cuts. You can use the Versa Stops and measuring guides to set up repeatable cuts just like on a table saw.
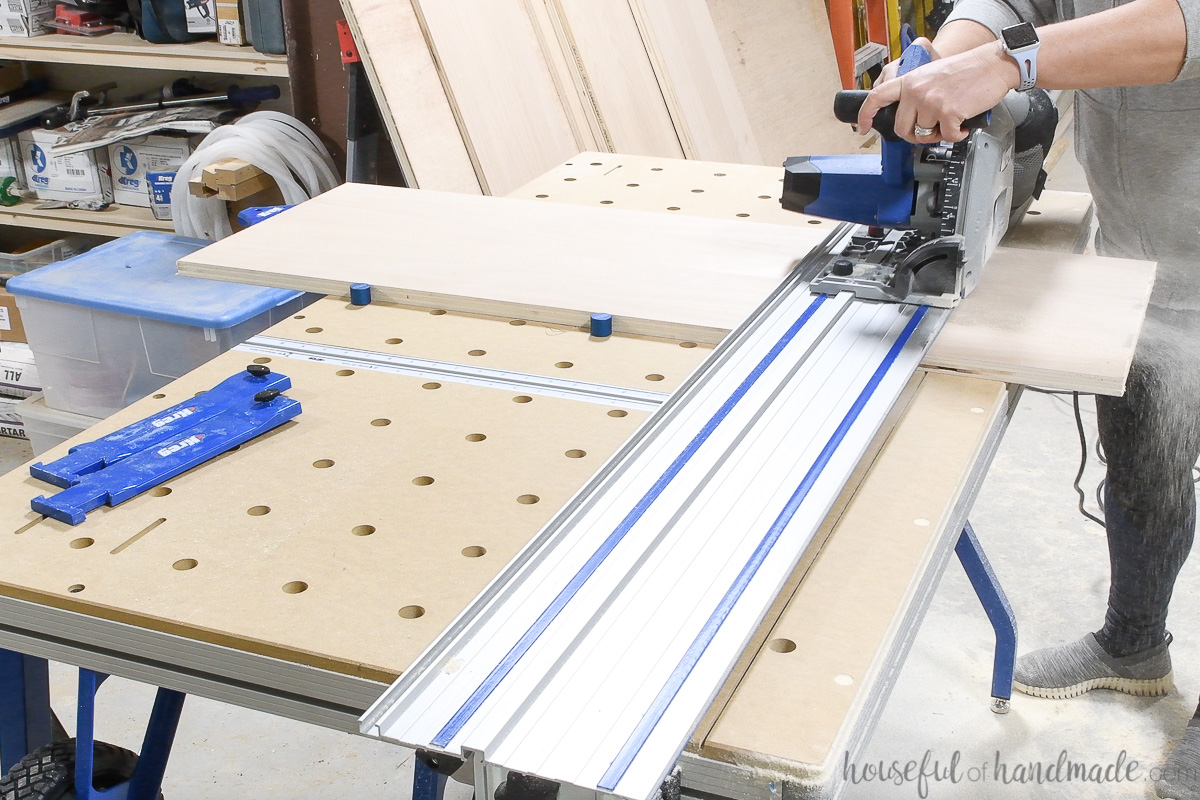
This makes sure your pieces are exactly the same. Which means you have nice square boxes and frames.
Plus on the table you can easily make angled cuts. The table has laser cut holes for stops at perfect 45 degree angles for miter cuts. Or it comes with a miter gauge to get any other angle you need.
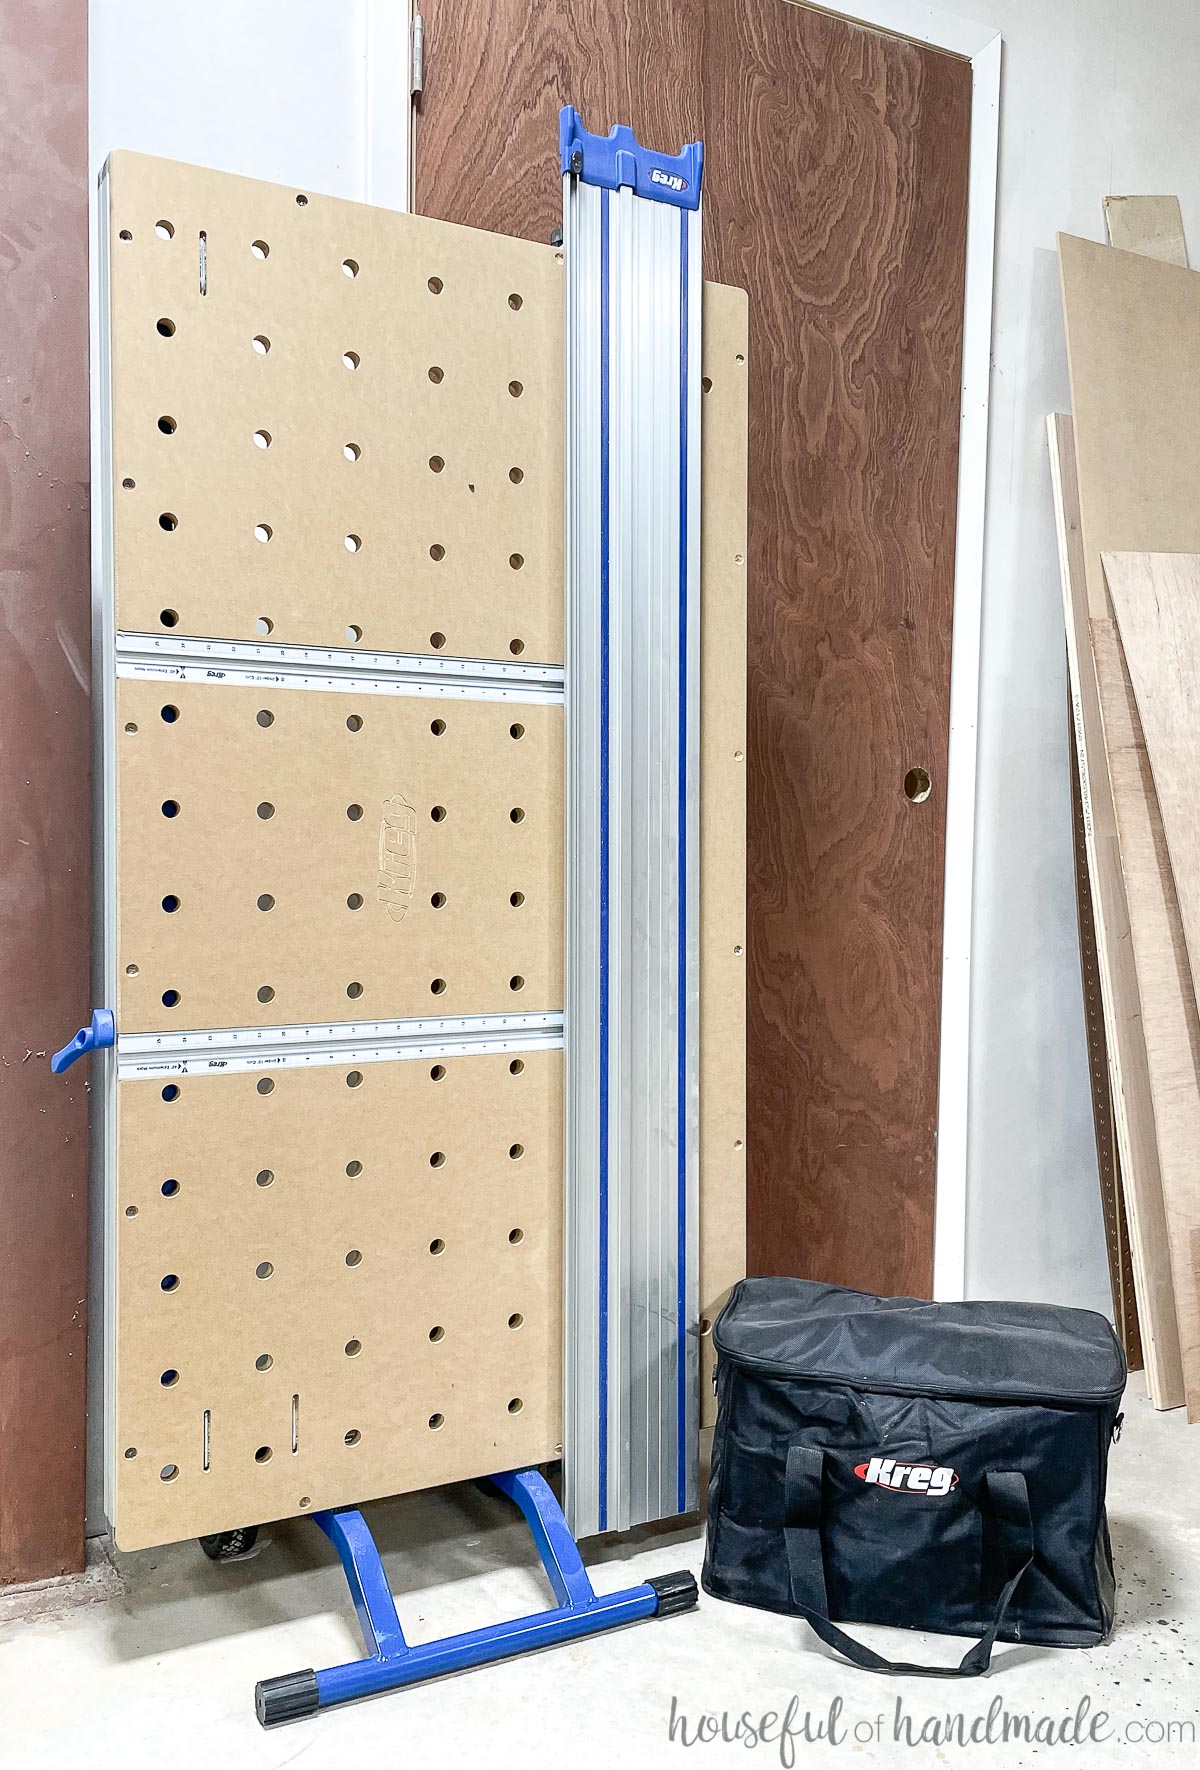
Then when you do not need it, you can quickly fold the table flat and wheel it out of the way!
Now back to the beautiful cabinet 😉
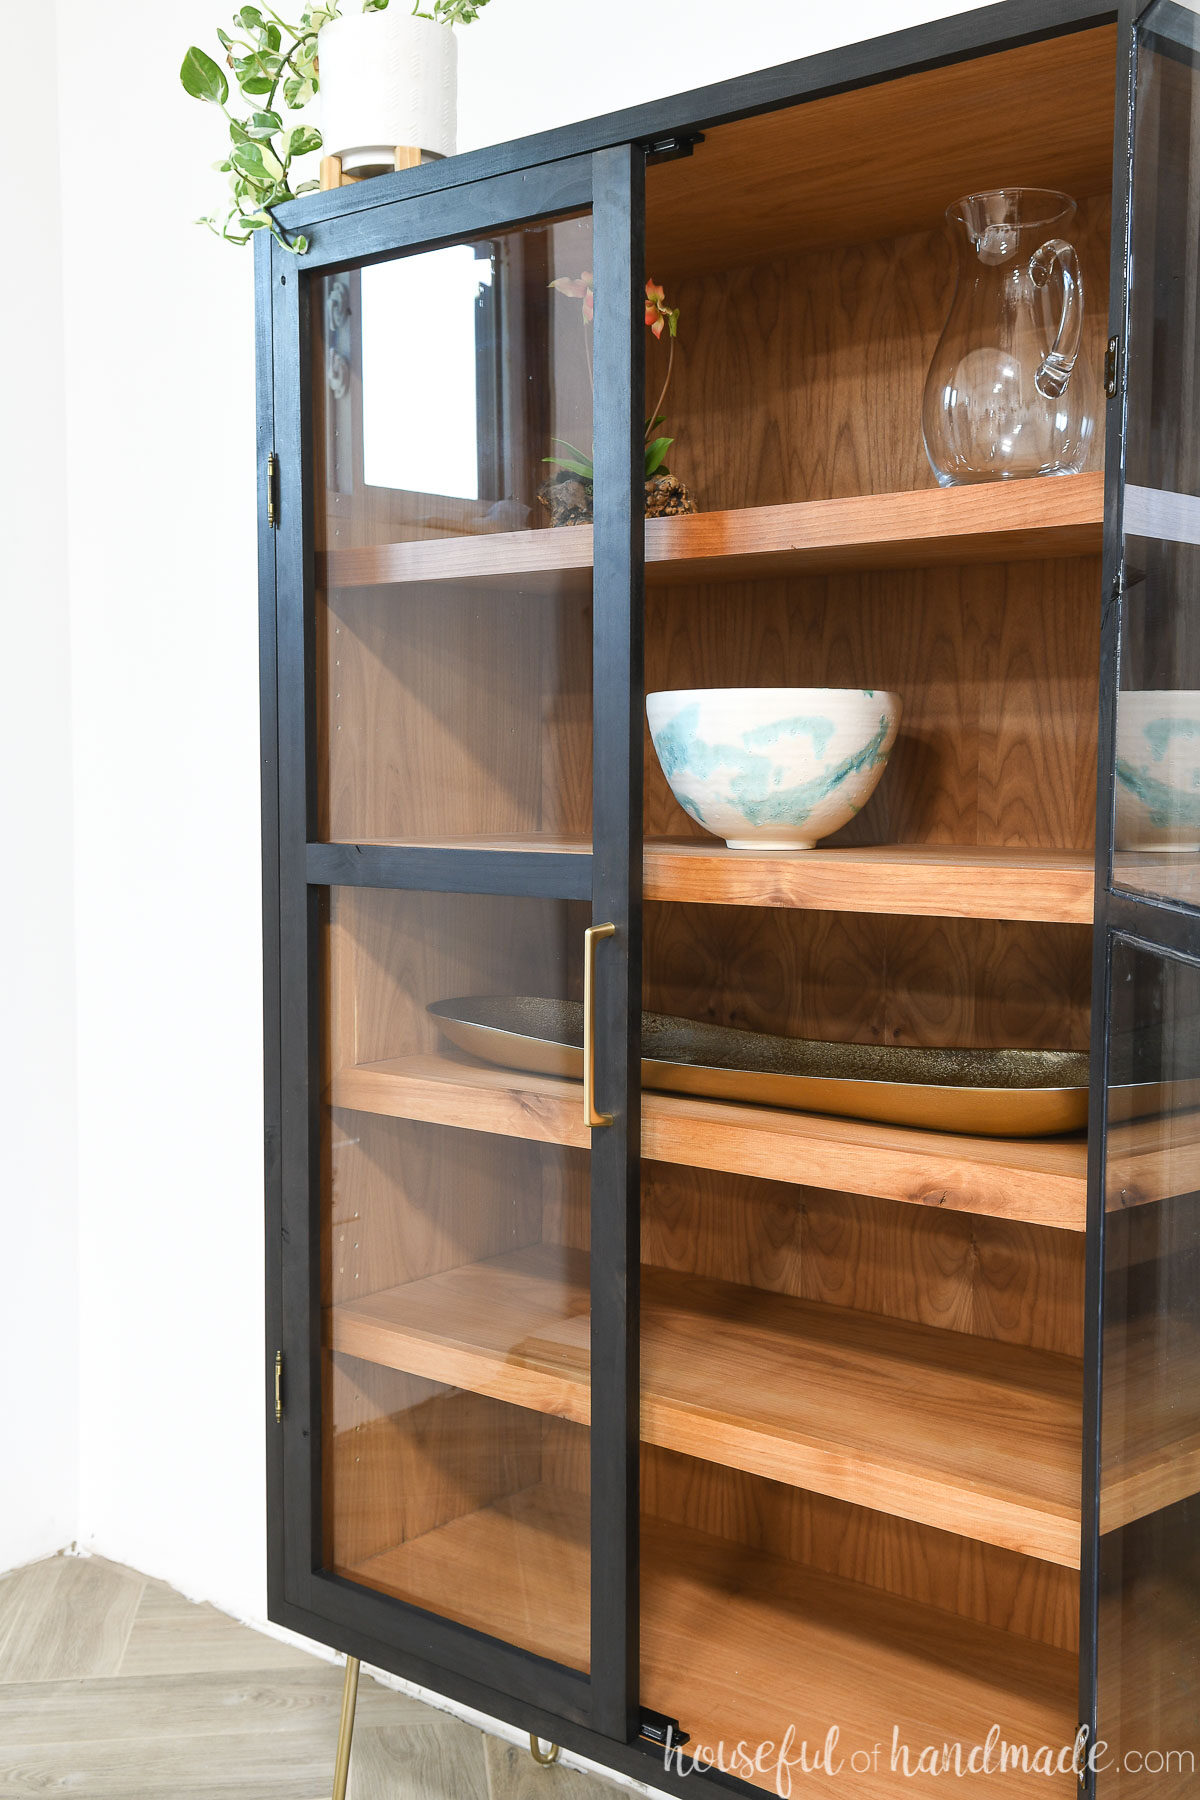
Glass Door Cabinet
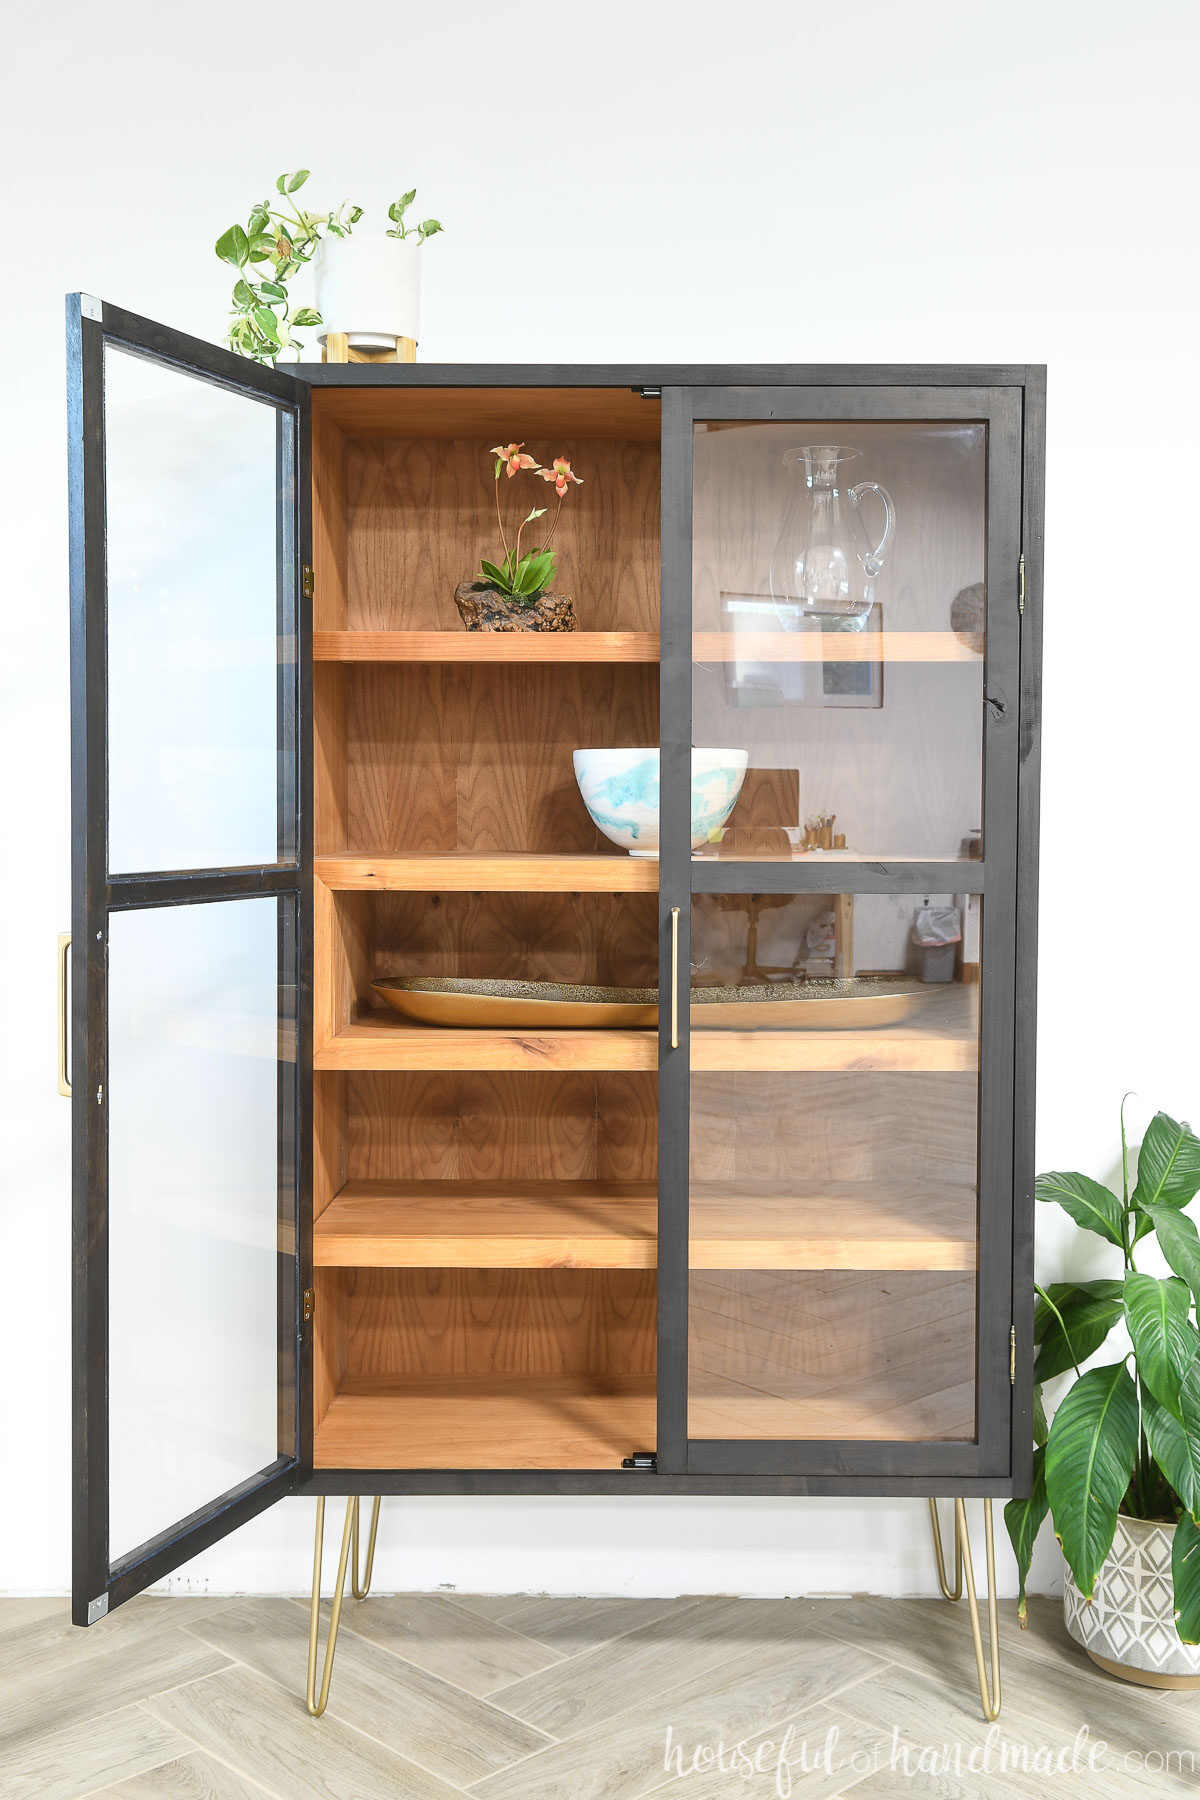
A display cabinet or curio cabinet is the perfect place to highlight and store the beautiful things you collect over the years.
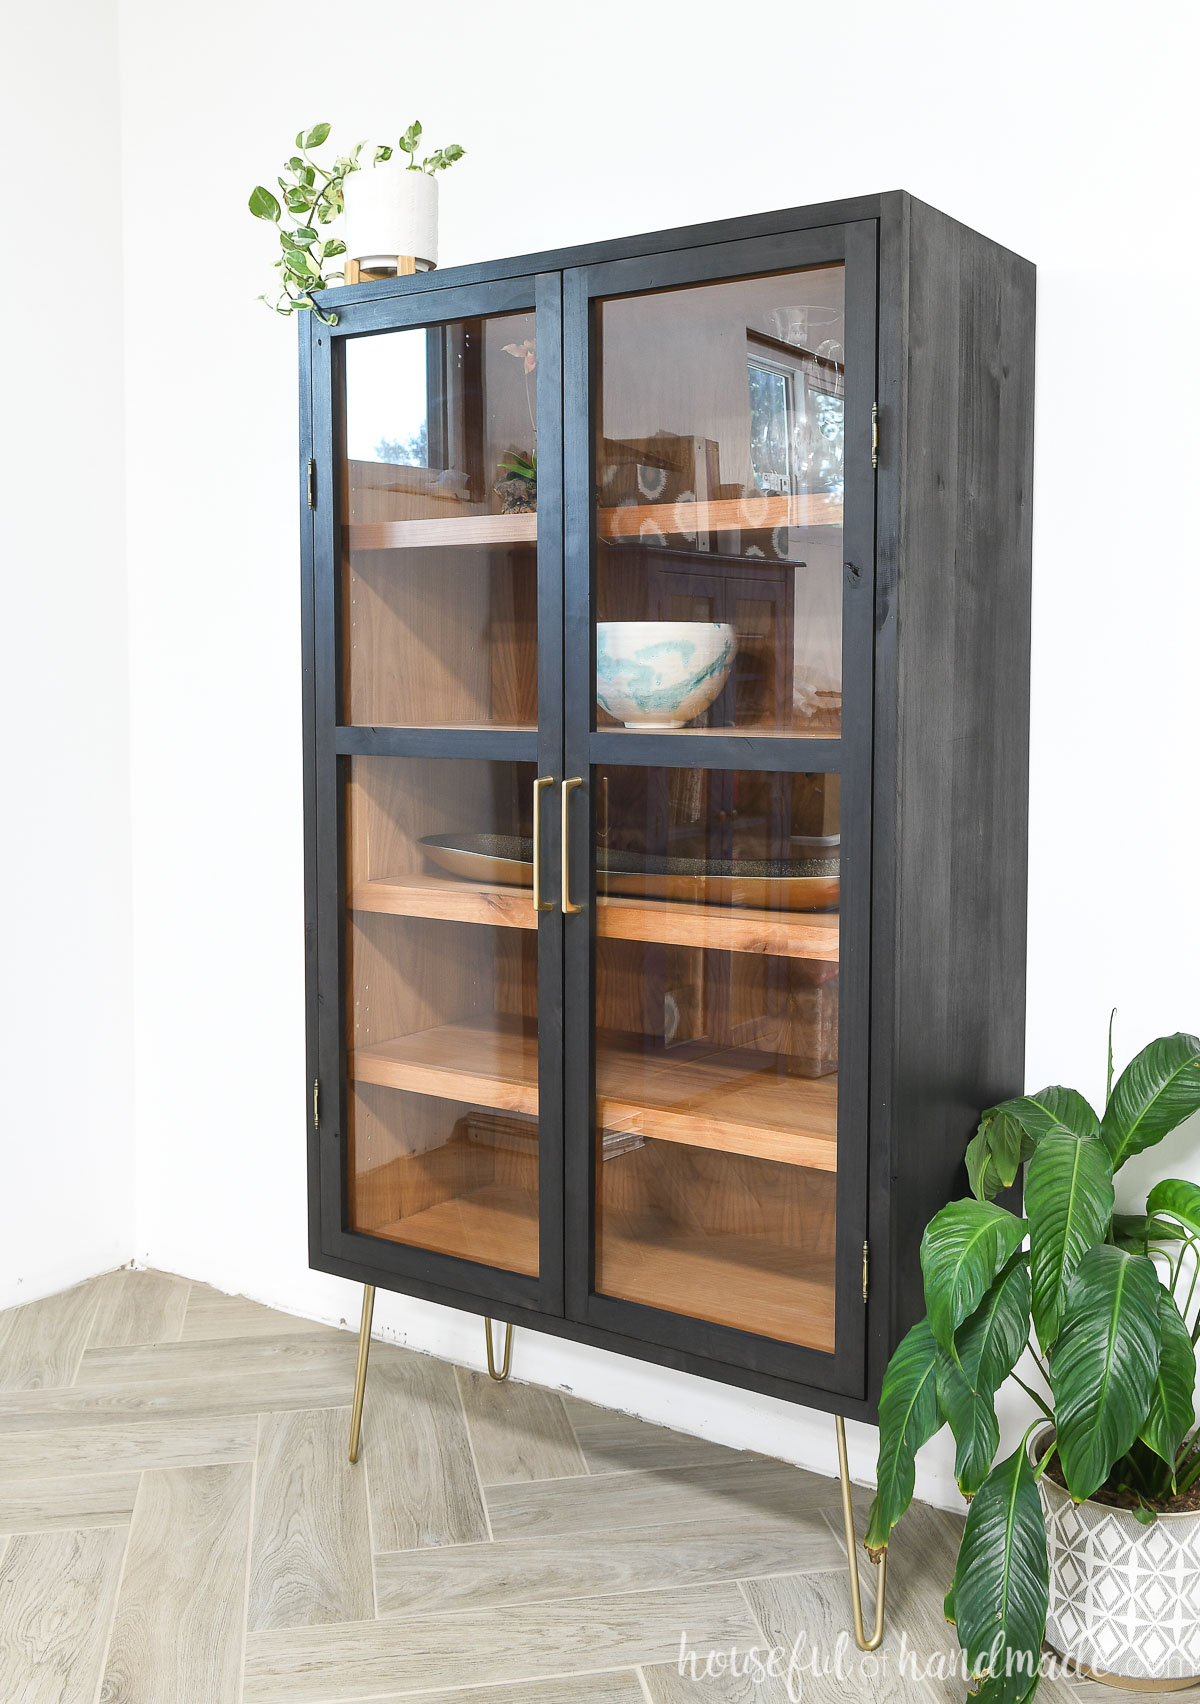
The main part of a display cabinet are the glass front doors to show off everything inside. DIY glass cabinet doors might seem intimidating, but they are actually quite easy to build!
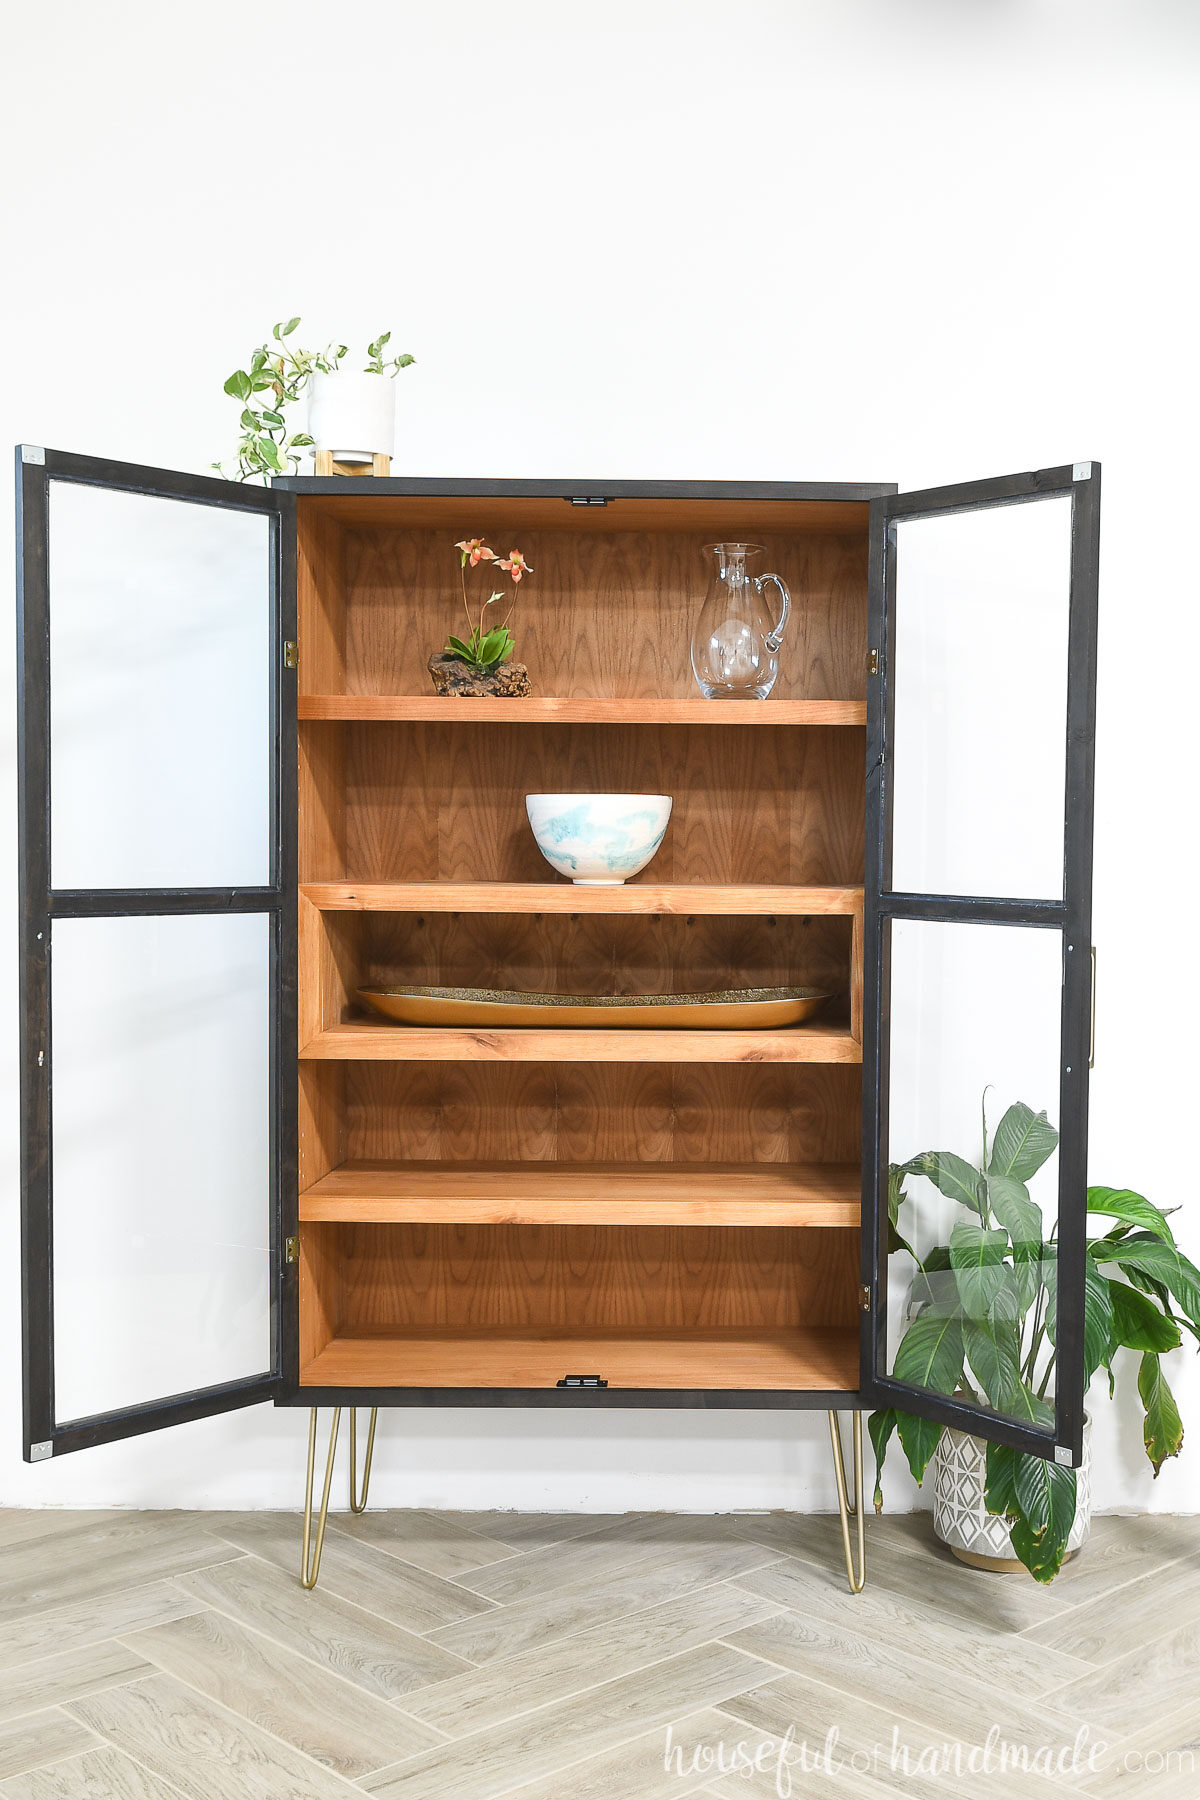
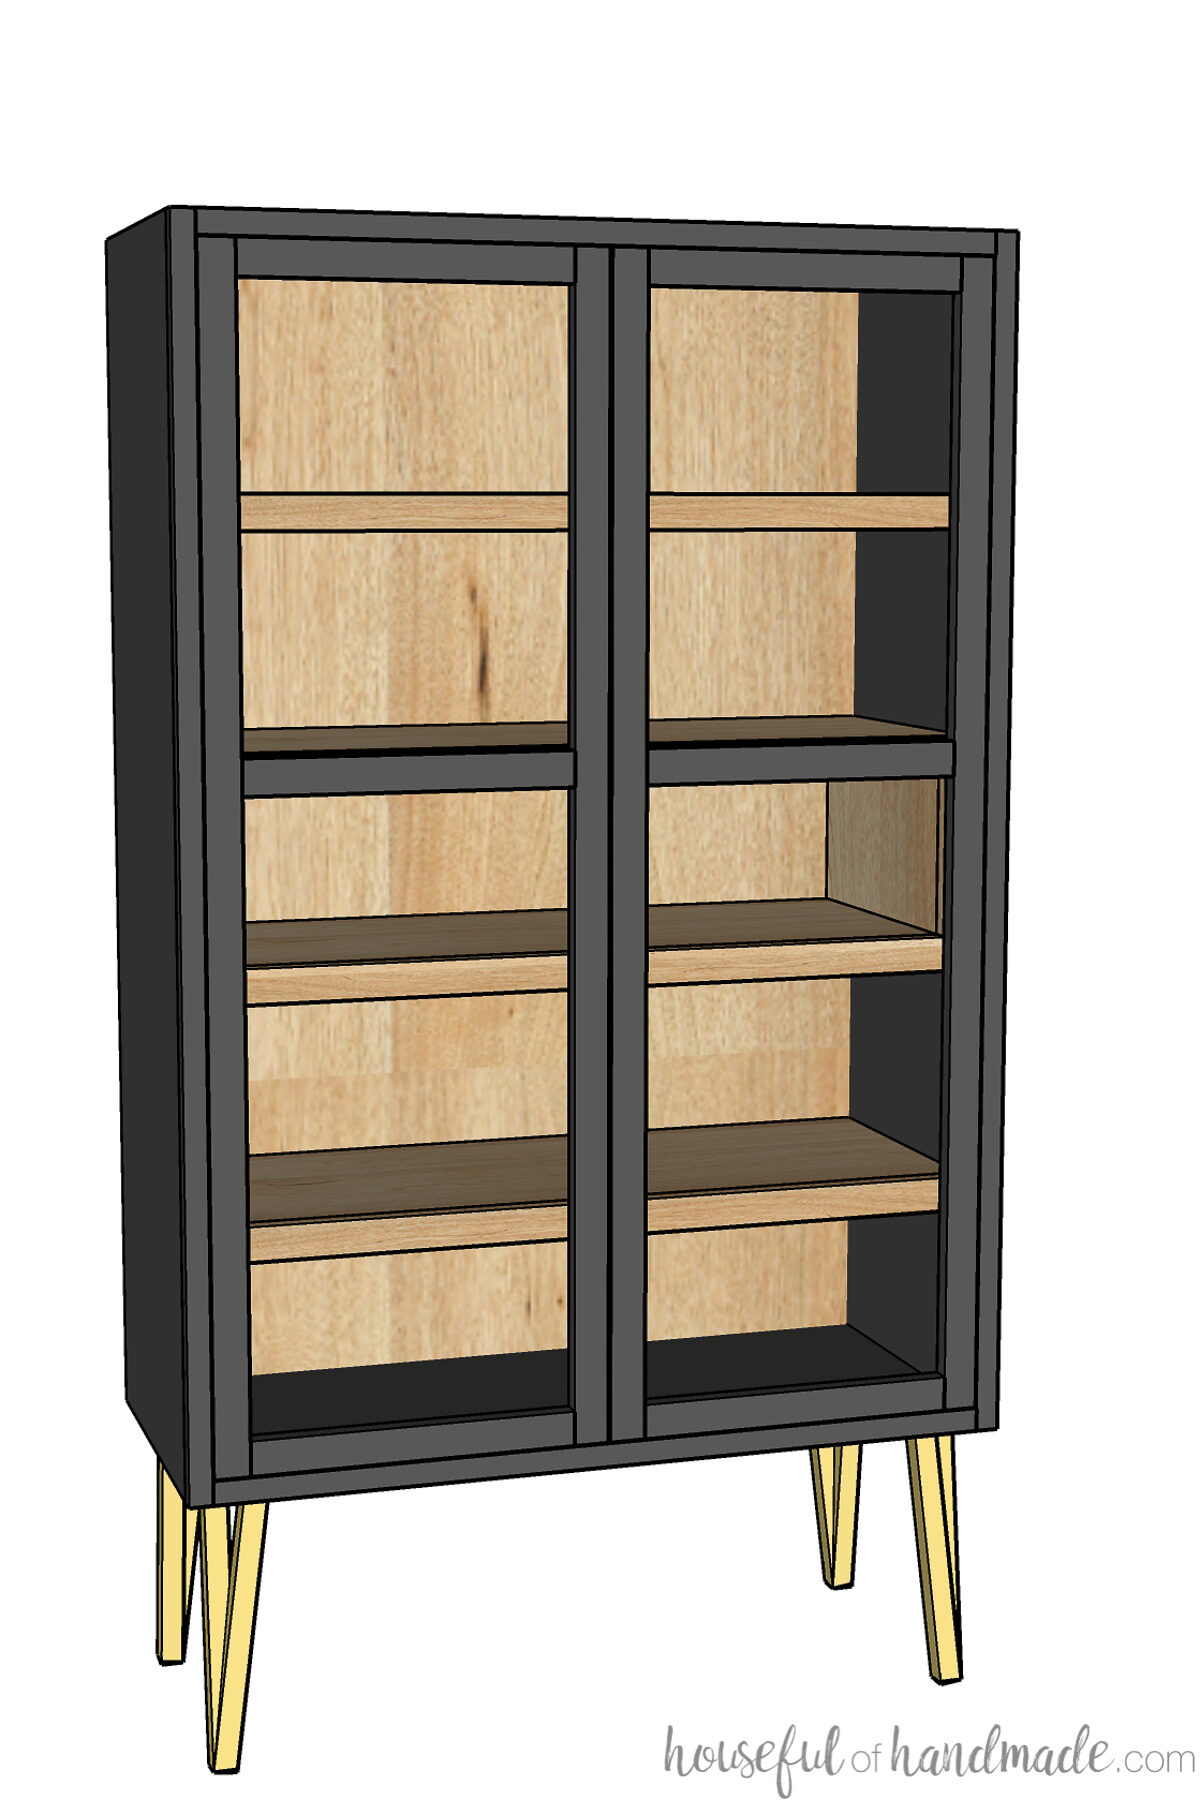
To make my display cabinet modern, I used a simple cabinet shape. But then I elevated the cabinet with beautiful 12″ hairpin legs.
You can use any furniture legs you want. The taller the legs, the more eye level your cabinet will be.
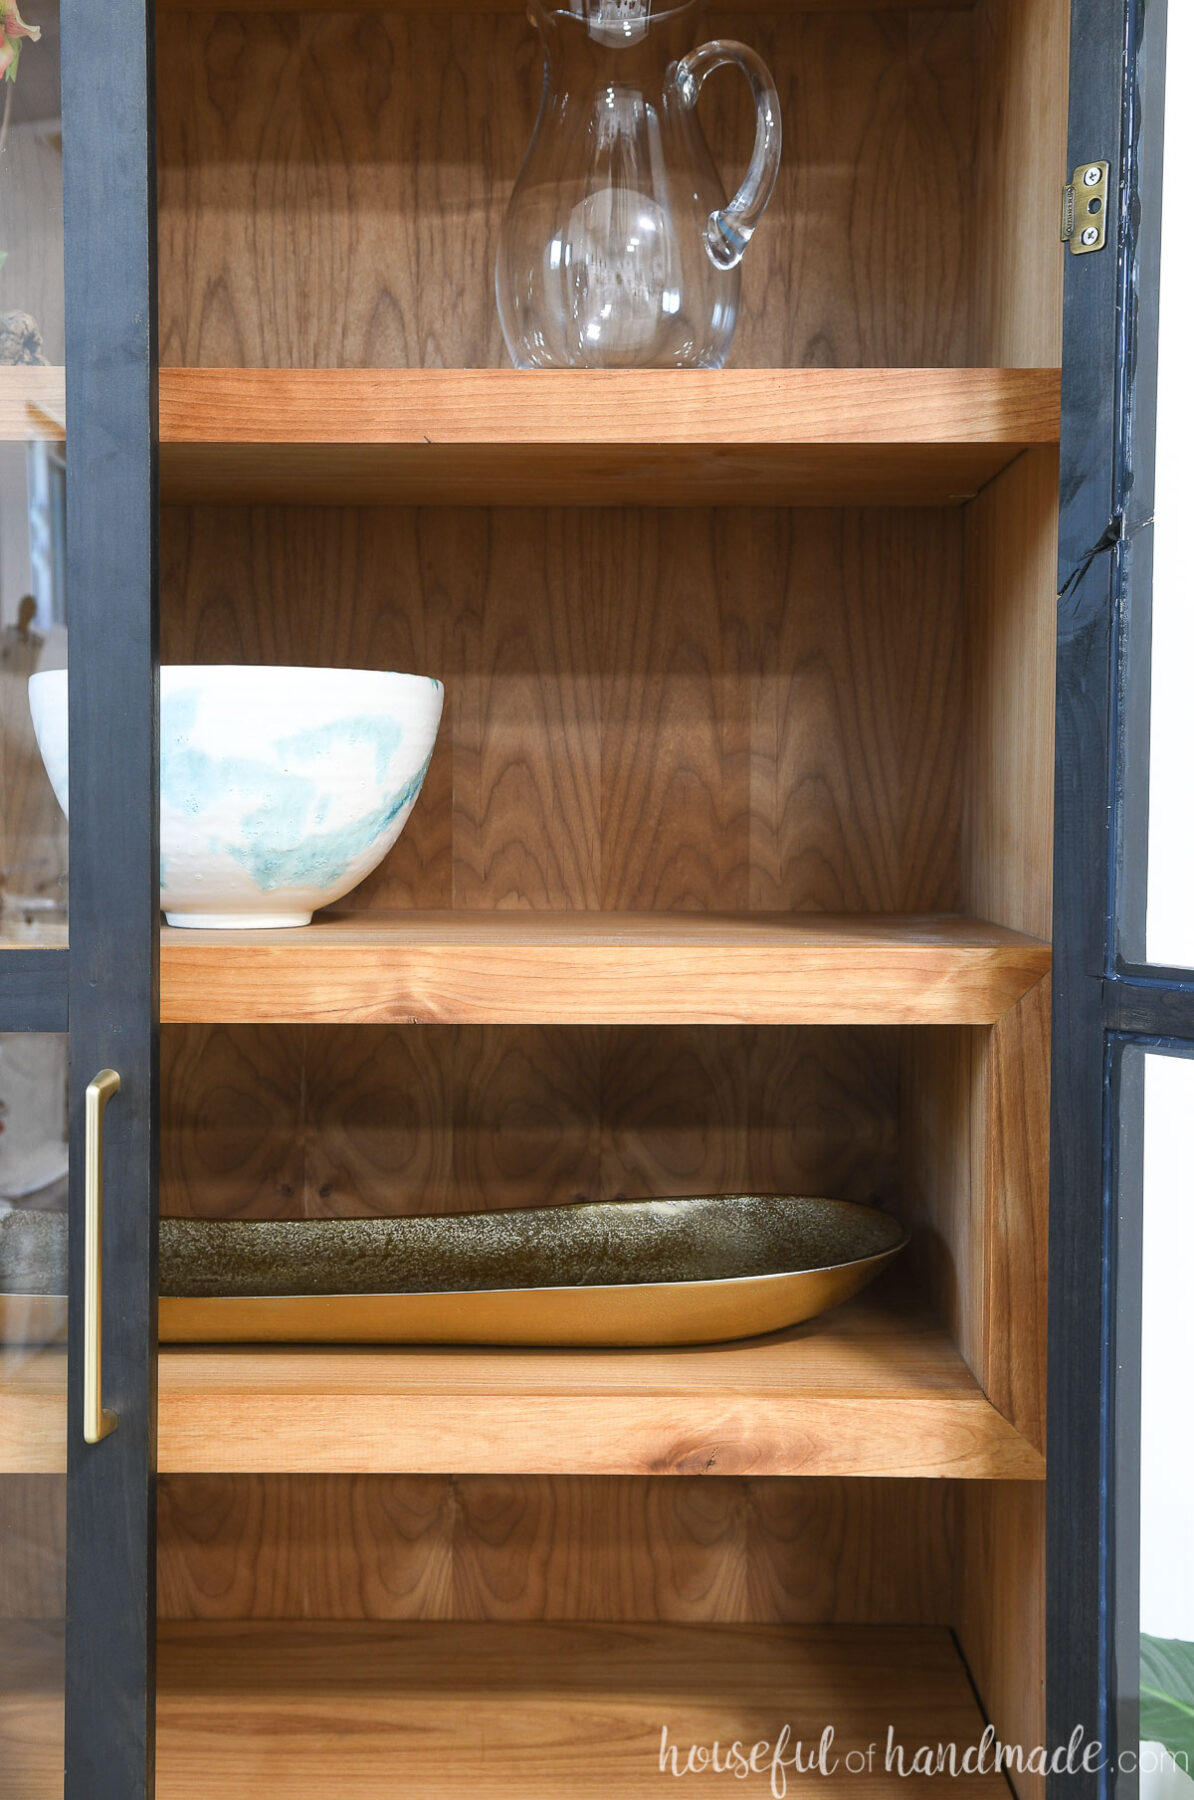
And the inside of the cabinet got a little extra design too. Instead of just a cabinet with shelves, I added what I am calling a display cubby.
This section is a build in shelf for stability in the cabinet and a little bit of design. The display cubby is the perfect place for smaller treasures.
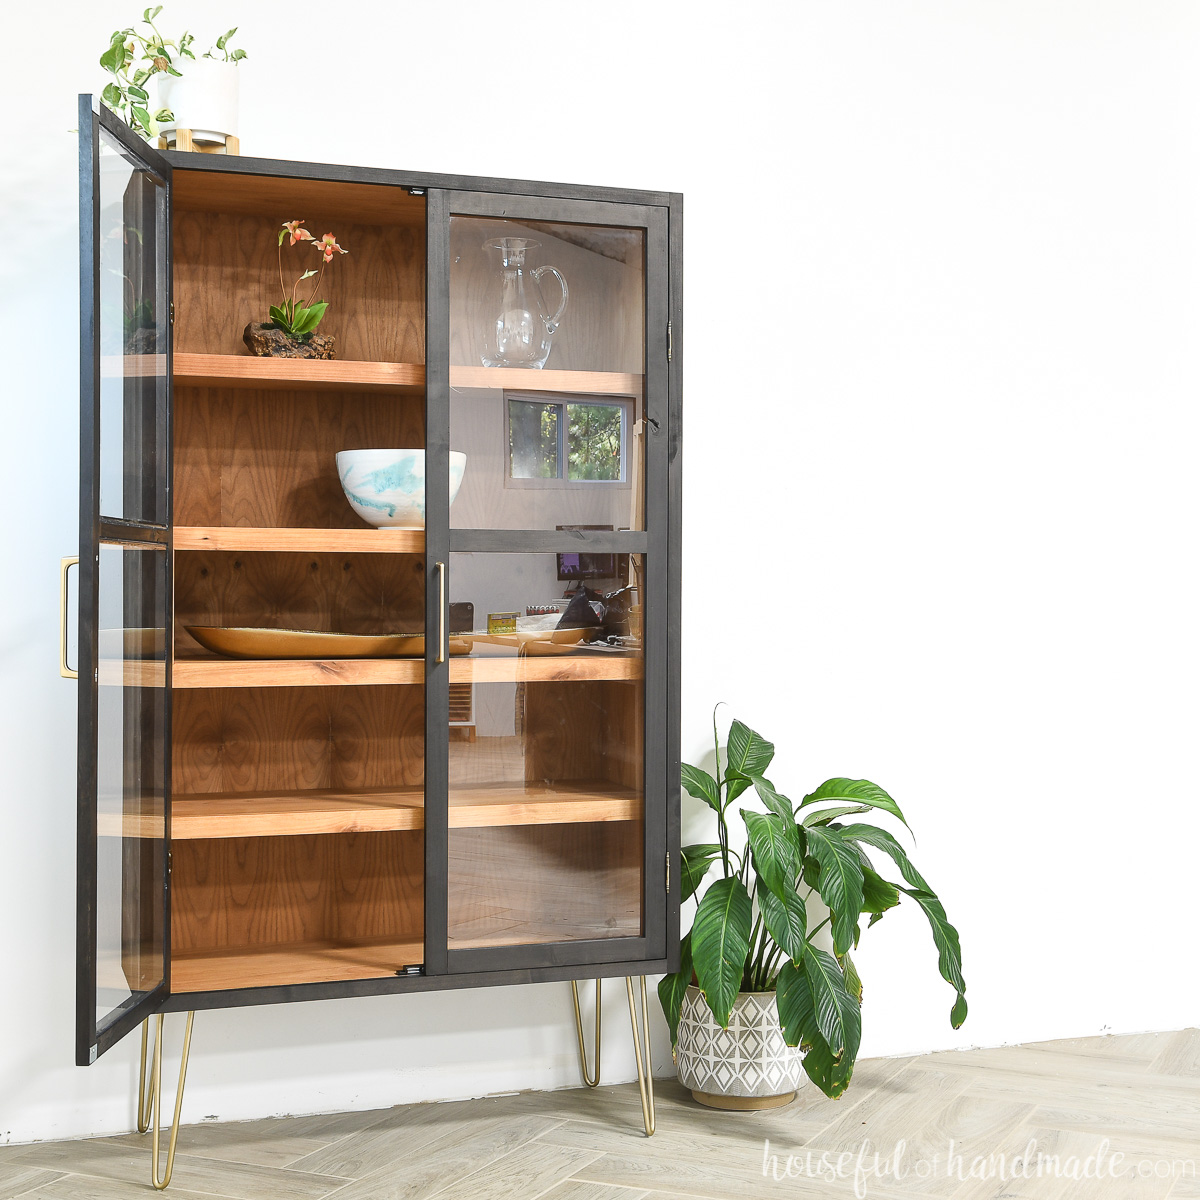
You can use your DIY display cabinet in so many places in the home. It would be a perfect gift for anyone who needs little extra storage.
Here are just a few places you can use your new curio cabinet:
- Use it in the dining room to display your serving dishes.
- Use it in the kitchen to store extra dishware.
- Use it in the office to display books and plaques.
- Use it in the living room to display antiques or vacation treasures.
- Use it in the bedroom to store extra linens and trinkets.
Wherever you decide to use your display cabinet, it’s a fun project to build. The basic cabinet box takes on a new life and turns into something beautiful!
More DIY Storage Solutions
Nothing beats an organized home. Get your home organized with loads of storage DIYs.
How to Build a DIY Display Cabinet
Tools & Materials
Recommended Tools:
- Kreg Adaptive Cutting System (ACS)
- Pocket hole jig
- Drill
- Impact driver (optional, but I love not having to switch bits with the drill)
- Face frame clamps
- Sander
- Trim router
- Brad nailer
- Caulk gun
Supplies:
- Printable PDF woodworking plans
- Wood
- (1 1/2) 3/4″ thick plywood, 4×8 sheet
- (1) 1/4″ thick plywood, 4×8 sheet
- (7) 1×2 boards, 8′ long
- Glass for doors
- 1 1/4″ pocket hole screws
- 1 1/4″ brad nails
- Clear 100% silicone
- 12″ furniture legs
- Inset door cabinet hinges
- Door pulls
- Shelf pins
Overall Dimensions
The competed display cabinet is 52″ tall without the legs or 64″ tall with 12″ furniture legs.
The cabinet is 36″ wide and 15 3/4″ deep. The cubby and adjustable shelves are 13 1/2″ deep.
STEP 1- Break down the plywood
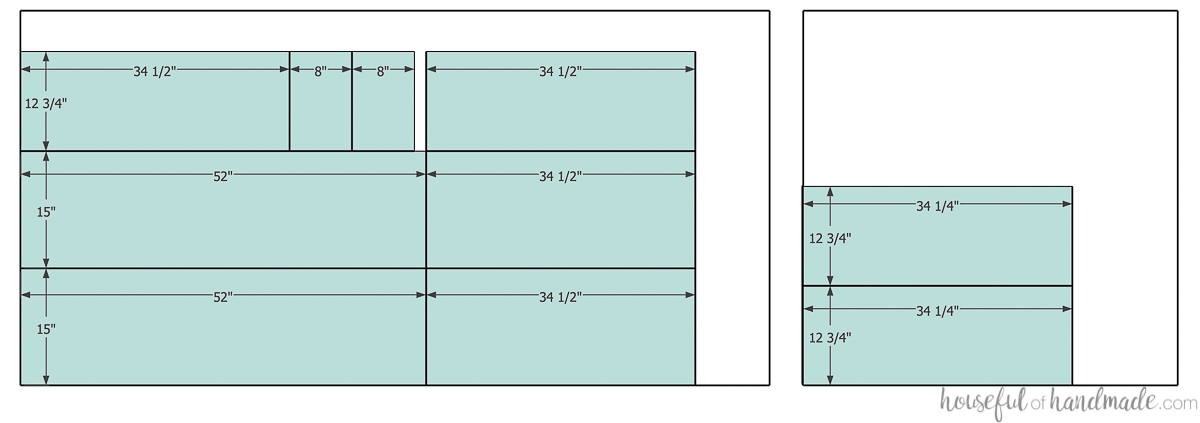
Break down the plywood according the diagram in the plans.
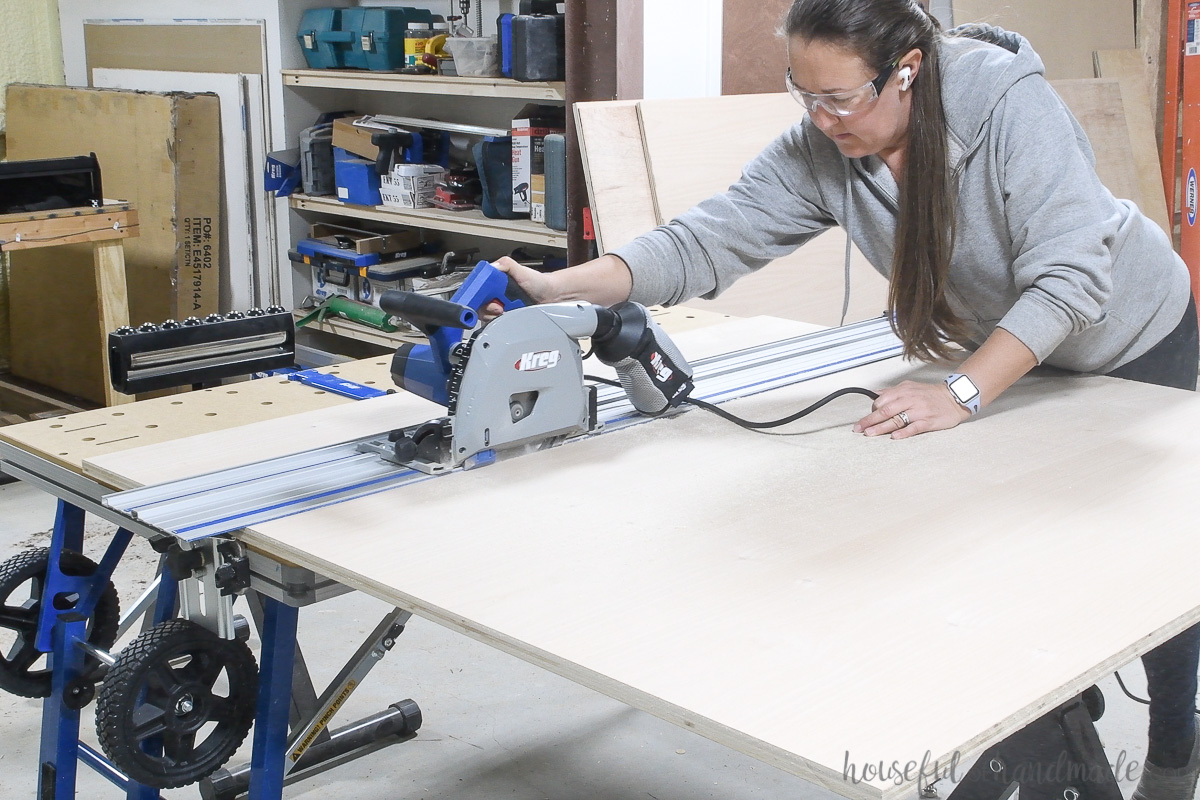
The ACS is great for breaking down full sheets of 3/4″ plywood. I makes it possible for a smaller person (like me) to break down these heavy sheets without needing a second set of hands.
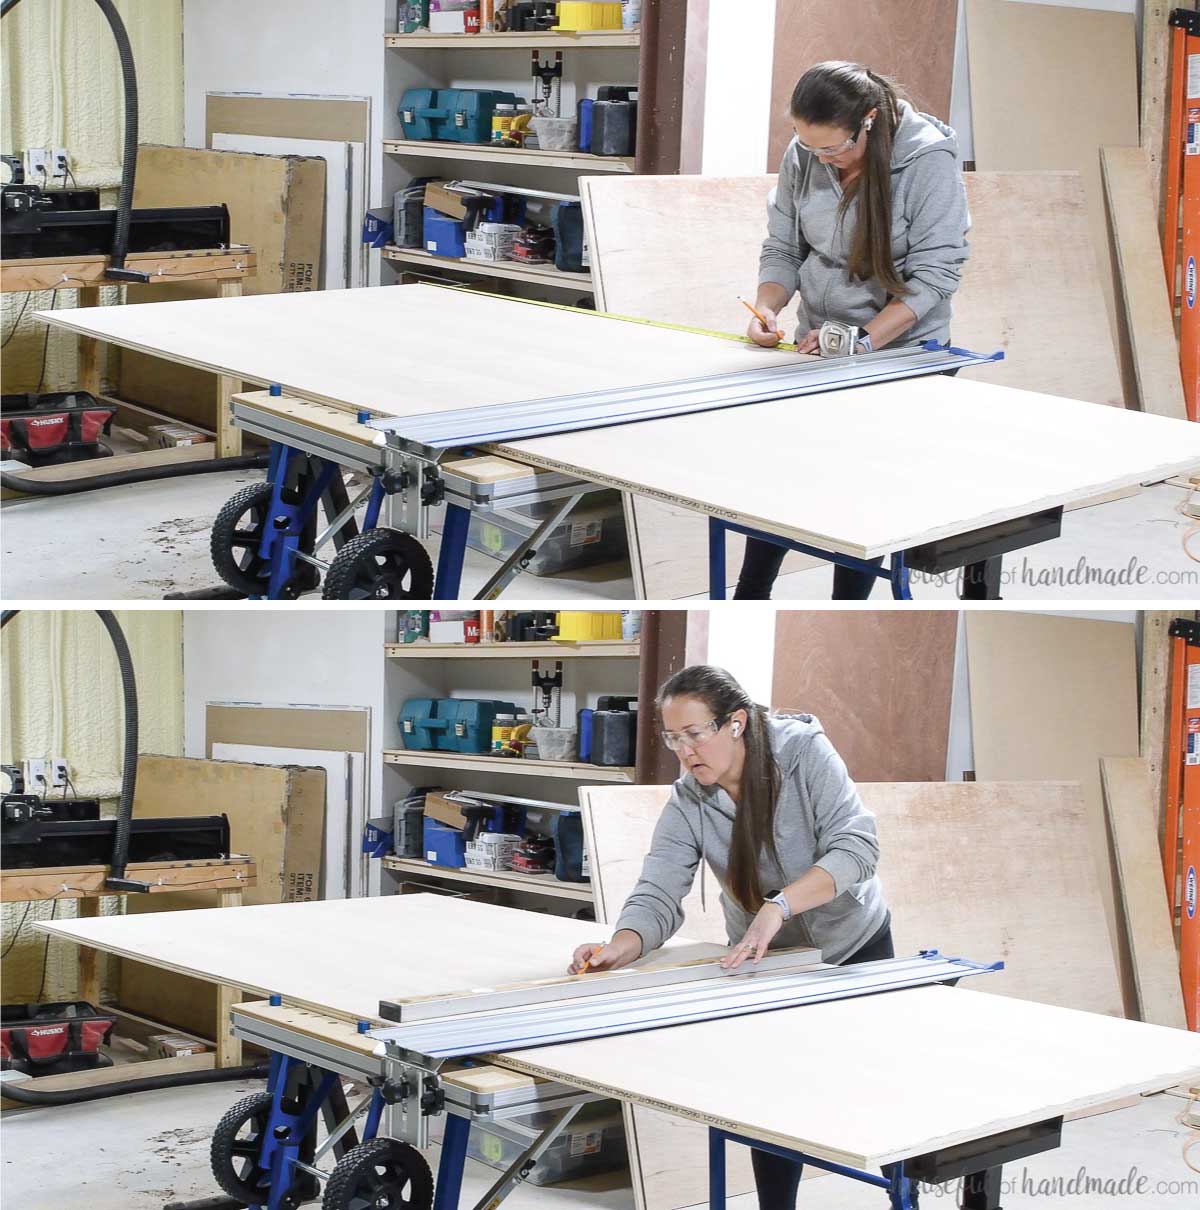
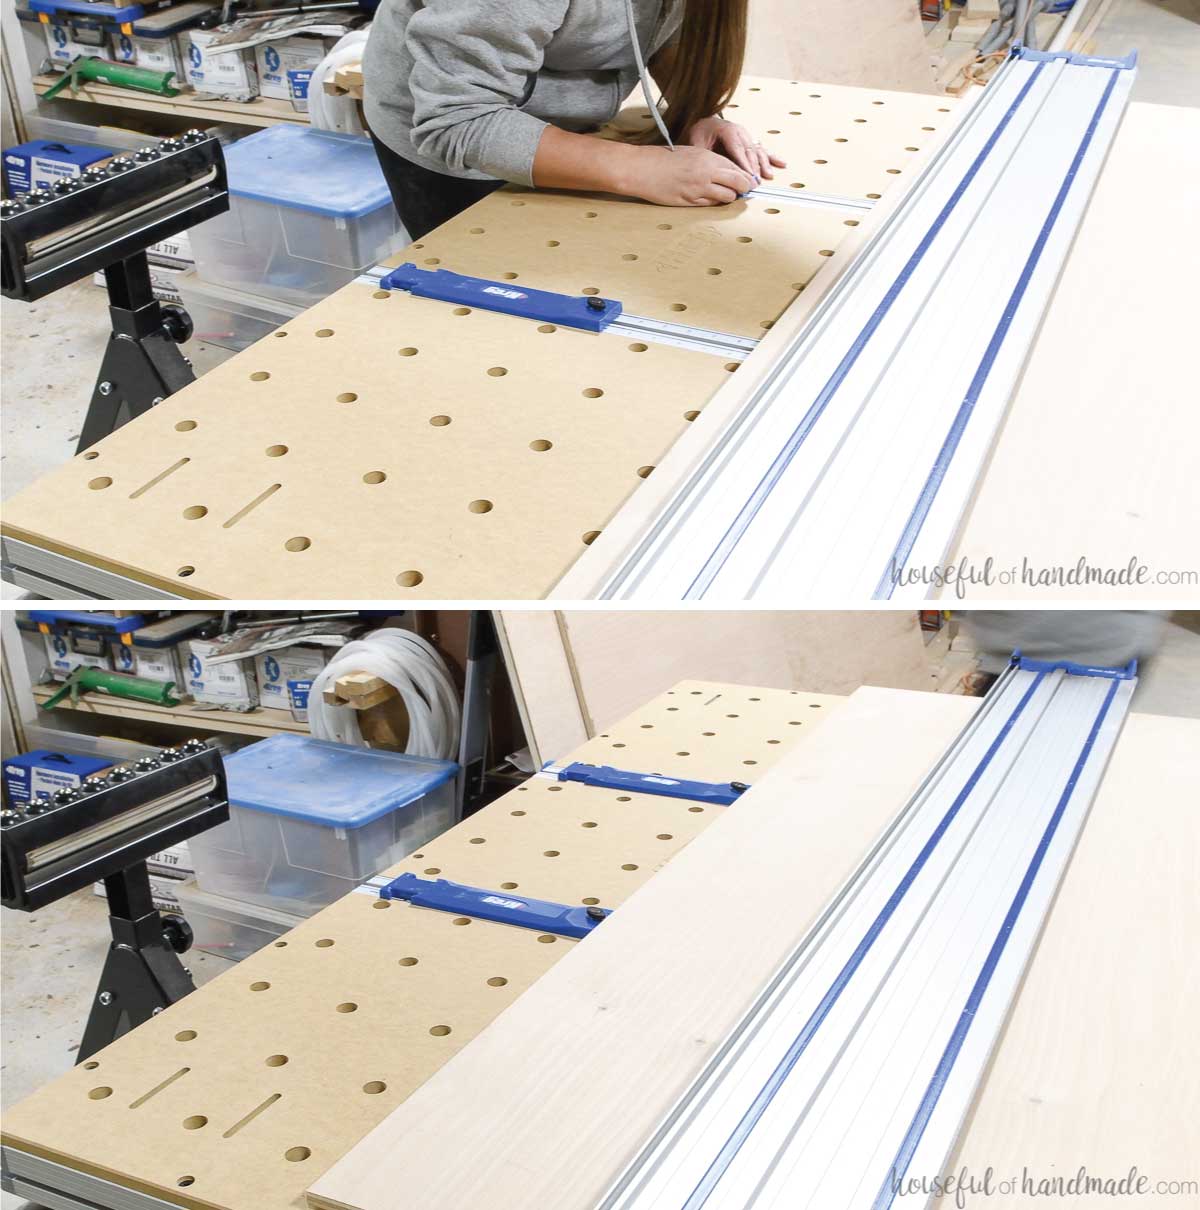
Start by cutting ~1/4″ off one of the short edges to get a clean edge. Make sure to press the plywood up against 3 stops on the far end of the table to get ensure the clean cut is square to the sides.
Flip the plywood around so the clean edge is on the backside of the ACS table.
The ACS project table has stops for setting repeatable cuts up to 48″. But the first cut will have to be measured the old-fashioned way.
From the clean cut edge, measure 52″ and make a mark. Make a few marks along the plywood. Then use the straight edge to connect the lines.
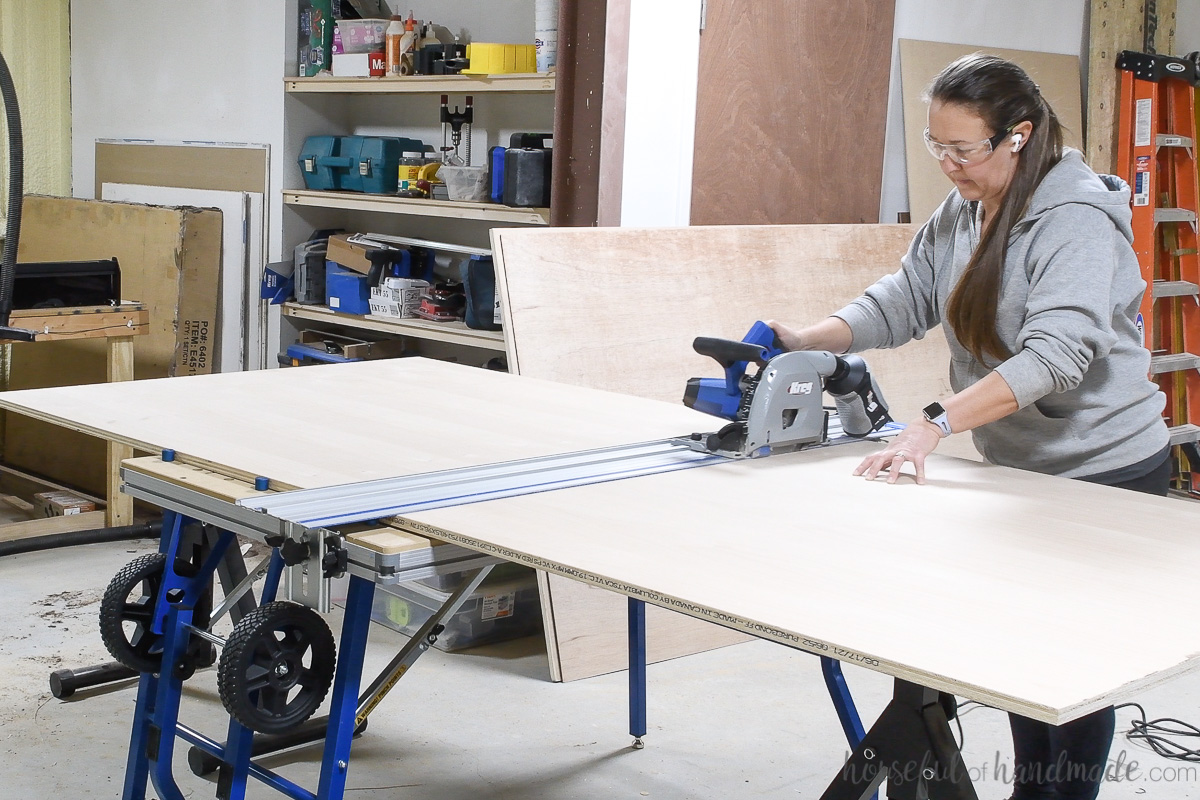
Press three stops into the table in a line at the far end of the table. Press the plywood up against the stops and line up the line with the blue anti-chip strip on the track.
Drop the track and cut along the track with the plunge saw set to 3/4″ plywood depth.
Next repeat to cut a 34 1/2″ piece from the remaining plywood. This time you can use the measuring extender set to the 34 1/2″ mark.
Then press the plywood up against all the stops and cut.
On the 52″ piece, you will need to break it down into (2) 15″ pieces and (1) 12 3/4″ piece.
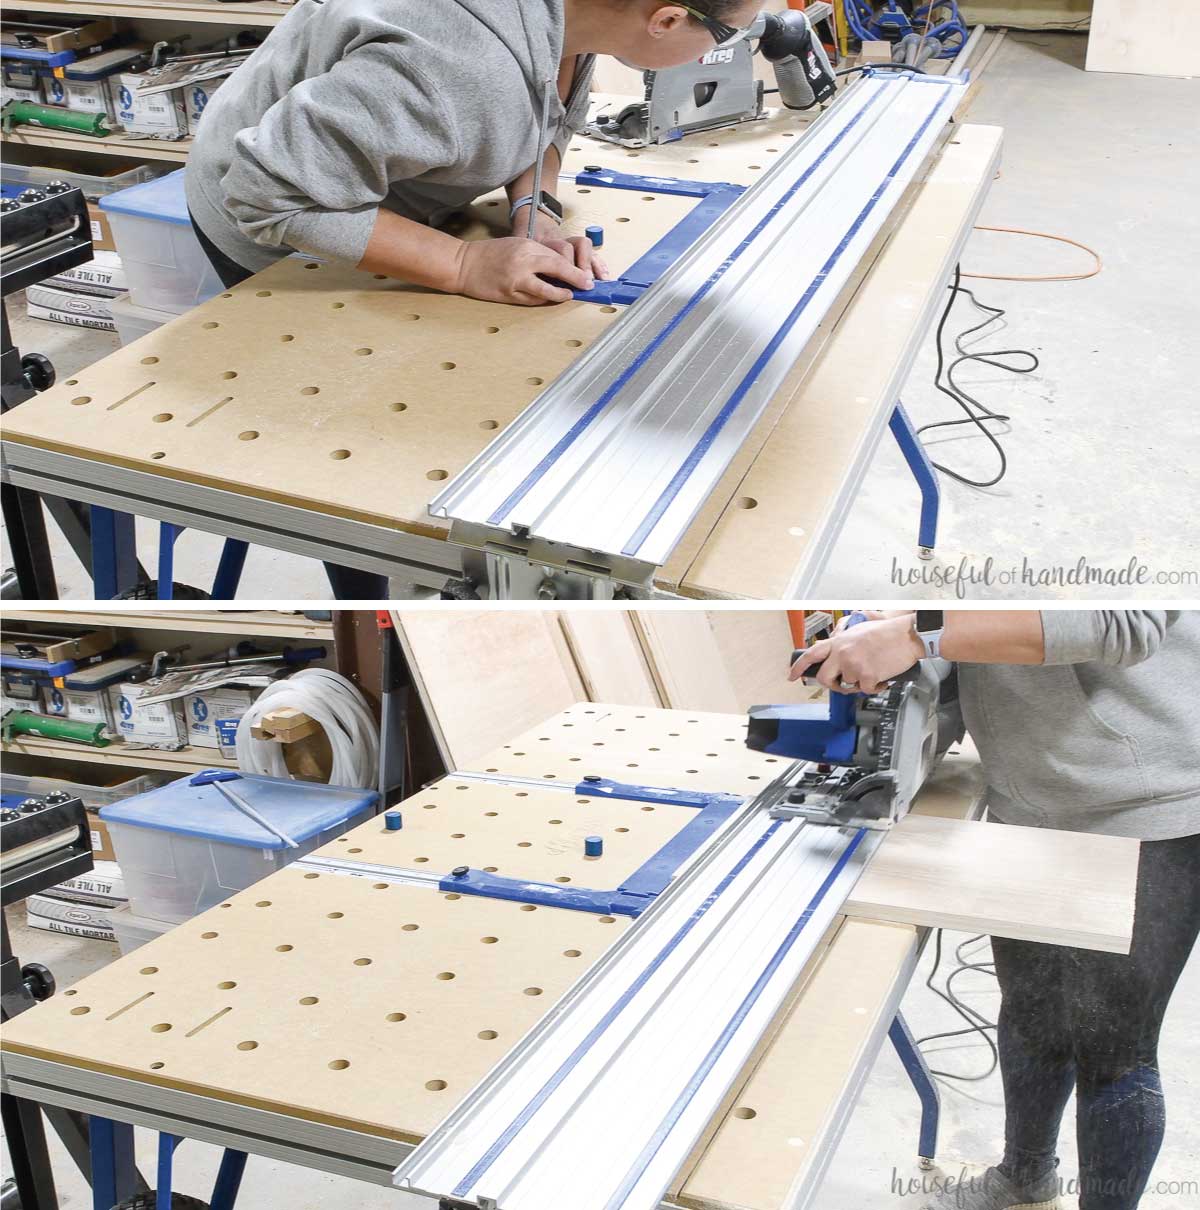
I cut the 52″ pieces on the cutting table. Instead of using a stop, I carefully pressed the plywood up against the bracket that holds the track.
But you can also remove the track and cut it with the plug saw on a piece of rigid foam.
Lastly, on the 12 3/4″ pieces cut (1) 34 1/2″ piece and (2) 8″ pieces.
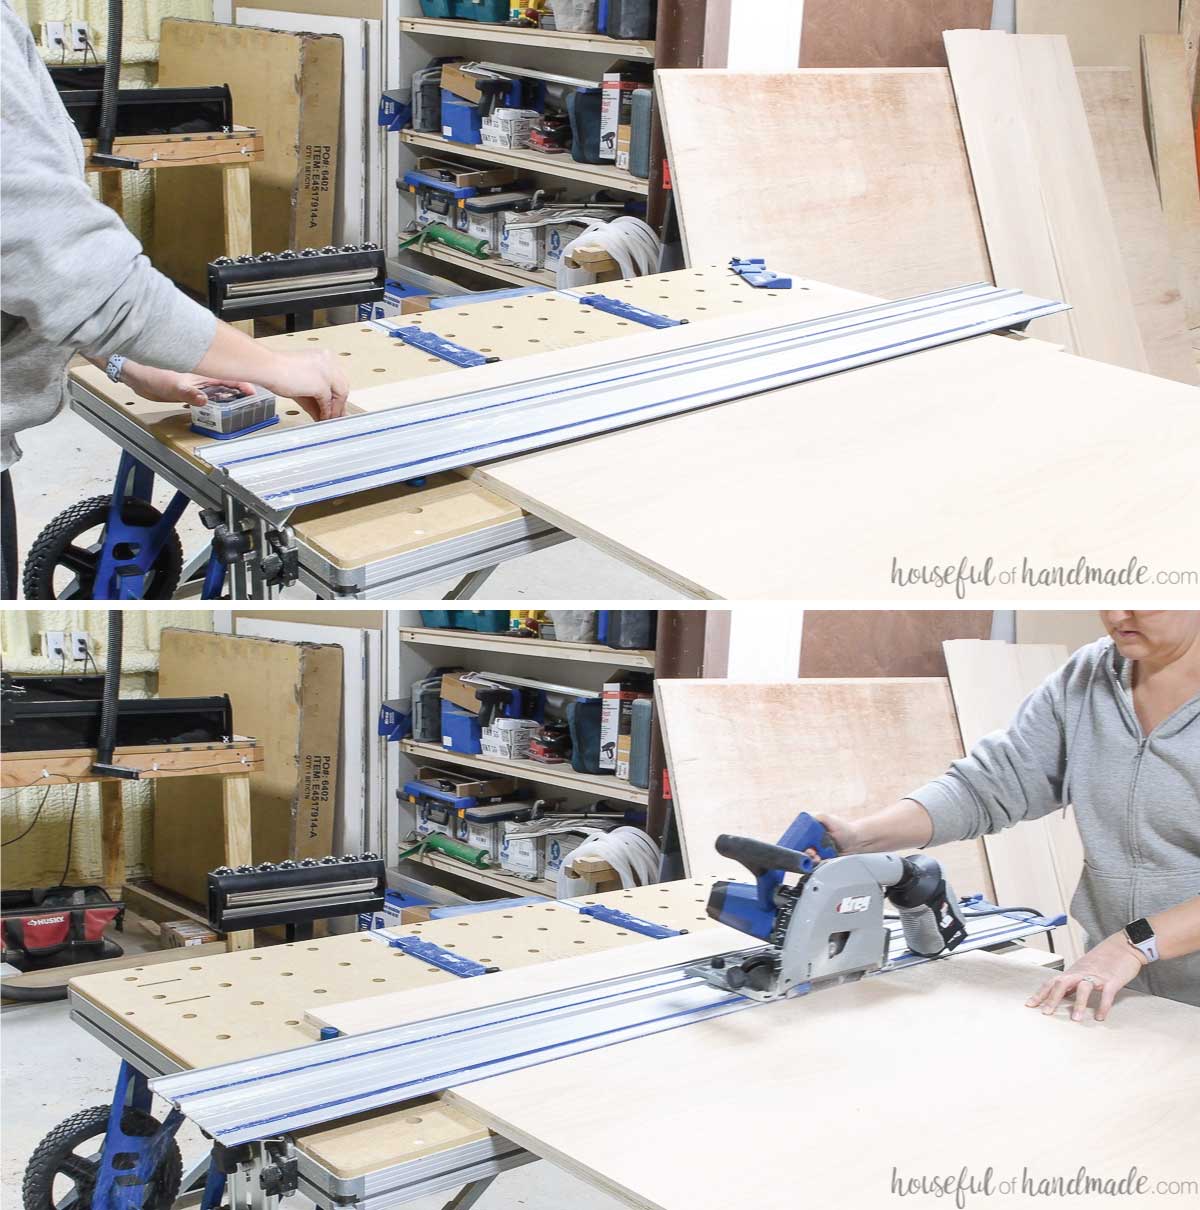
To cross-cut the pieces, place the stops in a line close to the measuring tracks. Set the blue guides at the measurement you want. Then press the board up against the stops and the guides.
Cut the board with the plunge saw.
On the 34 1/2″ piece, cut it into (2) 15″ thick pieces and (1) 12 3/4″ piece.
These are all the pieces needed for the cabinet. If you want to add adjustable shelves, cut 12 3/4″ x 34 1/4″ pieces from the other sheet of plywood.
STEP 2- Rip the face frame and door boards
Cut all the pieces according to the diagram in the woodworking plans.
The face frame of the cabinet is made from 1″ wide boards and the rest are from 1 1/2″ boards.
You can buy 1×2 boards and just rip down the 1″ cabinet face frame boards, or you can do what I did. I purchased 6 1/2″ wide boards from my local lumber yard and ripped them down to the 1″ and 1 1/2″ thickness that I needed.
At the lumber yard, I had them plane the board and flatten one side on the jointer.
Use the ACS to cut the boards to length. This ensures that the two opposing face frame or door pieces are exactly the same length leaving you with nice square frames.
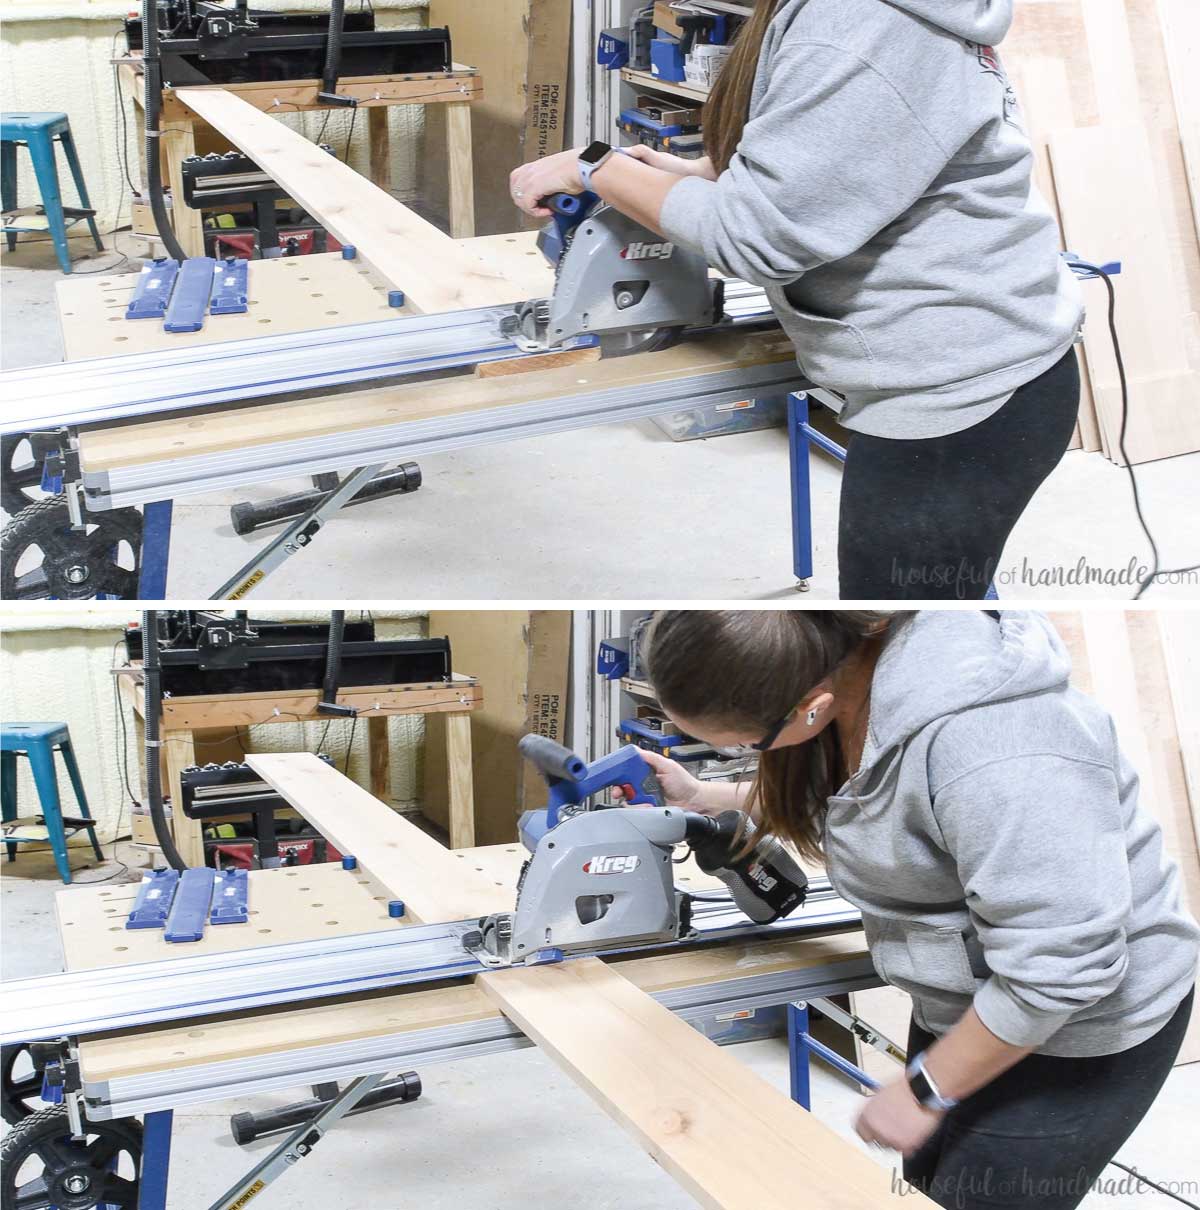
Make sure to set up the stops in a line so you can press the length of the board up against them ensuring the board is square to the cut.
Use the measuring guides to create stops at the back for you measurements.
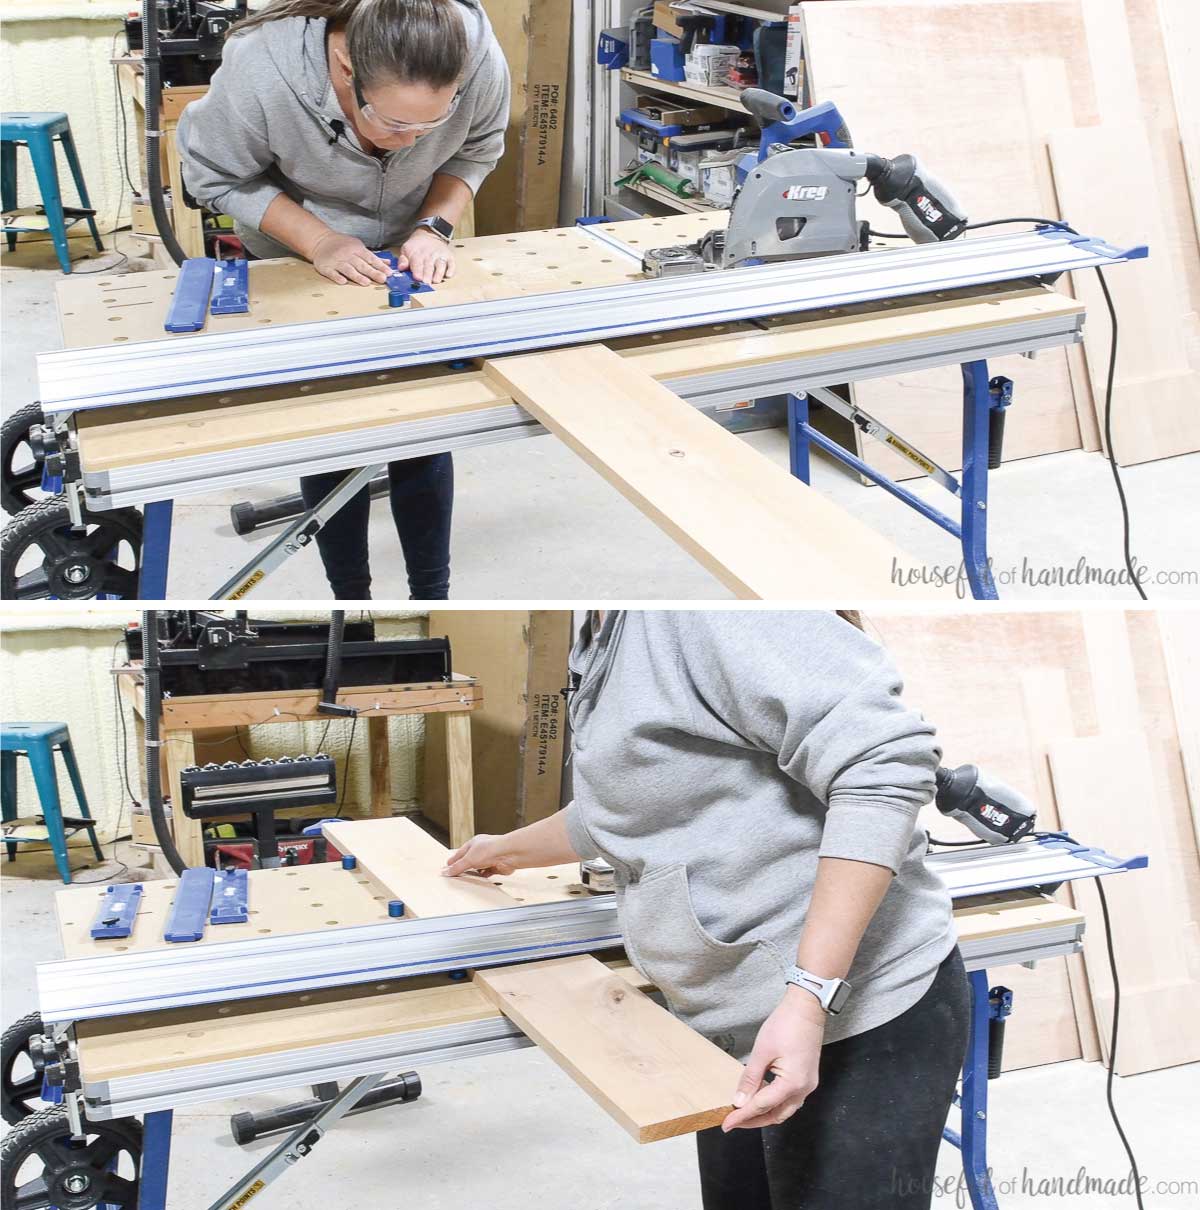
Once all the boards are cut to length, it is time to rip them down.
Place the bridge between the measuring guides and slide it to the measurement needed. It will disappear under the track.
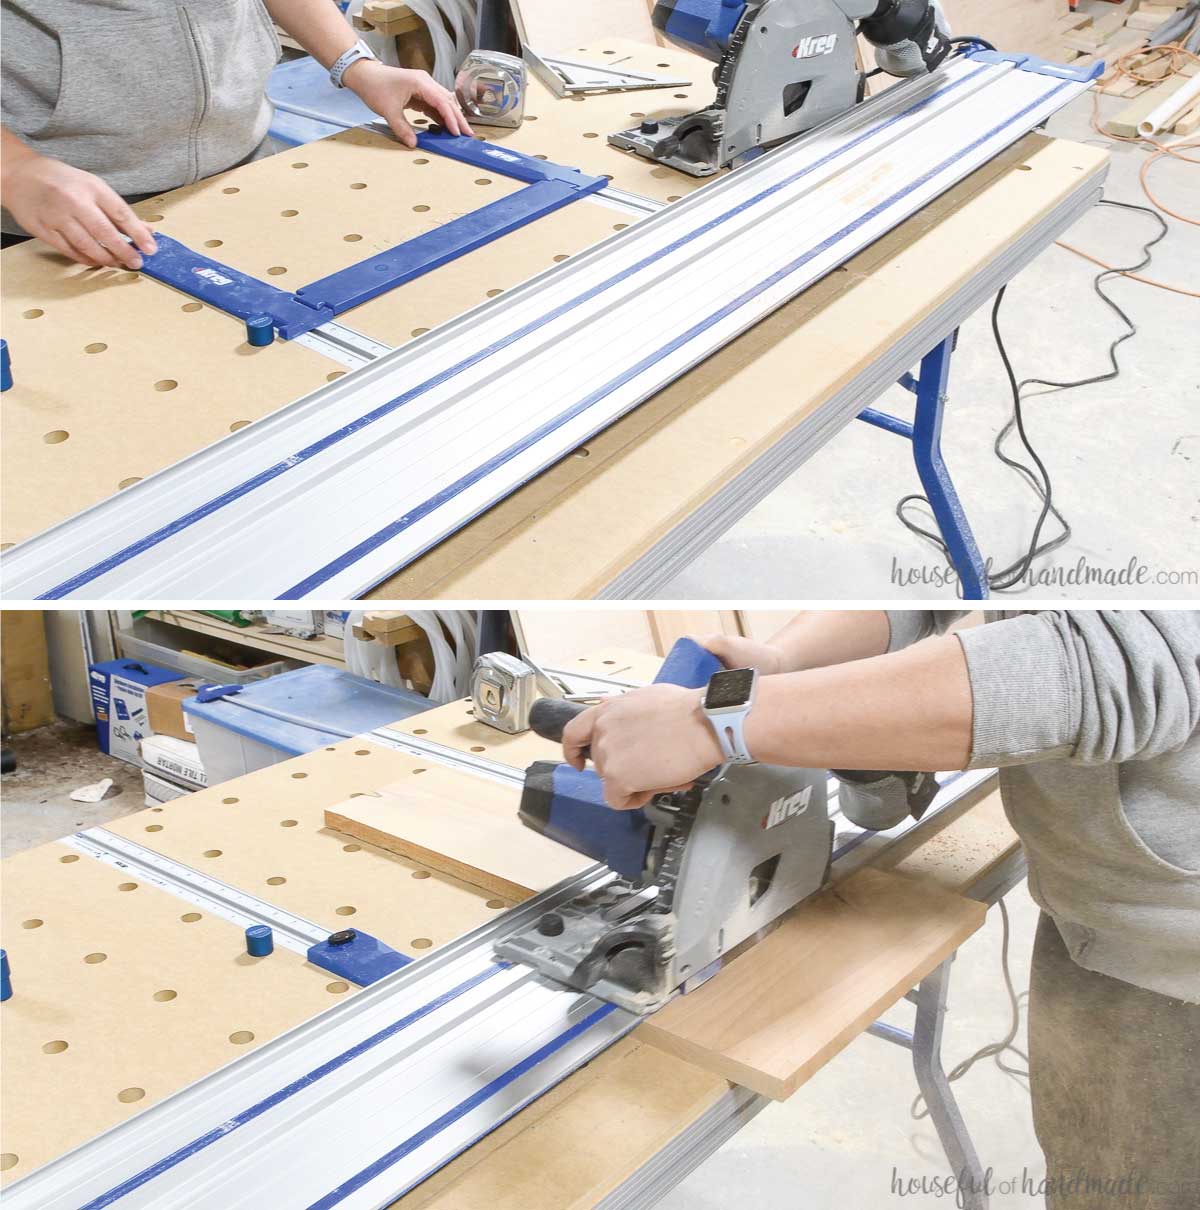
Place a stop on the table in front of the guides. For the shorter pieces it will be under the track so it is close to the measuring guides. For the longer pieces it will be in front of the track at the left corner of the table.
Place your board long way under the track pressing up against the measuring guides and bridge. Press it to the stop.
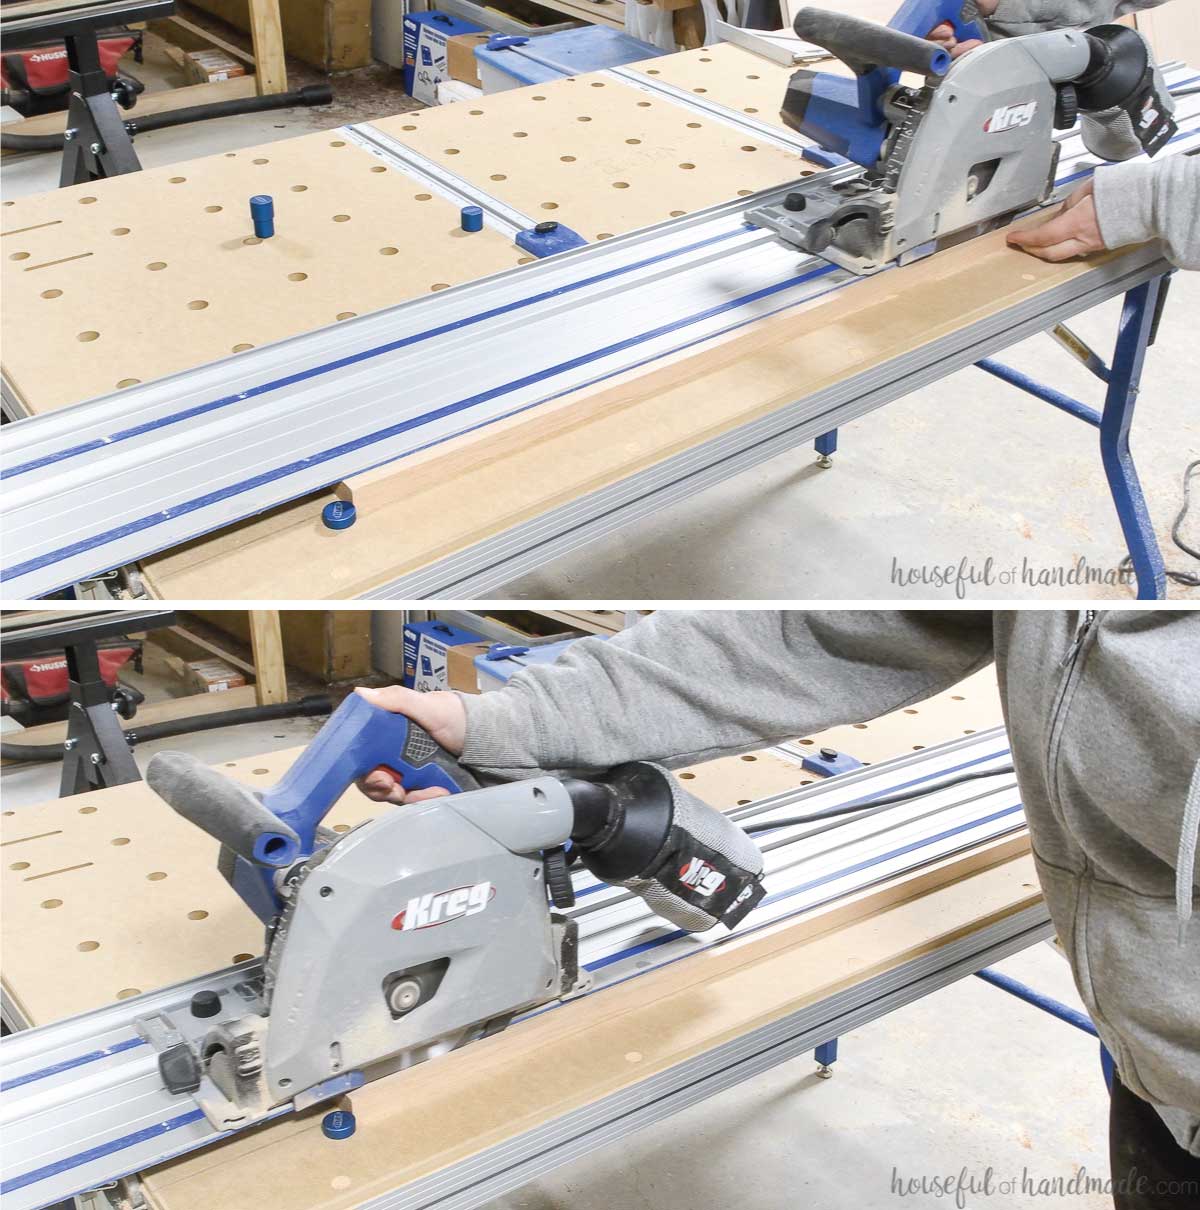
I also found it was helpful to use extra pieces under the track to keep it square to the table while ripping.
Plunge the saw and cut the piece.
For the 52″ long pieces, I used small clamps to hold the corners of the board securely so it did not move while cutting since I couldn’t use the stops.
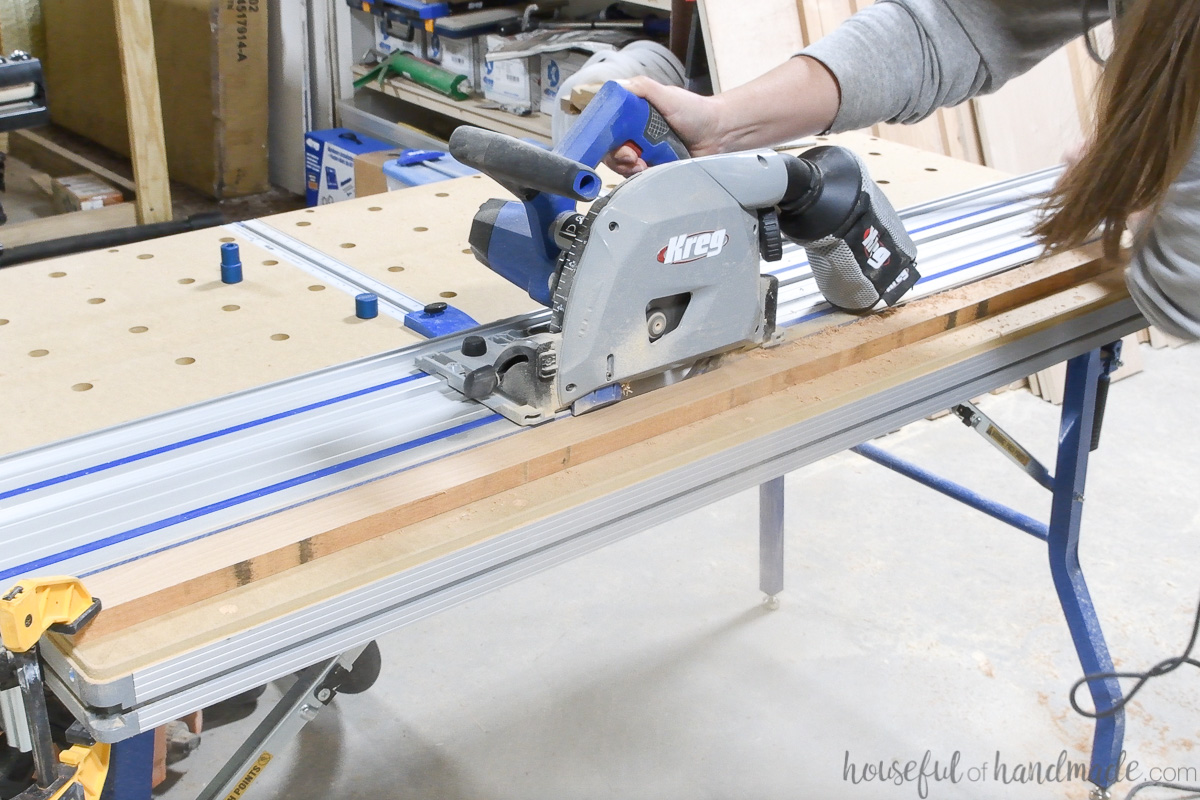
Repeat for all the rip cuts needed.
For the cubby face frame pieces, the corners need to be cut at a miter.
To do this on the ACS, place the blue stops in a diagonal on the table. They are laser cut to be at a perfect 45 degree.
Place the face frame board up against the stops so the top corner is lined up with the cut line. Drop the track and cut.
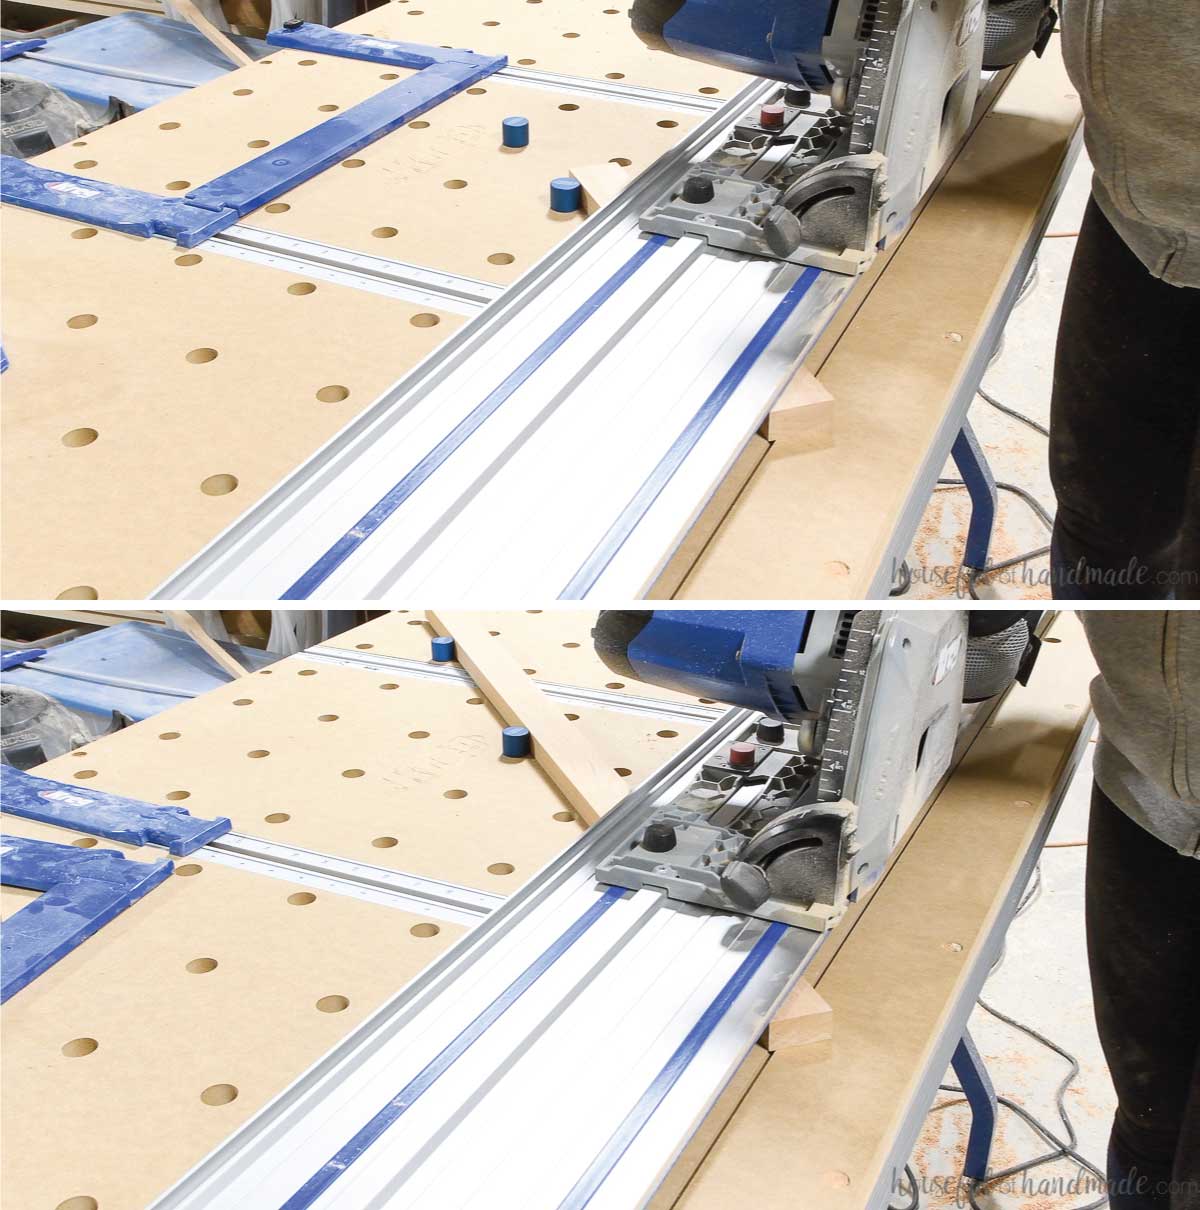
Repeat for the other side so the miters are angled toward each other.
STEP 3- Build the cabinet box
With all the pieces cut, it’s time to assemble!
The display cabinet is a simple cabinet box: 2 sides and a top and bottom! The bottom shelf is set up from the bottom of the sides so it is flush with the top of the face frame.
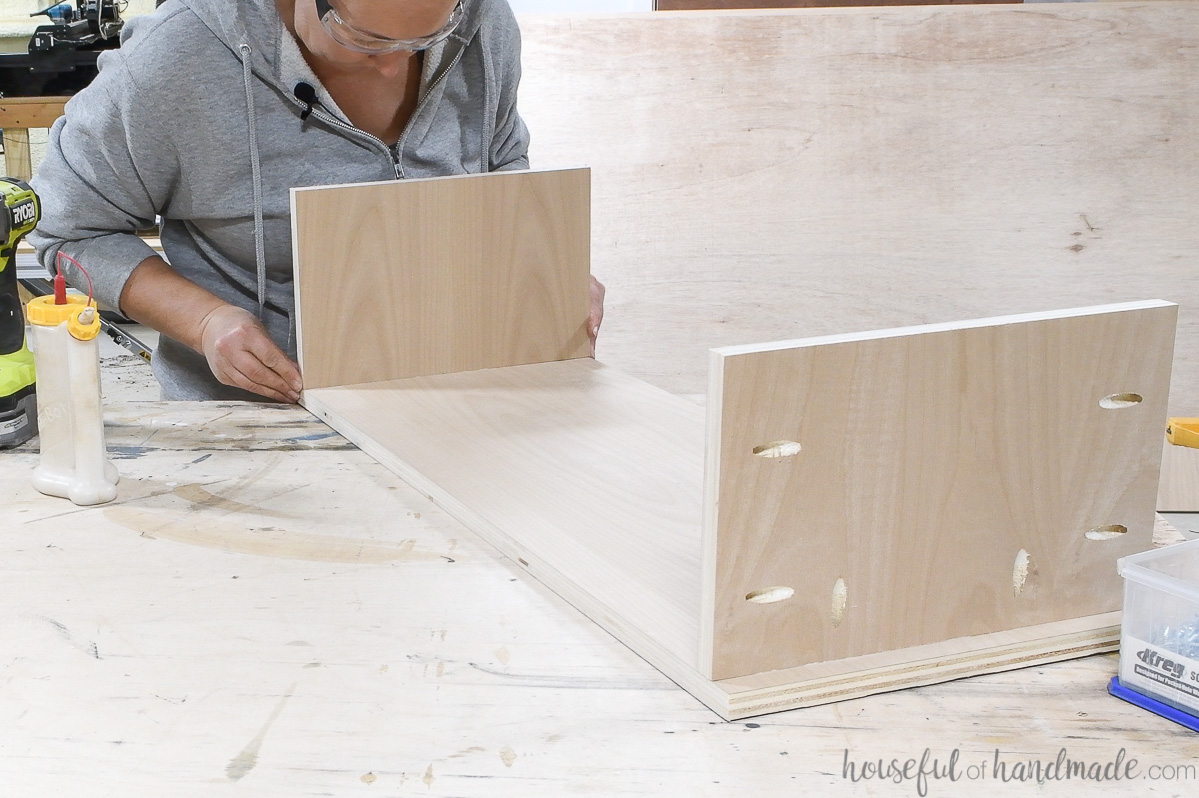
Drill pocket holes set for 3/4″ thick material in the sides and front of the top and bottom pieces.
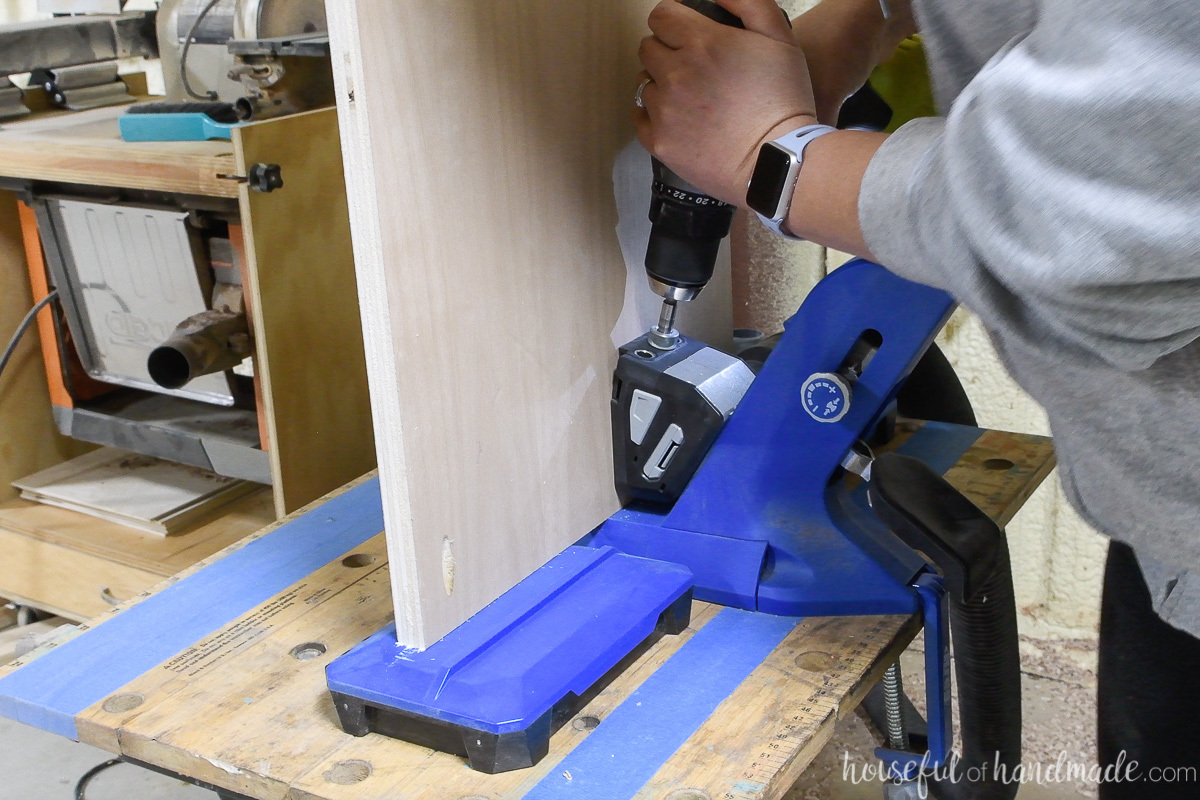
Also, you can drill 1 pocket hole on the inside of the cabinet sides 25″ up from the bottom to help secure the face frame. This will be mostly hidden when you install the cubby (but not totally). You can skip this if you wish.
Measure up 1″ from the bottom of the sides and mark it.
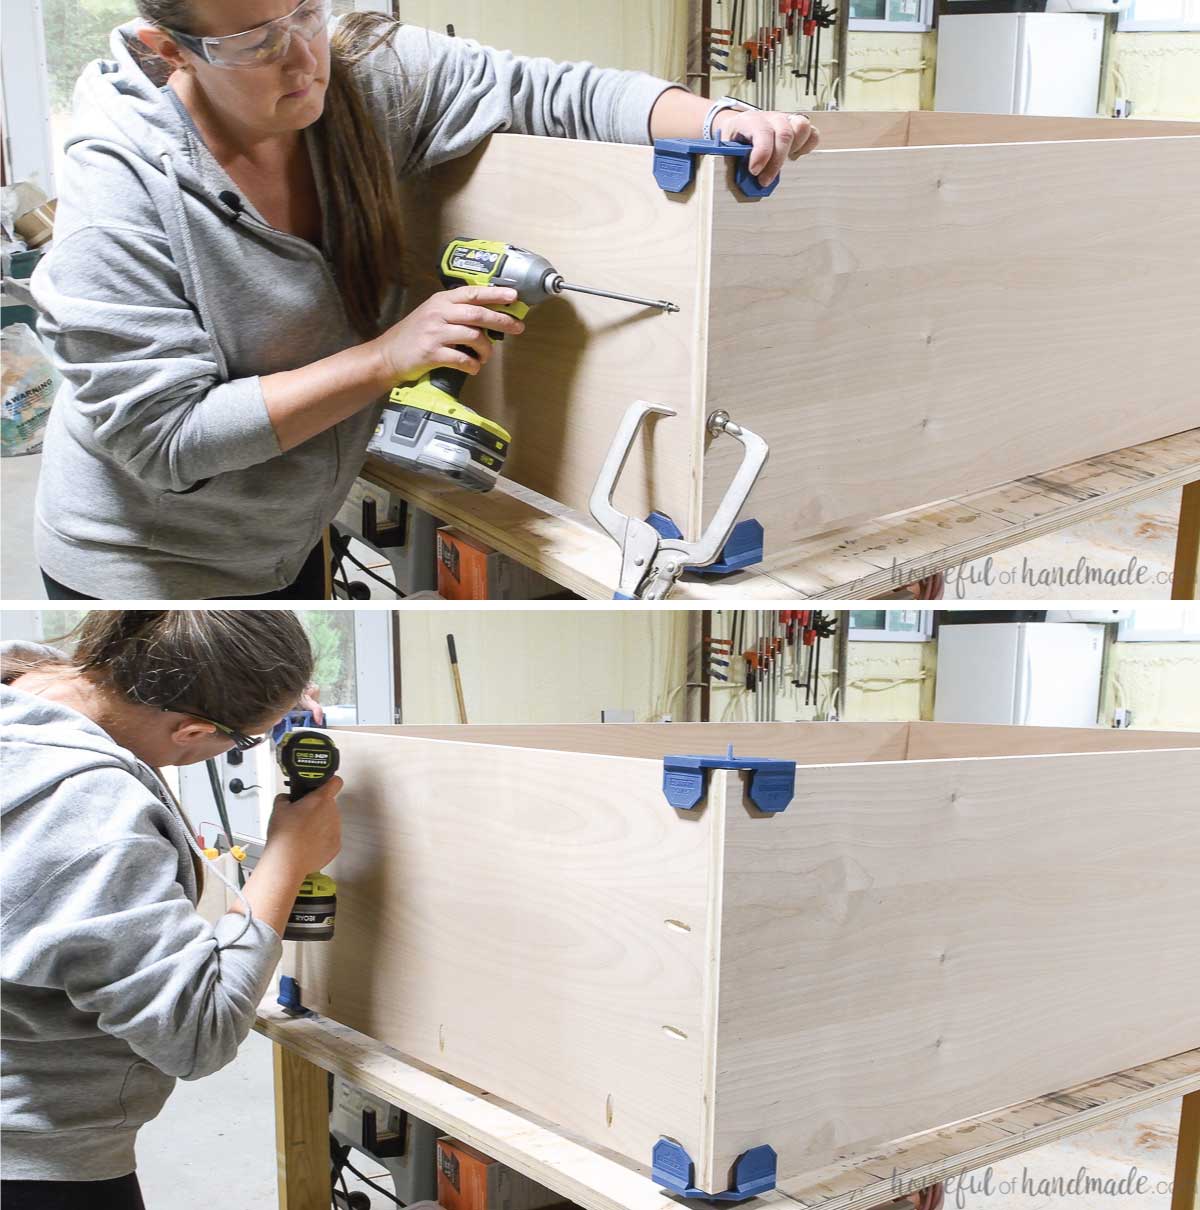
Using wood glue and 1 1/4″ pocket hole screws, attach the bottom shelf to one of the sides so it is flush with the 1″ line and secure. Use square clamps in the corners to keep your cabinet box square as you secure it.
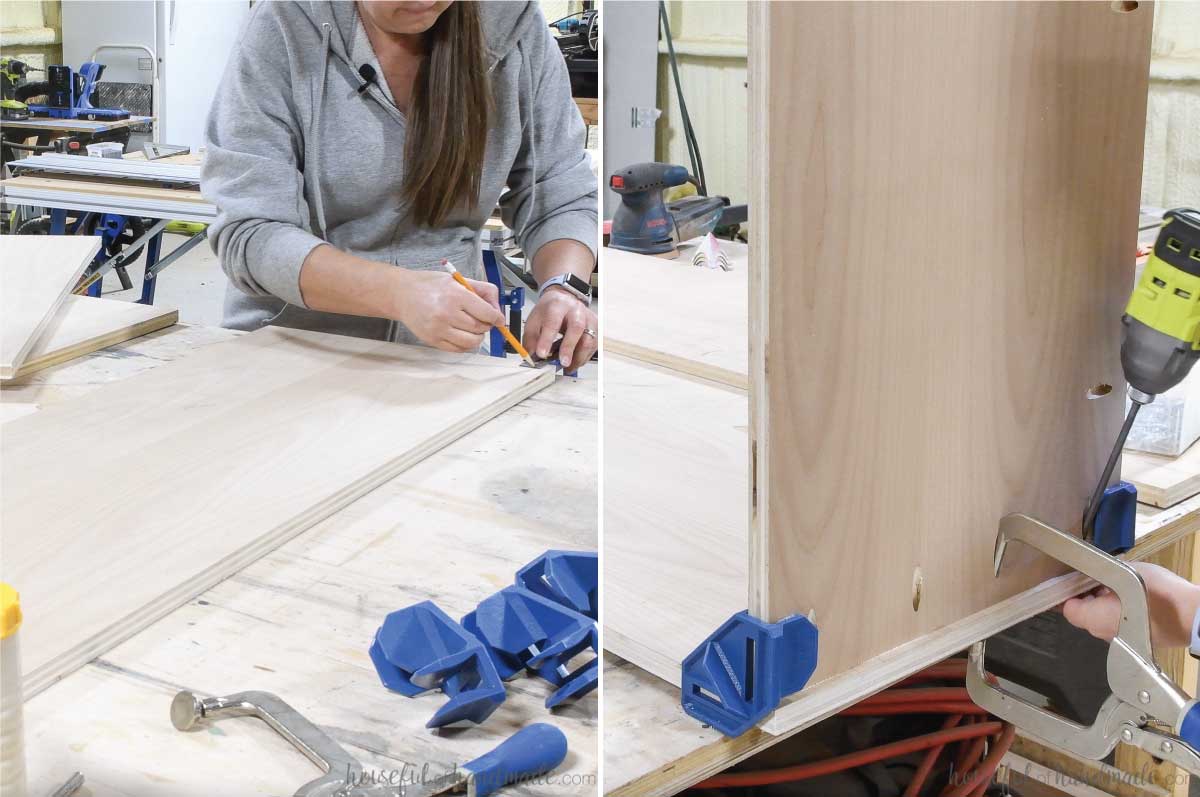
Then attach the other side the same way.
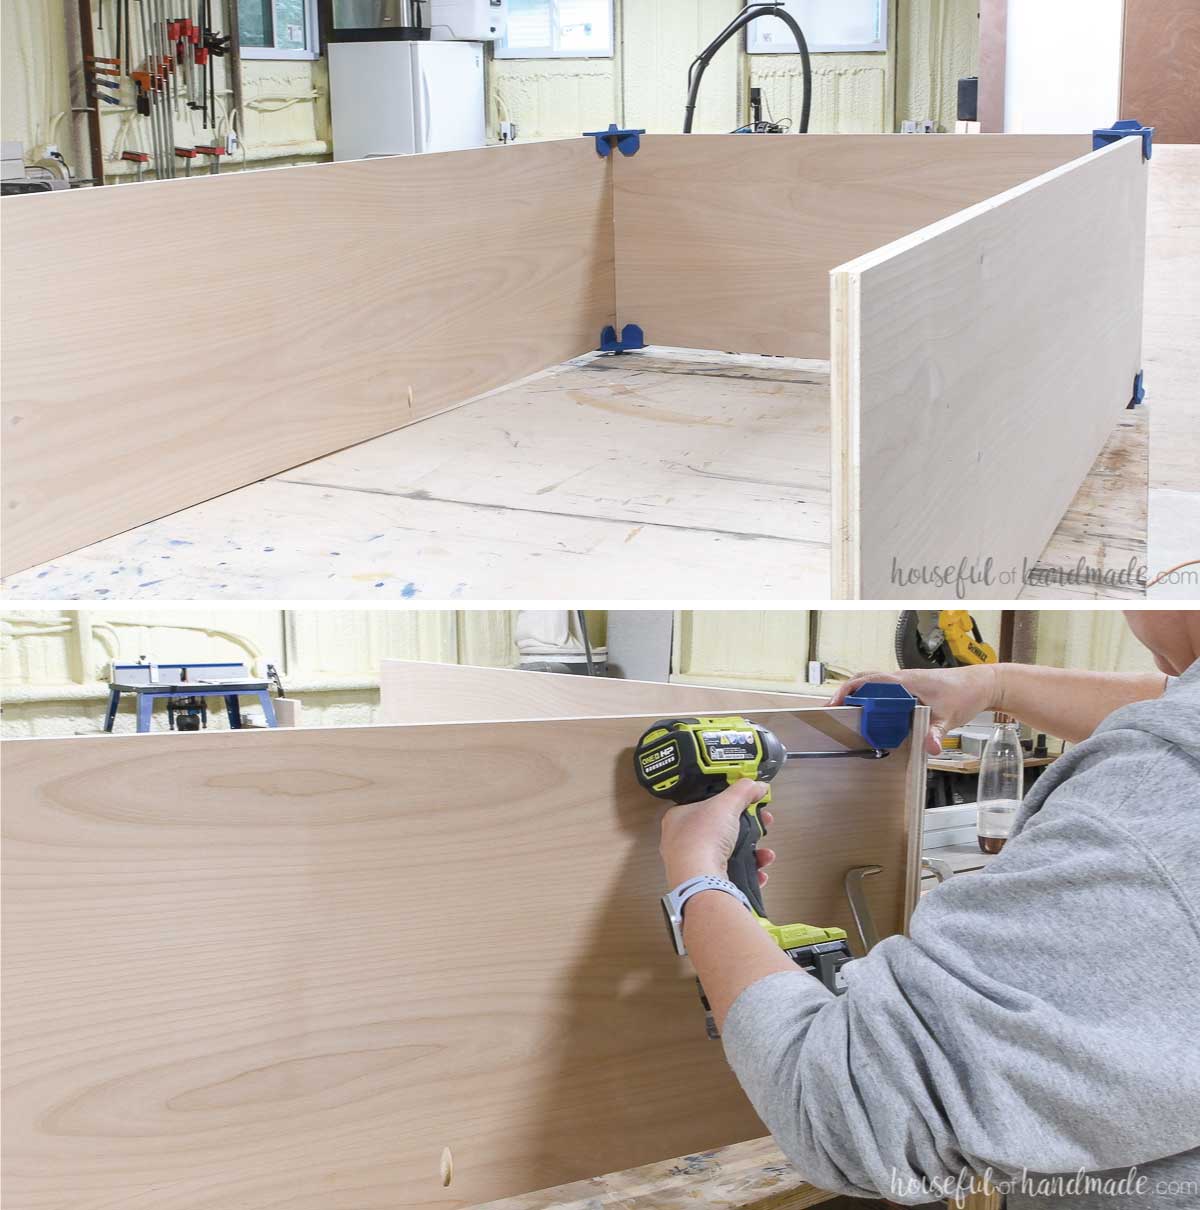
Attach the top in the same way so it is flush with the top of the sides. Place the pocket holes on the top of the cabinet box, this will help them be hidden.
STEP 4- Add the face frame
Before building the face frame, double check the measurements for you face frame. Plywood can be a variety of thicknesses up to 3/4″, but are usually slightly thinner.
Trim the face frame rails down so that the completed face frame is the exact width of the assembled display cabinet box.
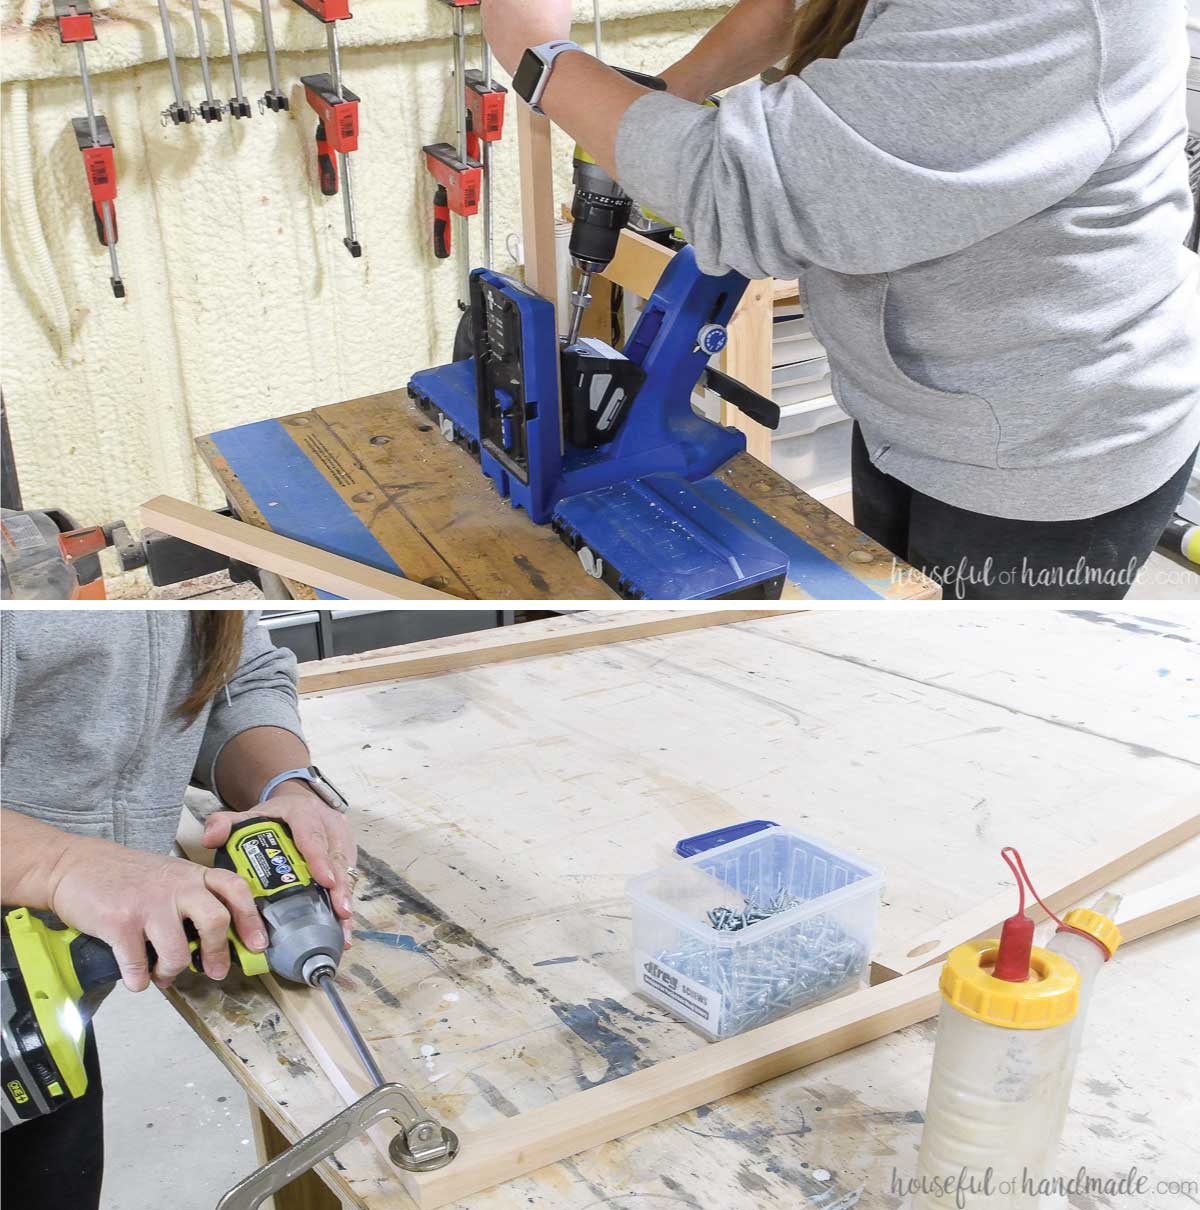
Drill one pocket hole in each side of the face frame rails.
Build the face frame by attaching the rails between the face frame stiles so they are flush with the ends, creating a square.
EXPERT TIP:
Use a face clamp to hold the face frame tight while securing. This will keep the front and back of the face frame flush while adding the screw.
Secure with wood glue and 1 1/4″ pocket hole screws.
Since there is only 1 screw in each corner, the rails can twist. To prevent this, let the glue dry a bit before moving the large face frame to the cabinet.
Add glue to the front of the cabinet and place the face frame on it. Line it up so it is flush with the top of the cabinet, the out sides, and the top of the bottom shelf.
Secure the face frame with pocket hole screws through the holes in the front of the top and bottom pieces and the side.
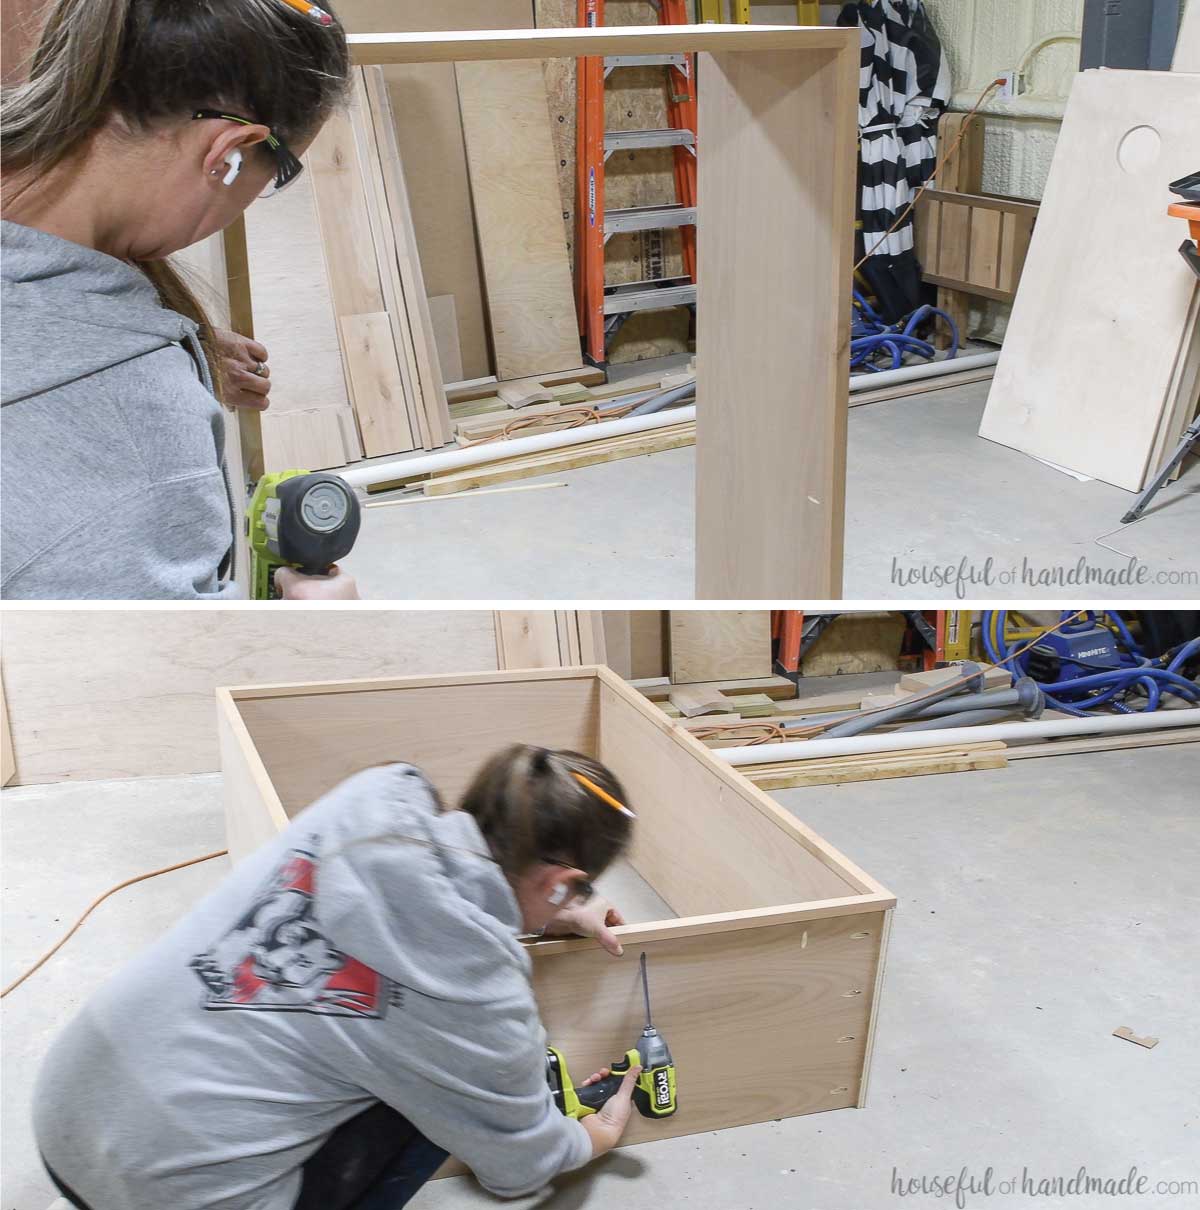
Use a brad nail gun to secure the face frame to the rest of the face frame on the sides.
STEP 5- Build the display cubby
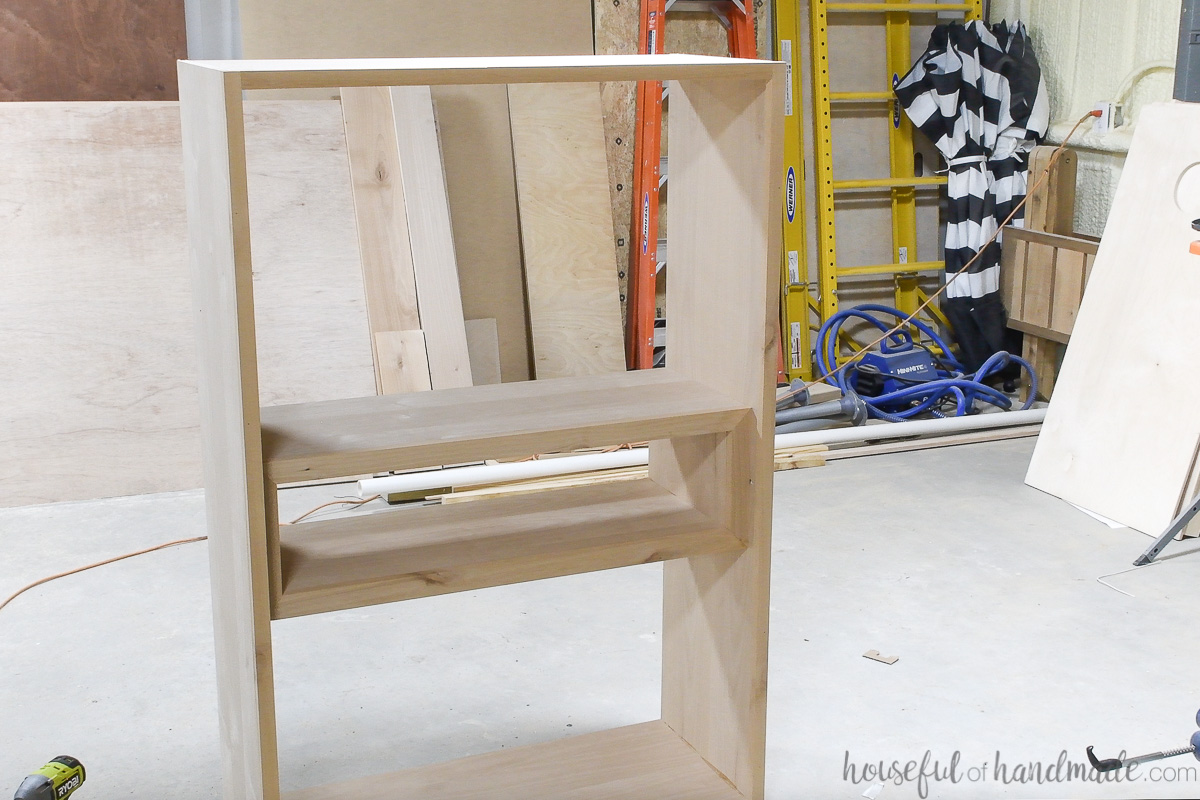
The display cubby is attached/built in sections to put it in without having visible pocket holes.
Start by measuring up 29 3/4″ from the top of the bottom shelf and drawing a level line on both sides.
Drill pocket holes in the sides and front of the cubby shelves. Then drill pocket holes in the bottom and front of the cubby sides.
Attach the one of the cubby shelf pieces to the cabinet so the top is flush with this line. Use wood glue and 1 1/4″ pocket hole screws.
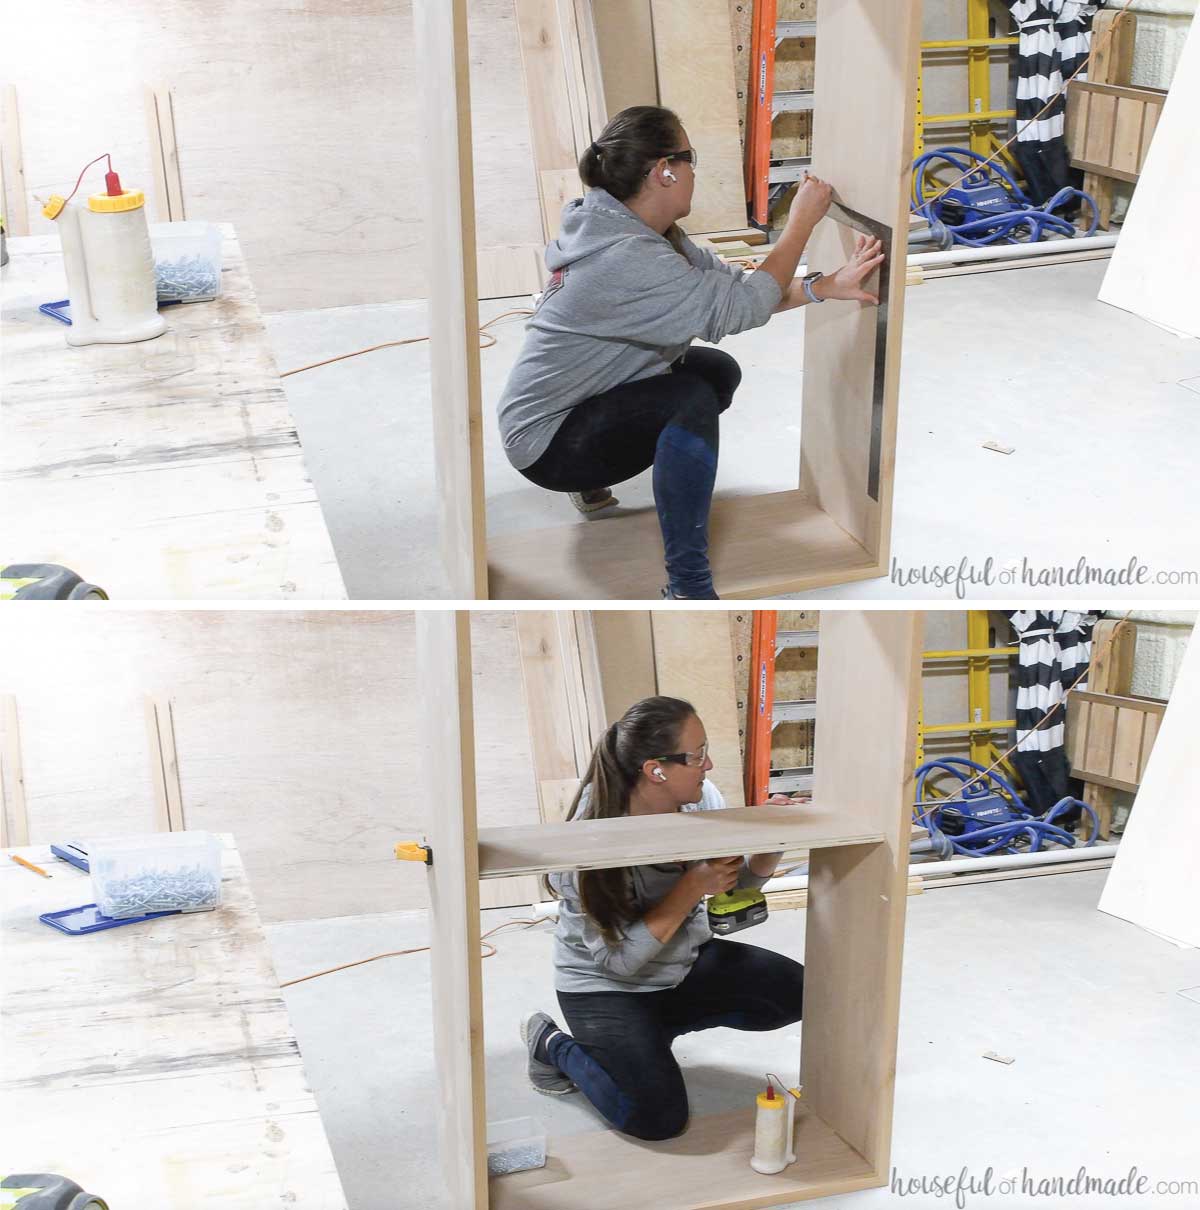
Next, attach the sides of the cubby to the top of the bottom cubby shelf. Set the sides in so the inside is 1 1/2″ in from the sides. This will make it flush with the inside of the face frame.
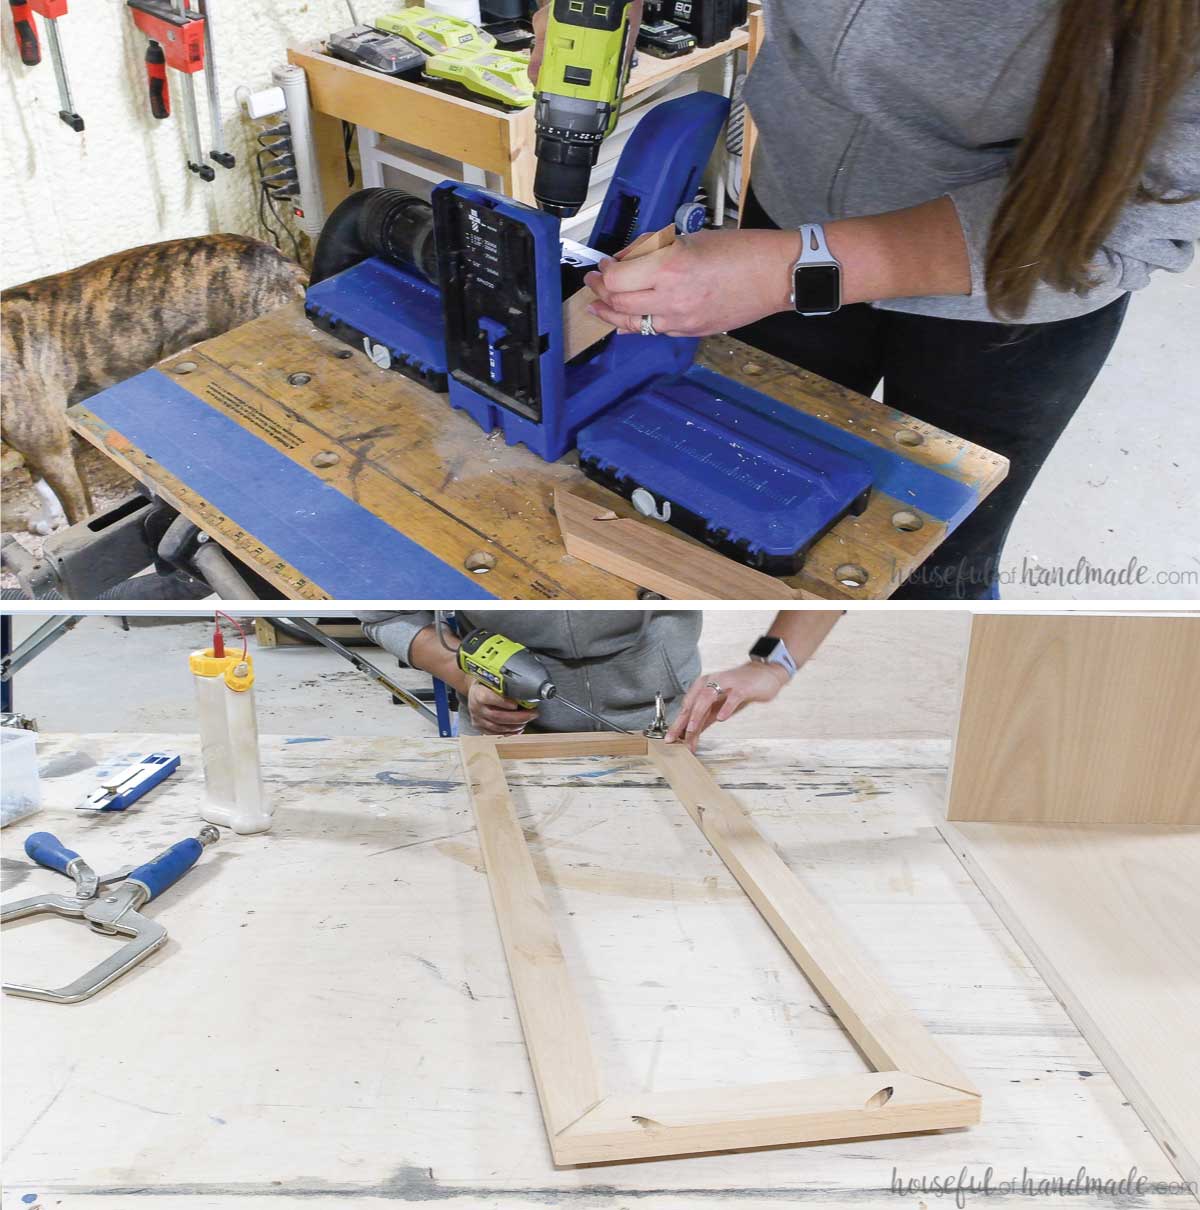
Build the cubby face frame by first drilling 1 pocket hole in each side of the face frame stiles.
These will be visible on the outside of the face frame, but will be hidden when the cubby is installed.
Attach the stiles to the rails with wood glue and a 1 1/4″ pocket hole screw in each corner. Again, with only 1 screw this frame can twist, so let the glue dry before moving it.
Attach the face frame to the cubby sides and bottom. Use wood glue and the pocket holes in the front of the sides and bottom to attach it.
Then place the cubby in the cabinet. Add wood glue to the front of the cubby shelf that is already attached and the top of the cubby sides.
Move the cubby into place on that shelf. This will take a little strength since the shelf that is already installed is holding the cabinet tight together.
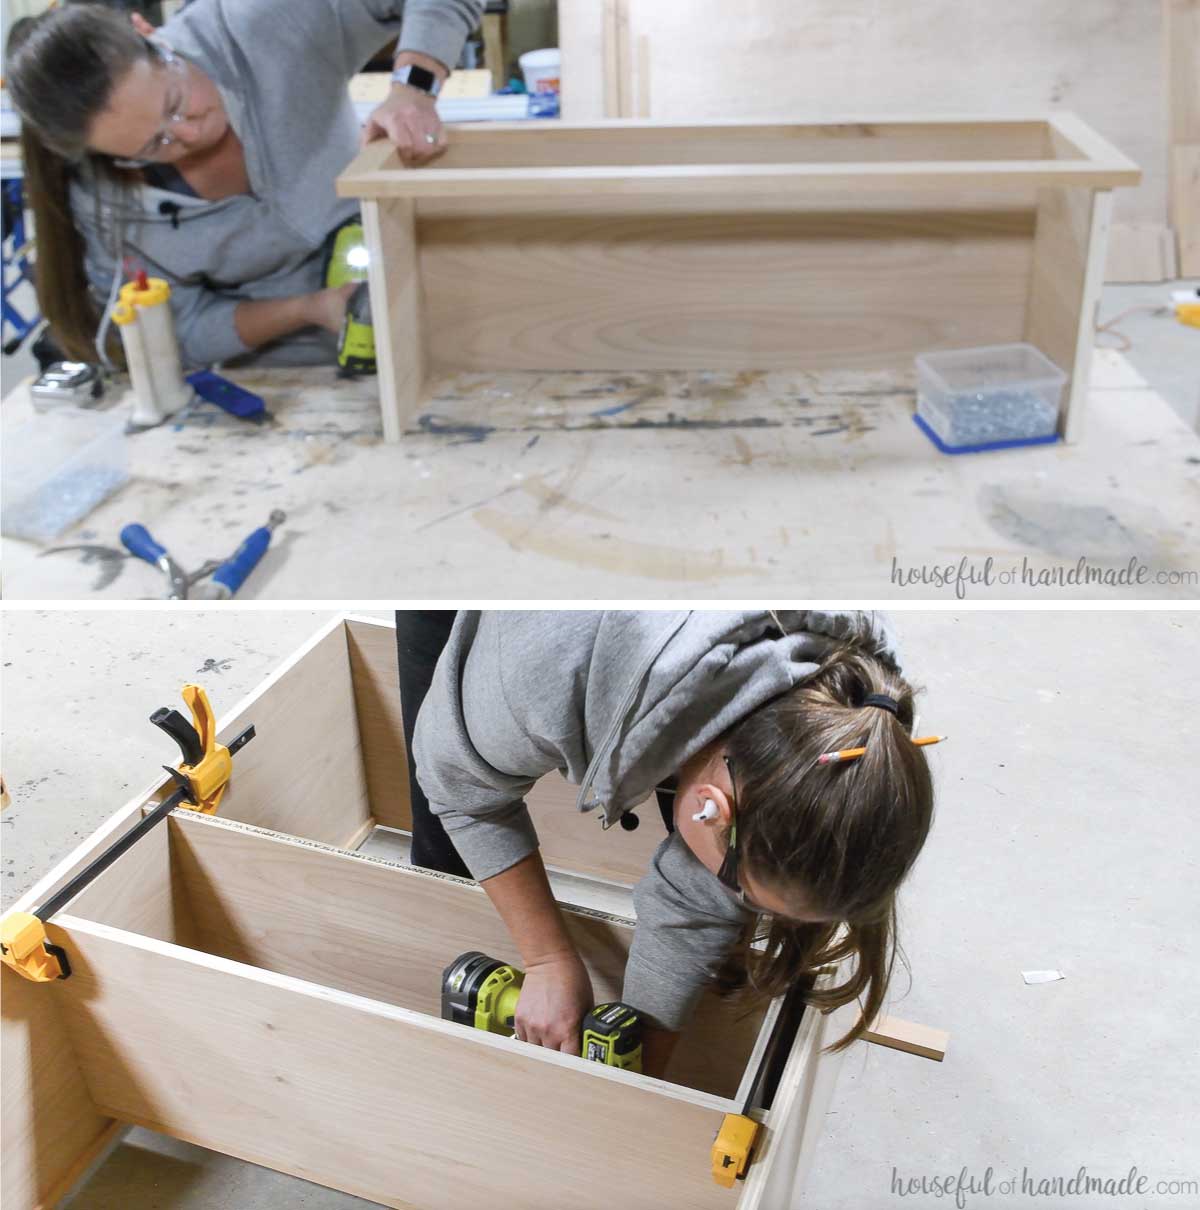
Clamp it in place and secure by attaching the upper shelf to the face frame and the lower shelf to the cabinet sides with the predrilled pocket holes and 1 1/4″ pocket hole screws.
STEP 6- Cut and attach cabinet back and shelves
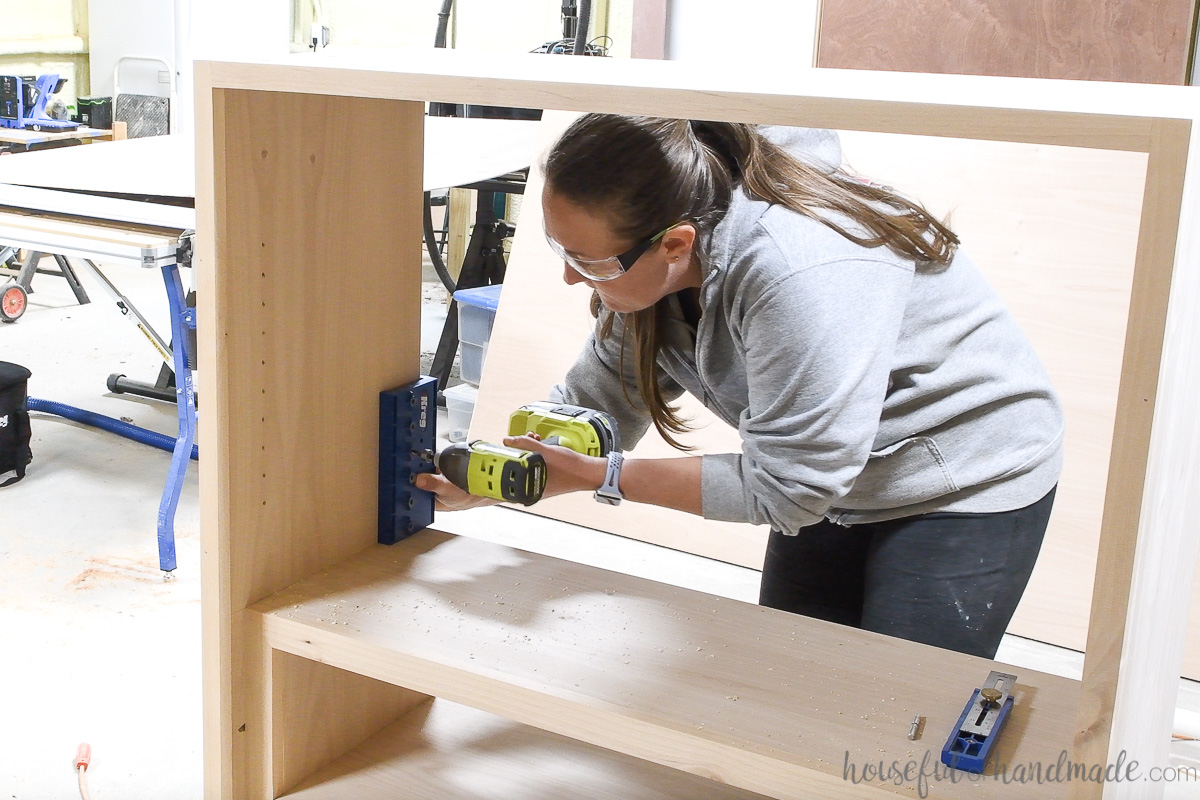
Before attaching the back, add holes for shelf pins for the adjustable shelves.
The shelves are only 12 3/4″ thick before the front so make sure to set the front shelf pin holes back from the cabinet enough to accommodate that.
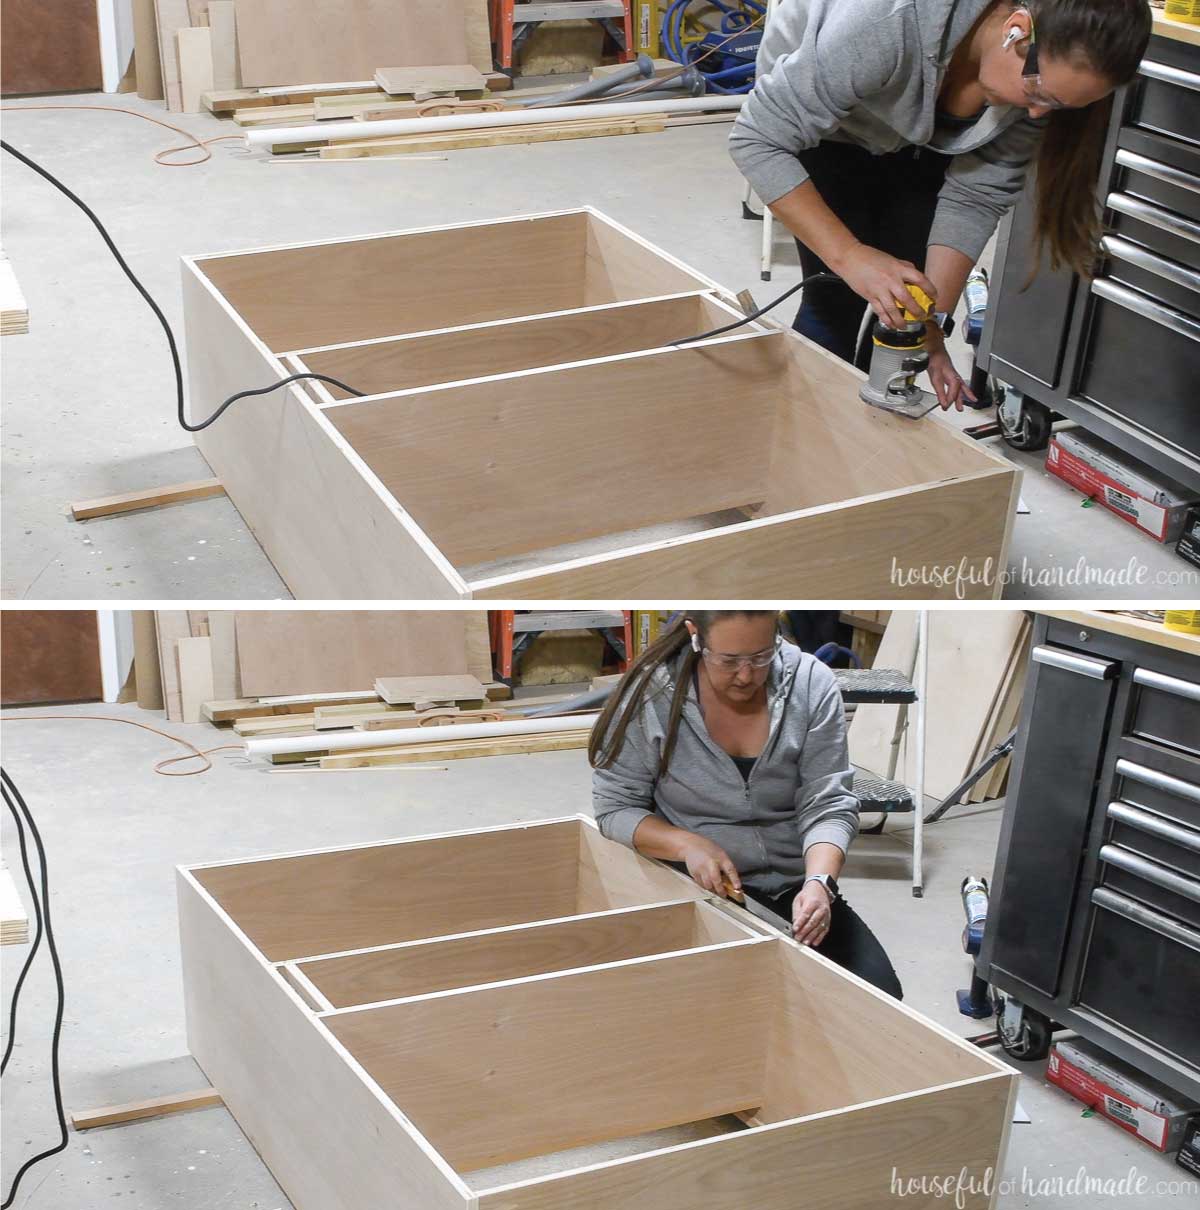
Using the trim router with a 3/8″ groove, set the depth of the router to match the depth of your backing plywood.
Router a groove all around the back. You will not be able to router a continuous groove around the cubby shelves. Use a chisel and/or hand saw to trim away any area not cut with the router.
Also, trim away the rounded corners to fit a square sheet of plywood.
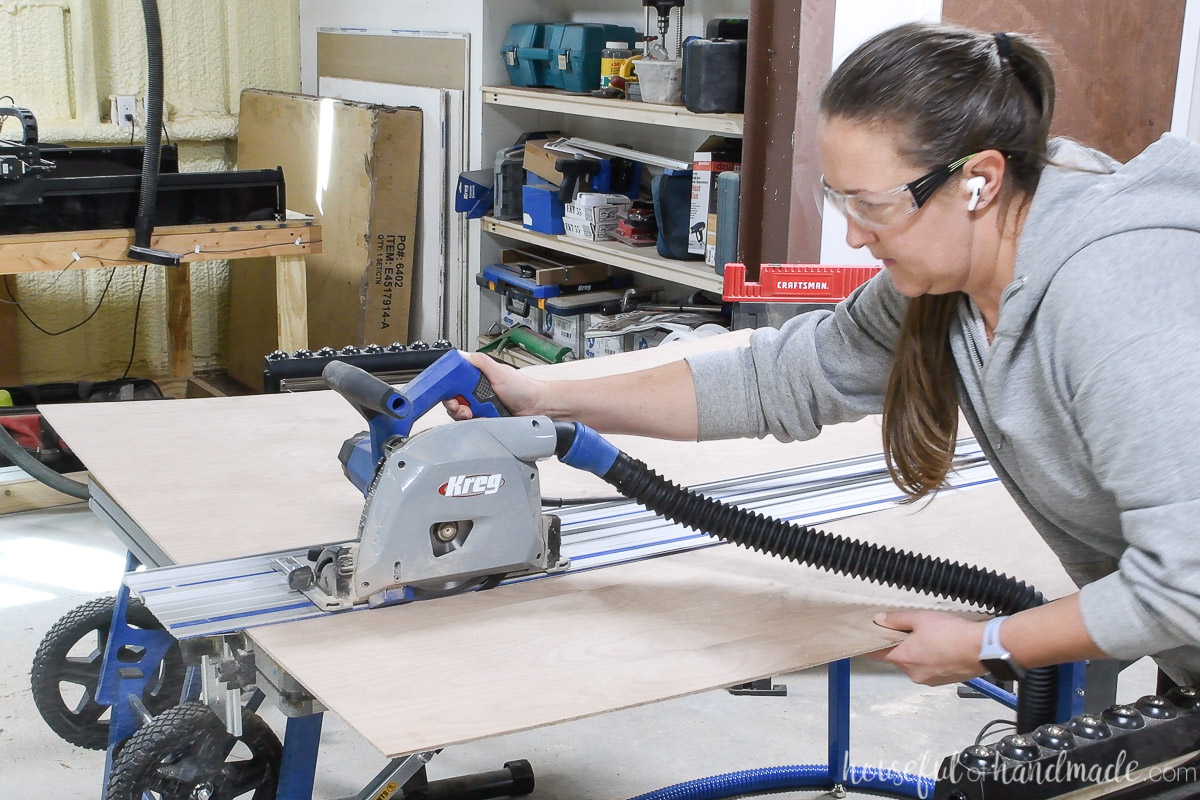
Set blade depth to match the depth of your cabinet backing plywood.
Double check the measurements from the cut list to the actual opening on the back of the cabinet and adjust as needed.
Cut the plywood piece for the back on the ACS.
Mark on the back of the cabinet where the cubby shelves are. Lay the backing in place and draw a line between the marks.
Attach the back to the cabinet along these marks with the brad nails. Make sure to secure it to the cubby shelves and all around the perimeter of the back.
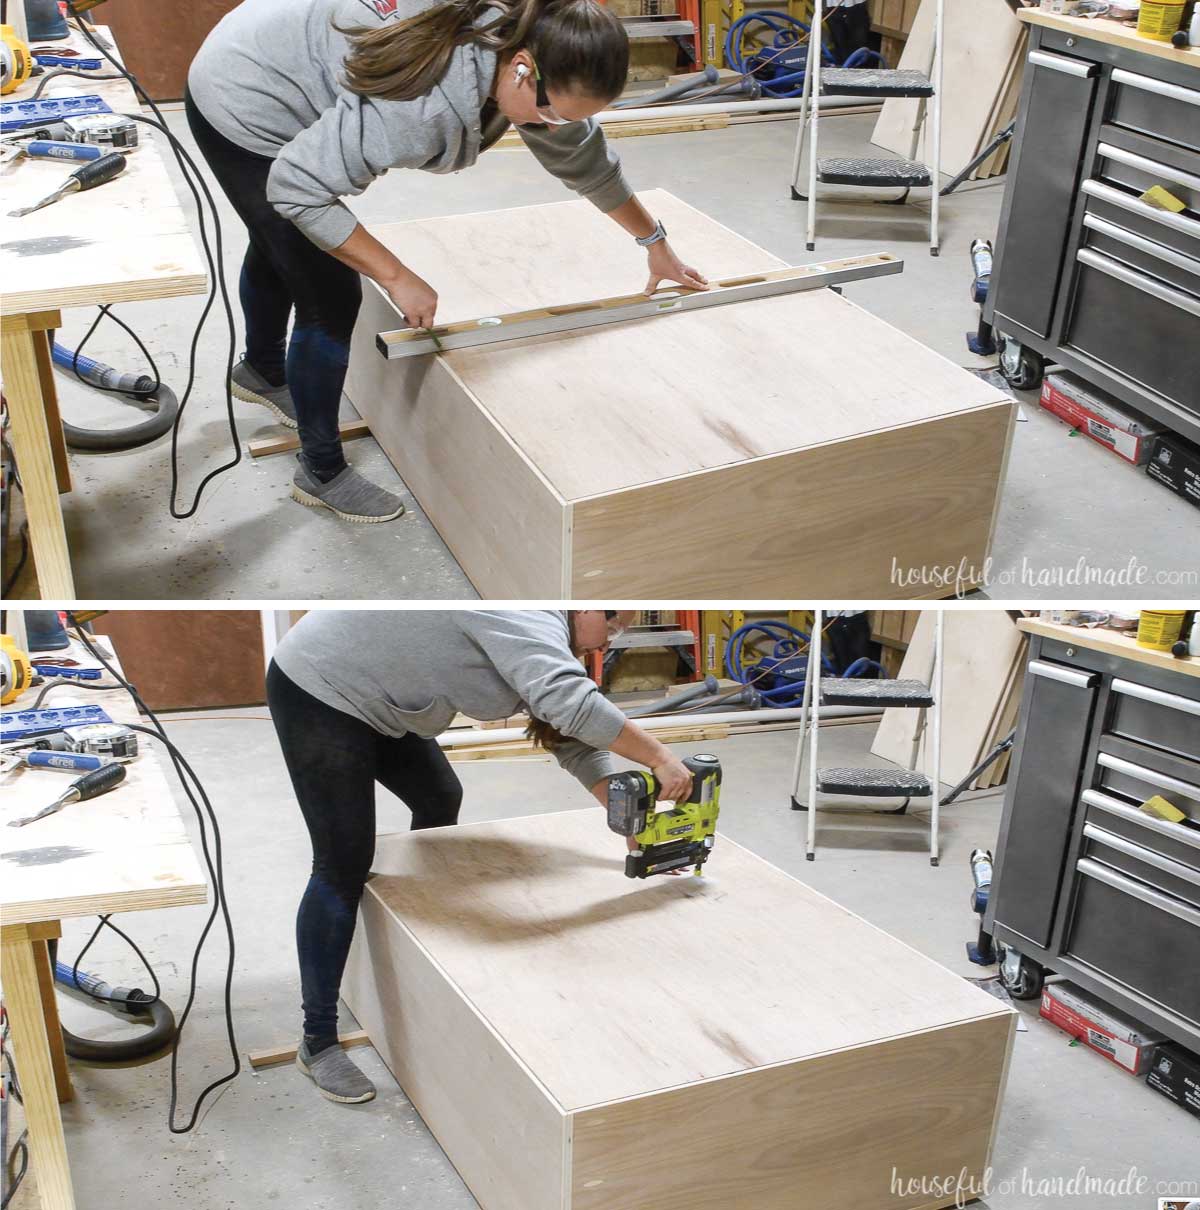
Cut the pieces for the adjustable shelves. Drill pocket holes set for 3/4″ thick material in the front of the shelf boards.
Attach the shelf fronts to the boards with wood glue and 1 1/4″ pocket hole screws. Make sure to keep the top of the plywood flush with the top of the 1×2.
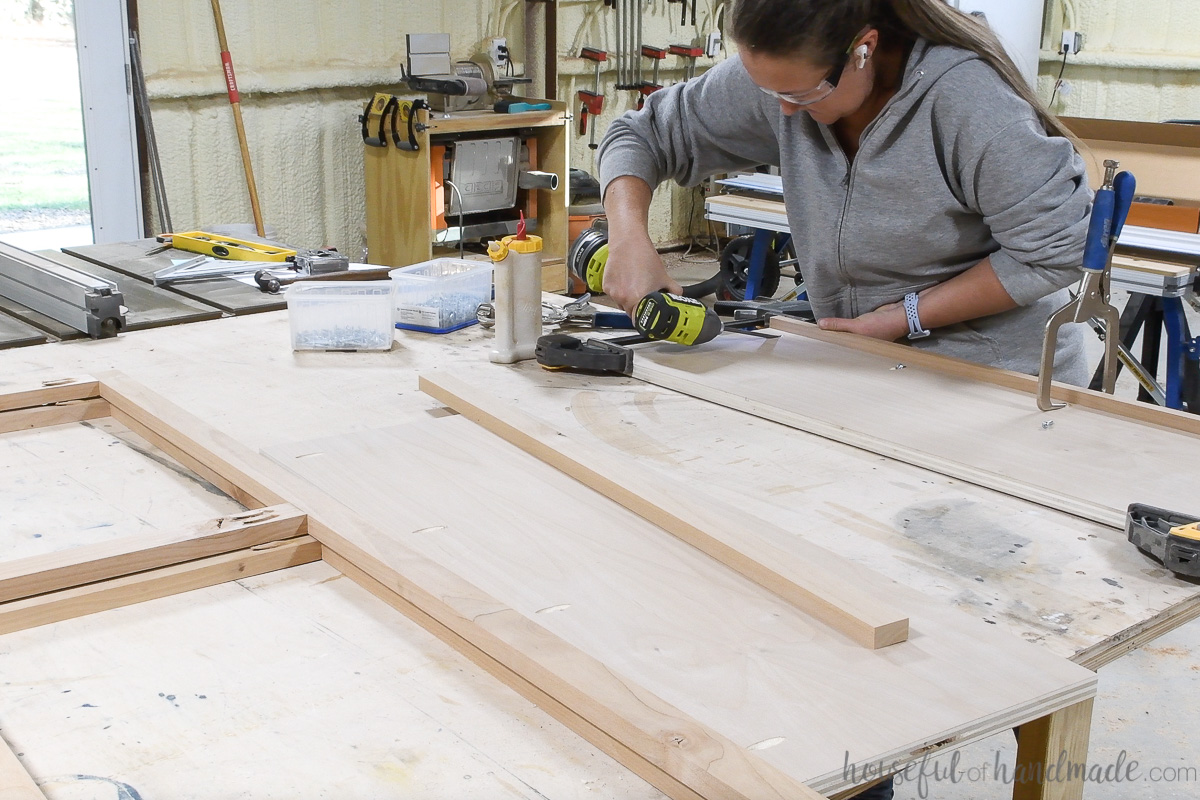
STEP 7- Build the glass inset doors
Double check your cabinet opening. The measurements for the door in the build plans allow 1/16″ reveal on all sides.
If you had to adjust the cabinet face frame because of the thickness of your plywood, you will need to adjust the door rails as well.
Drill 2 pocket holes set for 3/4″ thick material in each end of the door rails.
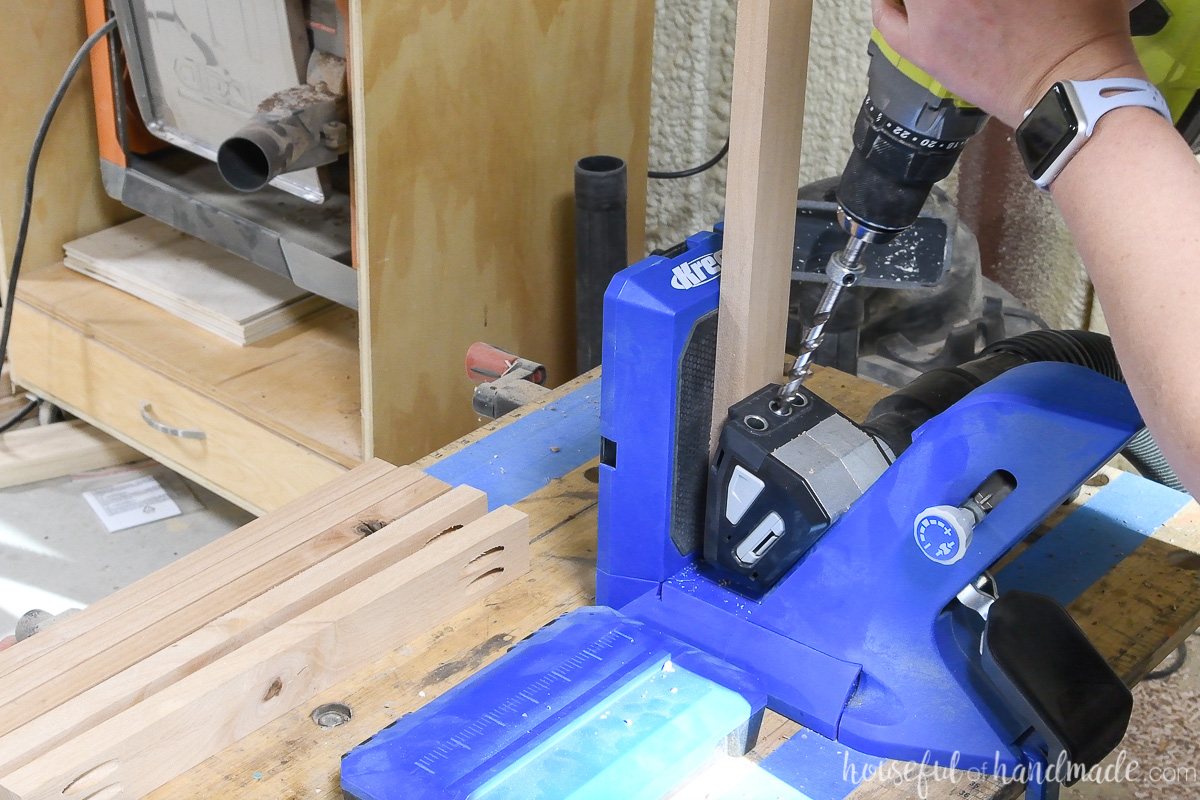
Attach the top and bottom rails to one of the stiles so they are flush with the top and bottom. Use wood glue and 1 1/4″ pocket hole screws to secure.
EXPERT TIP:
When screwing in the screws on the face frame, always attach the screw on the outside first. This will help prevent splitting in the wood of the stiles.
Attach the center rail so it is flush with the top shelf of the cubby. The top of the rail should be 29 7/16″ up from the bottom of the stiles. Double check against your cabinet.
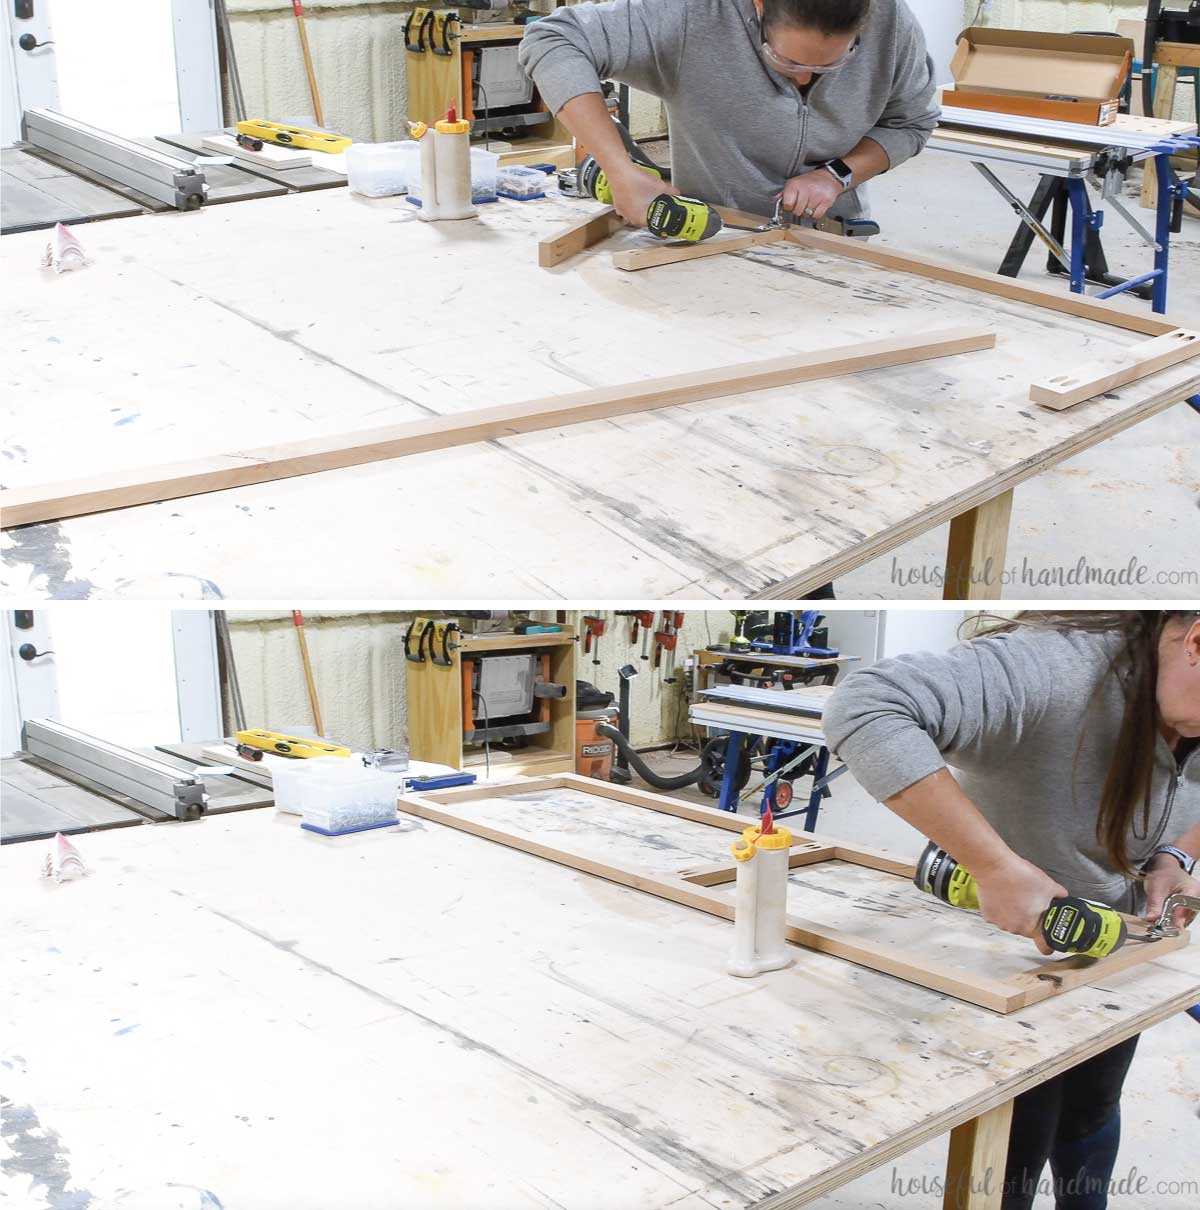
Then attach the second stile on the other side of all the rails. Make sure to keep the door square as you secure with the screws and wood glue.
Repeat for the second door.
Fill the pocket holes on the door with plugs. You can make custom plugs from scraps of the wood you used if you are staining your doors. If you are painting, use pre-made plugs.
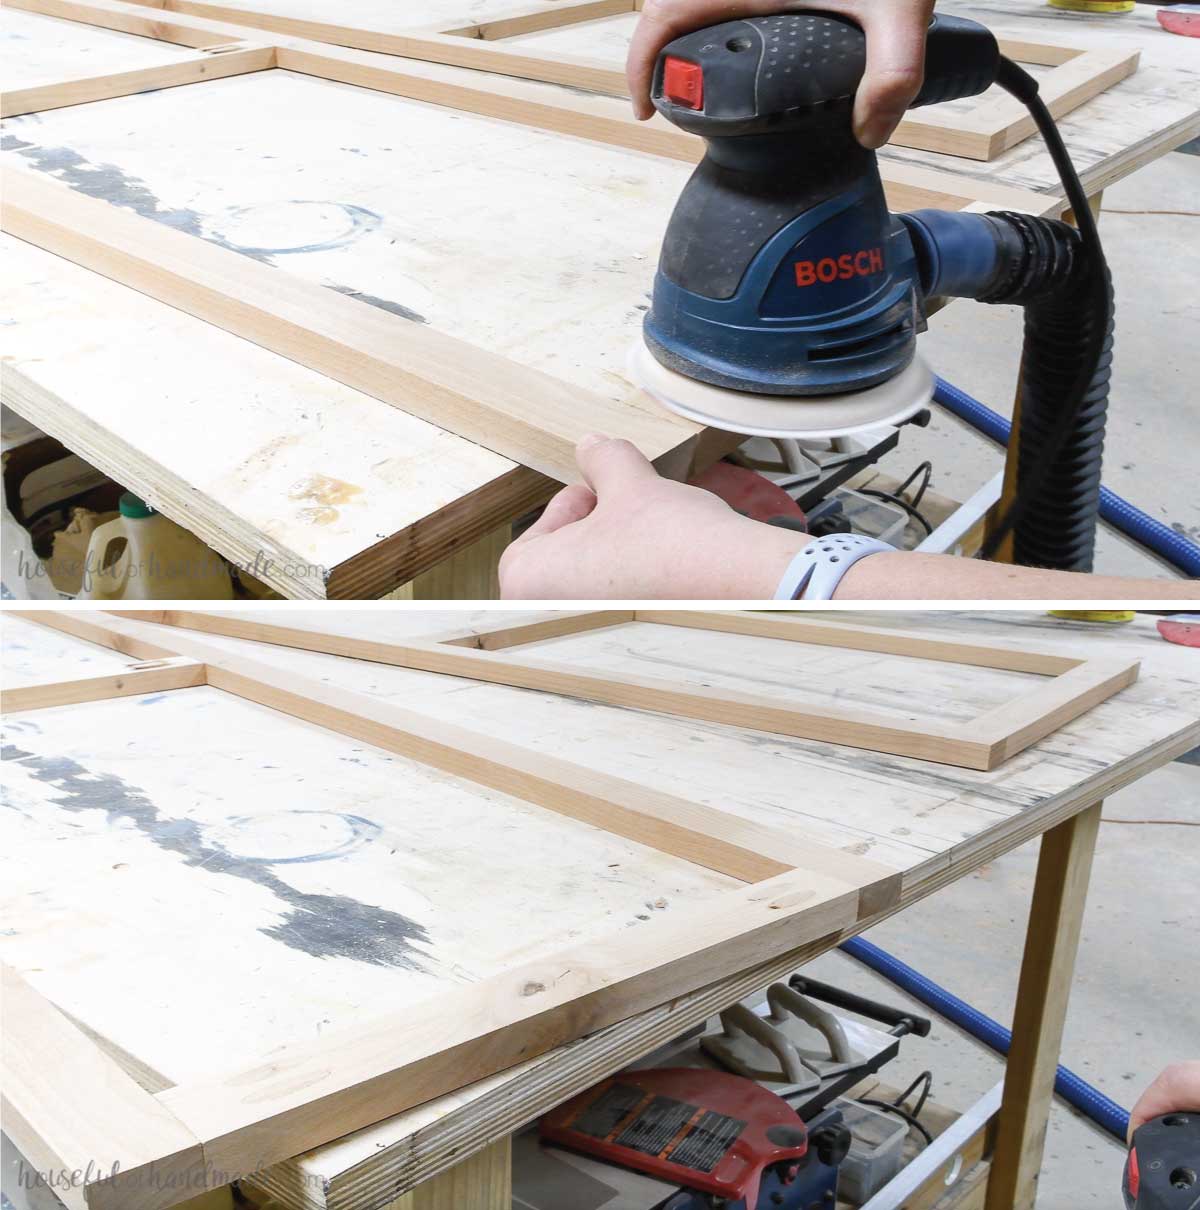
Let the plugs dry then sand them flat with 40 grit sandpaper in an orbital sander. You can also use a flush cut saw to cut off the extra but I find it faster to do with the coarse sandpaper.
Cut your glass to fit inside the door grooves with a slight gap around the edges.
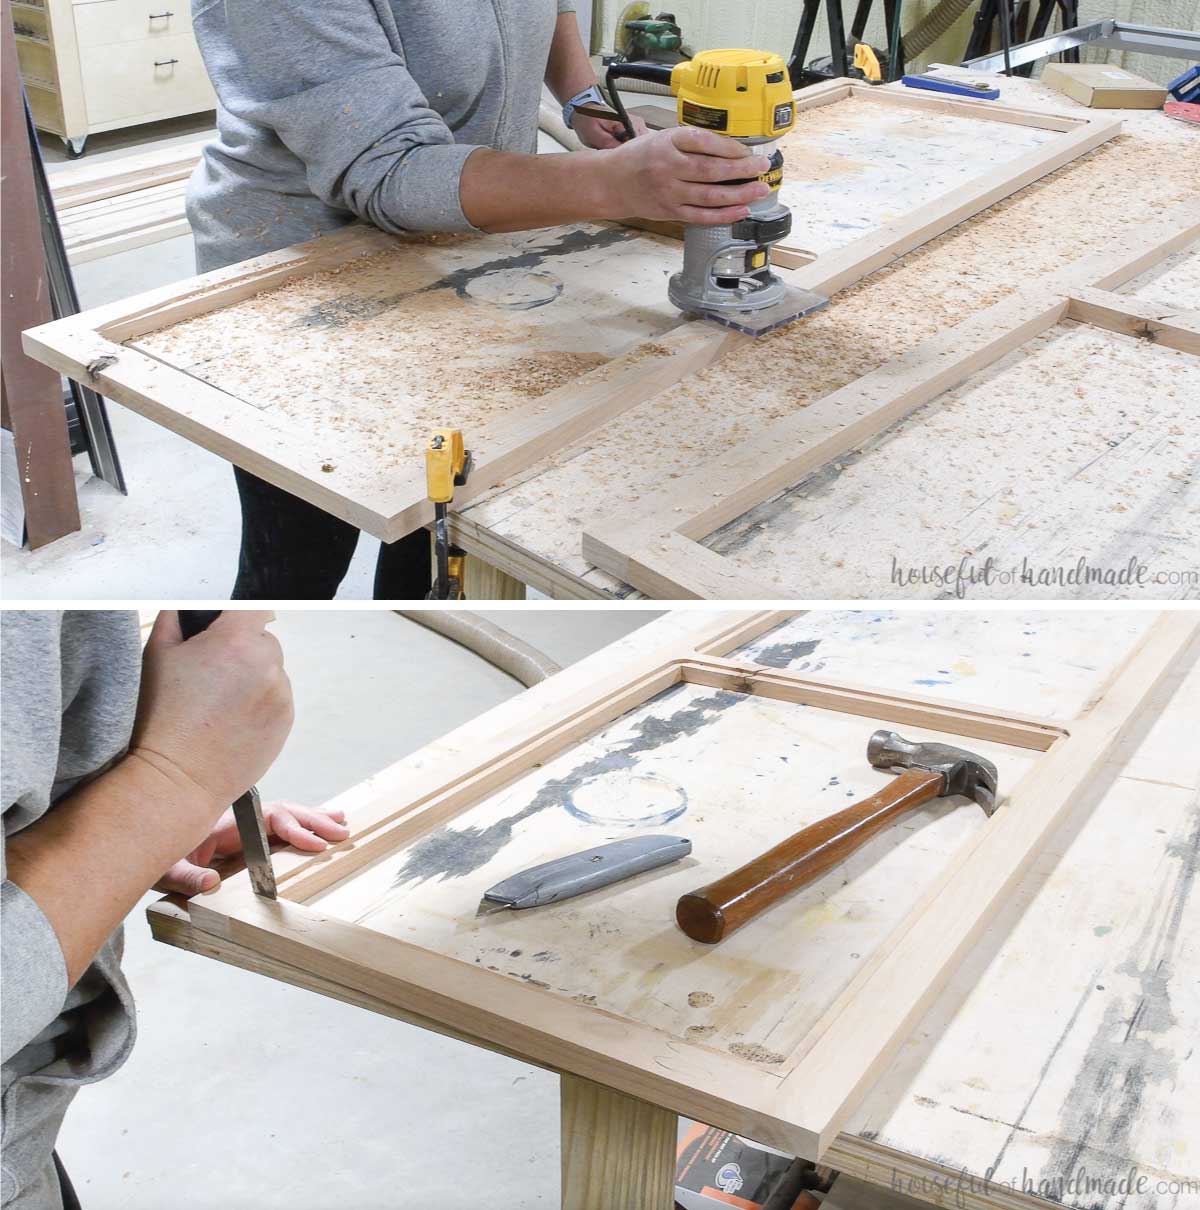
Set your router bit to carve a groove slightly deeper than your glass. My glass was 2.2 mm thick (0.866″) so I cut my groove 3/16″deep (0.1875″).
Router the grove all around the inside of both panel areas in the doors.
Use a chisel/knife to square off the corners of your routed groove.
Sand the doors to their final sanding. I also prefer to paint/stain my doors before adding the glass. So do that now and let it dry.
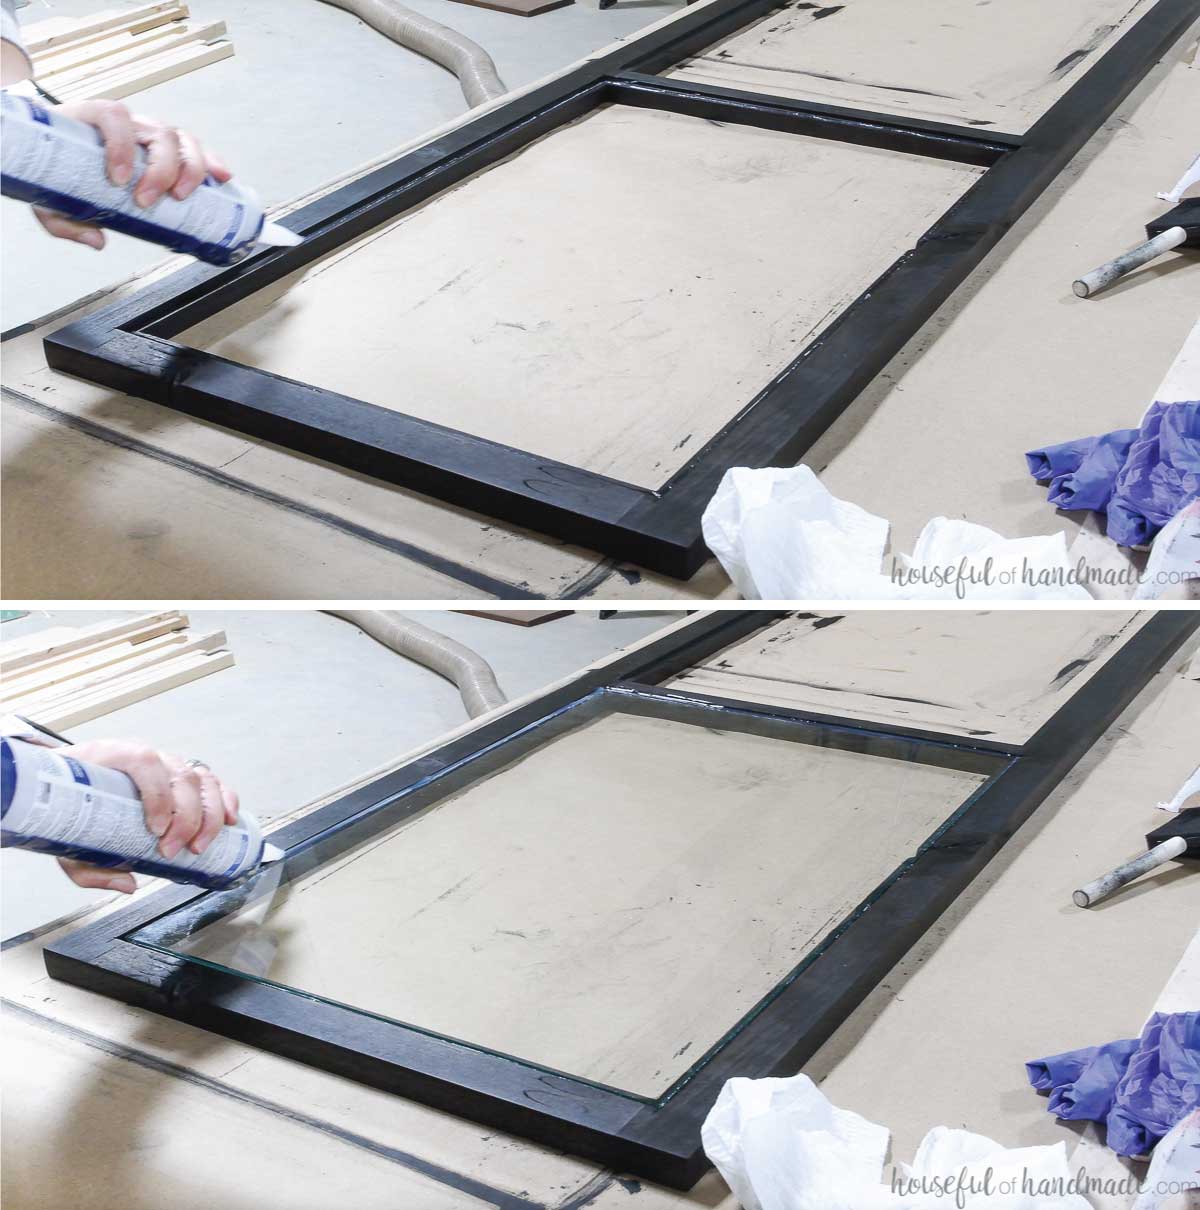
Place a very thin amount of silicone on the bottom of the groove where you glass goes. You do not want it to squee out to the front.
Carefully set the glass in the groove on the silicone. Center it. There should be a small gap around the edges.
Use the silicone to fill in the gap around the edges. Smooth it with your finger.
Let the silicone dry completely before moving the doors.
STEP 8- Finish the display cabinet
Sand and stain your cabinet and shelves.
For my cabinet I sealed the inside and stained the outside with a black stain for a modern look.
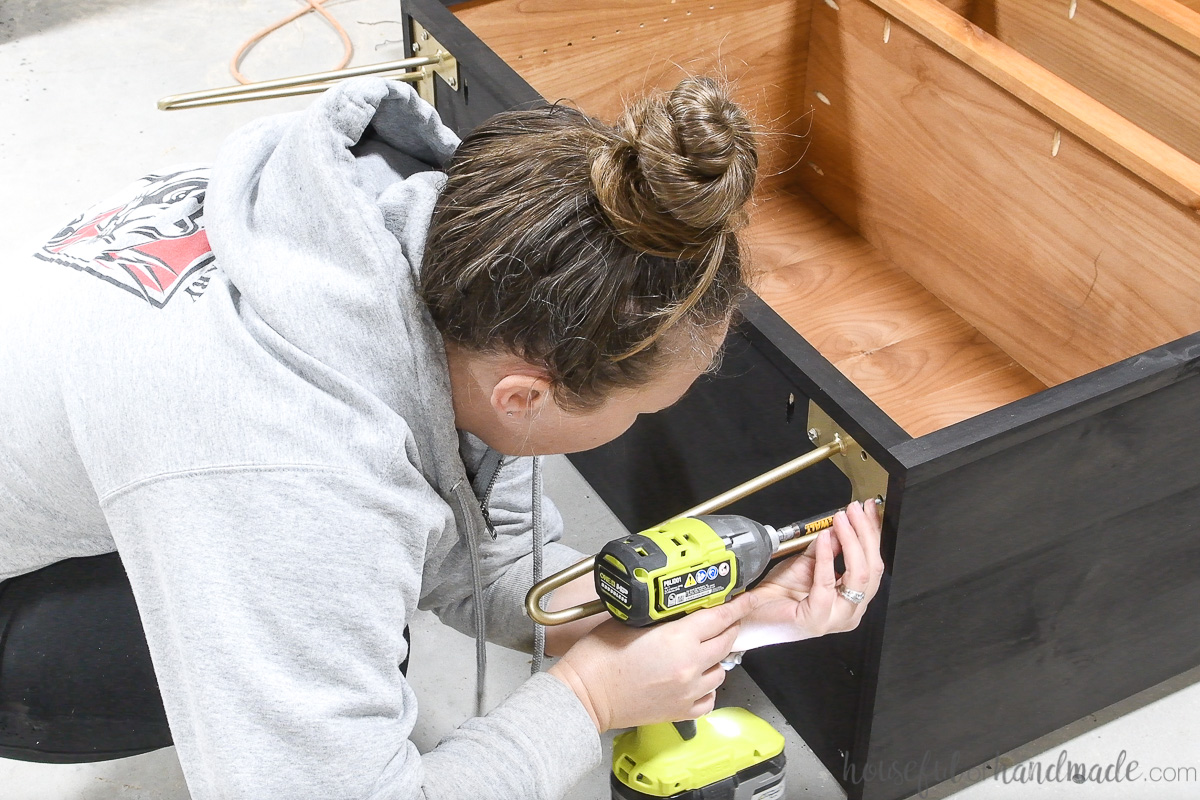
Attach the feet to the bottom of the cabinet.
Attach the cabinet doors to the cabinet with the inset cabinet door hinges. Make sure the doors are set so the center rail is in front of the top of the cubby.
Attach door pulls to the cabinet. You can also use magnetic catches on the top and/or bottom of your doors to keep them closed if desired.
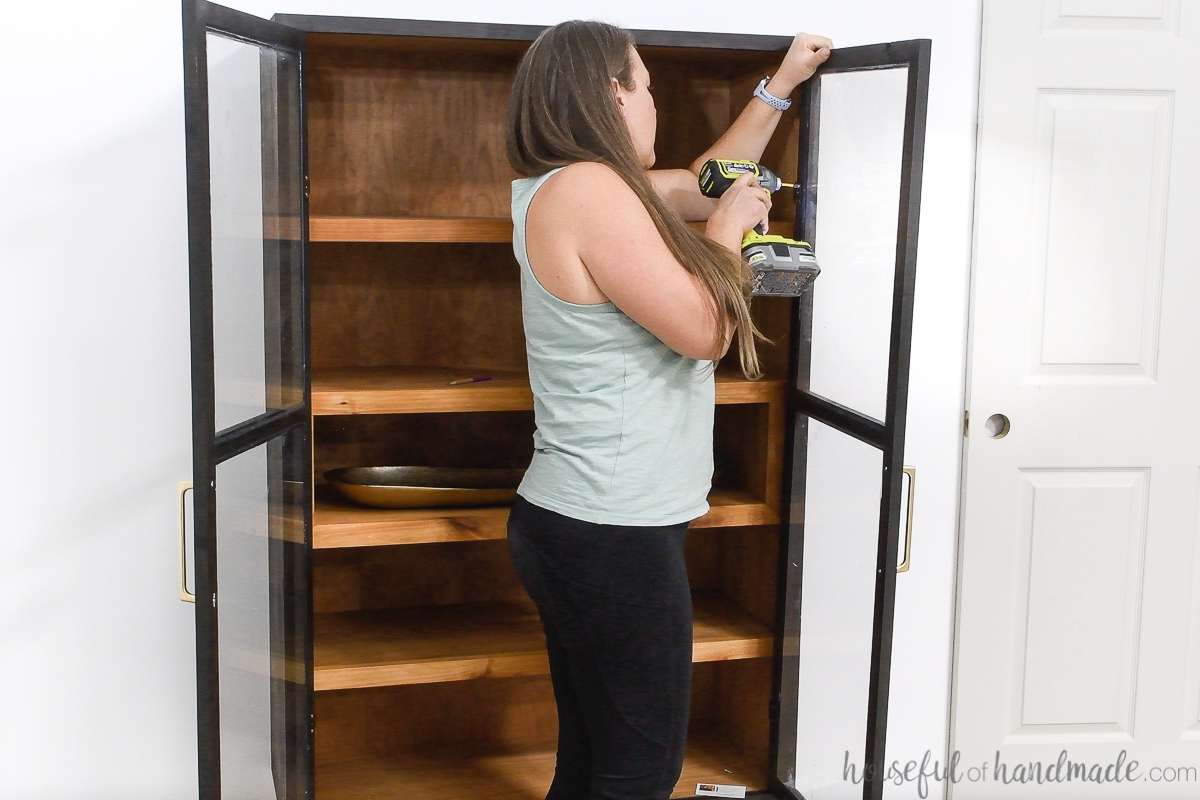
Add the shelf pins to the holes and slide in the adjustable shelves.
It is a good idea to secure your new display cabinet to the wall. Once it is full of your precious items you would hate for it to fall over.
You can attach it to the wall with an L bracket. Mark where the top of your cabinet is up against the wall then attach the L bracket to the wall into studs so the top is at this mark.
Slide the cabinet up under the L brackets and secure to the top of the display cabinet. This will keep the inside beautiful so you don’t have visibile mounting hardware.
You did it!
Premium plans include:
- Recommended Tools
- Shopping list
- Easy to read cut list table
- Cut diagrams
- Step-by-step instructions with 3D renderings
- Helpful resources
- BONUS: 3D SketchUp file
Prefer to Watch? Check out the Video Below
Now your cabinet is ready to load up with all your treasures!
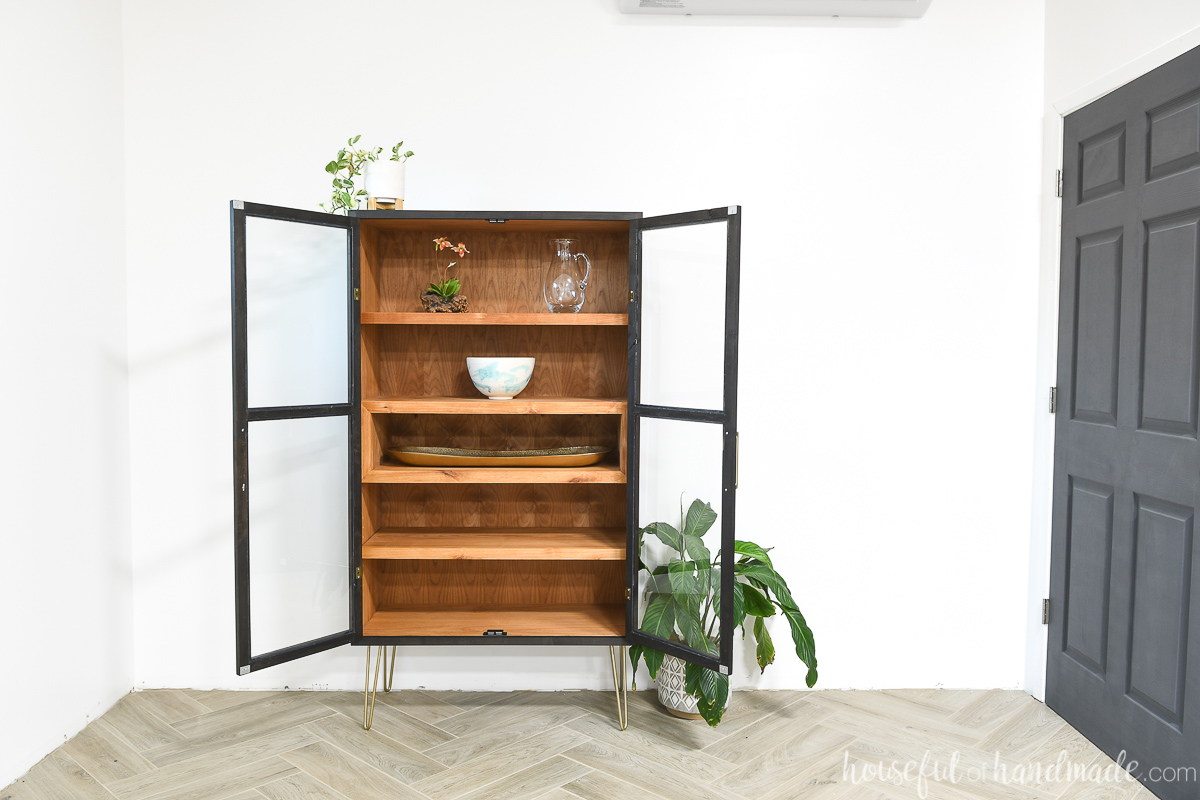
It looks like I need to keep my eyes out for more treasures to fill up my cabinet, but now at least I have a beautiful and safe place to display them.
Happy building!

Thank you to Kreg Tools for sponsoring this post. I only recommend products that I use and love and all opinions are 100% my own. Click here to read my full disclosure policy.

