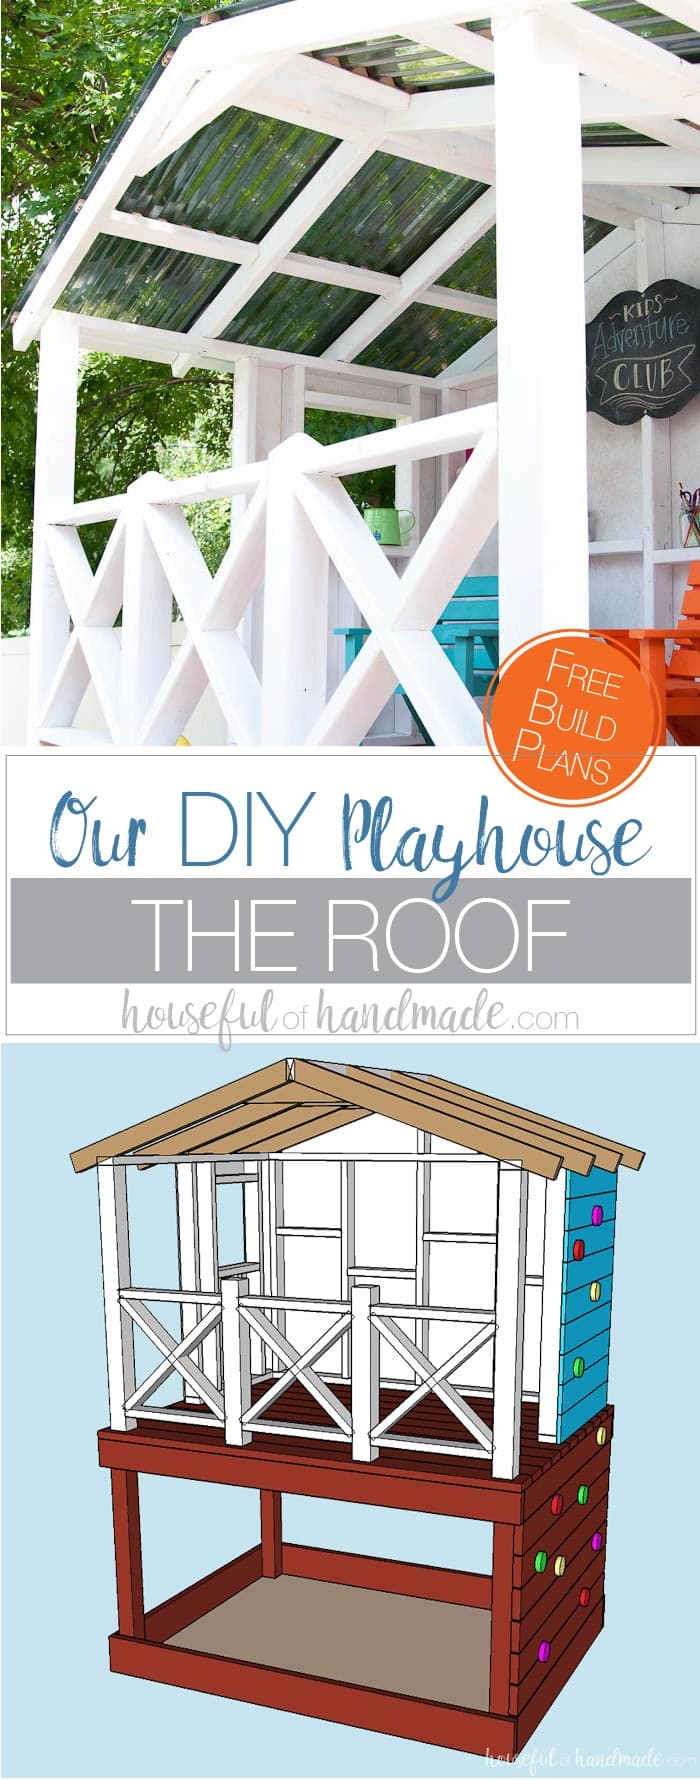
Learn how to build a DIY playhouse. This week we have all the details for how to roof the outdoor playhouse.
The DIY Playhouse is all done! This week we completed the roof build and now our kids have the perfect place to play, even in the hot sun.
The roof material we chose blocks the harmful sun rays but still allows lots of light into the clubhouse. And now the kids can play outside in any weather.
Now we have all the kids playhouse posts ready for you to build your own outdoor wooden playhouse!
This post may contain affiliate links. As an Amazon Associate I earn from qualifying purchases. Click here to read my full disclosure policy.
I was starting to feel like the kids outdoor playhouse was never going to be finished. July was a crazy month. And after waiting for the final roofing piece to arrive in the mail, we just had too much going on to get the roof build complete.
But after a couple strong summer rainstorms, I decided it was time to make the roof a priority. I’m so glad we did because the new roof is definitely the icing on the cake for the perfect outdoor DIY playhouse!
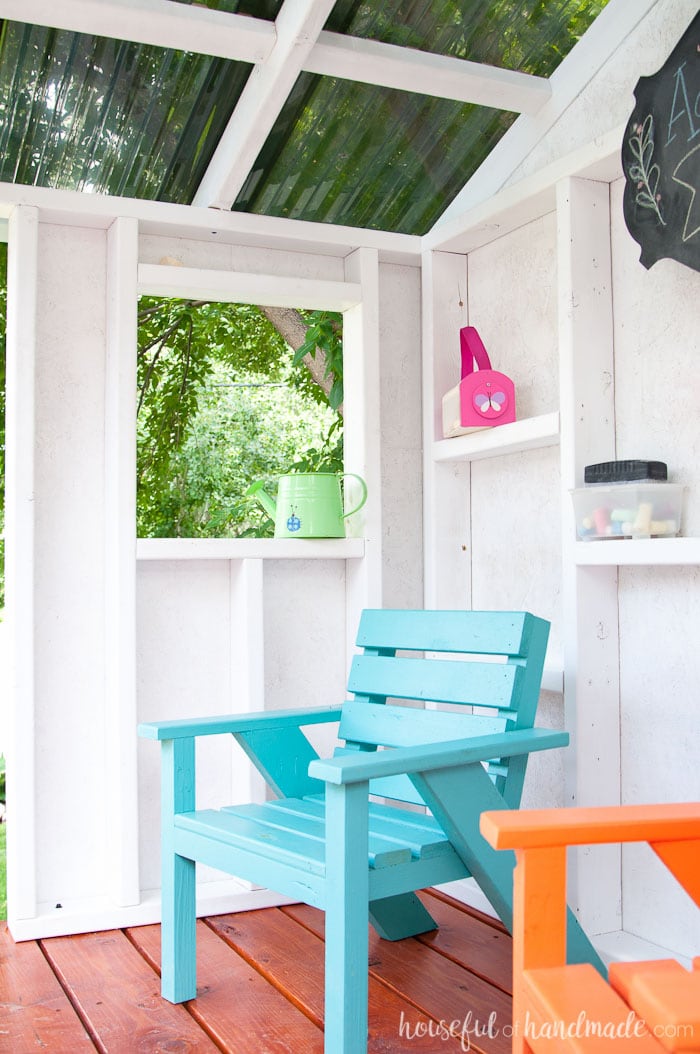
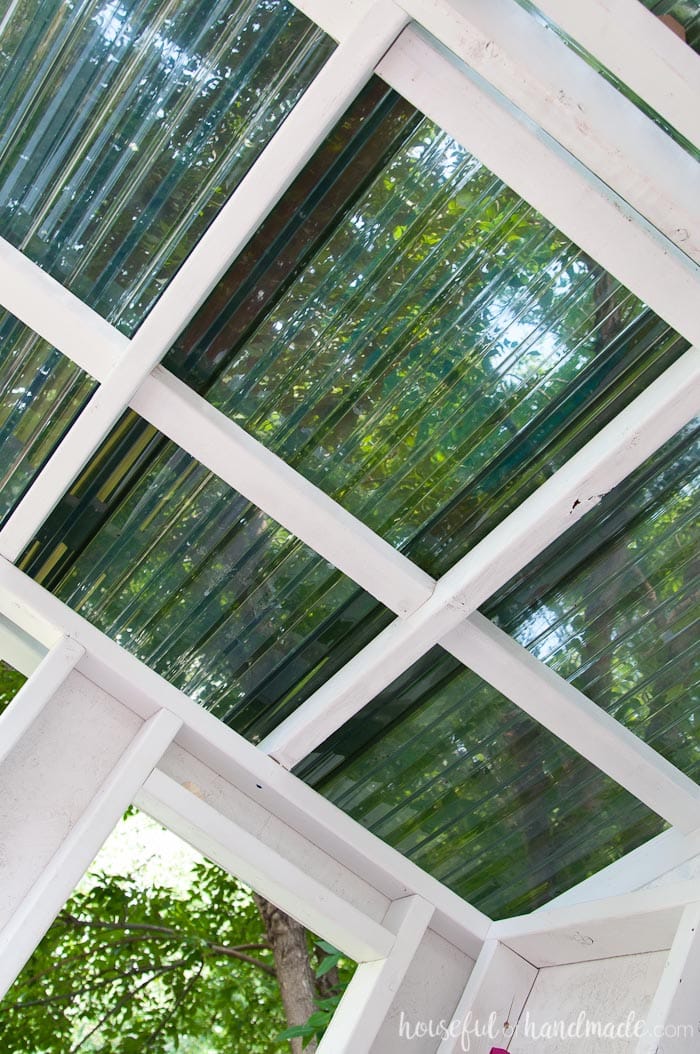
There were many different options for roofing the playhouse. We considered so many of them before finally settling on using the Suntuf corrugated polycarbonate roofing panels from The Home Depot (this is not a sponsored post, I just really love this product).
These roofing panels were not the least expensive option, but the pros of using them outweighed the cost. They block 99% of harmful UV rays, which will not only protect the kids in the playhouse, but also protect the actual playhouse so it lasts longer.
They are super easy to install (minus the almost falling off the ladder part). And the Solar Gray color gives the whole house a shaded feel so it stays cooler in the hot months, but still allows 70% off the light in.
There are many other ways you could roof a playhouse. I love the Suntuf panels we chose, but in case you want to try something else, here are some other playhouse roof ideas:
- Pergola style roof
- Roofing shingles (like on most homes)
- Metal corrugated panels
- Cover roof with outdoor fabric
Once we had decided on what we would use to cover our playhouse, we needed to build a roof to support it. I am not going to lie, building a roof scared me. But it was actually really easy to do!
The roof build did require two sets of hands. I couldn’t hold the boards how I needed them by myself and clamps were not an option.
But with my husband’s help, we had the roof frame built in a morning (except for one board that was mis-cut and required a trip to get more wood).
After the roof of the DIY playhouse was built, adding the Suntuf panels was quite easy. It did require a bit of balancing on a step stool and ladder, but was really easy to do. So easy I am planning on using them again on another project soon!
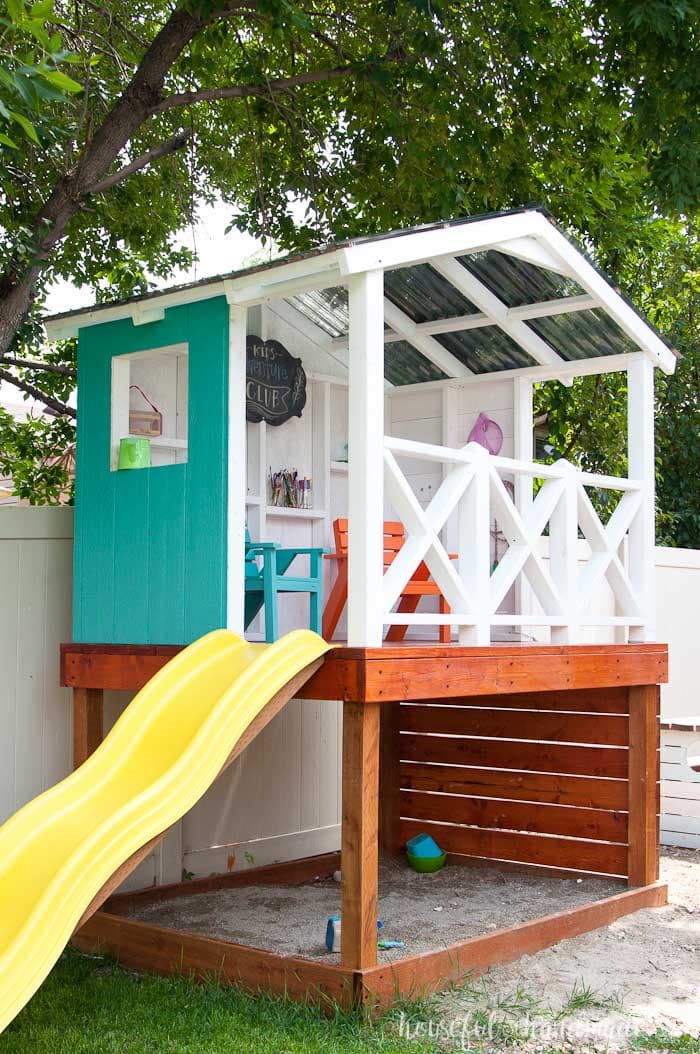
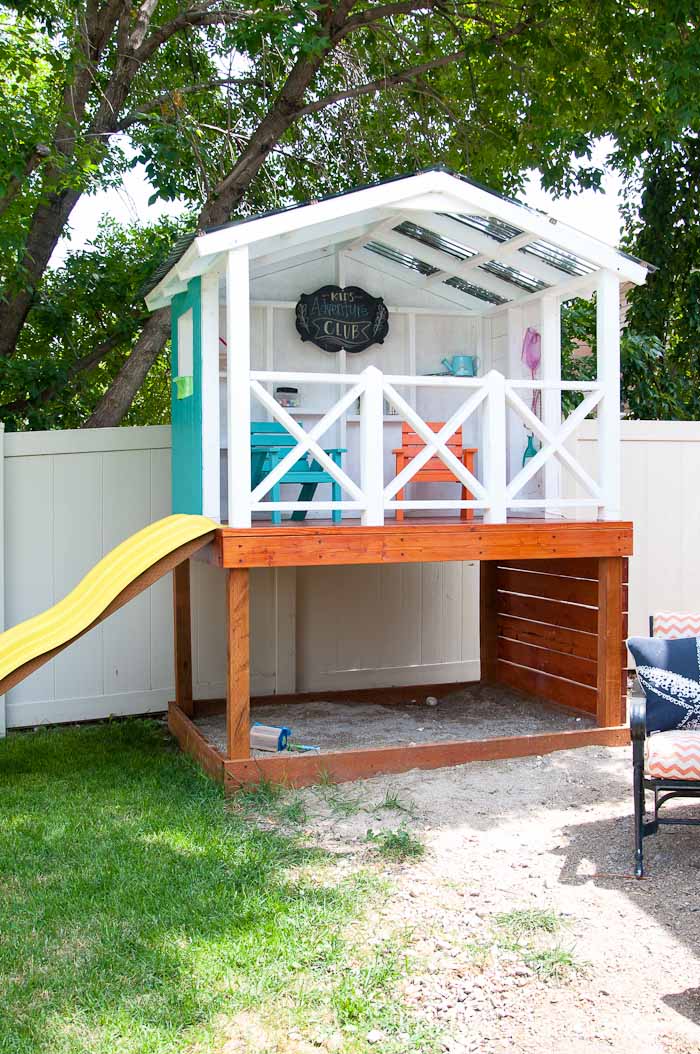
I absolutely love that the roof covers the entire playhouse deck. It will help protect all the kids toys during the winter. And the wood will last longer since it will be protected from the weather.
The kids feel so special with their own space to enjoy. They even asked for a broom for their playhouse so they can keep it clean.
And don’t miss the rest of the posts in the series. Click the links below for the rest of the playhouse build.
THE DECK || THE WALLS || THE RAILING || THE SLIDE & CLIMBING WALL
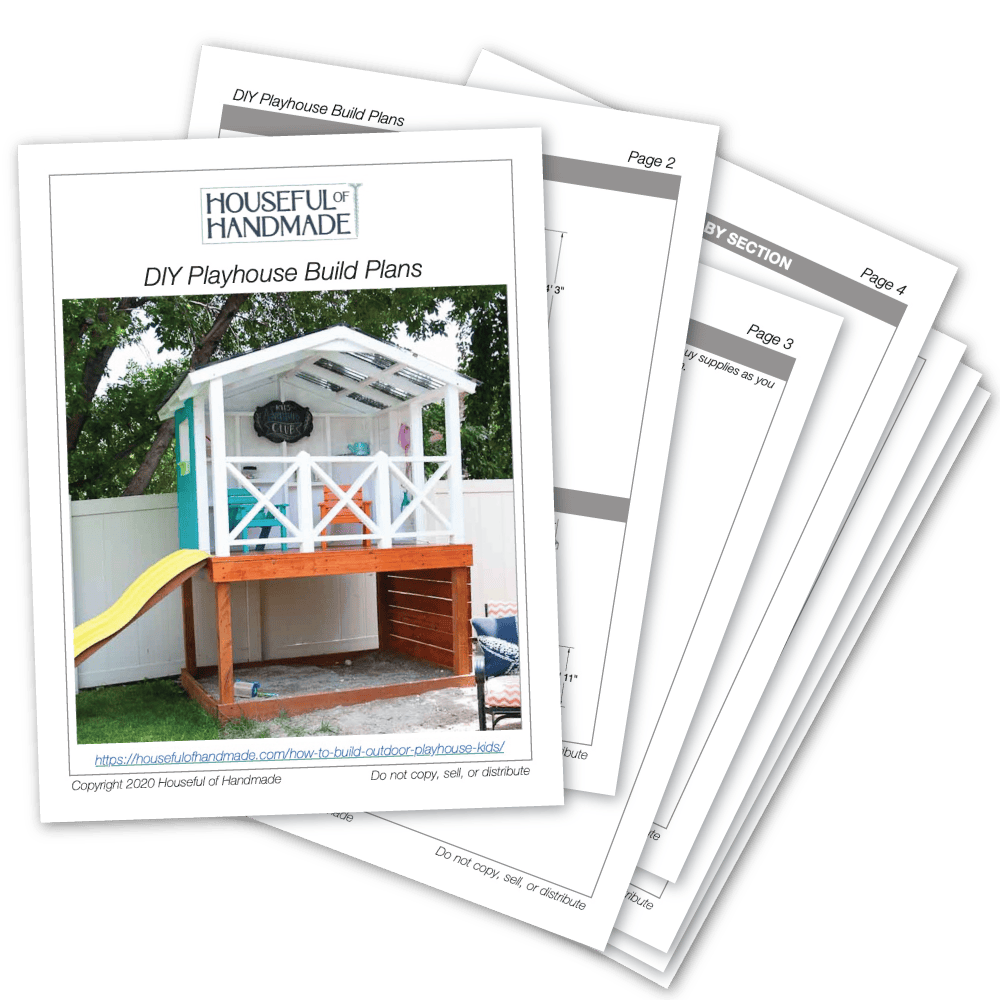
Printable PDF Plans
Prefer to print the instructions?
Grab the complete build plans (from all 5 posts) in one easy to follow printable PDF here. The plans include:
- List of recommended tools
- Detailed supply lists
- Easy to read cut list table
- Step-by-step instructions with diagrams & pictures
- BONUS: 3D SketchUp file
Material and cut lists include the totals for the entire build, as well as a break down for each step. Makes it easy to buy all at once or purchase as you go.
Click the link below for everything you need to build your own playhouse and so you can get the kids outside playing for hours on end!
How to Build a DIY Playhouse Roof
Tools:
- Miter saw
- I used my miter saw to cut all the 2x4s, but you could also use a circular saw for this.
- Circular saw
- Impact Driver
- Drill
- With 1/4″ drill bit
- Jig saw
- Kreg Jig
- Clamps
- I recommend starting with (2) 12″ bar clamps. They are super helpful and will do everything you need to build this playhouse.
- Speed square
- Measuring tape
- Tin snips
- Optional: FinishMax paint sprayer
Supplies:
- Regular wood (if you paint/seal it for the outdoors it will last for years)
- (5) 2×4 8′ boards
- (4) 2×3 8′ boards
- (3) 8′ Suntuf corrugated roofing panels
- I used the Solar Gray color to give a bit of shade to the playhouse.
- (2) 4′ Suntuf roof ridge pieces
- (3) Suntuf horizontal closure strips 6-pack
- (65) 2 1/2″ blue-kote pocket hole screws
- (8) 2 1/2″ TimberLOK wood screws
- 1 1/2″ gold screws (left over from the wall build)
- (75) 2″ Woodtite fasteners
- Exterior wood glue
- Exterior paint (left over from wall build)
- I used Ultra White by Behr for the roof of the DIY playhouse.
Cut 1 piece of 2×4 to 63″. This will be the roof ridge. Cut 8 pieces of 2×4 at 48″ with a 19 degree angle cut off one end. These will be the roof rafters.
You can paint the roof pieces now to make it easier. I pre-painted half of mine with my FinishMax paint sprayer and the others were easy to paint once installed.
Measure 1 1/2″ in from the back of the roof ridge piece and make a line. Measure 3 1/2″ in from there and make a second line. Drill 3 pocket holes in between these two lines so it can attach the roof ridge to the center wall stud on the back wall. I drilled 2 on one side and 1 centered between them on the other side.
Drill 2 pocket holes in the angled side of each of the roof rafters. Remember these will be mirrored when installed so pay attention to what side of the wood you add the pocket holes so you don’t end up with them showing on the front of your DIY playhouse.
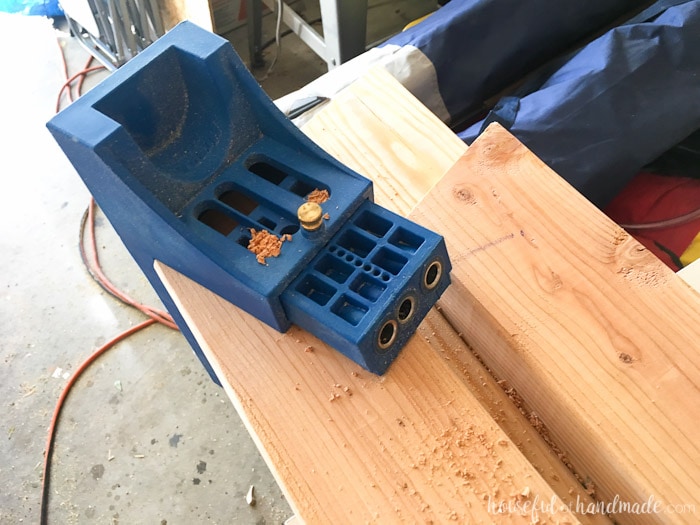
Attach the roof ridge to the top of the center wall stud with 2 1/2″ pocket hole screws and exterior wood glue. Make sure there is 1 1/2″ overhang on the back side.
Then attach two roof rafters to either side of the roof ridge so they are flush with the back of the ridge. The rafters should sit right on top of the wood paneling on the outside of the back wall.
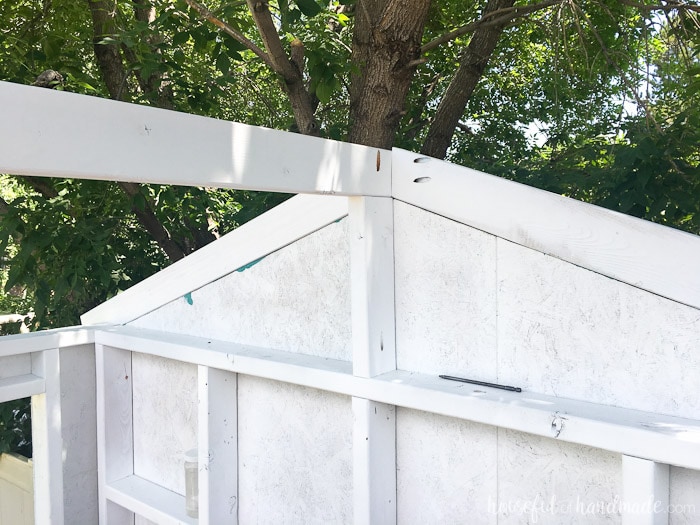
Secure the rafters to the side walls with a 2 1/2″ wood screw. Then repeat with the rafters on the front of the playhouse.
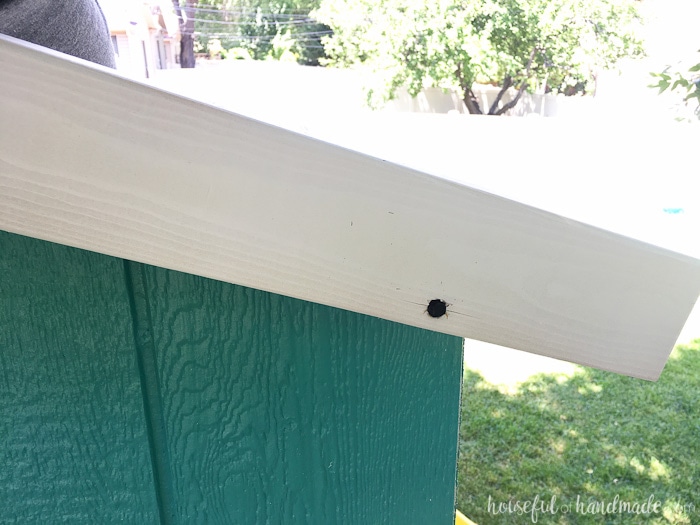
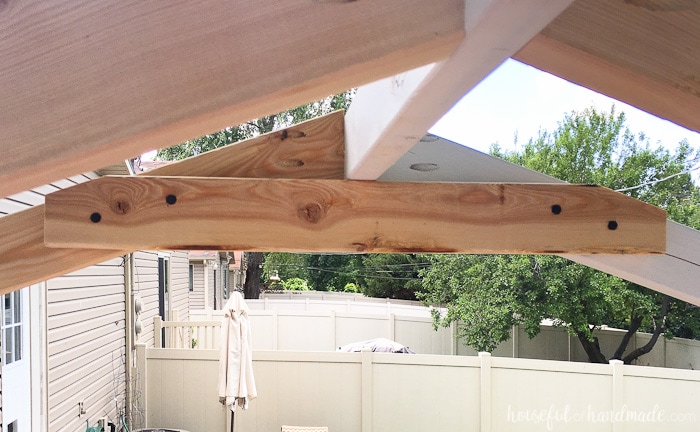
Cut the piece of 2×4 left over (after cutting the 63″ roof ridge) so it fits right under the ridge on the front of the playhouse. Secure it to the front roof rafters with 4 of the wood screws. This will help support the front of the roof since it is completely open.
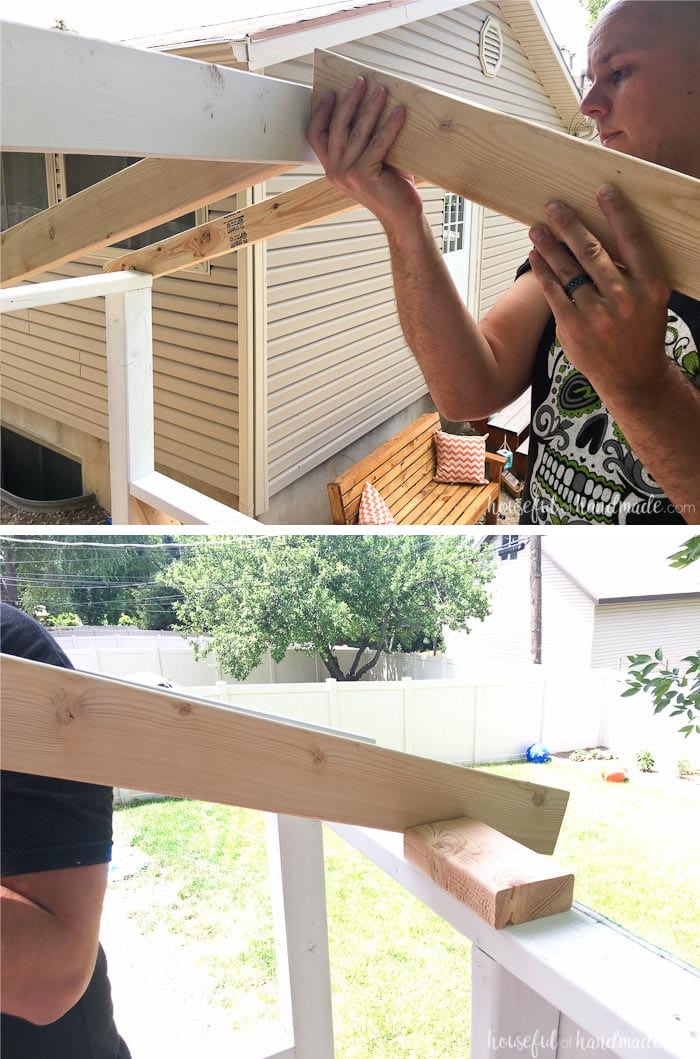
Before securing the rest of the roof rafters, you will need to notch out a spot for them to sit on the side walls.
The easiest way we found to mark these notches was to hold the rafter 1 1/2″ up from the bottom of the ridge. Then with the rafter resting on the side wall, sit a scrap of 2×4 next to it and trace the notch. Cut out the notch with a jig saw.
Attach the notched rood rafters to the ridge with 2 1/2″ pocket hole screws. Then attach the notched part to the side walls with pocket hole screws or left over decking screws, up through the stud on the top of the wall into the rafter.
To attach the Suntuf corrugated roofing to the newly built roof, you will need to add some 2×3 cross supports. You can just cut the 2×3 to 63″ and lay them on top of the roof rafters every 2′.
But I didn’t want the roof to be raised up above the rafters so I chose to cut the cross supports so they fit in between the roof rafters. Each cross support had to be measured to fit because the 2x4s weren’t perfectly straight. I used 2 pocket holes on either side of each 2×3 cross support to secure them to the rafters.
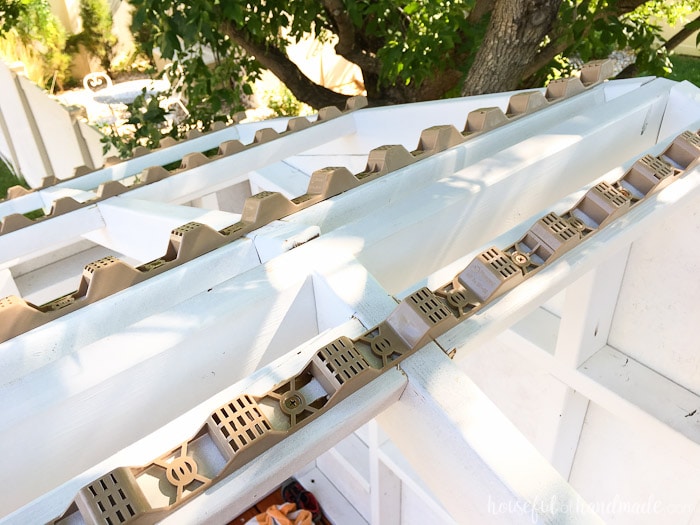
Now it’s time to add the roof! Attach the horizontal closure strips to the cross supports with the 1 1/2″ wood screws. Cut the closure strips as needed with tin snips (they are plastic and super easy to snip where needed).
Cut the (3) 8′ panels in half so you now have (6) 4′ panels. Clamp all the panels together and use a piece of scrap wood as a guide to keep your circular saw straight while cutting. Make sure to wear good safety glasses because little pieces of polycarbonate will fly everywhere when you cut it.
To attach the roofing panels to the roof, start on the back of the roof. You can easily reach it with a step stool in the playhouse and stepping up through the rafters and cross supports.
Pre-drill through the roofing panels with a 1/4″ drill bit, then carefully attach the panels with the Woodtite screws. Make sure the screws go in at a 90 degree angle to the roof and they are not over-tightened.
Use a drill that can be set with a lower driving setting instead of an impact driver to do this. You do not want to see dimpling in the roof where the screws are attached.
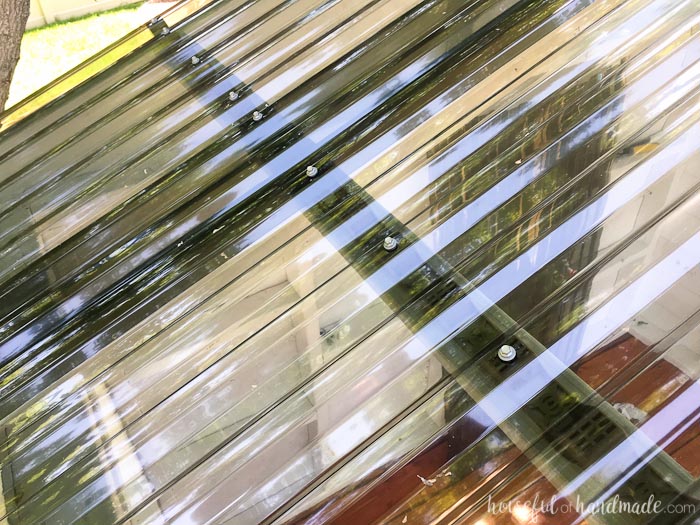
Overlap the roofing panels so they all fit (I believe the back panel was overlapped 2 ridges and the front was 3 ridges). Secure the panels withe screws in every other ridge, but making sure to put a screw in the edge of each panel (so some areas the screws will not be every other because of how they overlap).
Once you have the panels on, it is time for the roof ridge panel. The playhouse was small enough I was able to stretch on a ladder and attach the ridge without having to climb onto the roof.
You will overlap the ridge piece on the top of the roof panels and secure to the horizontal closure strips at the top of the roof (closest to the roof ridge).
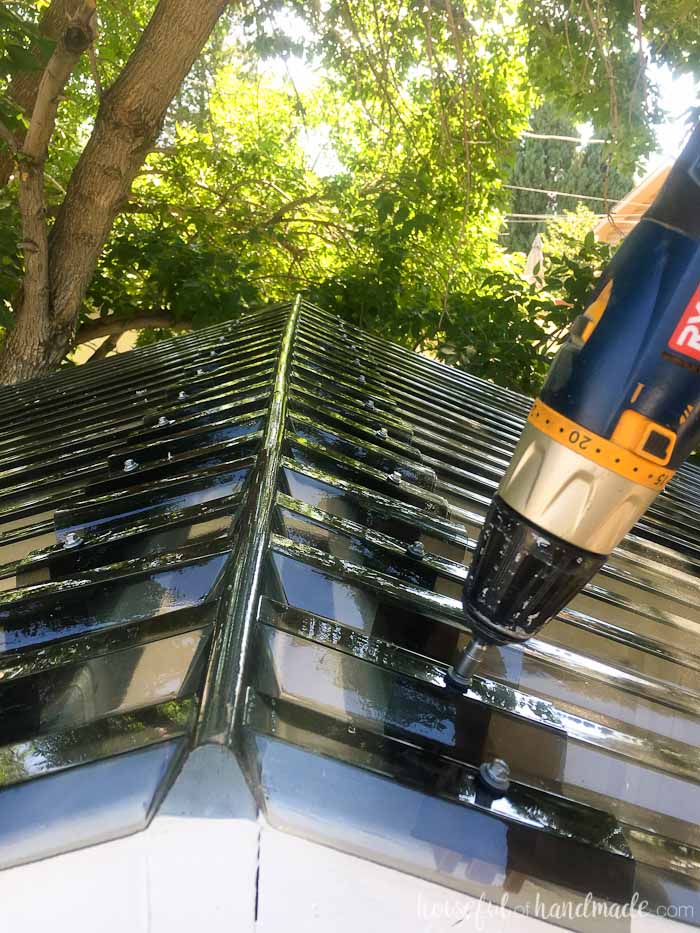
Now you have successfully completed the DIY playhouse roof! I felt the need to pat myself on the back because this what the first time I had roofed anything. It has made me realize I can really take on whatever I put my mind to.
The kids really are loving their playhouse. And I can’t wait until they get to go out and play in a rainstorm and put the new roof to the test. It’s seems like the perfect place to enjoy a summer rainstorm to me!
And now for the $$$. Here is what we have spent so far:
- The deck = $196.96
- The walls = $189.71
- The railings = $17.76
- The slide & climbing wall = $193.50
For the roof:
- (5) 2×4 8′ boards = $16.80
- (3) 2×3 8′ boards = $7.17
- (3) 8′ Suntuf corrugated roofing panels = $65.91
- (2) 4′ Suntuf roof ridge pieces = $35.54
- (3) Suntuf horizontal closure strips 6-pack = $16.41
- (65) 2 1/2″ blue-kote pocket hole screws = $10.94
- (8) 2 1/2″ TimberLOK wood screws (left over from the wall build)
- 1 1/2″ gold screws (left over from the wall build)
- (75) 2″ Woodtite fasteners = $11.94
- Exterior wood glue (left over from wall build)
- Exterior paint (left over from wall build)
Total for roof: $164.71
Grand Total: $762.64
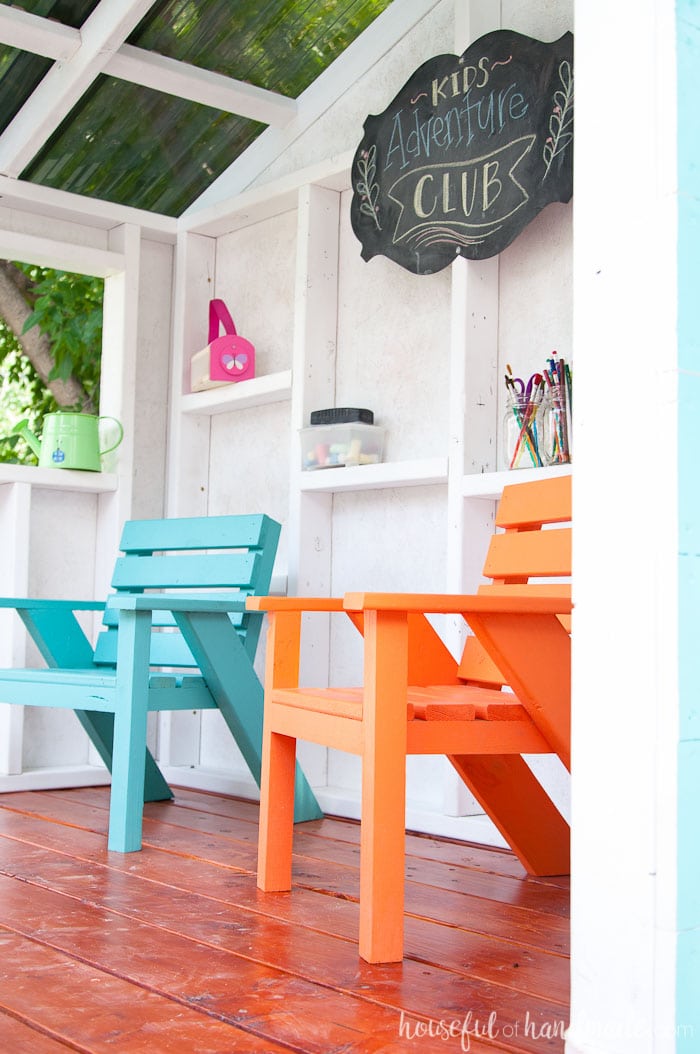
I was originally planning $650 for the playhouse. With the slightly more expensive roof, we were $100 over budget. But still, the playhouse cost less than the new iPad Pro and offers my kids way more hours of fun!
They love showing it off to anyone that comes to visit. And they almost always eat lunch in the “Clubhouse” so it is money well spent.
I would totally do it again, but I probably would start earlier or later so I wasn’t build in the middle of the summer heat
Thank you for the detailed plans, so helpful! Is the suntuf roof loud when it rains? We are finishing up our play house and undecided on what roof to use. The noise won’t bother us, but we have neighbors on each side and small lots so want to be conscious of noise for them. I appreciate your time!
It can be loud, similar to a metal corrugated roof. But it was only bothersome with heavy rain or hail (if that makes sense).
Hi Kati! Thanks so much for sharing your playhouse with us. I love it, and your instructions have been so helpful to me as we’ve started to build a modified version for our daughter. I have two questions. 1) Do the Suntuf panels make the playhouse feel hot? This may not be an issue b/c you have a totally open side… Just wondering if the Solar Gray would turn our house (which will have 4 walls) into a little greenhouse here in Florida. 2) How have the horizontal boards held up for the climbing wall? Have they sagged at all? My husband is concerned about wind… Thanks so much!
No the Suntuf panels actually block the UV so they keep it cooler. We even used clear ones on our pergola and in the heat of the summer, I could feel the difference under the pergola. No sagging at all on the side boards. The lower ones are 2xs so they are thick and hte upper ones are secured in the center as well!
Do you think the rick wall
Could be replaced with steps and a railing for special needs?
You can definitely adjust as needed. The climbing wall is not structural, the base is plenty strong without it.
When doing the back rafter and how does it attach to the back wall if paneling covers wall 2×4? Did you have to end up recutting back paneling angel to expose 2×4 to drill into it? This is great and we are on the walls right now. Thanks!
Can you just secure the 2x4s to the wall through the paneling? Mine was sitting just on top of the paneling so it exposed the corner of the side walls.
I just finished this for my son’s 3rd birthday. It looks amazing! We told him it was a dog house we were building for our pet to throw him off. This was a nice project and only took 3 weekends to finish. I bought the plans and that was a nice quick reference. (though some adjustments were needed) Overall this turned out great and I am really excited to spend some time in it this summer. Cheers!
Thanks so much for the comment Shane! I love that you were able to throw him off my telling him it was a dog house. I am sure he will get many years of play from it!
I can’t seem to find the solar gray ridge piece in store or online at Home Depot. Was this a special order item?
I had to order and have them shipped from Home Depot. They were the only thing I couldn’t find in stores locally.
I had to order the ridge piece, but picked up the panels in my local store.
Hi! Thank you so much for all your information and time you’ve put into this! We’ve started our build! One question. Did you do a sandbox underneath? If so did you make a lid/cover? I’m worried about cats and other animals getting into it. Thanks for your time.
Yes we have a sandbox underneath but did not make a cover for it. However, I wish I would have! The pets definitely found it and we made a makeshift fence with bungie cords later.
What color stain did you use? I love how bright it is. To me it looks a brighter orangish brown? But is it more on the red side? I can’t find anything like it on the Lowe’s site.
I wish I had written it down, but I don’t remember what it was called. My sister bought it for me because her store was clearancing them out a couple years ago.
Hi! I love this design so much! I want to build it for my 5 year old but the HOA where I live has to approve it first. Can you tell me how high it is total? I’m limited to a 10’ tall structure. Thank you!
The total height is right at 10′. Could be a few inches taller with the ridge of the roofing material. If needed you could lower the walls an deck platform a couple inches each to make sure it’s not to tall.
How is the whole playhouse holding up over time? I really want to build this but I want to make sure it will last if we spend that kind of money and time.
It is holding up great! There is a bit of wear on the deck from the kids pouring sand on it and sweeping it through the slats to the sandbox below. But the outdoor paint and roof are keeping it protected and the kids still use it regularly.
Thanks for responding! That is great to hear. I am obsessed with your playhouse. I am 95% sure we will start building one this spring.
Whenever my husband sees me on my phone he asks me if I am looking at the playhouse plans. Most of the time I am. ?
Do you have the plan for the chairs
You can find the plan for the chairs here: Easy DIY Kids Patio Chairs.
Awesome playhouse and amazing use of space! IF you had to move this do you think there is any way of doing so without dismantling it? I want to build this exact version but about 1/4 of it would be on the edge of a utility easement. It’s unlikely it would ever need to be moved, but I’m trying to plan ahead just in case. Thanks!
Since it is not secured to the ground, you possibly could, but it is very heavy. If absolutely necessary, I would suggest removing the house part from the deck and then moving it separate from the deck. And make sure you have lots of muscle to help!
Hi Kati! Thanks for such a terrific tutorial. We are working on our own version of the Handmade Hideaway playhouse and debating on roof material now. Our playhouse is set back in the trees a bit, so I love the idea of a clear roof to allow for more light and also to be able to see out to the woods…but I’m worried that it will show dirt and grime a lot easier than a solid colored plastic roof would. How has yours been holding up? Have you had to clean it, or does the rain take care of most of that?
The roof does get dusty and covered in stuff, but it washes off nicely with a good rain storm. We have the clear on our pergola (you can see it here: Installing a Clear Pergola Roof) and have never cleaned it off. During the dryer season it gets dusty but is still great to see through. It also has UV protection, perfect for the kids!
I am in love with this and am building an 8×8 model for my 3 little girls! Your instructions have been spot on and easy to follow! Do you have any tips for cutting the suntuf roofing without it chipping or cracking? I wanted the Home Depot guys to cut it for me and they said it was to risky-so they sold me the 8’ sheets for the same price I’d be getting the taller sheets for so I could cut them myself. I’d LOVE any tips.
From,
A Fellow Utah’n
I clamped the SunTuf between scraps of 2x4s. This gave me a line to follow as well and held it from shaking. Make sure your circular saw has a finer tooth blade too. I have no chipping out. You can see pictures of how we did it for our pergola here: Installing a Clear Pergola Roof. Have fun building!
Hi. I was wondering where you got the chairs. I love those. We built the playset and now we need to furnish it. Thanks
I actually built them myself. You can get the plans here: Easy DIY Kids Patio Chairs.
Hi there,
Regarding the construction of the playhouse roof, do I cut the 2 x 4 x 8s in half THEN do the angle cut for the pitch of the roof OR do I make just one miter cut at that angle to split them on half from the start?
Thanks!
You could do it either way, you may just have a slightly larger or smaller overhang on the sides.
Found you through Pinterest, but curious as to why you don’t give thehandmadehome.net credit for this as you clearly copied their design.
Emily, I did give them credit for inspiring me in multiple posts. However, I made my own design for our much smaller space and added different features. And the roof post was done based off the roofing material we used.
Kati,
I love this playhouse! My husband and I have been working on this little by little, taking days off when our 2 year old is at daycare to get this built. We laugh at ourselves because it takes us way longer than your estimated times to build. We are either too slow, don’t have the right tools, or you are a dynamo. Maybe all of them are correct
We tweaked the design a bit – the “X” railing is adorable but for our 2 yr old I was nervous about her falling through. We are also building a wood ladder instead of your rope ladder. But, thank you so much for sharing all the info that you have shared!!! I can’t wait to have finished photos of our project too!
Jessi
I am so happy the tutorial helped! I am learning that I do work very quickly. I like to just work hard to get done I guess. But having the right tools and experience using them does help! Please share pictures when you are done.
HOW ARE THE “WHITE LEGS” OR RAILINGS ATTACHED TO THE FLOOR?
All the details are in the railings post here: Our DIY Playhouse: The Railing.
Do you have the plans available in a pdf or all in one spot? My dad is coming to visit and may build this for my 5 and 2 year old!
Also, do you think this is safe for a 2 year old? We may hold off on the rock wall for now but the rest seems good for him! Thanks!
Unfortunately I do not Sara. I have tried to work on it but it is a big job. Also, I think you need to decide what is safe for your own kids. My baby was 4 when we built this and we had smaller kids come over and they all had fun on the playhouse.
Hi there! We are building my 6yo daughter a play house as we speak. My husband thinks that the corrugated plastic will crack if a ball hits it or if a limb from tree falls on it. Can you tell me if your has withstood time? Thank you so much! From a husband and wife who can’t agree in KY!
We have had no issues with the Suntuf roofing we used. It is very sturdy. We liked it so much we even put it on our large pergola.
Hi I’m trying to build this playhouse for my girls, we want it to be 8×8 and I’m horrible at math. How do I figure out the length for the roof rafters?
If you have already figured out the back walls with the added length, you can just measure from the top support in the wall to the edge of the wall with an overhang. That way you don’t have to remember how to do geometry Good luck Krys!
A shingled roof for a child’s playhouse? How do I attached the shingles without creating the hazard of even short shingle nails penetrating the exposed underside of the roof sheathing? I’ve not encountered roofing nails shorter than 7/8 inches.
That is one of the reasons we chose to use the polycarbonate corrugated roofing. There is nothing coming through the roof for kids to get hurt on. Also it lets in light so that there is way more play time! If you really want shingles on your roof, you could choose a thicker underlayment.
What is the sq footage footprint? Floor dimensions? Seeing if we can fit it in our yard. Thanks
The actual playhouse is 5′ x 7′ but the slide adds a bit. Probably sticks out about 5′ from the side of the playhouse. Hope this helps!
I think it is 4 2×3 needed,correct? I am building it.
If you want to cut the 2×3 supports to sit on top of the roof rafters you will need 6- 63″ pieces. But since I cut them to sit in between the rafters, I was able to do it with 3 8′ pieces.
It is 4 2x3s, we are building it and 3 only gets us 15 pieces about 19” apart. We needed another 2×3 to get us to the necessary 18.
Thanks for the correction. I might have had some scraps in the shop I used. I’ll fix that! Enjoy your build!
How old were your kiddos/ were they able to climb the rock wall portion? We’re about to start a similar playhouse for our daredevil 4 y.o. with the rock wall on the side.
They were able to climb it the year we built it so 4 and 7. They love the rock wall! Good luck with your project. It’s a fun one.
Do you have a rough idea of the cost for everything you did?
On the second page (under the tutorial) I shared the cost breakdown. It came out to about $760.
So cute! I bet your littles just love this! Suntuf is the best hey?!
Thank you Shavonne! The kids are loving it so much and I am loving that they are out of the house more
Is that what they call the grey in the Suntuf? I love it!
The roof is the material called Solar Gray. It is not a solar panel, but just a gray color. I love that it makes the area feel shaded but still lets in so much natural light! I love it so much I’m getting ready to use it again
Wow! This is the cutest I have seen! The clear roof is such a great idea! All the colors make this so adorable! What a great job!
Thanks Renee! I love the bright colors, they are perfect for the kids.