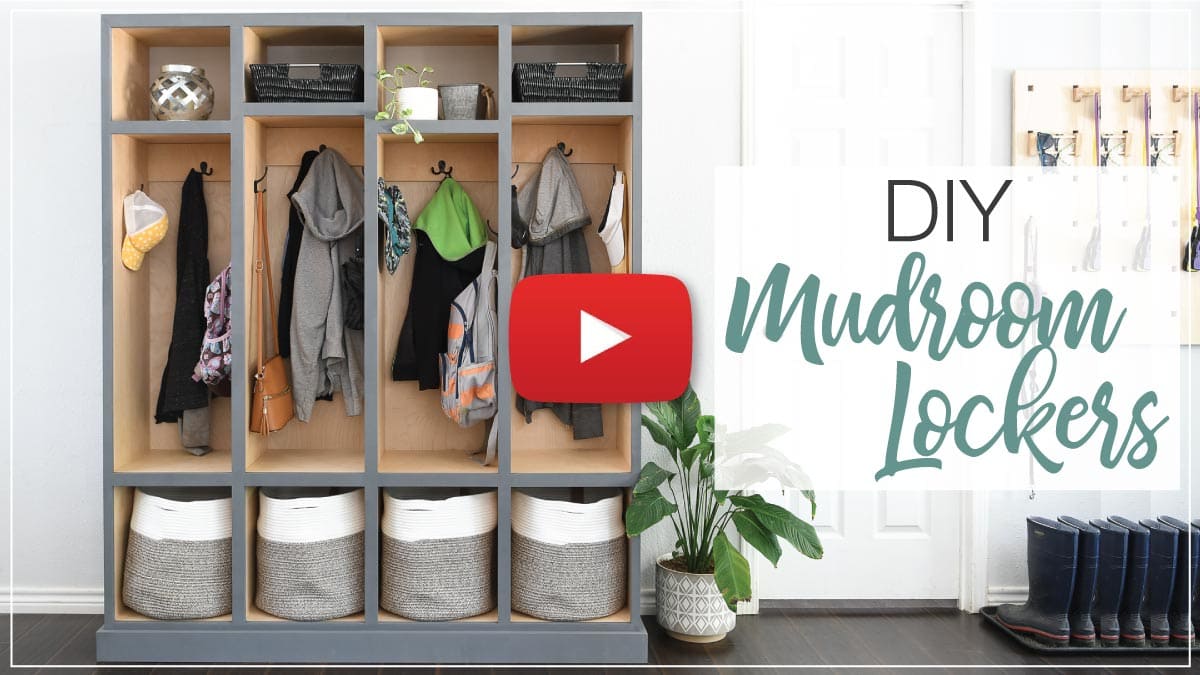
Today’s project is making me oh so happy!!! I never realized how much I loved having a coat closet until I was without one.
Currently we have a wonderful modular entryway organizer for all the little things, but now we have the perfect place for everything we need to store.
So I partnered with Kreg Tools to use their new pocket hole jig and Straight edge guide to build the ultimate mudroom storage lockers. And now I have more storage than I need. That is a good feeling!
This post may contain affiliate links. As an Amazon Associate I earn from qualifying purchases. Click here to read my full disclosure policy.
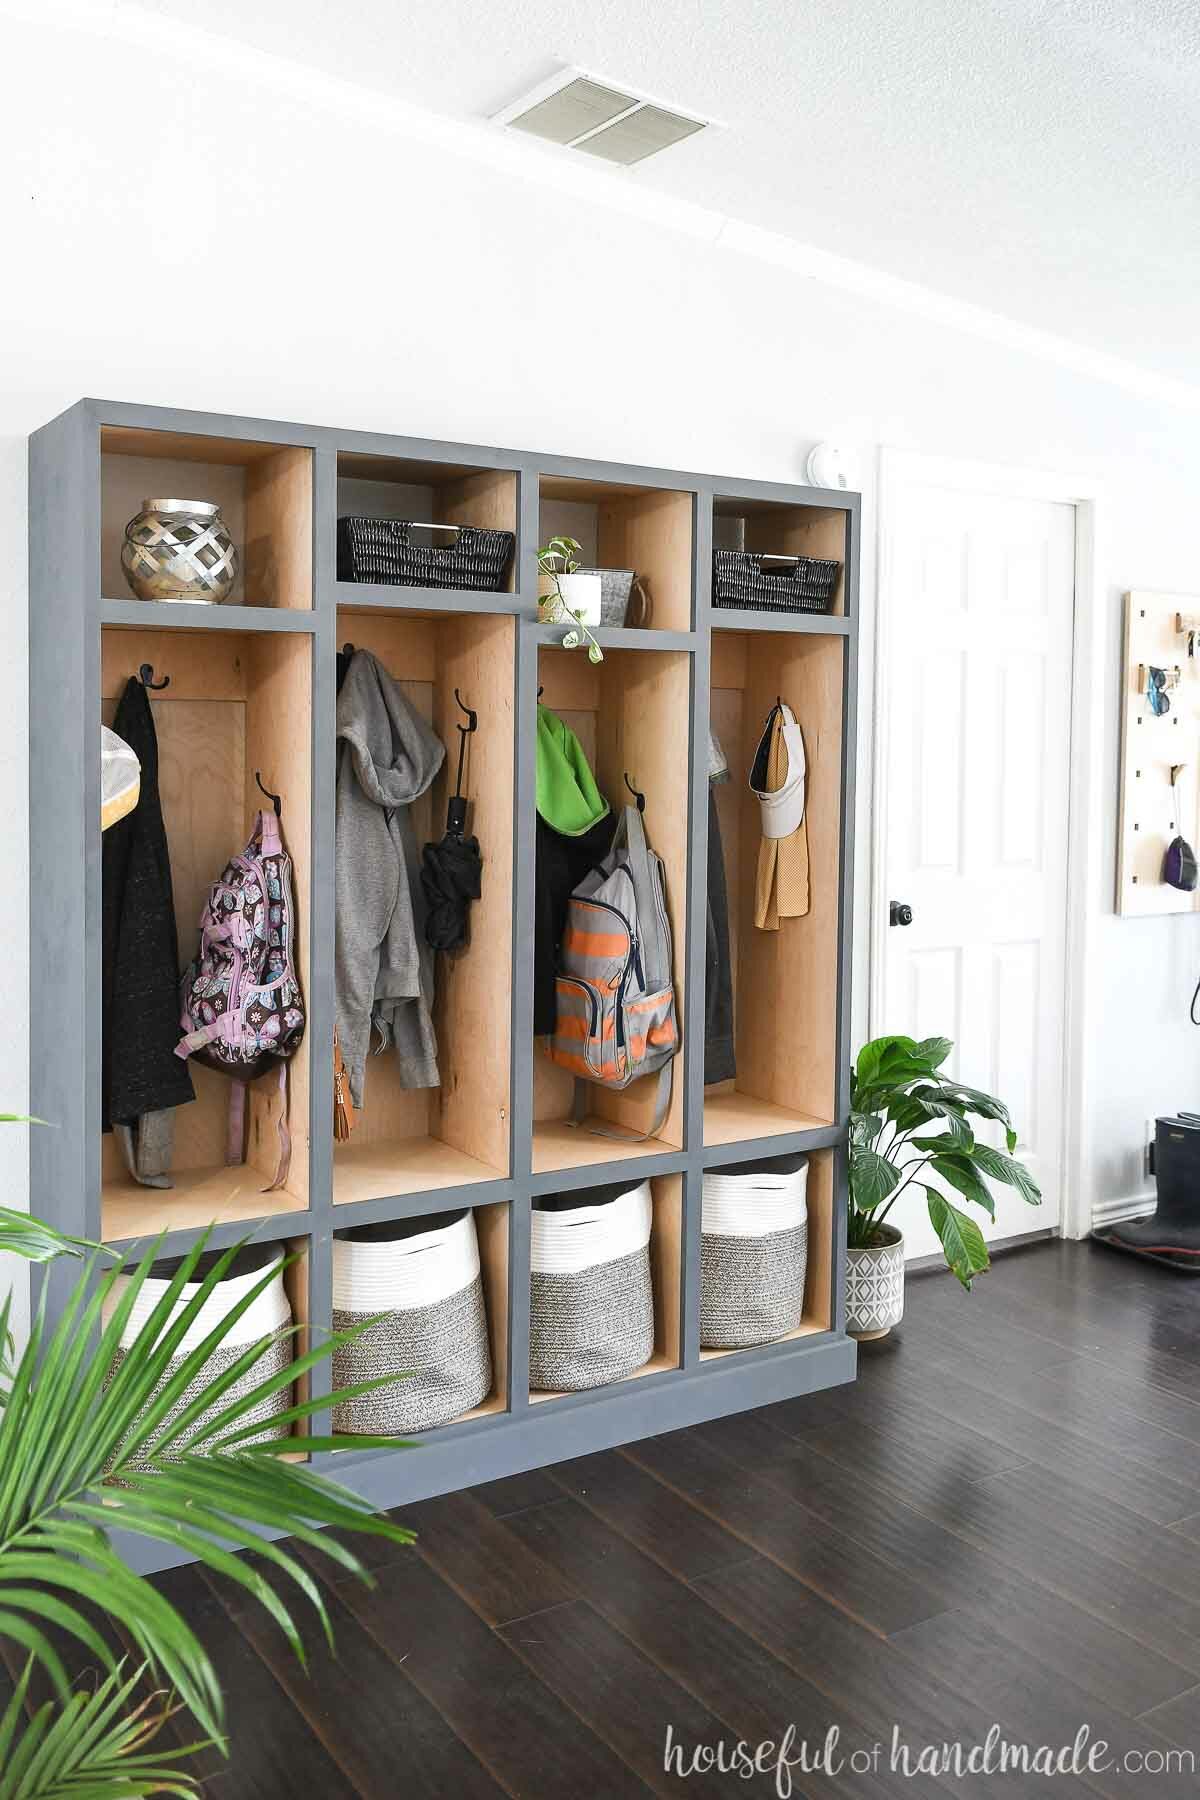
By using the DIY bookcase build plans, I was able to create a custom mudroom storage cabinet with plenty of room for our family of 4. And you can do the same!
Storage Locker Design
Since we do not have a mudroom, our mudroom lockers need to be extra pretty! They sit right inside the front door for everyone to see.
I designed the mudroom storage lockers to be a beautiful cabinet, not just utilitarian lockers. The design of the cabinet mimics the design of the dining room hutch I built a few years ago.
But that does not mean the hutch and mudroom storage lockers are matchy, matchy. The hutch is built with alder wood and the outside is painted a greenish-gray color.
The mudroom lockers are made with birch plywood. And the outside is painted a blueish-charcoal color to better match the living room furniture it is closer too. But together they create a cohesive, modern feel to our home!
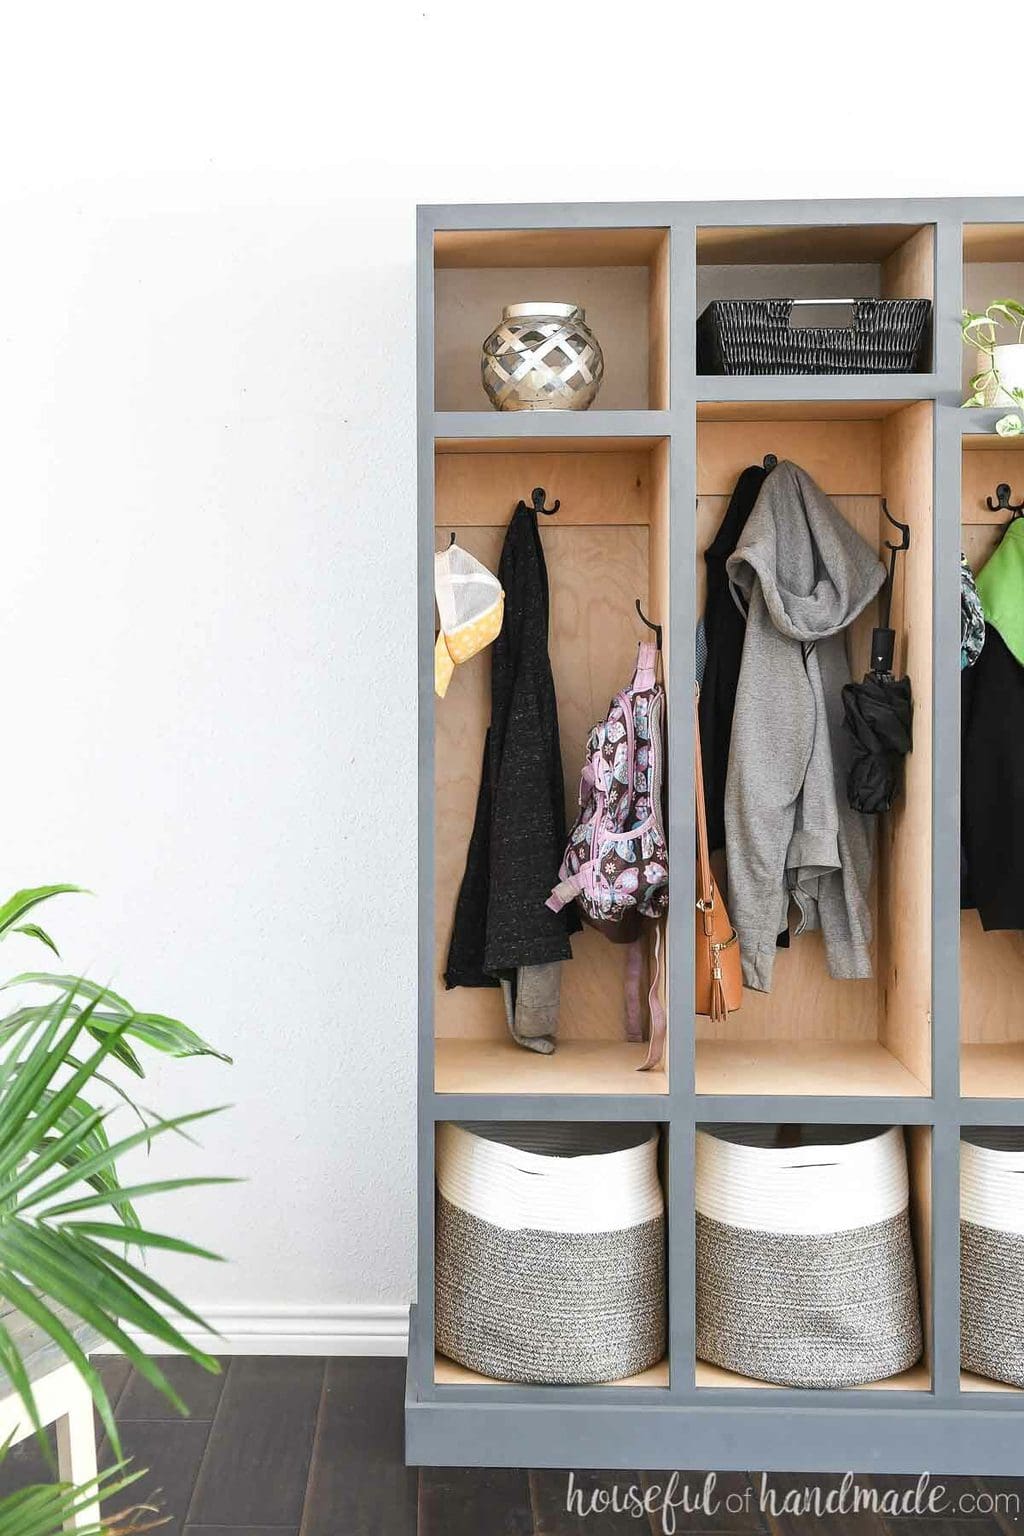
Storage for Coats, Backpacks, Shoes and More!
There is a lot of gear that comes along with a family of 4. Just the large pile of shoes that cluttered up the entryway was driving me crazy, not to mention the jackets, backpacks, hats, gloves, etc., etc.
Without a coat closet, we were using the folding mudroom shelves that I made to add more seasonal storage when we needed. The folding shelves were great for additional storage, but not so great for the only storage for our family.
The new mudroom storage lockers have so much more space!
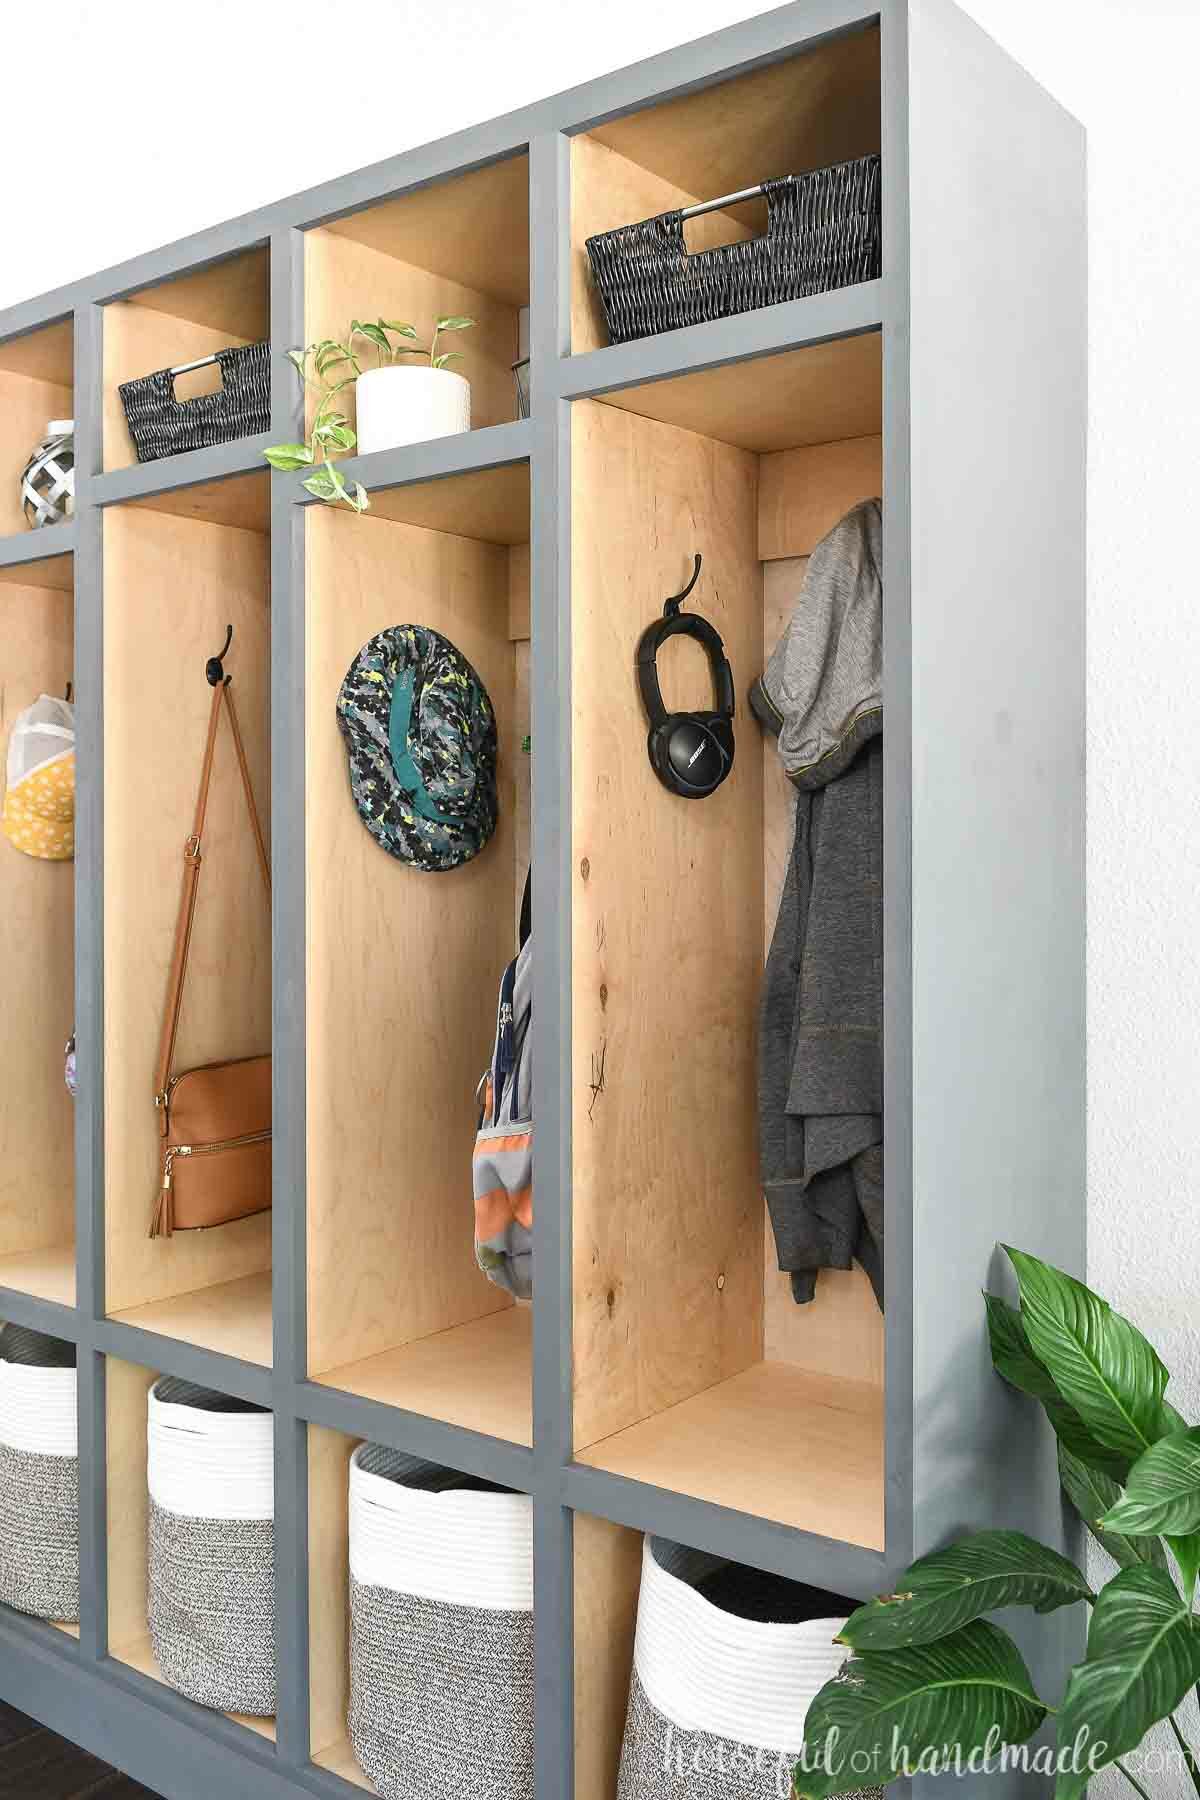
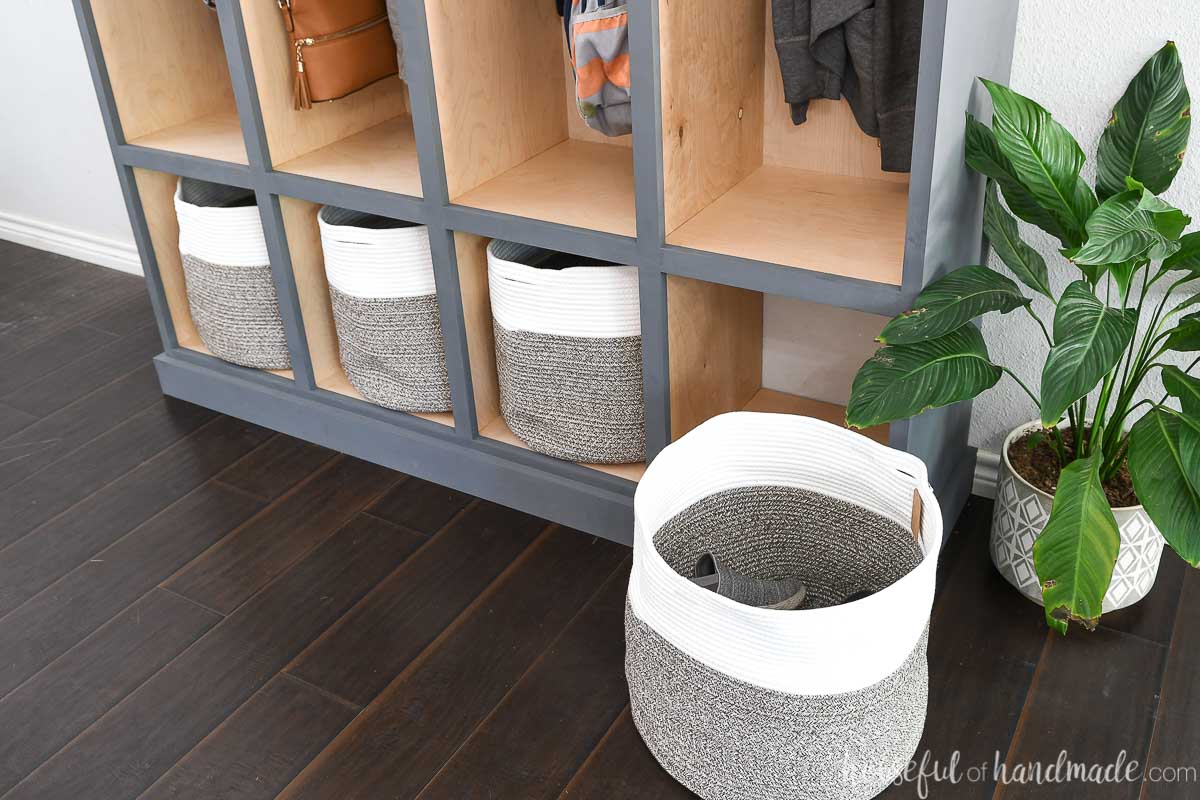
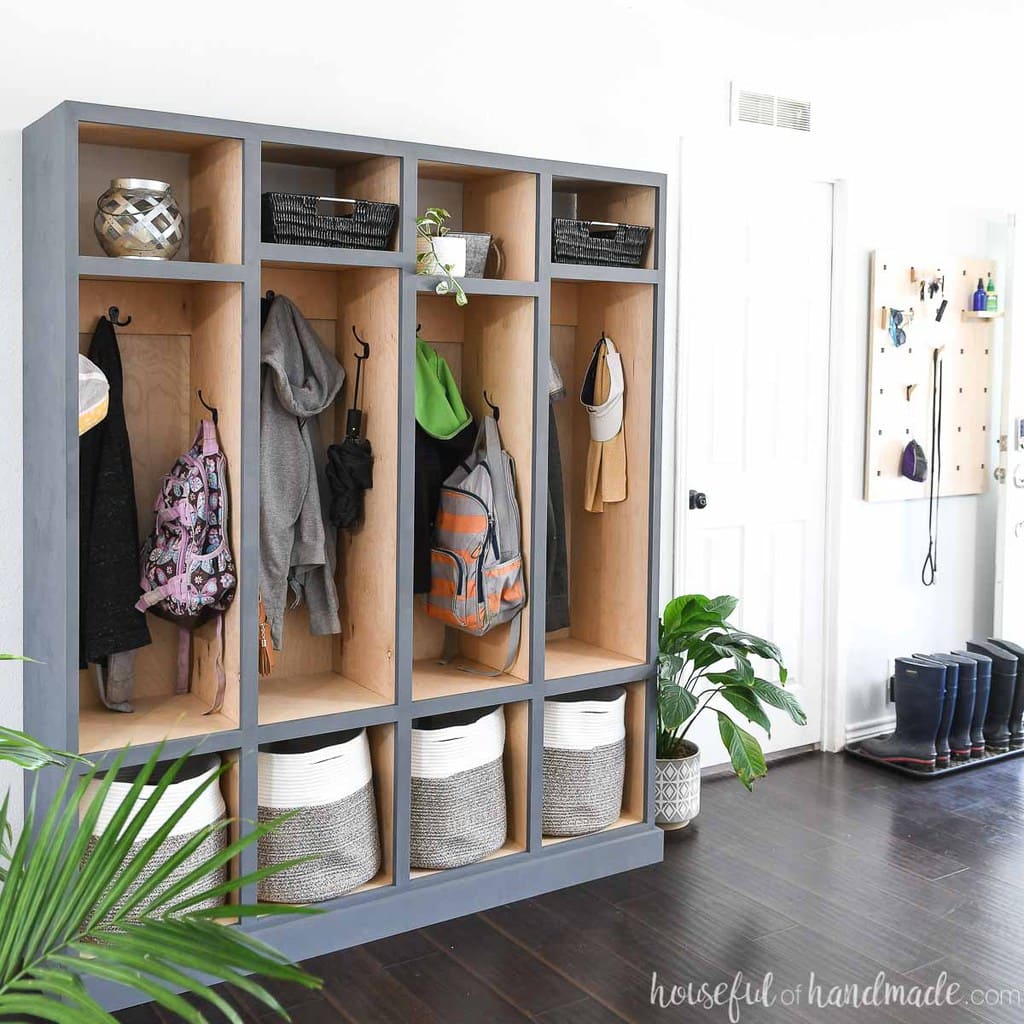
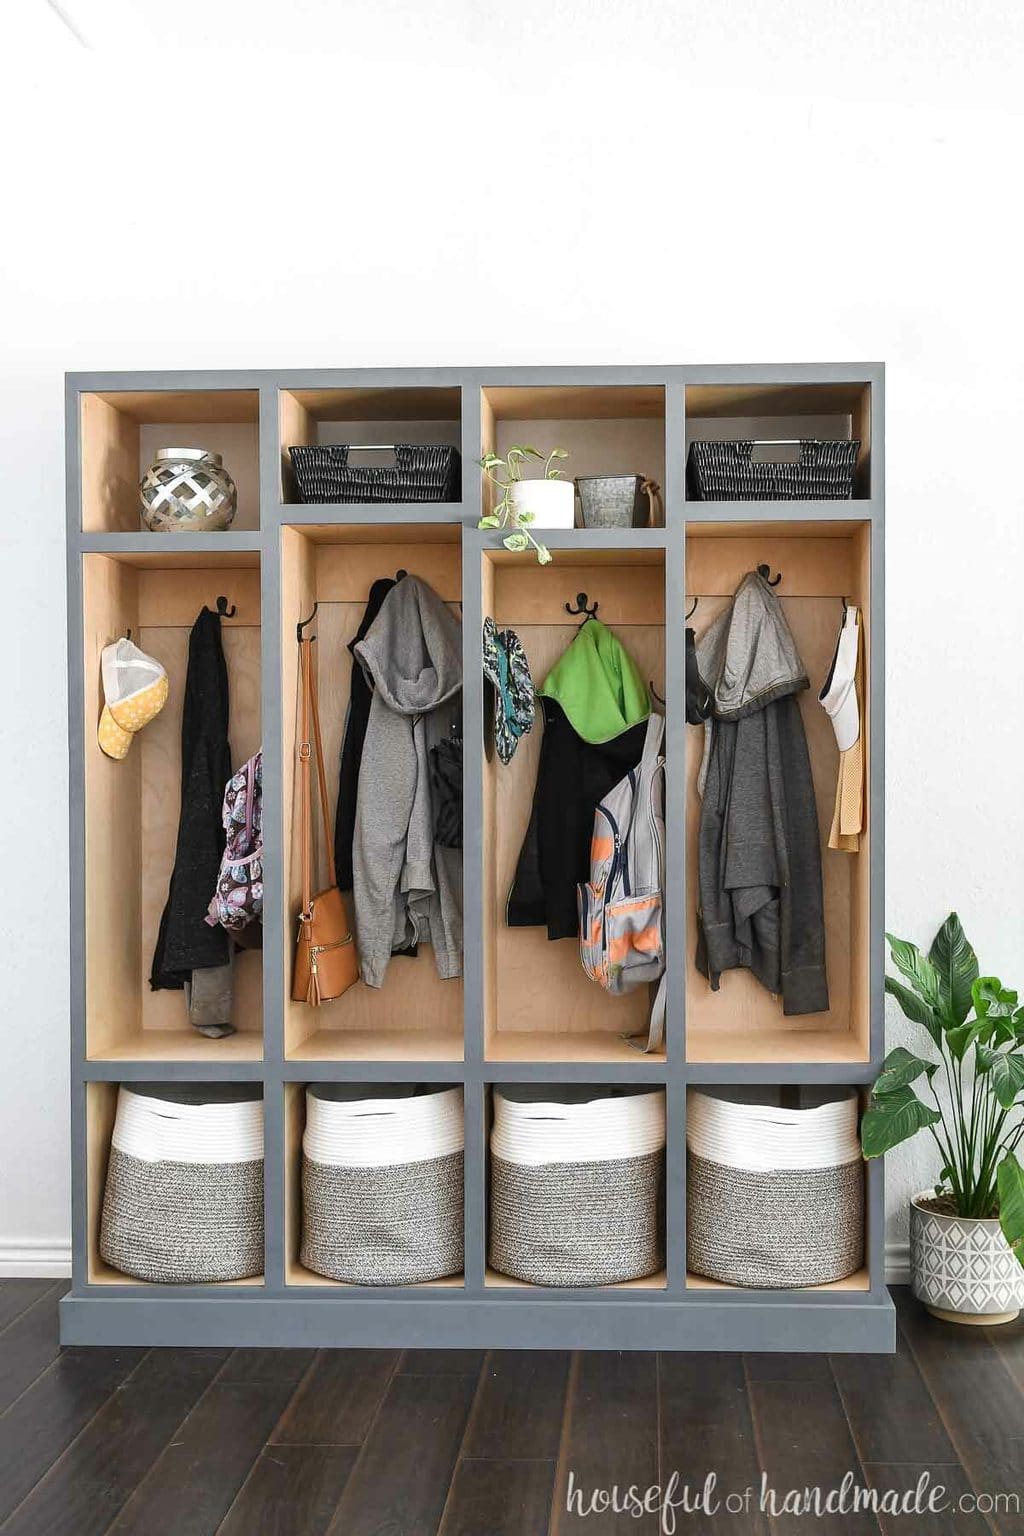
The lower compartment on each locker holds a large basket for shoes. I purchased these woven baskets and was shocked at how much they can hold!
Or you can build some easy DIY drawers to add even more storage to this locker system.
Now each family member has their own basket for shoes. I am hopeful this will help solve the “Where are my shoes” problems we have been having.
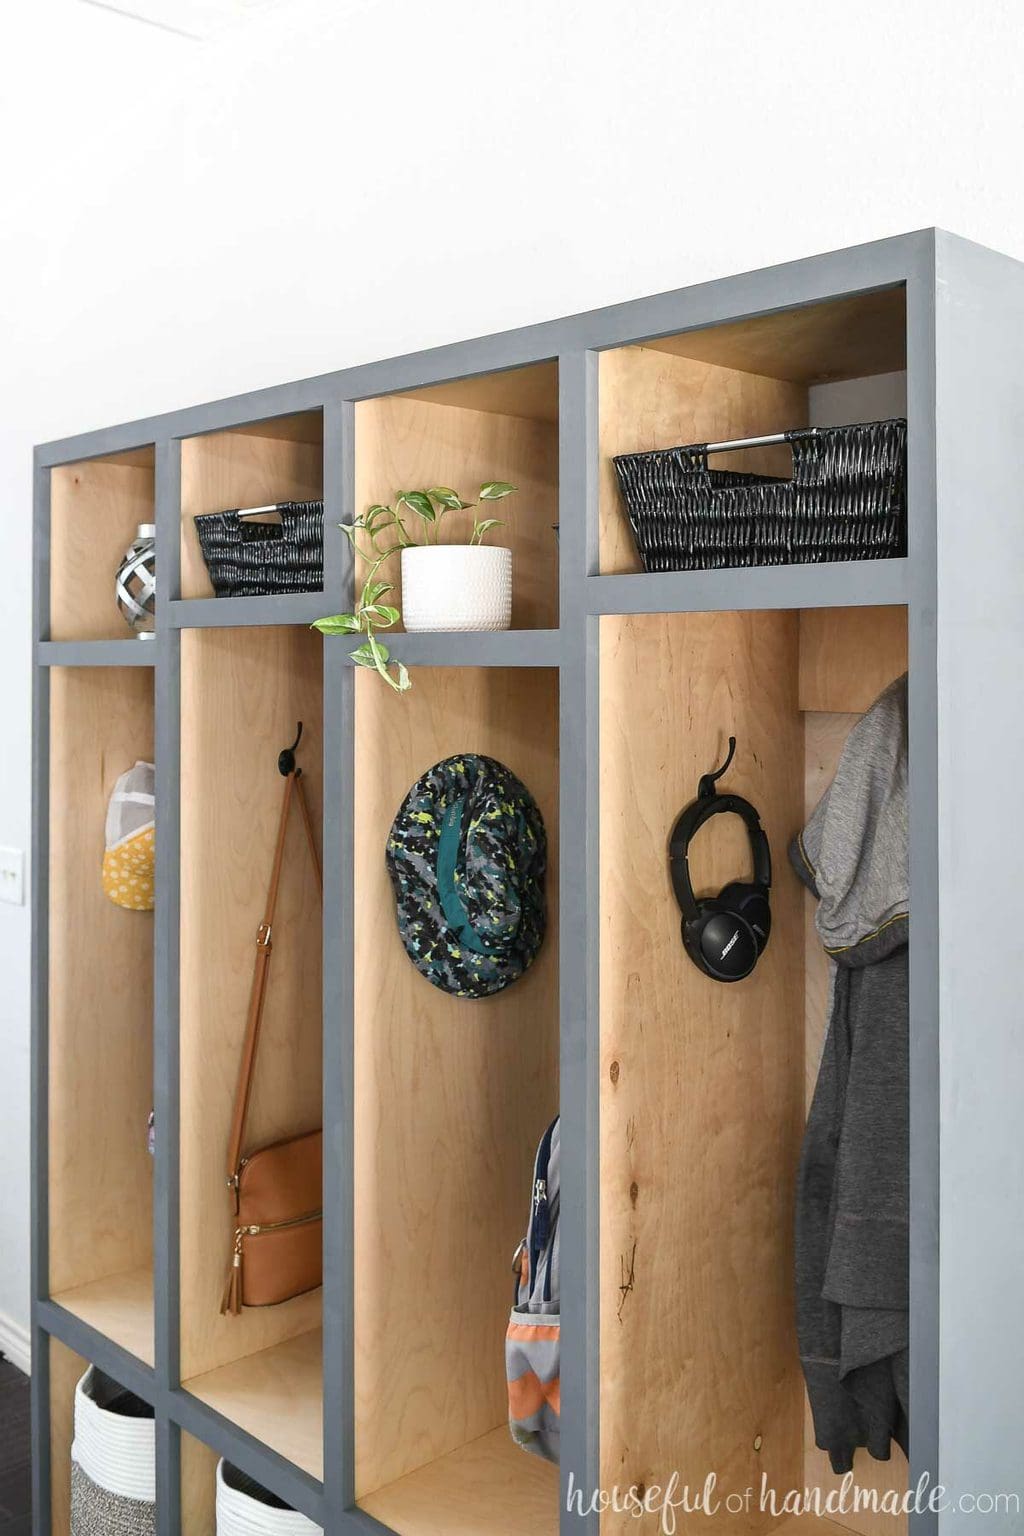
The center compartment of each locker has 3 coats hooks! And each hook actually has 2 hooks on it. Do you have any idea how much can be hung on 6 hooks?
Luckily we have not found out what maximum capacity is yet because we were so use to having only 1 hook per person.
Now the kids have a dedicated space for their backpack and jacket. Plus room for hanging more!
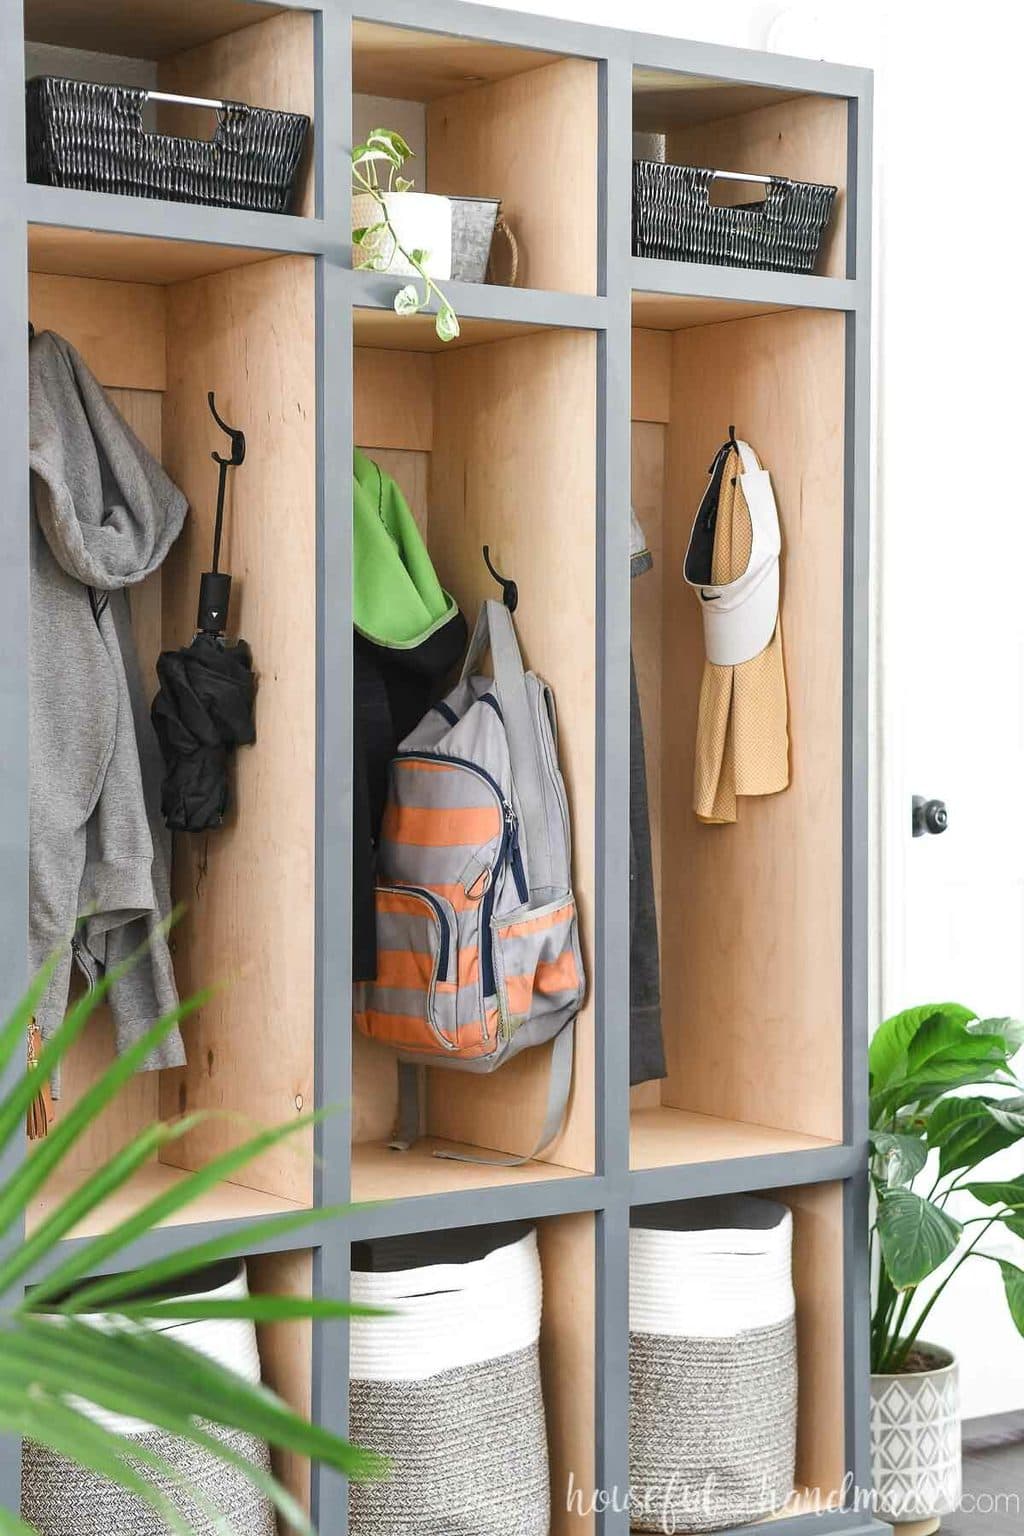
Lastly the upper compartment is available for even more storage. The kids cannot easily reach above their hanging storage so I am using it for pretty stuff. But as we need more storage, we have room to grow.
And above my husband and my hanging storage, I put bins to hold gloves and dog supplies. I love having them out of sight, but organized and ready when we need them!
You will also notice the top of the lockers is not even. I staggered the upper shelves for 2 reasons, it gave the cabinet some visual interest as well as made 2 of the hanging compartments larger.
The larger compartments are used for the adult sized jackets. And the smaller hanging compartments still make it easy for smaller kids to hang their own items.
Four Mudroom Lockers
The plans for the DIY mudroom storage lockers makes 1 cabinet with 4 locker sections in it. This worked perfectly for our family of 4.
But if you need more space don’t worry! I also have plans for a 3, 5, or 6 locker mudroom cabinet.
How to Build a Mudroom Storage Cabinet
Tools & Materials
Recommended Tools:
- Miter saw
- I recently upgraded to this larger sliding miter saw (watch for it to go on sale), but all my projects before were built with this inexpensive miter saw that I loved.
- Circular saw
- Pocket hole jig
- Trim router
- Straight edge guide
- Drill
- Impact driver (optional, but I love not having to switch bits with the drill)
- Speed square
- Face clamps
- Brad nailer
- Right angle clamp
- Sander
Supplies:
- Wood products
- (2 1/2) 3/4″ plywood, 4×8 sheet
- (1) 1/4″ plywood, 4×8 sheet
- (7) 1×2 boards, 8′ long
- (1 1/4) 1×4 boards, 8′ long
- 1 1/4″ pocket hole screws
- 1 1/4″ brad nails
- 5/8″ brad nails
- Wood glue
- Coat hooks
Overall Dimensions
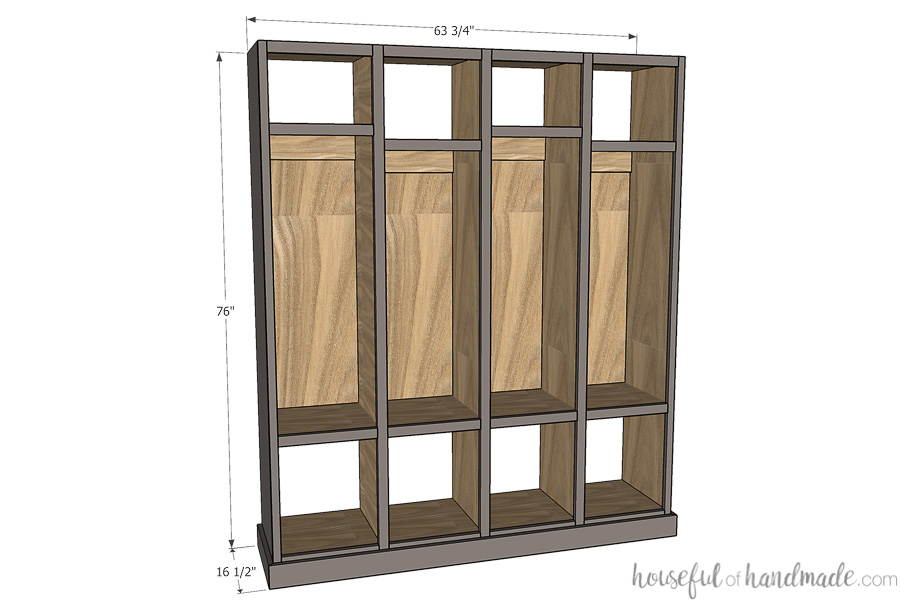
The finished mudroom cabinet is 16 1/2″ deep and 76″ tall. The width of each unit is as follow:
- 3 locker unit is 48 3/4″ wide
- 4 locker unit is 63 3/4″ wide
- 5 locker unit is 80 1/4″ wide
- 6 locker unit is 96″ wide
Cut List
For the 4 locker cabinet, cut out the pieces according to the build plans on Kregtool.com.
For a 3, 5 or 6 locker cabinet, cut out the pieces according to the easy-to-read cut table in the PDF plans.
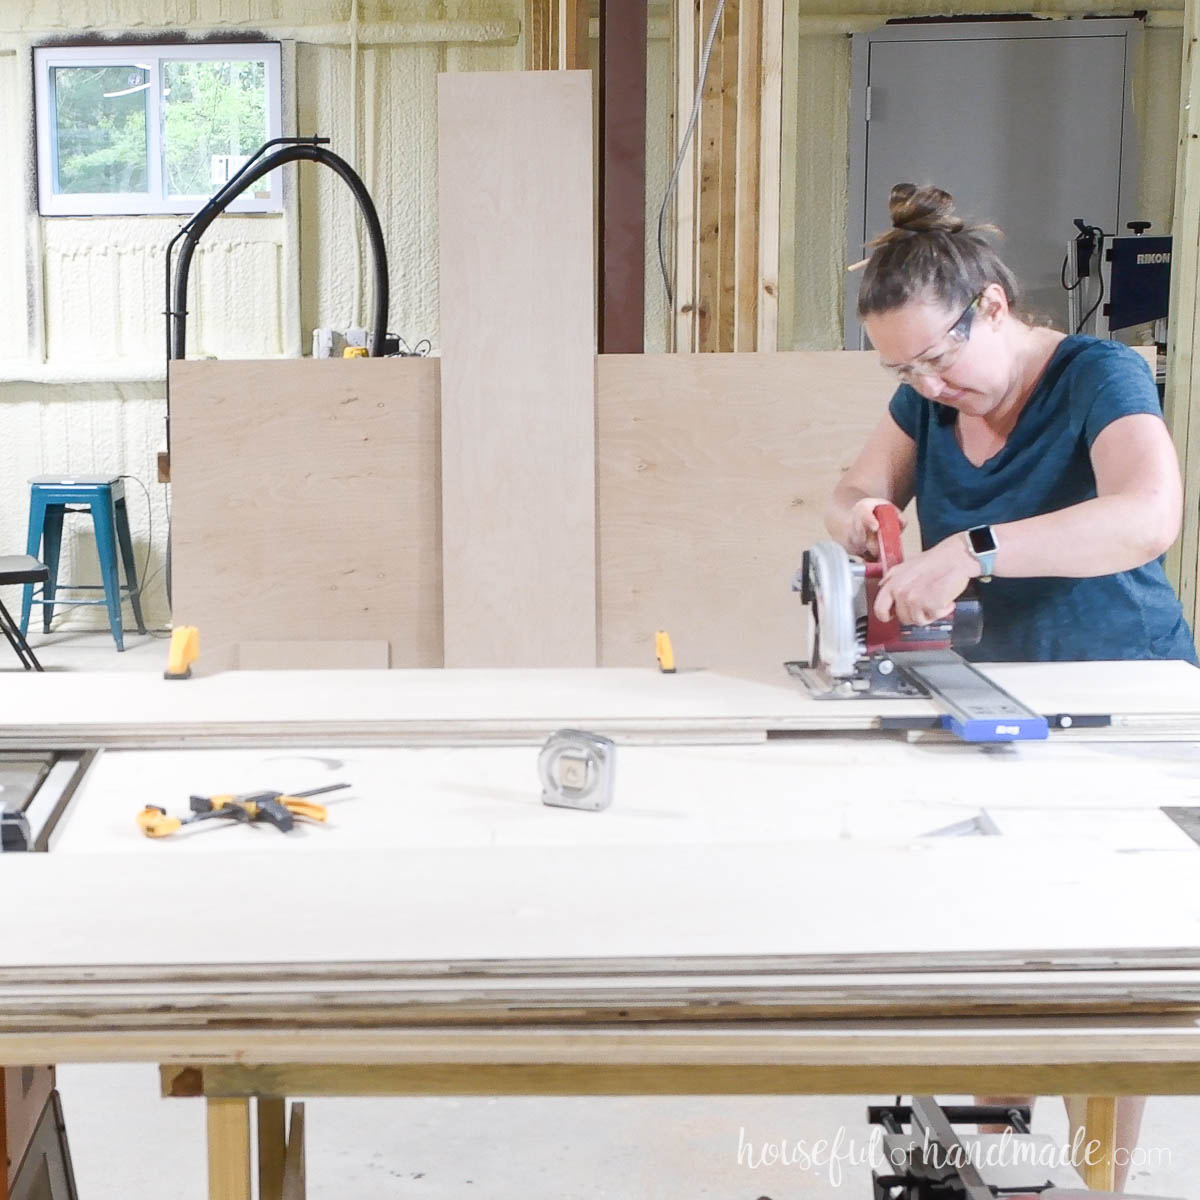
Rip the plywood down into strips first, then cross-cut the pieces to final dimensions. I like to cut my plywood on a piece of rigid foam insulation to keep it fully supported.
Learn all my tips for cutting plywood with a circular saw here.
STEP 1- Router dados
Mark the lines for the first set of dados on 4 of the 5 side boards.
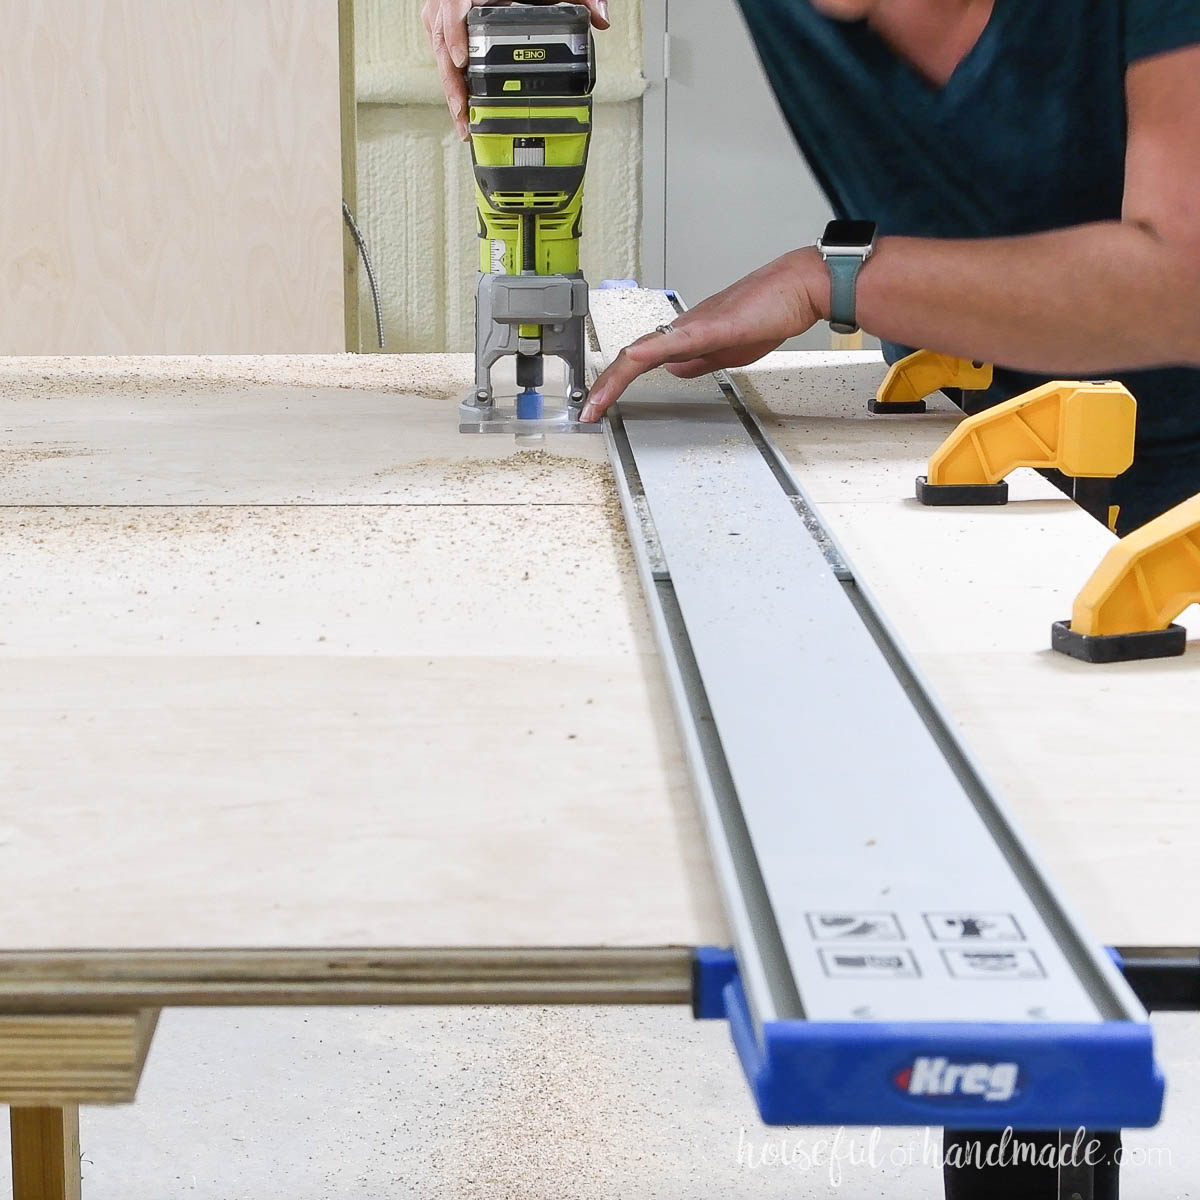
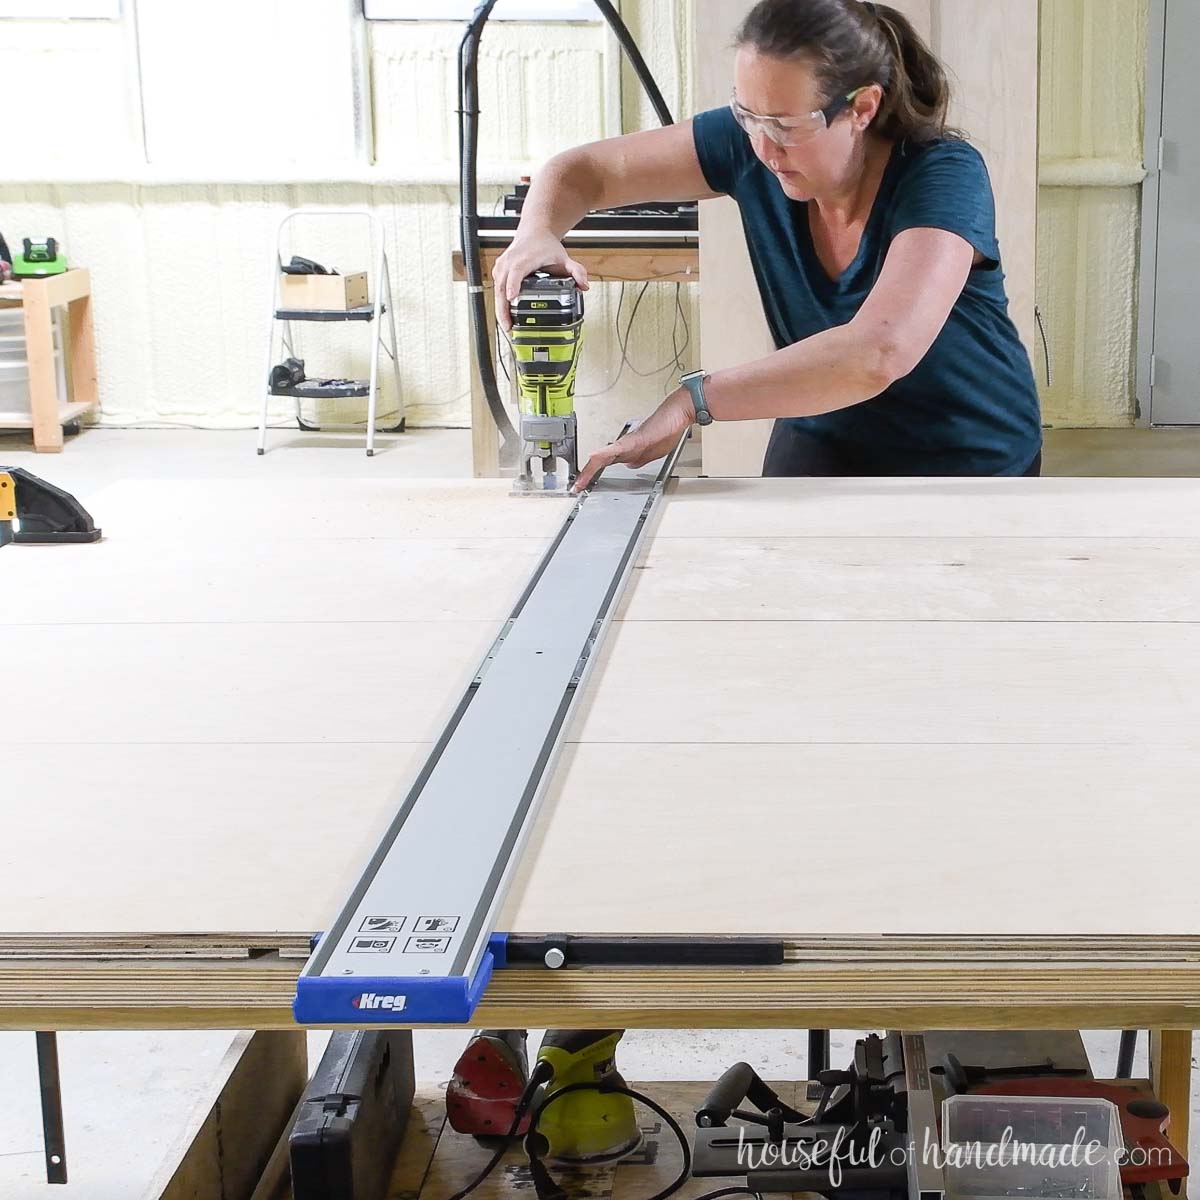
Clamp the Kreg Straight Edge Guide to the boards lined up to the marks. Using a router, cut a 1/4” deep dado along all the boards.
I lined all 4 of the pieces up and clamped them together. Using the Kreg Straight Edge Guide XL, I was able to router the dado along all the boards in one pass.
Remove one of the boards you have already routed dados in and replace it with the 5th side board. Flip the remaining 3 boards with dados in over.
Router the second set of shelf dados in these 4 boards. You will end up with 3 boards with dados on both side and two boards with dados on one side.
EXPERT TIP:
Be careful when moving the boards with double sided dados since the bottom dados leave a weak spot until the shelves are glued into them.
STEP 2- Assemble the cabinet
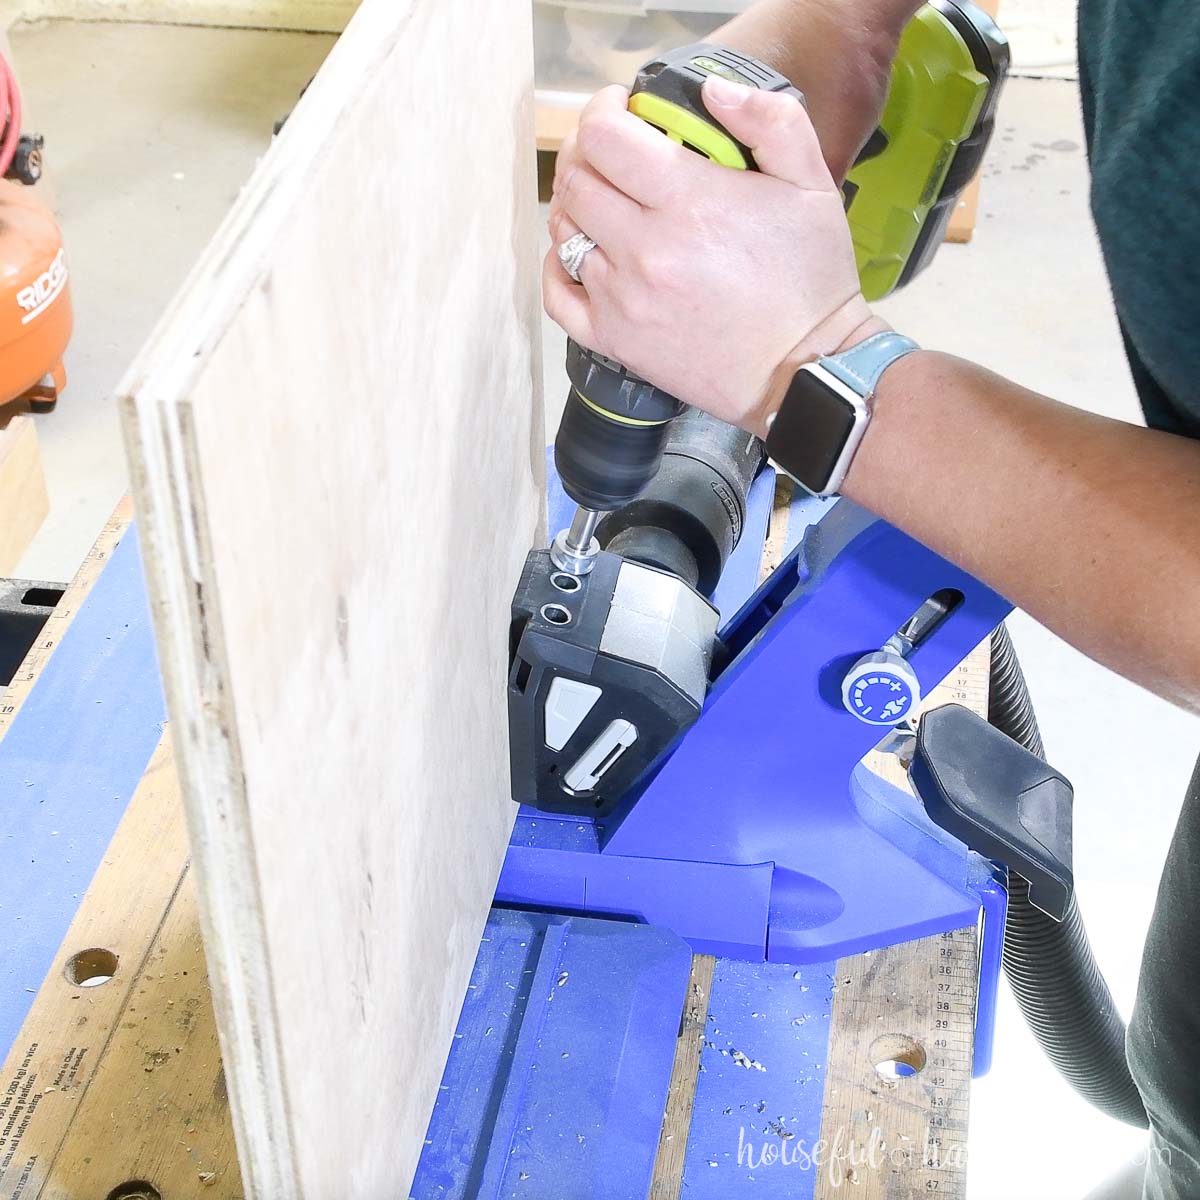
Set your pocket hole jig for 3/4″ thick material.
Drill 3 pocket holes in both ends of all 8 top & bottom pieces. Also drill pocket holes in both ends all 4 upper supports and all 4 lower supports.
Using one of the side pieces with dados on only 1 side and one piece with dados on both sides, assemble the first section.
First attach a top piece and a bottom piece to one side piece with 1 1/4″ pocket hole screws and wood glue. The top should be flush with the top of the side piece and the bottom piece should be 4 1/4” up from the bottom.
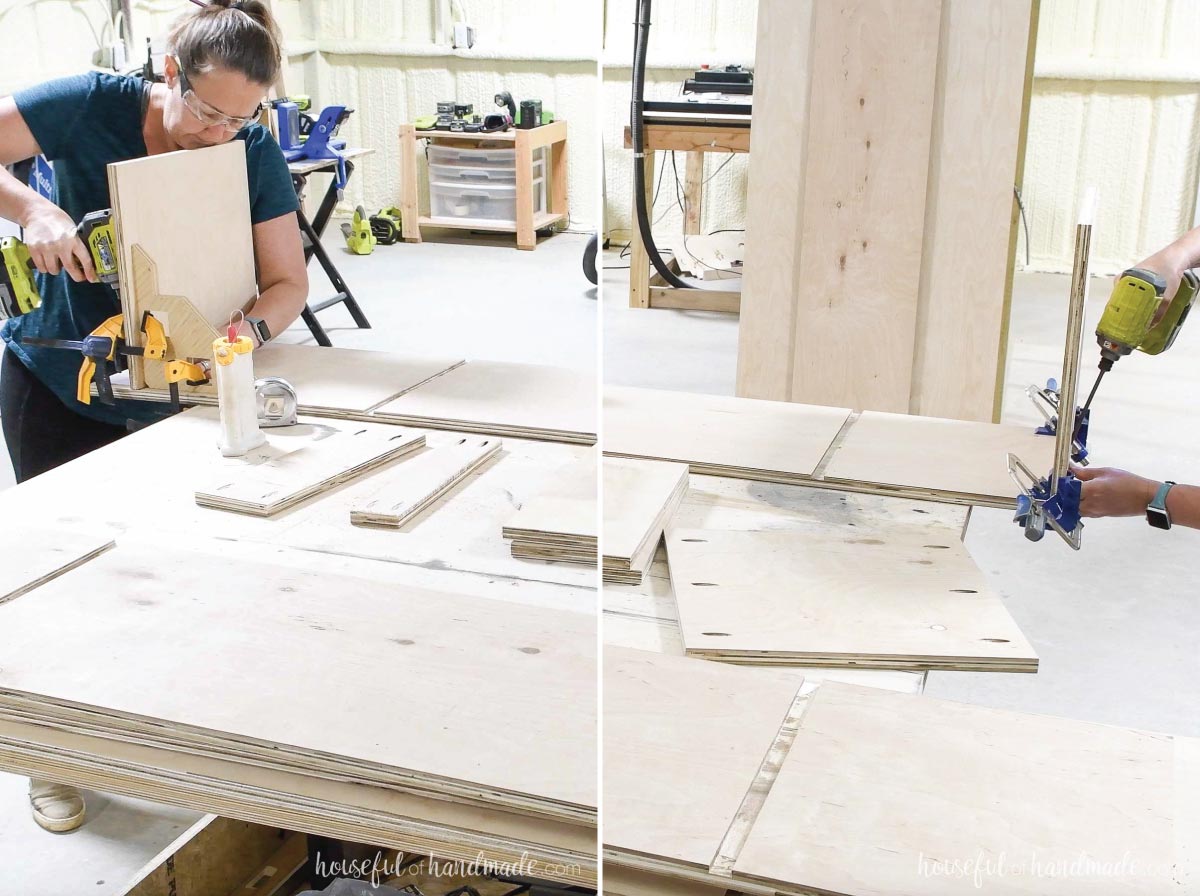
Next, attach the two support pieces so they are right under the shelf dados. The larger one needs to be on the top so you have room to attach a coat hook.
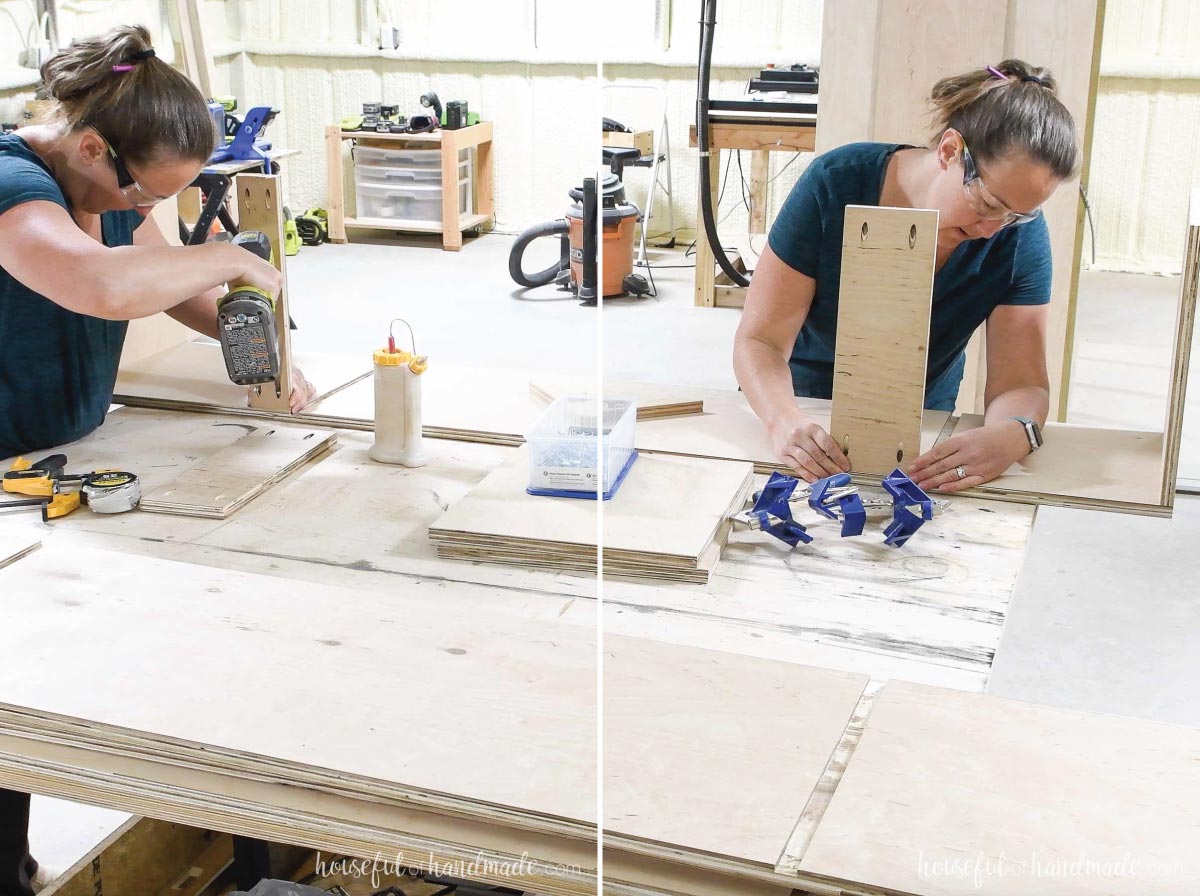
Add wood glue to the dados for the shelves and place the shelves into the grooves.
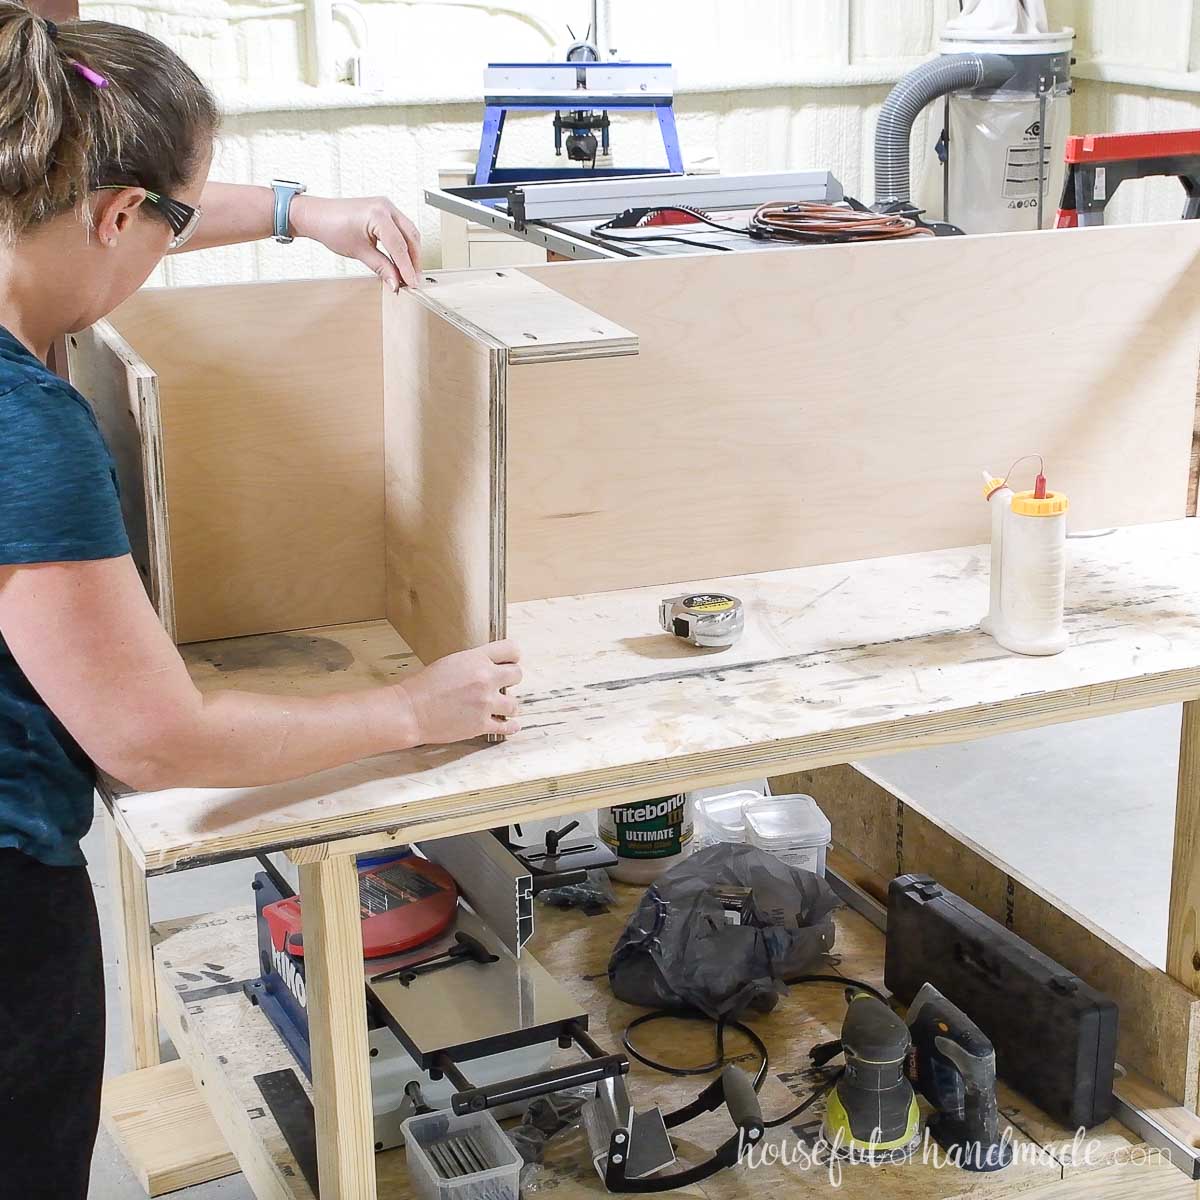
Attach the other side piece to the side of the locker with 1 1/4” pocket hole screws making sure to square up the top and bottom and shelves.
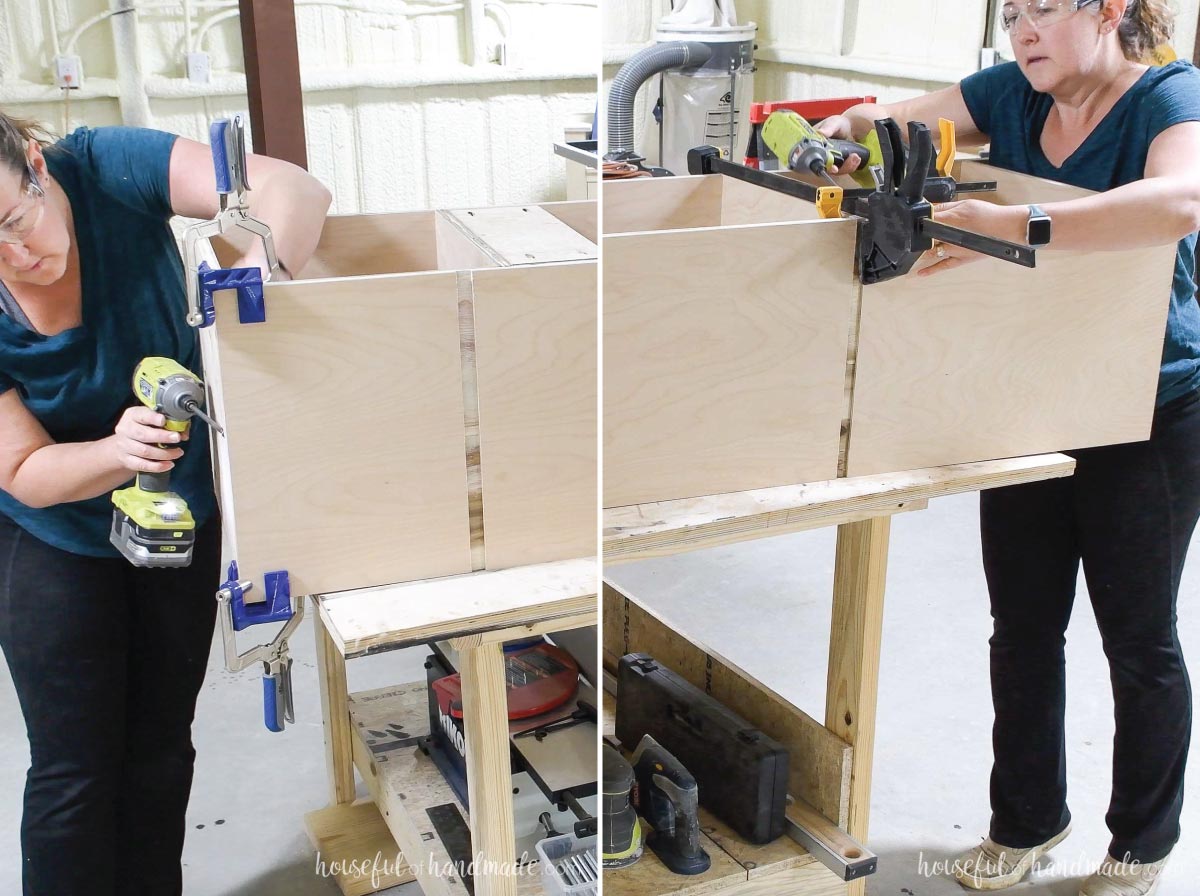
Attach a top and bottom piece to the next side piece with dados on both sides. Make sure to pay attention up the top dados so you alternate the upper shelf.
Then attach the upper and lower support pieces. Use wood glue and 1 1/4” pocket hole screws to attach them.
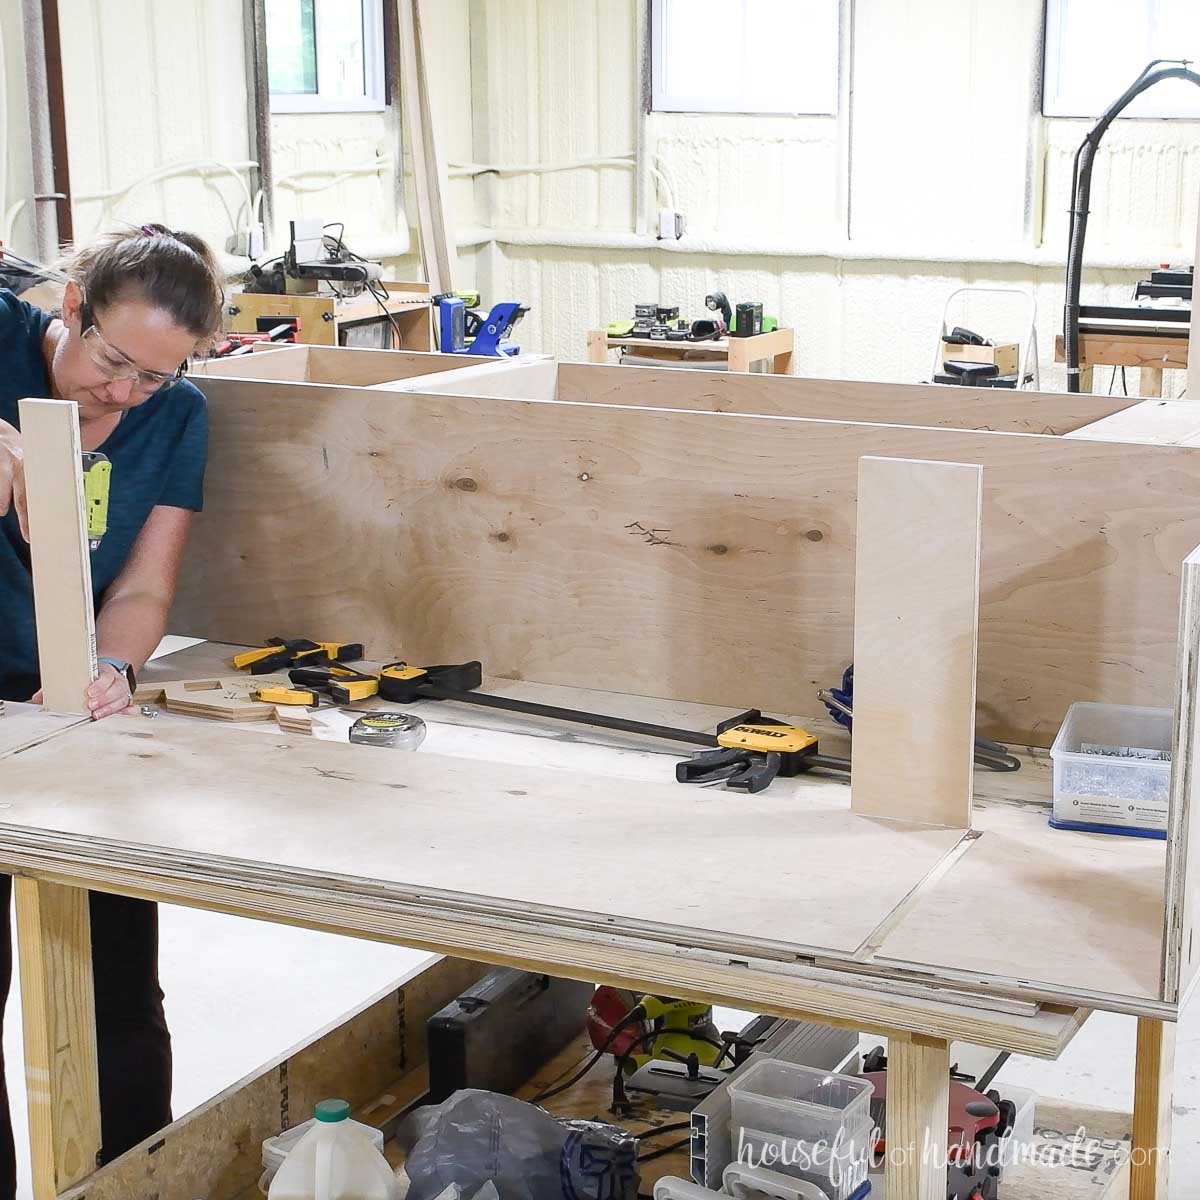
Glue in the shelves then line it up with the dado end of the assembled locker section and attach it.
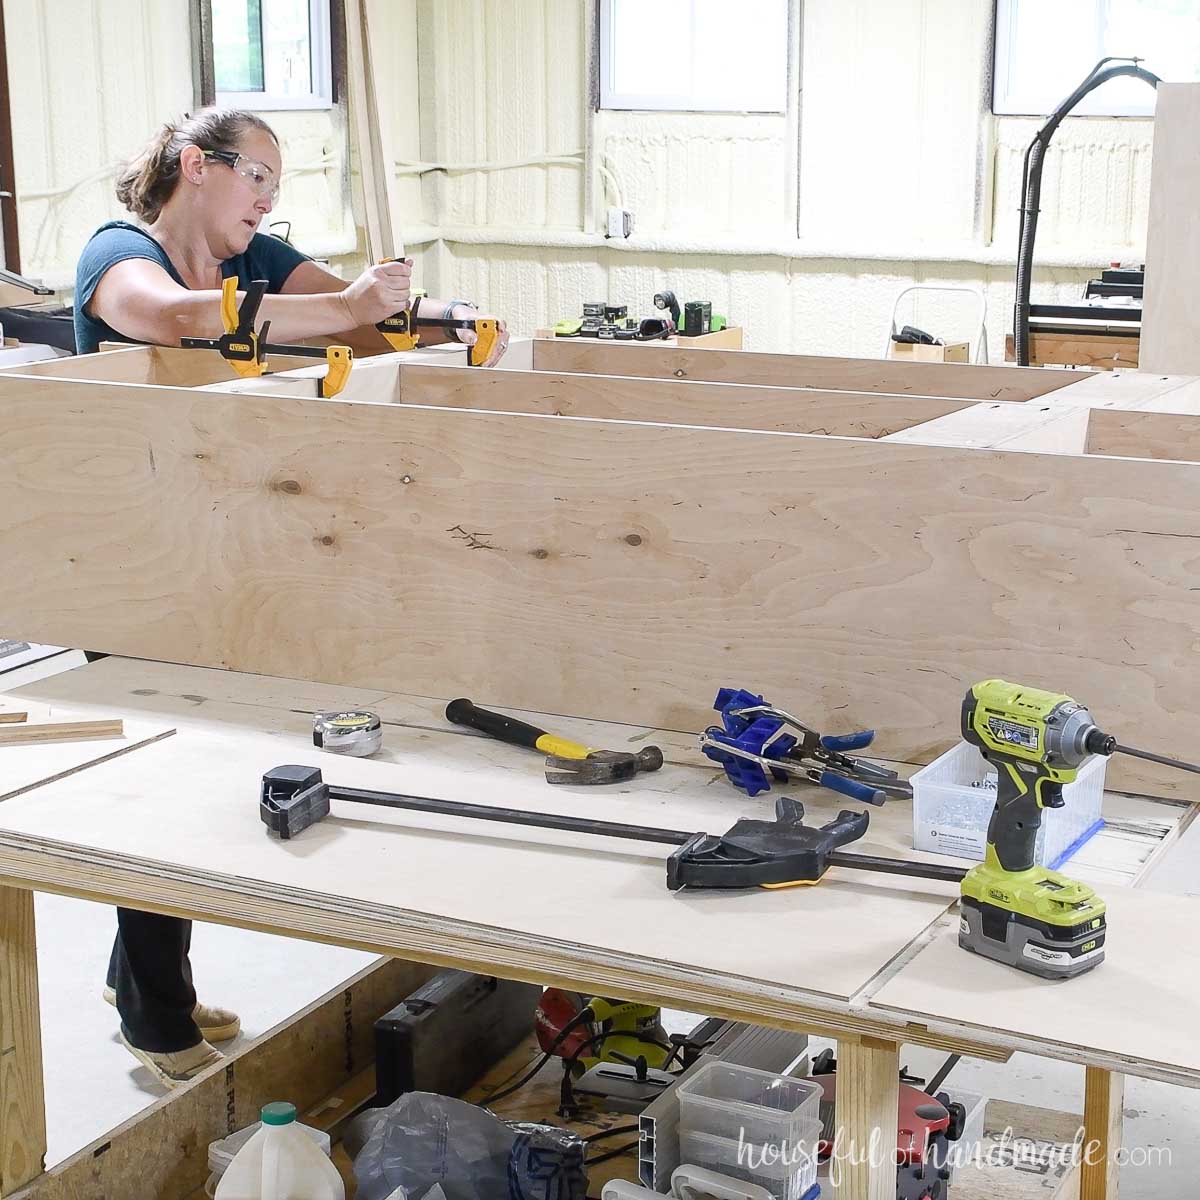
Continue to add the remaining locker sections in order until you have added all 4.
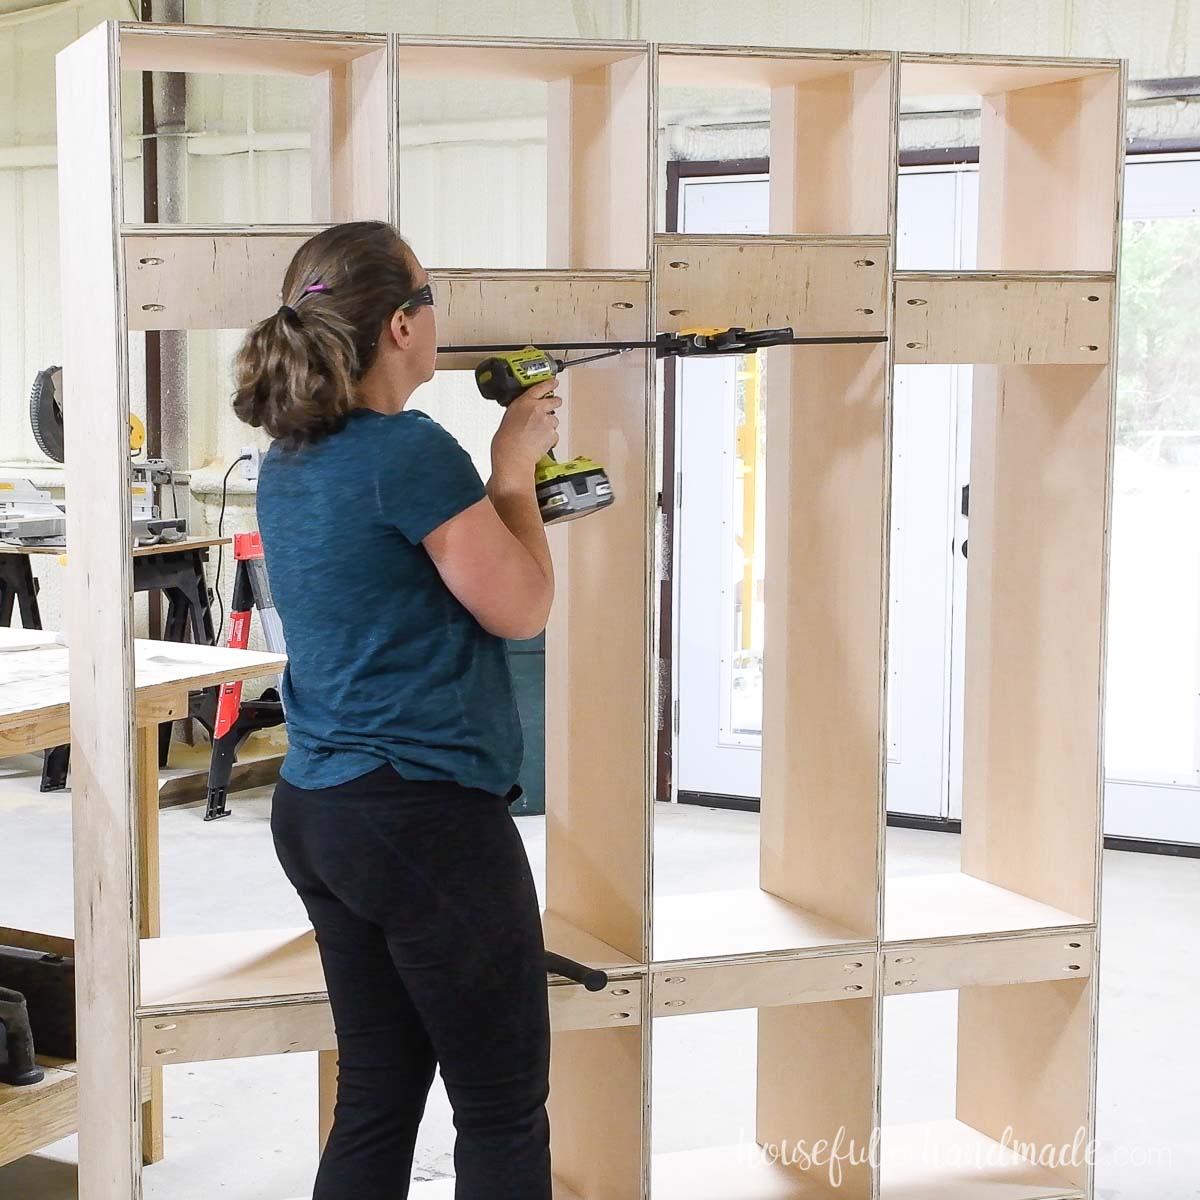
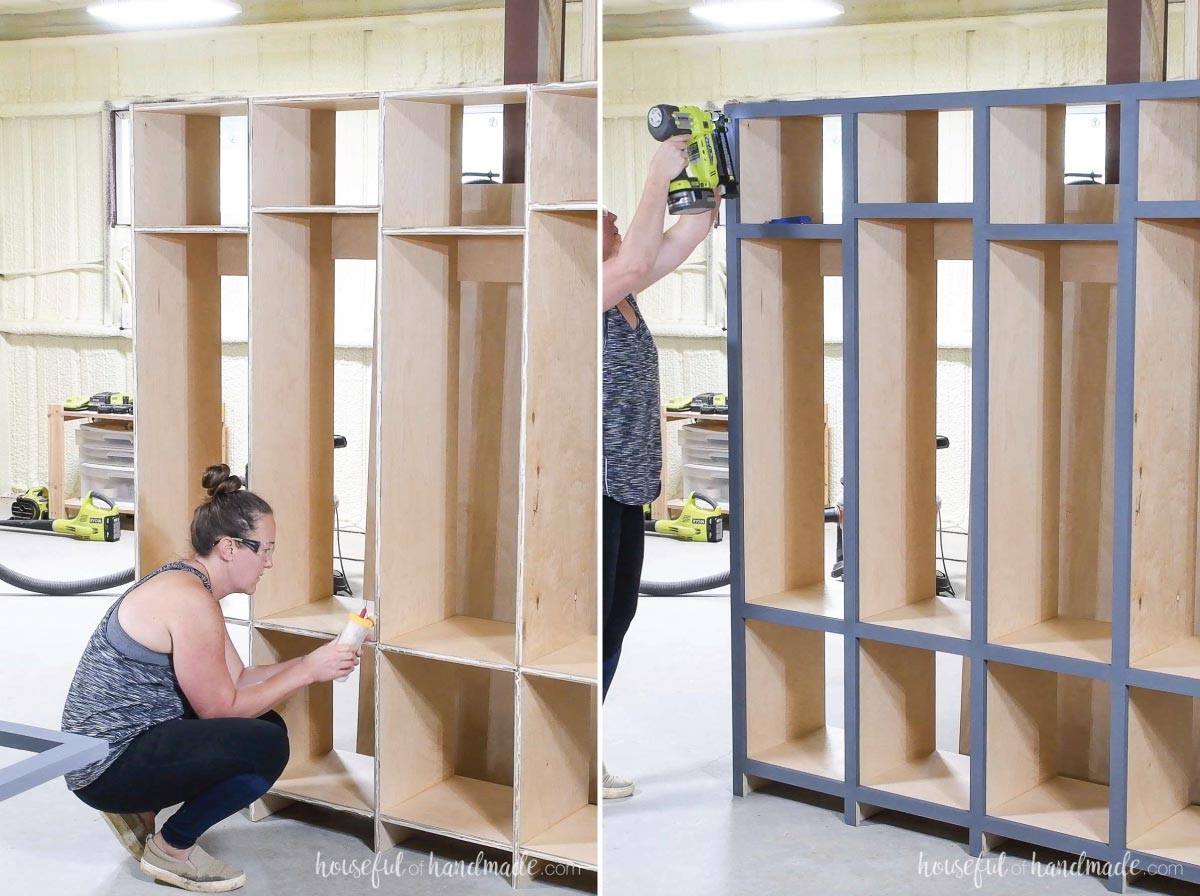
STEP 3- Add the face frame
Add pocket holes set for 3/4” thick material to each end of all the face frame rail pieces.
Attach them between the face frame stiles so they cover the front of the plywood according to the plans.
The rail in front of the upper shelf is raised 1/4” and the rails in front of the middle and lower shelf are raised 1/8” to ensure the front of the plywood is covered.
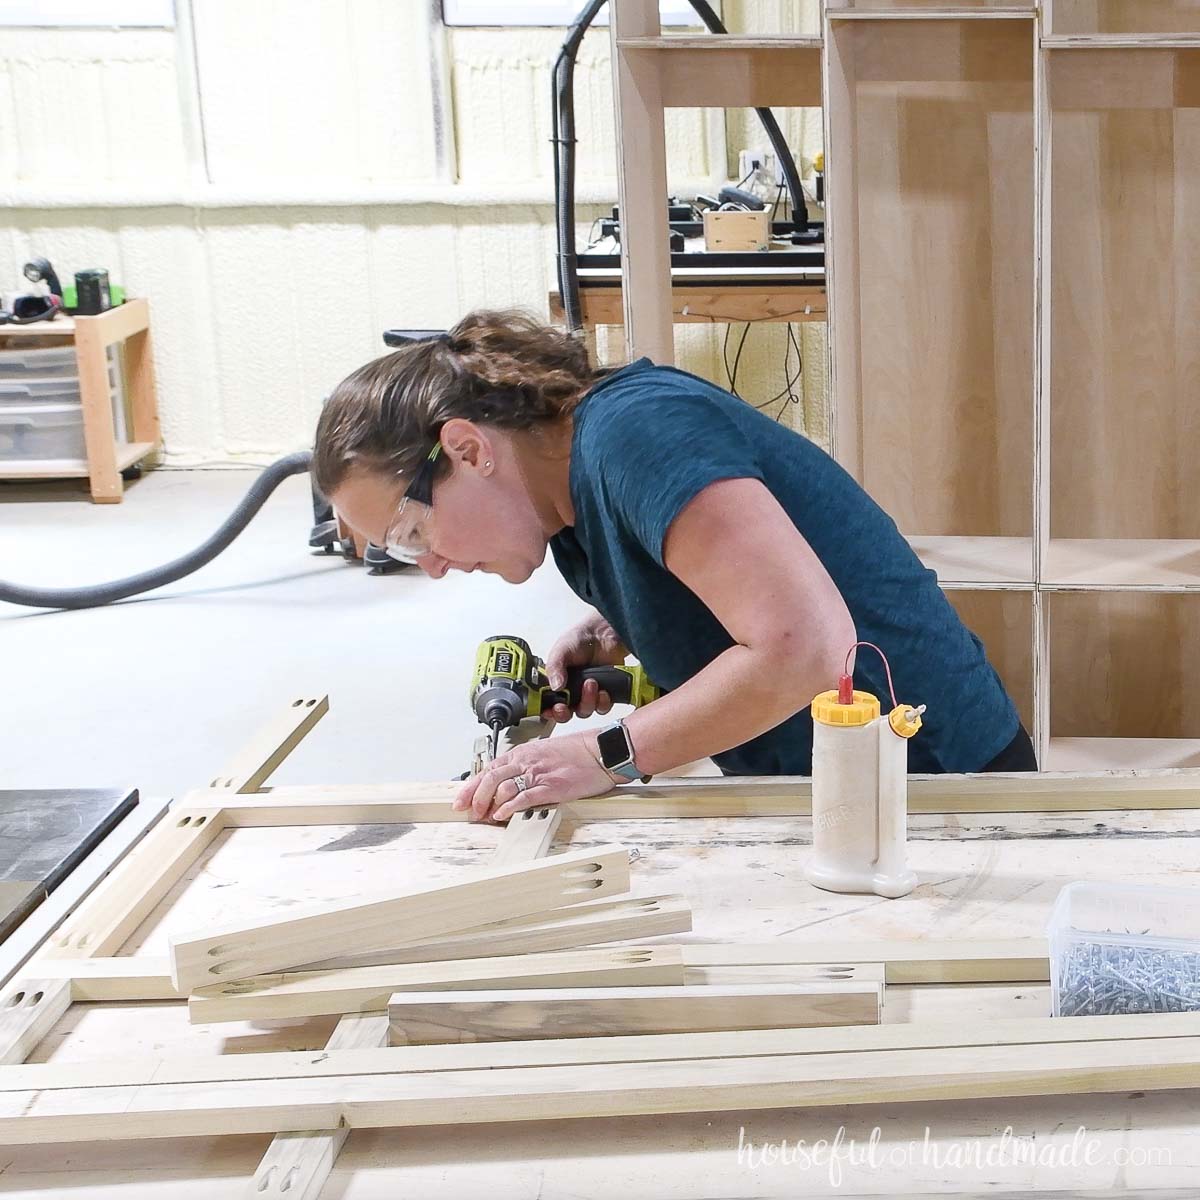
EXPERT TIP:
I wanted my mudroom lockers finished with the outside painted and the inside sealed wood, I painted the face frame before attaching it to make it easier to paint without needing tape.
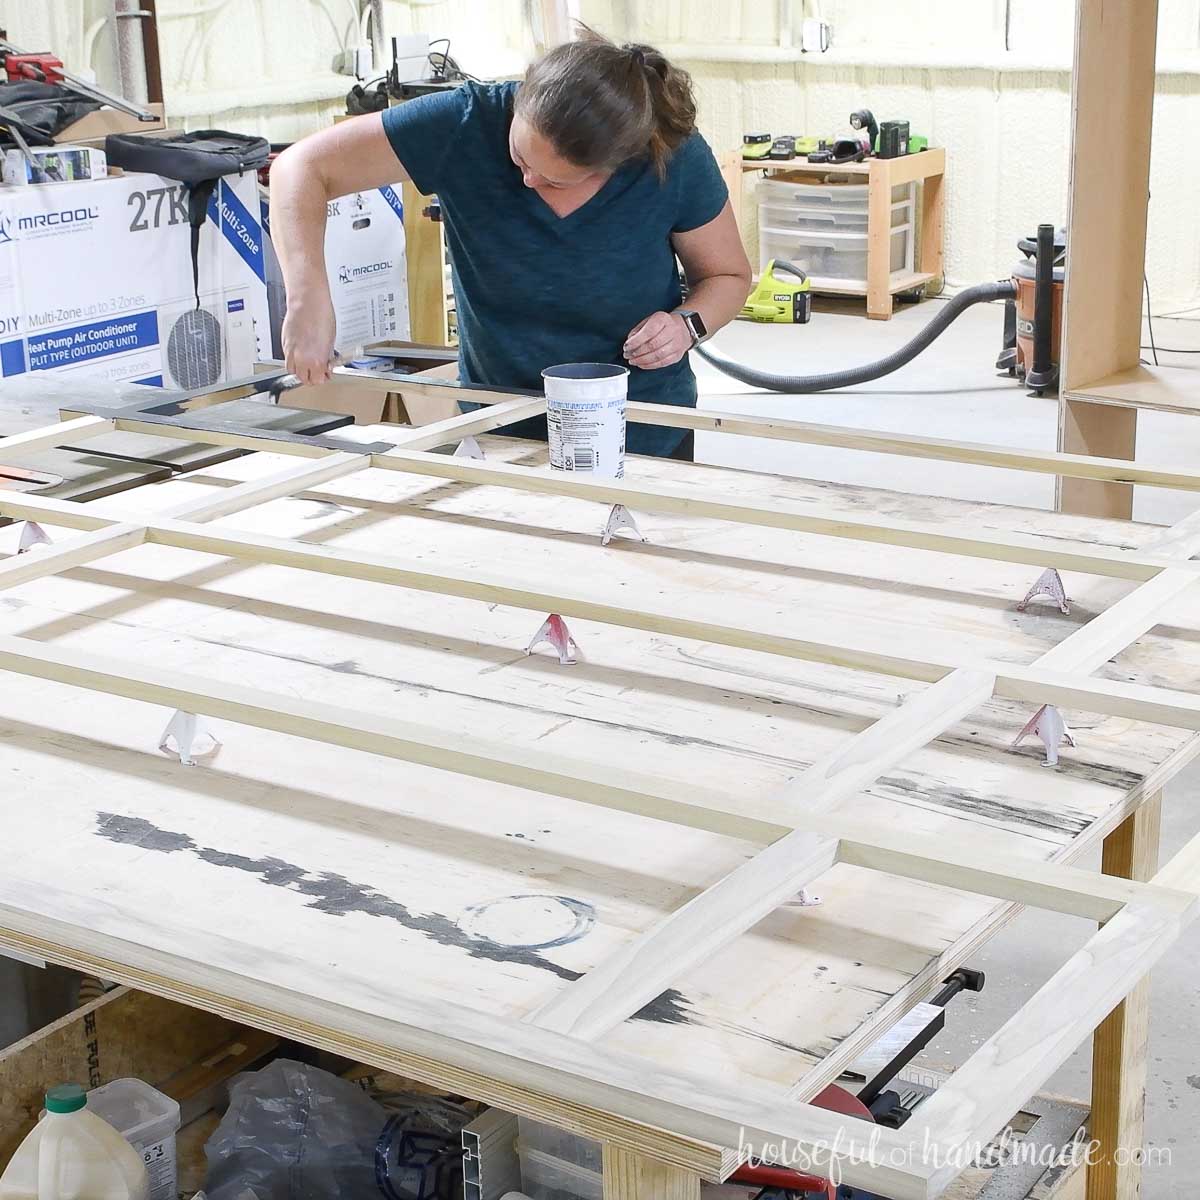
Line up the face frame to the cabinet. The frame should be flush with the top and bottom but it will hang over the edges approximately 3/8”.
Attach with wood glue and 1 1/4” brad nails.
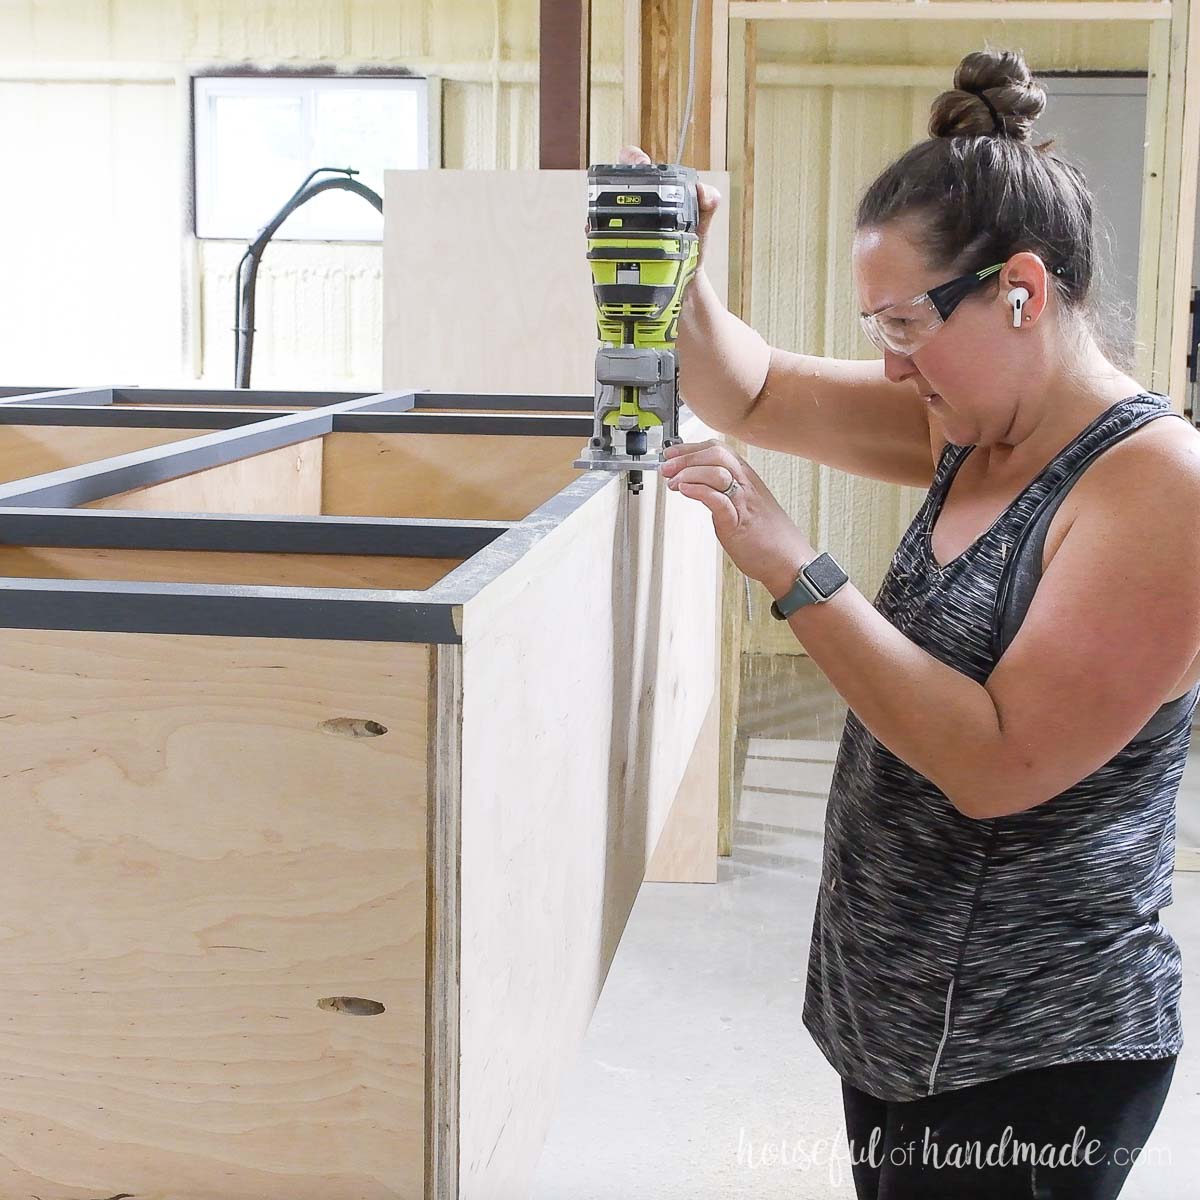
Then use a flush cut bit on the router to remove the overhang on each side and cut the face frame flush with the cabinet.
Since there is 3/8” to remove, take multiple passes removing a small amount each time.
STEP 4- Add base and back
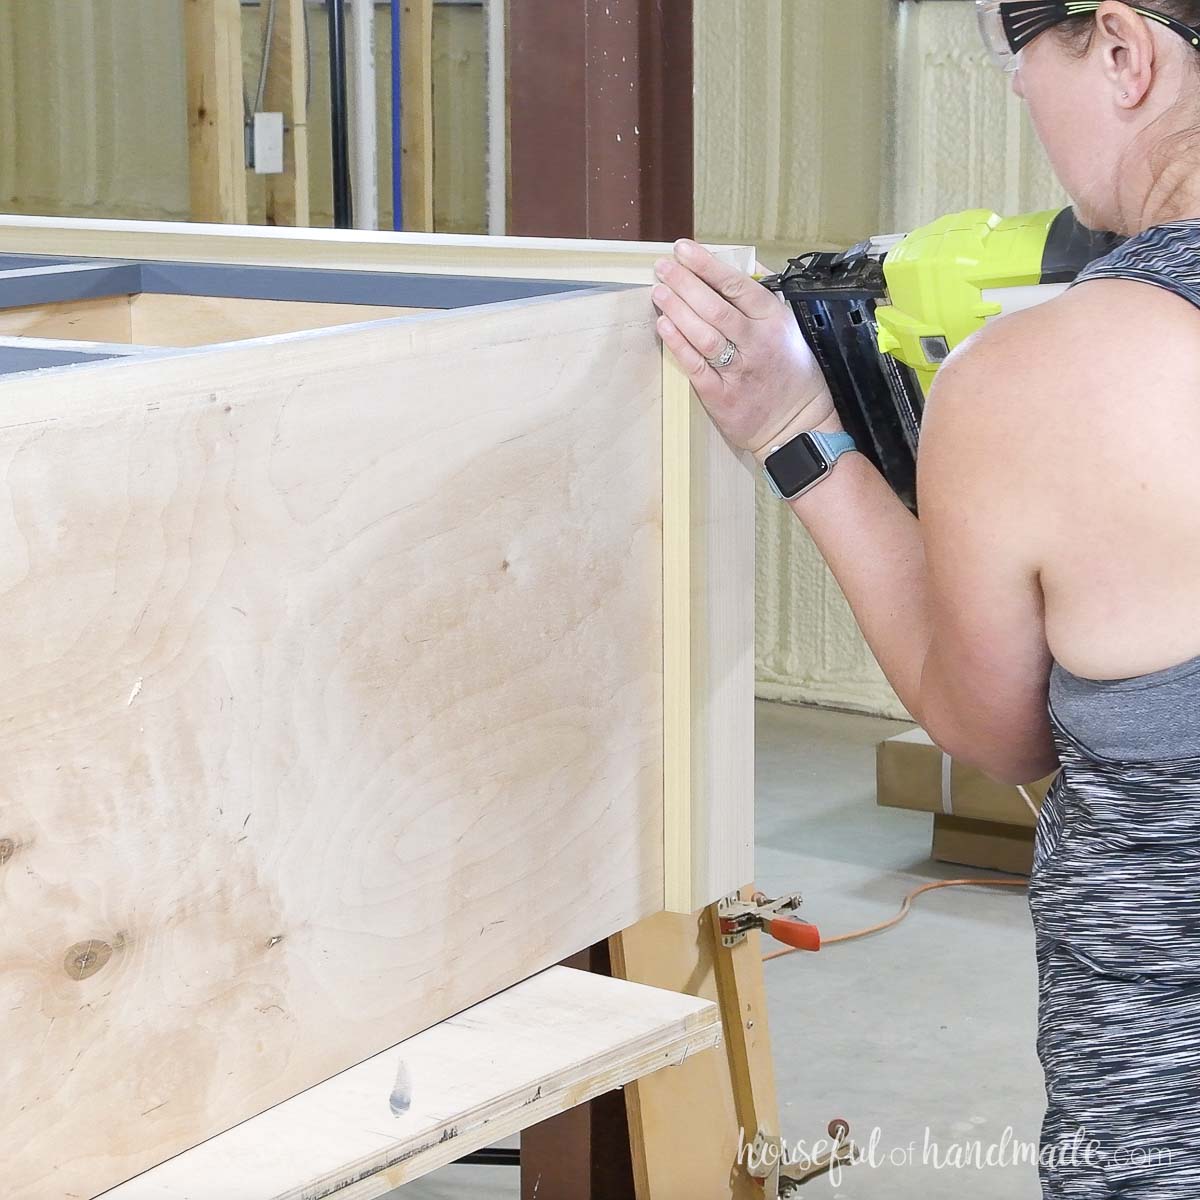
The cut list for the cabinet base is based on true 1/2″ measurement and most plywood is slightly thinner. So measure the front of the cabinet once assembled, then cut the base to fit.
Cut both ends of the base front at 45 degree angles and one end of the base sides at a 45 degree angle to give the base a mitered corner.
Attach with wood glue and 1 1/4” brad nails.
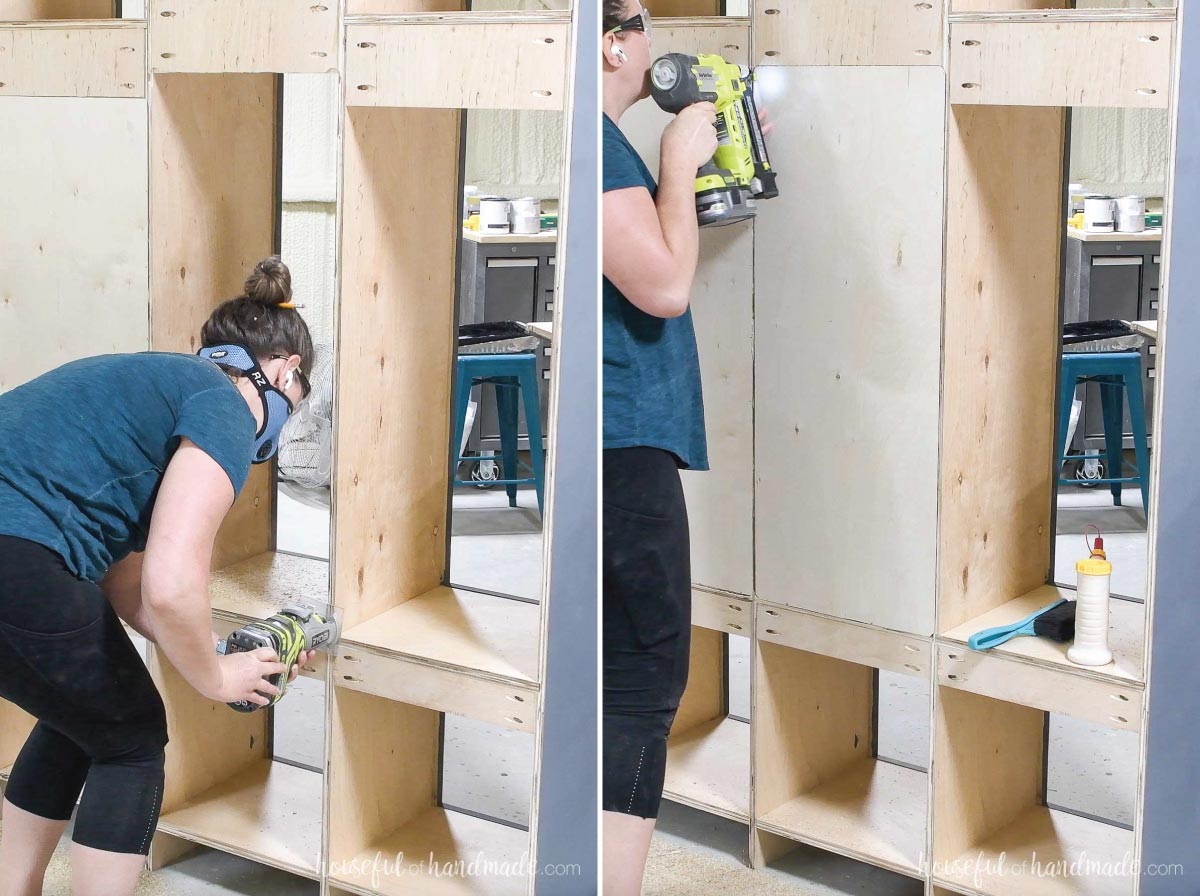
Adding a back to the lockers is optional. If you are painting the cabinet, you can skip the back, attach it to the wall and paint the wall behind it to match.
For a stained/wood cabinet, you will want to add a back panel to the hanging section of the lockers.
Router a 1/4” deep by 1/4” wide groove around the center openings in the back. Place the back pieces in the groove and secure with 5/8” long brad nails.
STEP 5- Finish and install
Fill the nail holes used to attach the face frame. Then sand and finish the mudroom lockers.
Since I already painted the face frame, I just had to touch up the face frame and paint the outside after flush cutting the sides.
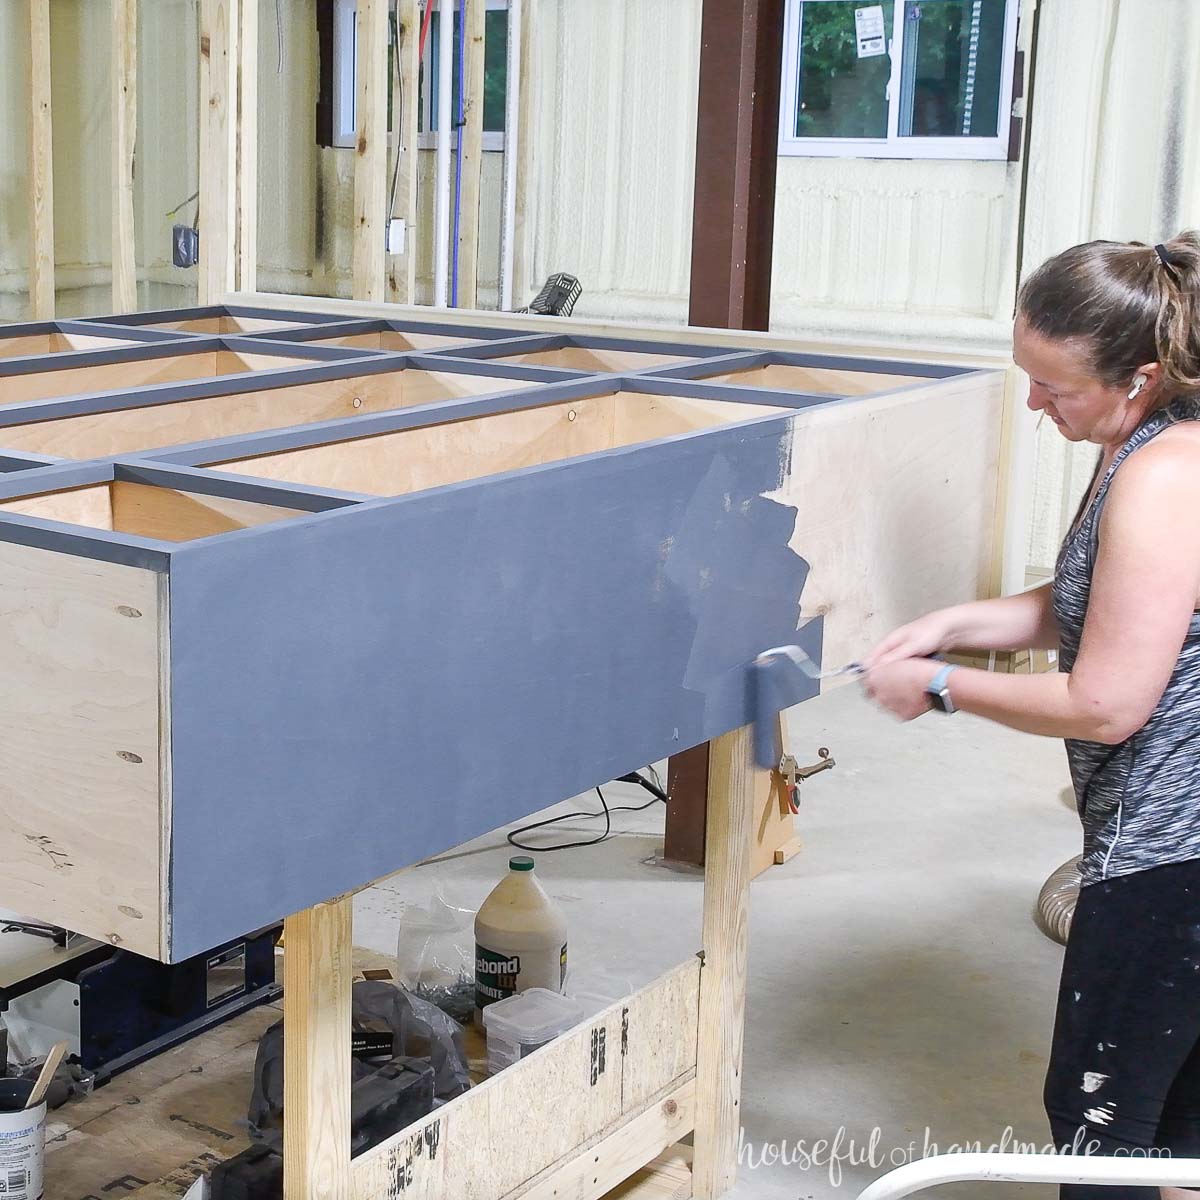
To attach the lockers to the wall, first cut away any baseboards where the cabinet will go. Then secure it into studs through the support pieces in the back.
Premium plans include:
- Recommended Tools
- Shopping list
- Easy to read cut list table
- Cut diagrams
- Step-by-step instructions with 3D renderings
- Helpful resources
- BONUS: 3D SketchUp file
You did it!
Add boxes and bins to help hide any clutter and enjoy all your storage.
And watch the full YouTube video for more tips as you get ready to build!
Happy Building!

Thank you to Kreg Tools for sponsoring this post. I only recommend products that I use and love and all opinions are 100% my own. Click here to read my full disclosure policy.

