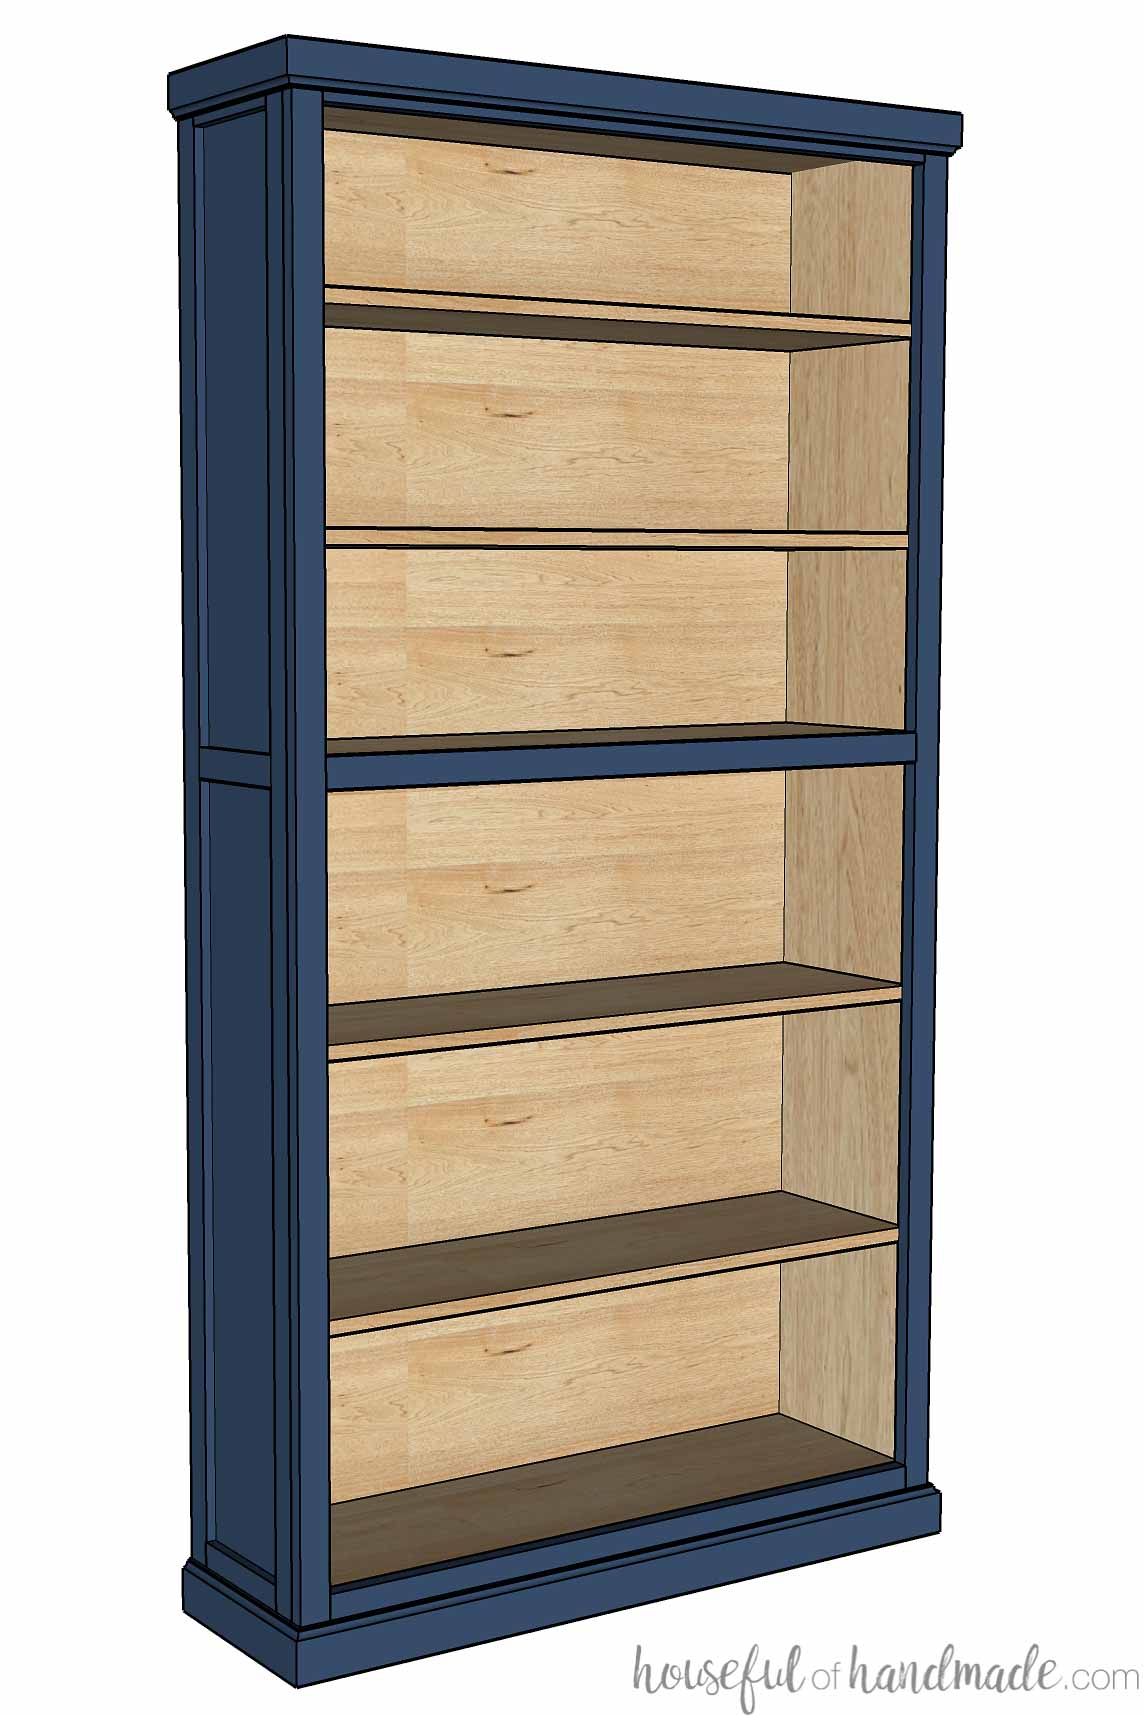
Whether you want your bookshelf freestanding or built-in, this complete guide has everything you need to build a bookcase. I will break down everything you need to know to build a custom bookcase, including how to make a cut list.
Building a bookshelf is a lot like building your own cabinets. They are easier than you might think! All they are is a box with a few extra pieces.
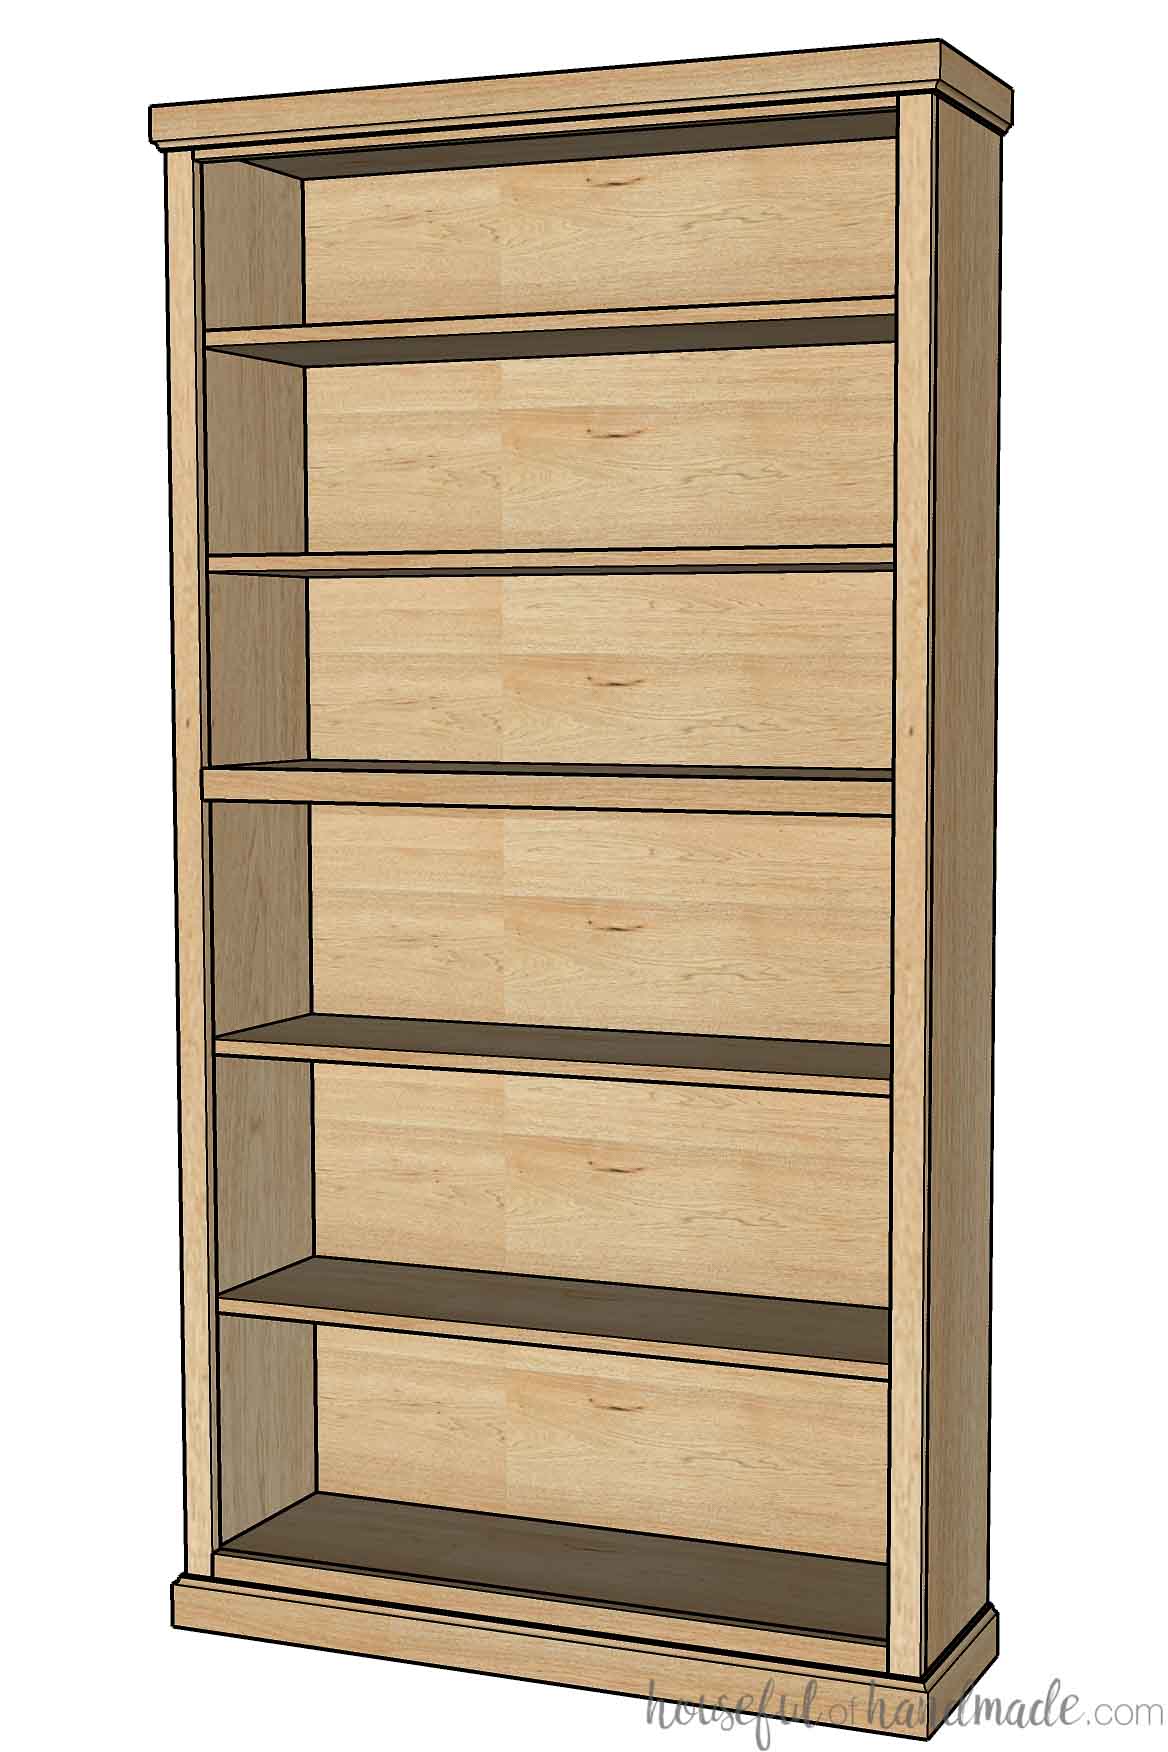
Table of contents
Types of Bookcases
Bookcases are so useful. Obviously they are perfect for storing books, but this easy to build cabinet can also be used for so many other storage solutions in your home.
This post may contain affiliate links. As an Amazon Associate I earn from qualifying purchases. Click here to read my full disclosure policy.
Customize your own bookcase to use it as:
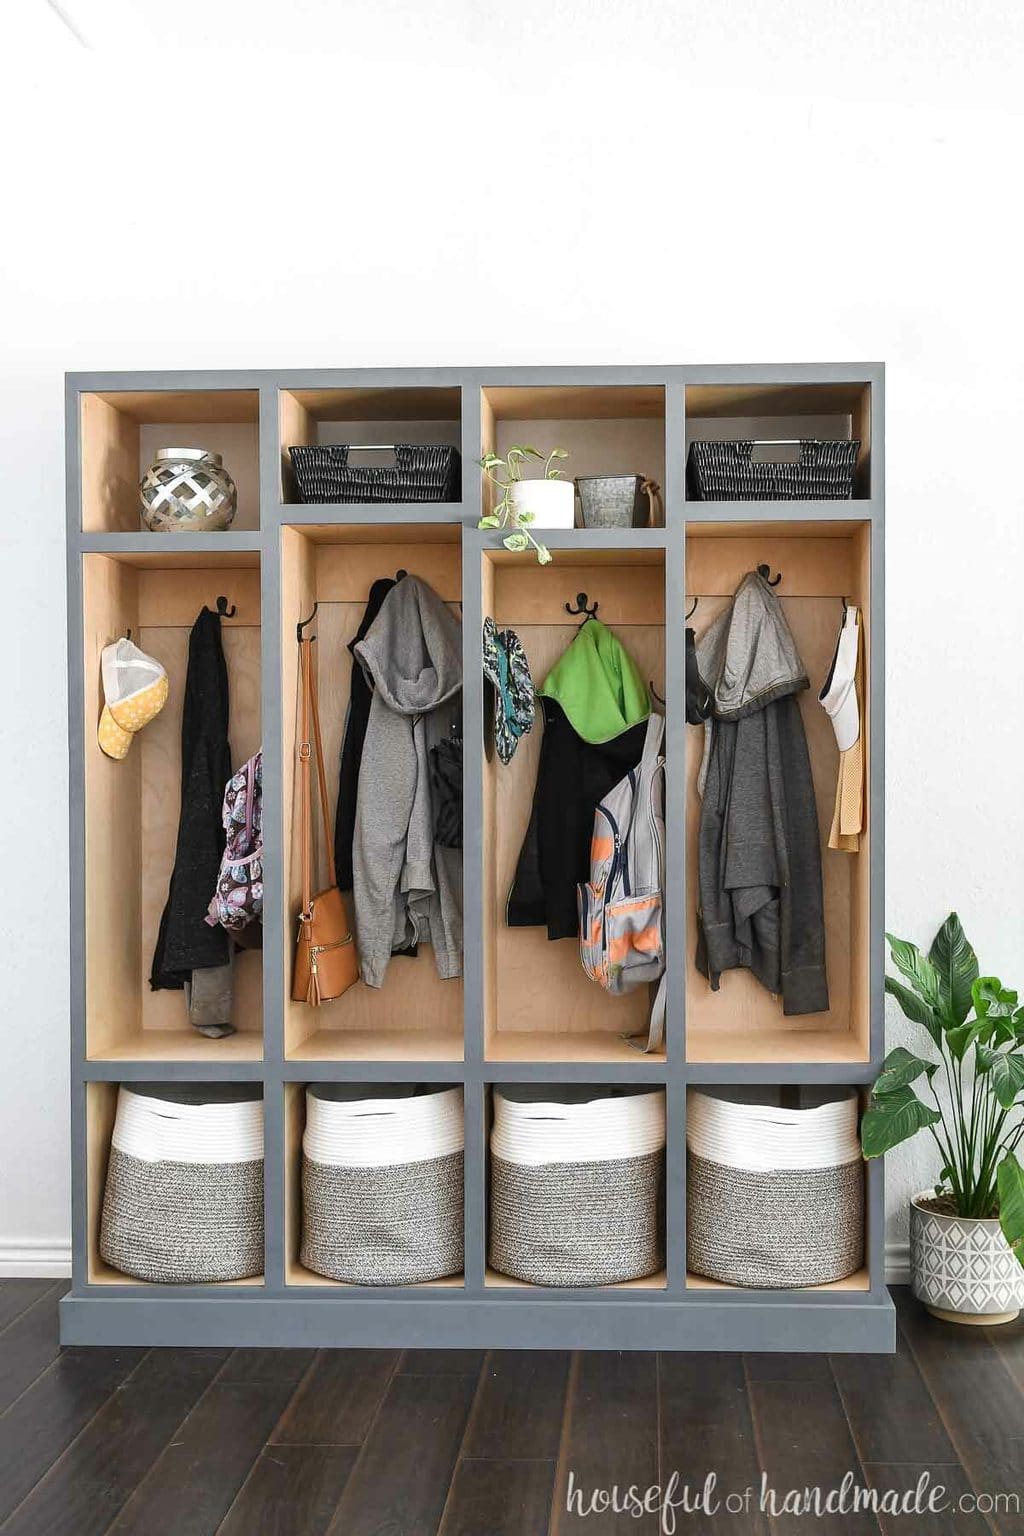
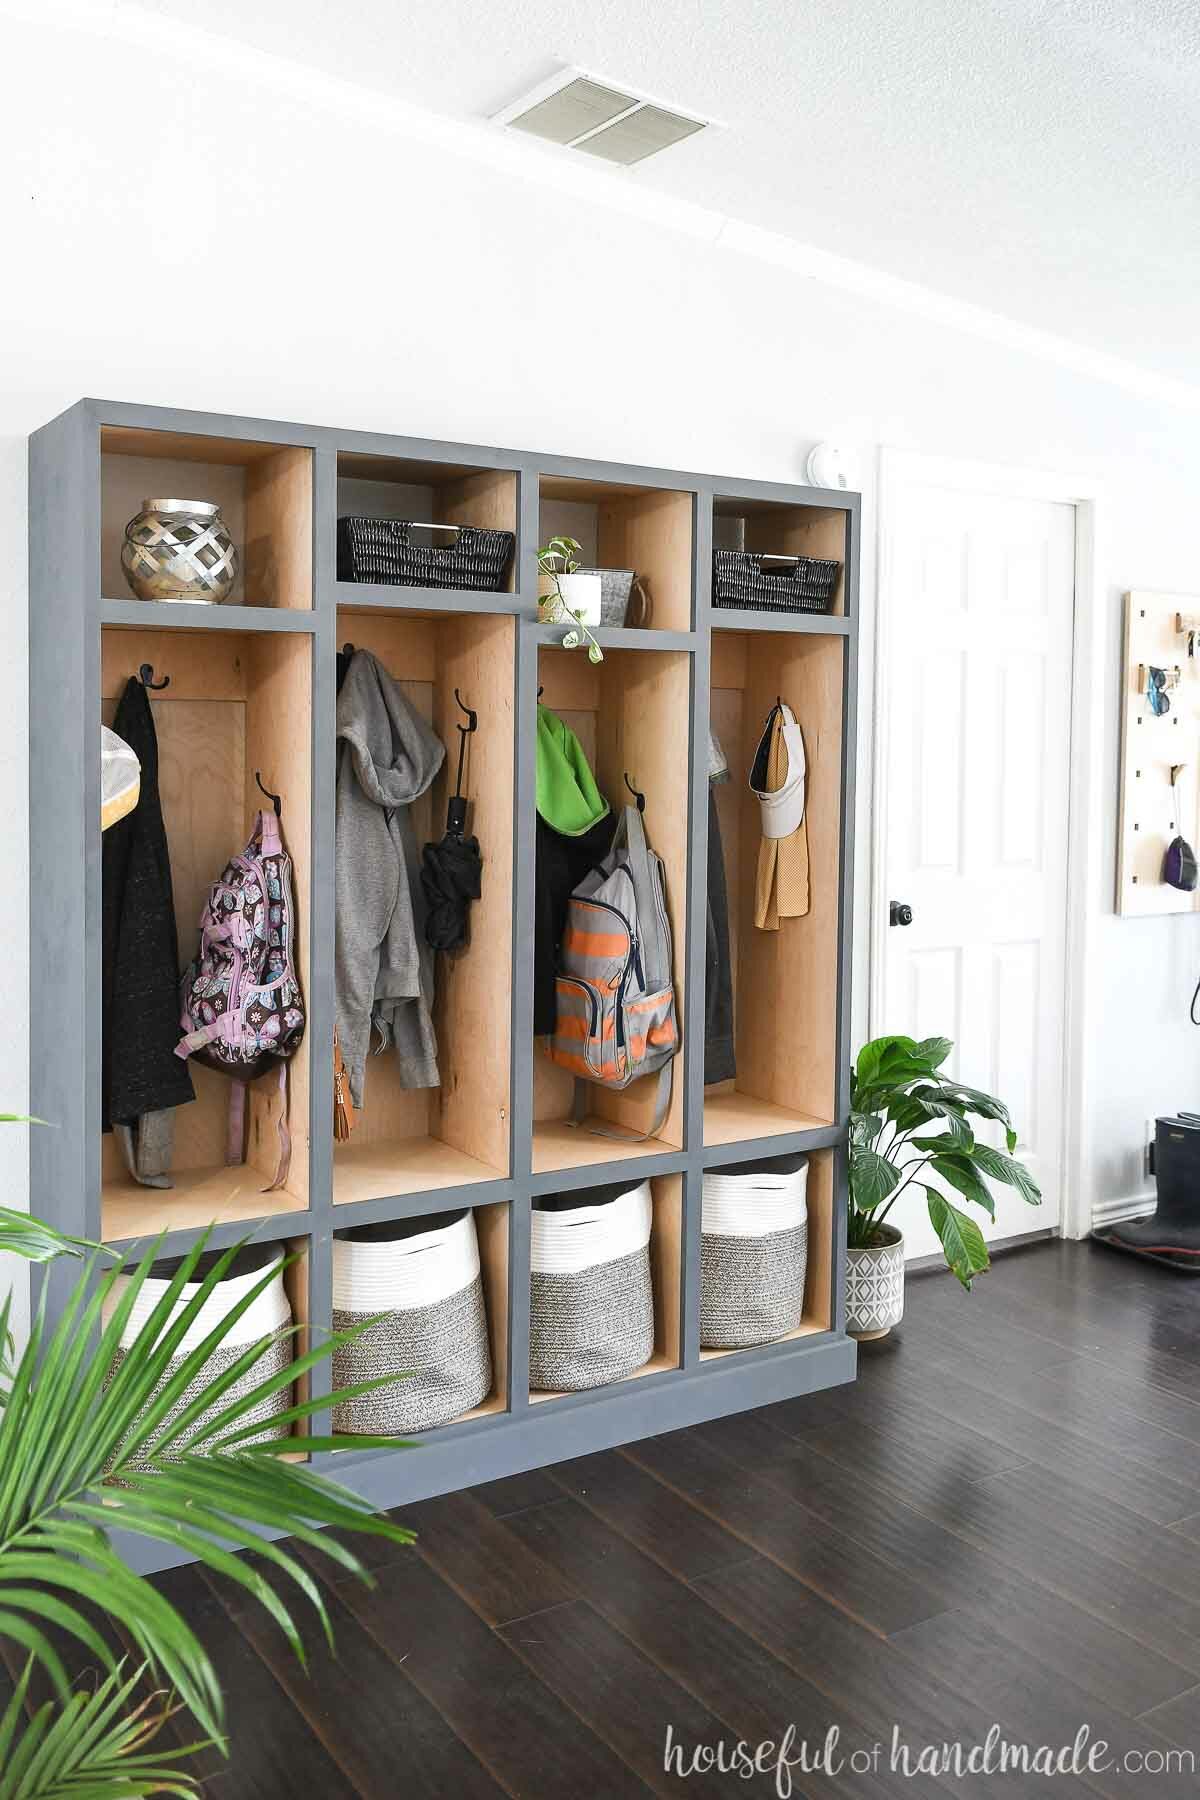
- Storage lockers for a mudroom
- Display shelves around a fireplace or window
- Console under or around your TV to hold DVDs
- Dining room hutch
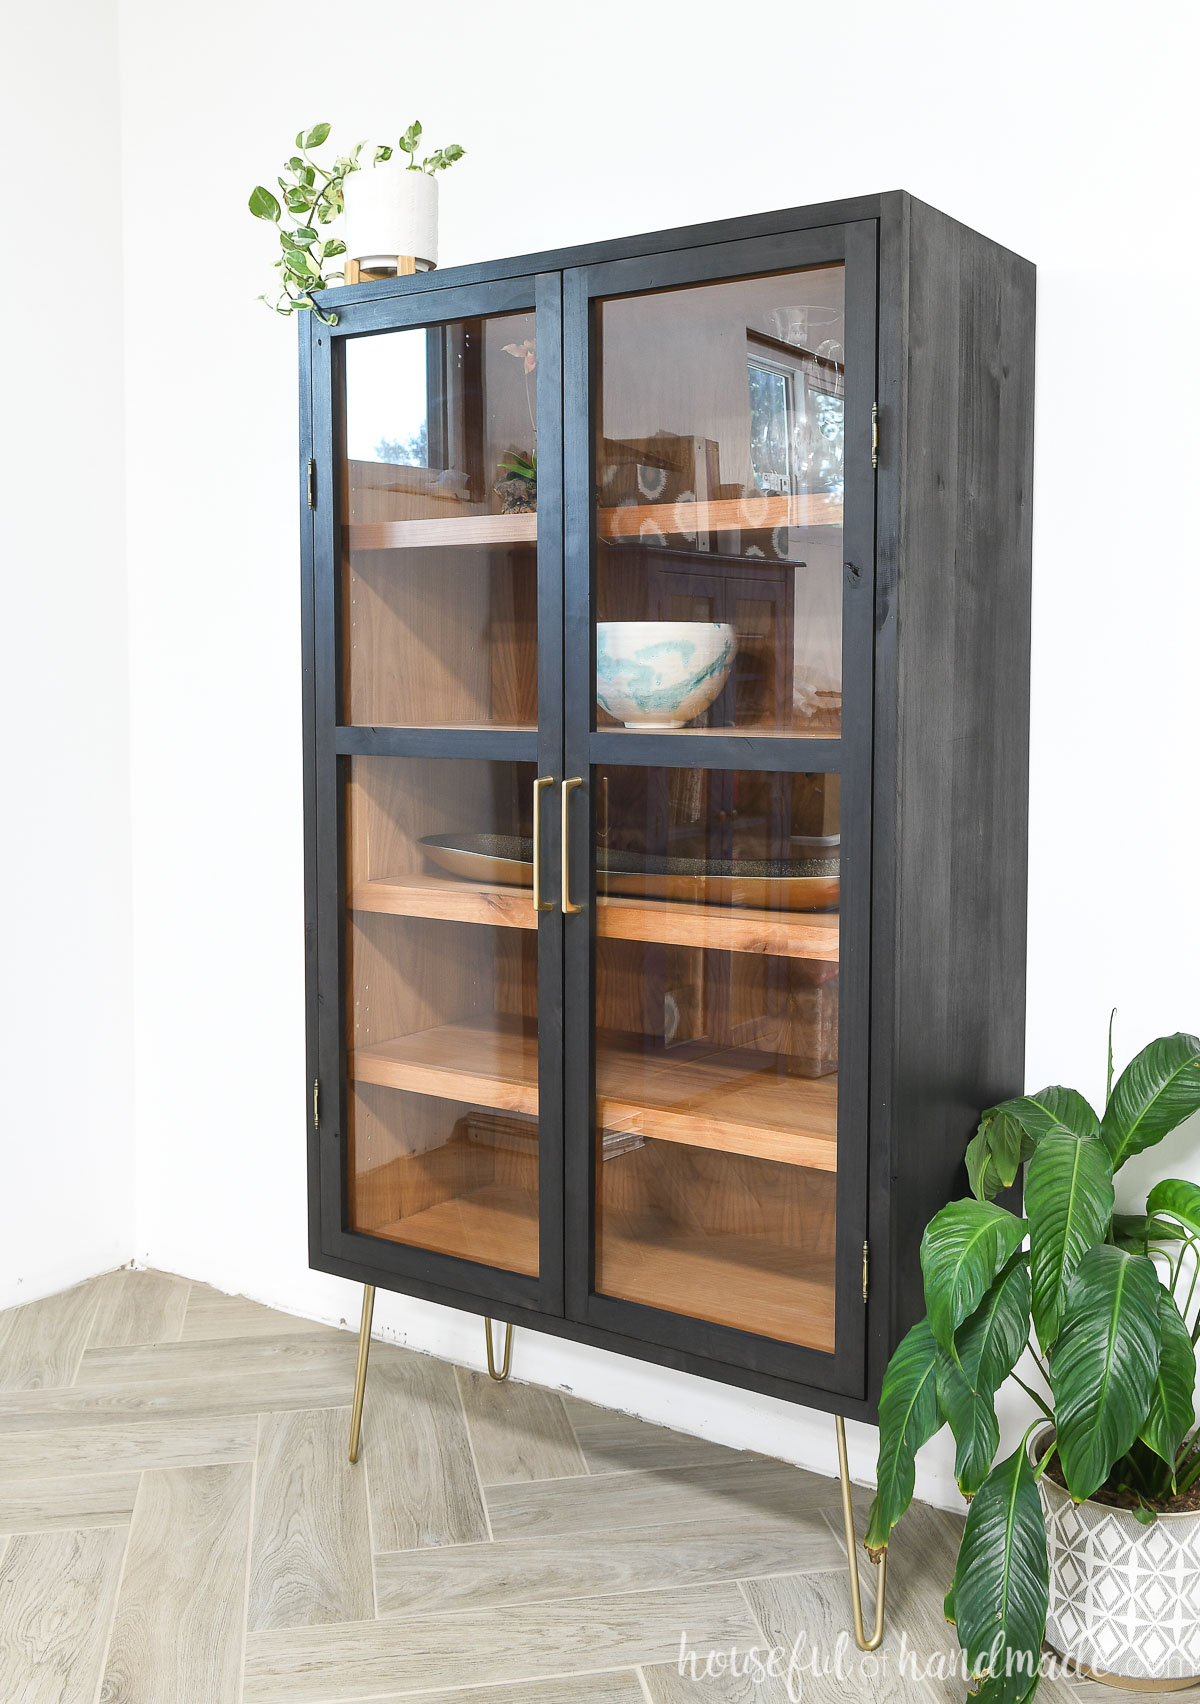
- Display cabinet with glass doors
- And anything else you can dream up!
Why Should You Build Your Own Bookcase?
There are many reasons why building your own bookshelf is way better than buying pre-fab bookcases or paying a lot for custom ones.
- You will save a lot of money or get way better quality for the same money. Most inexpensive pre-fab bookcases are made with cheap particleboard that will not last. You can build your own cabinets with quality plywood instead.
- Get custom bookcases that fit your home perfectly! Make built-in bookshelves that fit perfectly or custom bookcases to store exactly what you want.
- You will feel really amazing! Nothing beats the feeling of doing something yourself. And you will feel ready to take on even more projects when you are done!
Things to Consider when Building a Bookshelf
When you are building your own bookcase, you need to figure out a few things before making your bookcase plans. Let’s look at the different options you have when building bookcases so you can make some decisions.
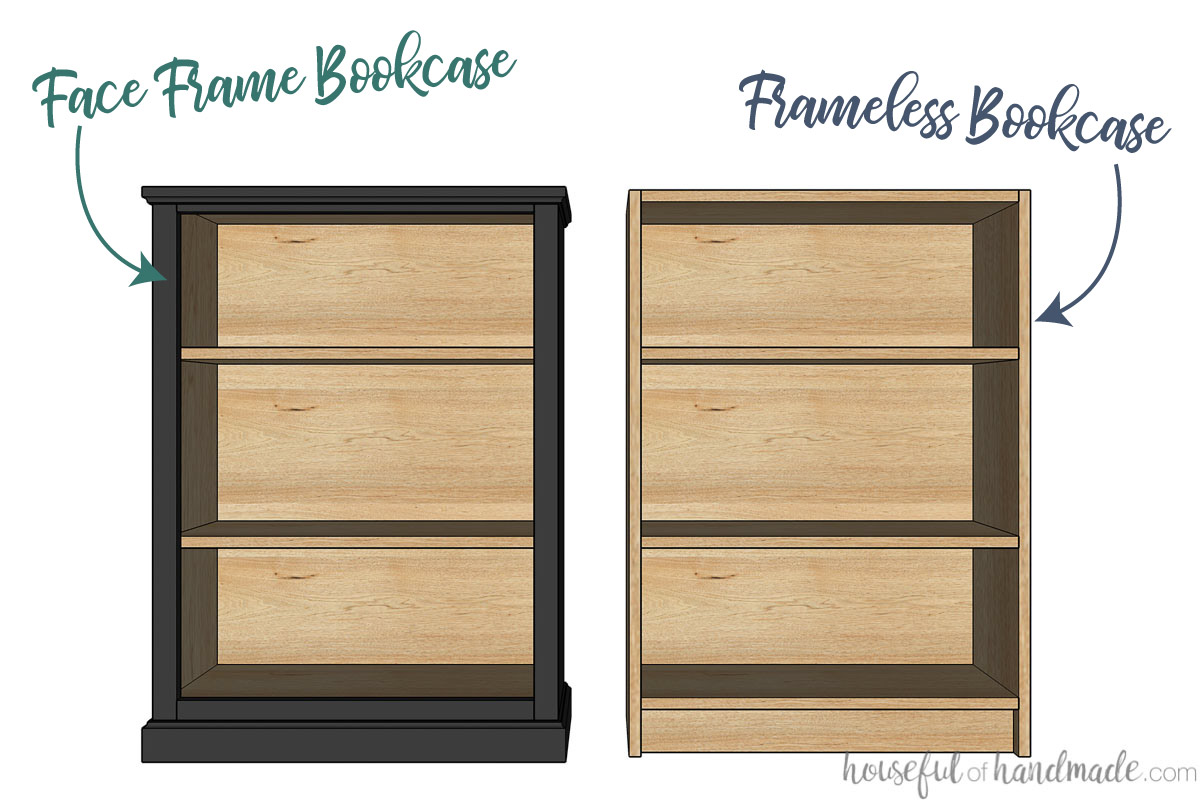
What style of bookcase do you want?
You can build your bookcase with a face frame to cover the plywood edges or use edge banding to cover the edges (frameless bookcase).
The face frame will create a wider front to your bookcase. It also can hide the small gap on the sides of adjustable shelves.
How deep should my bookshelves be?
Because you are making your own custom bookcase, you can make the shelves any depth you want. That is the best part of DIY!
You will want to consider what you want to store or display on your bookcase to determine the right depth.
Here are some common shelf depth recommendations for various bookcases.
- Standard bookcases: 10″-12″ deep
- Shelves for paperback books: 6 1/2″ deep
- Shelves for DVDs: 5 1/2″ deep
- Shelves for records: 14″ deep
Adjustable or Stationary Shelves?
Bookcases can easily be built with either stationary or adjustable shelves. Stationary shelves are attached to the sides of your bookcase and offer support.
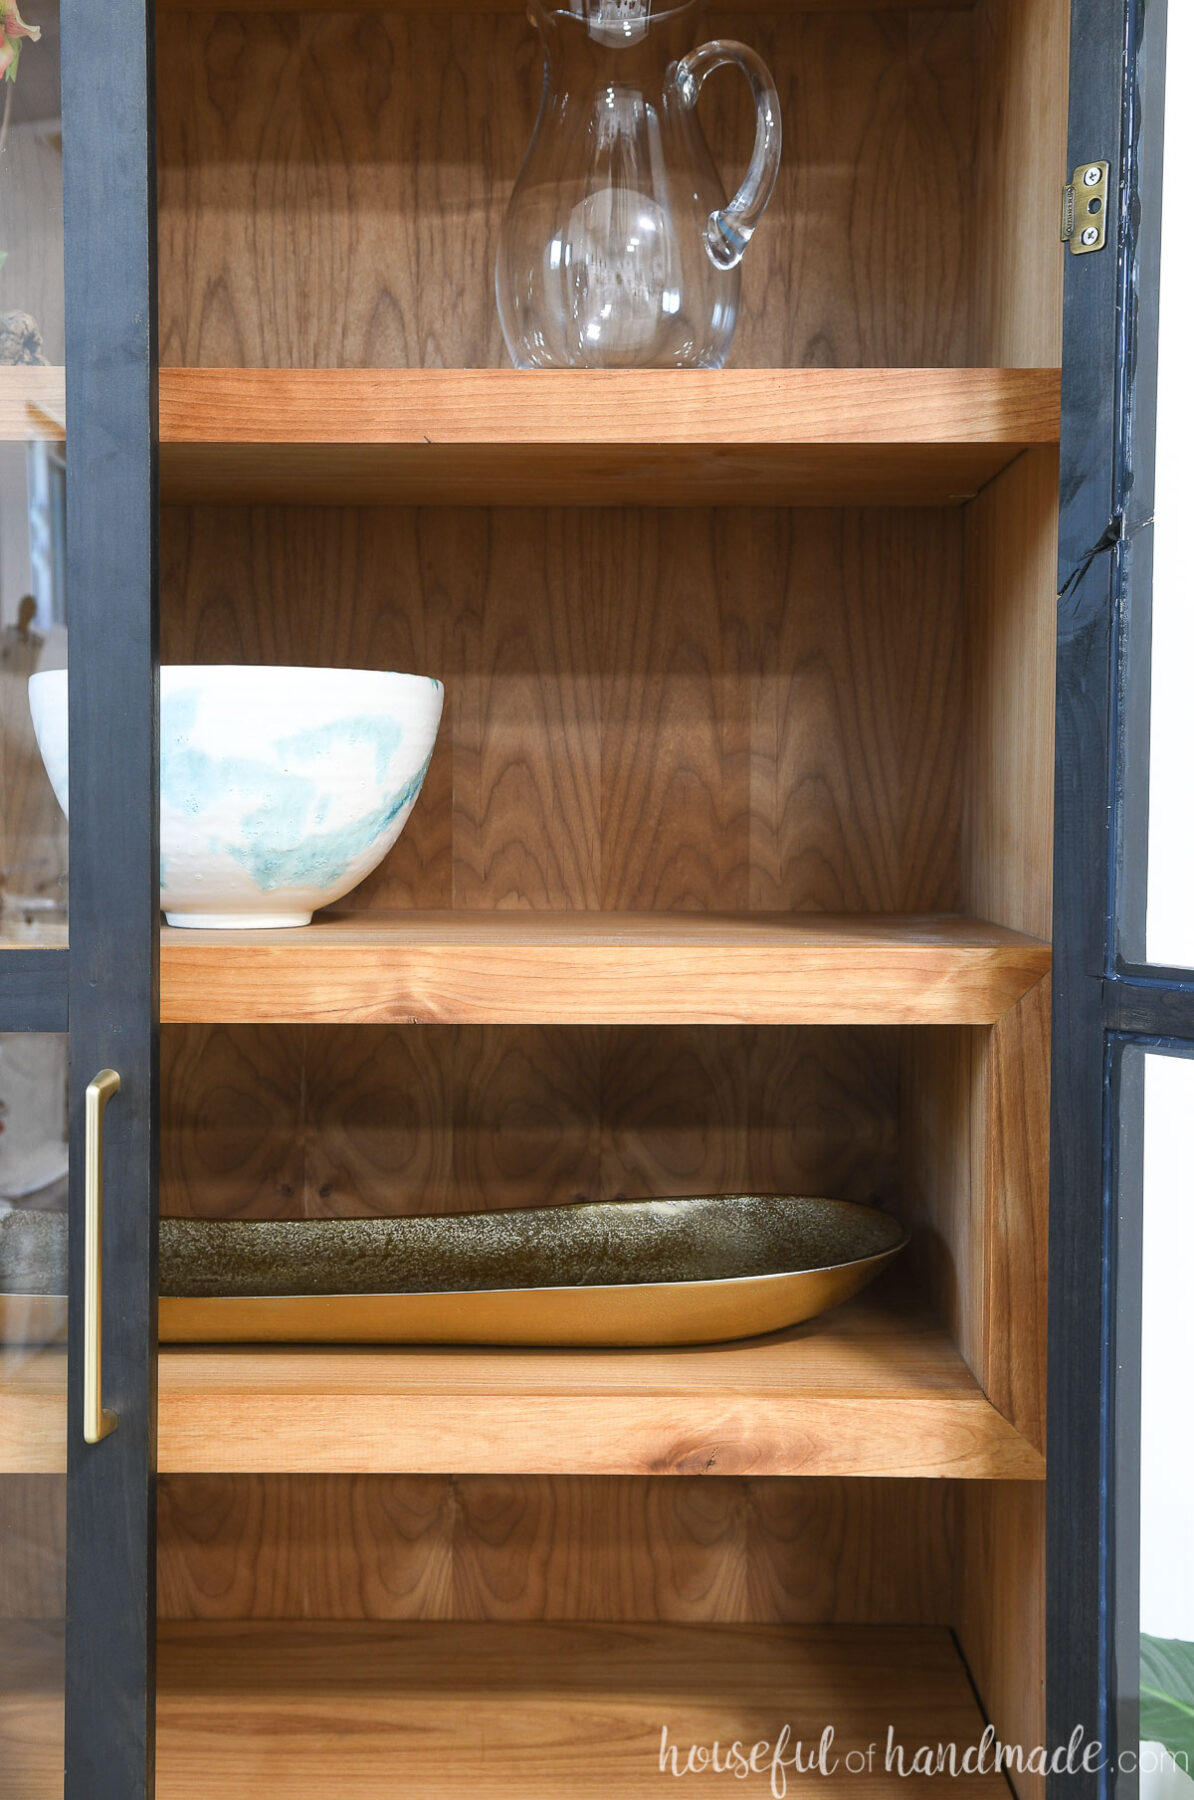
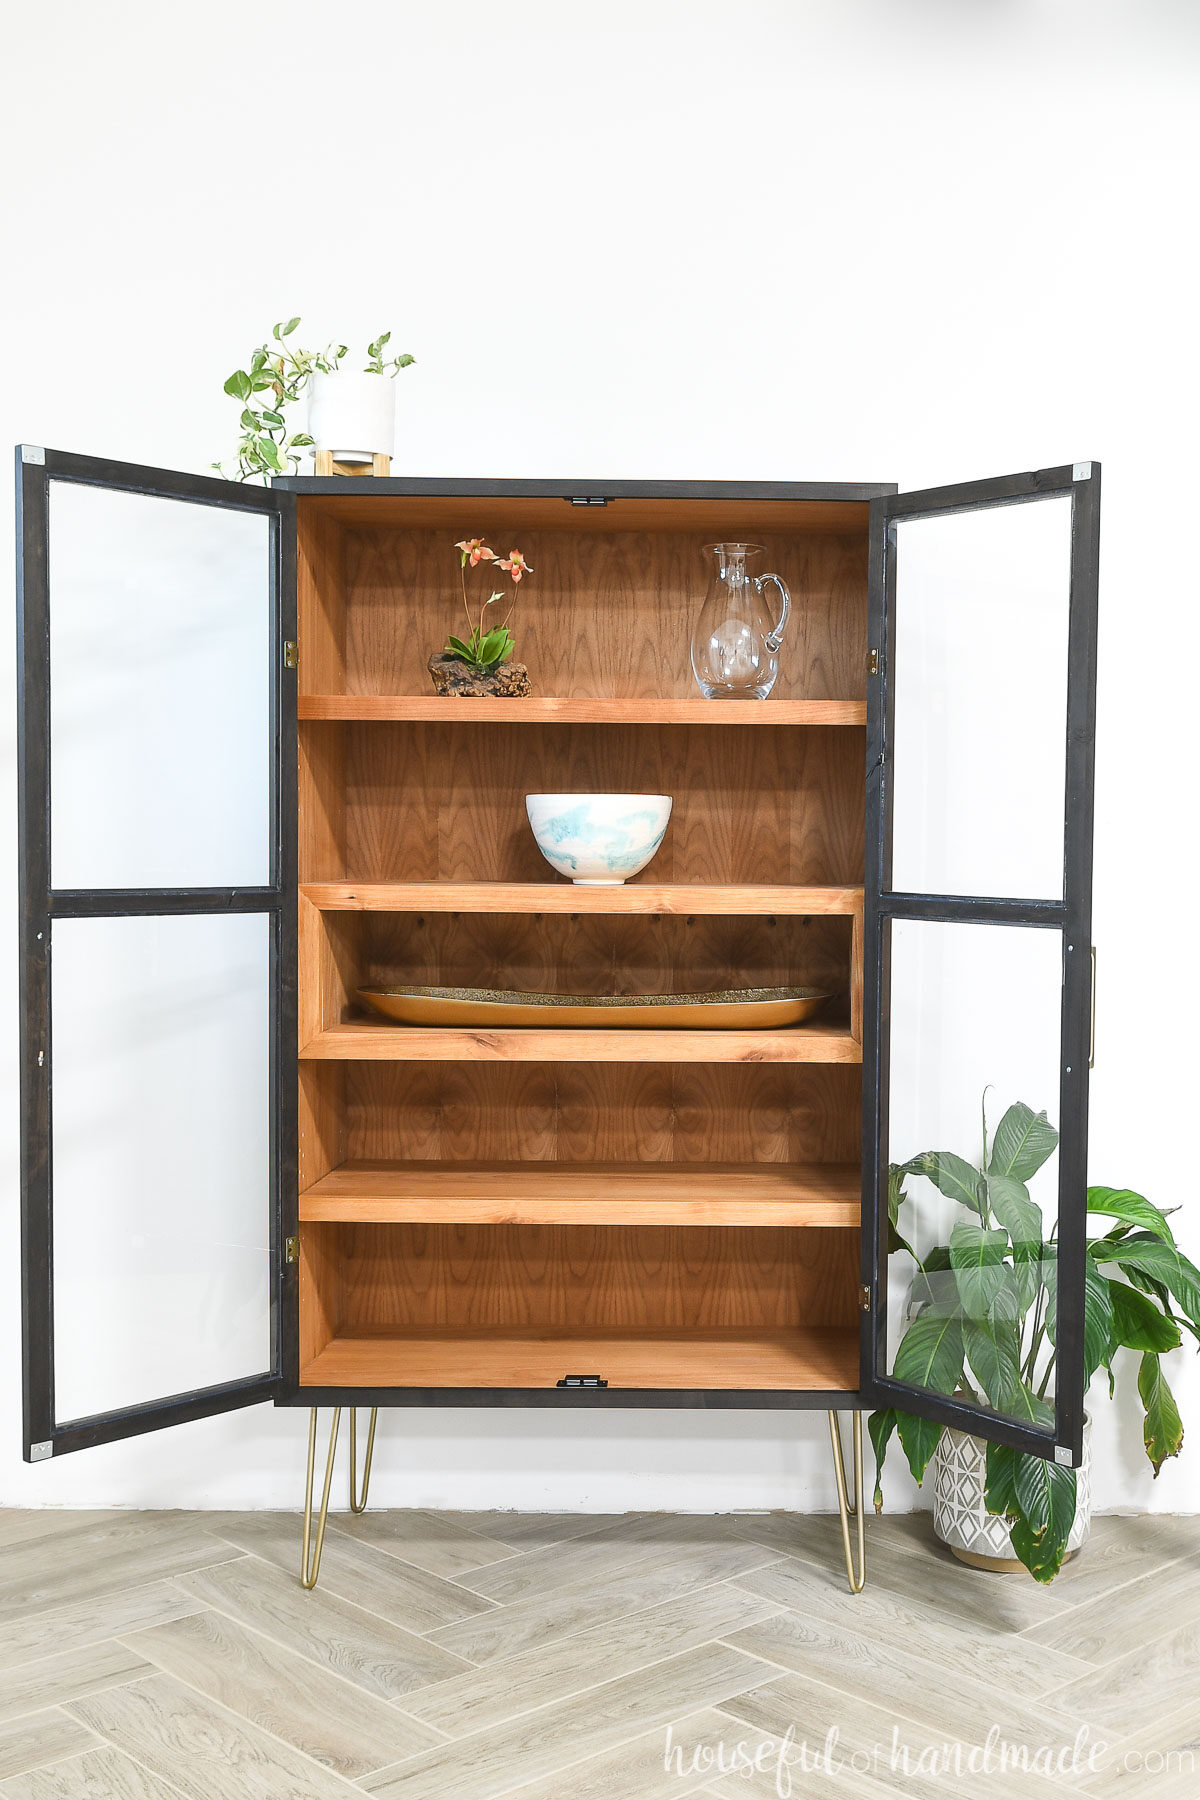
If you are building a tall bookcase, you will need to add at least one stationary shelf in roughly the middle of the bookcase. In my display cabinet, I made the stationary shelf a statement by making a second box inside the first
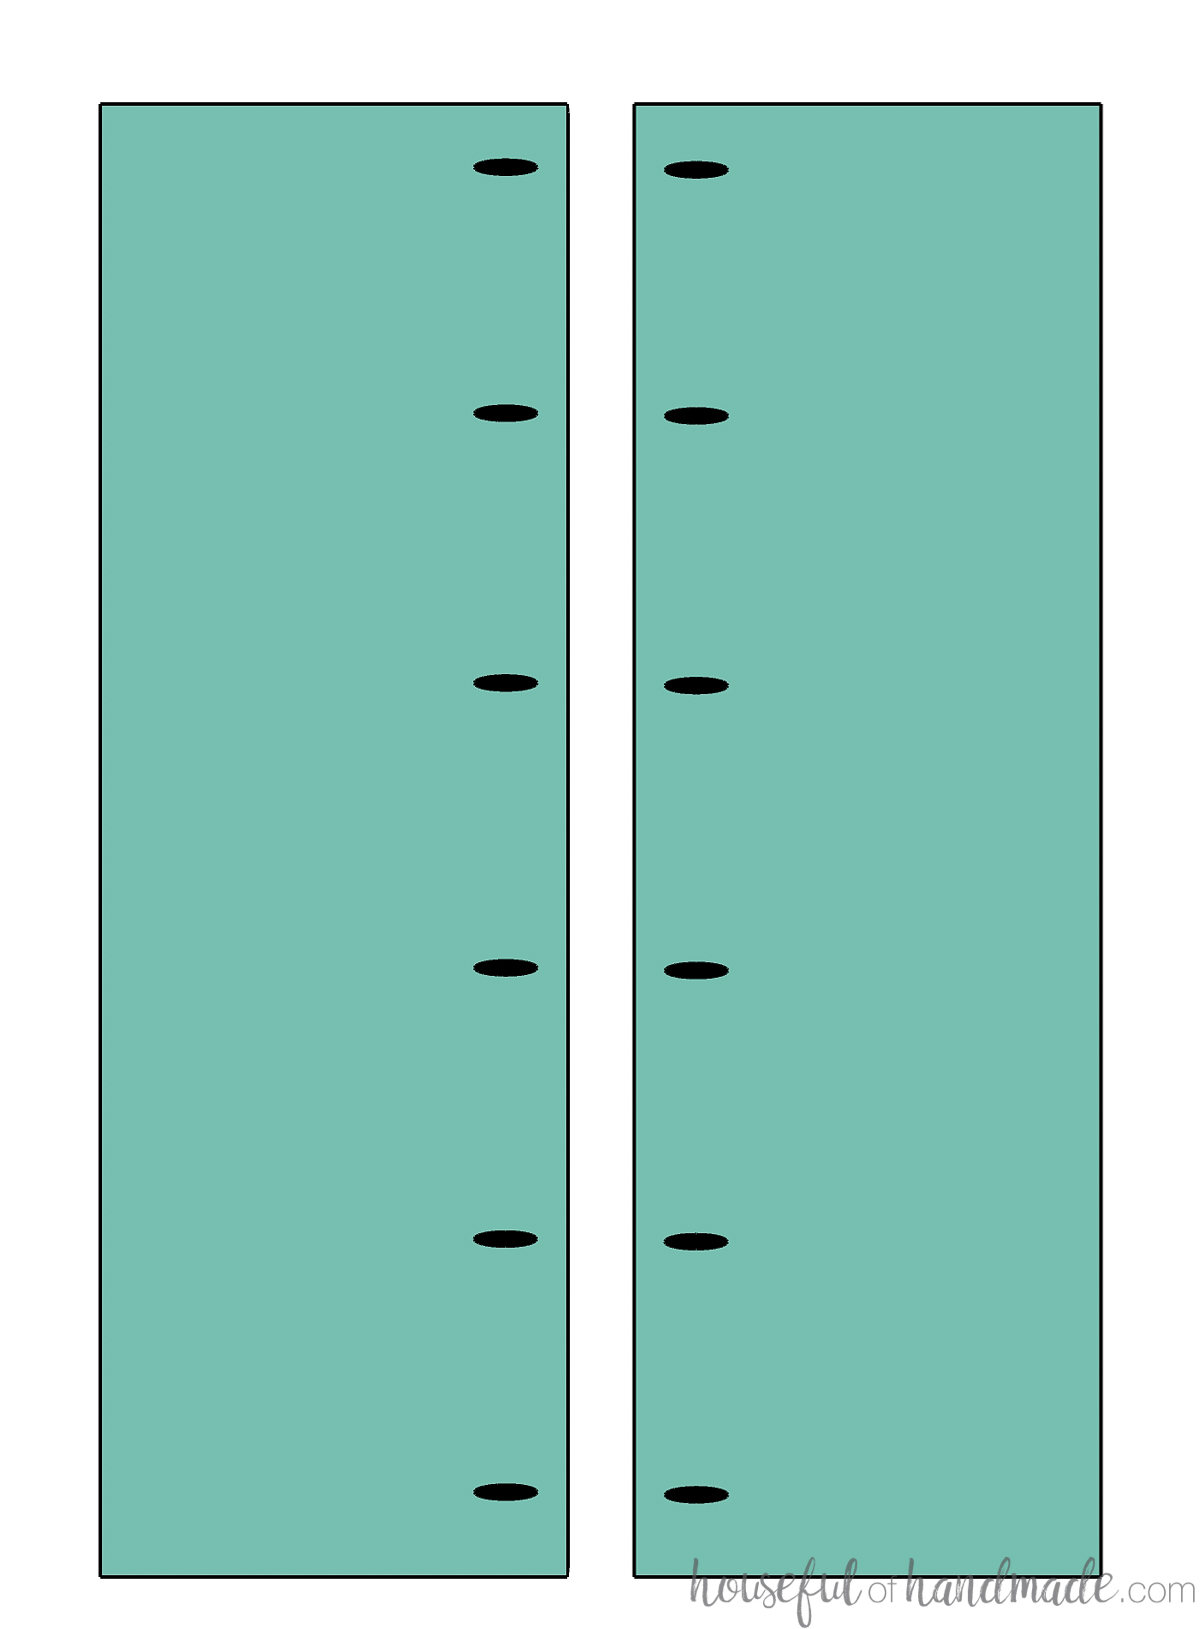
For adjustable shelves, you can use either shelf pins added to holes drilled in the plywood or strips called shelf standards or pilaster strips.
To add holes for shelf pins, you can use a jig like this to drill holes that are perfectly straight and evenly spaced.
Shelf pins typically come in 5mm or 1/4″ sizes. Make sure you use the appropriate sized drill bit for the shelf pins you bought.

Shelf standards (pilaster strips) are typically installed into a routed groove in the inside of your bookcase. You could install them directly to the top of the plywood, but you would want to have a large enough face frame to help hide it from view.
Then you use metal clips inside pressed into the shelf standard to hold the adjustable shelves.

For face frame bookshelves, you can add a face frame to the front of your shelves (both adjustable and stationary). This will make them look thicker and hide the plywood edge.
If adding a face frame to a stationary shelf, you will want to attach it as part of the bookcase face frame.
To add face frames to adjustable shelves, make sure to cut your shelves shallow enough to allow the face frame on the shelf to sit inside the bookcase face frame.
Kickboard, Toe kick, or Legs?
The bottom shelf of your bookcase will need to be lifted off the floor slightly. The bottom will need to be finished off with either a kickboard, toe kick or legs. Which one is up to you.
A kickboard is a piece of wood around the base of the bookcase, similar to a baseboard on your wall. It covers up the area below the bottom shelf. I used a kickboard on this bookcase that I built for the mudroom lockers in our home.
A toe kick is traditionally used under cabinets. It allows room for your feet to be under the cabinet instead of hitting the front of the cabinet.
You can use a smaller version of a toe-kick to finish off the bottom of your bookcase. Set a piece of plywood inside the bookcase sides and under the bottom. You only need to set it back 1/2-1 inch.
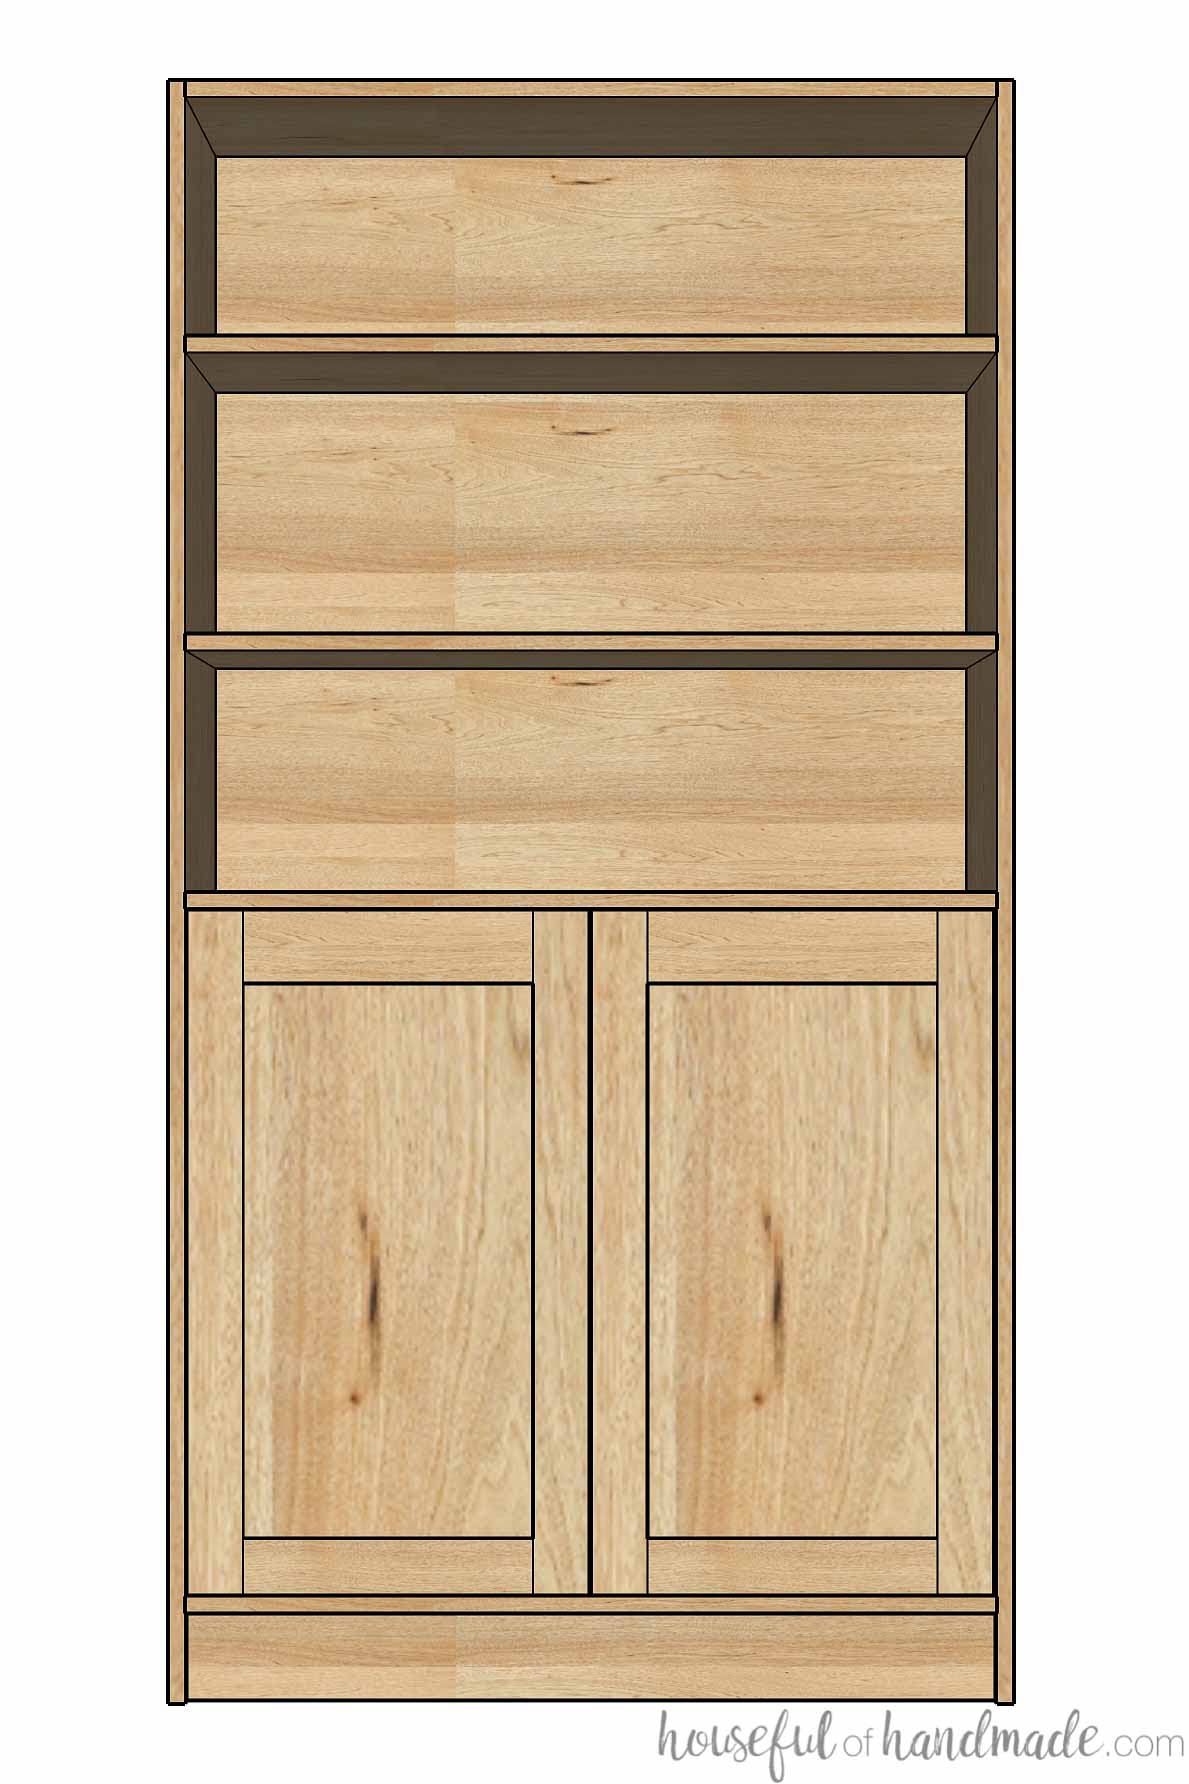
Lastly, you can use legs to raise the bottom of your bookshelf off the floor. Your legs can be built in like this hutch that I have in our dining room. They are part of the face frame around the bottom shelves.
Or your legs can be added under the bottom of the completed bookcase. That is what I did with this DIY display cabinet.

Trimming out a Bookcase
You can leave your bookcase simple or you can add trim to the top, bottom and/or sides to create a more intricate piece of furniture.
You can find lots of different types of trim at your local home improvement store. Use whatever trim you like to create the look you want for your bookcase.
If you are staining your cabinet, make sure to pick trim in the same wood species or a coordinating wood species to the wood you build the bookcase out of.
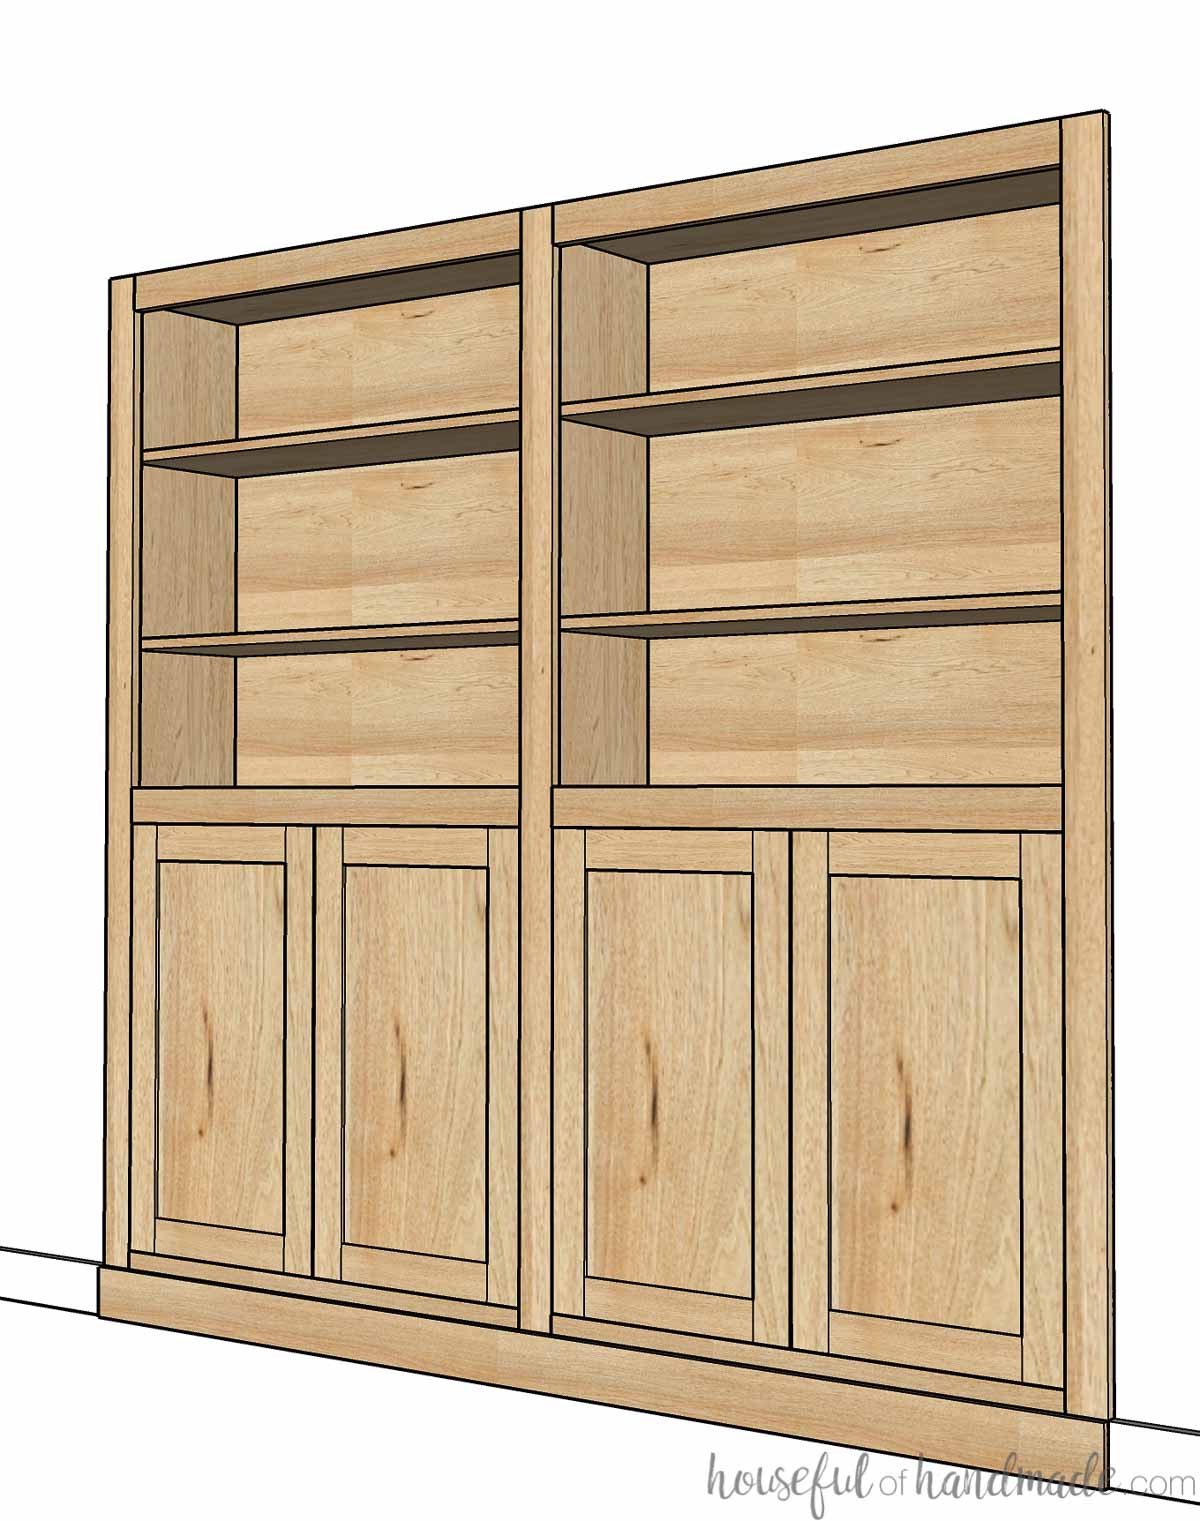
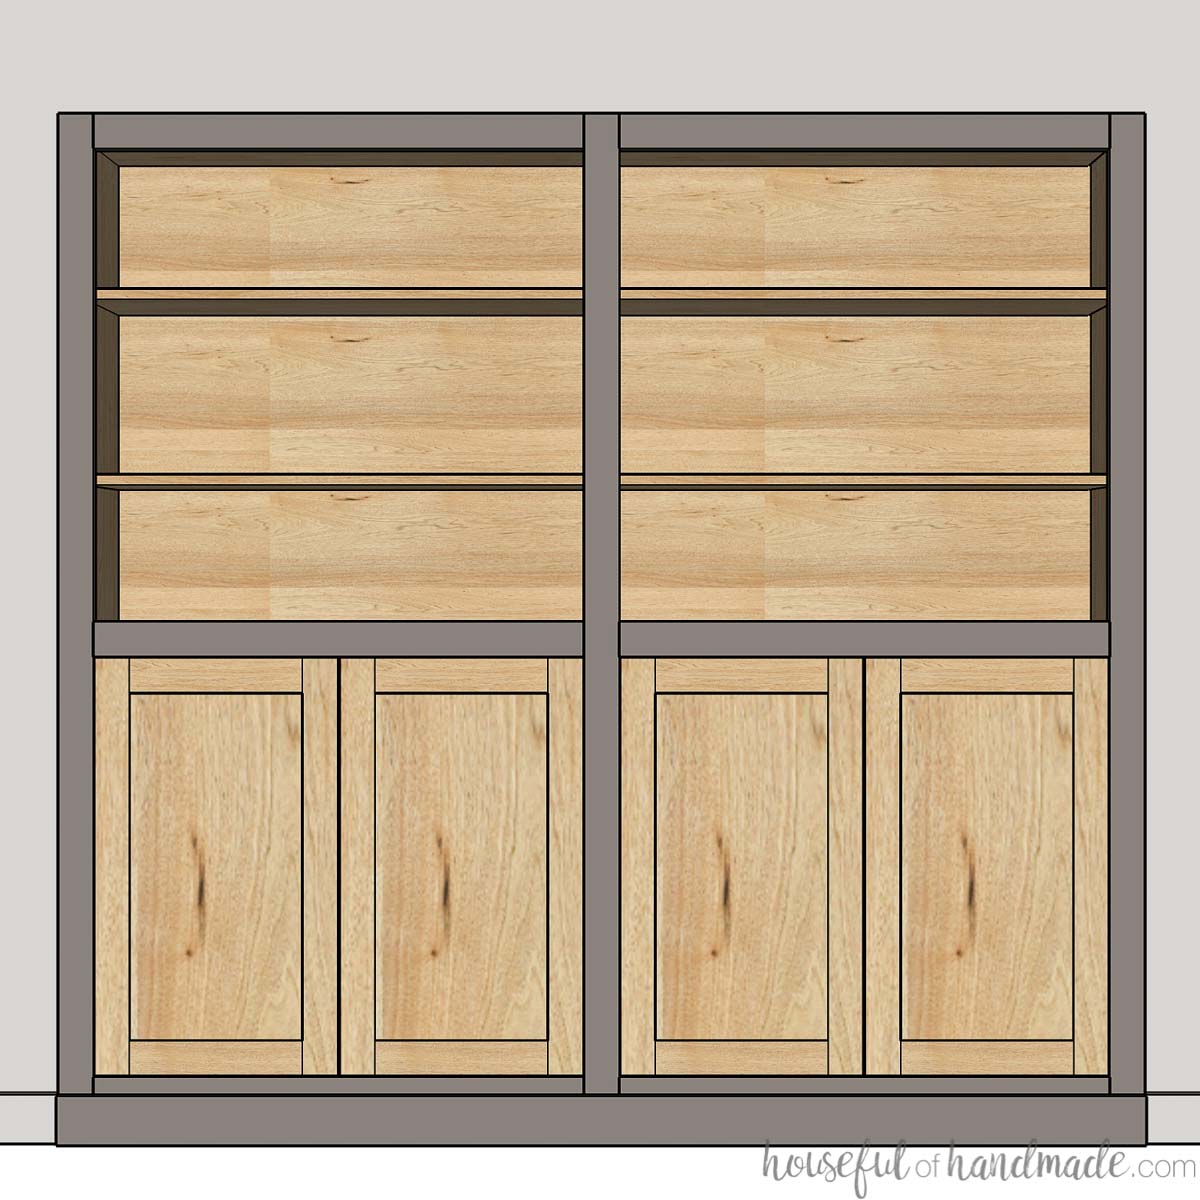
Adding Doors to a Bookshelf
You can create great storage by adding doors to all or part of your bookcase. Learn how to make DIY cabinet doors here (3 options from beginner to pro).
If you want to add doors to just part of your bookcase, you will need a stationary shelf as the top of the area with doors.
Doors can be added to both a face frame and frameless bookcase. And you can either inset or have your doors overlay the front of the bookcase.
Learn everything you need to know to add doors to your bookshelf here: Understanding Cabinet Door Sizes and Hinges.
What Kind of Wood Should you Use to Build a Bookshelf?
The base of your bookshelf will be built using 3/4″ thick plywood. The type of plywood you use will depend on the end use of your bookcase.
- For painted bookcases, use a smooth plywood.
- For a stained bookshelf, use a cabinet-grade plywood with the wood veneer you want.
- For utility bookshelves, you can use a lower grade plywood.
The face frame of your bookcase (if you chose to add one) will be built using 1x material (3/4″ thick). You can use whatever width of 1x that you want for the look you want. Face frames are typically made from 1×2 boards that are 1 1/2″ wide.
A thicker face frame board will give your bookcase a chunkier look. But it can make putting in adjustable shelves harder since you will have a smaller opening to insert them through.
You can use any wood you want for your face frame. If you plan on staining your bookcase, you will want it to match or coordinate with the veneer on your plywood.

DIY Bookcase Plans
Once you have answered all the questions above, it is time to create plans for your own bookcase! I will walk you through how to create plans for your custom bookshelf so you will be ready to start building.
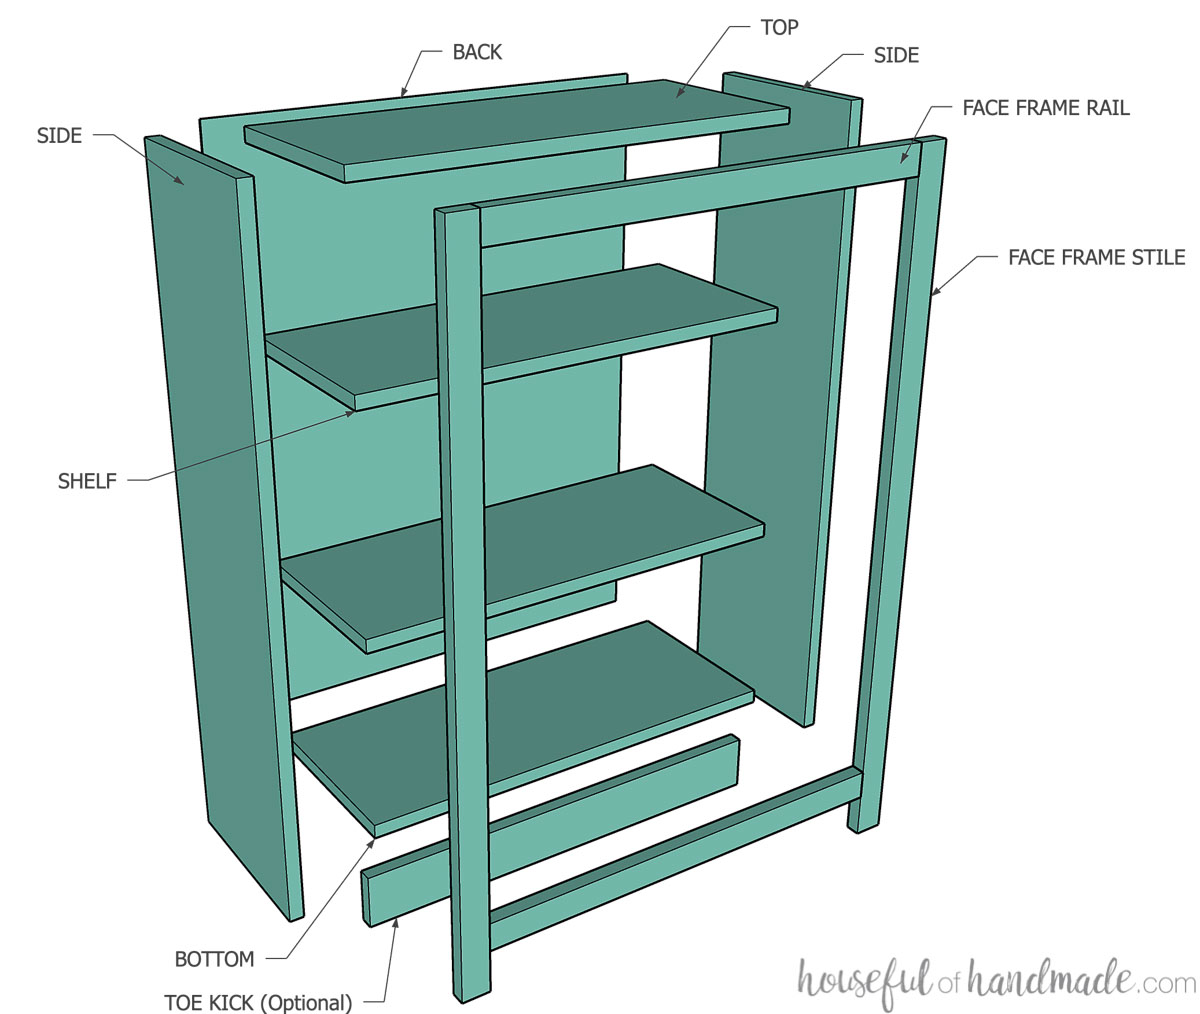
Each bookcase will have the following parts:
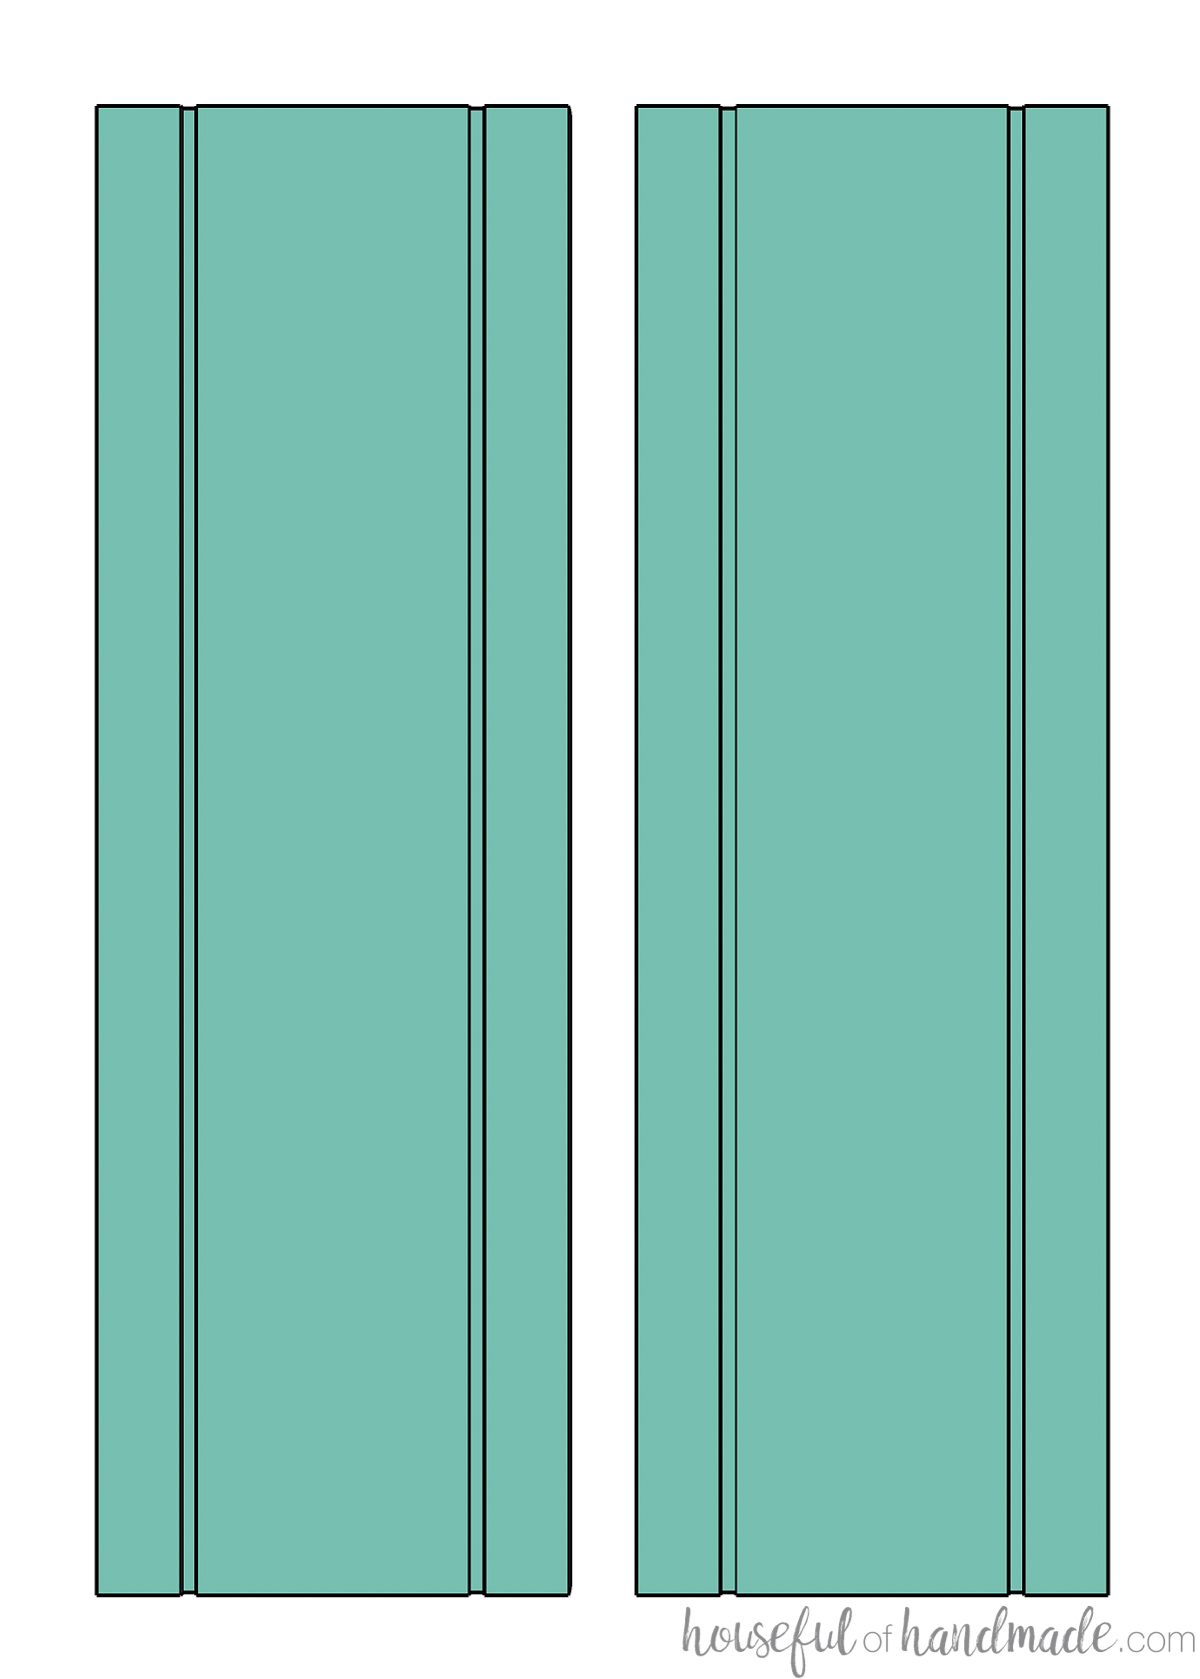
- 2 side pieces
- 2 top/bottom pieces
- 1 back piece
- Shelves
- Kickboard (3 pieces to wrap around the base), toe kick, or legs
- Optional: face frame
- 2 face frame stiles
- 2 face frame rails
How to Figure Your Cut List
Now that you know the style and components you need for your bookcase, it is time to create a cut list!
For your cut list you will need to know the exact measurements for the bookcase you want. You will also need the measurements for the wood you plan to use.
Use the formulas in the charts below or in the printable PDF plans to turn these measurements into cut lists for your new DIY bookcase.
Face Frame Bookcase Cut List
Use the following chart to figure out the dimensions for your all the piece of your face frame base cabinets.
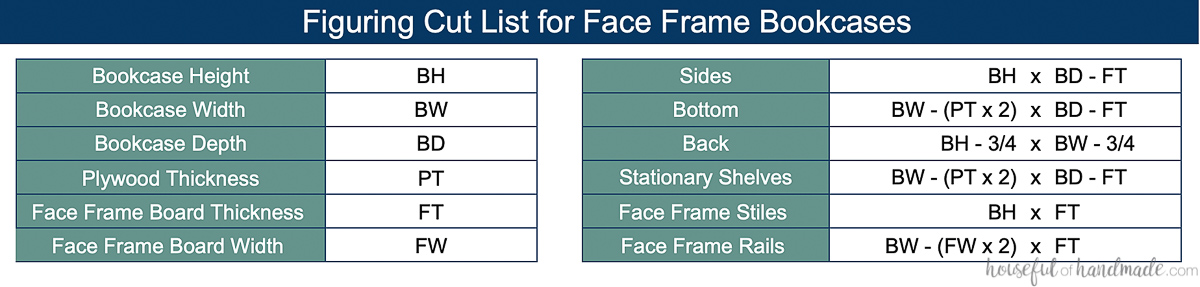
Important notes for face frame bookshelves:
- The face frames hang over the inside of the bookcase 3/4″ and up (depending on the width of the face frame boards). You will need to have enough space between fixed shelves/top/bottom to insert adjustable shelves at an angle to get them inside the face frame.
- The back panel measurement is for a panel that is recessed into the back in a groove. This hides the pack panel from view. For bookcases built into a nook, you can just nail the back on since it will not be visible, so you do not need to subtract the 3/4″ from the measurements for the back panel.
Once you figure out the dimensions for all you pieces, you will need to cut them out.
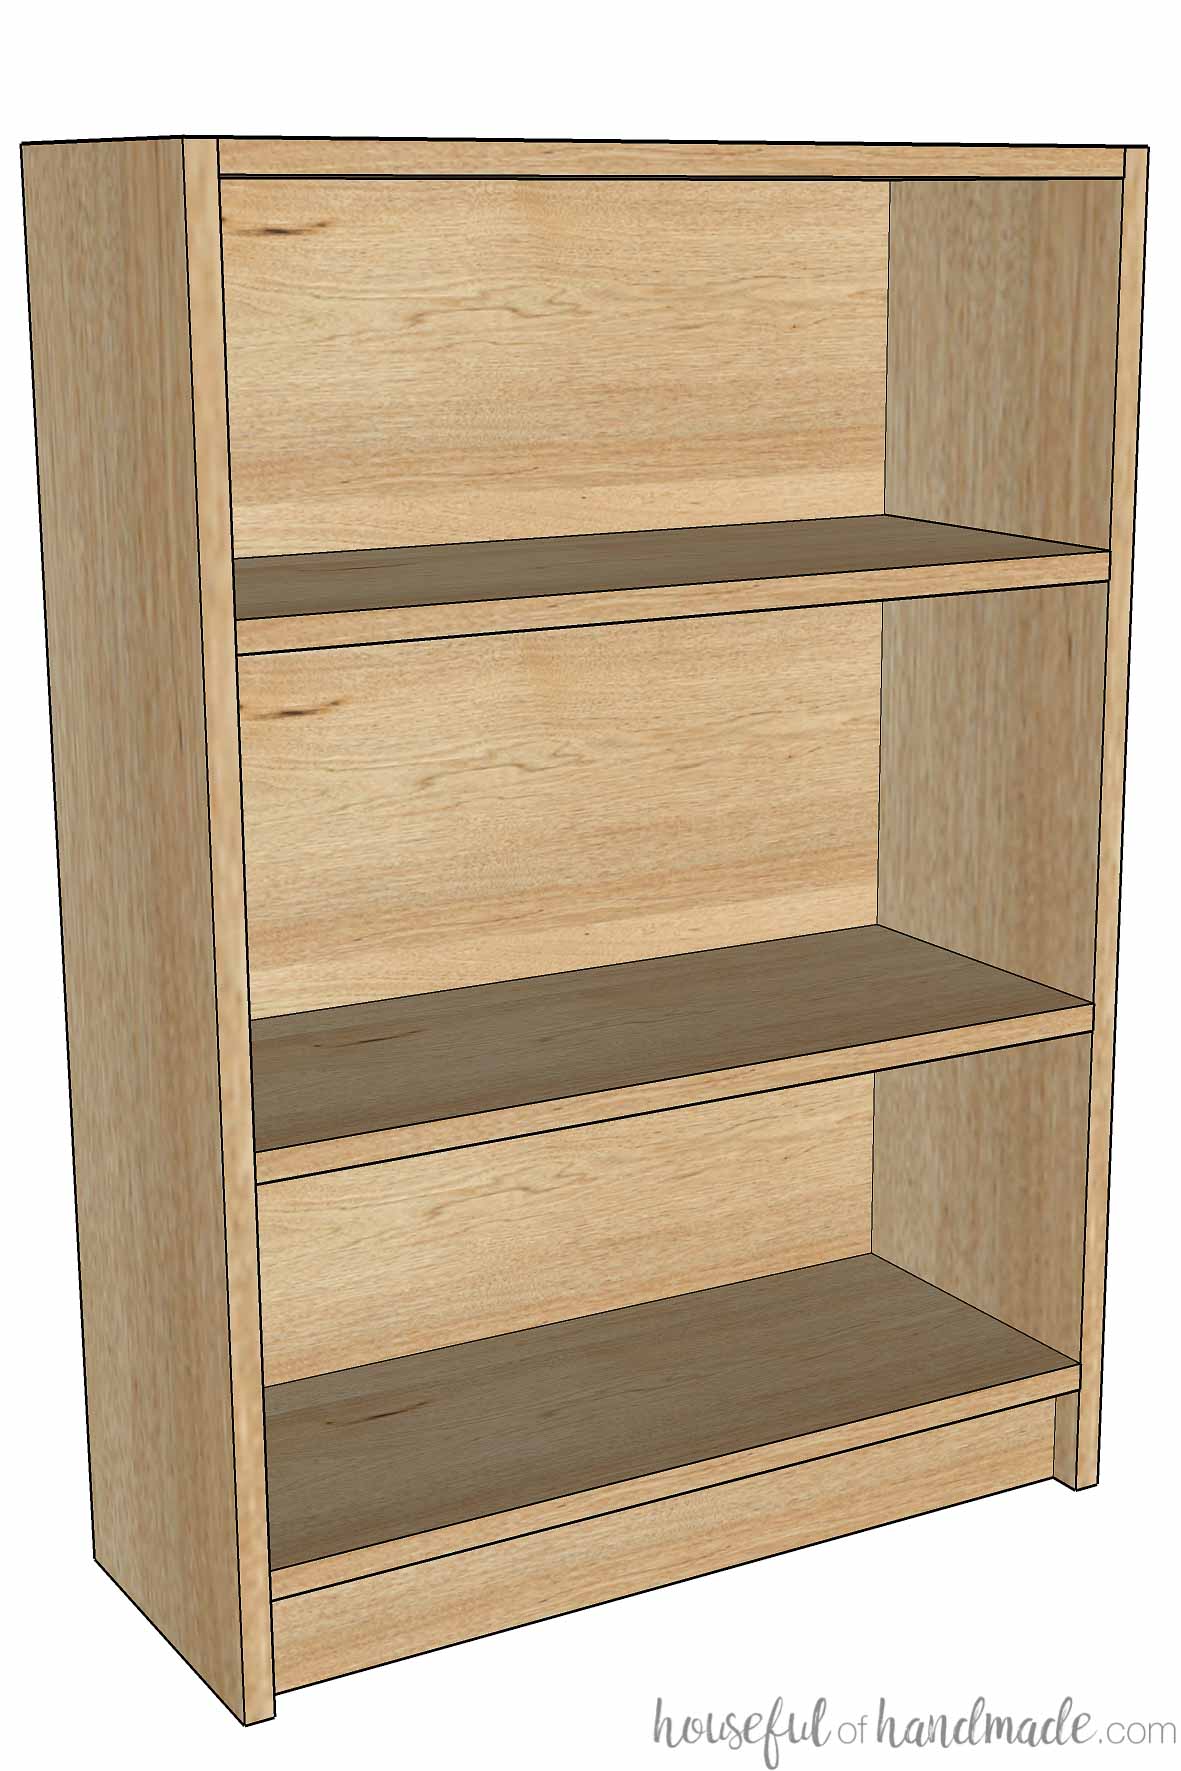
Frameless Bookcase Cut List
Use the following chart to figure out the dimensions for your all the piece of your frameless (plywood only) bookcase:

Important notes for frameless bookcases:
- Plywood is not actually 3/4″ thick, it is slightly smaller. And not all plywood is the exact same. I would recommend you tightly press two pieces of the plywood you are using together and measure it. This will give you more exacting bookcase widths.
- The back panel measurement is for a panel that is recessed into the back in a groove. This hides the pack panel from view. For bookcases built into a nook, you can just nail the back on since it will not be visible, so you do not need to subtract the 3/4″ from the measurements for the back panel.
What Size to Cut Adjustable Shelves?
For adjustable shelves, how much smaller you cut the plywood than the inside of your bookcase will depend on what type of shelf pins or shelf standards you choose.
I prefer to install the pins/clips into the completed bookcase, then measure the space to get an accurate measurement for the shelves.
How to Assemble a Bookcase
Since there are so many different types of bookcases, this post will be a general overview of how to build one. I will try to cover all aspects of all types of bookshelves. If I missed anything, leave a comment and I will answer it there.
Tools & Materials
Recommended Tools:
- Table saw or circular saw with guide tracks
- I cannot break down a full sheet of 3/4″ plywood by myself on the table saw so I use my circular with the Kreg Accucut and Ripcut to do it. You can cut all your pieces these tools, just make sure to take the time to measure accurately each time. The benefit of using a table saw is you can set the fence once and make multiple cuts that will be the same size.
- Pocket hole jig
- You can build your bookcase the more traditional way with rabbets and dados, but pocket holes are quicker, easier, and very strong. Find the best Kreg pocket hole jig for you here.
- Miter saw
- You will use the miter saw to cut face frames (not be needed for frameless cabinets). I recently upgraded to this larger sliding miter saw (watch for it to go on sale), but all my projects before were built with this inexpensive miter saw that I loved.
- Drill
- Impact driver (optional, but I love not having to switch bits with the drill)
- Router
- Finishing nail gun
- Measuring tape
- Squares
- Clamps
- Sander
- Optional: Shop vacuum
Supplies:
- Wood products:
- 3/4″ plywood
- 1/4″ plywood
- Optional: 1x boards for face frame cabinets
- Optional: Plywood edge banding for frameless cabinets
- Wood glue
- If using pre-finished plywood, use melamine glue to get strong joints
- 1 1/4″ pocket hole screws
- 1 1/4″ & 3/4″ finishing nails
Tips for Perfectly Square Bookcases
If all your pieces are square and cut at perfect 90 degree angles, you will have perfect bookcases.
- Before cutting any wood, make sure the blade is set to a true 90 degree angle to the bed/plate of the tool. Even being off by 1 degree can cause you boxes and face frames to be wonky and un-square.
- Square off the raw edge of your plywood or board before cutting. They do not come from the factory perfectly square which will result in not-square pieces.
- You cannot measure out all the pieces and then cut them. The blade will remove a section of the plywood (known as kerf) when you cut, making your cuts slightly short (resulting in non-square cabinet boxes). Instead, measure out the first cut and cut it. Then measure from new edge to the next cut line and cut. Also, make sure the edge of the blade is on the outside edge of the cut line so the full amount measured is left behind.
- Quickly check all cut pieces for square by measuring from the top right corner across the piece to the lower left corner. Note the measurement. Then measure the opposite two corners. If the measurements are exactly the same, your piece is square.
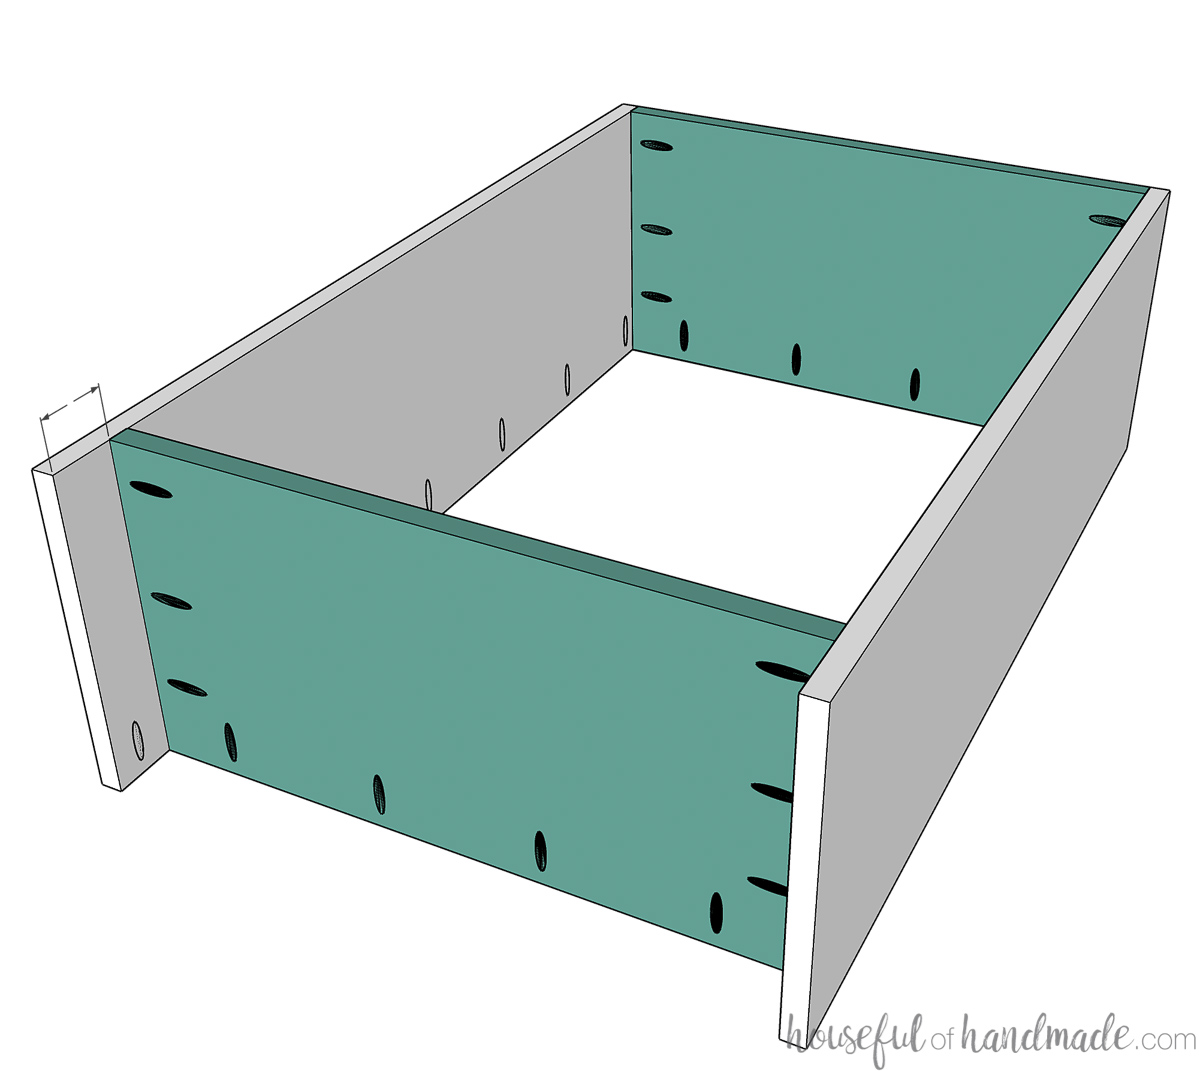
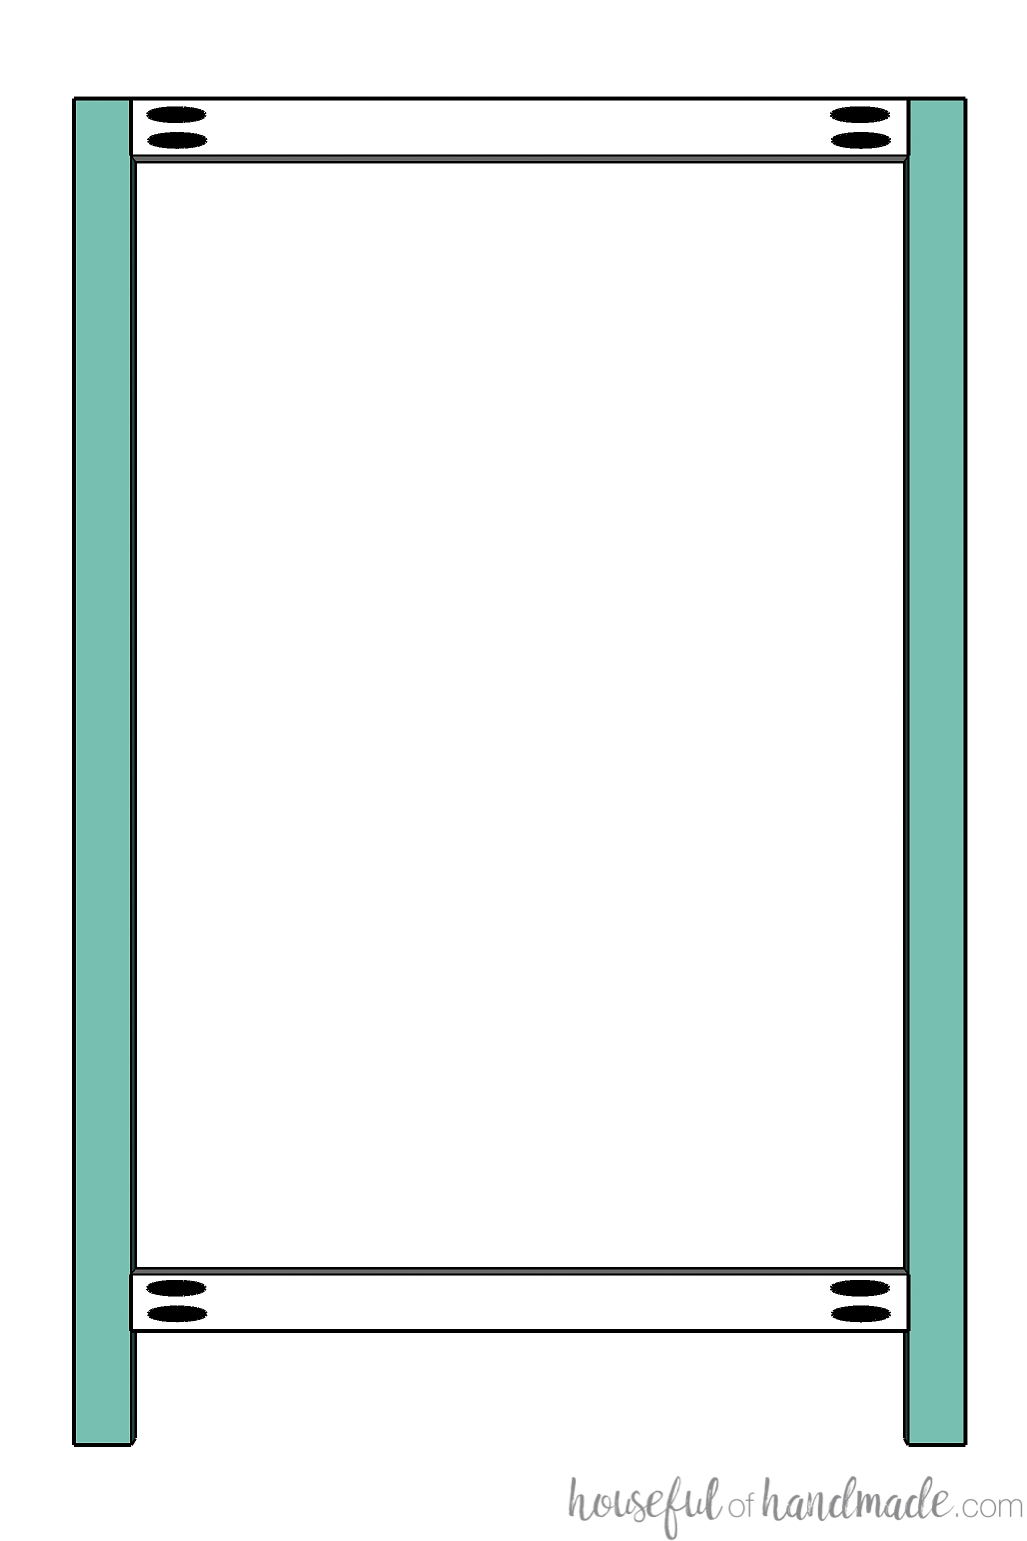
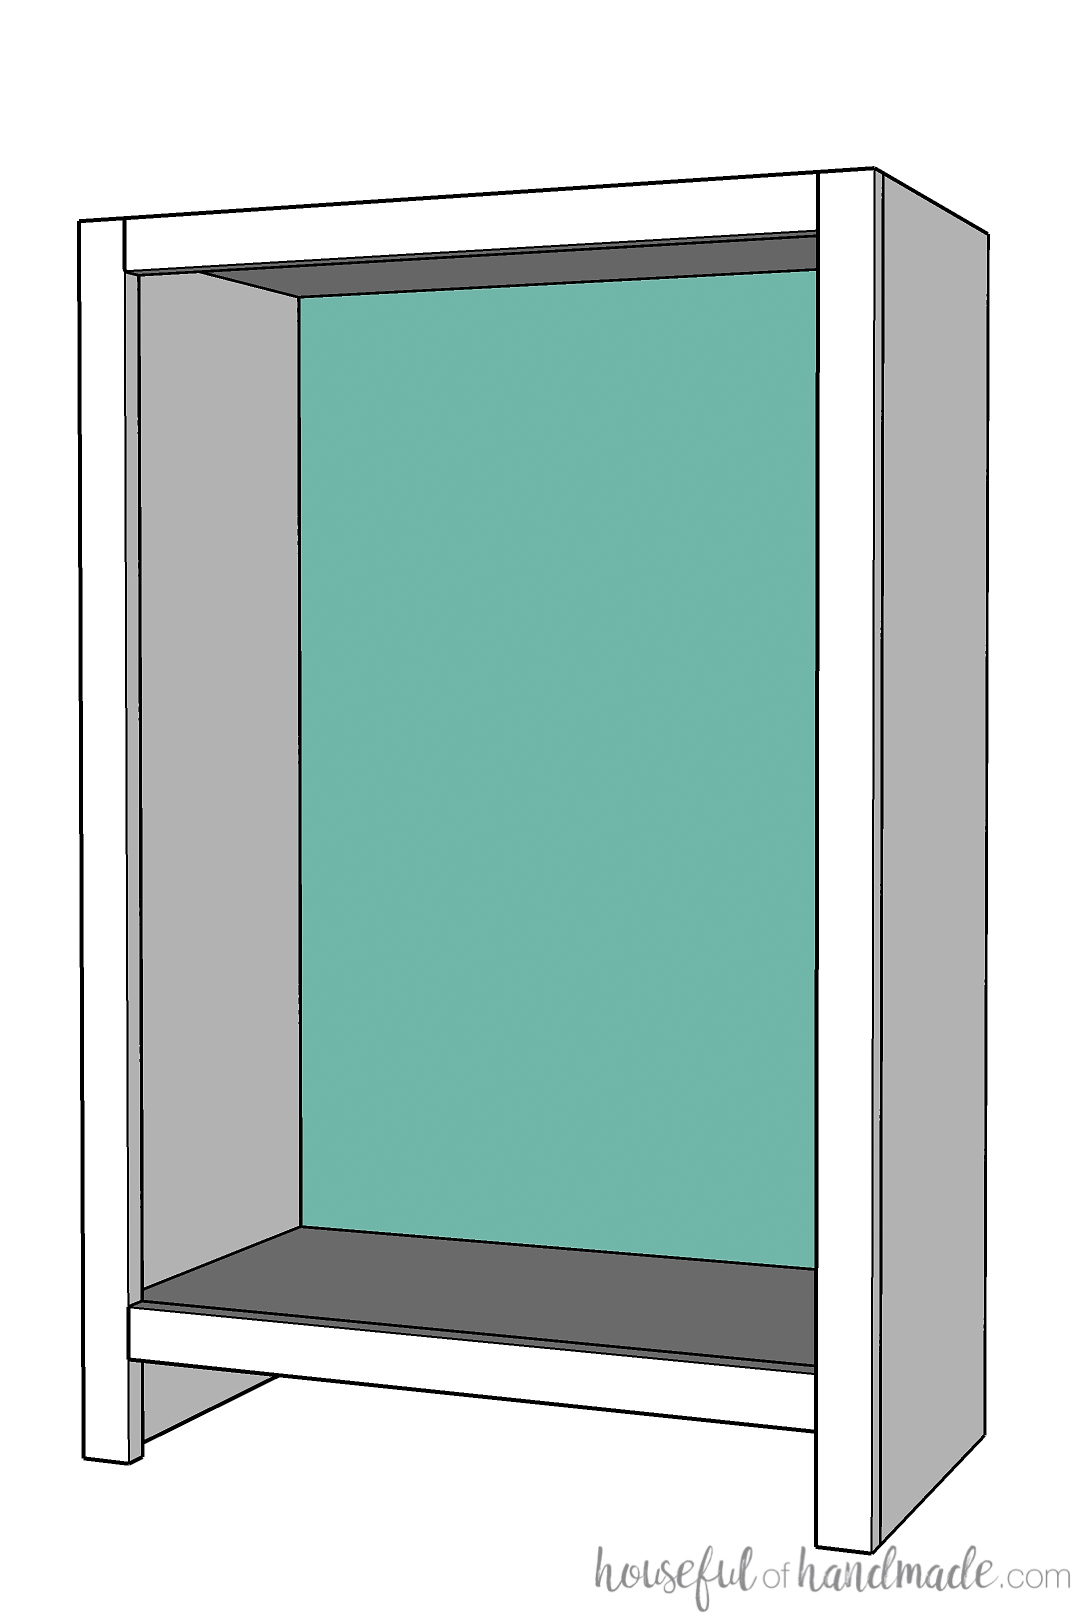
STEP 1 – Assemble the Bookcase Carcass
For face frame bookcases, you can attach the face frame with pocket holes (set for 3/4″ thick material) drilled on the front of the side and top/bottom pieces or with finishing nails.
Pocket holes will leave no visible holes on the front of the face frame, but you may have visible holes on the inside of your bookshelves. Pocket holes are also a stronger hold than the nails.
For face frame bookcases: if using pocket holes, set your pocket hole jig for 3/4″ thick material and drill pocket holes in the front of the side boards.
For frameless bookshelves: add edge banding to the front of the side, top/bottom, and stationary shelf pieces before assembly. Trim off excess.
If using shelf standards: router out grooves on the side pieces where you want them inserted now. It will be much harder later.
If using shelf pins: I prefer to drill them into the sides once assembled. The jig makes it easy to line up inside the completed bookshelves.
Drill pocket holes set for 3/4″ thick material in the sides of the top/bottom pieces and any stationary shelf pieces.
For face frame bookcases: if using pocket holes to attach the face frame, also drill pocket holes in the fronts of these boards.
Attach the bottom piece so the top of the shelf is at the height you want the bottom of your bookcase to be. Attach the top piece so it is flush with the top of the sides.
If you are adding a kickboard to the base, make sure the bottom is slightly higher than the trim you are putting around it.
Secure these pieces with 1 1/4″ pocket hole screws and glue. Use squares to ensure your box is square as you assemble.
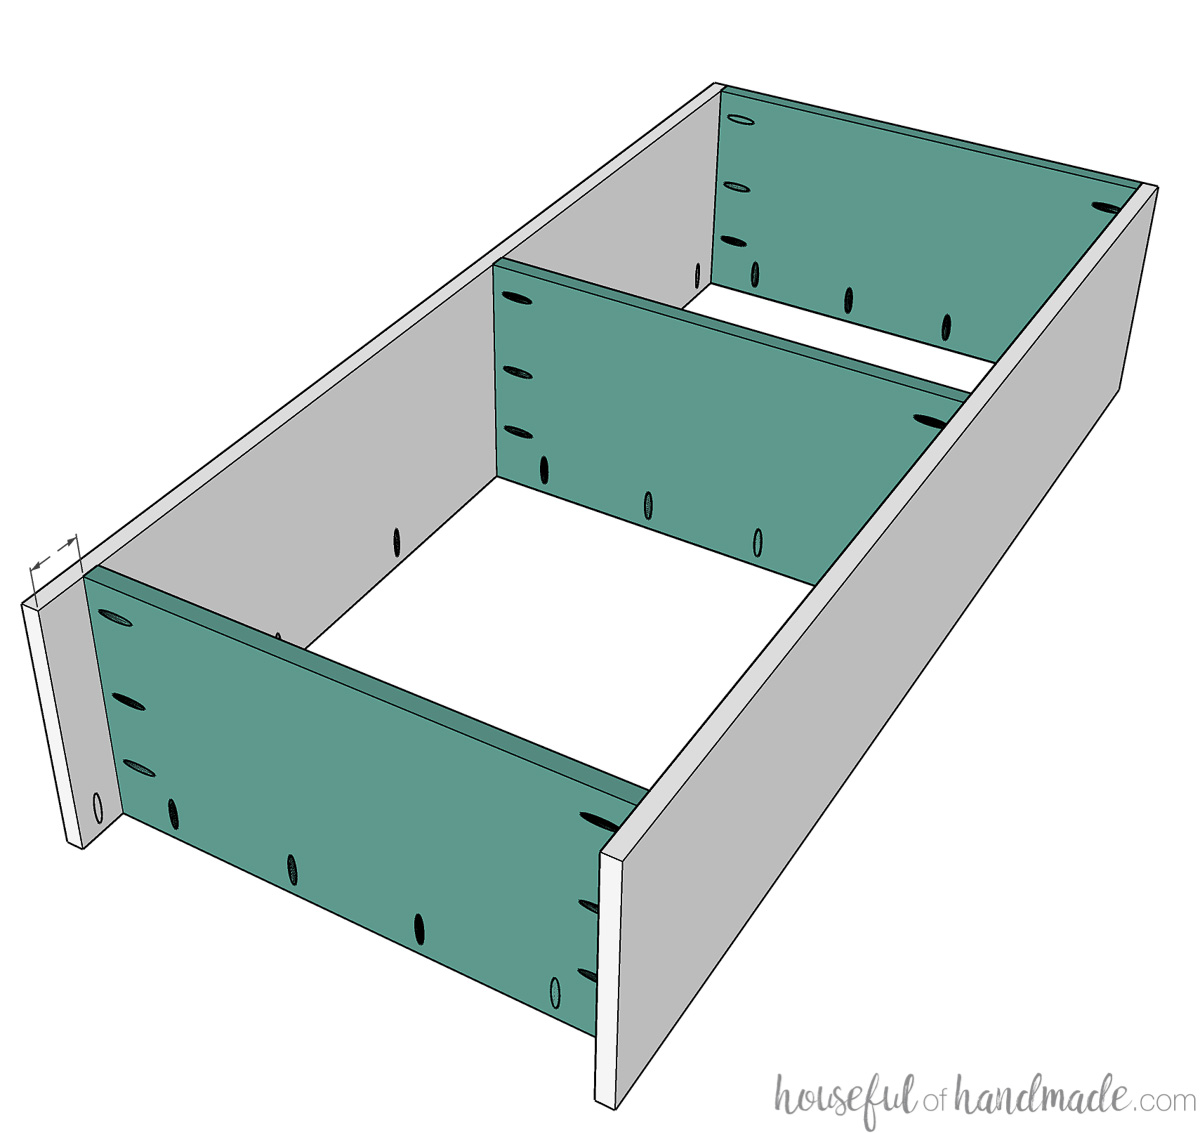
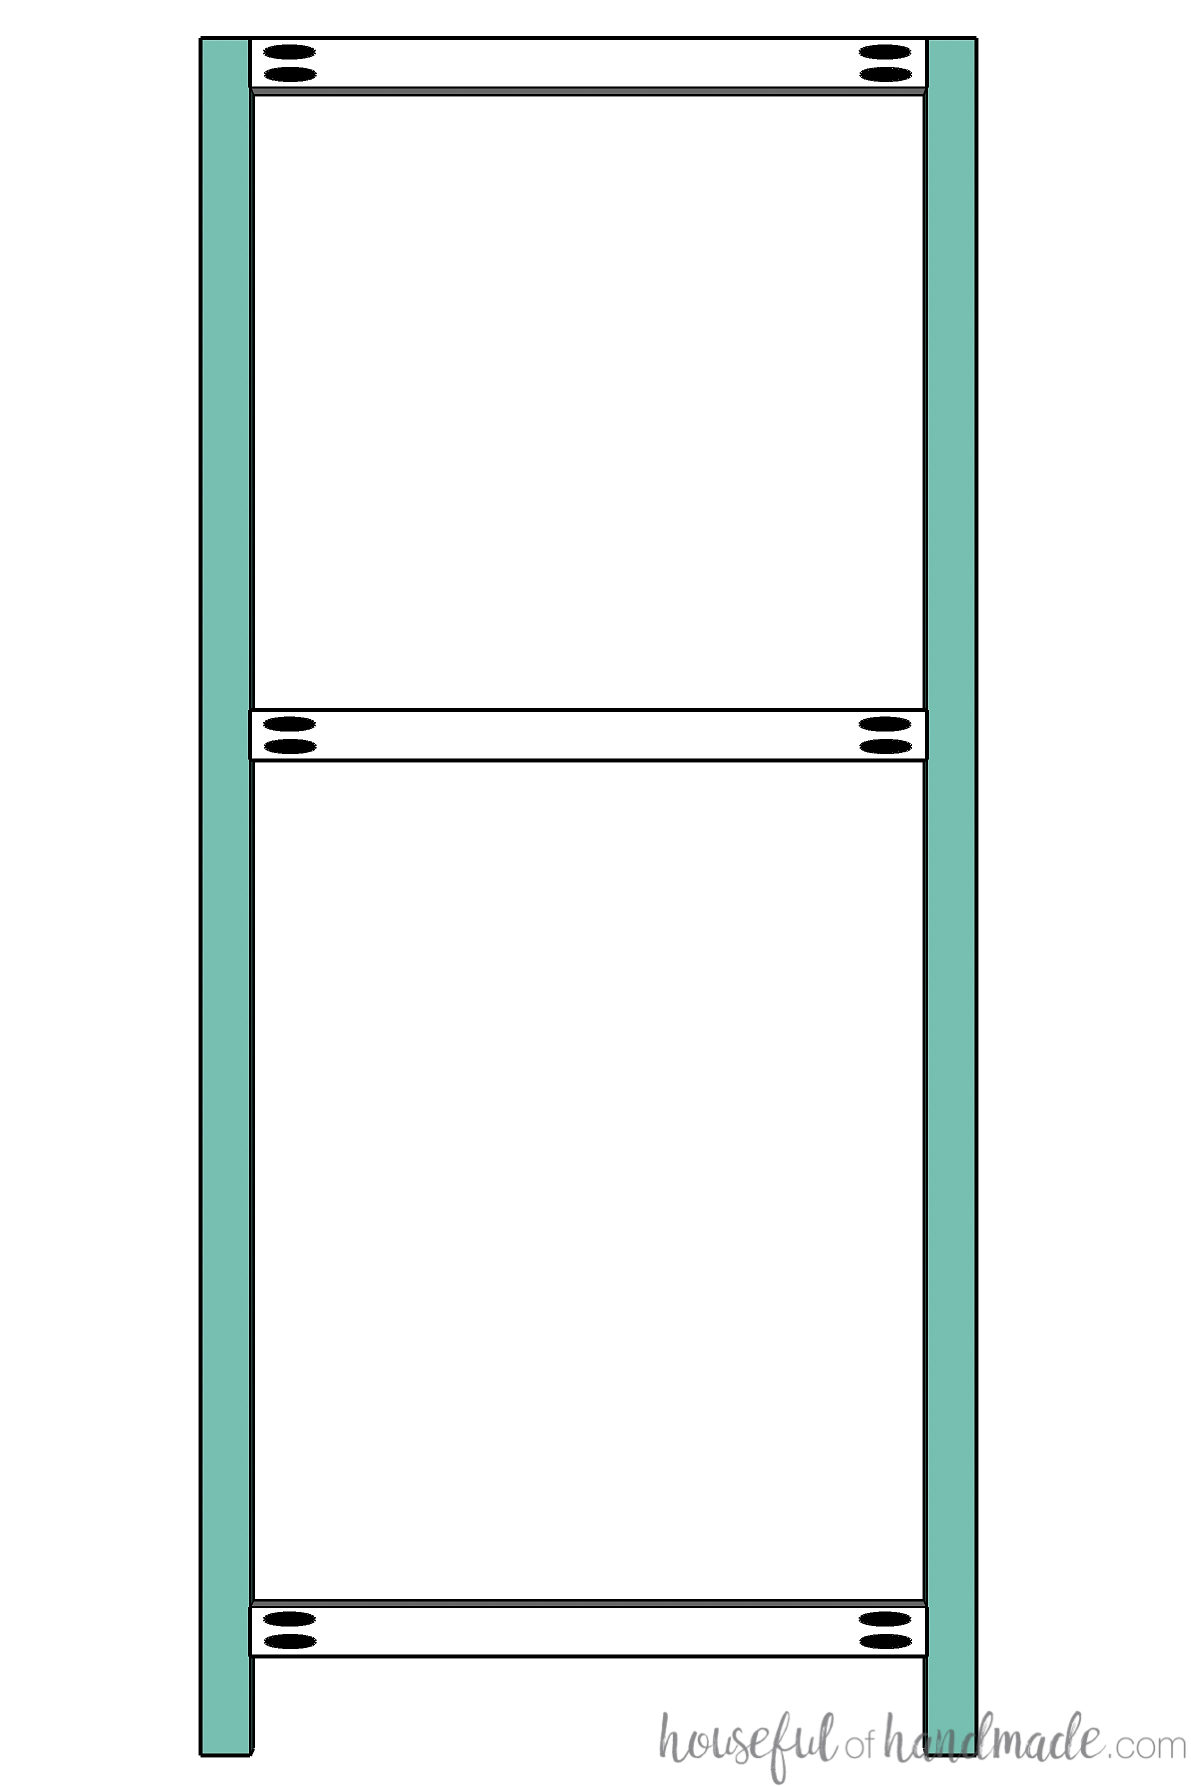
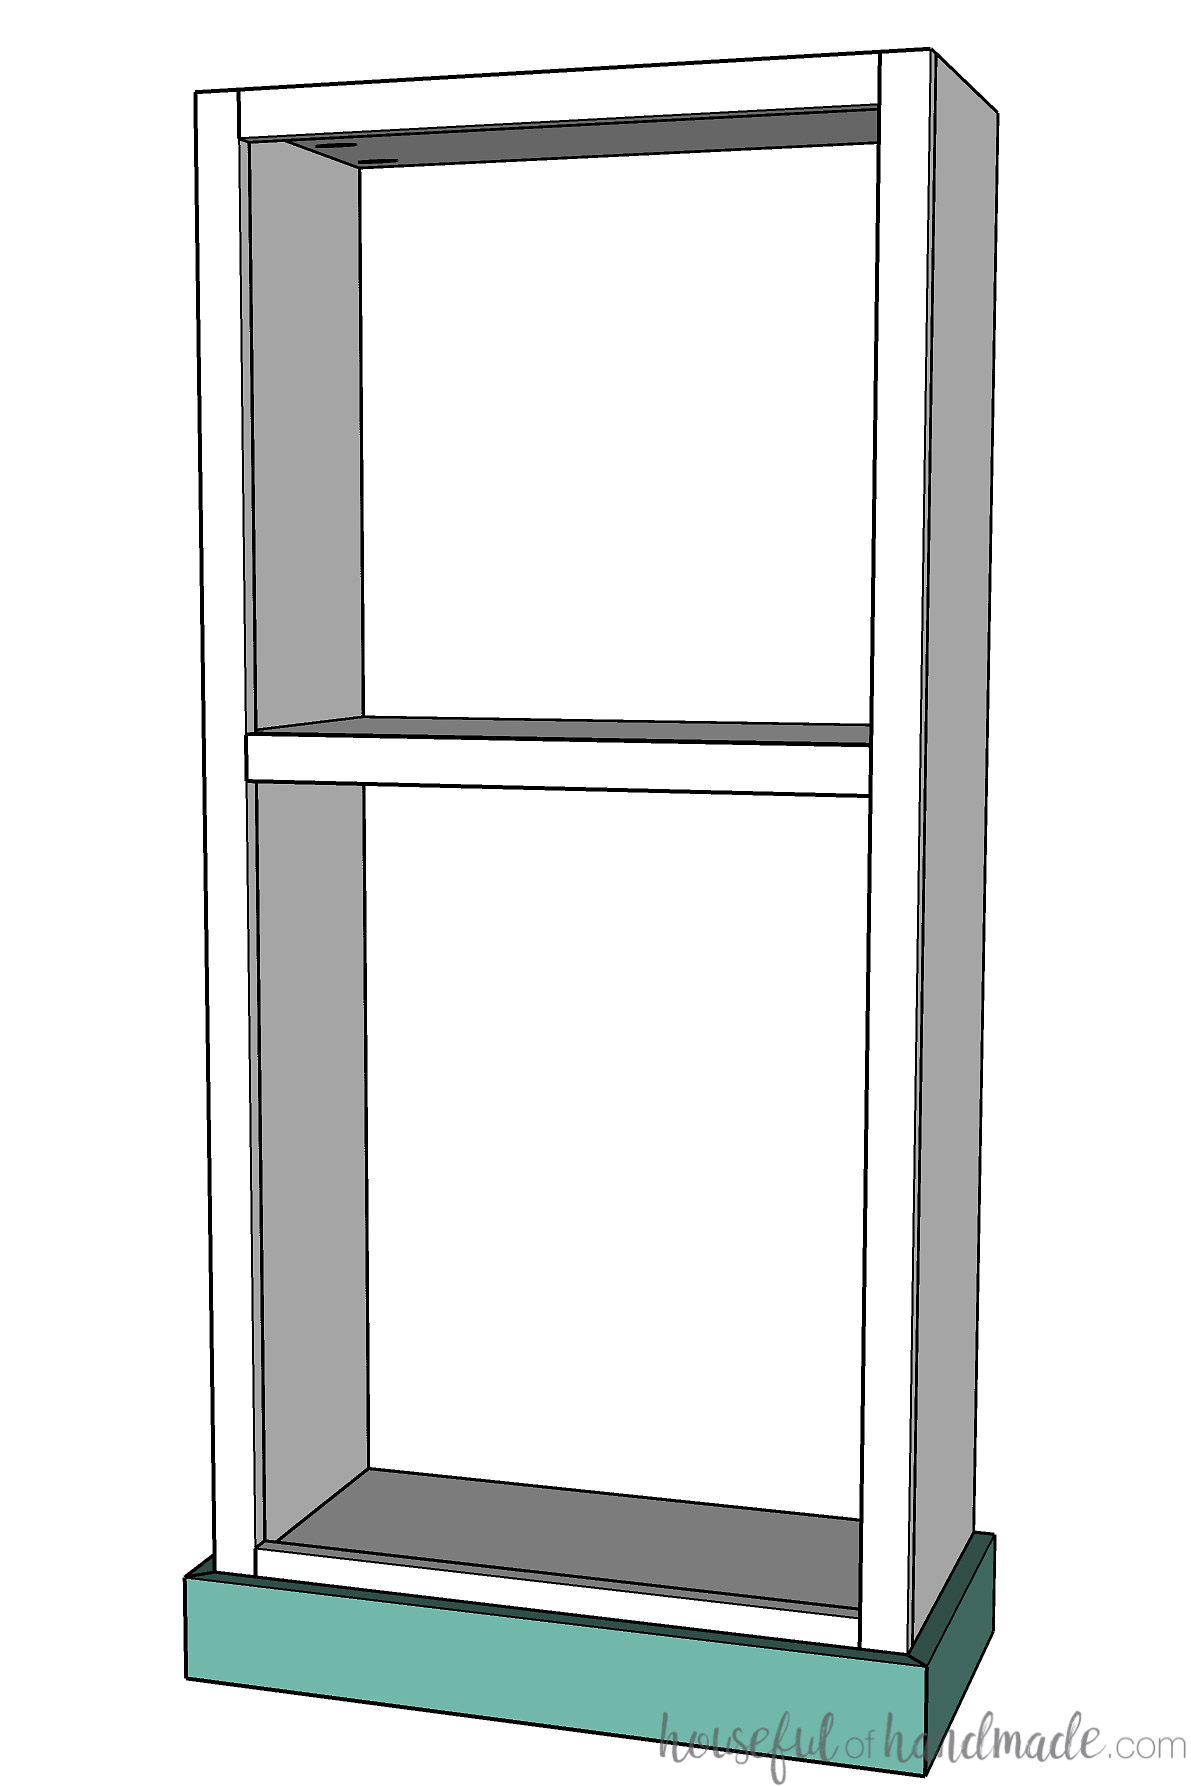
If you are building a taller bookcase, you will need to add at least 1 stationary shelf. Attach it the same way you attach the top and bottom pieces.
Secure with 1 1/4″ pocket hole screws and glue and use squares to ensure your box stays square as you assemble.
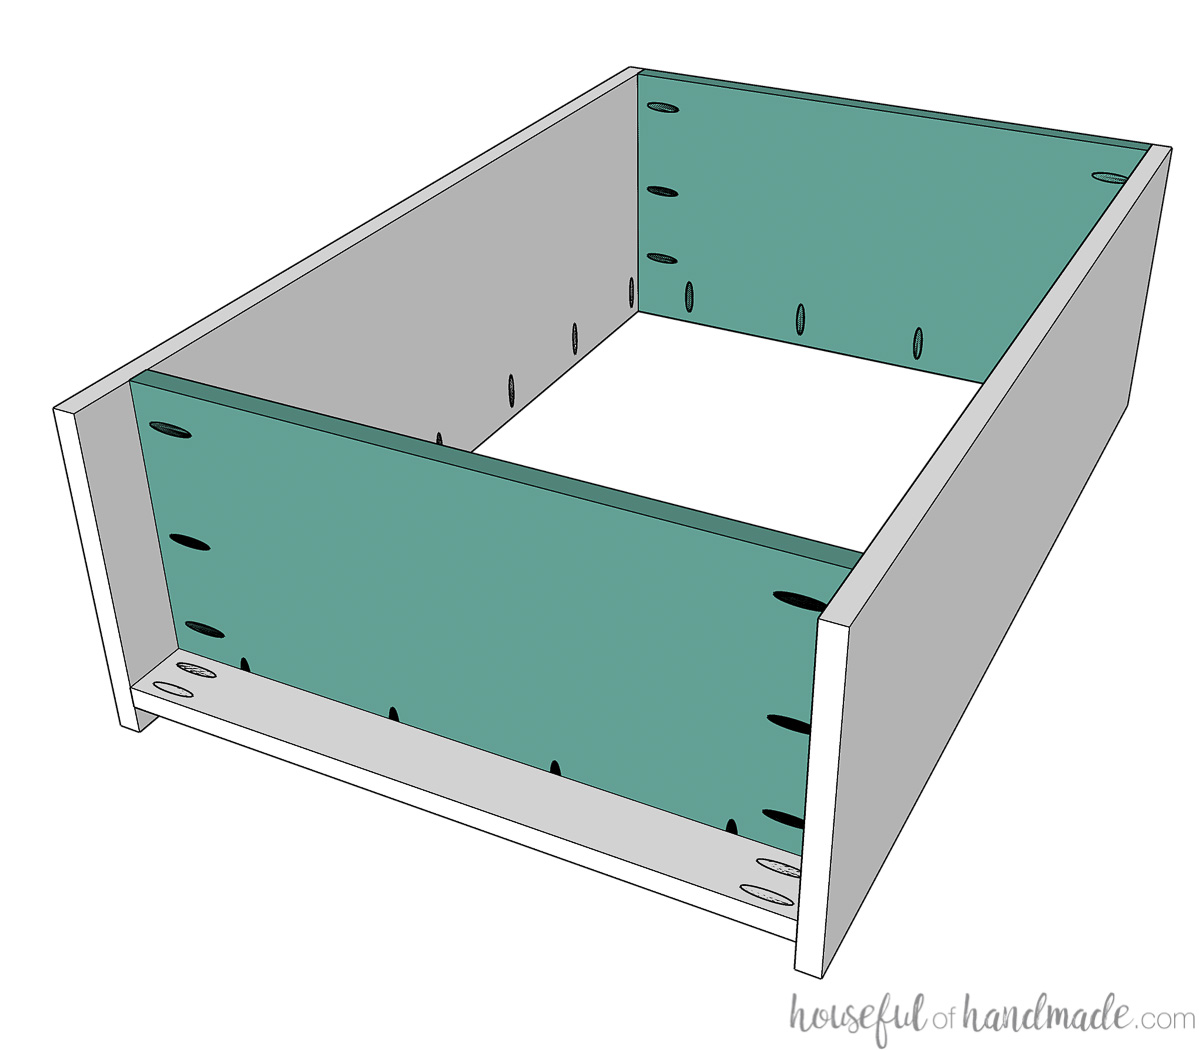
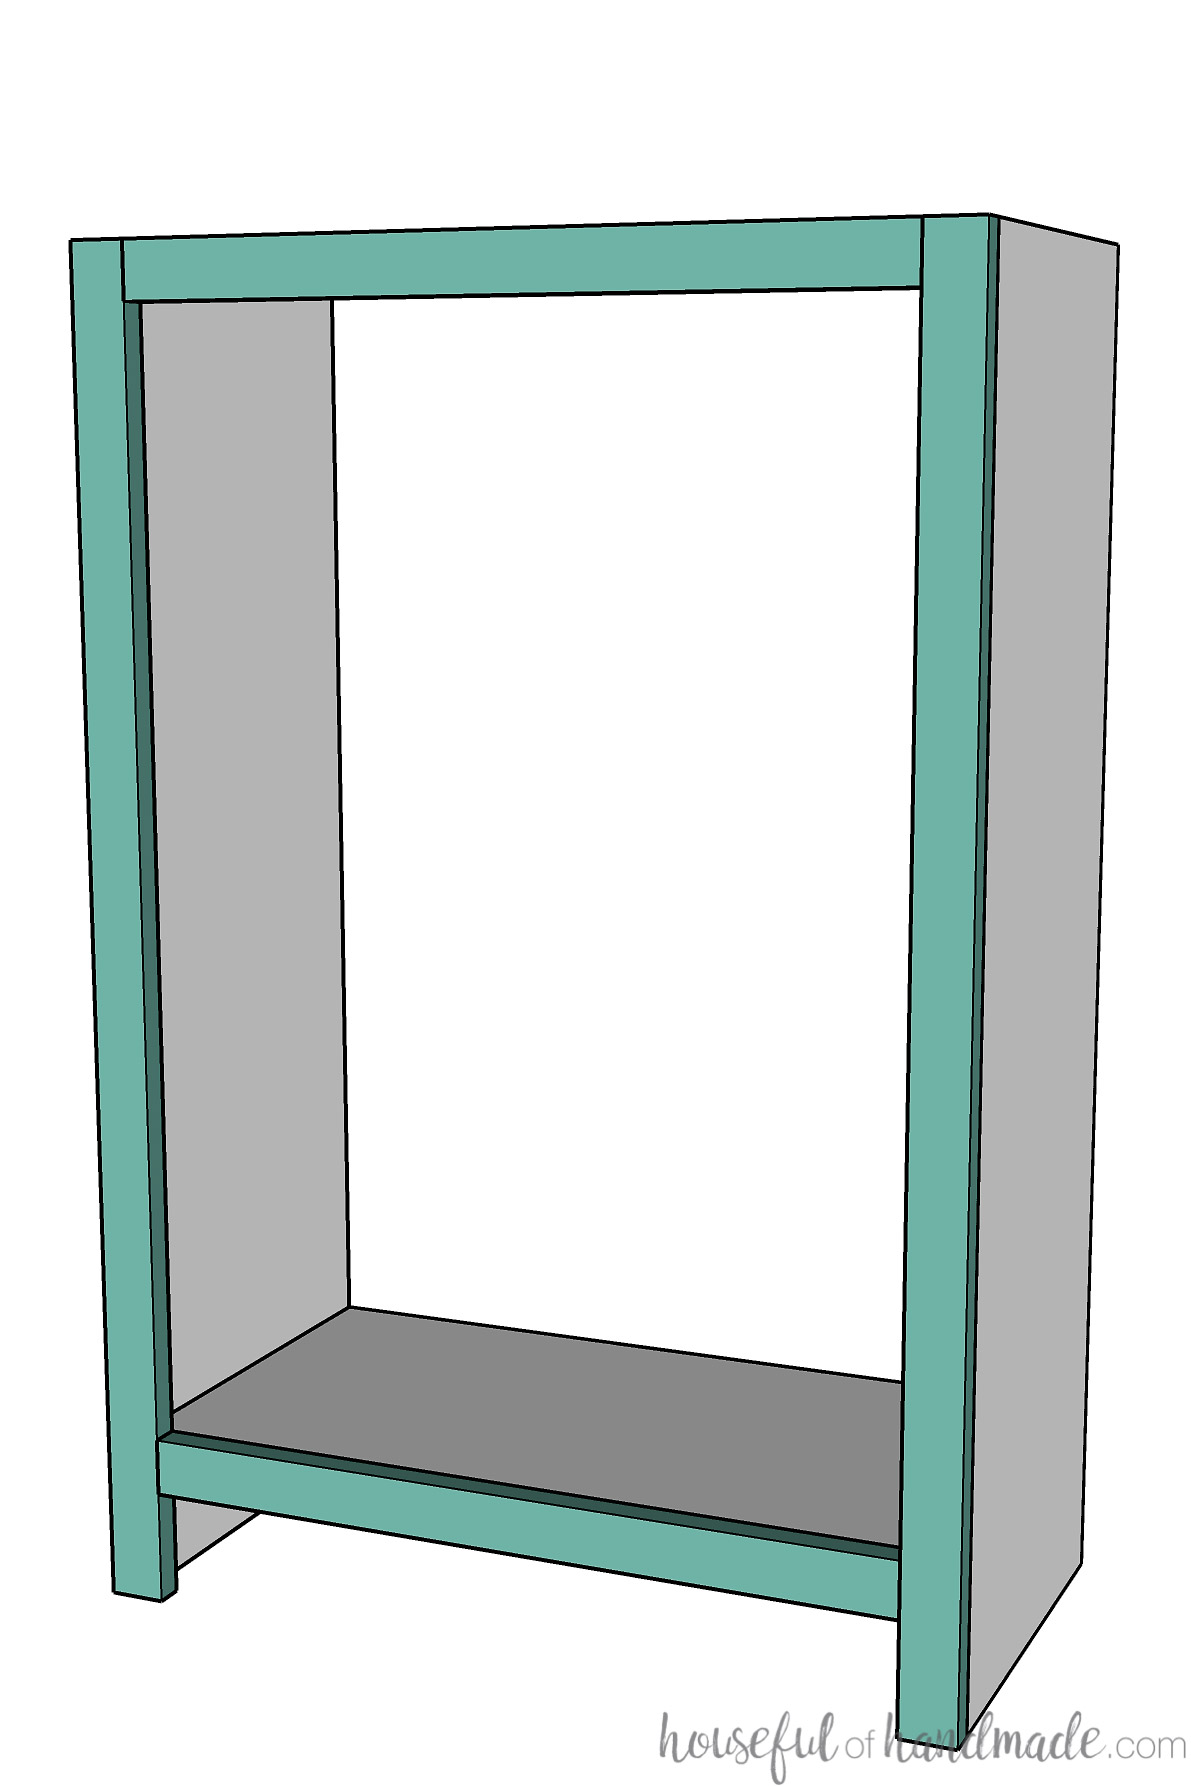
If adding a toe kick: drill pocket holes in the ends of your toe kick board. Attach it below your bottom shelf so it is set back at least 1/2″.
Secure it with 1 1/4″ screws and glue.
STEP 2 – Assemble the Face Frame
Cut the rails and stiles for your face frame.
Set your pocket hole for 3/4″ thick material and drill 2 pocket holes in each end of all the face frame rail boards.
Attach the rails between the stiles. The top rail should be flush with the top of the stiles (sides) and the bottom one should be flush with the top of the bottom shelf in your bookcase.
EXPERT TIP:
Use face clamps to keep the face frame pieces flat as you drive in the screws.
Secure with 1 1/4″ pocket hole screws and glue.
For tall bookshelves, add an additional rail to the face frame where the stationary shelf is. Line it up so the top of the rail is flush with the top of the shelf.
Secure the same as the top and bottom rails.
Now you face frame is ready to be attached to your bookcase carcass.
Add wood glue to the front of the plywood and line up the face frame so it is flush all around. Secure with 1 1/4″ pocket holes screws or 1 1/4″ finishing nails.
STEP 3 – Attach the Back
Set your router to router out a 3/8″ wide groove that is the same depth as your back panel.
Since most plywood is slightly thinner than the noted thickness, it is a good idea to measure and set your router to that measurement.
If you have a stationary shelf, you can either cut 2 back pieces that fill in the two sections separately. Or you can cut the stationary shelf shallower (to match the depth of the bookcase minus the routed groove) before attaching it and cut 1 large back piece.
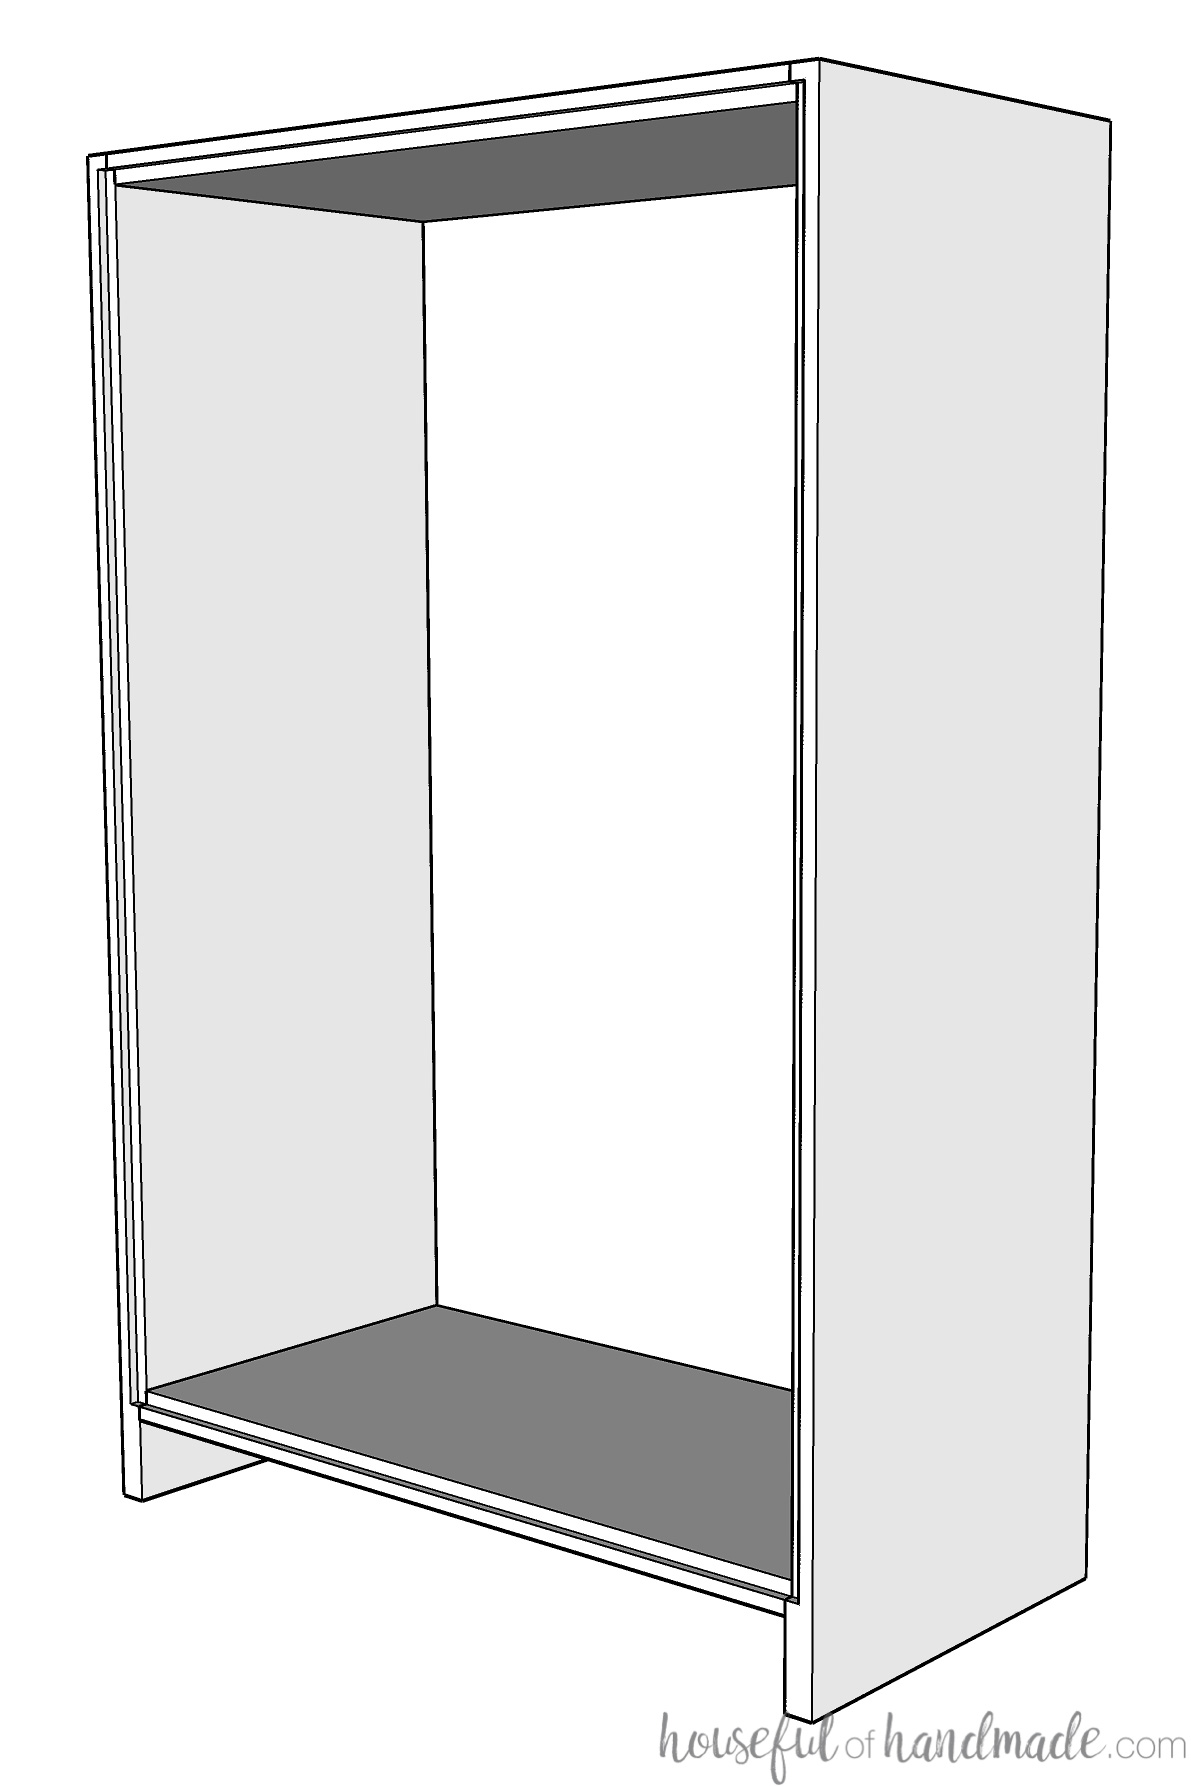
Add the back panel to the bookcase and ensure the bookcase is square.
Attach it with 3/4″ finishing nails through the back into the sides and top/bottom boards.
STEP 4 – Finishing Touches
If using shelf pins for adjustable shelves: drill holes for pins with a jig inside the bookcase. You need 4 lines, 2 in each side, one close to the front and one close to the back.
If using shelf standards: install the standards inside the grooves in your bookcase sides.
Add trim/base boards around the bottom if using. Attach with 1 1/4″ finishing nails.
Trim out the top and sides as desired.
Measure for your adjustable shelves and cut out.
STEP 5 – Sand & Finish
Sand and paint or stain your bookcase. If you are making built-in bookcases, read instructions below to install.
For free standing bookcases, it is recommended that you secure them to the wall to prevent tipping over.
How to make a Built-in Bookcase
Turning a bookcase into a built-in is easier than you might think. You can do this with any bookcase you built yourself, or even turn store bought bookshelves into amazing built-in bookcases.
For built-ins that go inside a cubby or nook:
- Build the bookcase to fit inside the recess without a face frame attached.
- Install the bookshelf so it is flush with the front of the recess.
- Use trim or a wide face frame to cover the plywood edges and the side of the recess.
- Caulk the trim/face frame where it meets the wall to make it seamless.
For built-ins on a wall:
- Build the bookcase to fit the wall you want (it can be the entire wall or just part of it).
- Remove any baseboards and molding on the wall where the bookshelves will go.
- Install the bookcase (or bookcases) so they are secured to the wall.
- Reinstall baseboards from the wall over your bookcase.
- Add trim to the bookcase to cover where it meets the wall and ceiling if necessary.
- Caulk the baseboards and trim where it meets the wall to make it seamless.
Premium plans include:
- Recommended Tools
- Materials list
- Design guidance
- Common shelf depths
- How to figure cut list for custom bookcase
- Step-by-step instructions with 3D renderings
- Bookcase making tips & techniques
- Tips for built-in-bookcase
- BONUS: 3D SketchUp file
And if there are any questions or things I forgot, leave a comment and I will do my best to answer. I want to give you the confidence to design & build your own bookcases too!
