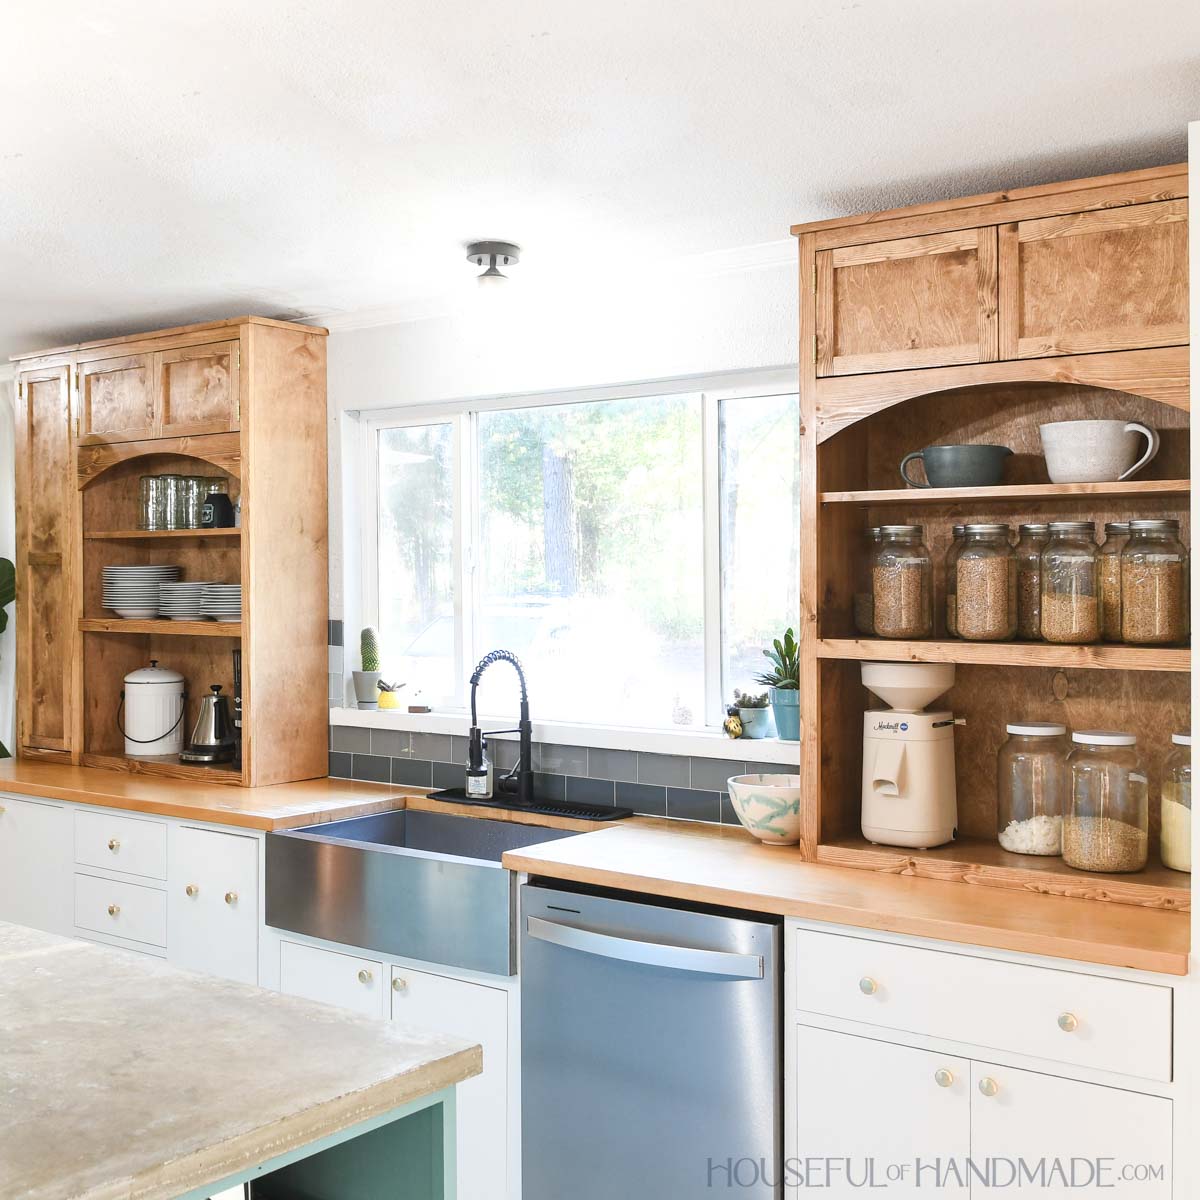
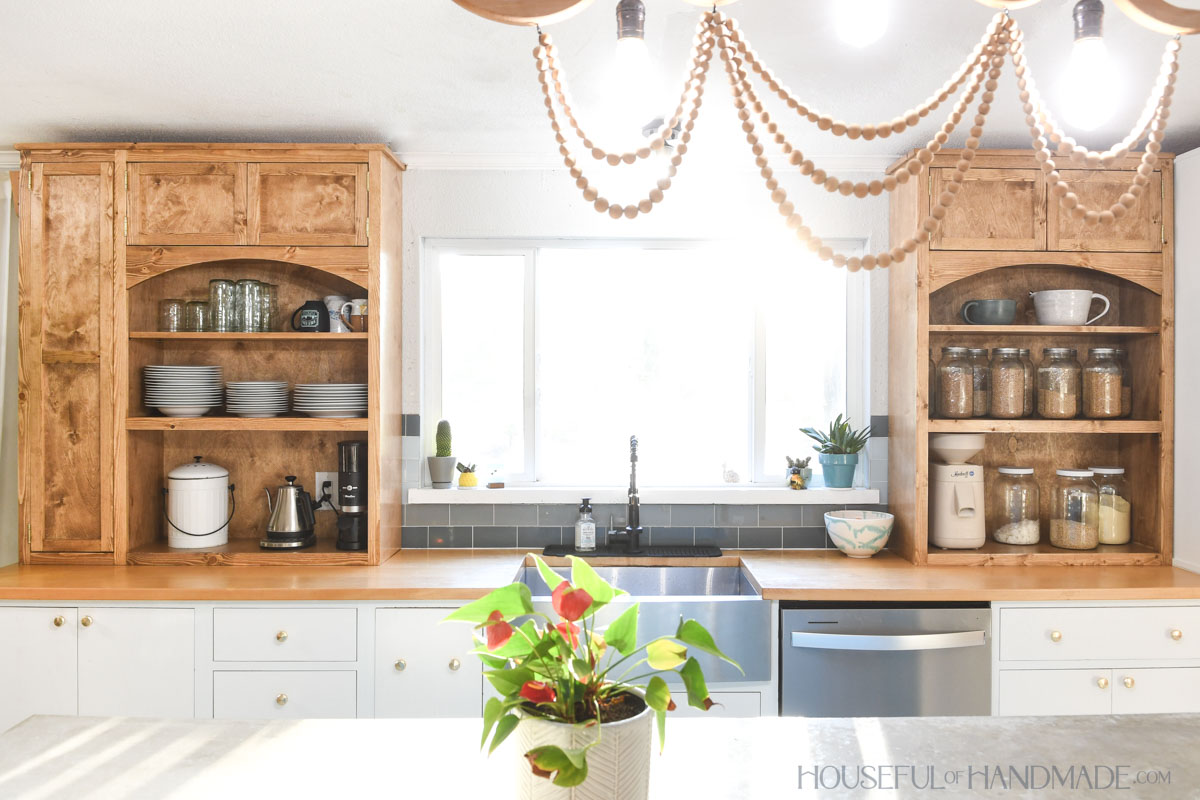
I feel like I can always use more storage in my kitchen. And the long floating shelves were no longer serving us.
So I decided it was time to take them out and add cabinets with more storage. But instead of standard wall cabinets, I built beautiful countertop kitchen cabinets.
Having the cabinets sit on the countertops means 16-18″ of additional storage. You can use it to corral the appliances or store more dishes.
This post may contain affiliate links. As an Amazon Associate I earn from qualifying purchases. Click here to read my full disclosure policy.
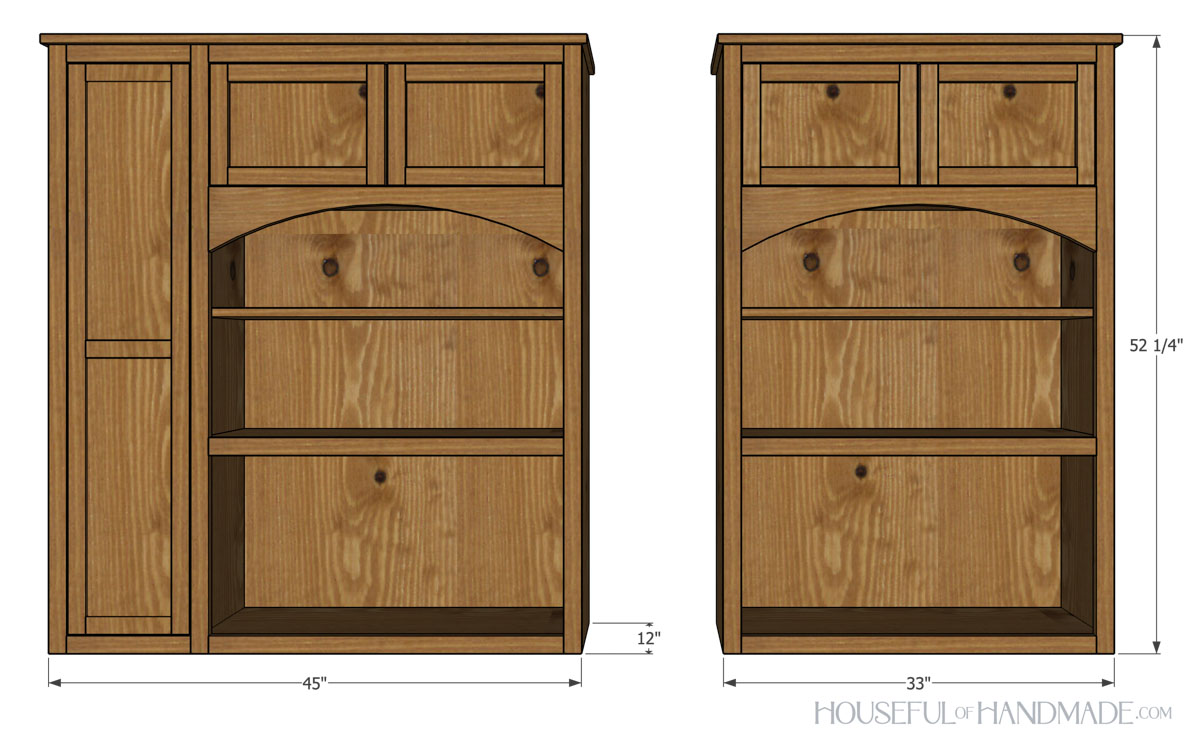
Kitchen Countertop Hutches
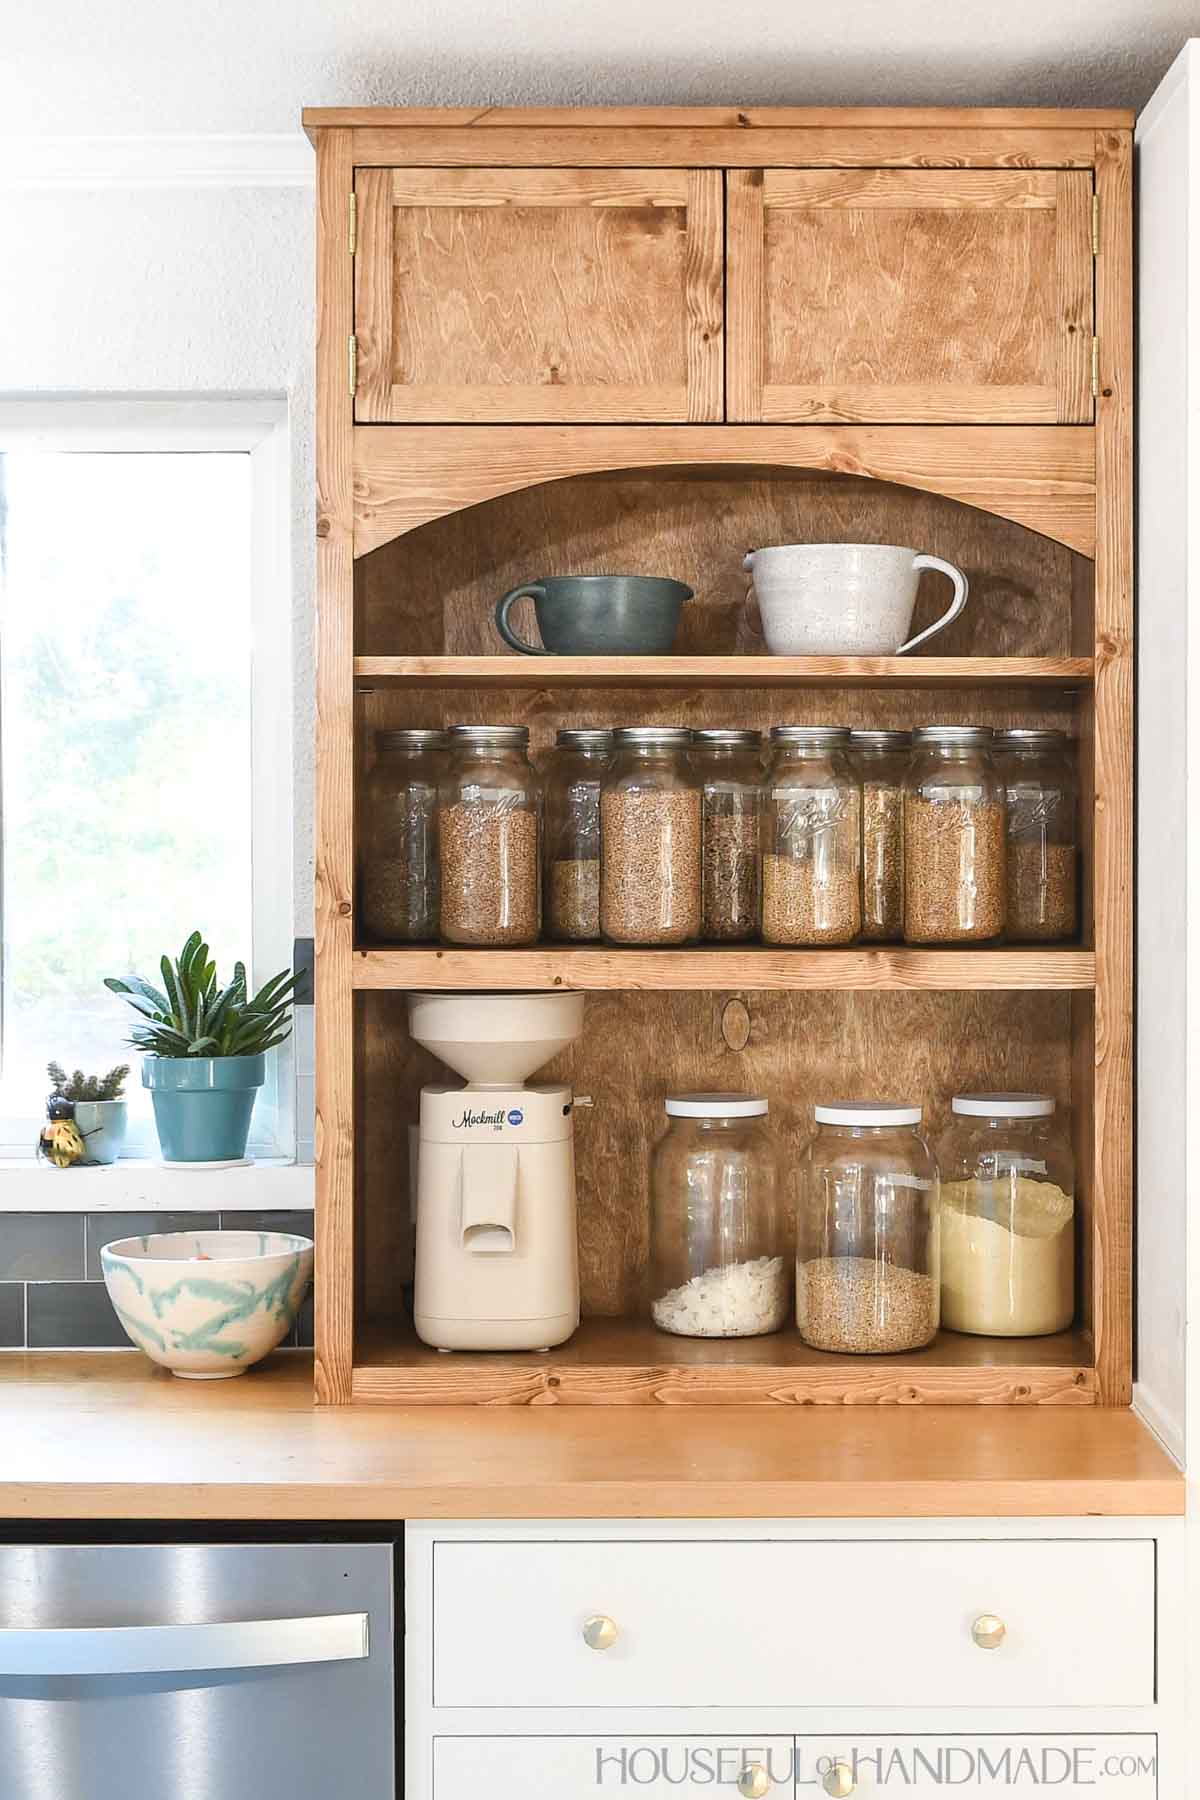
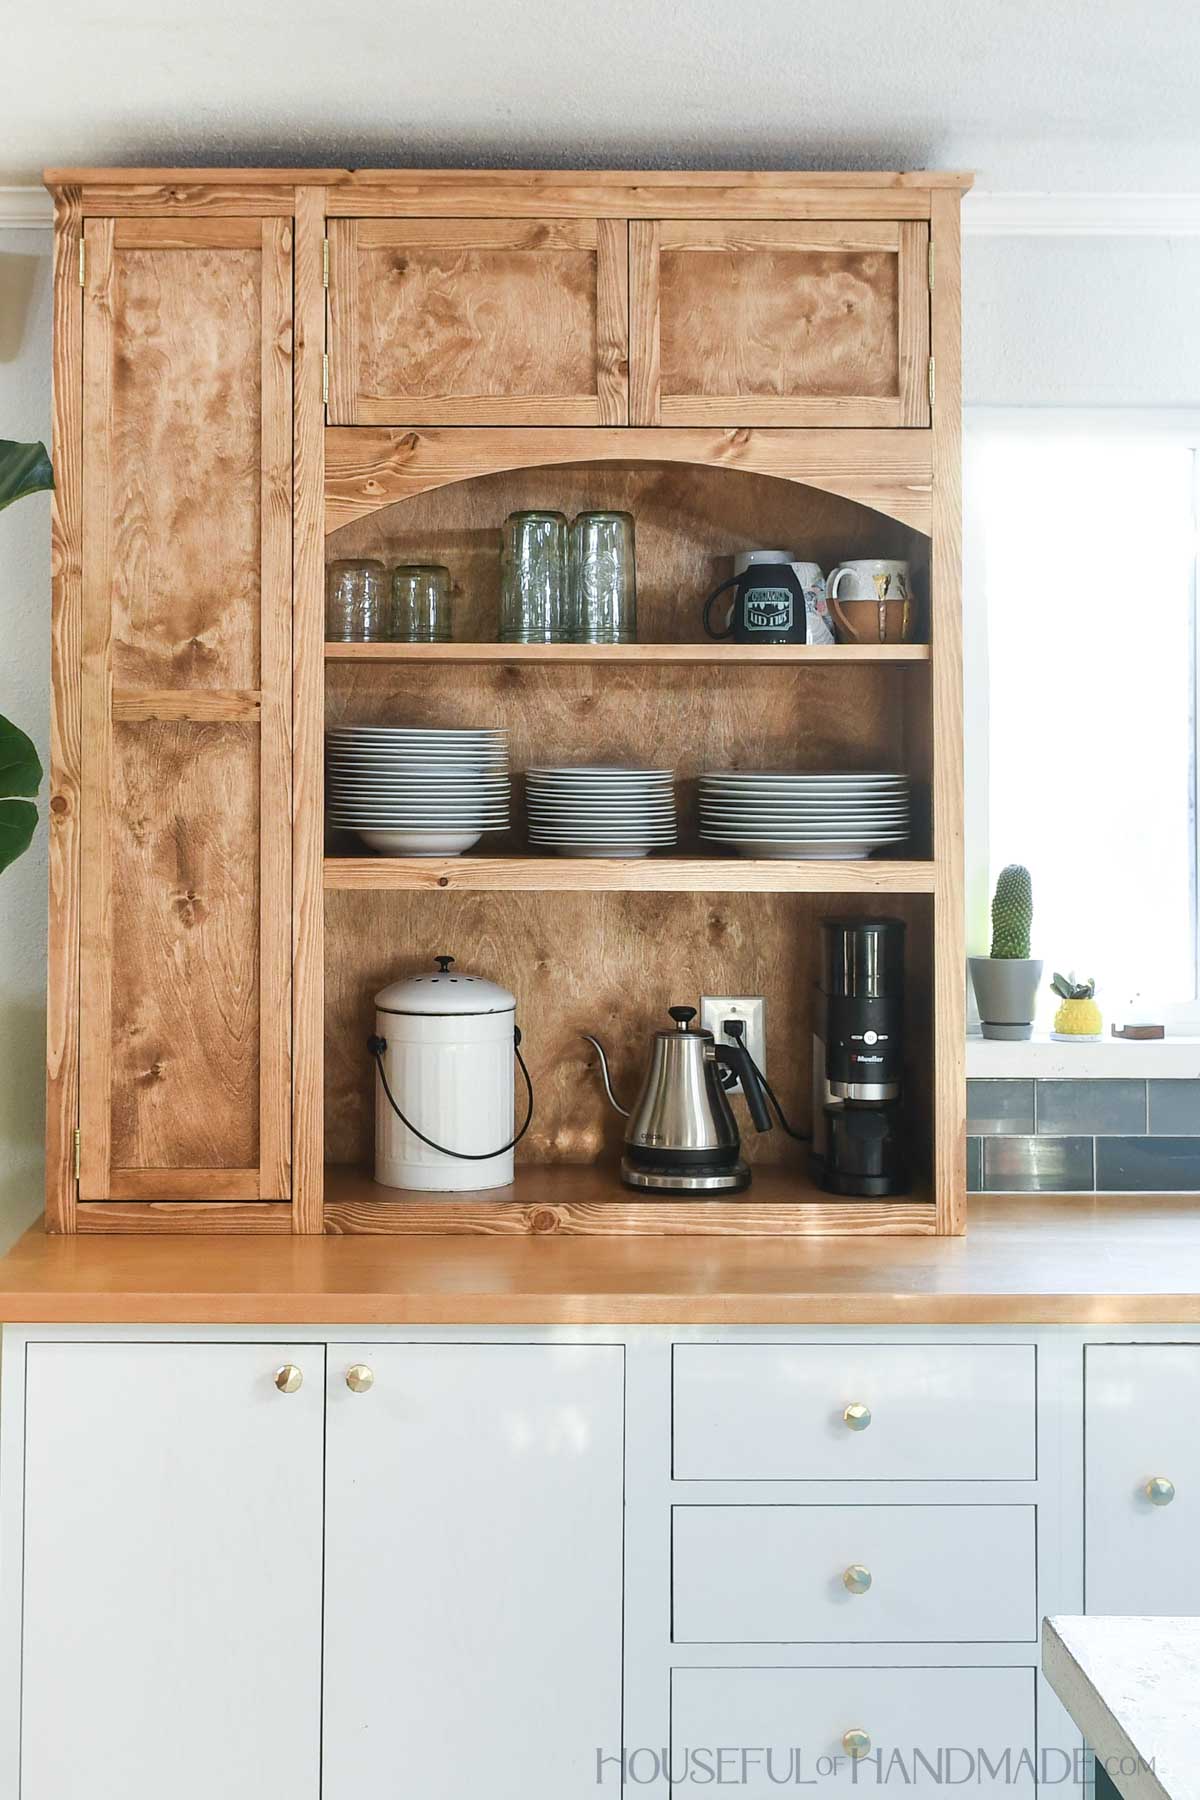
These kitchen hutches are a combination of open shelves and hidden storage.
It makes them perfect for displaying items that we use daily, like our dishes and drink ware. But also makes it easy to hide cluttered looking items.
And I love how these countertop cabinets make the appliances that looked cluttered on my counters look organized and put away.
My sink is not perfectly centered in my counter. Instead I have 12″ more on one side than the other.
When designing my countertop cabinets, I wanted them to still look similar. So I added a small cabinet to the side of one of the hutches.
This small cabinet is perfect for storing appliances I want accessible but hidden. And it adds the balance I needed to my kitchen wall.
More Kitchen Storage Ideas
The kitchen is the heart of the home, so keep it organized with these fun DIY projects.

How to Build a Countertop Cabinet
Tools & Materials
Recommended Tools:
- Miter saw
- I recently upgraded to this sliding miter saw (watch for it to go on sale), but previously used this inexpensive miter saw that I love.
- Circular saw with guide track or rip guide
- Jig saw
- Dowel jig
- I used Kreg Tools new dowel jig. You could also assemble the cabinet using a pocket hole jig if preferred.
- Drill
- Impact driver (optional, but I love not having to switch bits with the drill)
- Multi-mark measuring tool
- Face clamps
- Brad nailer
- Trim router
- Shelf pin jig
- Sander
Supplies (per cabinet):
- Wood products
- (4-6) 1×2 boards, 8′ long
- (1) 1×6 board, 3′ long
- (1) 3/4″ plywood, 4×8 sheet
- (1) 1/4″ plywood, 4×8 sheet
- (6′) edge banding or 1/8″ strip of face frame lumber
- 3/8” x 1 1/2” dowel pins
- 1 1/4” brad nails
- 5/8” brad nails
- 2 1/2” cabinet screws
- (4-6) inset face frame hinges
- (2-3) knobs or pulls
Overall Dimensions
Each cabinet is 52 1/4″ tall and 12″ deep. The single cabinet is 33″ wide (34″ with trim on top) and the double cabinet is 45″ wide (46″ with top trim).
Cut List
Cut out the pieces according to the easy-to-read table in the PDF plans.
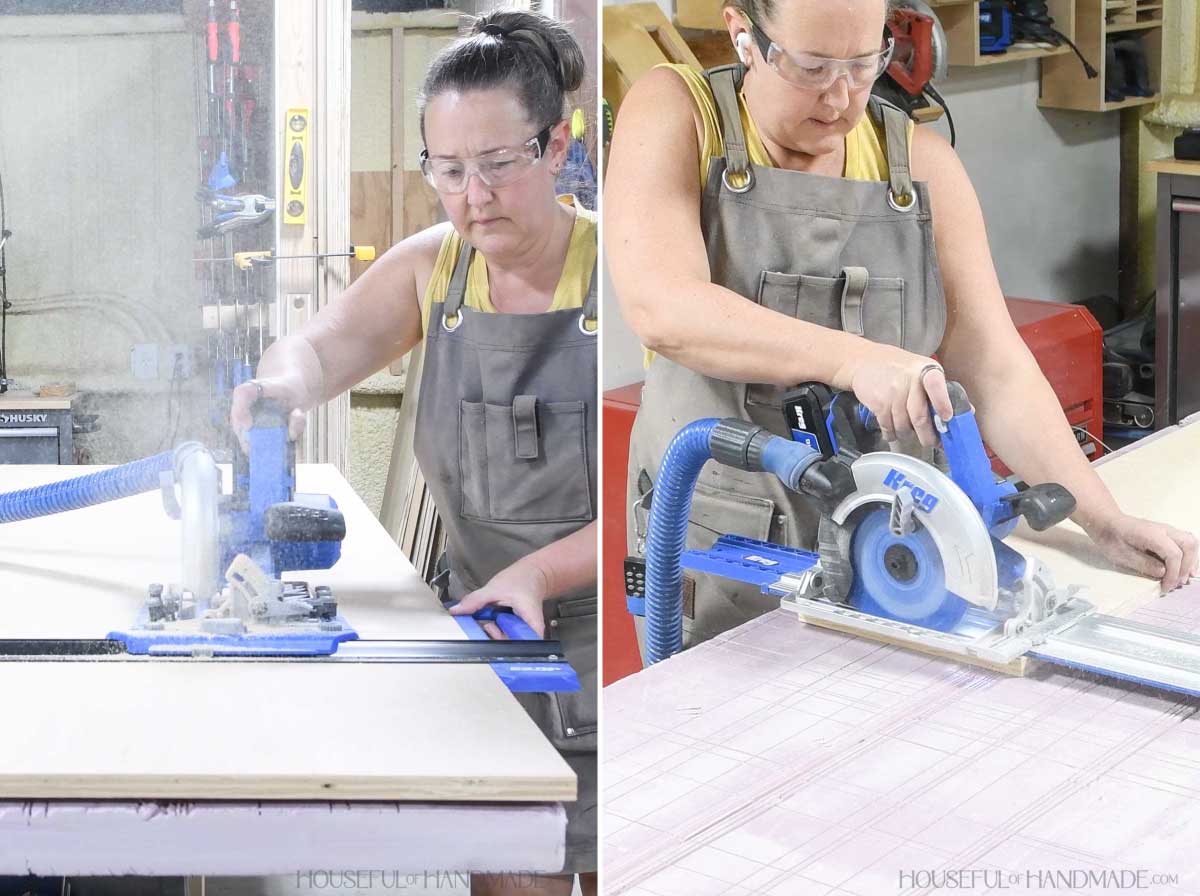
Start by cutting the plywood into strips using the Rip-Cut guide. Then use the AccuCut with your circular saw to cross cut the pieces to length.
Learn my easy technique for breaking down plywood with a circular saw here.
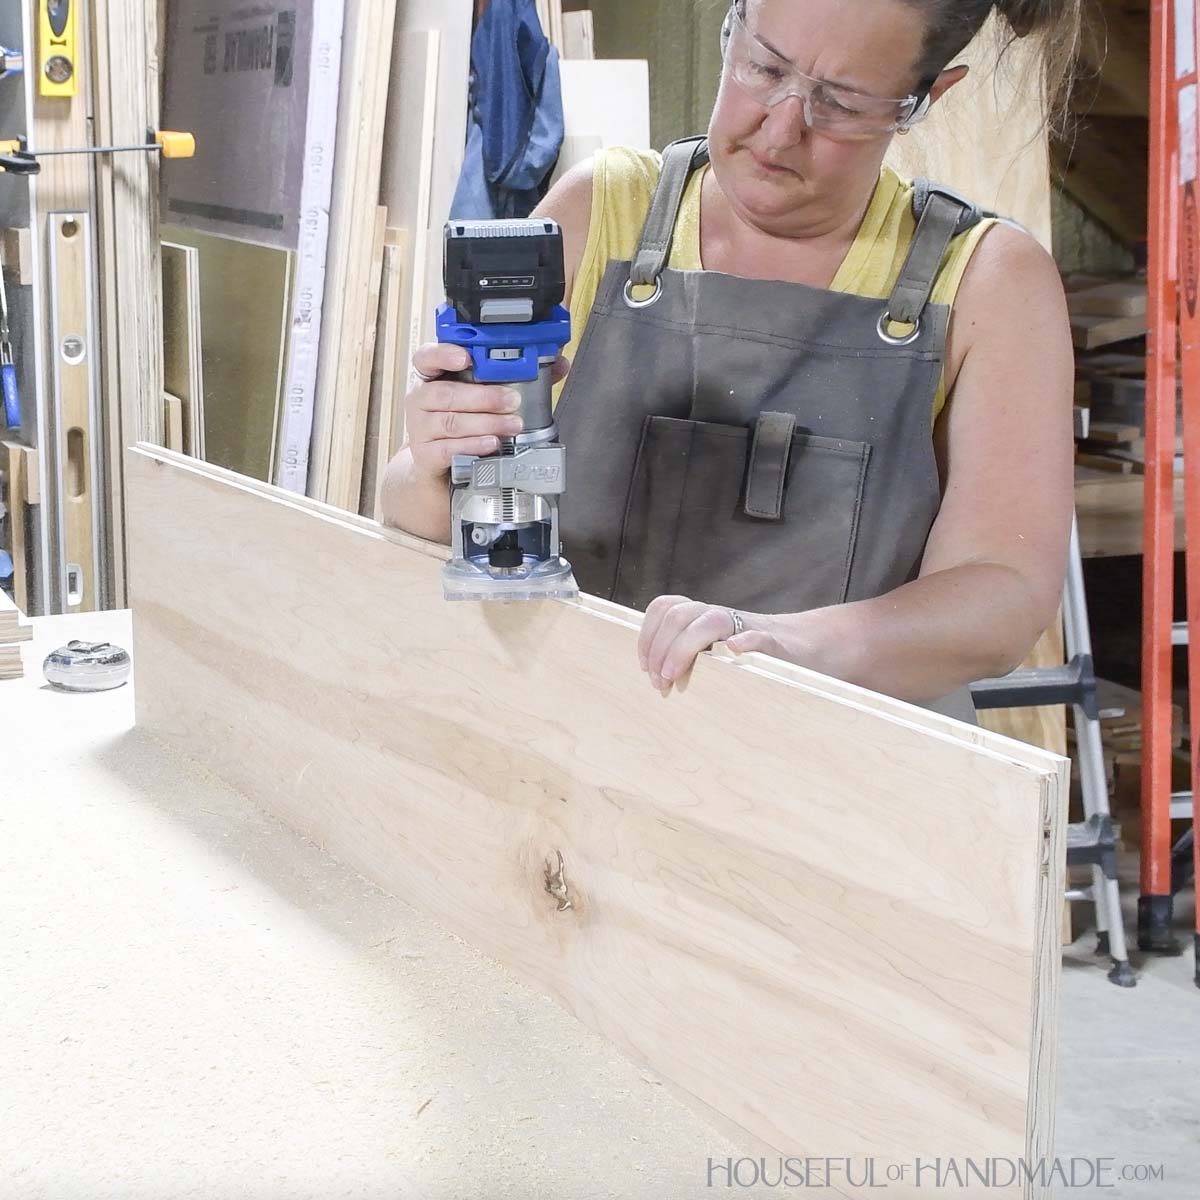
Cut a 1/4” x 1/4” groove in the inside back edges of the side boards. This groove is for the back to sit inside later.
You can cut the groove with either a router, a circular saw or table saw.
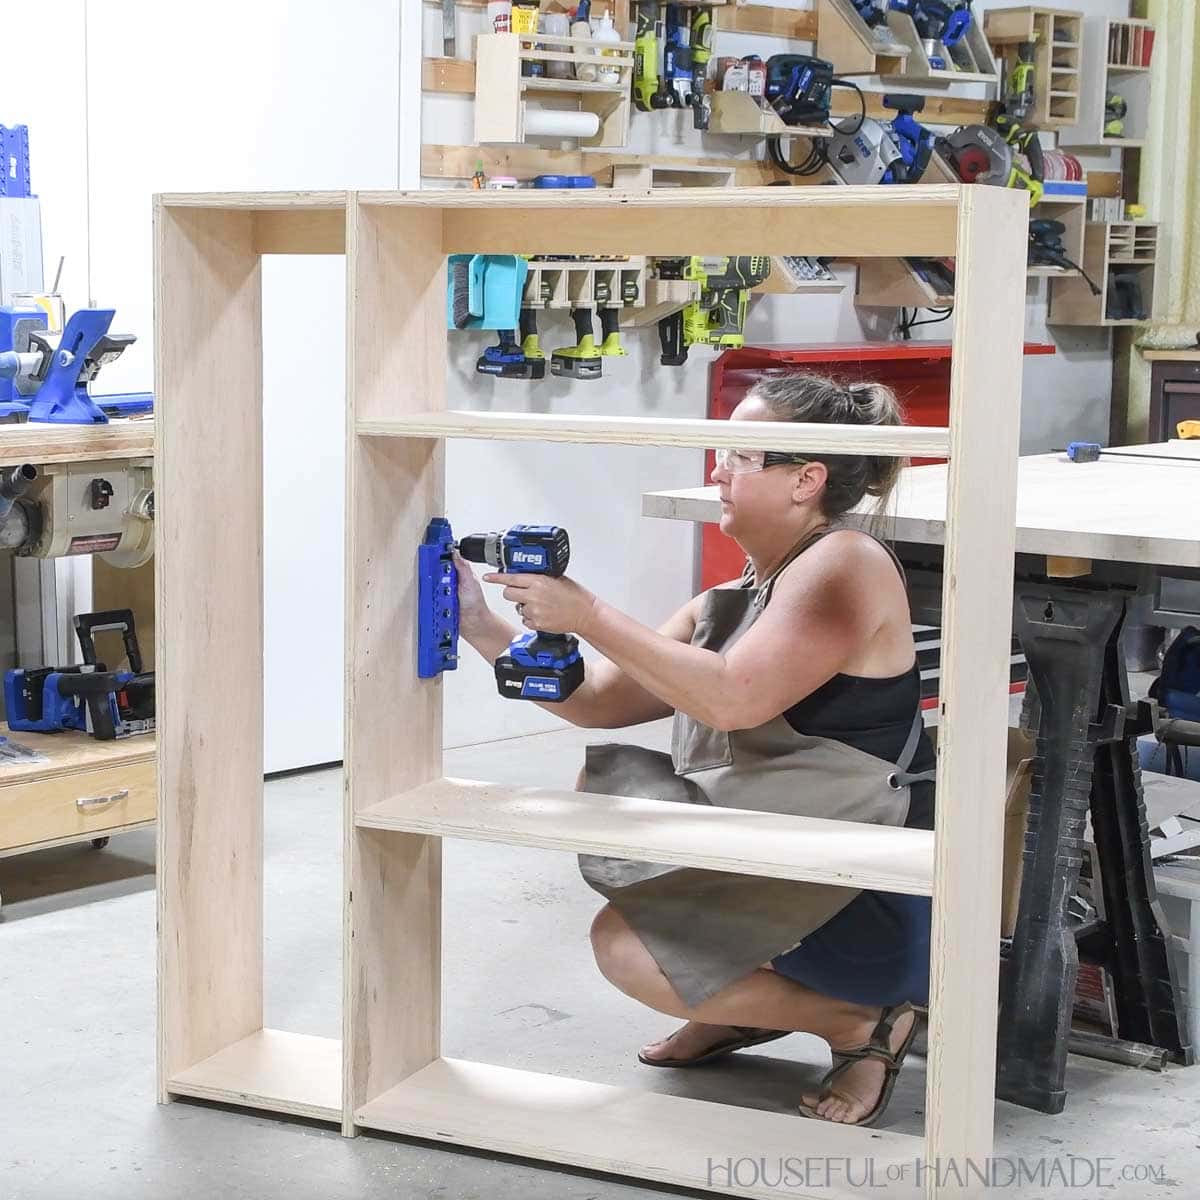
STEP 1- Assemble cabinet box
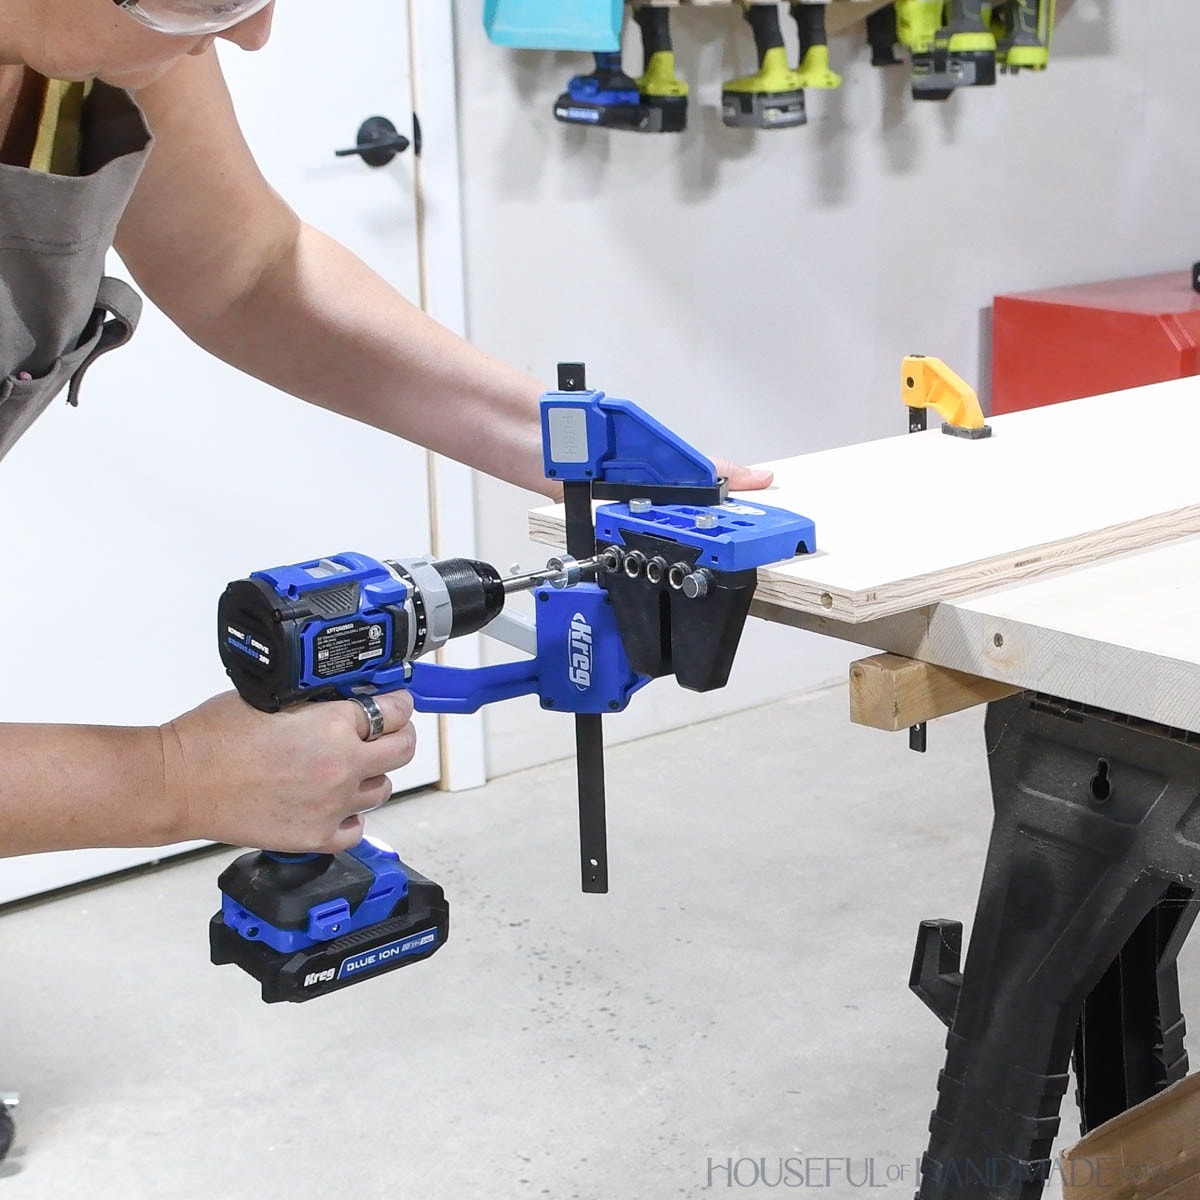
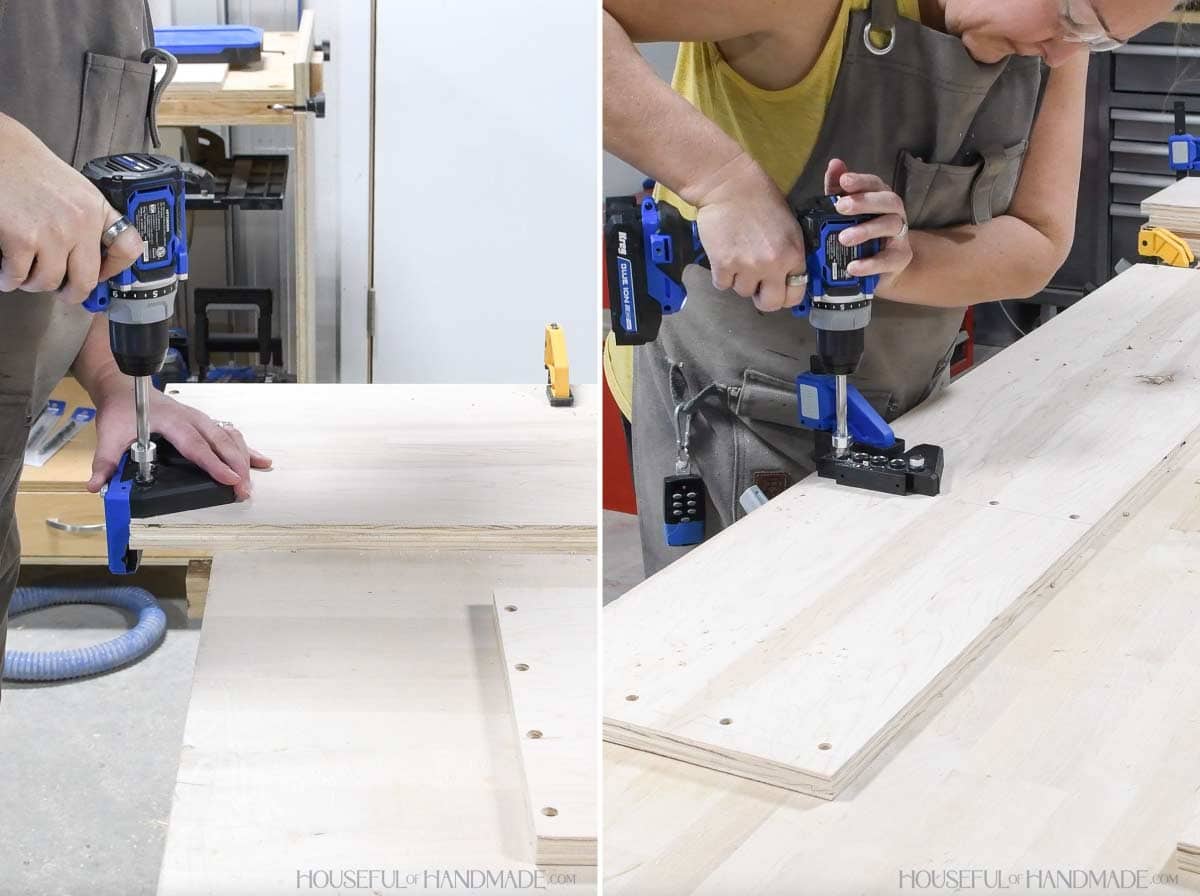
NOTE: I assembled the entire cabinet with dowel pins using a dowel jig. This ensured no visible fasteners on my shelves. You can assemble the cabinet with pocket holes if you prefer.
Drill 3/8” wide holes along both sides of all the shelf boards, as well as the ends of the back support.
I used Kreg Tools new dowel jig to ensure straight holes for dowel pins.
I started drilling holes from the front of each shelf board, lining up the edge of the dowel jig to the front edge of the board.
Then used the pin to keep the spacing perfect as I moved the jig along the board.
Next I drilled holes along the back of one of the shelf boards. As well as coordinating holes along the top edge of the back support board.

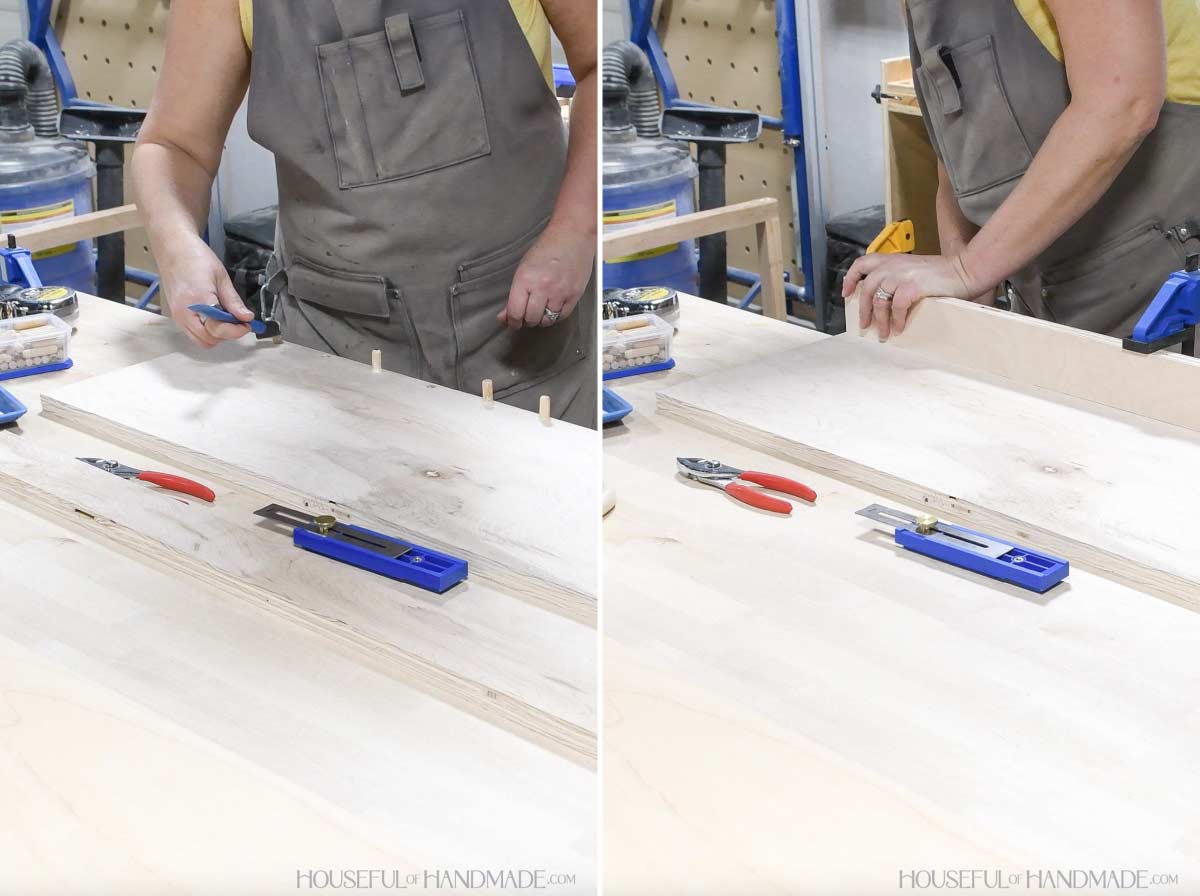
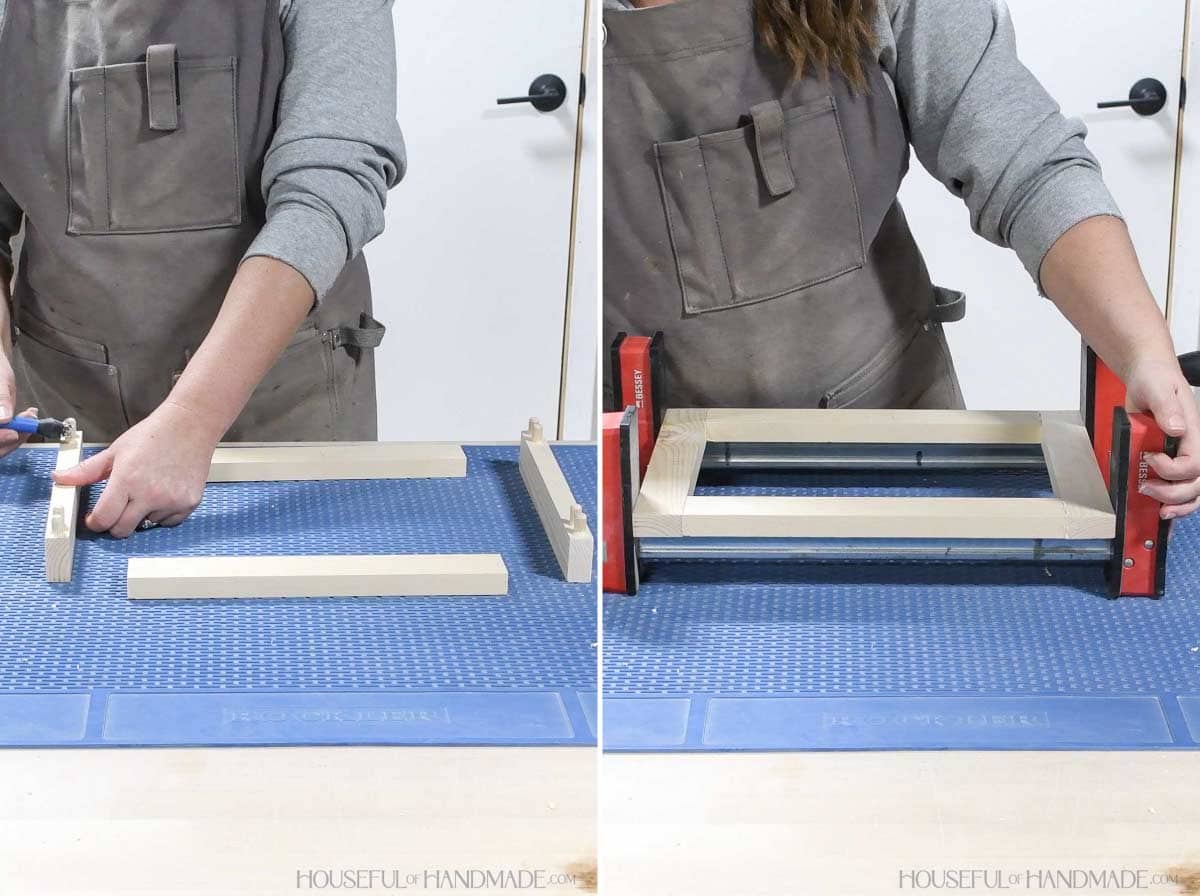
To attach the back support, dry fit with 1 1/2” dowel pins and adjust as needed.
Then secure the boards together with glue and dowels. Clamp till dry.
Drill dowel holes along the side boards where the shelves will attach.
The top shelf should be flush with the top of the sides and the remaining shelves according to the diagram in the plans.
Make sure all boards are flush to the front of the sides.
Dry fit with 1 1/2” dowel pins and adjust as needed.
Then secure the boards together with glue and dowels. Clamp till dry.
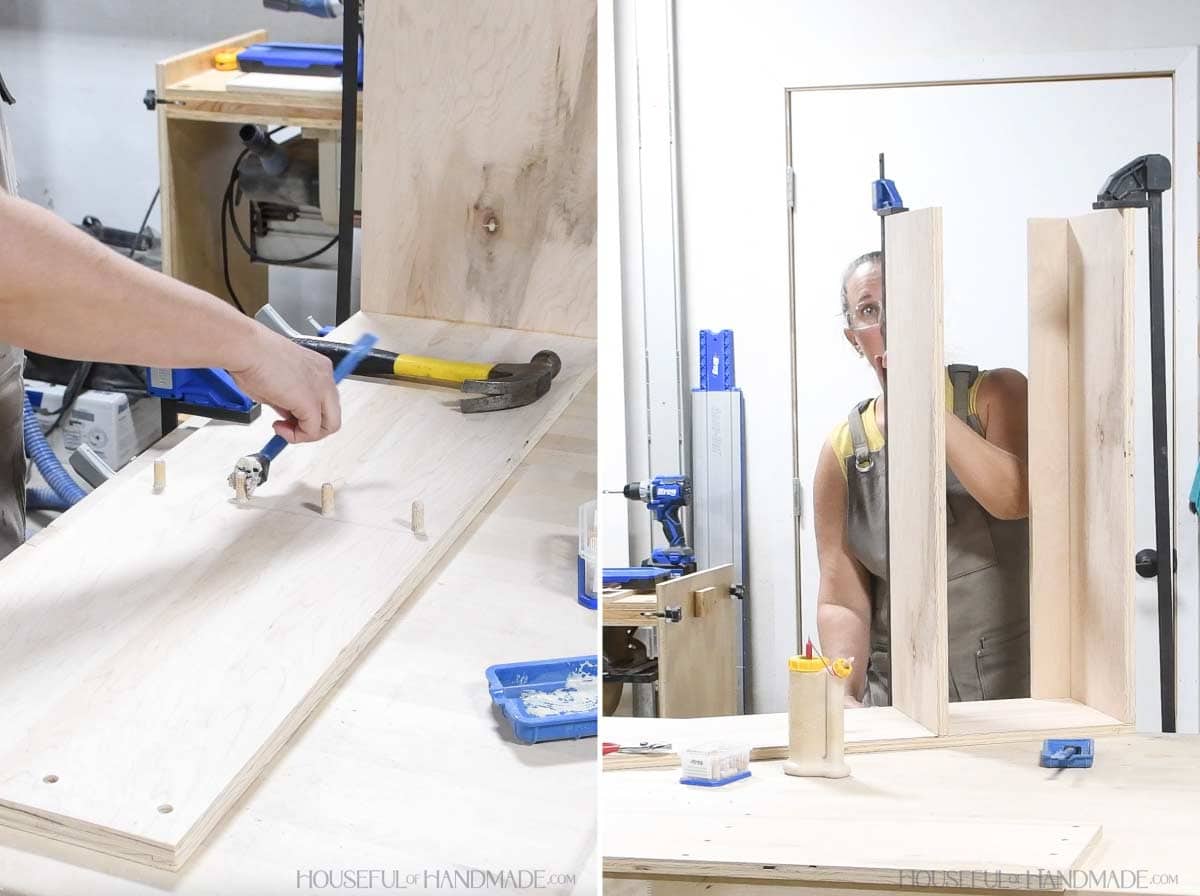
Once all boards have been secured to one side. Secure to the other with glue and 1 1/2” dowel pins.
The second side can be a bit stressful to line up and a get clamped before the glue starts drying.
I like to start at one end and line up the dowel pins and press them slightly, just so they stay in place but not so the joint is fully closed. Then move to the next shelf in line and so on.
Once all boards are in place, start clamping the boards to close the joints and let the glue dry.
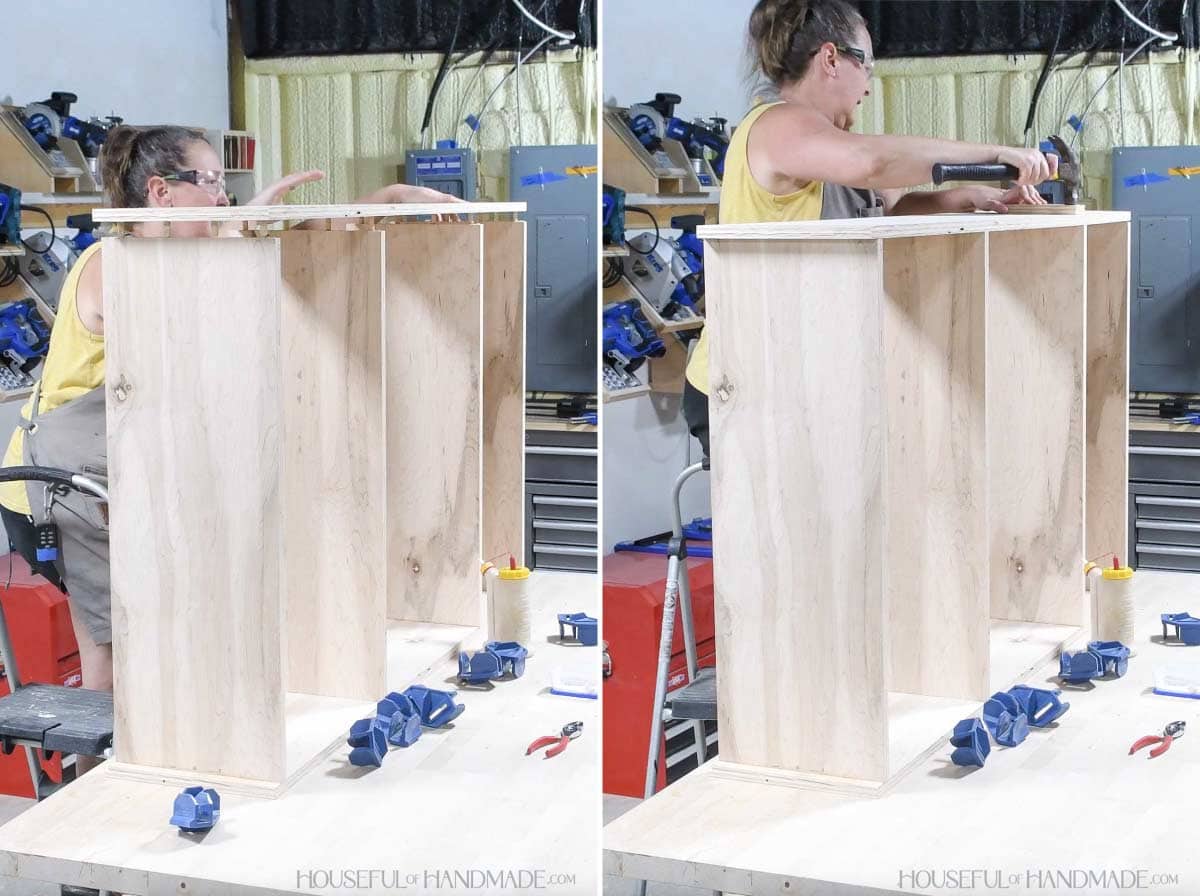
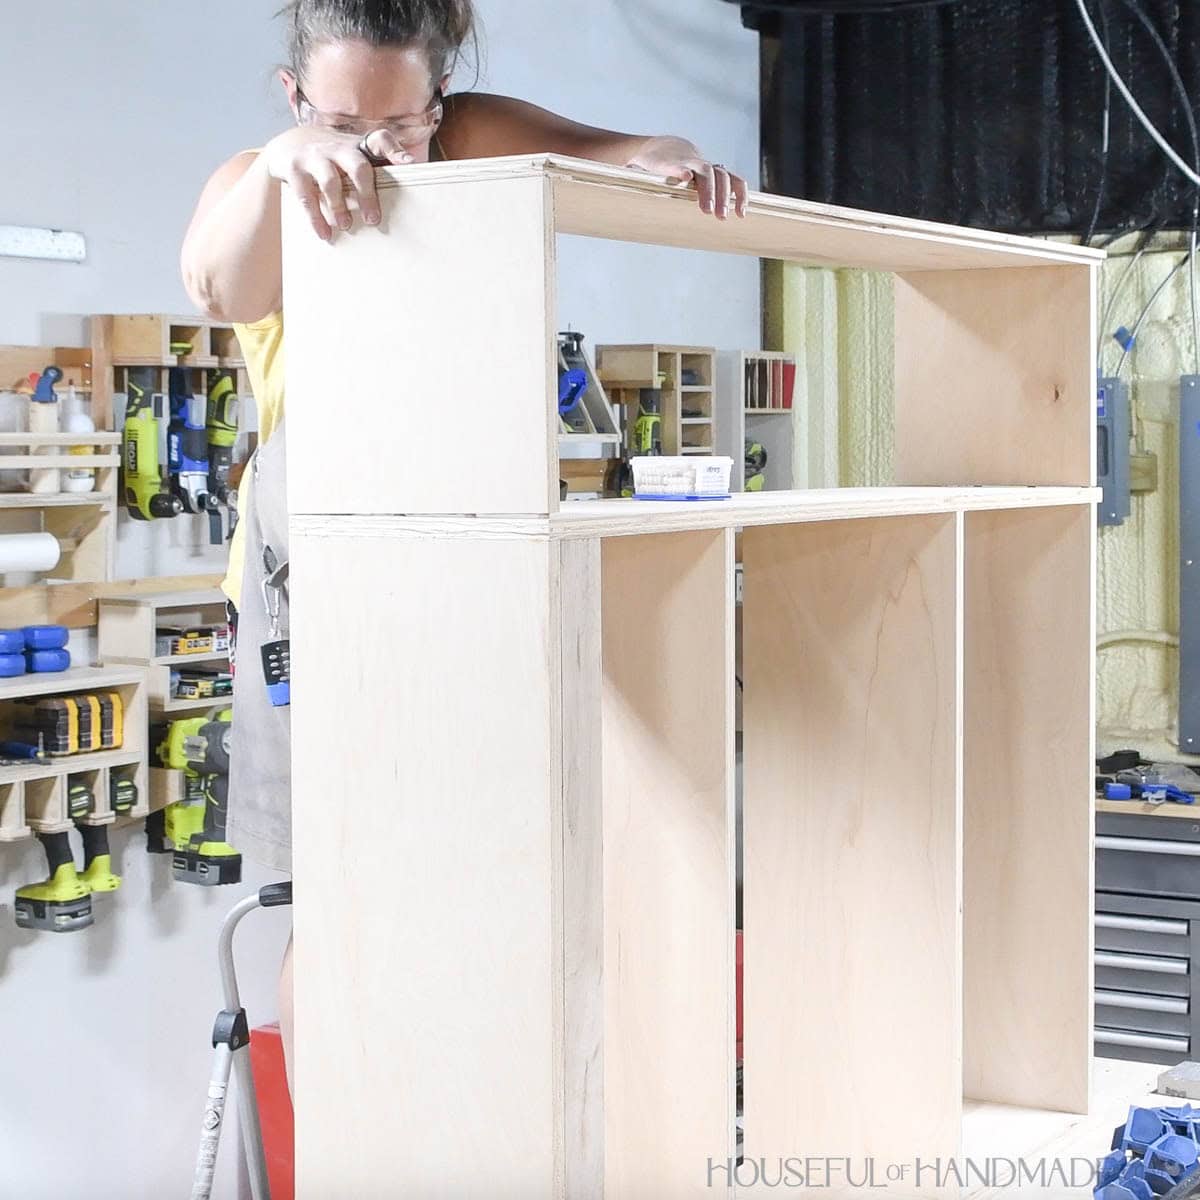
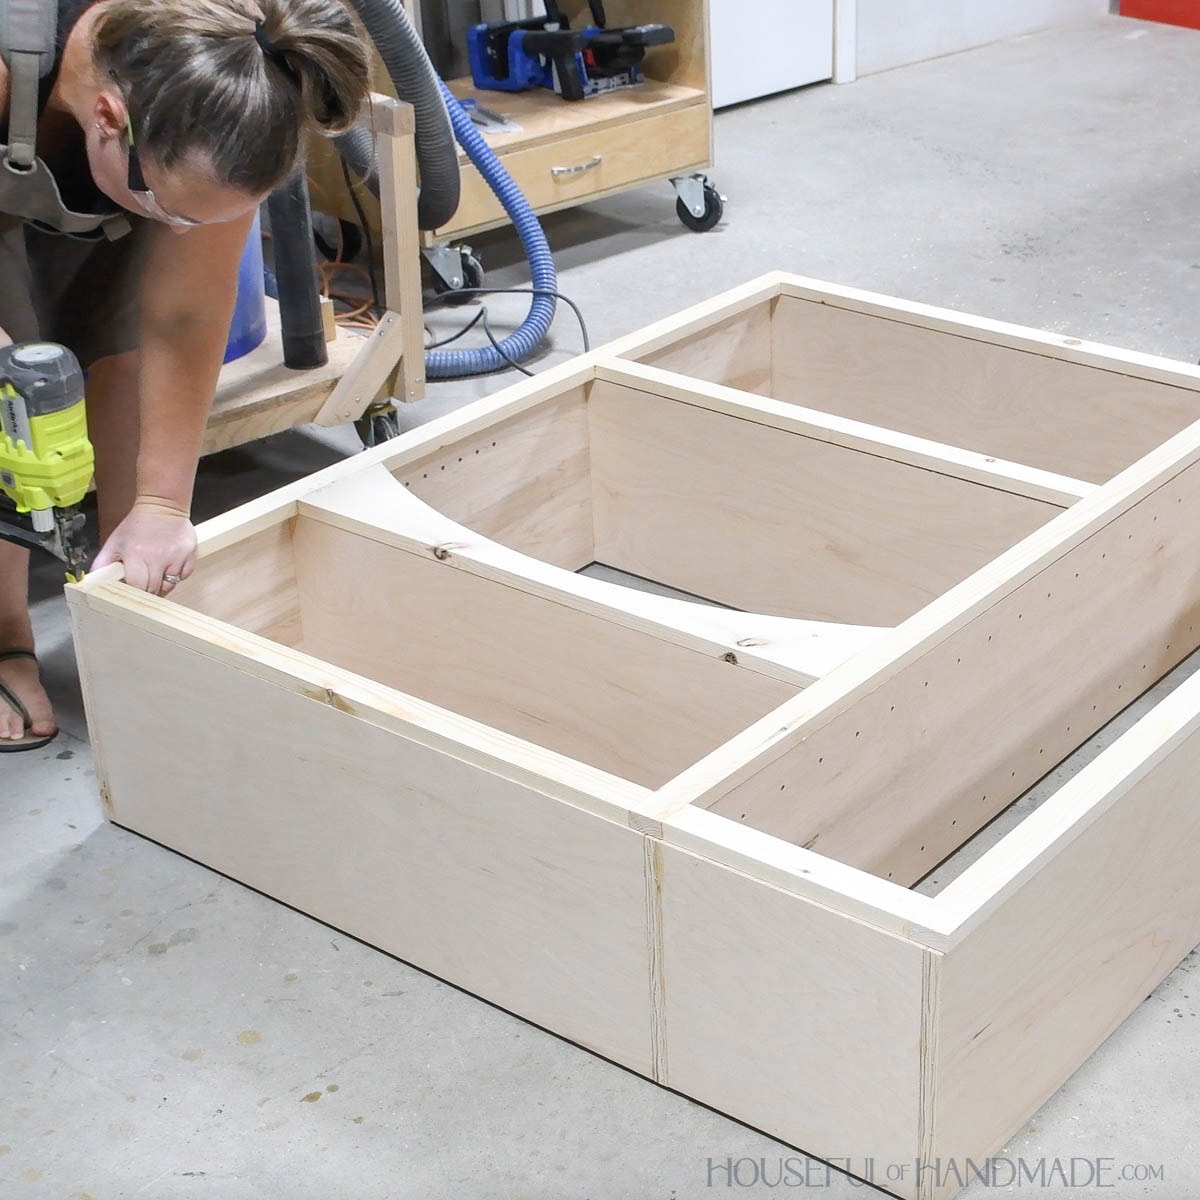
For the larger countertop cabinet, I added a second small cabinet to the side.
I attached these smaller shelves the same way as the larger shelves, but offset these holes slightly from the dowel holes used in large shelves.
The top shelf should be flush with the top of the sides and the bottom shelf 3/4” up from the bottom. Make sure all boards are flush to the front, and flush to the edge of the groove in the back.
After installing the side cabinet, I realized I forgot the back support.
Instead of trying to pull the cabinet off, I installed it with pocket holes since they will be completely hidden on the back of the cabinet.

You can drill holes for shelf pins now or once assembled.
Add holes to both side of the center area. I used a shelf pin jig to make sure the holes are evenly spaced and level.
Also, for the double cabinet, drill holes for adjustable shelves all the way up both sides. But make sure to offset the shelf pin holes from the ones in the center area.
STEP 2- Assemble face frame
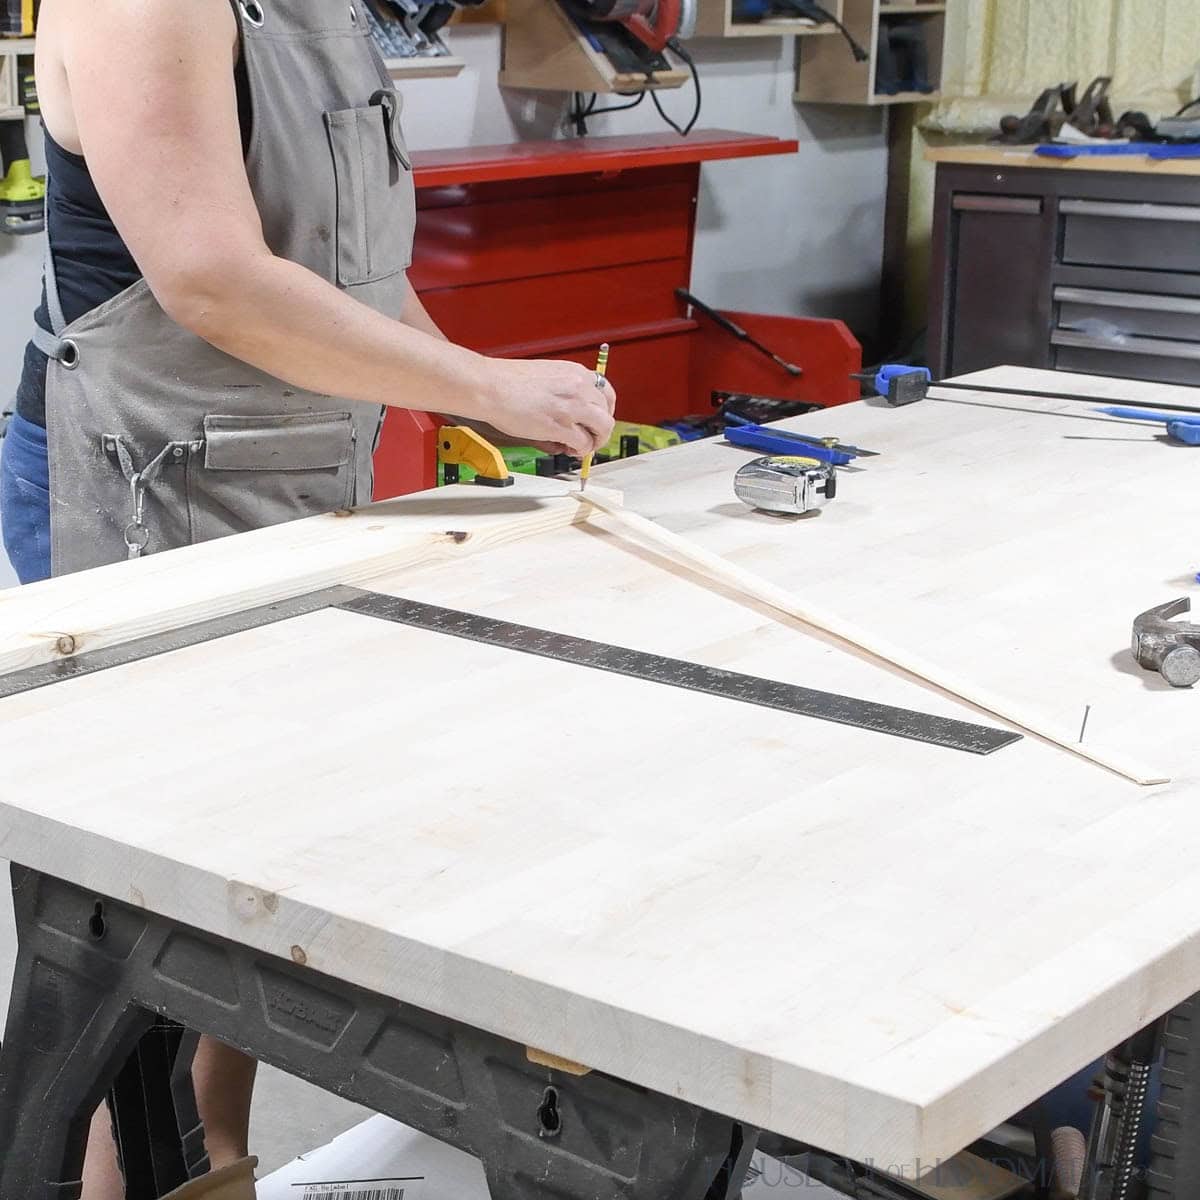
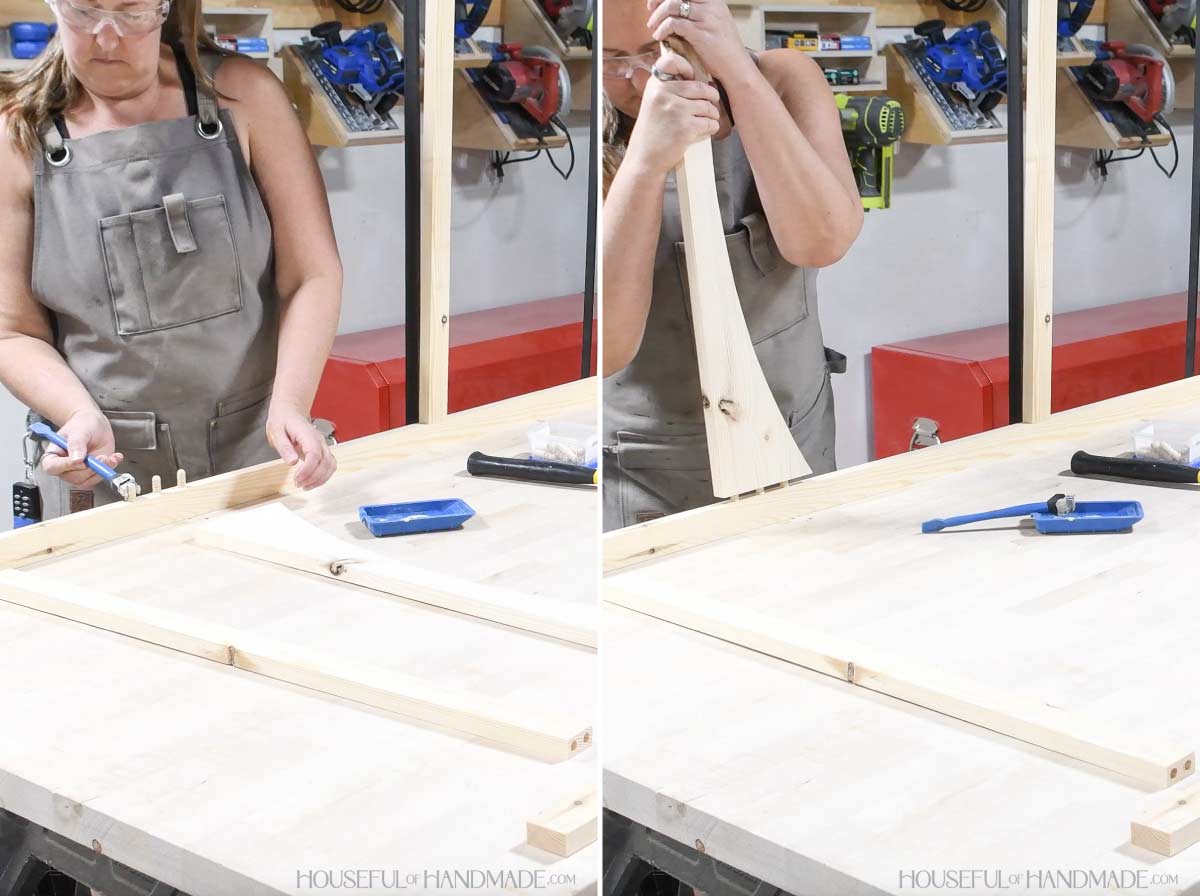
Draw an arch on the bottom of the 1×6 face frame rail so the top of the arch is 1 1/2” below the center top of the board.
I found the easiest way to do this was to clamp the board to my work surface. Measure and mark 25 5/8” from the bottom of the board, square to the center.
Place a nail in this point and use a thin scrap of wood or string to pivot a pencil on this point to draw the arch.
I adjusted the arch as needed to hit the bottom corners and center point.
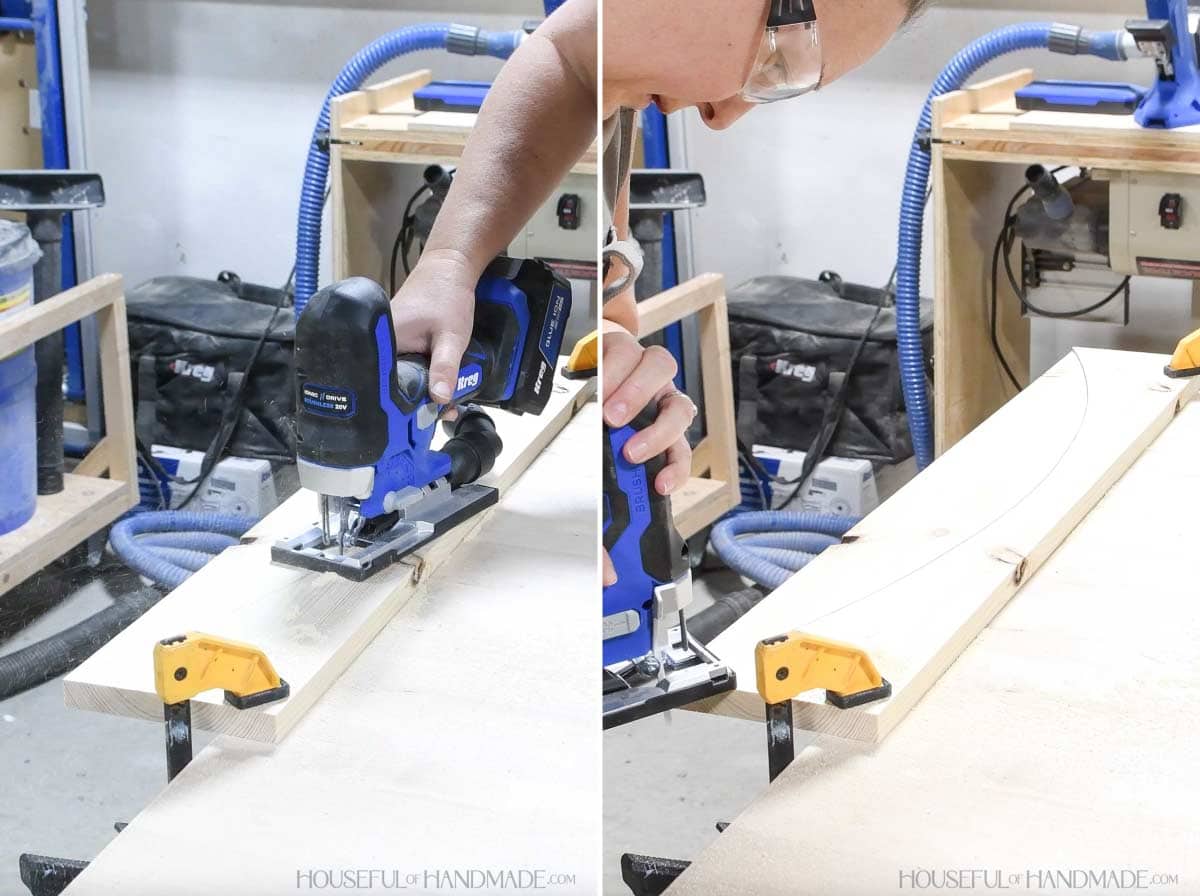
Then cut the arch out with a jig saw.
Be careful when cutting through the corner as it can chip out the tip. Instead start at the outside on both corners and come in to prevent this.
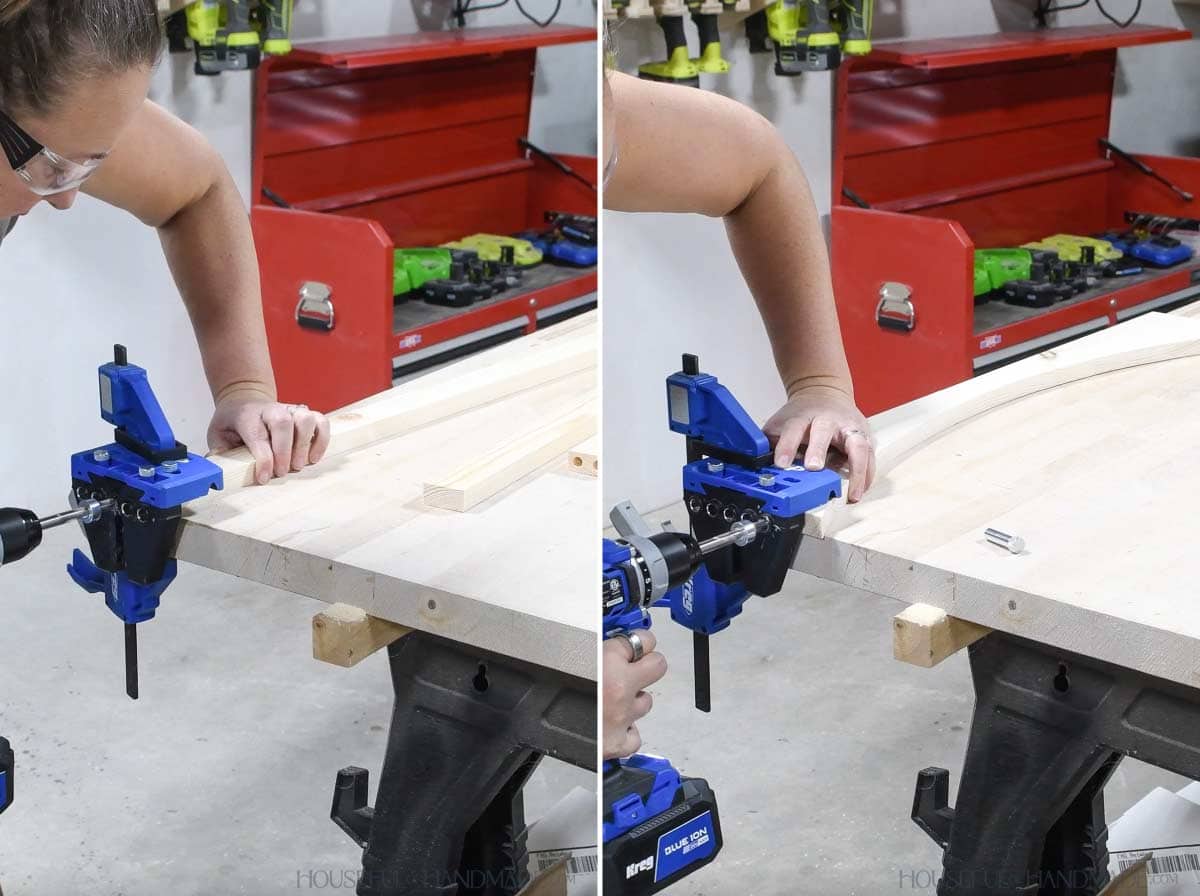
Drill dowel holes on the ends of the face frame rails.
With Kreg’s dowel jig, I placed the pin in the front of the jig marked 1 1/2″. Then pressed the end of the face frame flat against the jig and up against the pin.
This perfectly aligned the holes in the center edge of the 1 1/2″ wide face frame boards.
For the arched rail, I lined the jig up with the top of the board, then drilled holes in the top, middle and bottom guides.
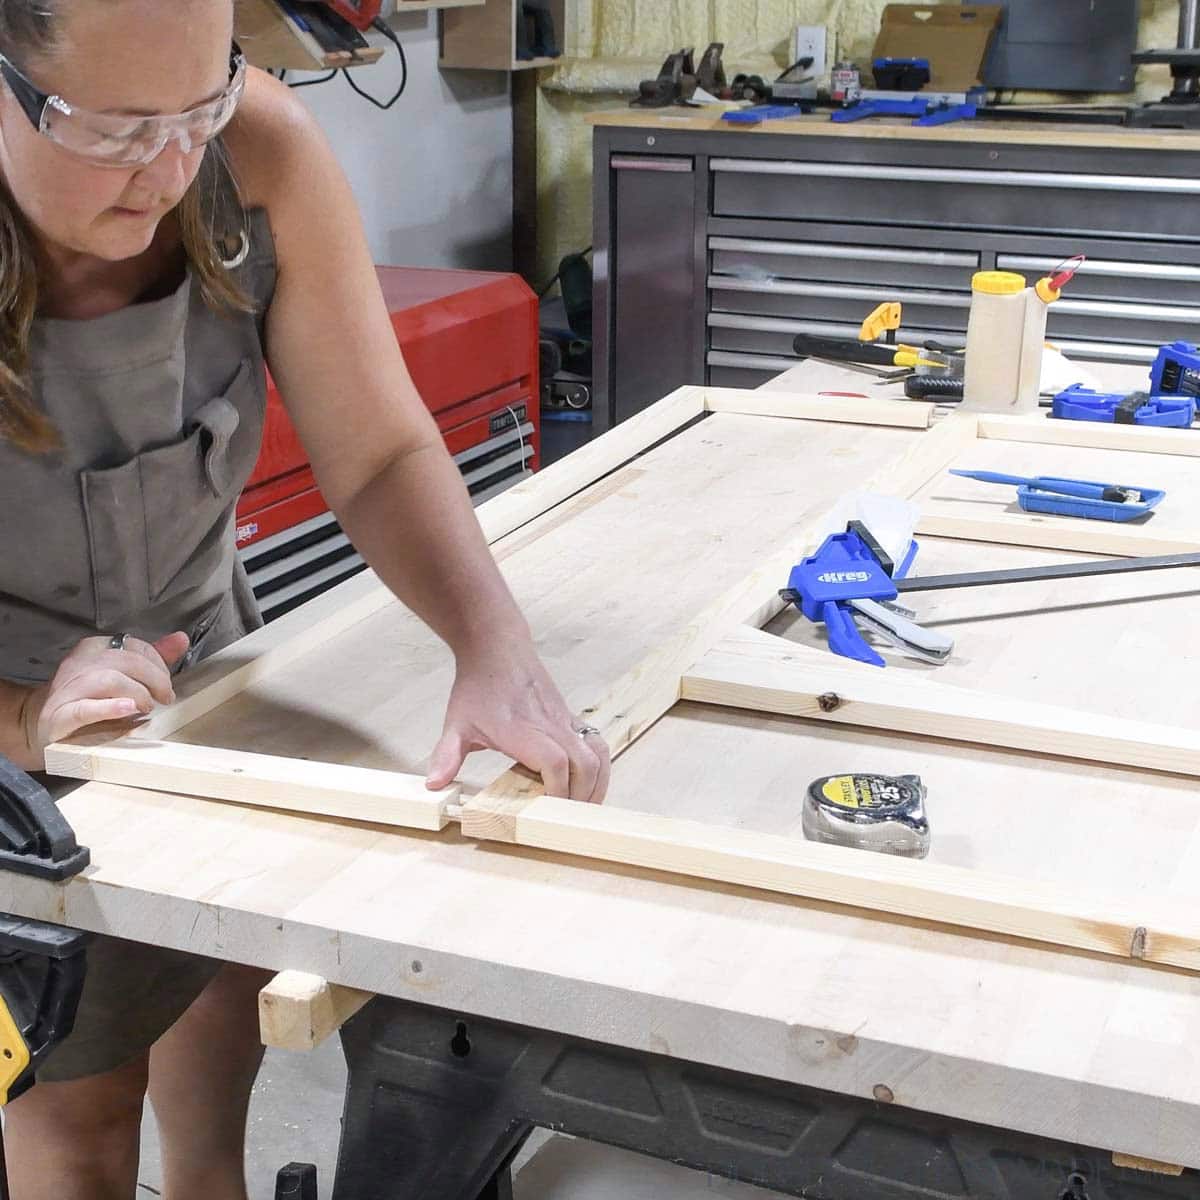
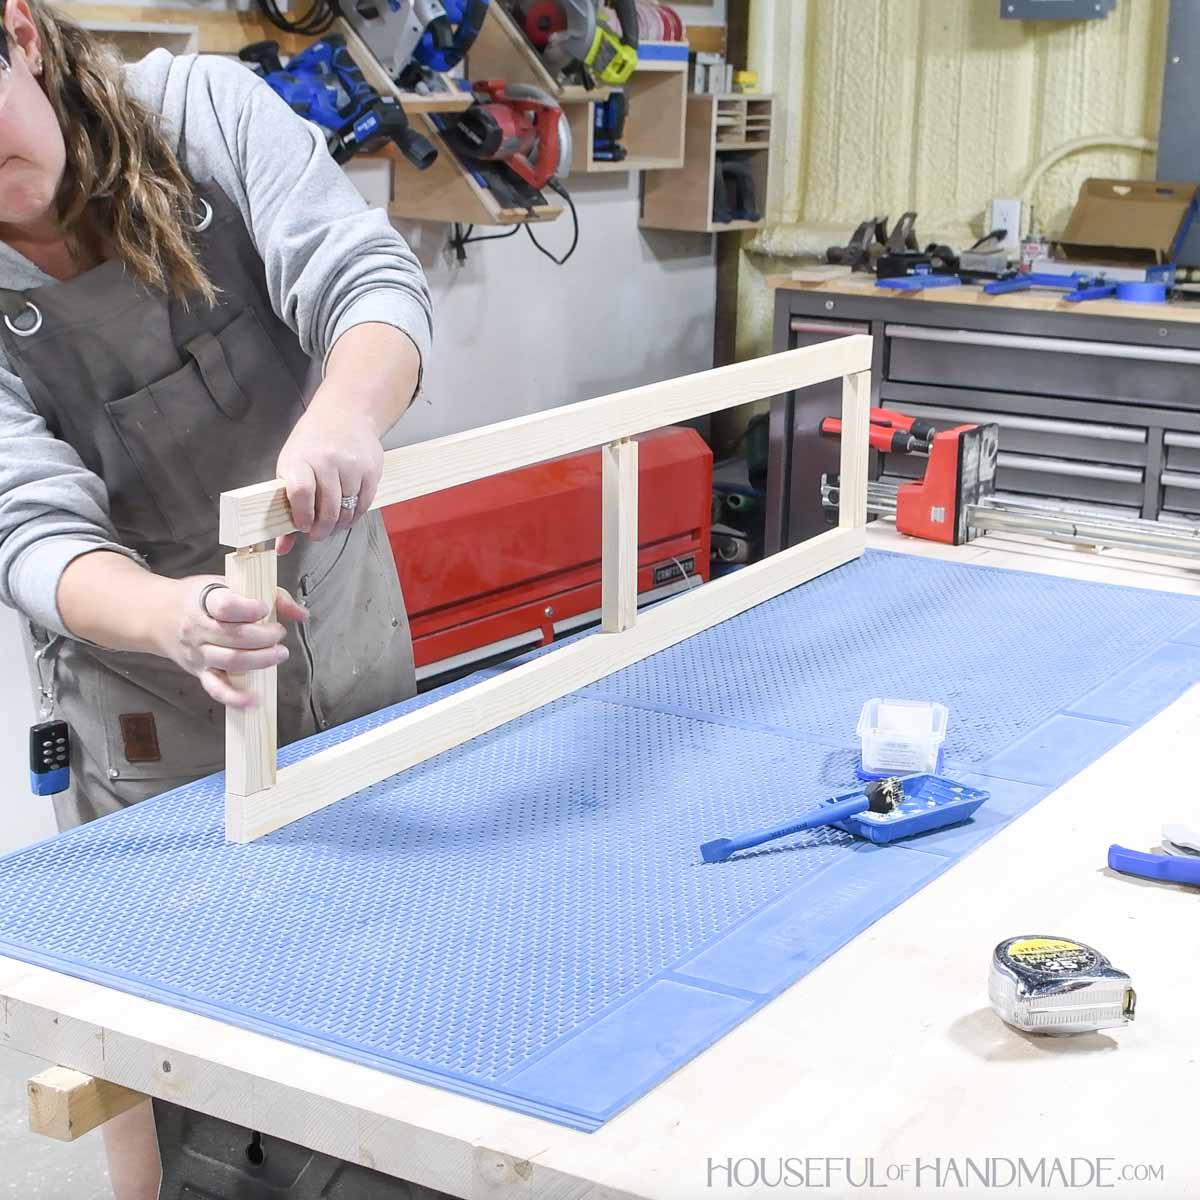
Drill dowel holes in the sides of the face frame stiles so the face frame according to the diagram in the plans.
The top of all the rails should line up with the top of your shelves in the cabinet.

Dry fit, then secure with glue and 1 1/2” dowel pins.
First add all the rails to one stile. Clamp until dry.
Then add dowel pins to the second stile.
Press it up against the rails, taking care to align them with the dowels. And clamp firmly, but not too tight to cause the frame to bow.

For the larger cabinet, repeat for the two additional rails and stile to finish the face frame.
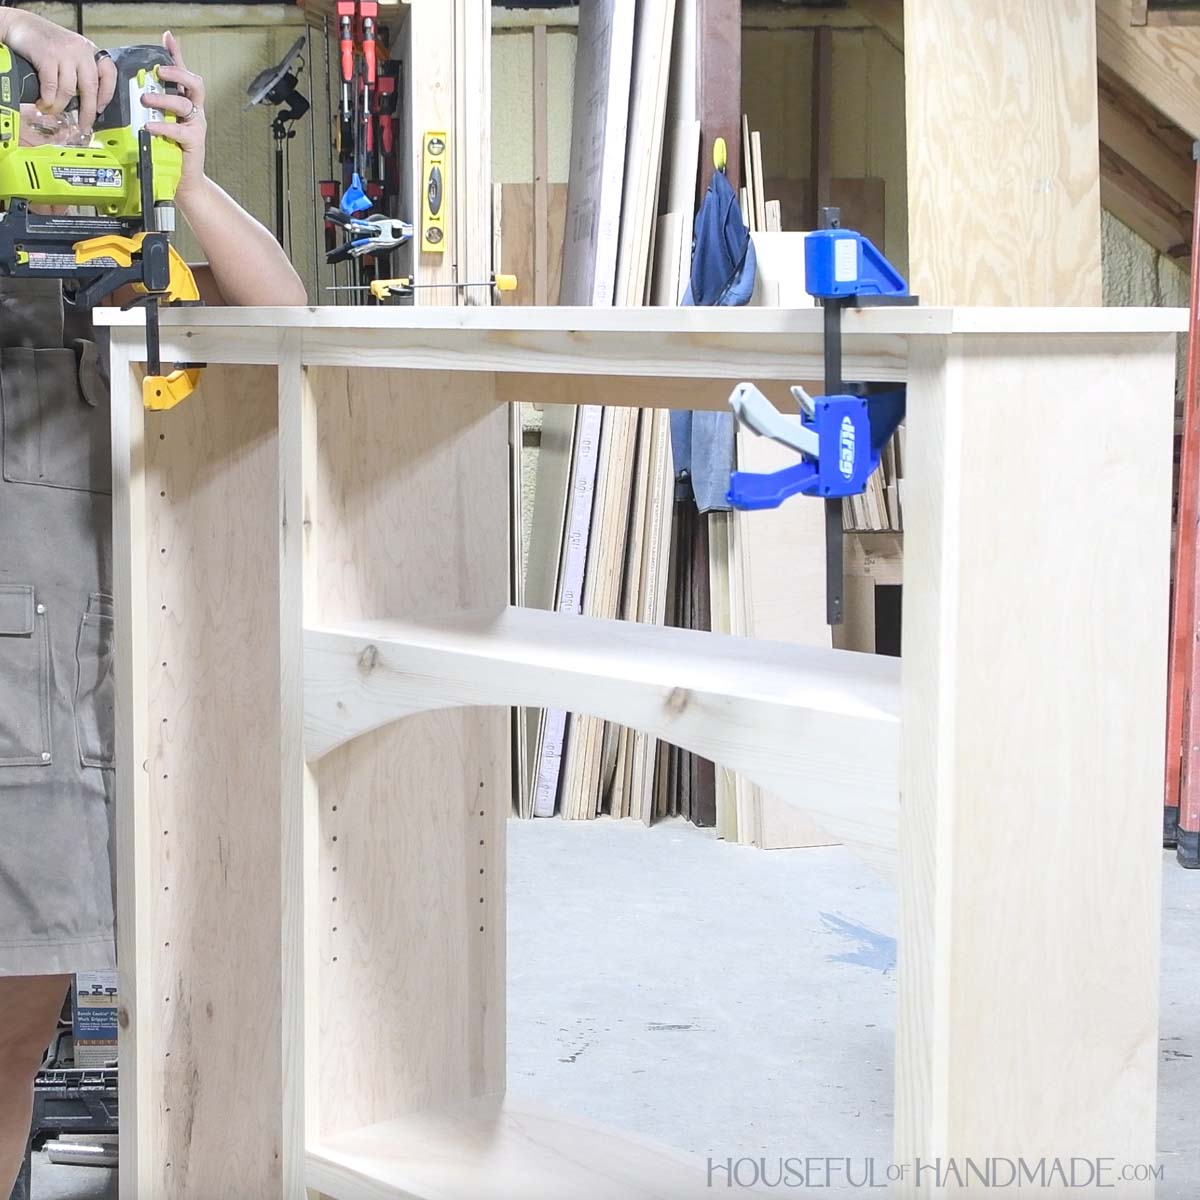
STEP 3- Finish the cabinet
Line the face frame up on the front of the cabinet so the sides are flush and the top of the rails are flush with the top of the shelves.
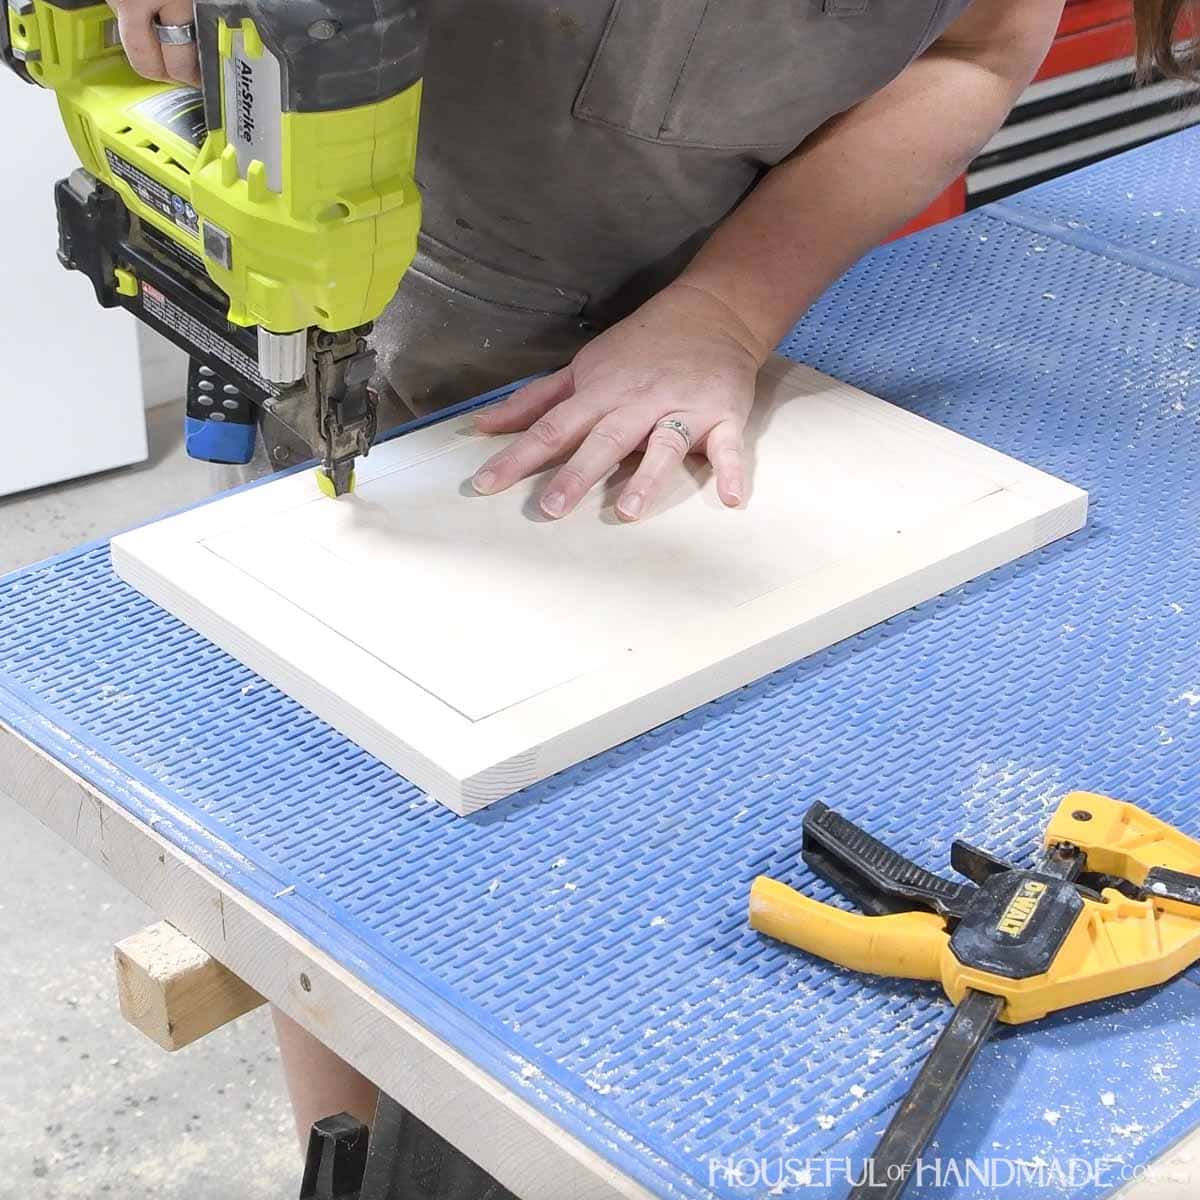
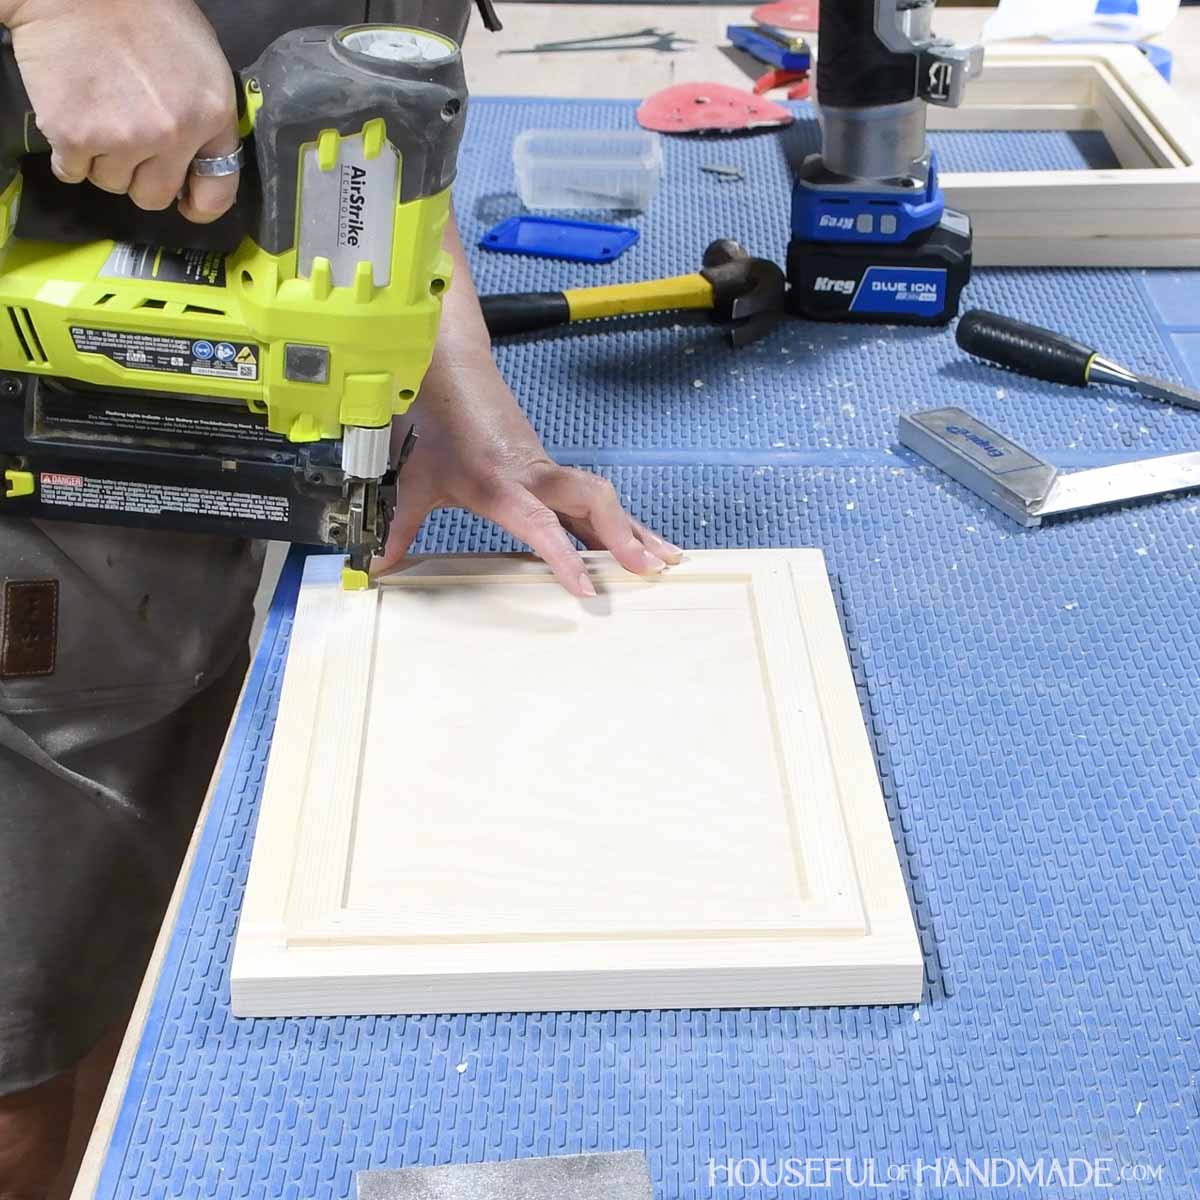
Secure with glue and 1 1/4” brad nails.
Fill the nails holes with wood filler. Make sure to use stainable filler if you plan to stain your cabinet.
Sand or router the edges flush if needed.
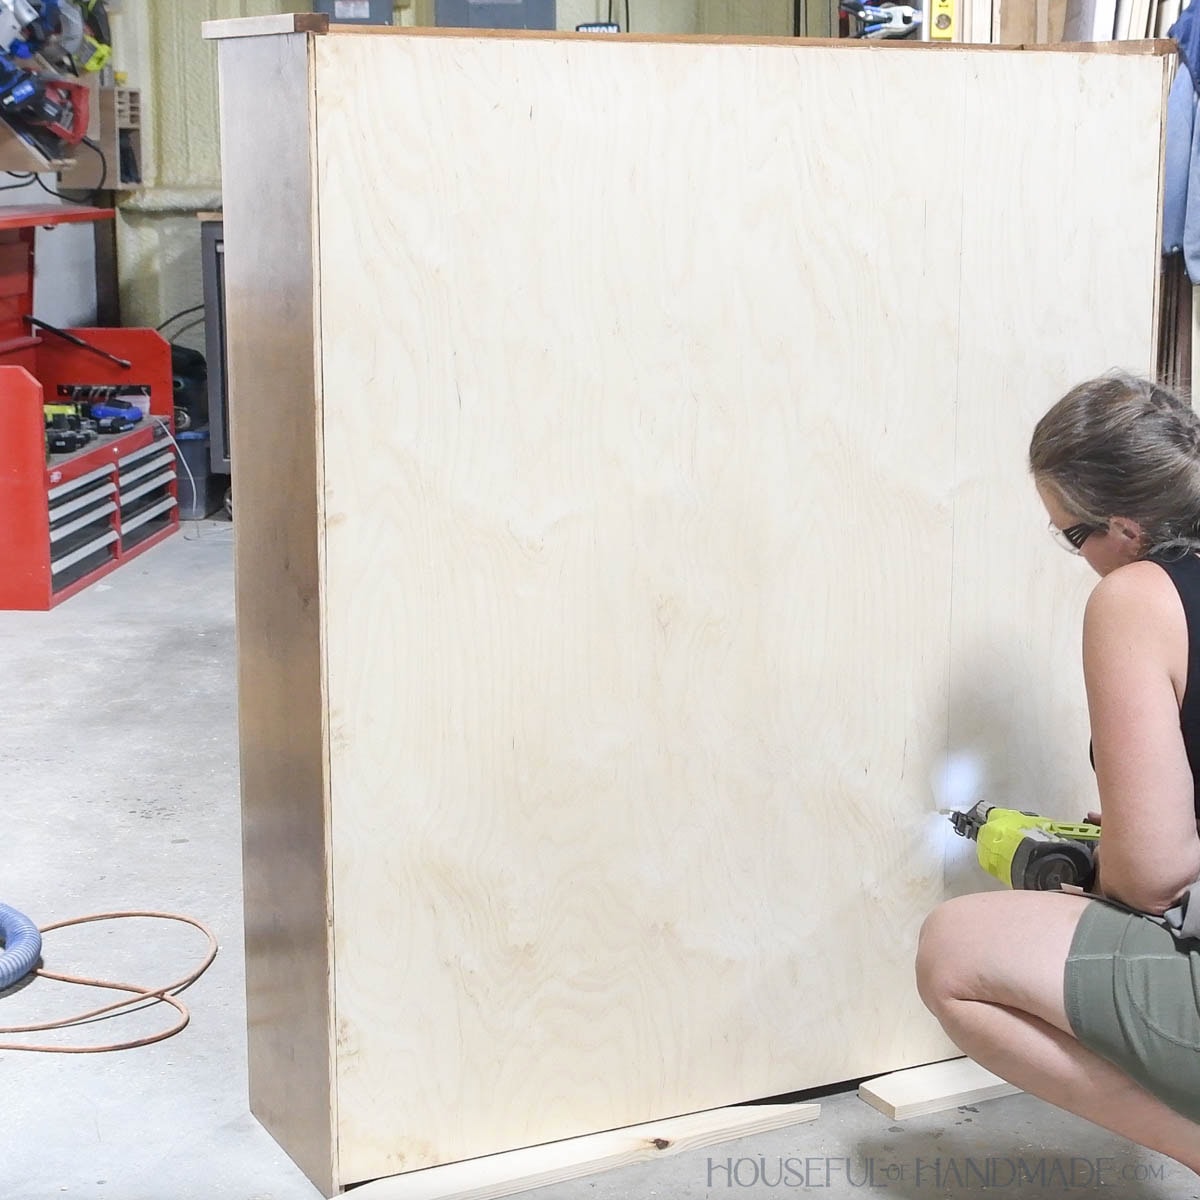
Attach the top trim boards to the top of the cabinet with 1 1/4” brad nails so they hang over the edge 1/2” and are flush with the back.
If your cabinet is going to be up against another cabinet or a wall, do not add trim to that side, instead cut the front trim so the side up against the wall is flat and flush with the edge of the cabinet.
I decided to sand and finish my cabinet before adding the back. I found it much easier to be able to get inside the shelves to sand and seal them without the back installed.
To attach the back, sit it inside the grooves. It should be flush to the top of the cabinet and to the bottom of the lower shelf.
Secure with 5/8” brad nails into the sides and the back of the shelf boards.
Cover the front of the plywood shelves with edge banding or glue an 1/8” strip of the lumber used for the face frame.
STEP 4- Build doors
Drill holes on the ends of the door frame rails and coordinating holes in the ends of the door stiles.
Dry fit, then secure with glue and 1 1/2” dowel pins. Clamp until dry.
Build the tall door the same way, but use a third rail in the center.
Router a 1/4” x 1/4” groove around the inside back of the door frame, then chisel the corners so they are square.
Learn other ways to build cabinet doors, including one without any routing here.
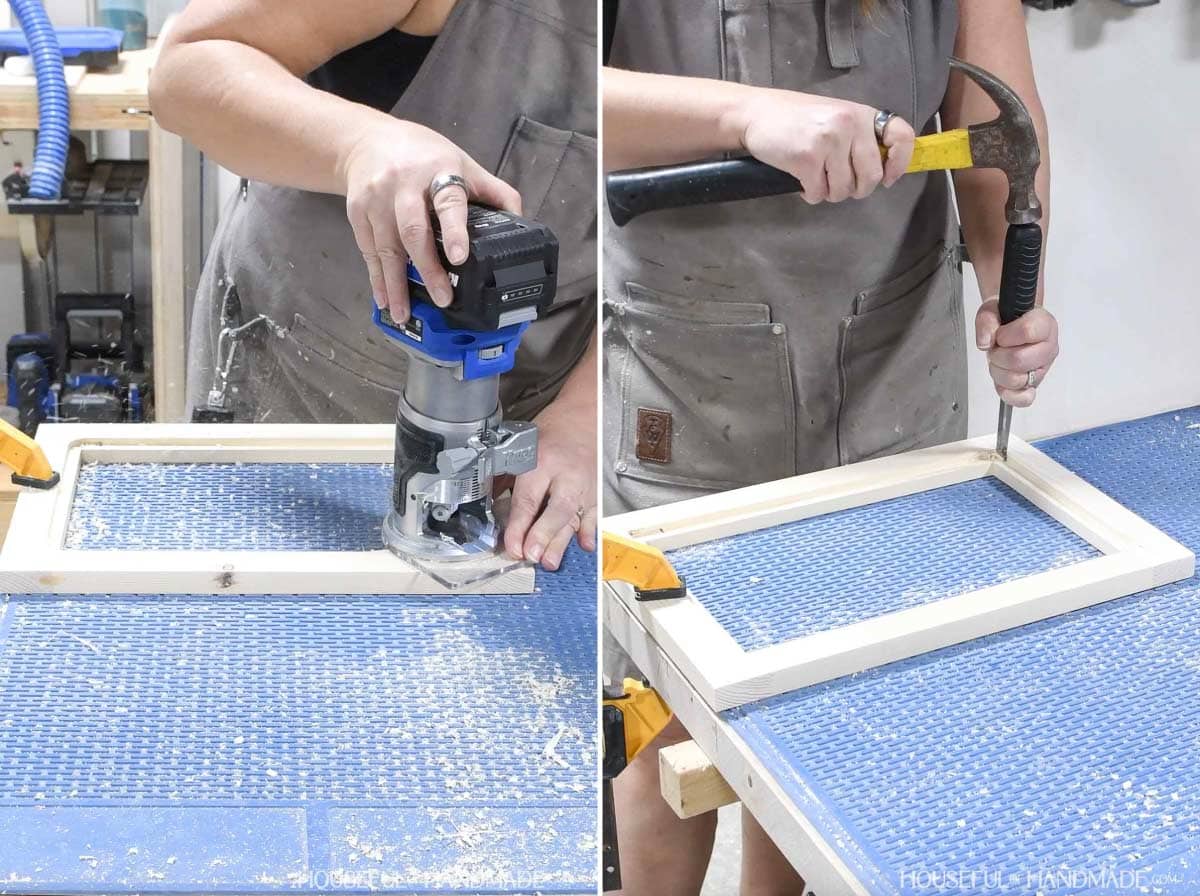
Cut and place the door panel inside the groove. Adjust as needed.
Secure with a few 5/8” nails around the perimeter.
If desired, cover the edge of the plywood and routed groove with 1/8” thick strips ripped off an extra piece of 1×2.
Secure with 5/8” nails.
STEP 5- Install cabinet
Sand and stain/seal or paint your finished cabinet and doors before installing. Make sure to seal the bottom edges of the plywood and face frame well in case any water is spilt on your countertop.
I stained my cabinets with Early American stain by Minwax and sealed them with 3 coats of a wipe on polyurethane.
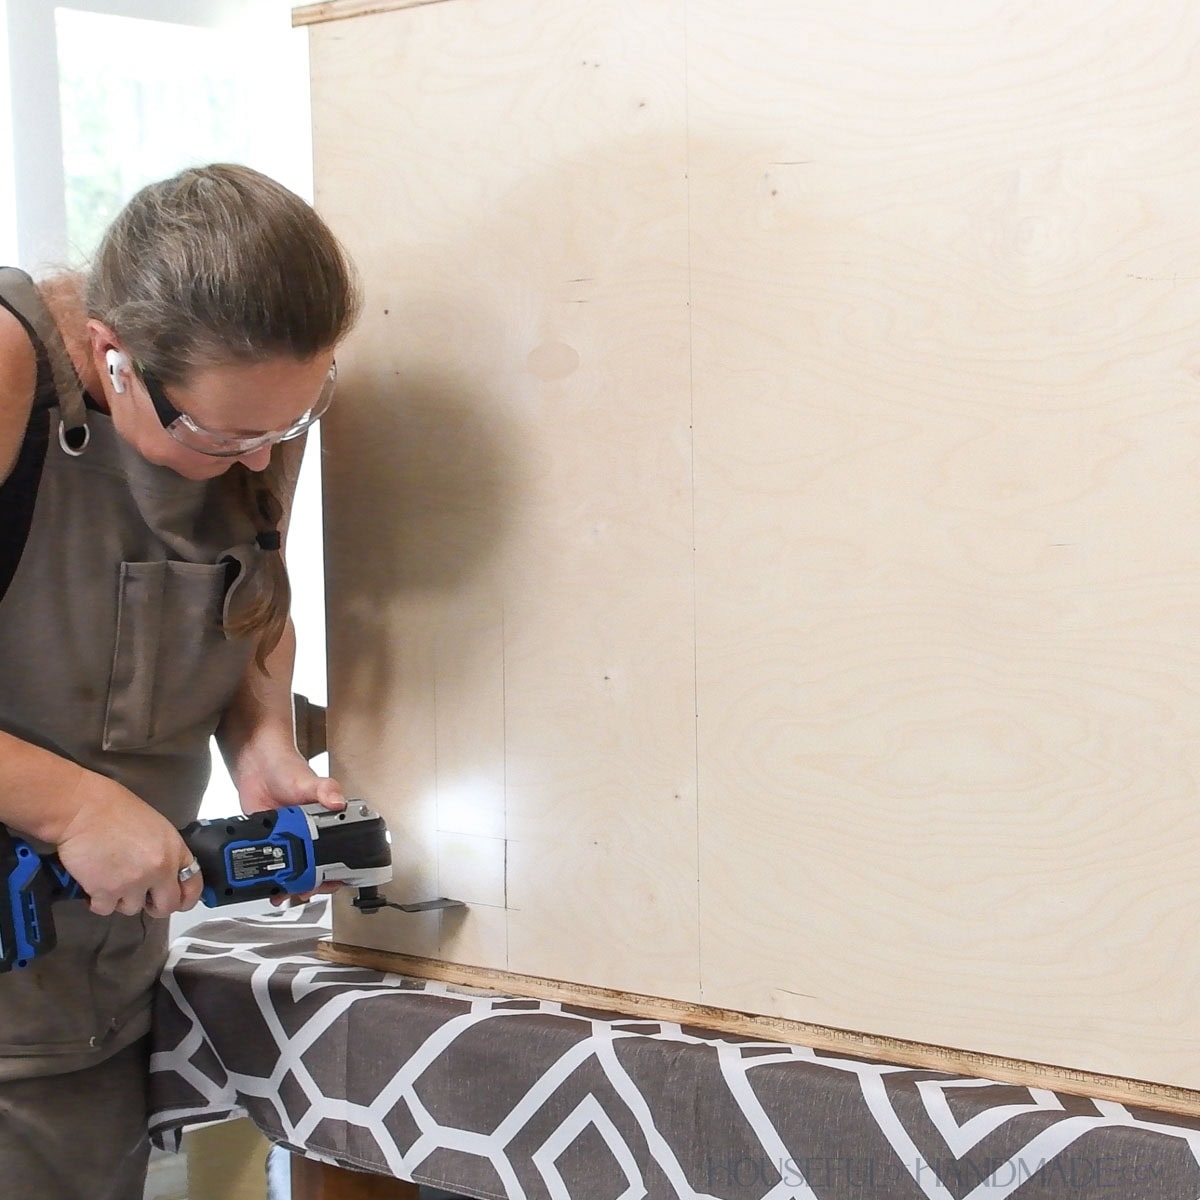
If you have outlets in the wall where you want to put your cabinet, carefully measure where they are and cut a hole into the back panel.
I removed the outlet cover on my outlets, and loosened them from the box before installing the cabinet.
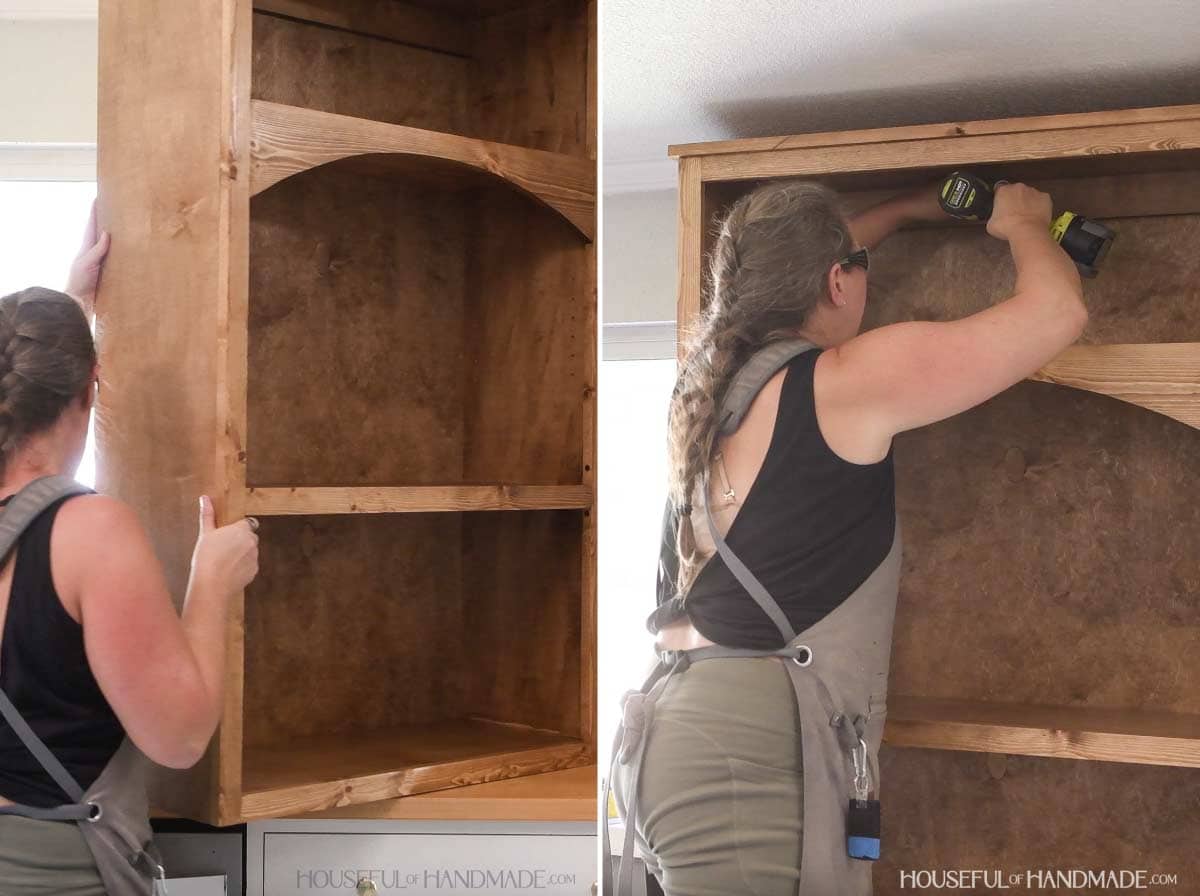
Place the cabinet on top of the countertop so it is flush against the wall and any cabinet/wall next to it.
Secure the cabinet to the wall studs with 2 1/2″ cabinet screws through the support in the back. I also attached it to the cabinet on the side.
I pulled my outlet through the hole cut in the back. Then reattached the outlet to the box and put the cover back on.
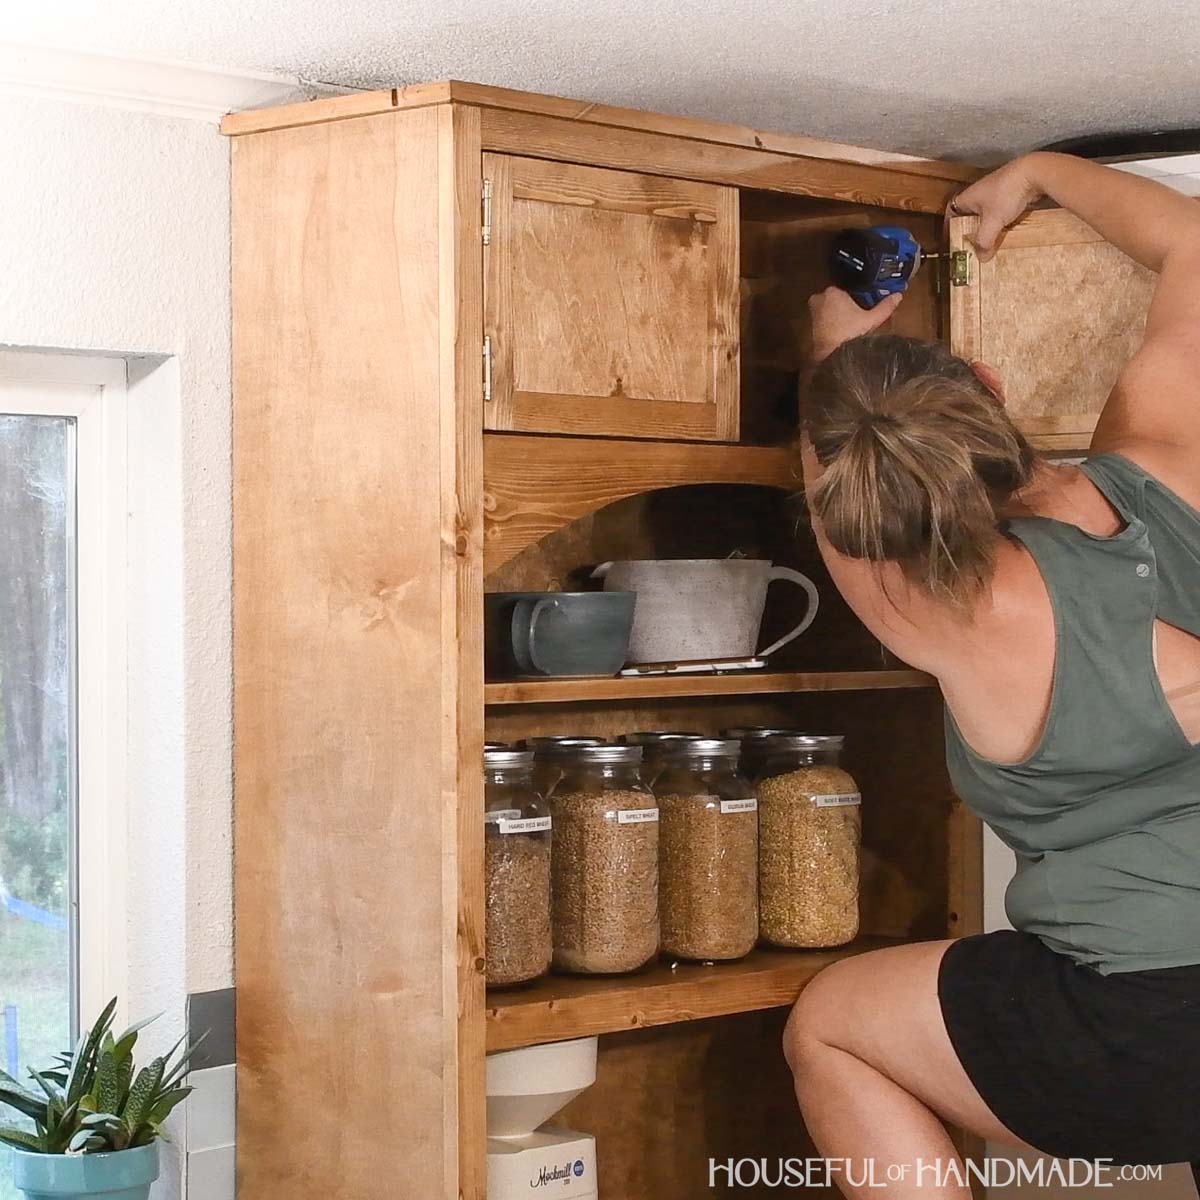
Finally it was time to hang the doors! Set them inside the upper compartment of the cabinet with 1/8” reveal all the way around.
Attach with inset hinges for face frame cabinets. Then add a knob or pull to each cabinet door.
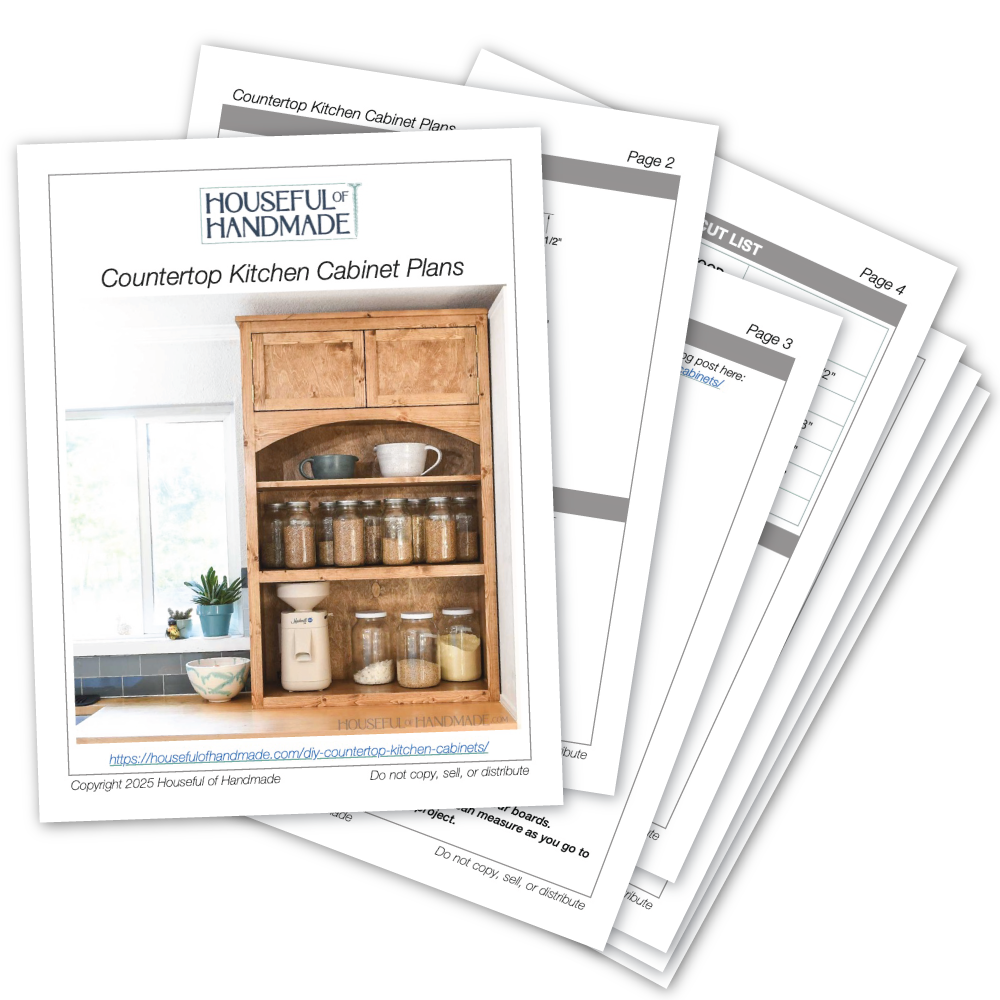
Premium plans include:
- Recommended Tools
- Shopping list
- Easy to read cut list table
- Cut diagrams
- Step-by-step instructions with 3D renderings
- Helpful resources
- BONUS: 3D SketchUp file
You did it!
Load up your new cabinet with dishes and enjoy all the beautiful storage. I love all the additional space it added to my kitchen.
Happy building!
