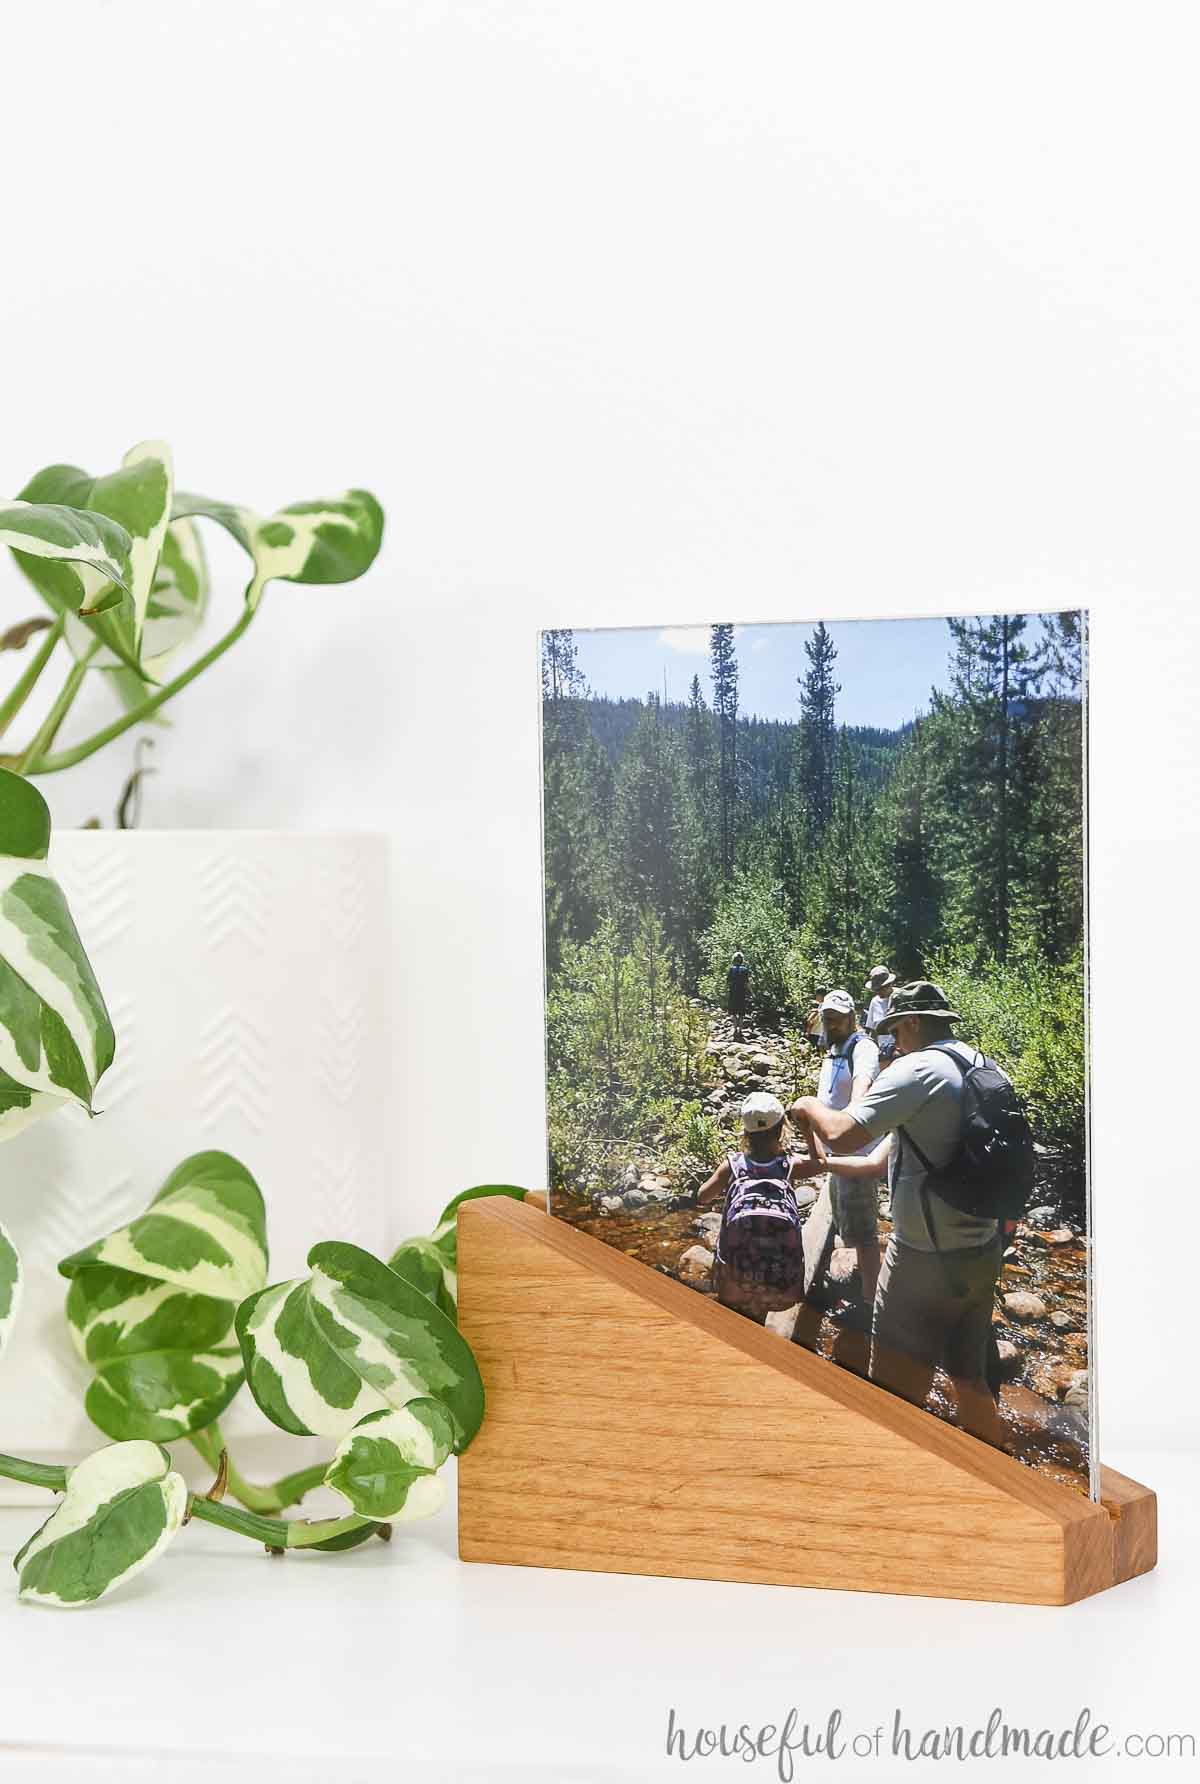
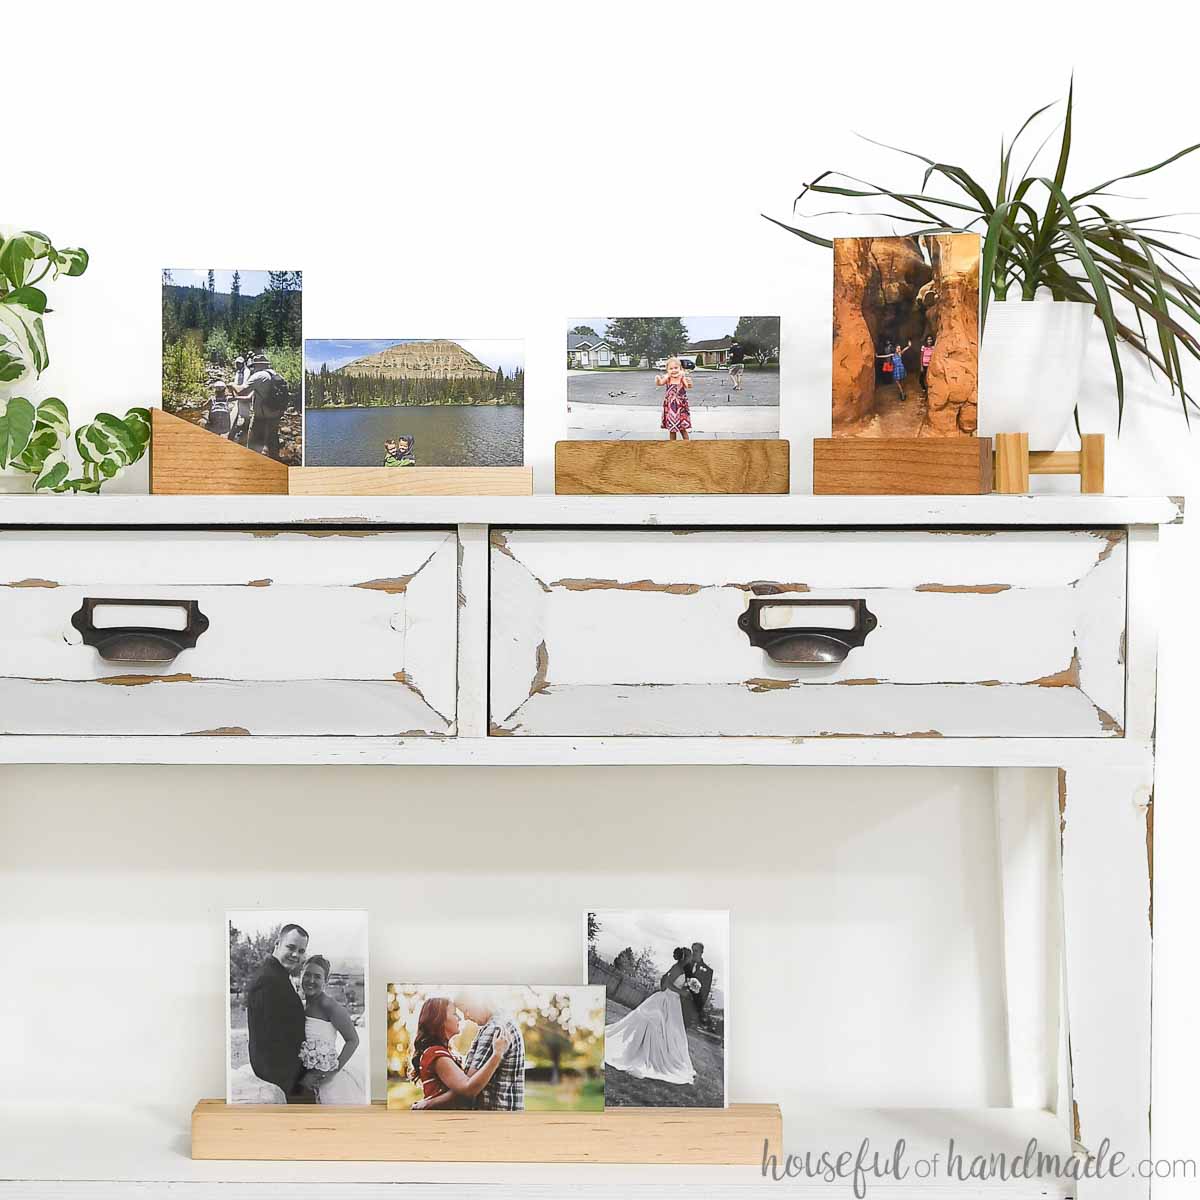
No mitered corners necessary to make these fun picture holders.
I knew I was saving all those small scraps of wood for a reason…
To turn them into these fun & simple picture frames!
Maybe frame is the wrong word, because the wood does not frame the photo. But instead it creates a block to hold the picture safely between two pieces of acrylic or plexiglass.
This post may contain affiliate links. As an Amazon Associate I earn from qualifying purchases. Click here to read my full disclosure policy.
These frames are so fast to make, use up lots of scraps, and make great DIY gift ideas!
The best part about these DIY picture frames is all the different ways you can make them. Get creative and have fun!
Use whatever scraps you have. I recommend hardwood boards since they are heavy and less likely to splinter or crack.
Plus the hardwood will look amazing with just a little bit of sealer on the finished picture frame blocks.
I recommend sticking to regular printed picture sizes (ie, 4×6, 5×7, etc). This makes it easy to change out pictures in your frame.
And you can buy pre-cut plexi sheets in a pack. Then it’s just as easy as cutting out your blocks in different ways.
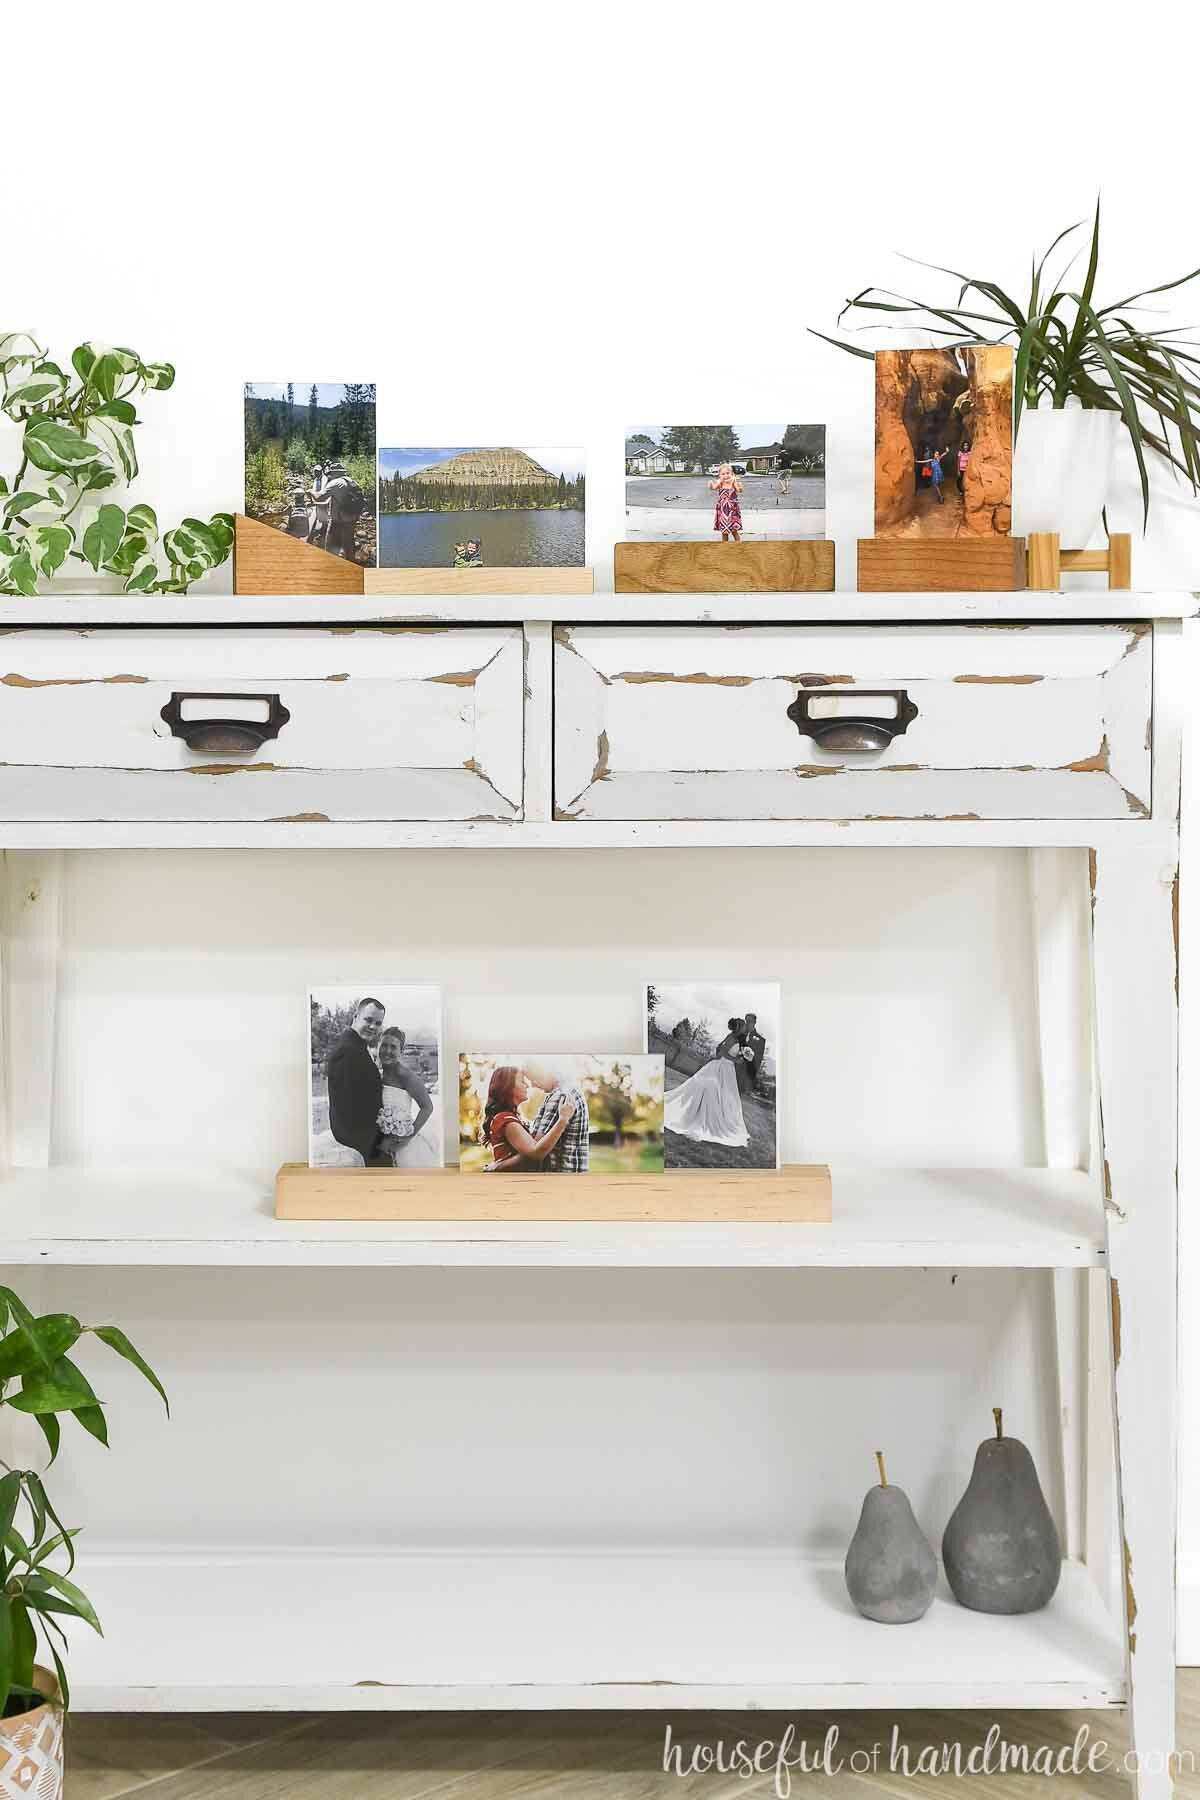
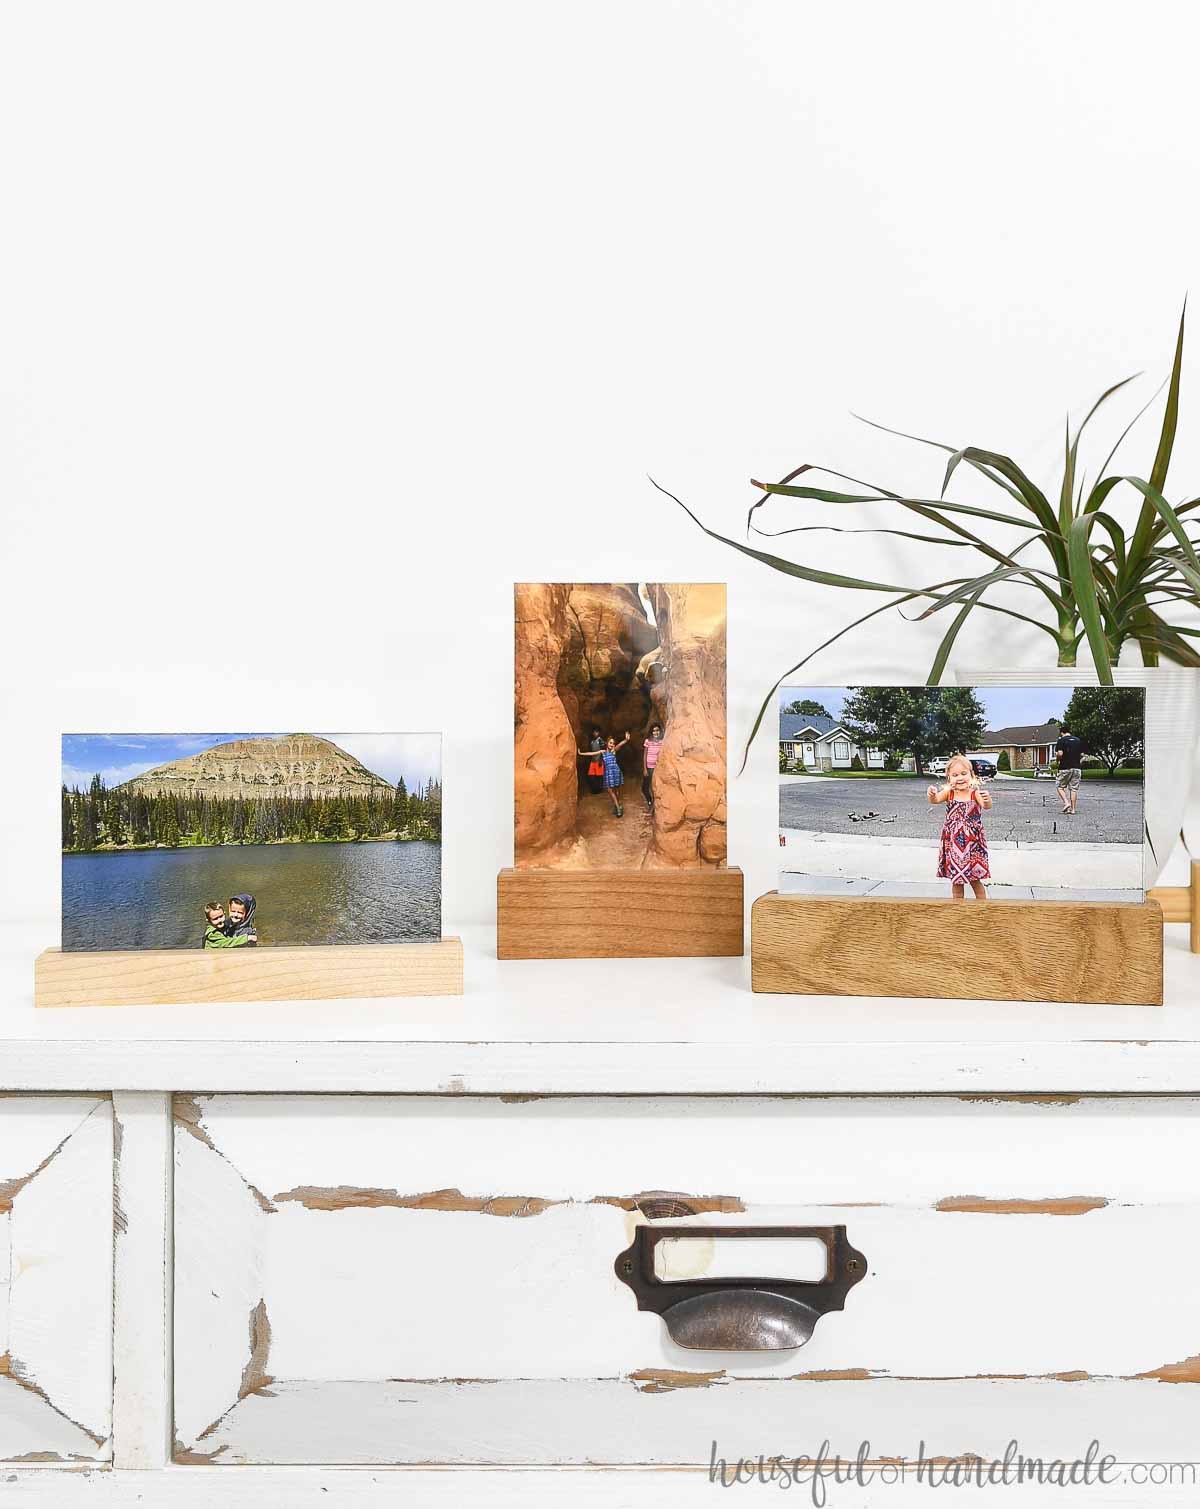
You can cut the blocks to be just larger than the acrylic, either vertical or horizontal, and it will hold one picture.
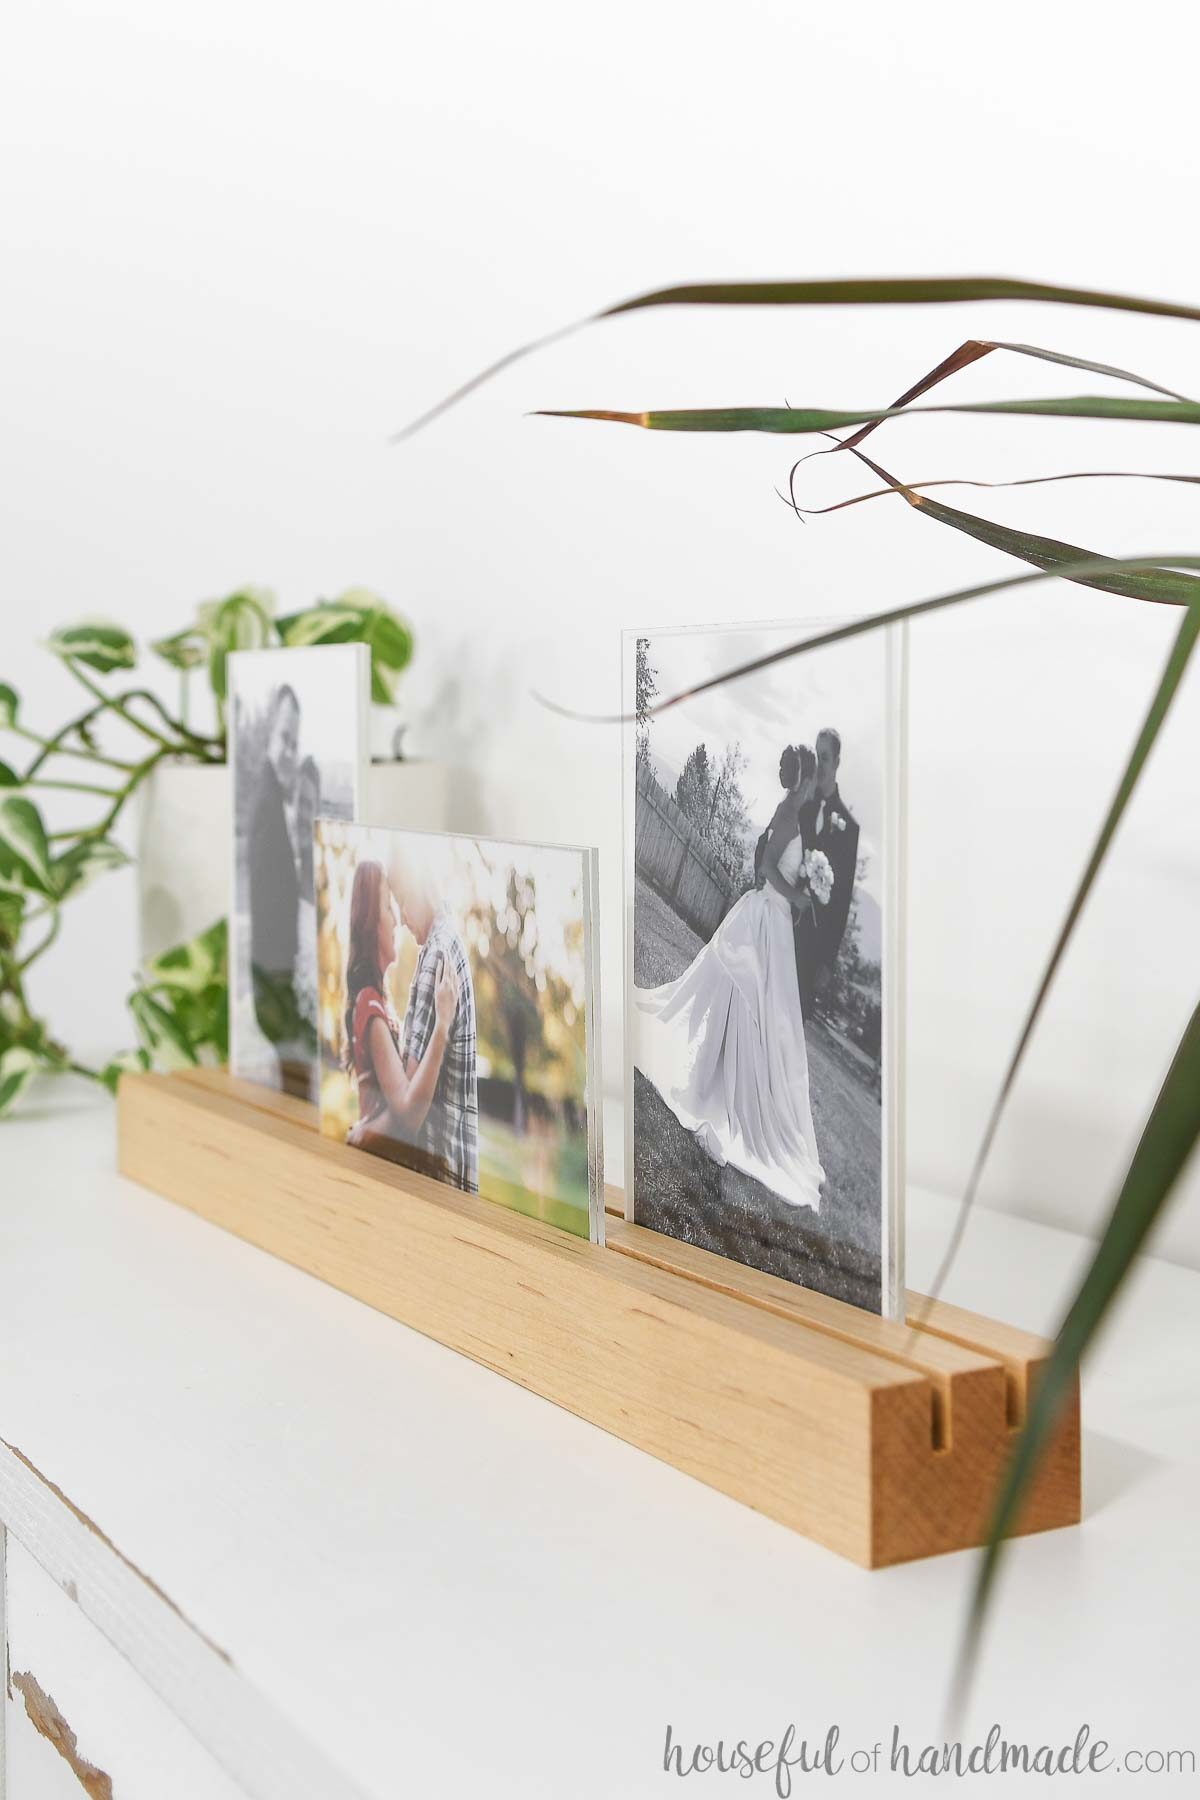
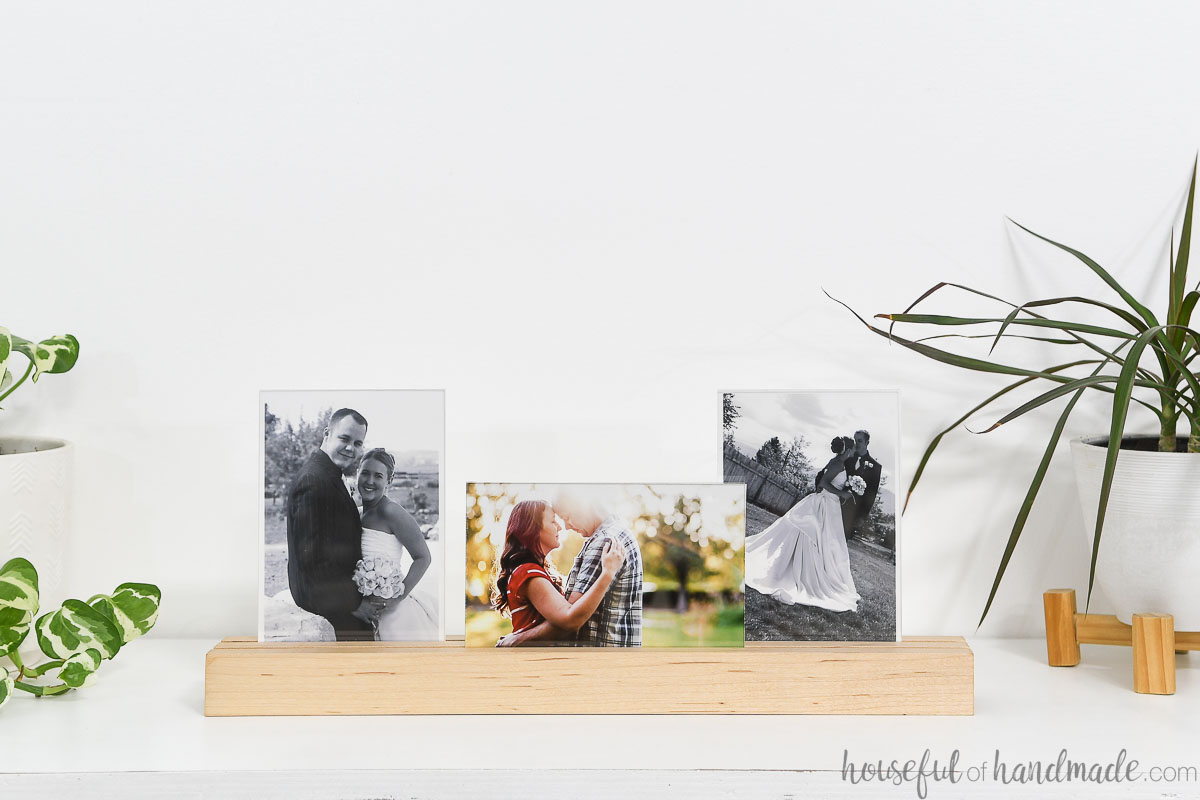
Or you can cut a long block of wood with multiple grooves to hold a variety of pictures in any orientation.
This one was perfect for holding some of our wedding photos and a more recent picture.
Or have fun and cut the blocks on a diagonal.
This creates a unique frame around the bottom of the picture.
DIY Gift Ideas
Picture frames always make amazing DIY gifts! And you can add photos of you together to make it extra special.
This week my friend Shara, from Woodshop Diaries, and I have shared easy DIY gift ideas every day! That is 10 new handmade gifts you can use for anyone on your list.
Check out all the new ideas below or check out these 50+ handmade gift ideas.


How to Make a Simple Picture Holder
Tools needed:
- Miter saw
- I recently upgraded to this larger sliding miter saw (watch for it to go on sale), but all my projects before were built with this inexpensive miter saw that I loved.
- Table saw
- You could also use a router or circular saw to cut the grooves.
- Measuring tape
- Sander
Supplies:
- Scraps of wood in various sizes
- 0.08″ thick acrylic sheets
- I bought these already in the 4×6 size so I didn’t have to cut them.
- Sealer
STEP 1- Find and cut your wood blocks
You can make your picture holders out of any wood species and size you want.
I made my picture frames out of the following:
- 1×2 board (actual size is 3/4″ x 1 1/2″)
- 2×2 boards (actual size is 1 1/2″ x 1 1/2″)
- 2×3 boards (actual size is 1 1/2″ x 2 1/2″) for the angled one
- 1″ x 2 1/4″ board for the long one (you could use a 2×3 or 1×3)
For individual picture blocks, cut the length of the board to 1/2″ wider than the plexi or acrylic sheet.
For a multiple picture block, you can cut it as long as you want. Mine is 16″ and is holding three 4×6 photos.
STEP 2- Cut the groove
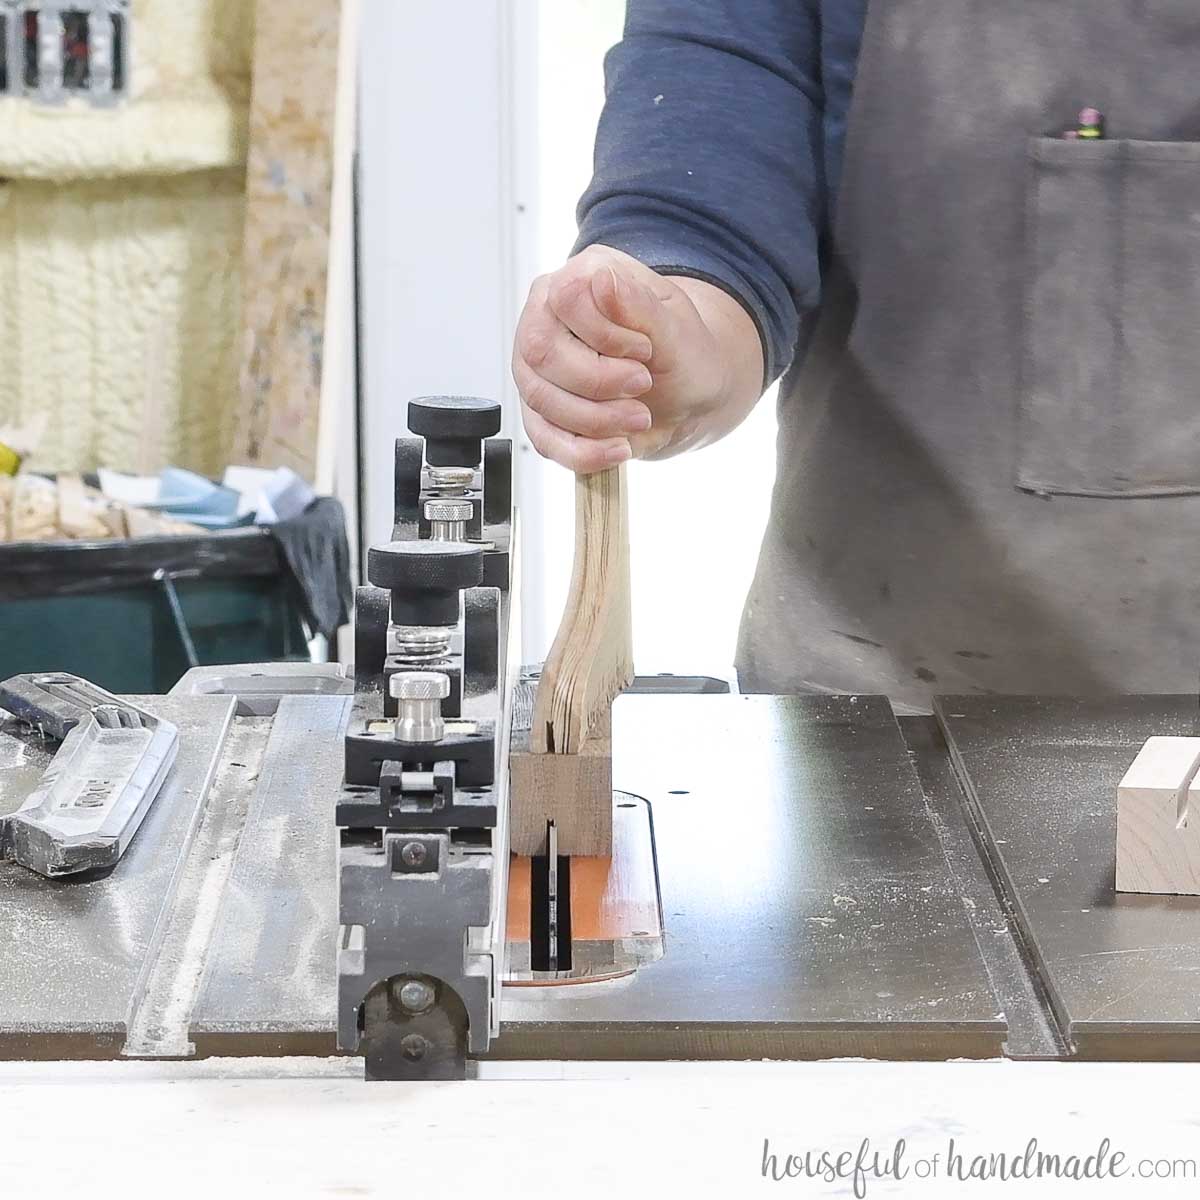
Set your table saw so the blade is 1/2″ deep.
Set the fence so the blade is roughly in the center of the block.
Don’t worry if it isn’t perfectly centered, some of mine are a bit more off and I just used the thicker side as the front.
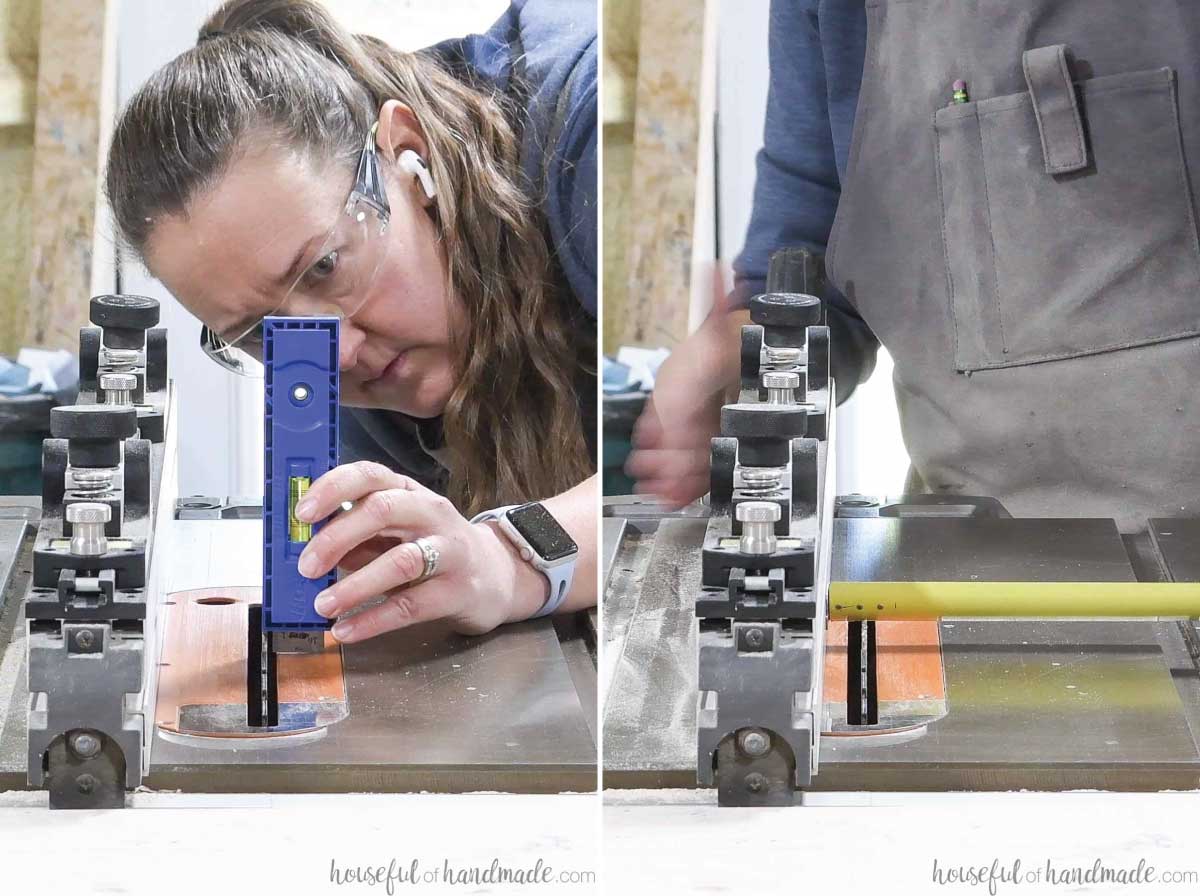
Run the block through the saw.
Be careful and use a push stick, small blocks can be dangerous on the table saw!
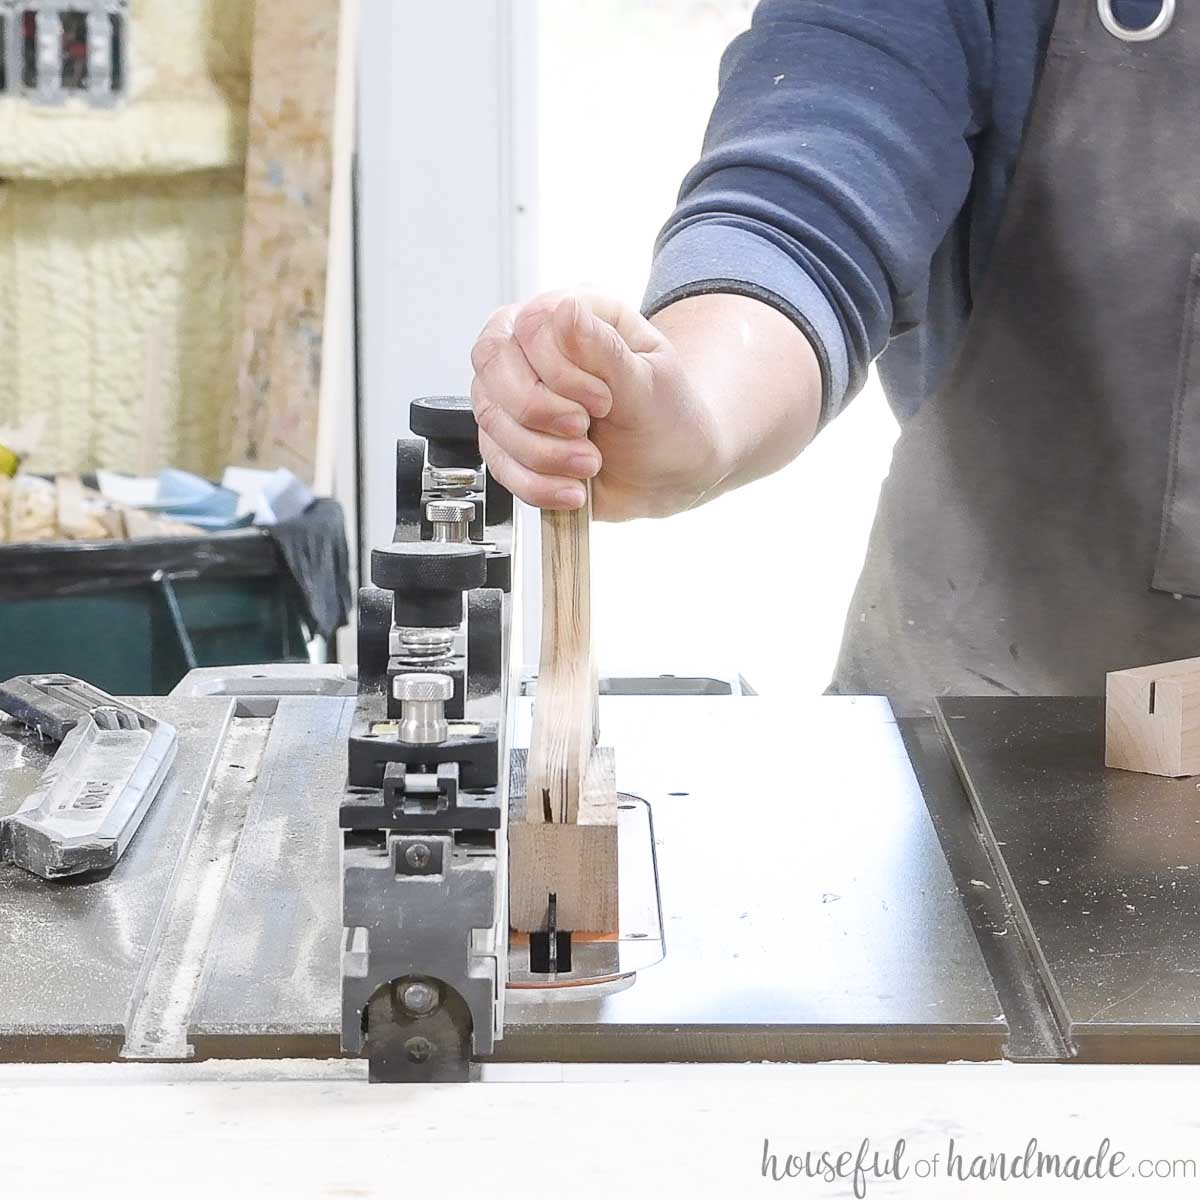
Slide the fence over so that it is barely 1 blade saw width (kerf) away from the original cut.
I used the block on to help me see where the first cut was when adjusting my blade.
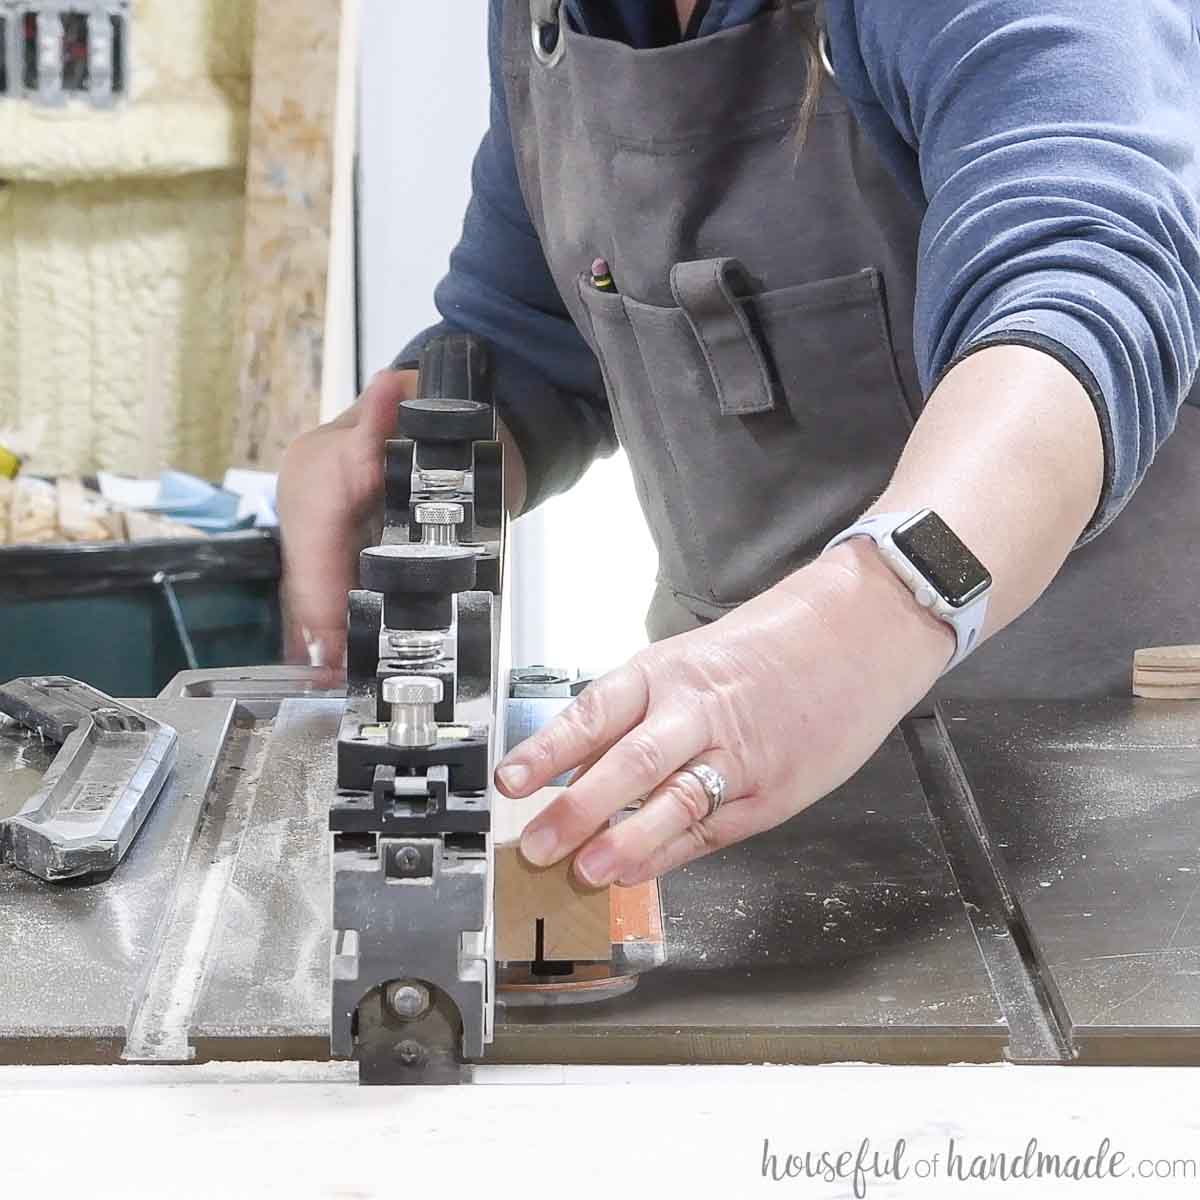
Run the block through the saw again.
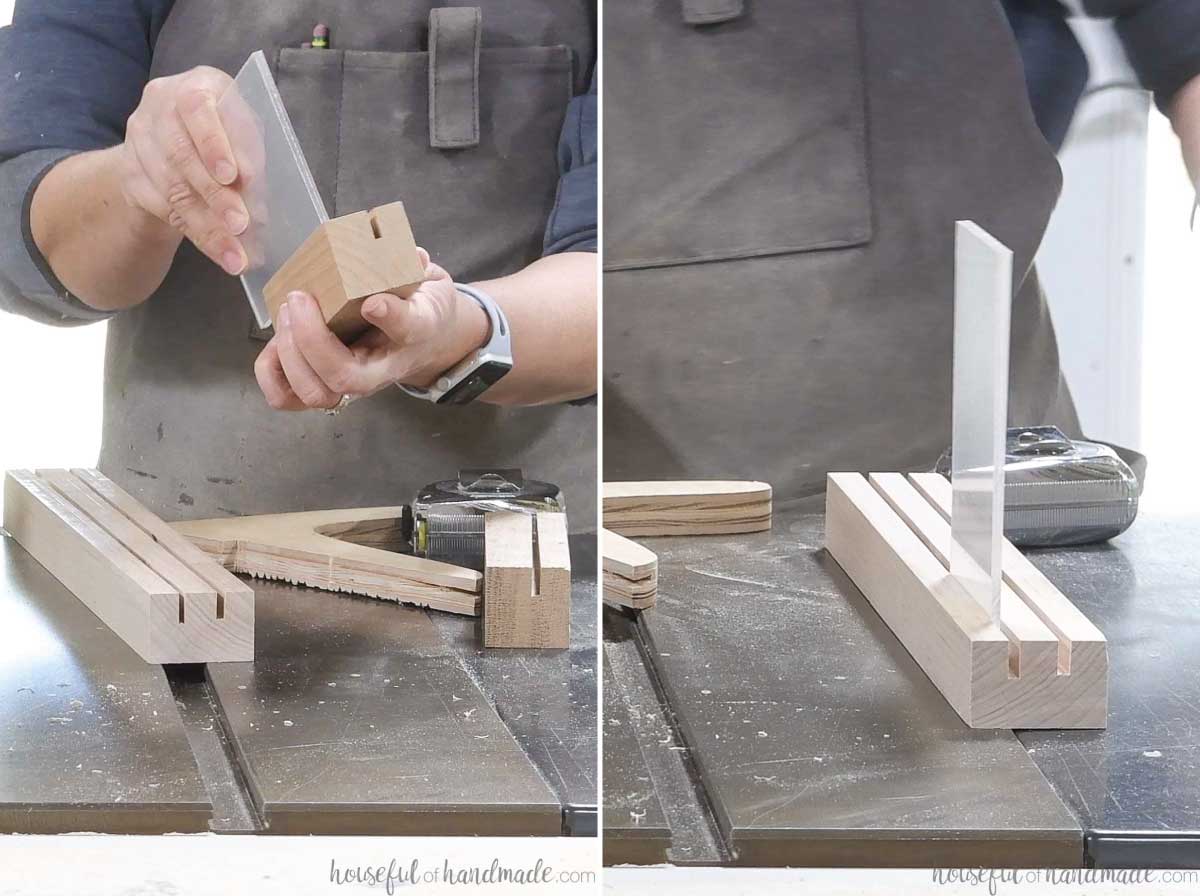
Check the size of your groove by placing 2 piece of plexi into it. It should fit snug, but not tight.
Remember you need to also fit a picture in between them too (and they have a coating on them that you will remove)
If the groove is too small, adjust the blade slightly and run the board through again. Repeat until they fit!
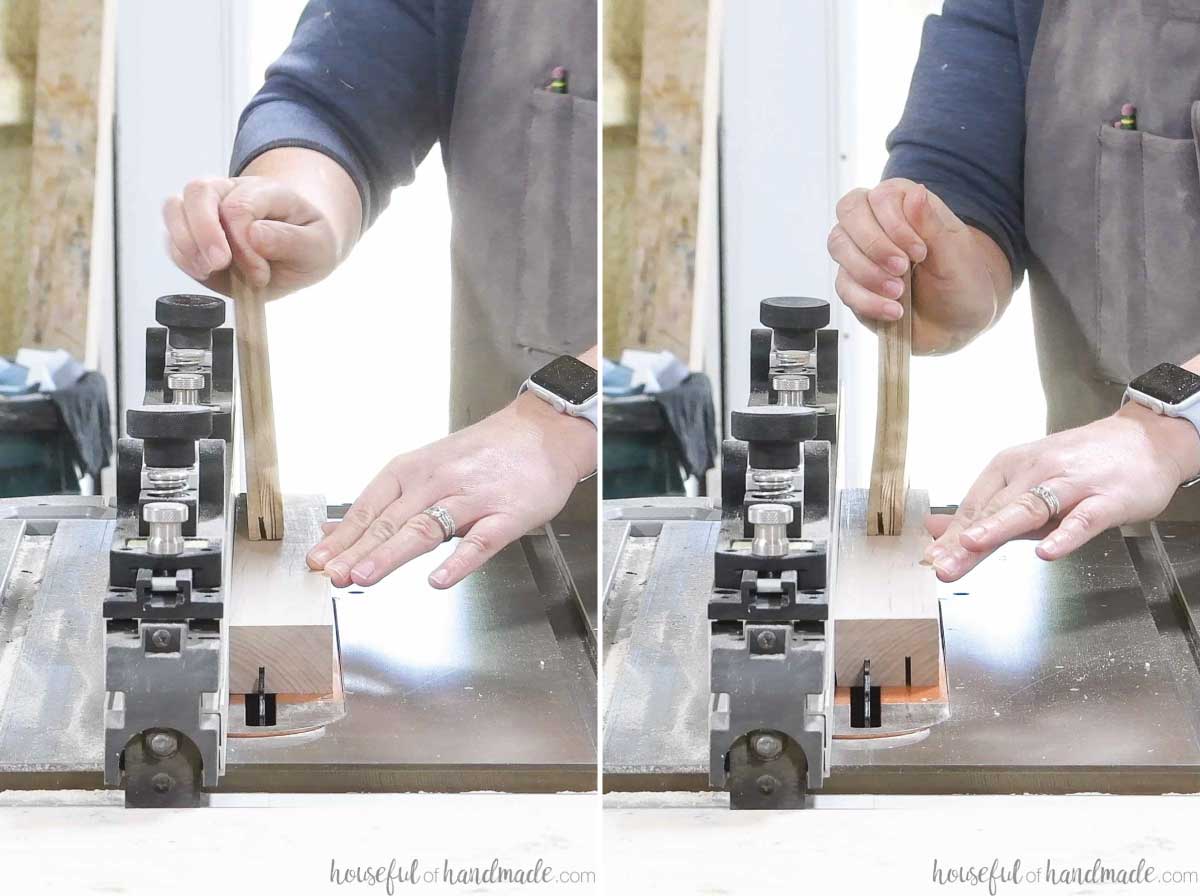
To cut the multi picture block
Divide the width of the board by thirds to get a starting point for how far away you want your fence from the blade.
Run the board through the saw to cut the first groove, then rotate it and run the opposite side through.
Adjust the fence so it is a kerf away from the original blade and run them through again. Check and repeat as needed.
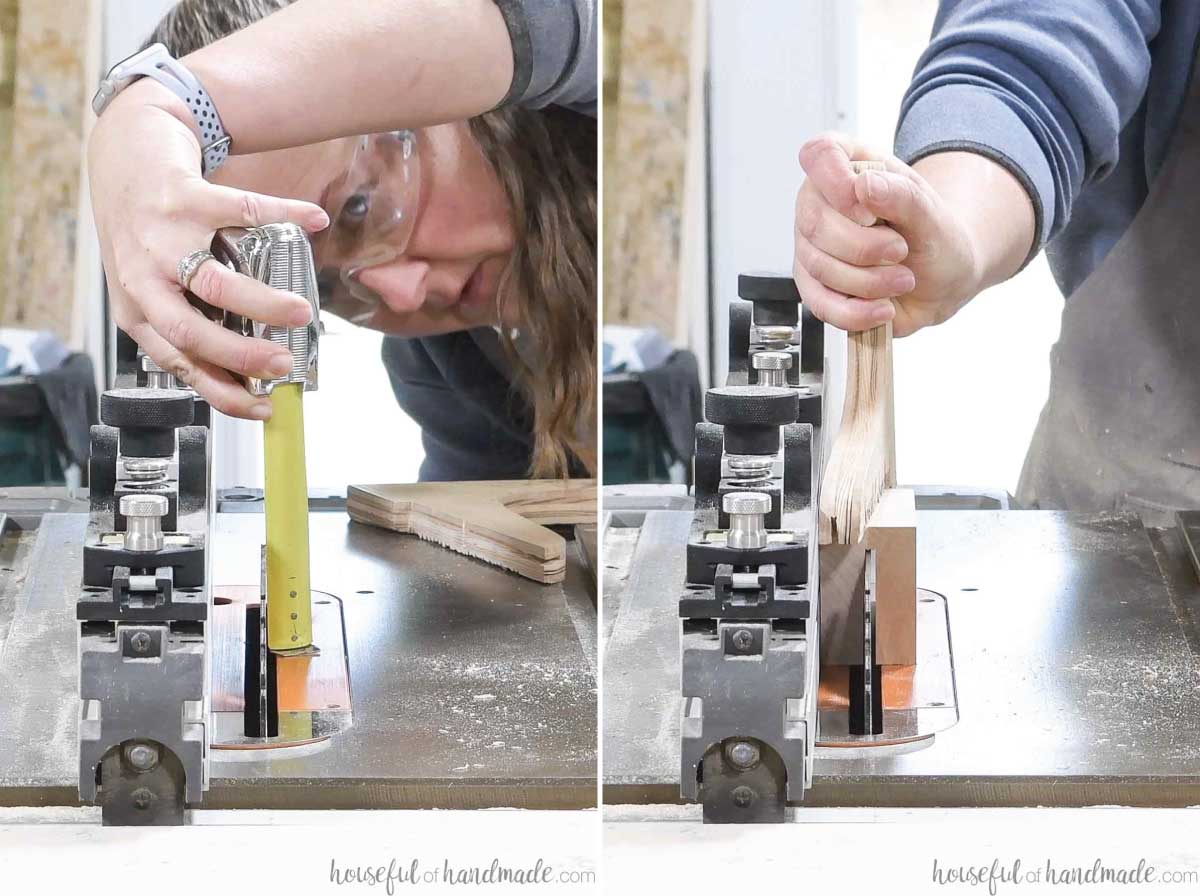
To cut the angled block
Set the table saw blade to be only 1/2″ shorter than the full width of the block. My 2×3 block is 2 1/2″ wide so I set the blade to 2″.
Cut the groove the same as the others.
Draw a line from the top corner to the bottom of the groove on the other side.
Or you can play around with the angle and size of the diagonal. It is up to you.
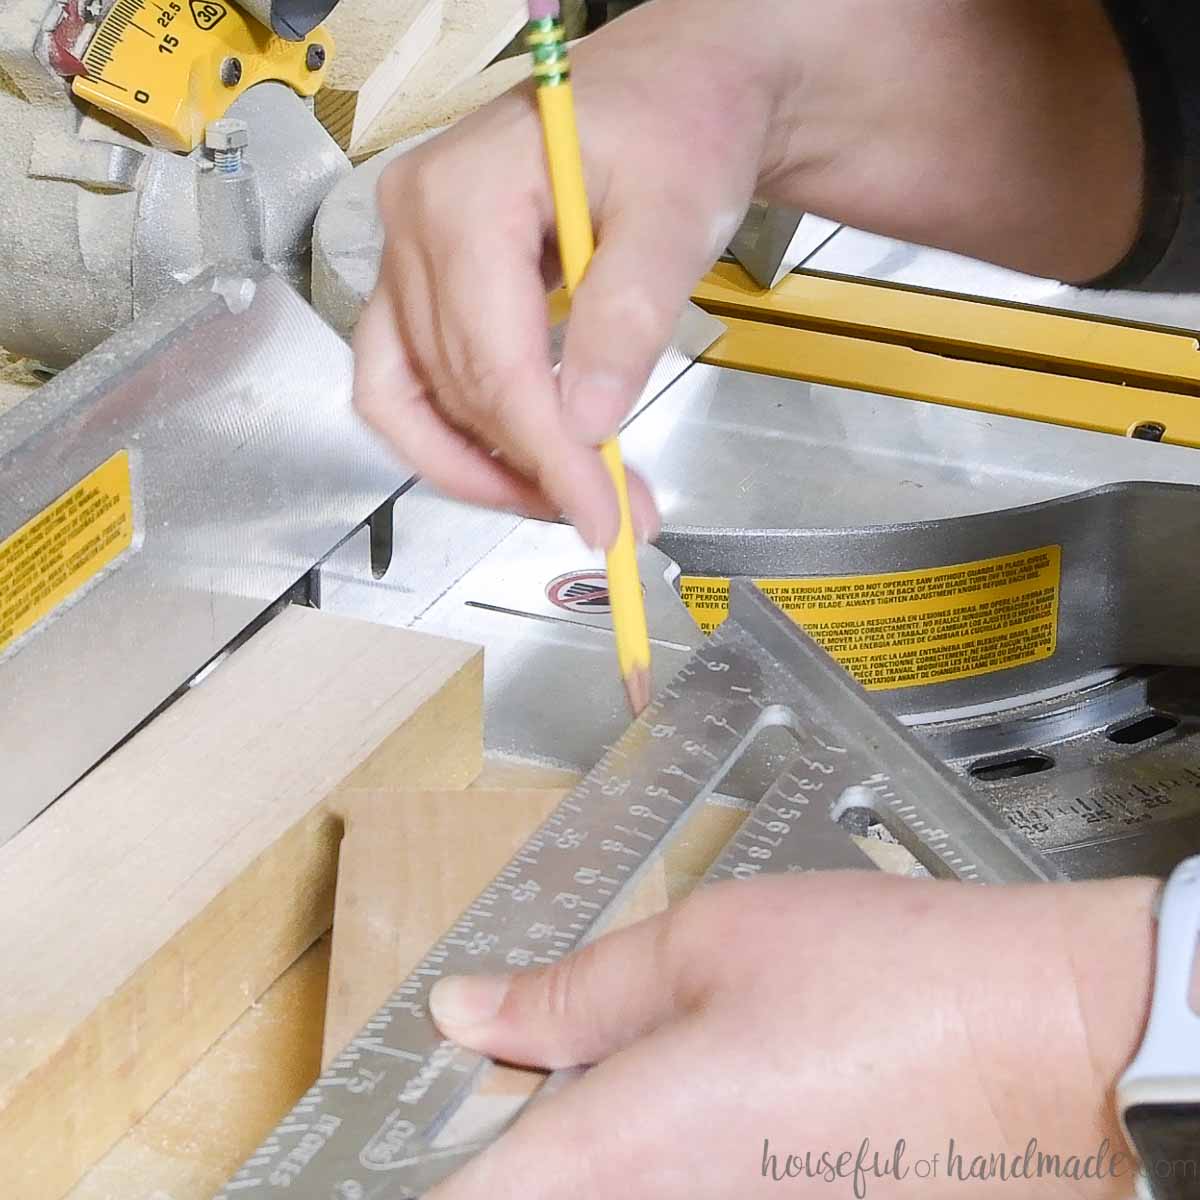
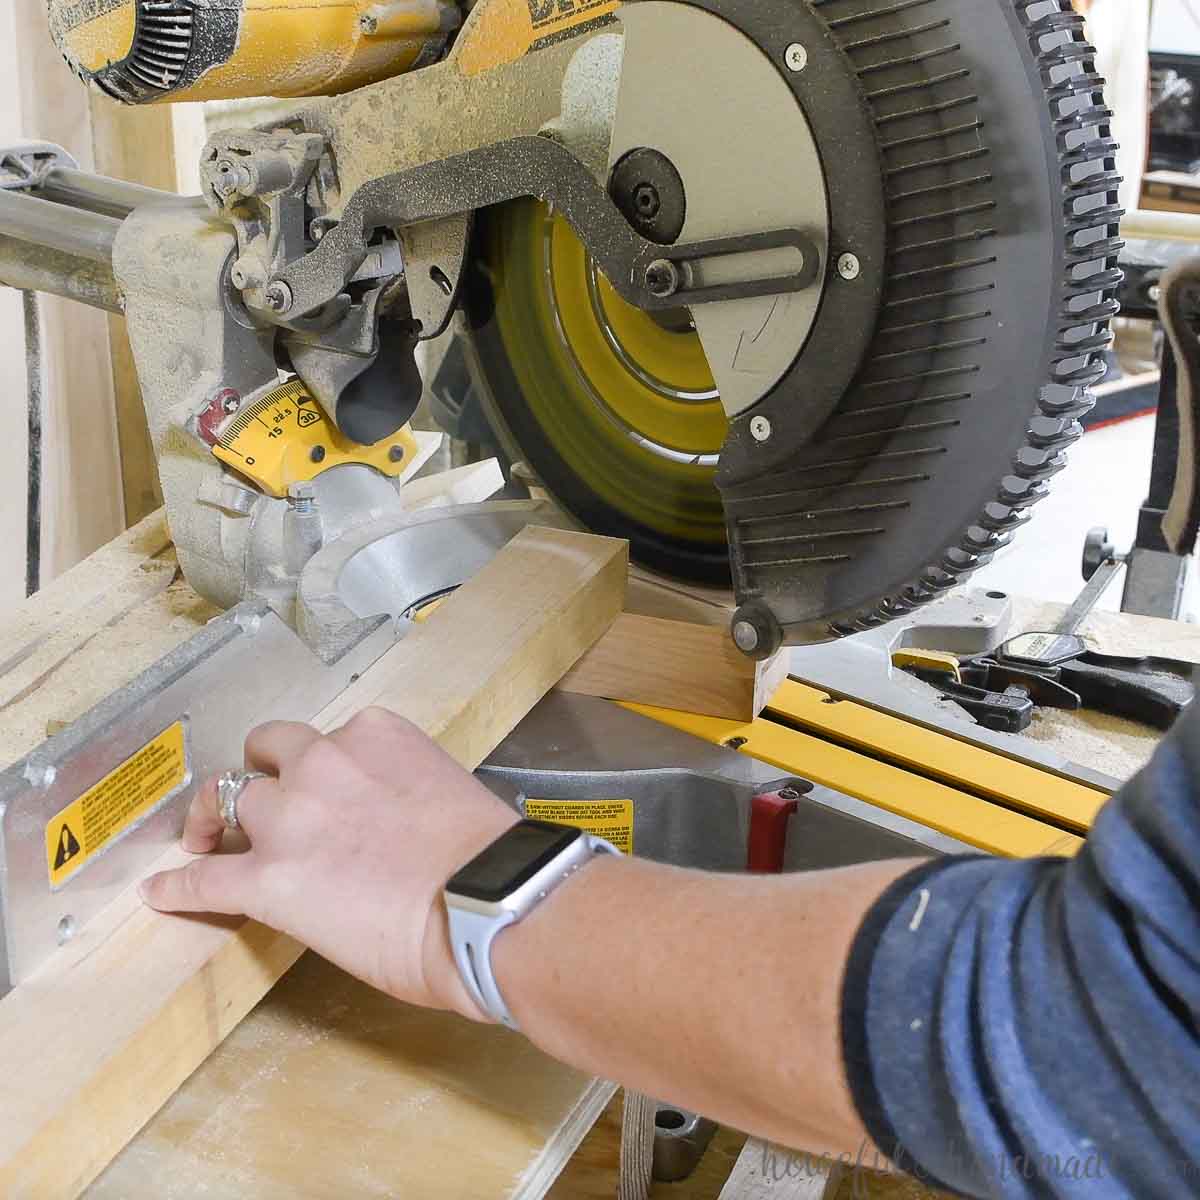
Cut the block off at that line.
I used my miter saw and set the blade to mimic the angle I drew.
Since the block is so small, I used a scrap of wood to safely hold the board so my fingers were fare from the blade.
EXPERT TIP:
Make sure to let the blade come to a complete stop before lifting it back up. This will prevent your cut piece from getting flung away from the blade.
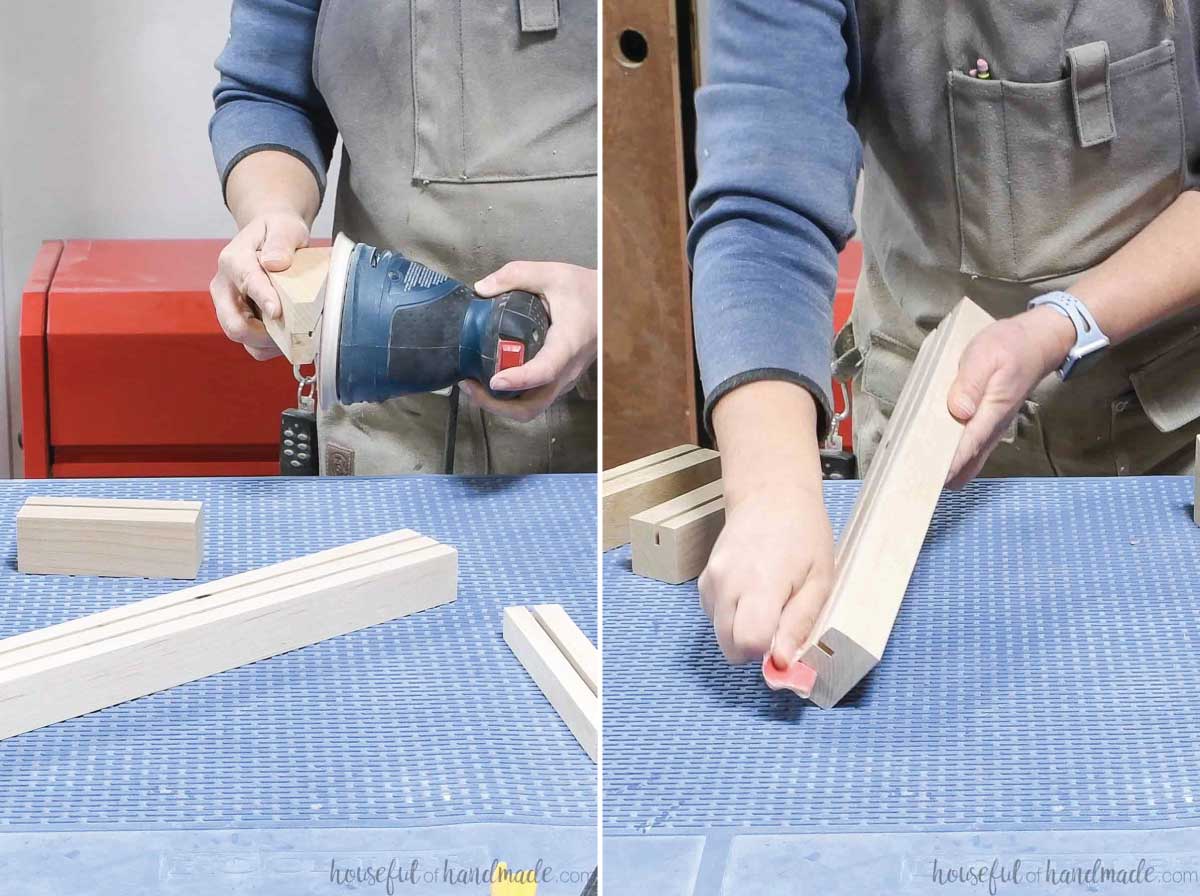
STEP 3- Sand and seal
Sand your blocks nice and smooth.
To get inside the grooves, fold a piece of sand paper in half and run it back and forth inside them.
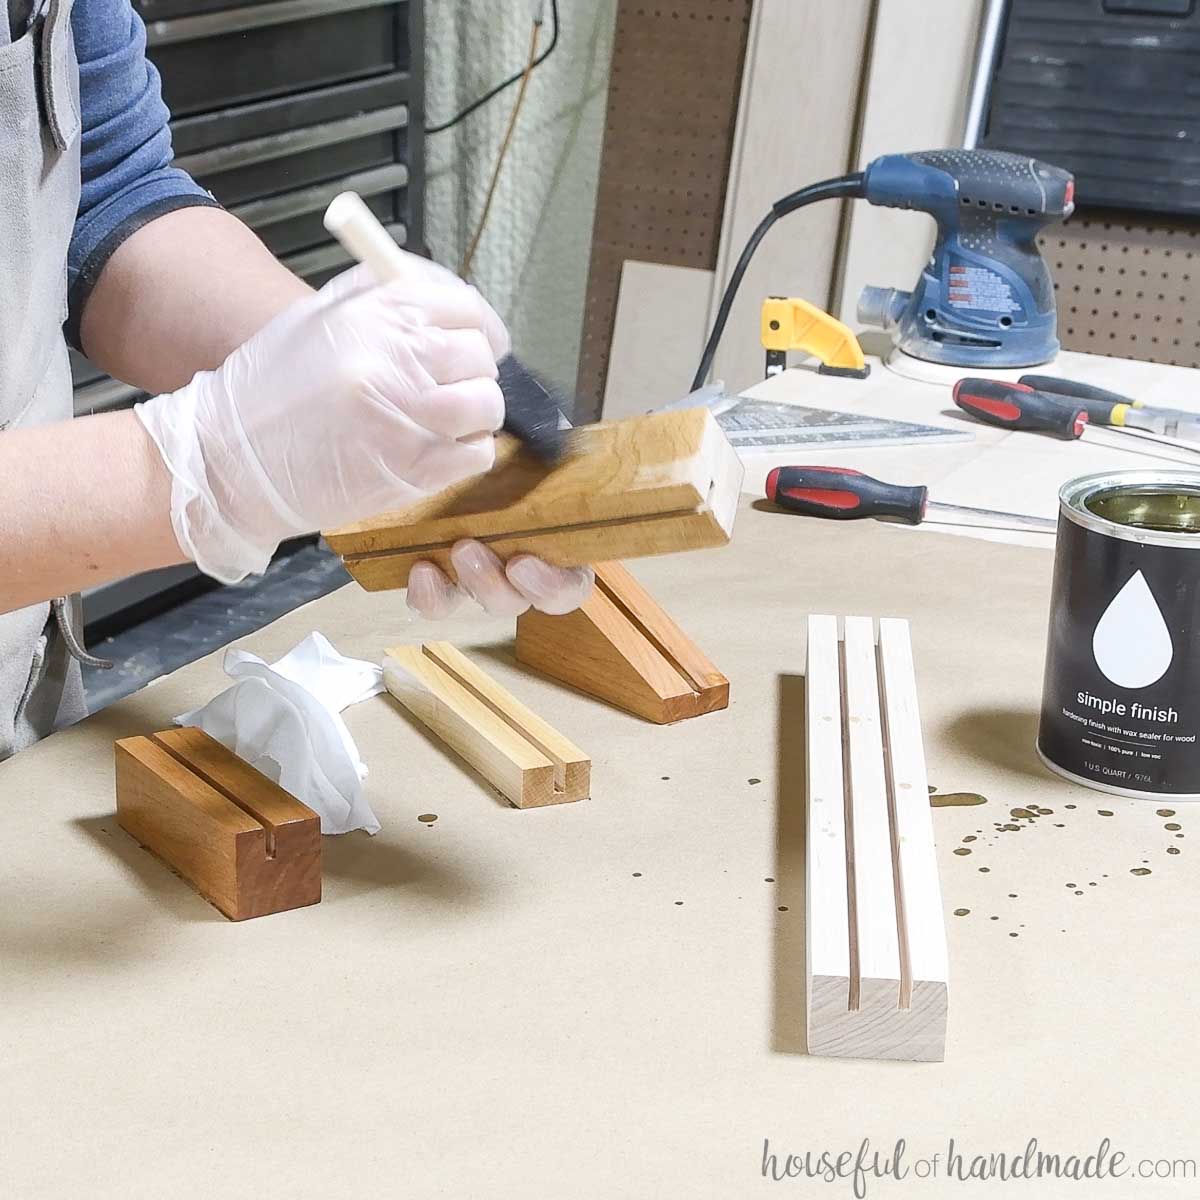
Seal your blocks and watch the color of the grain pop!
I used Simple Finish sealer by Maker Brand. It is easy and really made the wood colors beautiful.
Let them dry fully.
Now all you have to do is add your pictures!
Remove the protective cover on your plexi or acrylic sheets and place a photo between them.
Then slide them into the grooves and admire your beautiful pictures and frames!
Happy building!
