These fun portable dollhouses are a great gift for kids.
What kid doesn’t love dollhouses? The hours of imaginative play they give is amazing.
And while big DIY 3′ dollhouses are amazing, sometimes the kids need something more portable. That is where these toy totes come in handy!
Each tote is large enough to hold dolls, animals, furniture and more. It’s like a classic wooden toolbox, but for toys.
This post may contain affiliate links. As an Amazon Associate I earn from qualifying purchases. Click here to read my full disclosure policy.
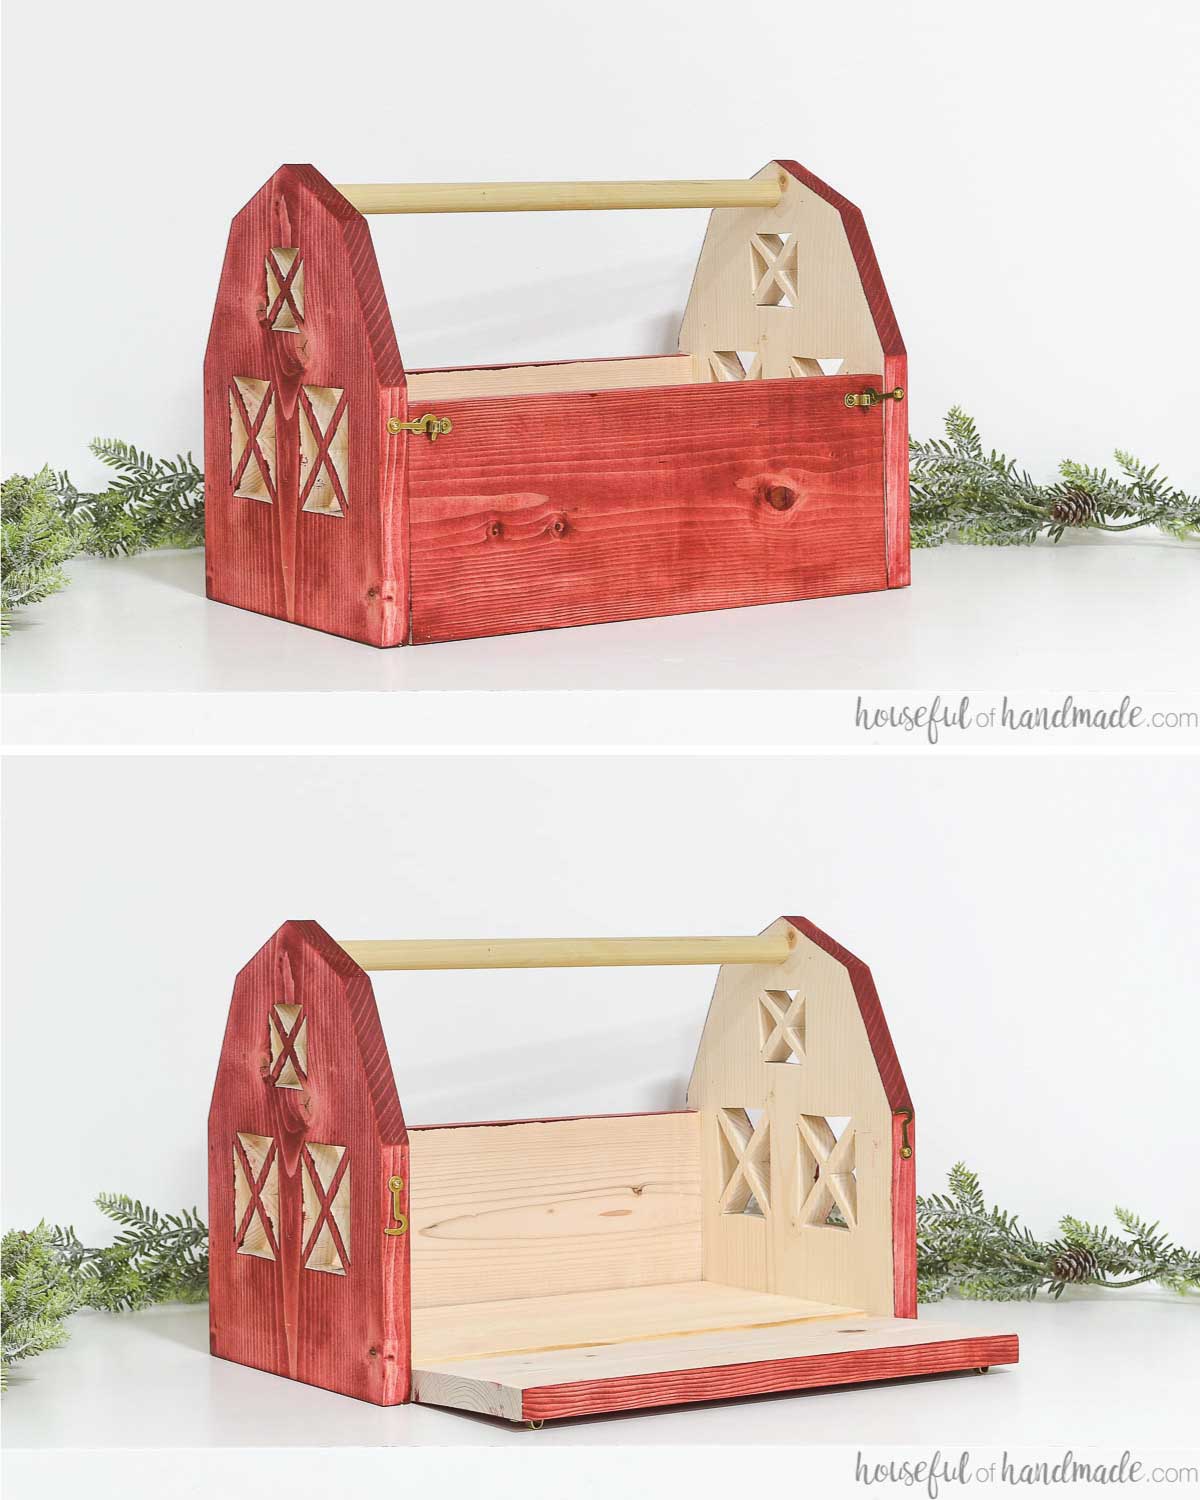
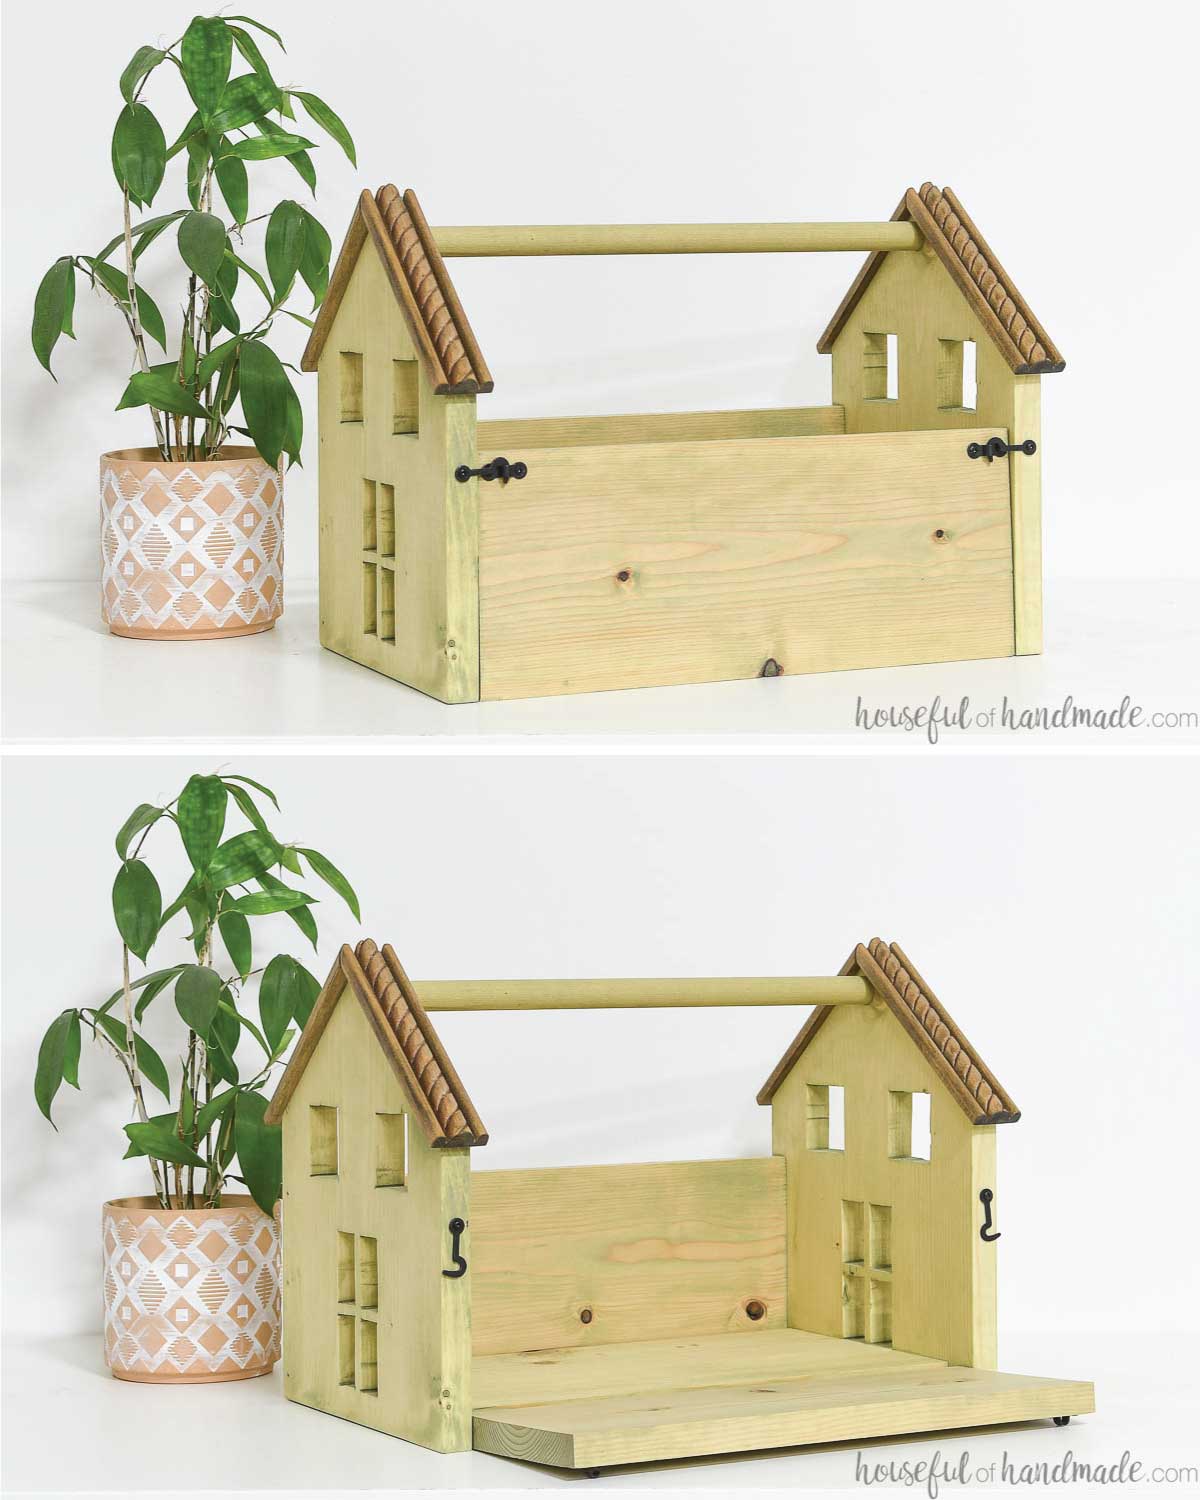
They are easy to carry, even for little kids. Then when you are ready to play, the one side opens and lays flat to create a play area for lots of fun!
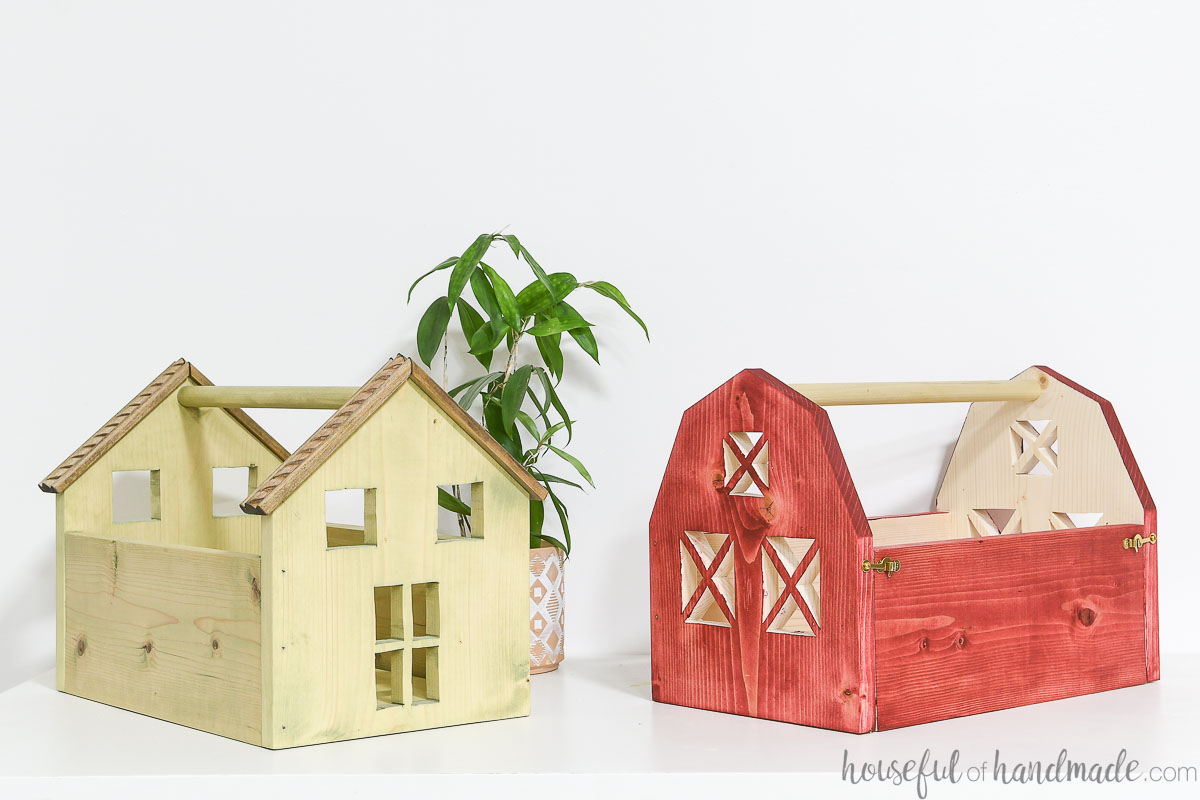
Toy Barn
Toy barns are the dollhouse for the animals. You can have hours of play with all kinds of animals, not just the classic farm ones.
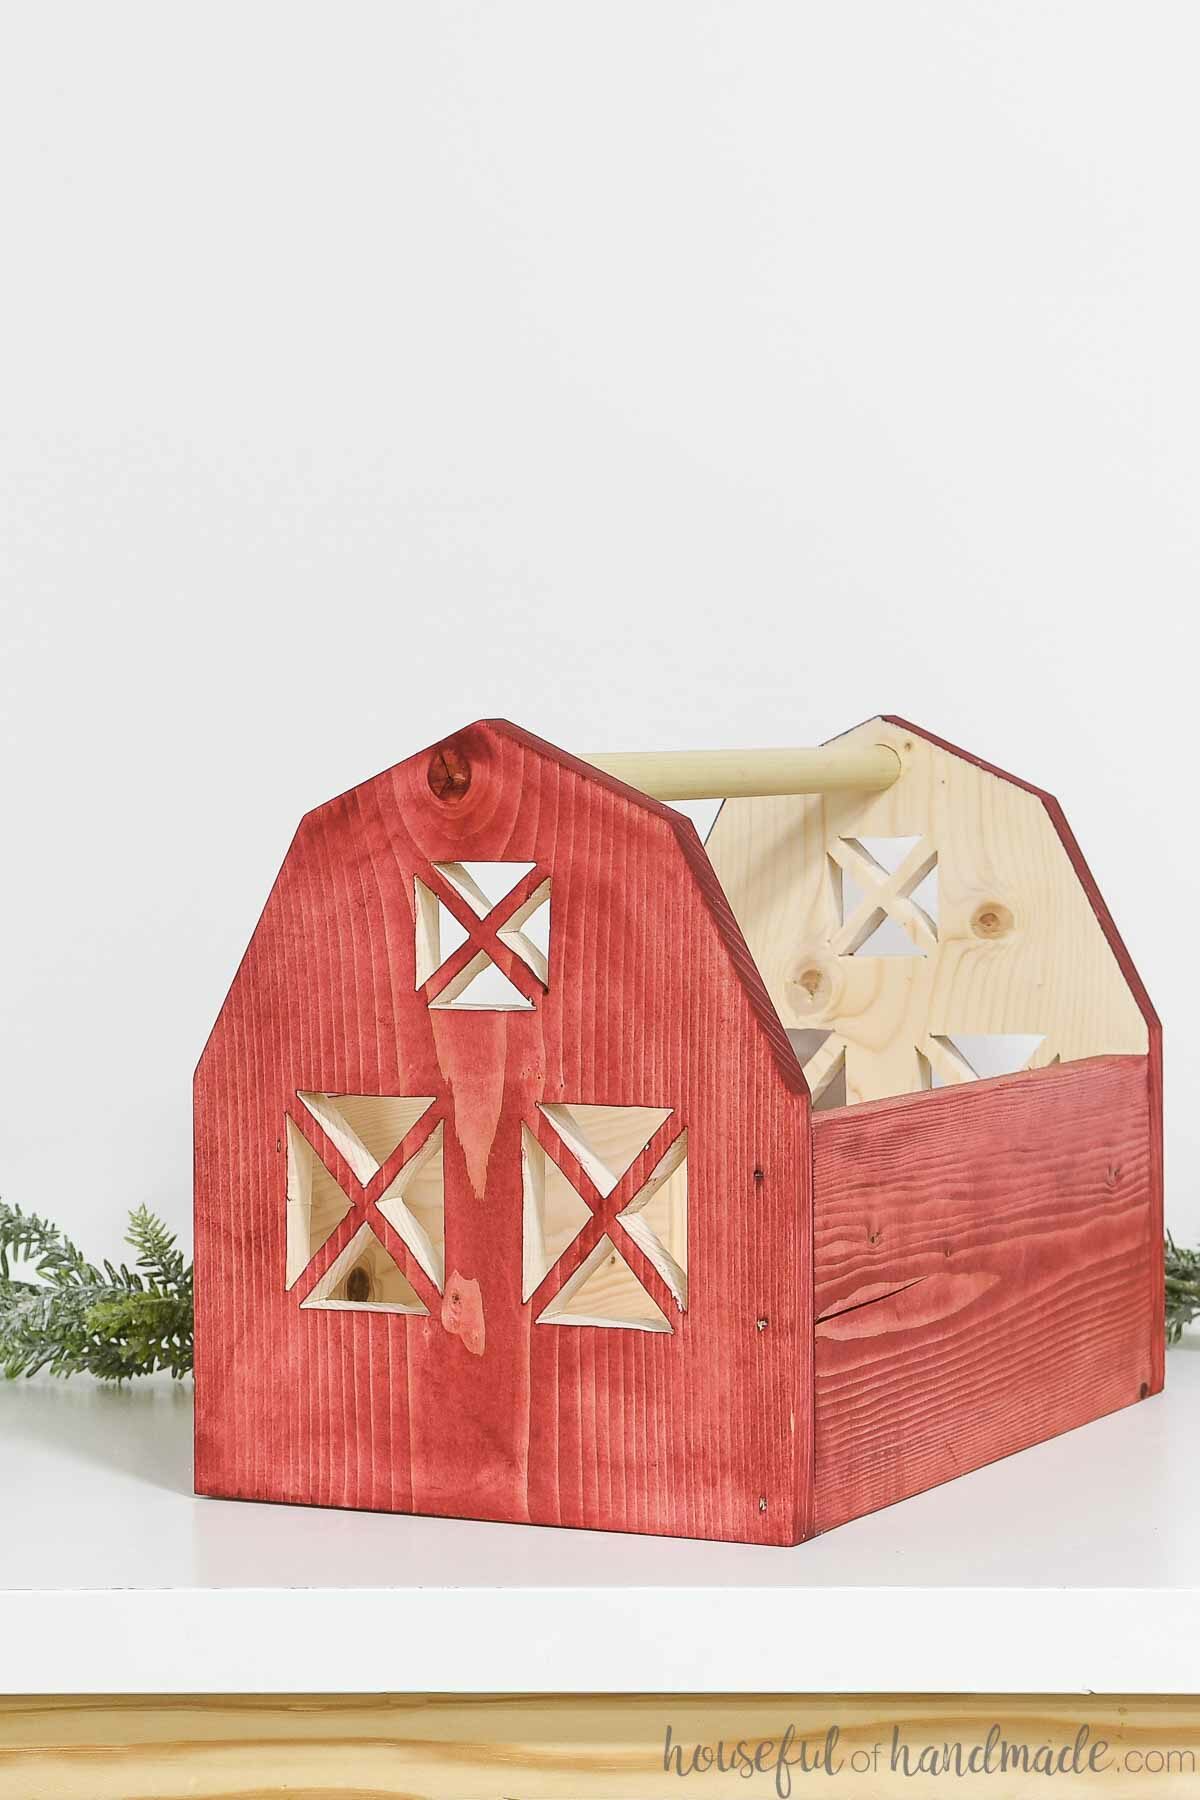
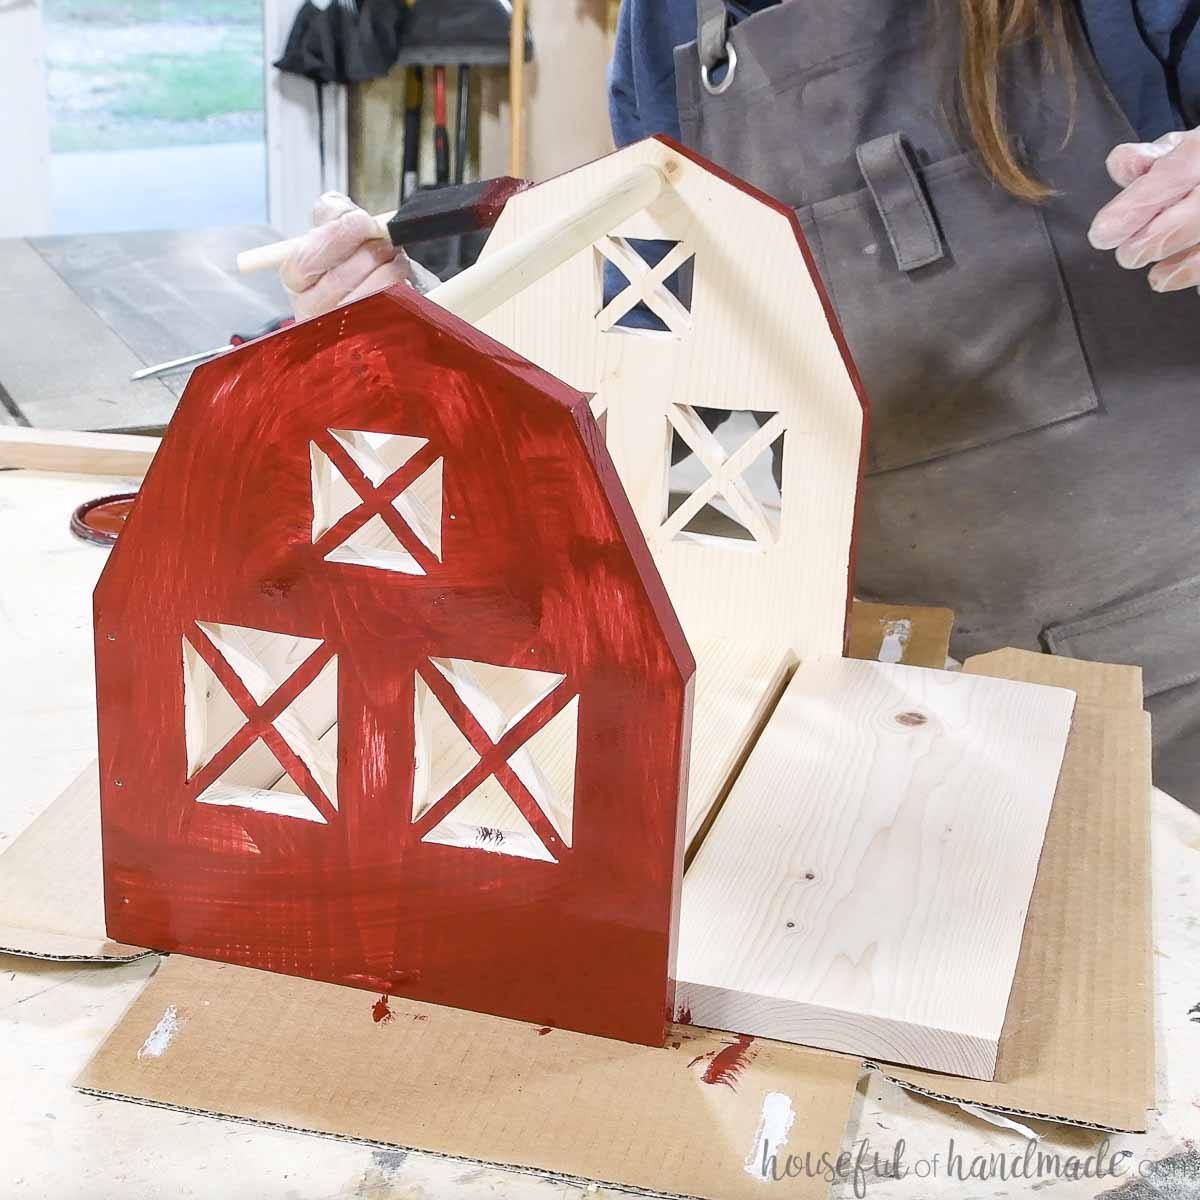
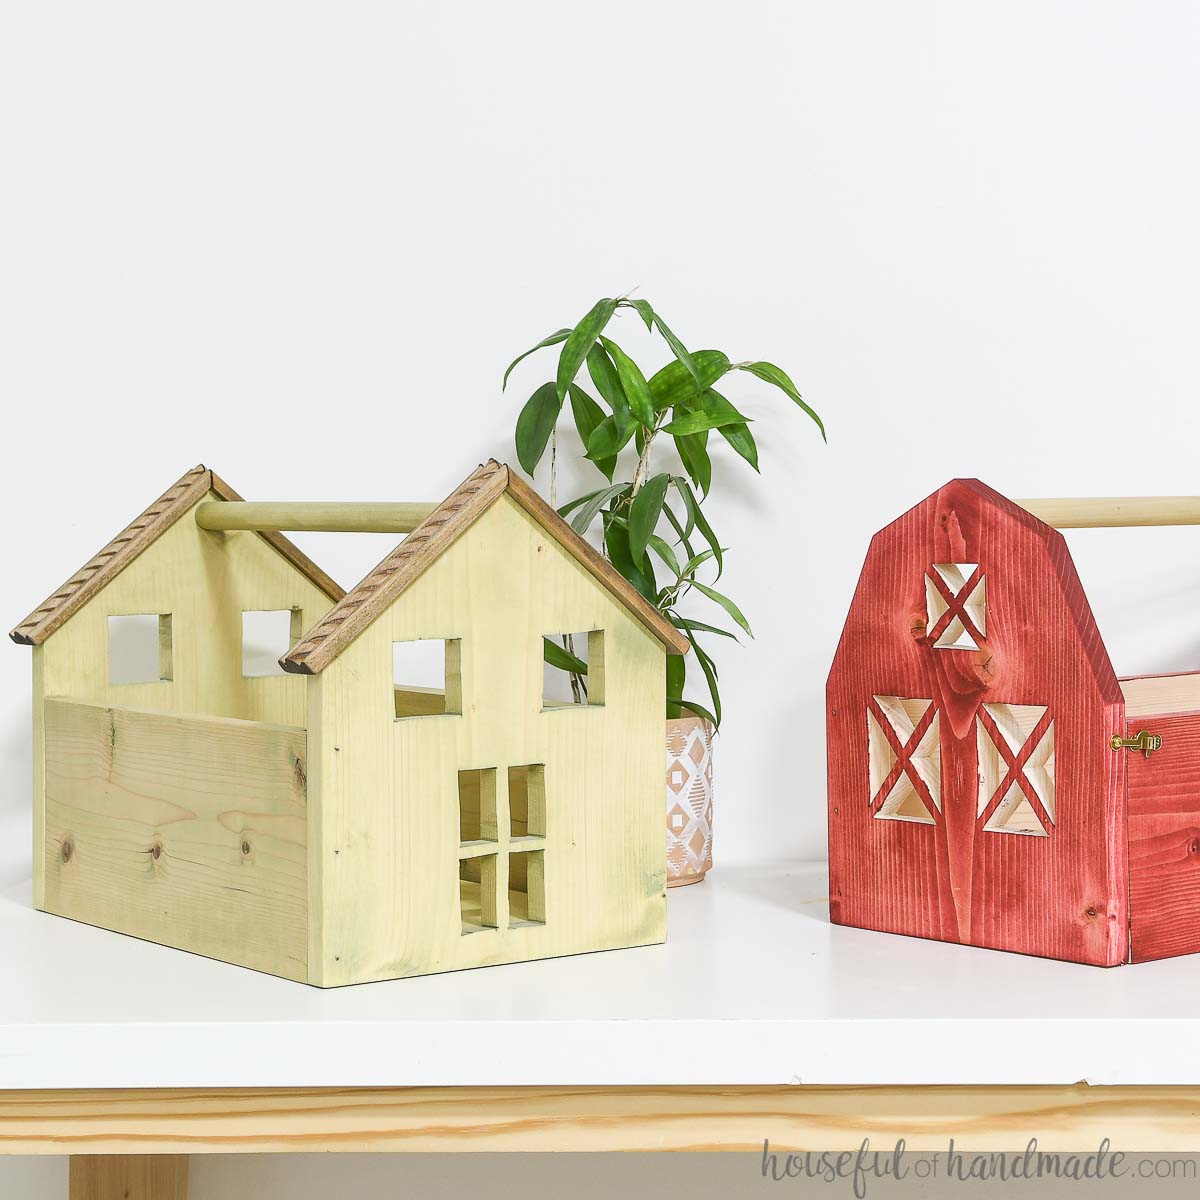
But if you have a farm or horse lover, they will absolutely adore this tote. It’s a classic red barn with a gambrel roof.
The X details on the doors and windows are perfect for the animals to peak through. Have fun decorating your barn.
The inside opens up and creates the perfect barn play area.
I see so many opportunities to decorate the inside to make your barn even more amazing!
You could add painted hay and stalls inside for a horse barn. Or even paint it like a house for a beautiful barn dollhouse.
Portable Dollhouse
I knew I couldn’t just make a barn tote. I needed a sweet little dollhouse too!
Dollhouses are so classic and can be used with so many different toys. My daughter loves to play in the dollhouse with her stuffed animals. They become little people in her imagination.
The wood dollhouse is perfect for any little dolls. And you can store all the dolls and accessories inside the tote. Then open it up to play.
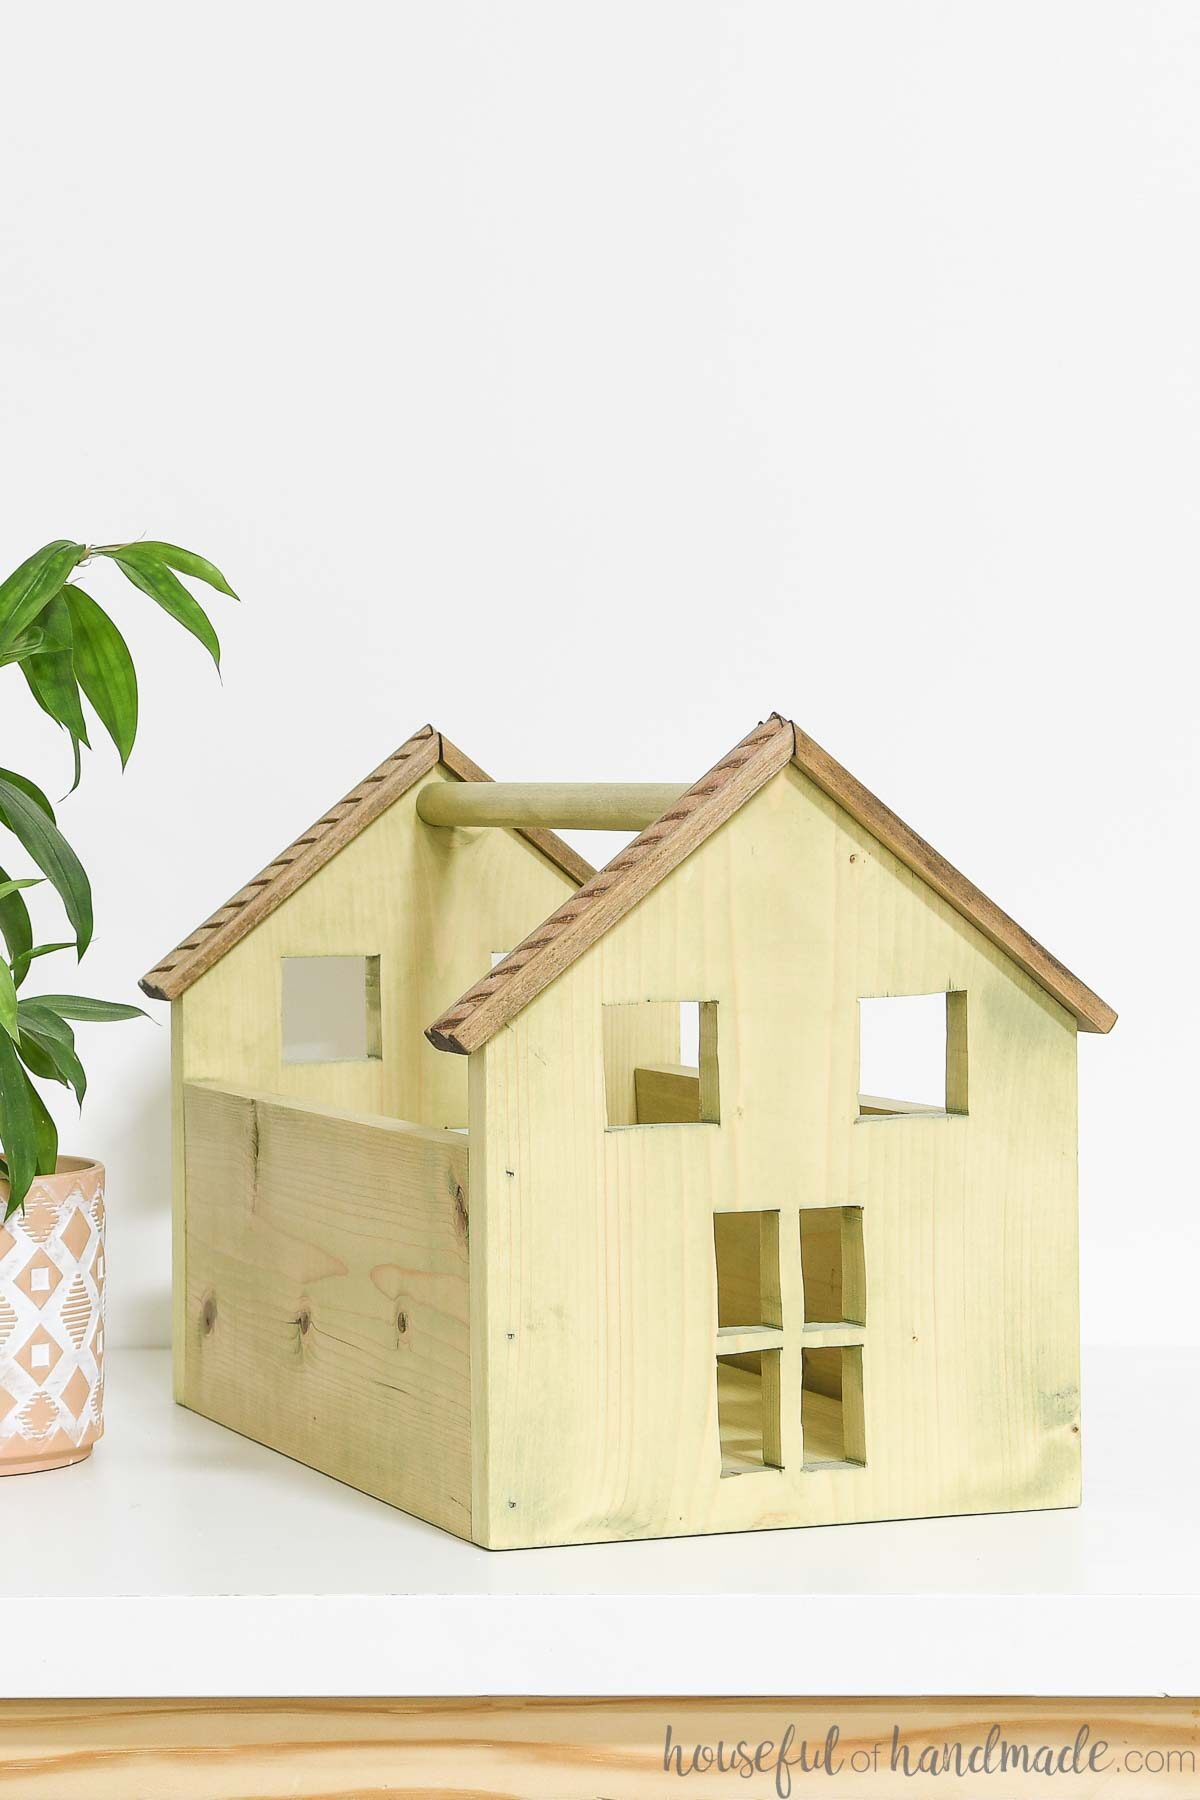
This dollhouse can be decorated as much or as little as you want. I added some trim left over from the letters to Santa mailbox to create a simple roofline.
It would also be fun to paint lines around the doors and windows. You could even glue on curtains or add plexiglass to them.
On the inside, it would be fun to paint or decoupage house scenes for a complete dollhouse look. Then add some little furniture and you are ready to go!
However you decide to make your toy barn or dollhouse, you are going to love how easy these sweet little toys are to build. Perfect for a fun DIY gift!
Easy DIY gift ideas
A dollhouse or barn tote is perfect for the kids, but what about everyone else on your list?
This week my friend Shara, from Woodshop Diaries, and I are sharing easy DIY gift ideas every day! That is 10 new handmade gifts you can use for anyone on your list.
Check out all the new ideas below or check out these 50+ handmade gift ideas. I will be adding new posts as we share throughout the week.


How to Make Toy Tote
Tools needed:
- Miter saw
- I recently upgraded to this larger sliding miter saw (watch for it to go on sale), but all my projects before were built with this inexpensive miter saw that I loved.
- Jig saw
- Pocket hole jig
- Drill
- Impact driver (optional, but I love not having to switch bits with the drill)
- Brad nailer
- Drilling guide
- Trim router
- This is optional, you could round over the areas needed with your sander, but a router is faster.
- Sander
Supplies:
- Wood products, per tote-
- (1) 2′ long 1×10 board
- (1) 14″ long 1×8 board
- (1) 3′ long 1×6 board
- (1) 15″ long 3/4″ dowel
- 1 1/4″ pocket hole screws
- 1 1/4″ brad nails
- Dowel shelf pins
- Hooks & staples
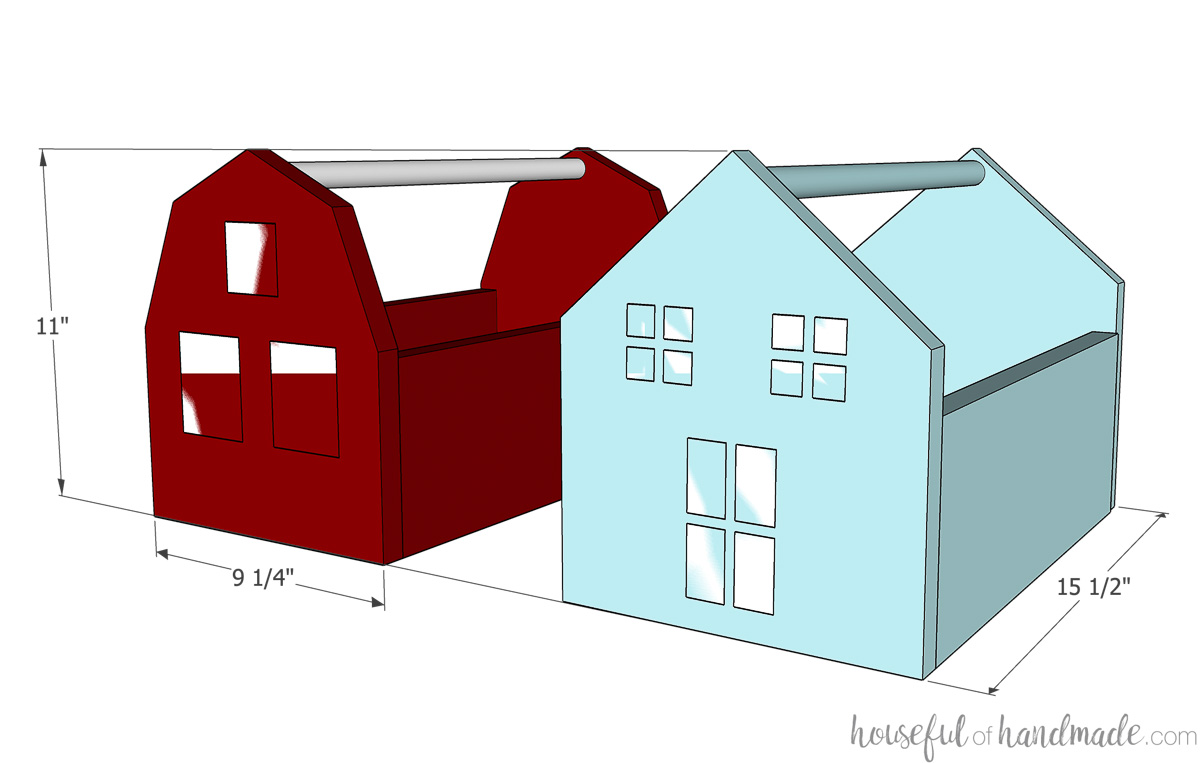
Overall Dimensions:
Each tote measures 11″ tall, 9 1/4″ wide and 15 1/2″ deep.
STEP 1- Cut out the front of the totes
Cut two 11″ long pieces from the 1×10 board. Then draw your barn or house roof shape on the boards.
For the barn: the top point of the roof is centered on the top of the board. The second point is 9″ up from the bottom and 1 1/2″ from the edge. The third point is at the edge of the board and 5 3/4″ up from the bottom.
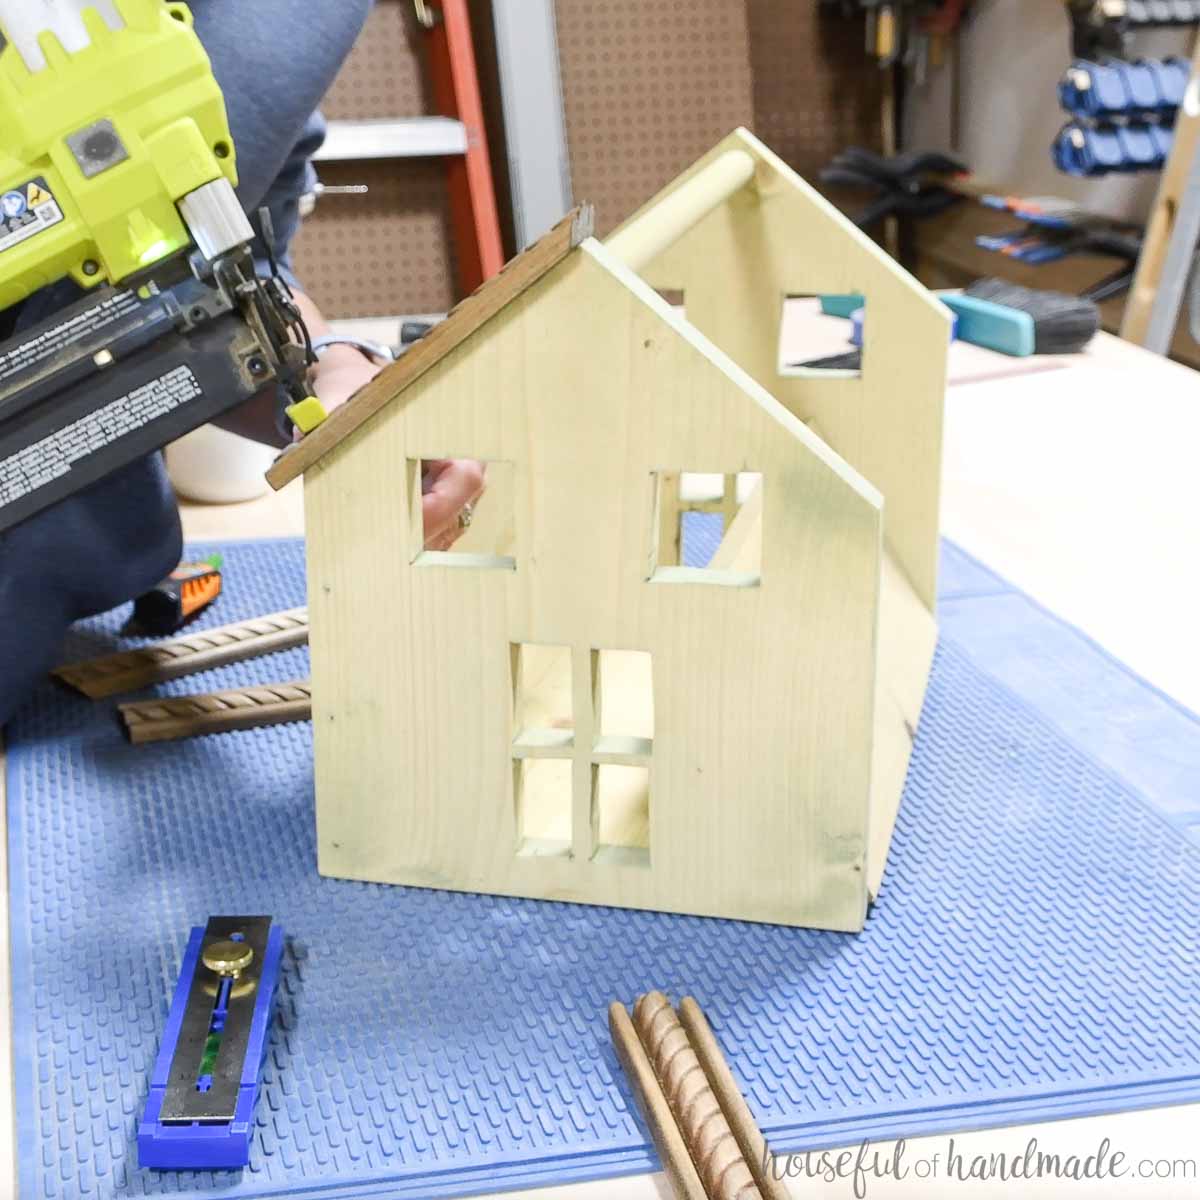
For the house: the top point of the roof is centered on the top of the board. Connect this to the sides 7″ up from the bottom.
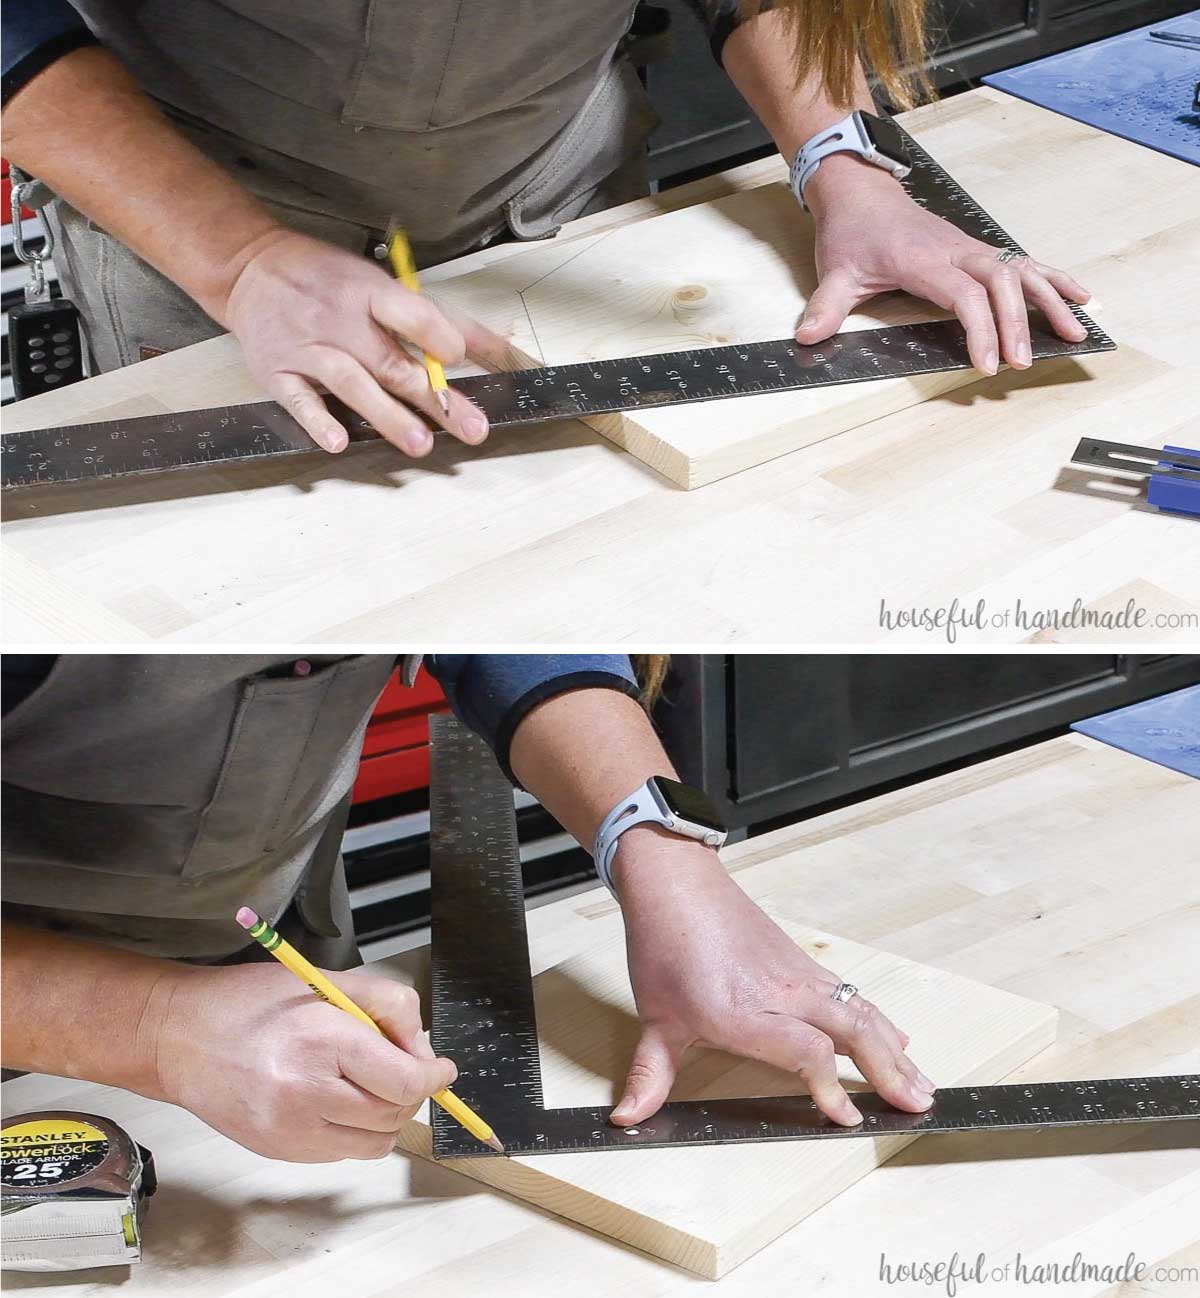
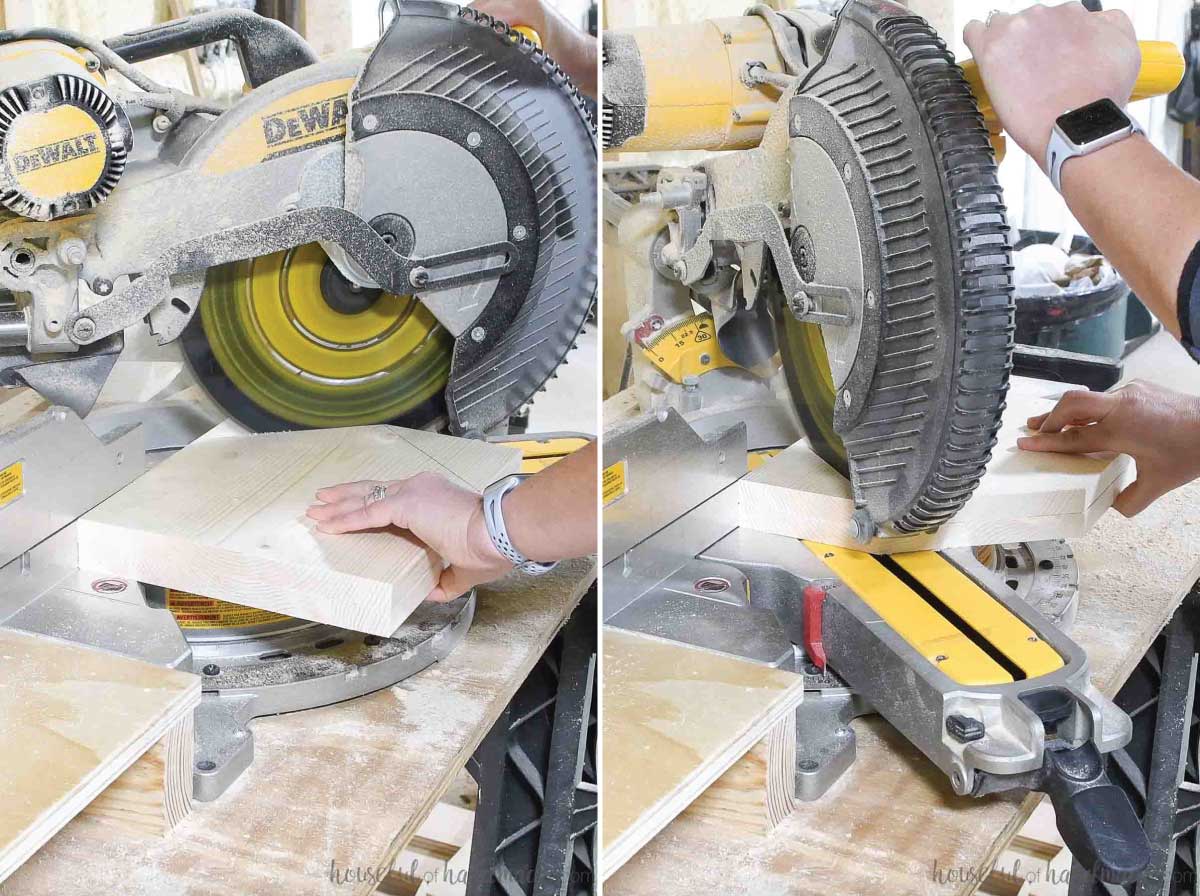
Then cut the two boards out on these lines.
You could cut these out with a jig saw or circular saw. Or use a miter saw to cut along the lines.
To determine the angle, adjust it until it lines up with the blade.
For the barn: you will need to make two cuts on each angle. Make sure the flat edge of the board is up agains the fence.
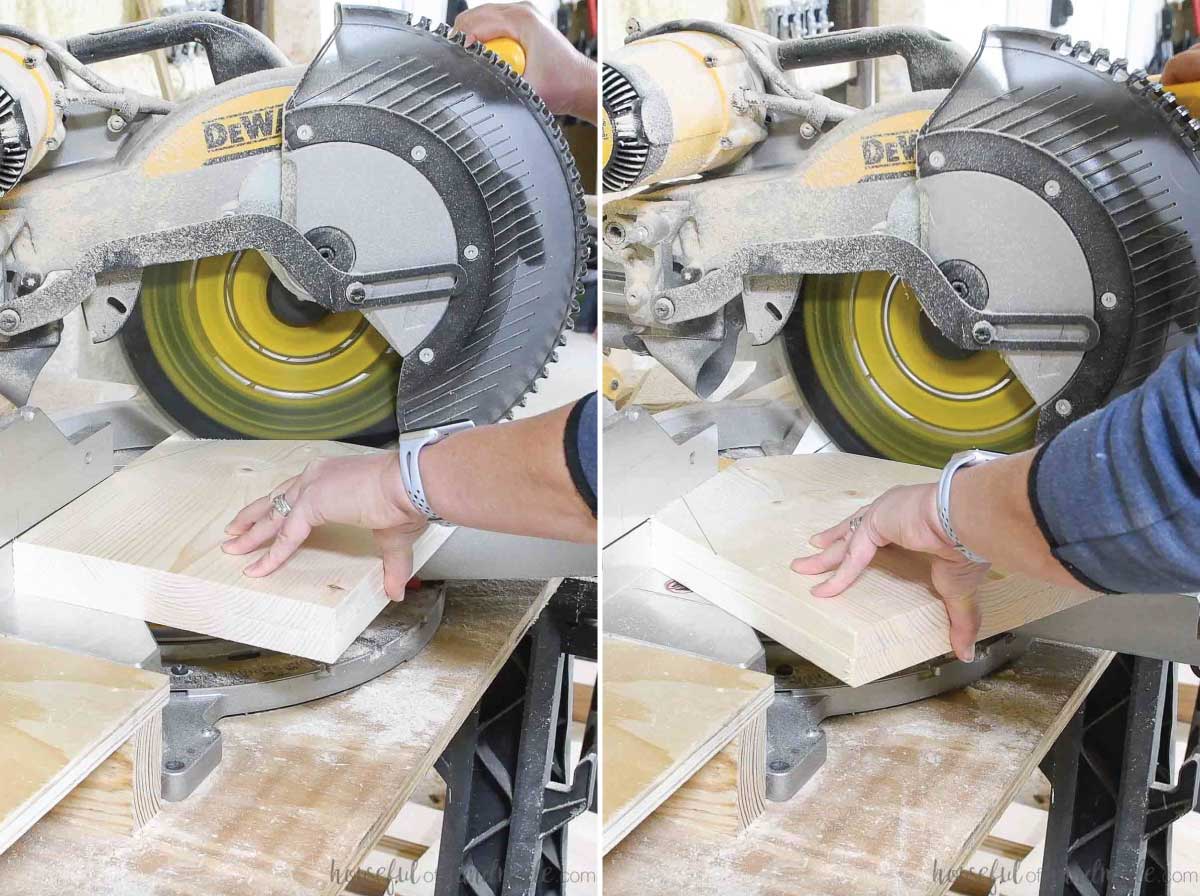
For the house: determine the angle the same way. Then cut the same angle on both sides.
Once all the roofs are cut out, measure and sketch out where you want the doors and windows.
Make sure any cut outs are at least 3/4″ up from the bottom so it will not be blocked by the bottom when it is attached.
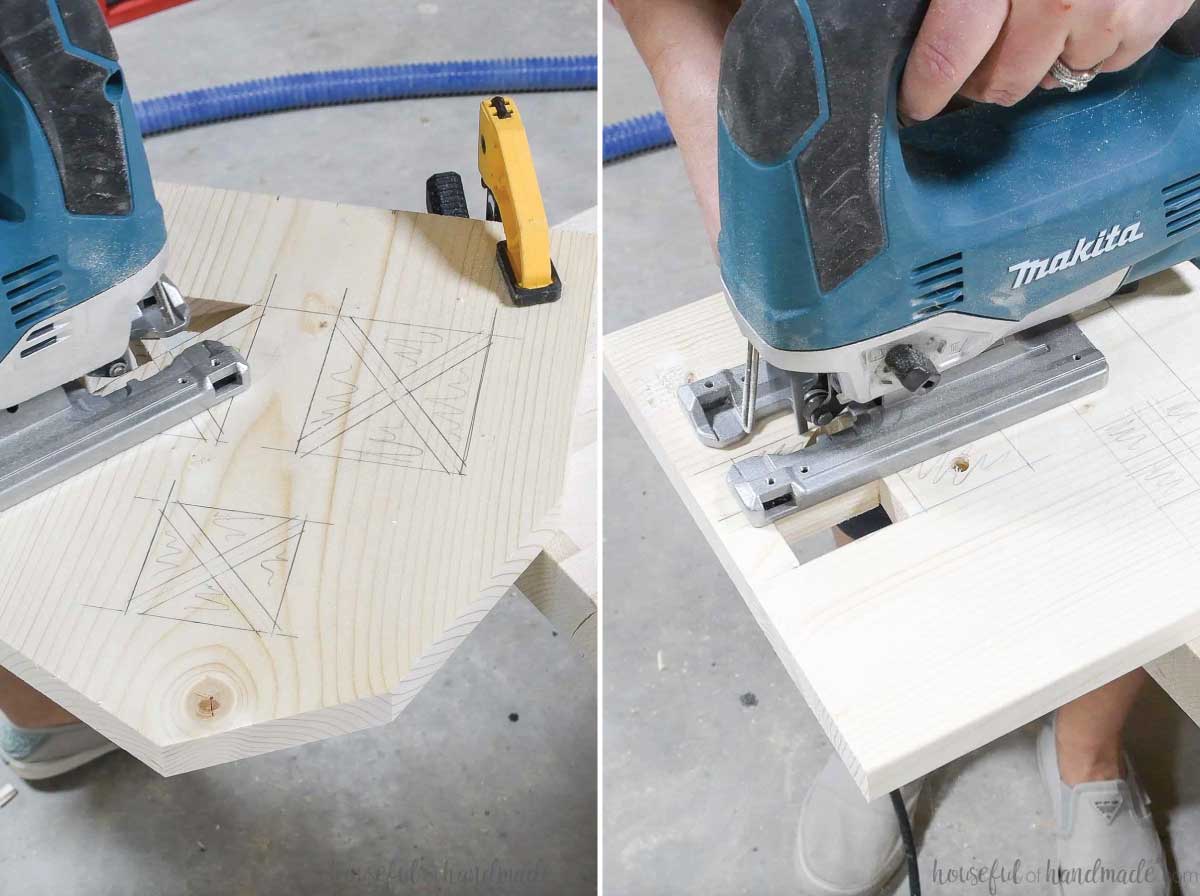
For the barn: draw diagonal lines in the openings and then a 1/8″ line on either side of these. This will create a 1/4″ X in the design.
For the house: Draw out rectangles to mimic window panes on the door. For the upper windows, you can add panes as well but they will be very tight to cut out with the jigsaw.

Drill a hole big enough for your jig saw blade. I recommend you use a scroll blade for detailed cuts.
Insert the blade into the hole and cut towards the corners. You will have to make multiple cuts to cut out the shapes.
End all the cuts in the corner since you will not be able to pivot the blade to a 90 degree angle.
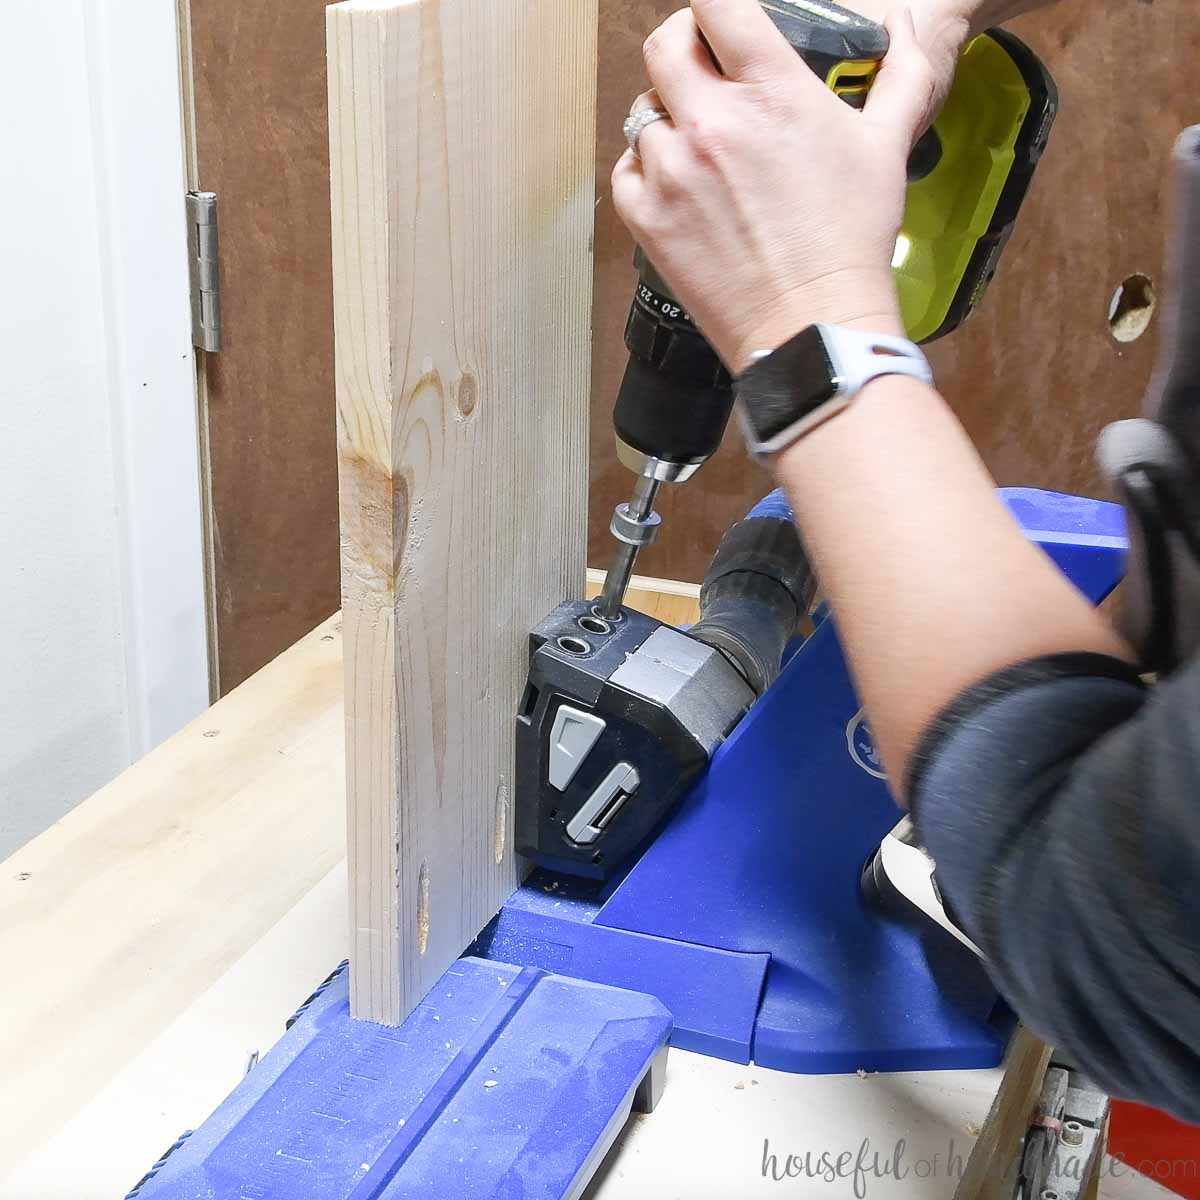
Measure 3/4″ down from the top point on the inside of the front piece.
Drill a 3/4″ wide and 1/2″ deep hole centered on that mark for the dowel handle. Repeat on the back piece.

STEP 2- Prepare the pivoting side
To allow the one side to open and close for play, we will attach it with a pivot point.
Measure 3/8″ in and 3/8″ up from the bottom on one corner of the front/back pieces. Make sure the corners are mirrored.
Drill a hole the size of your dowel shelf pin at those points.
Then cut one side piece just about 1/16-1/18″ shy of the other 14″ side pieces.
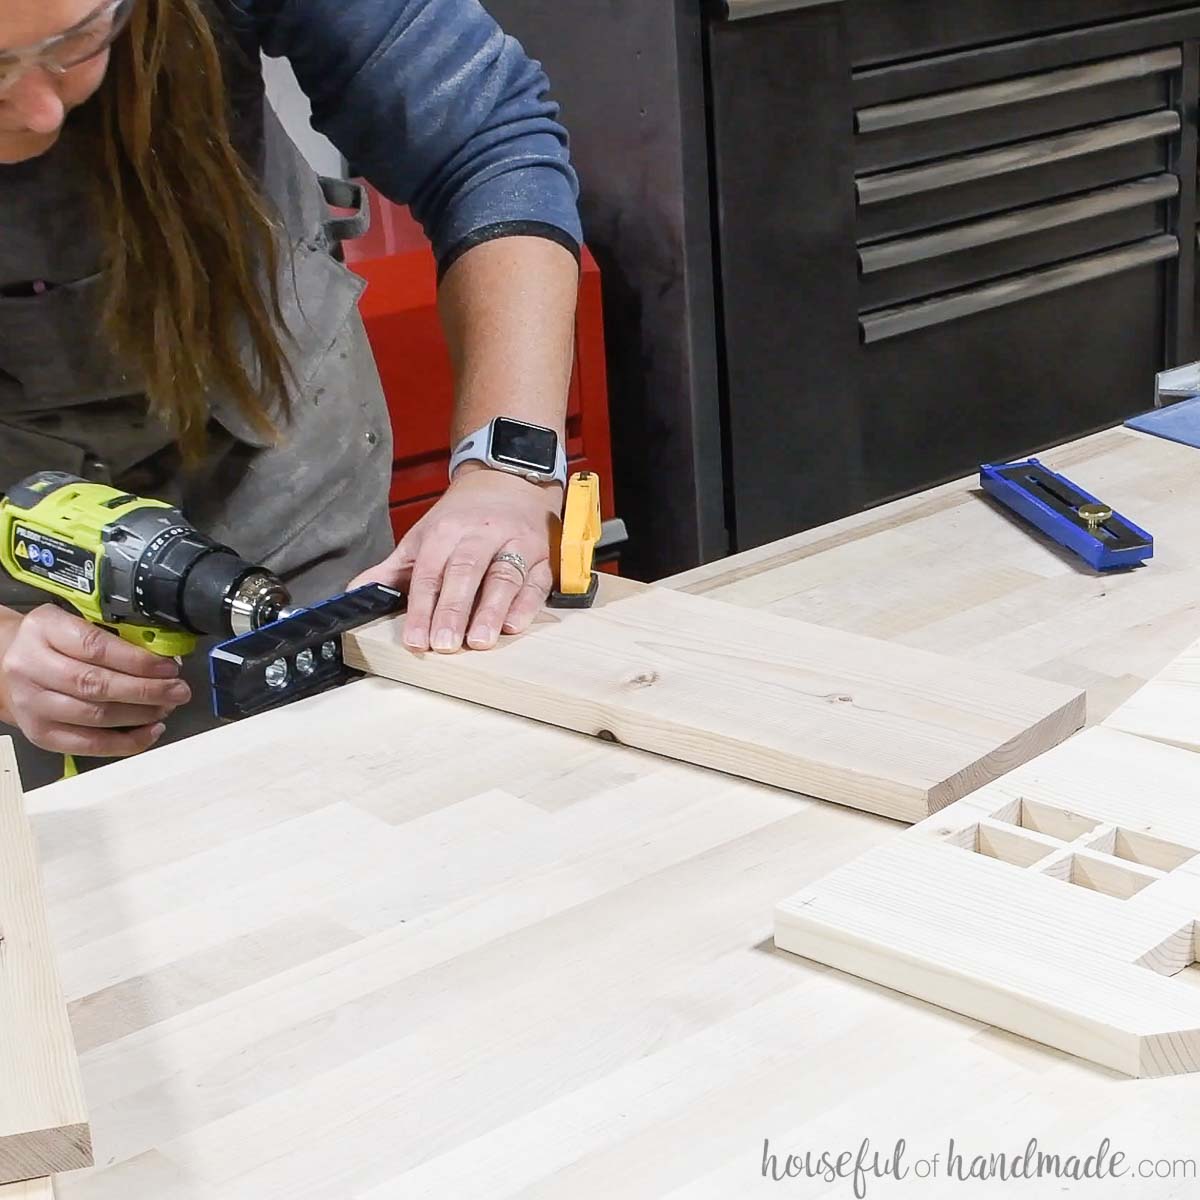
Measure up from the bottom 3/8″ on both ends. Drill a hole the same size as your dowel shelf pin centered on the boards at that mark.
A drilling guide is helpful for keeping the drill bit straight and centered.
On the inside bottom edge of the side board with the holes, round over the edge to allow it to pivot.
You can do this quickly with a trim router with a roundover bit. Or you can use a sander if you do not have a router.

STEP 3- Assemble the totes
Cut a 14″ long second side piece from the 1×6 board and bottom piece from the 1×8 board.
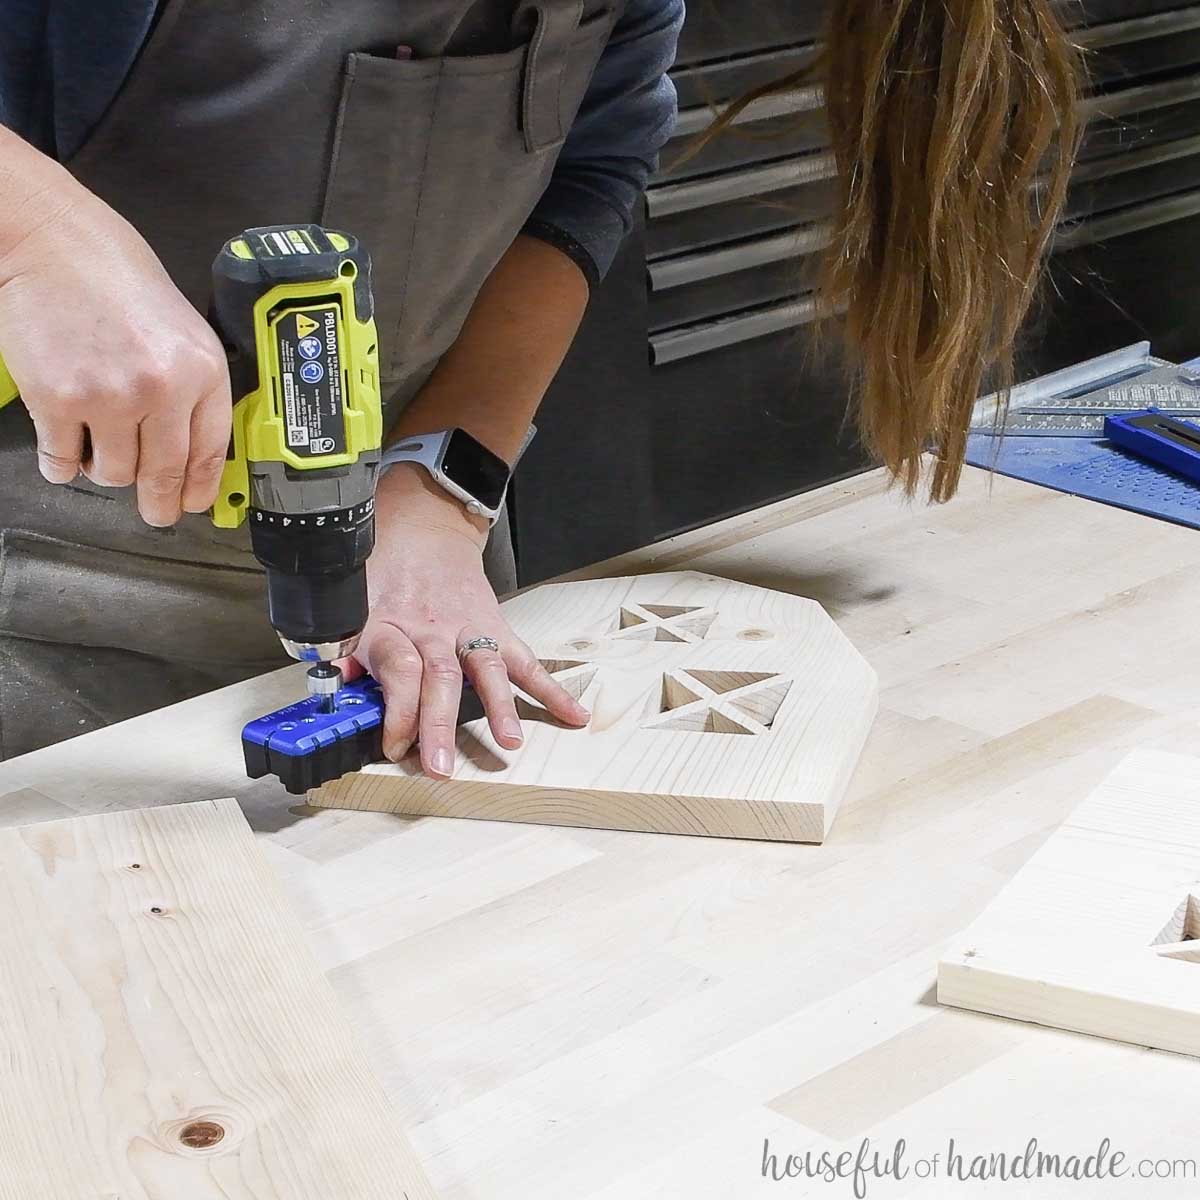
Drill pocket holes set for 3/4″ thick material in the both ends of the bottom board.
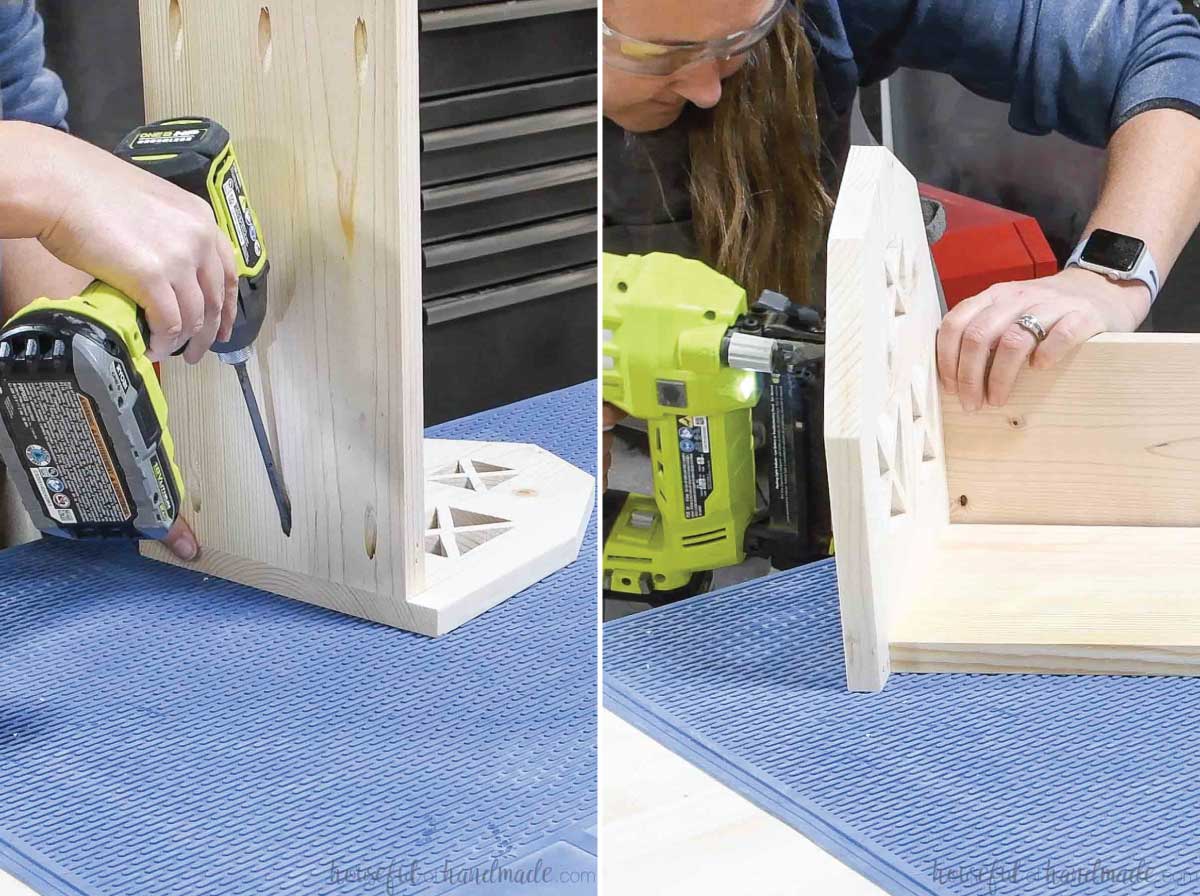
Line the bottom up so it is centered on the bottom of the front piece. Attach with wood glue and 1 1/4″ pocket hole screws.
Then line up the non-pivoting side on the side without the holes drilled in the bottom corner.
Attach with wood glue and 1 1/4″ brad nails. There will be a small gap between the bottom and the side board.
Then insert a dowel pin in the hole on the attached front piece.
Place the pivoting side piece on it. Make sure the rounded edge is on the inside. There will be a small gap between the bottom and the side board.
Also, add some glue into the hole on the front board and insert a 15″ long piece of dowel into it.
Add another dowel shelf pin to the top of the pivoting side piece.
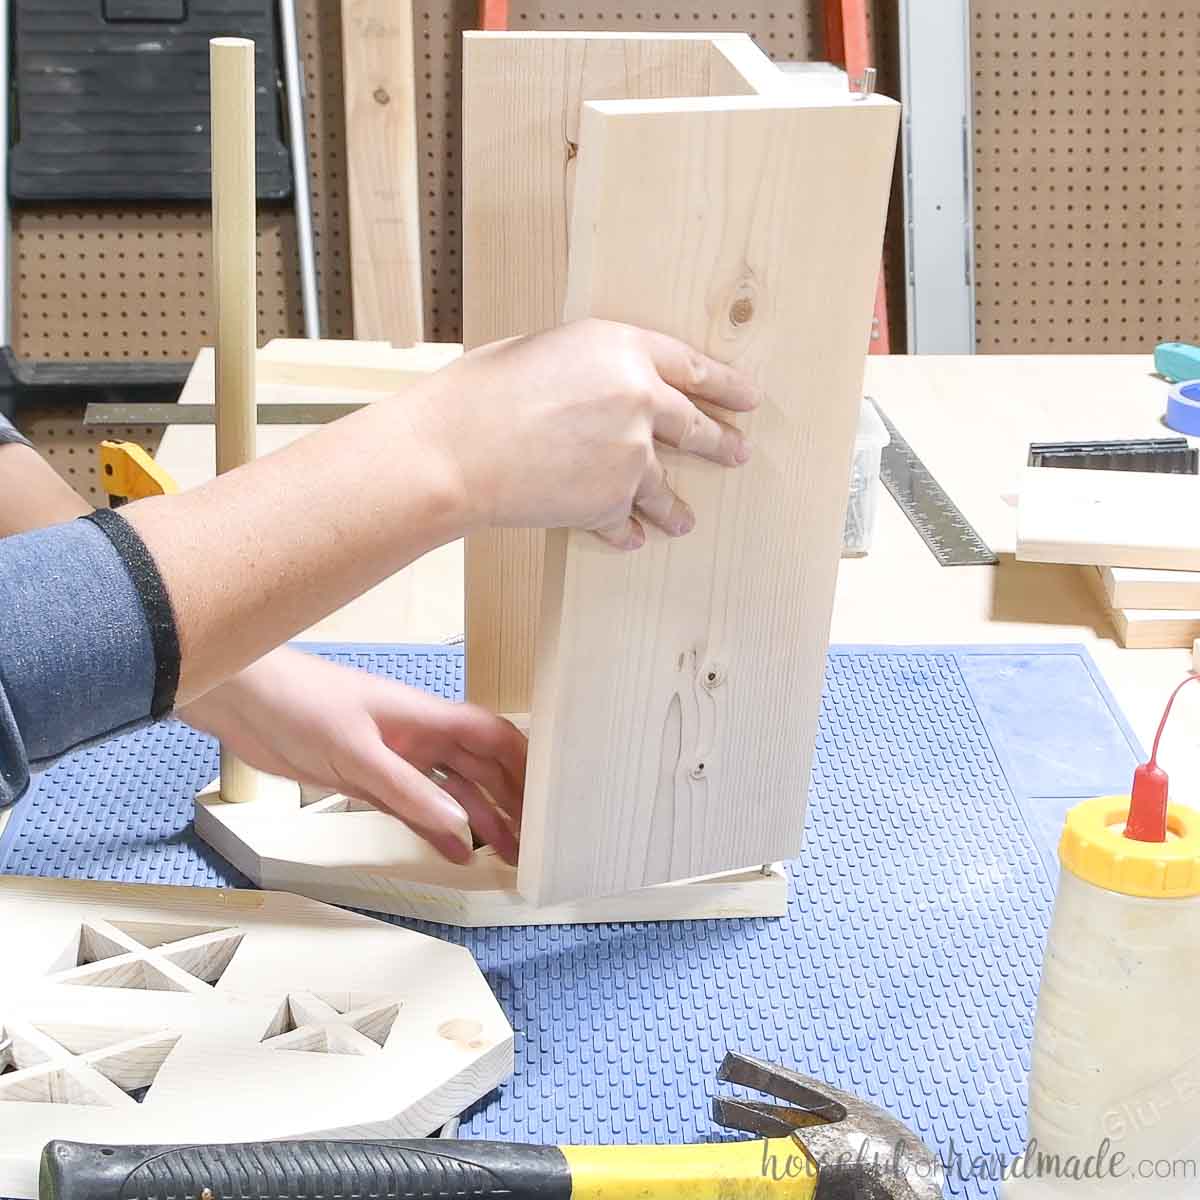
Also add wood glue into the dowel handle hole and the tops of the non-pivoting side and bottom pieces.
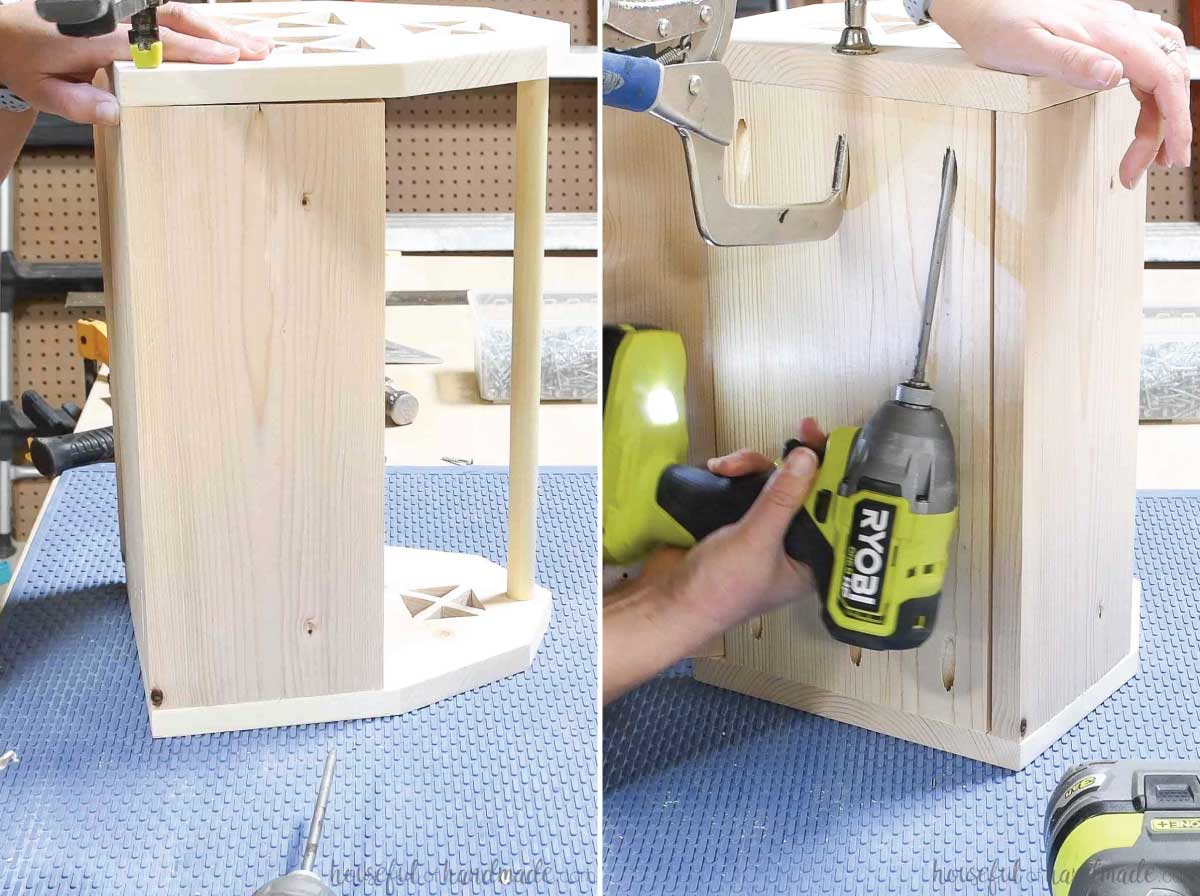
Carefully position the back piece on top. Make sure to line everything up and squeeze the dowel and shelf pin tight into their corresponding holes.
Secure the bottom with the pocket hole screws and the non-pivoting side with brad nails.
STEP 4- Stain and decorate
Sand and stain (or paint) your completed totes.
For the dollhouse: I stained mine with a Sage color by Varathane. For this one, I stained the inside and outside since it was such a subtle color.
Then I cut some decorative trim pieces to fit over the top to create a roof. I stained these with Ebony stain.
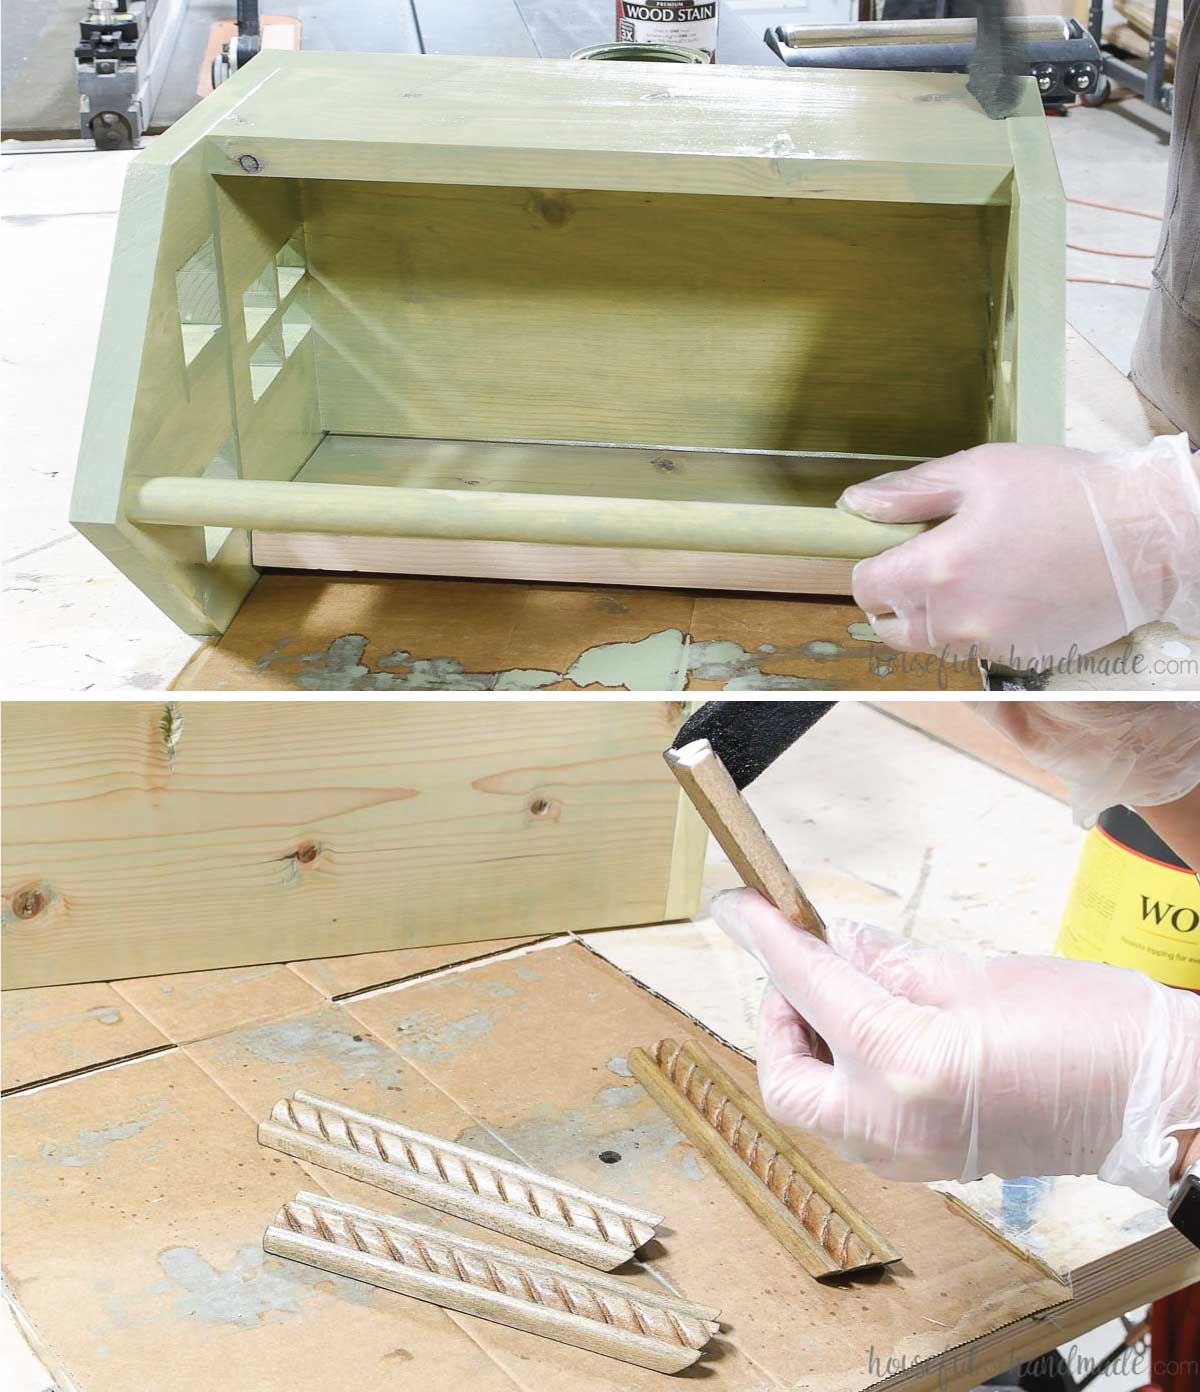
To attach the roof trim, use super glue (since the pieces are already stained).
Then nail them in with the brad nails to secure while the glue dries (and for extra holding power from the kiddos).
For the barn: I stained just the outside of the barn with a Barn Red stain by Varathane.
It was tricky to just stain the outside, there is some bleed through in the cutouts for the doors/windows.
But I love the look leaving the inside natural, just like the inside of a real barn.
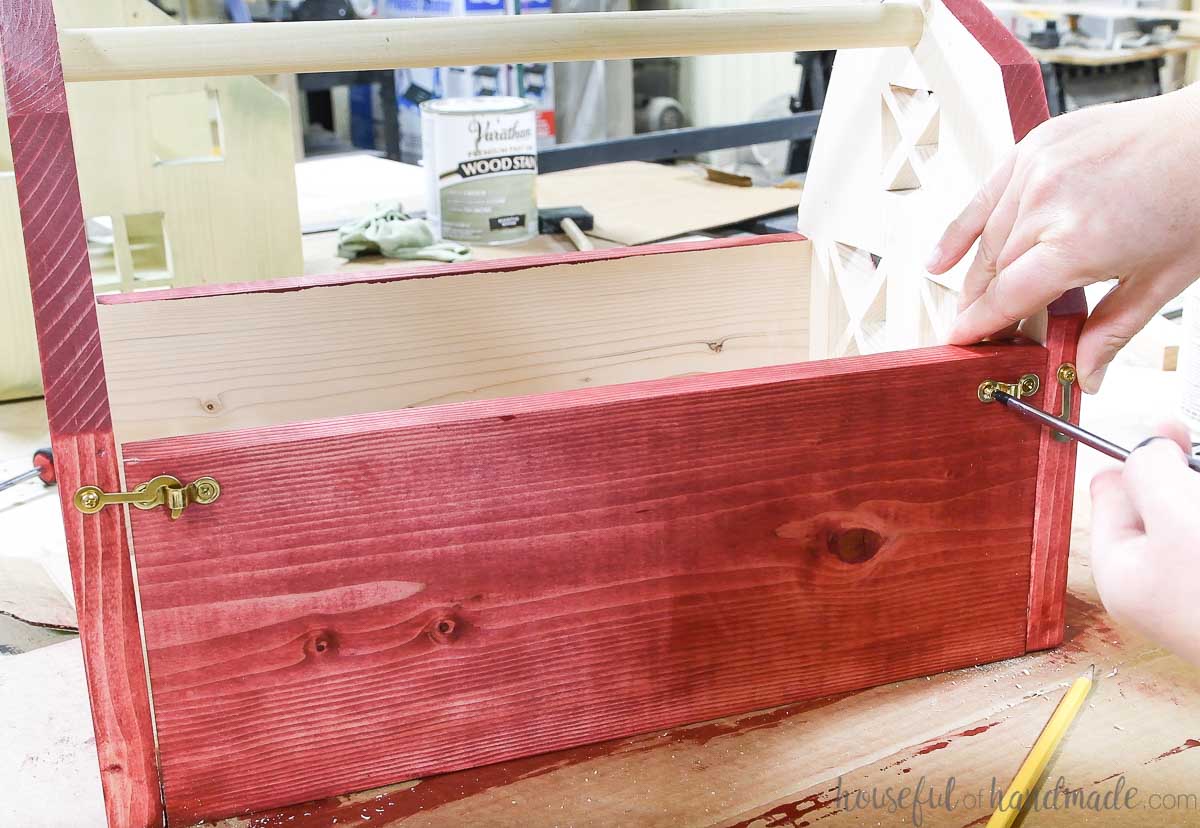
To keep your pivoting side in place for travel, add a hook & staple to each side.
You could also use a small decorative barrel bolt if you can find them. All my local stores were out.
Now your portable dollhouse totes are ready for play!
If you are giving them as gifts, you can fill them with dolls, animals, or accessories so they are ready for play immediately.
And then sit back and enjoy watching the kids use their toy totes for hours of creative play!
Happy building!
