
You do not need a bunch of fancy tools to make a high quality cutting board.
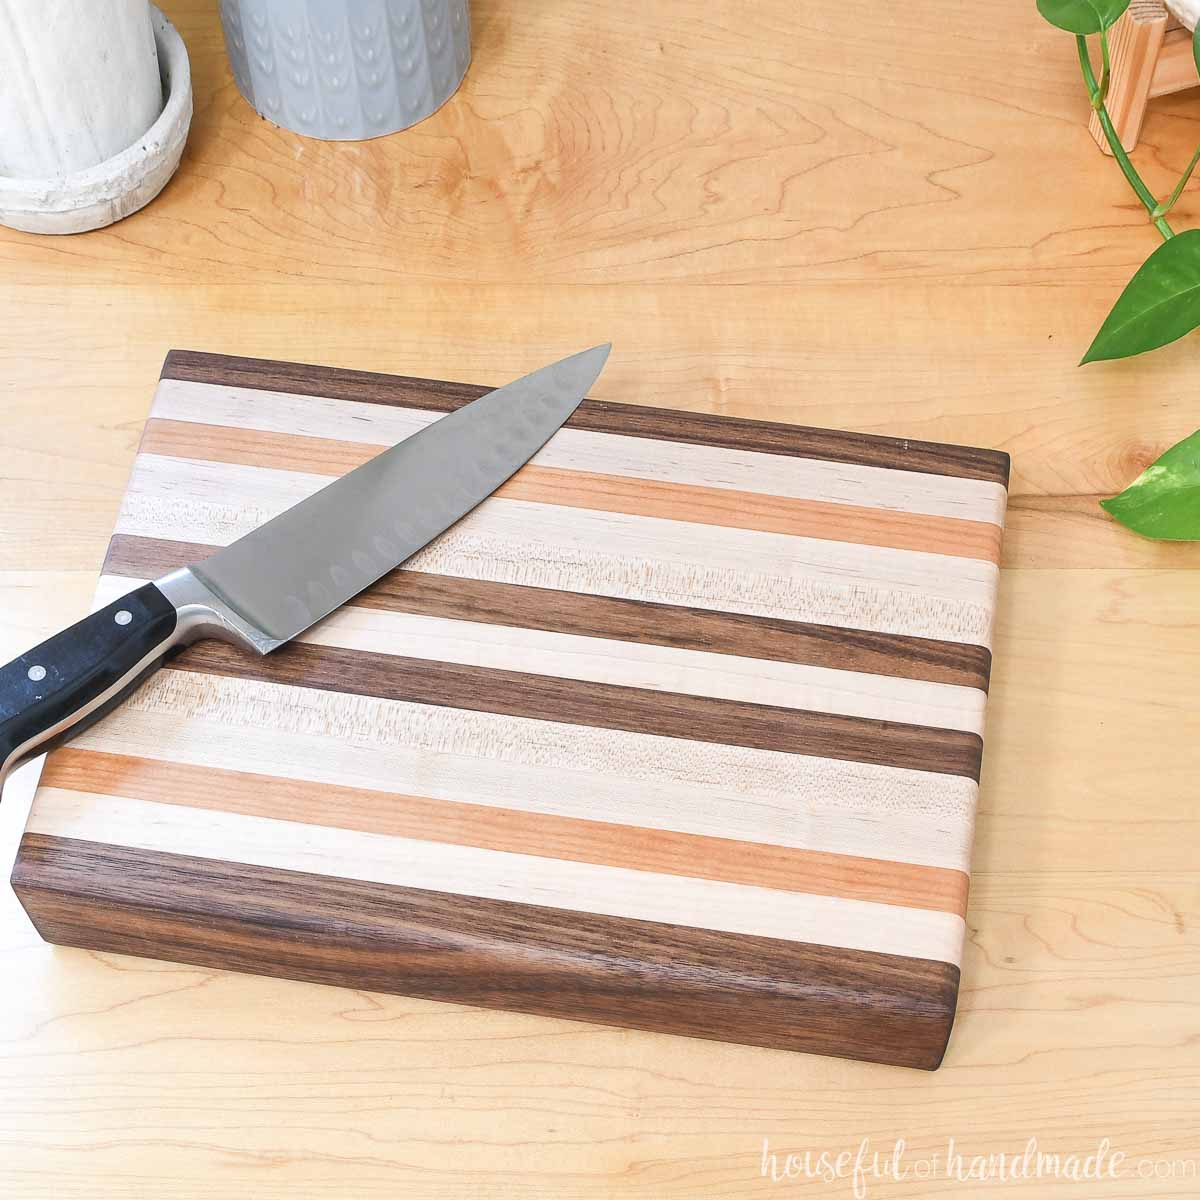
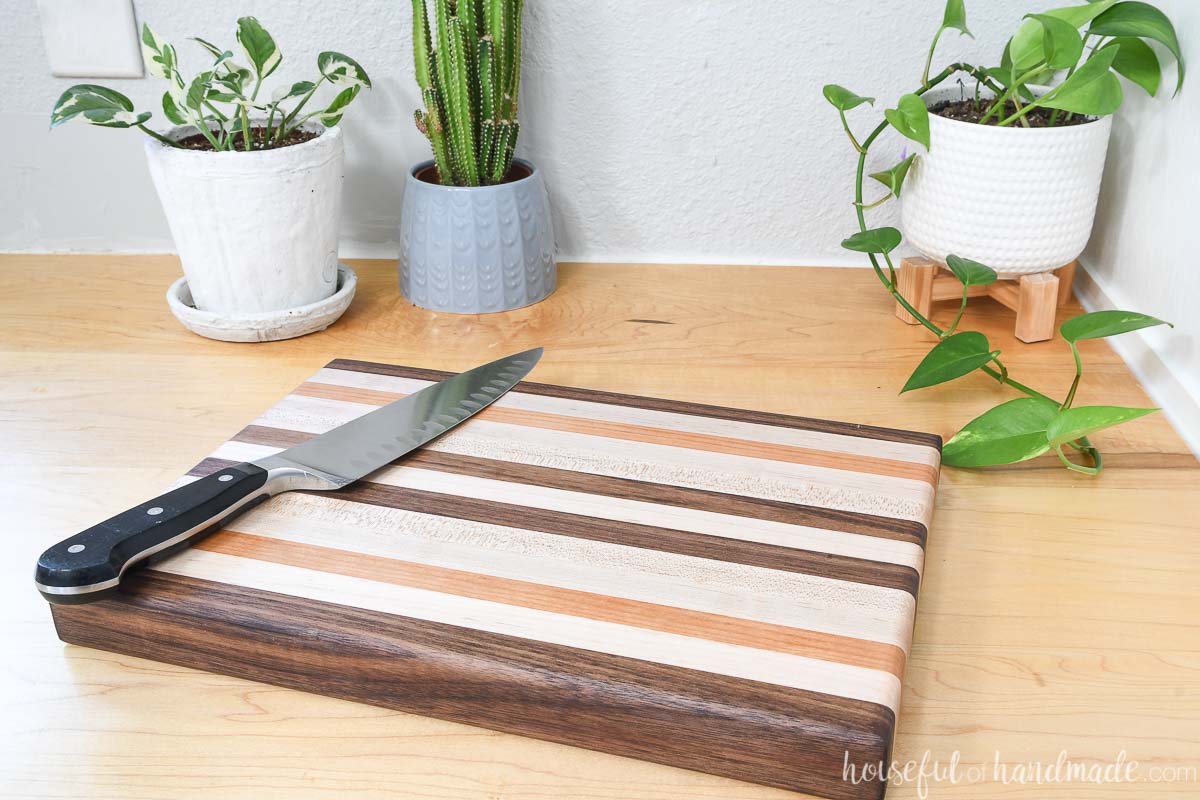
This easy edge grain cutting board is 1 1/2″ thick and will last for decades. But more importantly you can make this with just a miters saw, clamps and a sander!
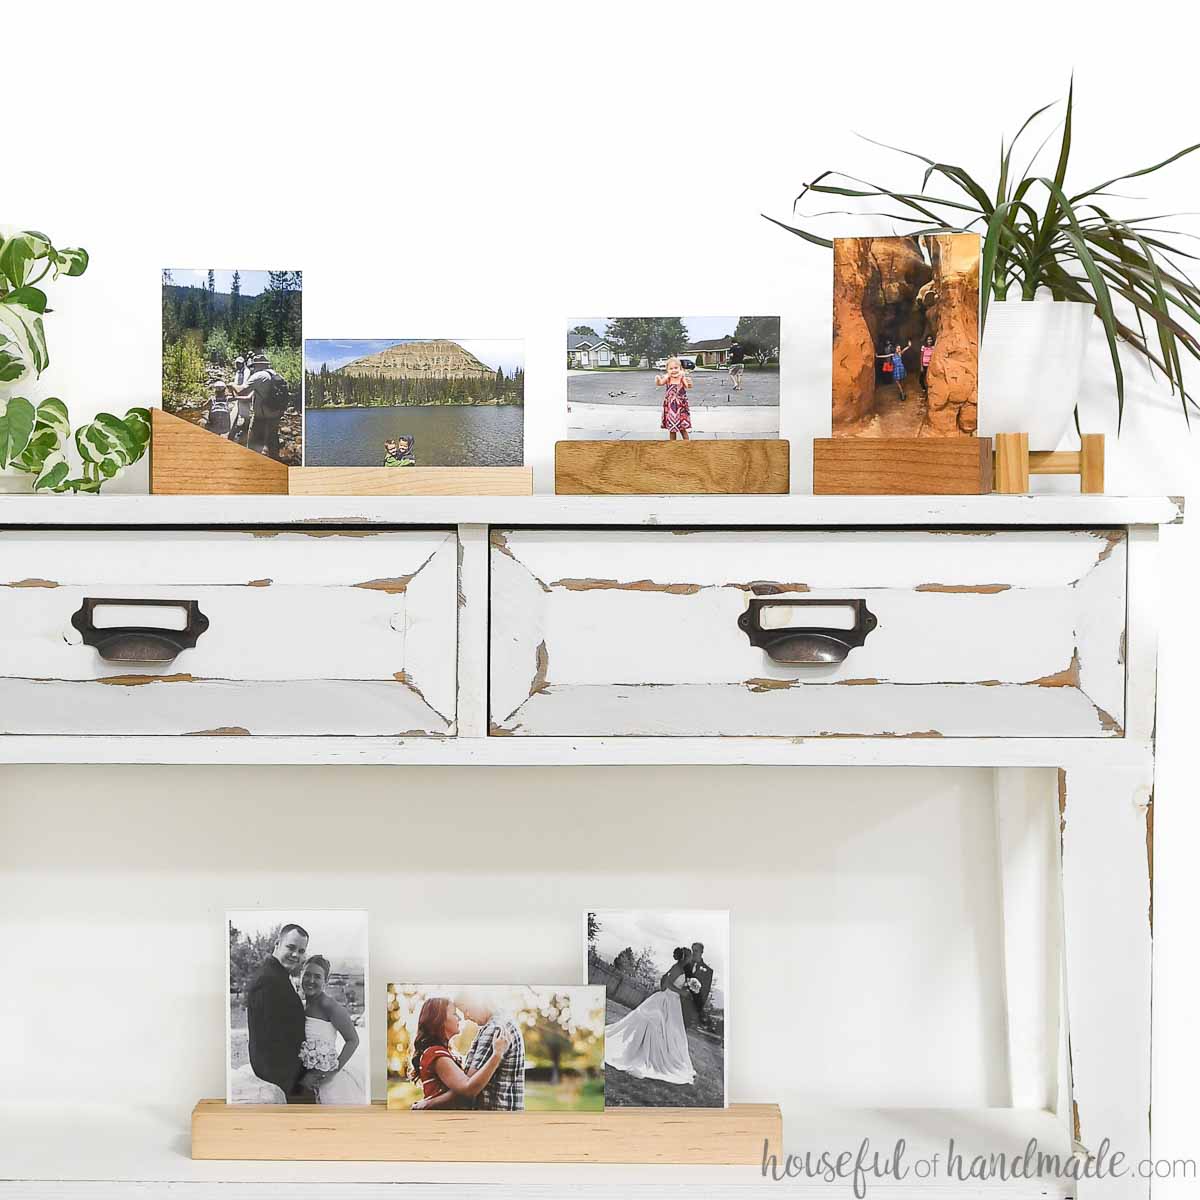
A homemade cutting board also makes a wonderful DIY gift idea. Who wouldn’t love a beautiful and useful gift?
So go grab some 1×2 boards and make one, or a few, easy cutting boards. They are so fun, you just might get addicted to making them!
This post may contain affiliate links. As an Amazon Associate I earn from qualifying purchases. Click here to read my full disclosure policy.
Types of Cutting Boards
There are three types of cutting boards:
- Face grain
- Edge grain
- End grain
A face grain cutting board is where the edges of the boards are glued together and you cut on the top, or face, of the board. These show knife marks faster than other cutting boards and, unless you have a mill to get thick boards, will only be 3/4″ thick.
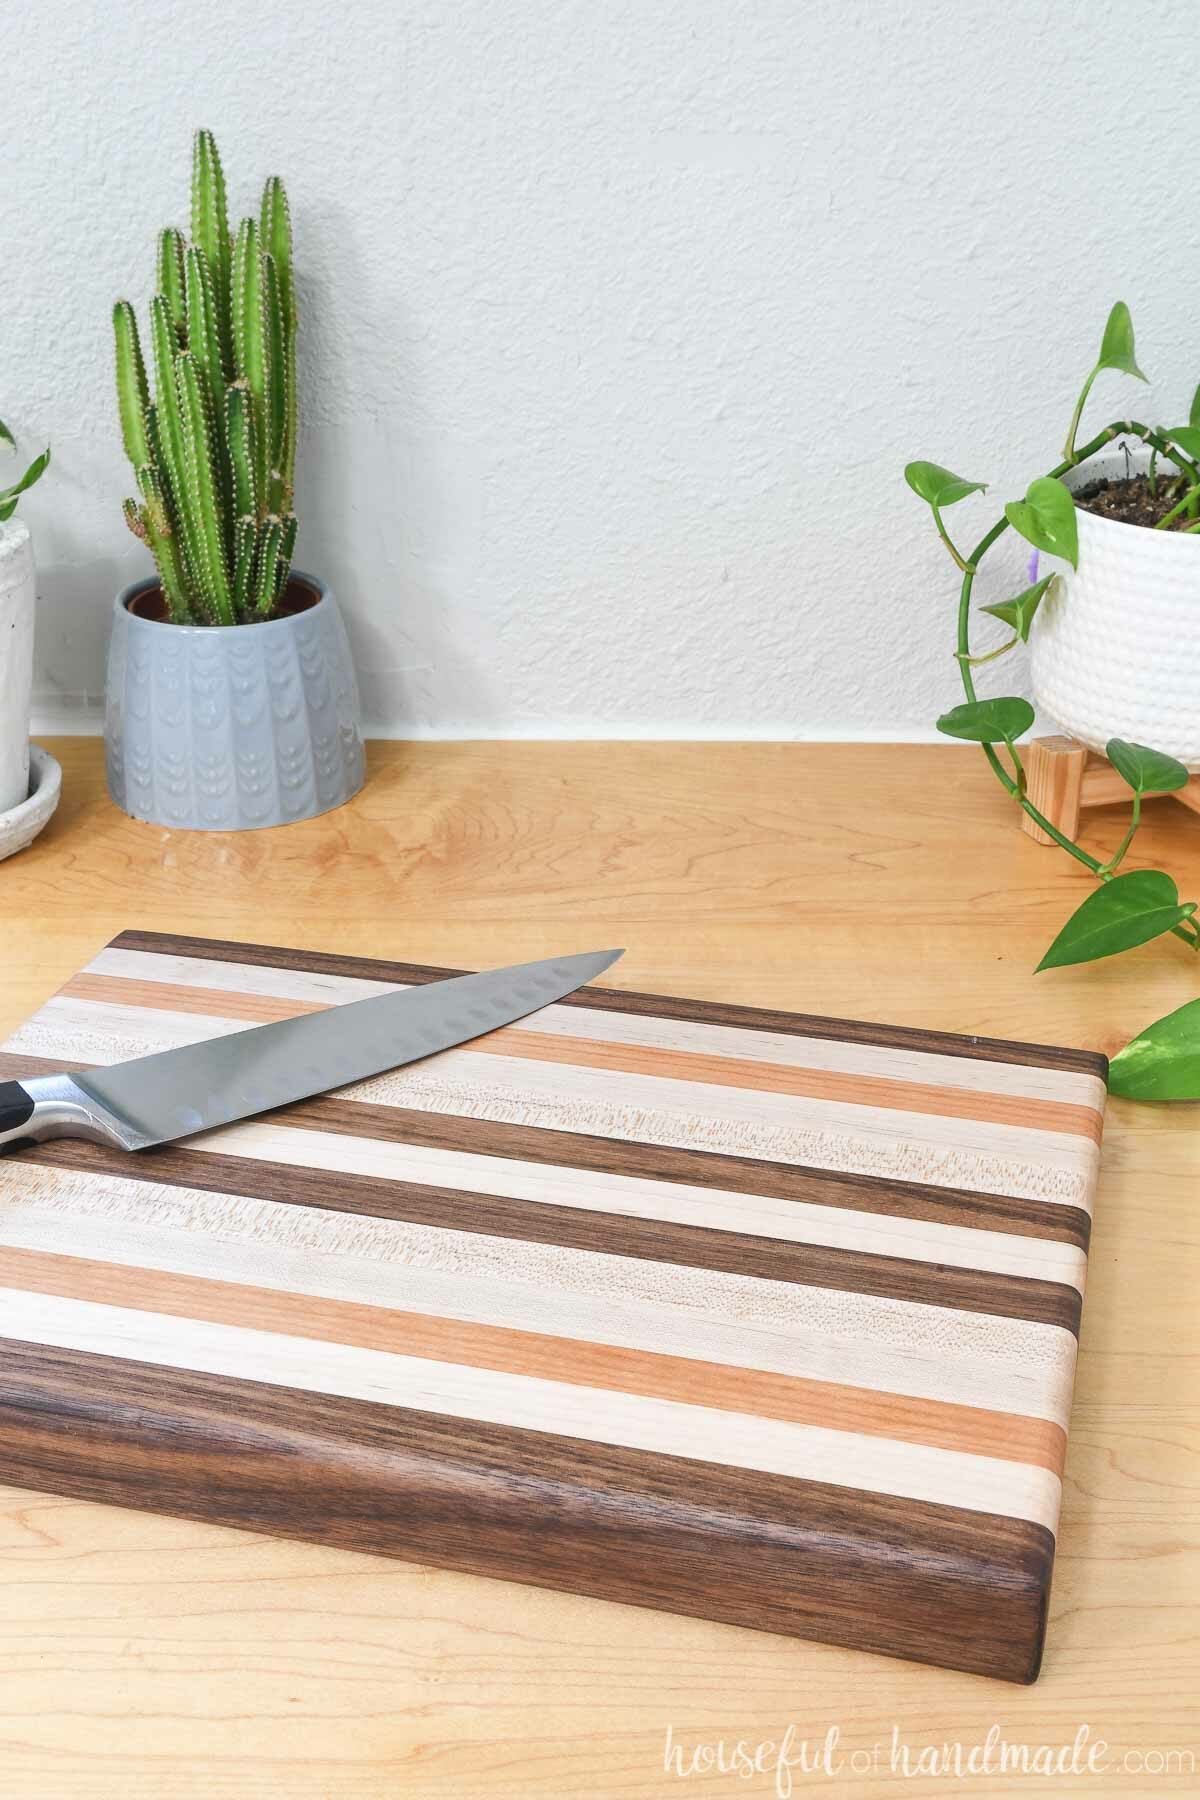
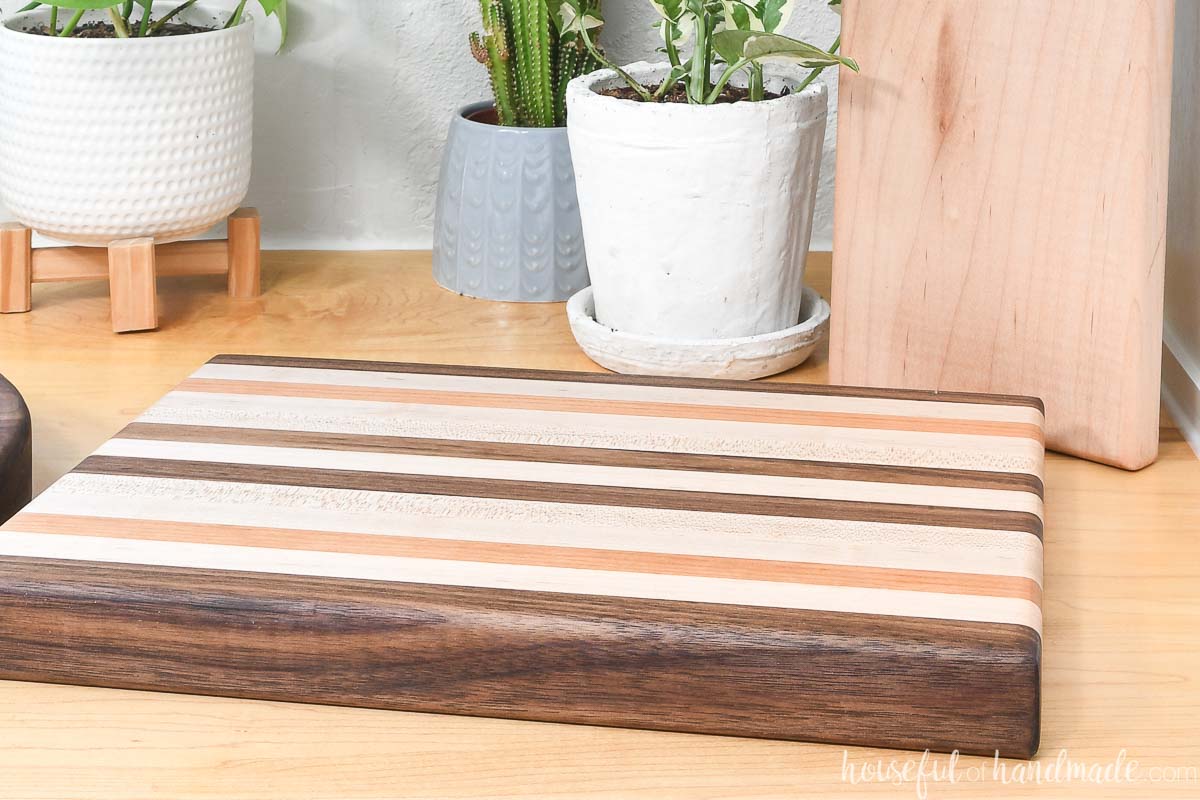
An edge grain cutting board is where you glue the boards together on their face and so the top of the cutting board is the side, or edge, of the boards. This kind of cutting board is less likely to warp and split. And it is easy to make them 1 1/2″ thick.
An end grain cutting board is where the sides and edges are glued together in stages and the top of the cutting boards is the ends of the lumber. They are very durable and hide knife marks the best, but take more time and equipment to make.

So to get a really nice, but easy to make, cutting board, I recommend starting with an edge grain board.
This board is made completely out of 1×2 hardwood boards. Check with your local hardware or lumber stores to get dimensional hardwood 1×2 boards (they will actually be 3/4″ x 1 1/2″)
You can get a variety of boards and make a fun striped cutting board. Or use all the same species to get a beautiful solid colored board.
What wood to use?
What wood you use to make your cutting board out of is important.
Do not use soft woods (like pine, fir or cedar). They splinter easily and are too porous so they can harbor bacteria.
When selecting hardwoods for cutting boards or other food surfaces, you want a hardwood with a tight grain. Wood with open grains (like ash, oak and hickory) are more porous and which means food can get stuck in there.
Select woods like hard maple, cherry, pecan or walnut for food safe boards. Also, more exotic woods like purple heart or bubinga can offer some fun colors to your wood gifts, but can be more expensive.
This article goes into more detail on selecting wood for your cutting boards.
DIY Gift Ideas
A DIY cutting board is a great handmade gift idea. Perfect for a hostess or housewarming gift or any holiday.
This week my friend Shara, from Woodshop Diaries, and I are sharing easy DIY gift ideas every day! That is 10 new handmade gifts you can use for anyone on your list.
Check out all the new ideas below or check out these 50+ handmade gift ideas. I will be adding new posts as we share throughout the week.


How to Make a Simple Edge Grain Cutting Board
Tools needed:
- Miter saw
- I recently upgraded to this larger sliding miter saw (watch for it to go on sale), but all my projects before were built with this inexpensive miter saw that I loved.
- Clamps
- Sander
- Chisel or sharp edge
- Optional- Trim router
Supplies:
- Hardwood 1×2 boards
- Waterproof wood glue
- Sandpaper
- Cutting board oil/wax
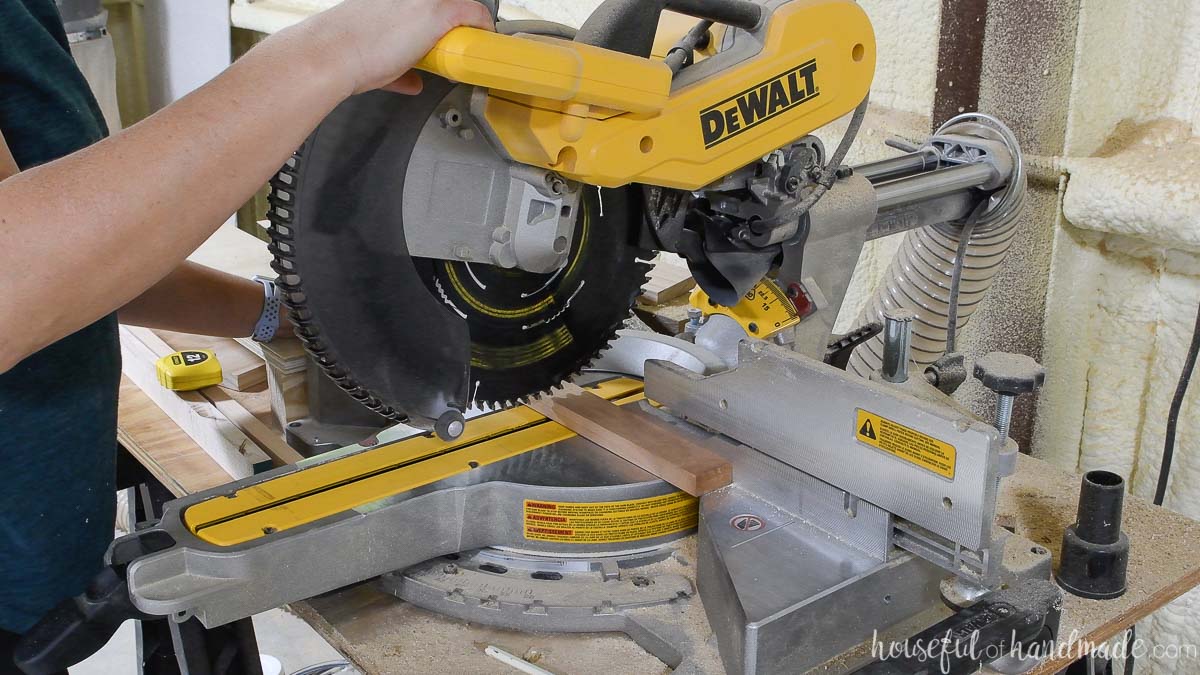
STEP 1- Cut your boards to length
Determine the length and width you want your cutting board. I made mine 9 3/4″ wide x 14″ long. It will be 1 1/2″ thick since that is the thickness of your 1×2.
The width will determine how many boards you need. Each 1×2 board is 3/4″ thick, so divide the width you want by 0.75 to get the number of boards you need. Then round up or down as needed.
For example, a cutting board made from 14 boards will be 10 1/2″ wide (14 x 0.75). Or a board made with 21 boards will be 15 3/4″ wide.
The length of the cutting board is determined by the length you cut your boards.
EXPERT TIP: Cut your boards around 1/2″ longer than needed so you have room to square off the cutting board after it is glued together.
Cut all the 1×2 boards to length on a miter saw or your saw of choice.
STEP 2- Glue boards together
You can create designs in your cutting board by using different species of wood. Line them up to create a pattern you like.
Or you can use all the same species of 1x2s for a solid look cutting board.
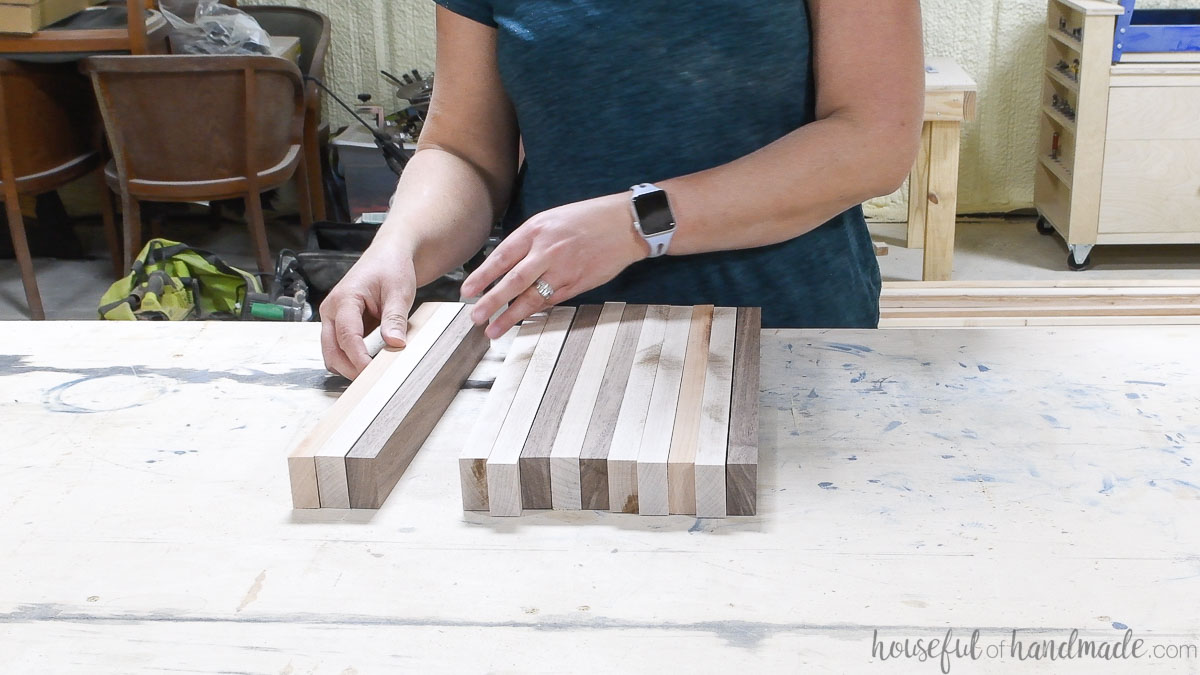
With all boards in order, flip the boards flat so the face grain is up. Add a good amount of waterproof wood glue to the top of all the boards, except the last one.
EXPERT TIP:
Make sure the glue completely covers the face of the boards. You cannot expect the glue to spread out into the edges and corners. And seams without glue can cause the boards to split apart with use.
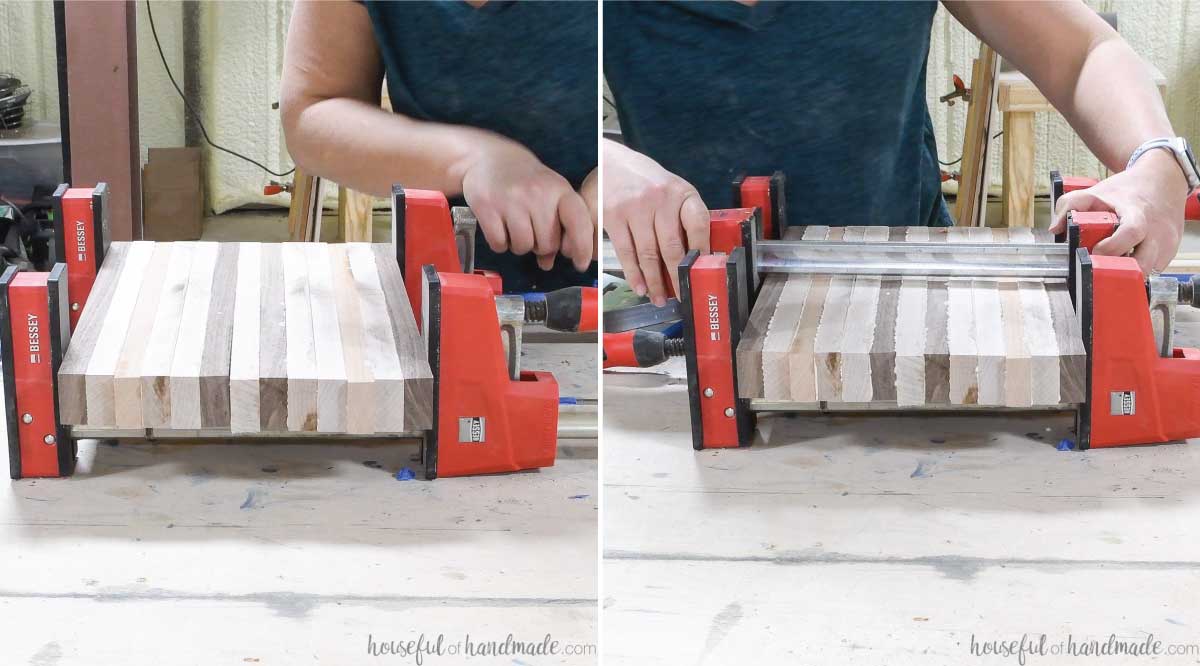
Flip the boards back on their sides so there is a side with glue in between all the boards. Slide them next to each other and try to line up the ends as best you can.
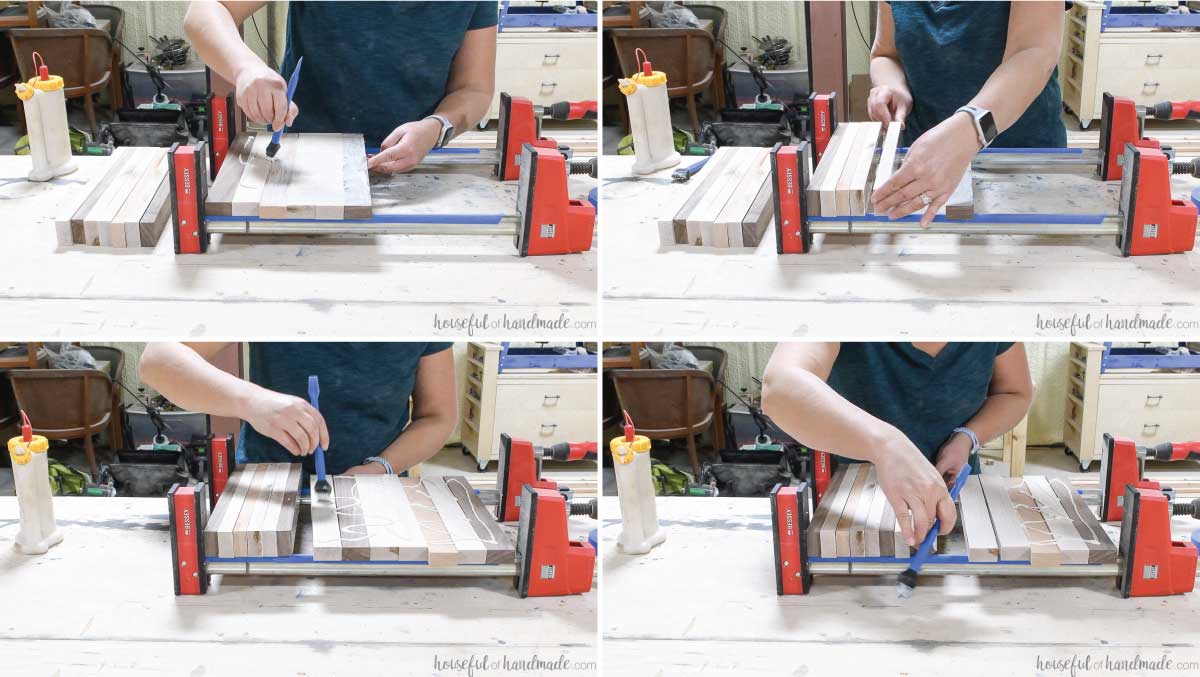
Tighten the clamps on the boards.
EXPERT TIP:
Tighten the clamps until you have glue bubbles coming out of all the seams and they are firm. No need to tighten too extreme. That can cause your board to bow.
Use alternating clamps to help prevent the board from curving in the clamps.
Let the glue dry for a few hours or overnight.
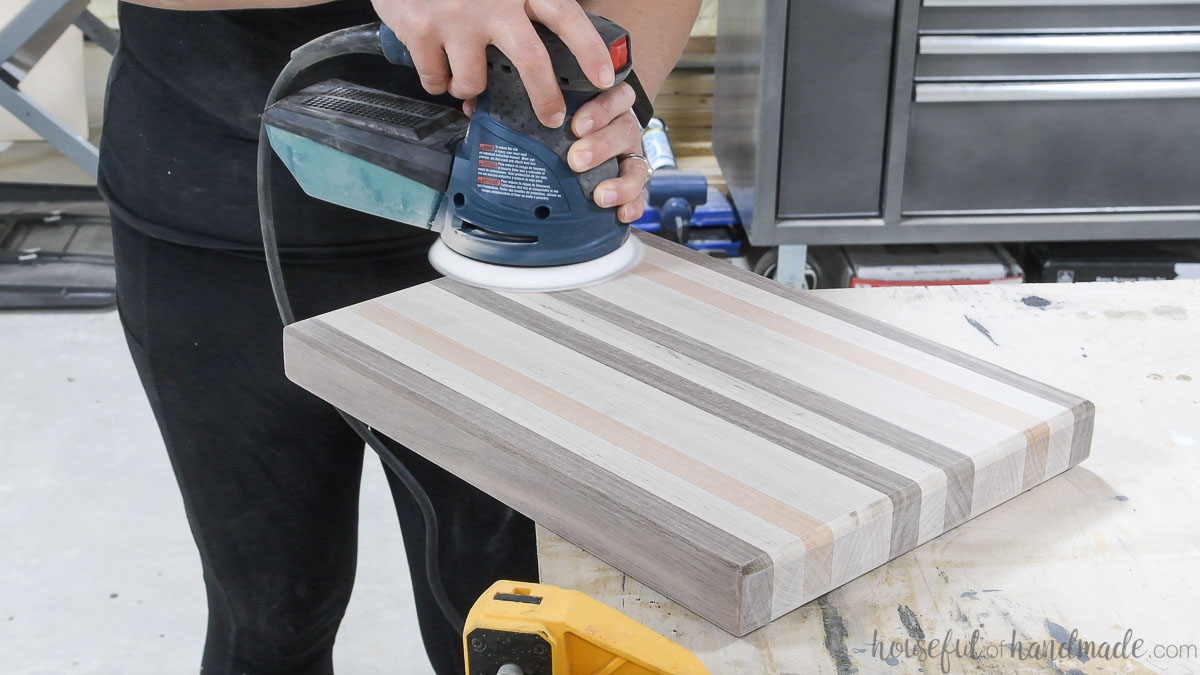
STEP 3- Sand and shape
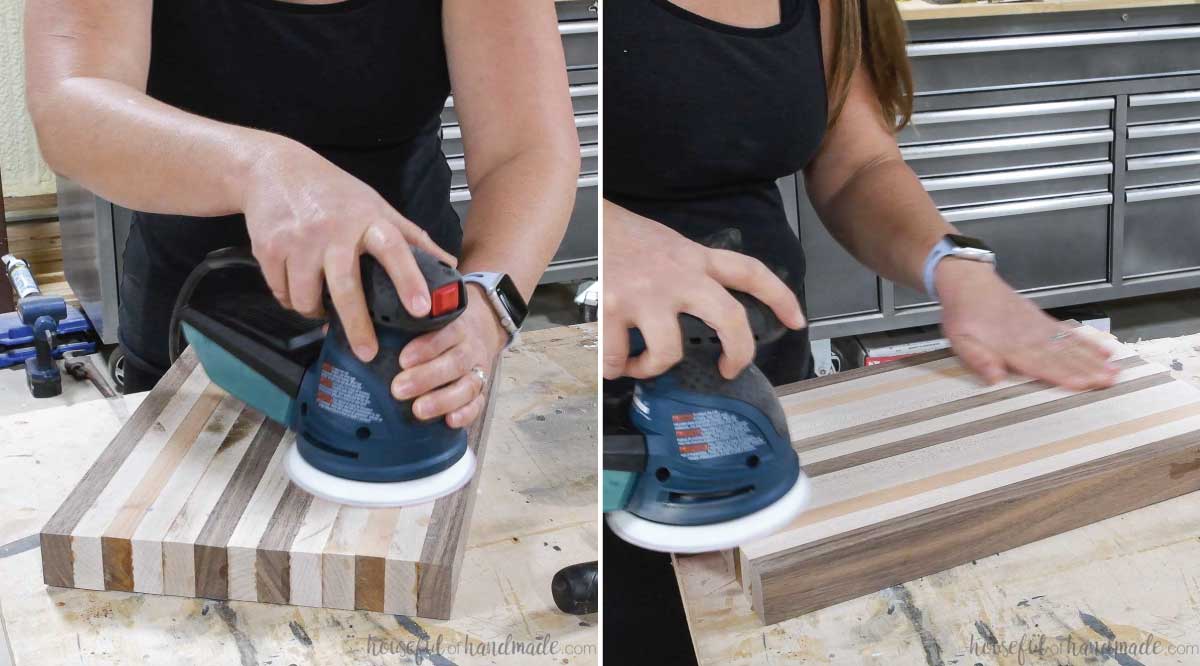
Use a chisel or sharp edge to remove all the glue bubbles. It is way faster than trying to sand it with your sander. And it can gum up the sandpaper.

Use a coarse sandpaper (I used 40 grit) on your sander. I used an orbital sander, but a belt sander would also be a good option.
Keep consistent pressure on your sander and try to keep it flat while you sand the entire surface with the coarse sandpaper.
Run your hand over the surface to check for smooth. If there are still any ridges, you will be able to feel them even if you cannot see them.
Once the first side is smooth, flip it over and repeat on the other.
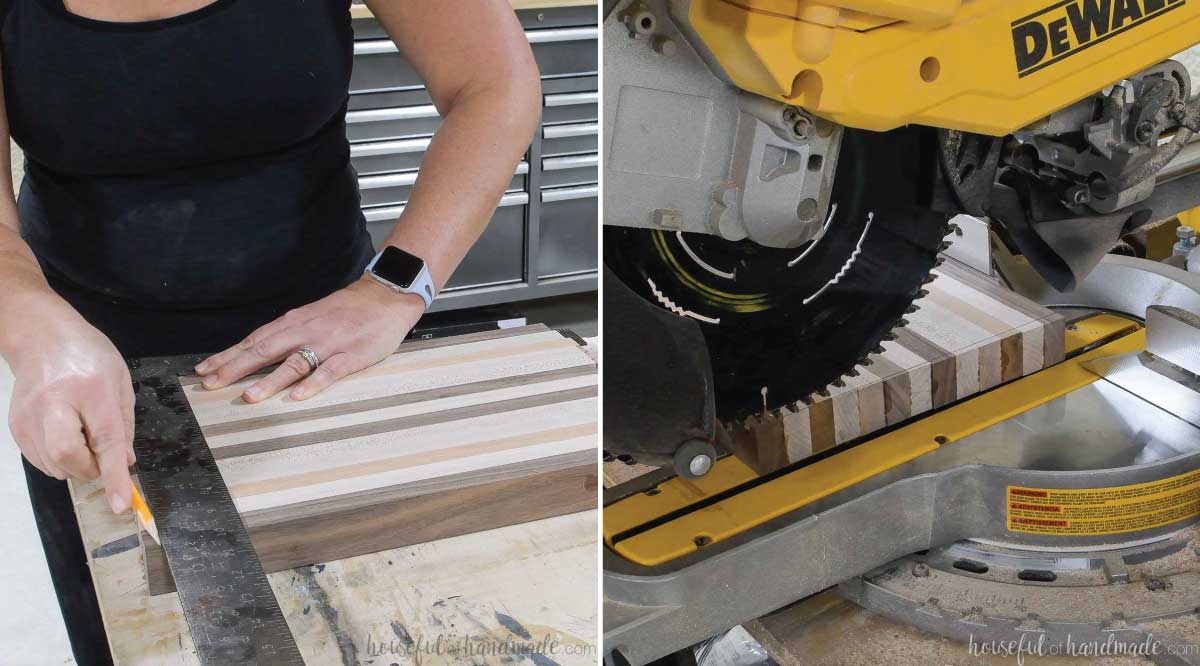
After sanding the entire cutting board smooth with your coarse sandpaper, square off the edges.
To do this, draw a line on both sides of the board perpendicular to the edge of the board. Make sure you cut off all the uneven parts of the ends.
Use a saw to cut along this line. If you do not have a sliding miter saw, you can cut it on a regular miter saw. Just cut half of the first side, then flip over the cutting board and reline up the saw blade before cutting the other half.
If you have a trim router, you can use it to round over the edges of the cutting board for a nice finish.
If not, you can round over the edges with your sander.
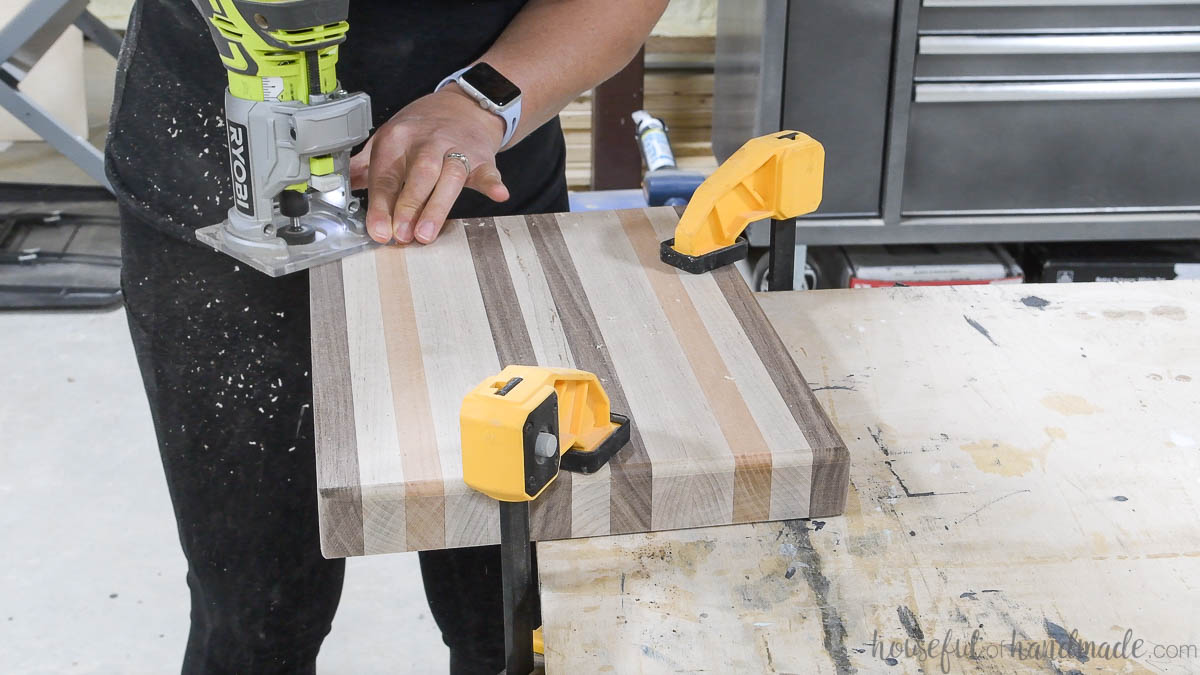
Now step down your sandpaper to a less coarse one. Sand the entire cutting board, including the sides and round over.
Then step down the sandpaper again. Sand the entire cutting board again.
Continue until you have use a 220 grit for your final sand.
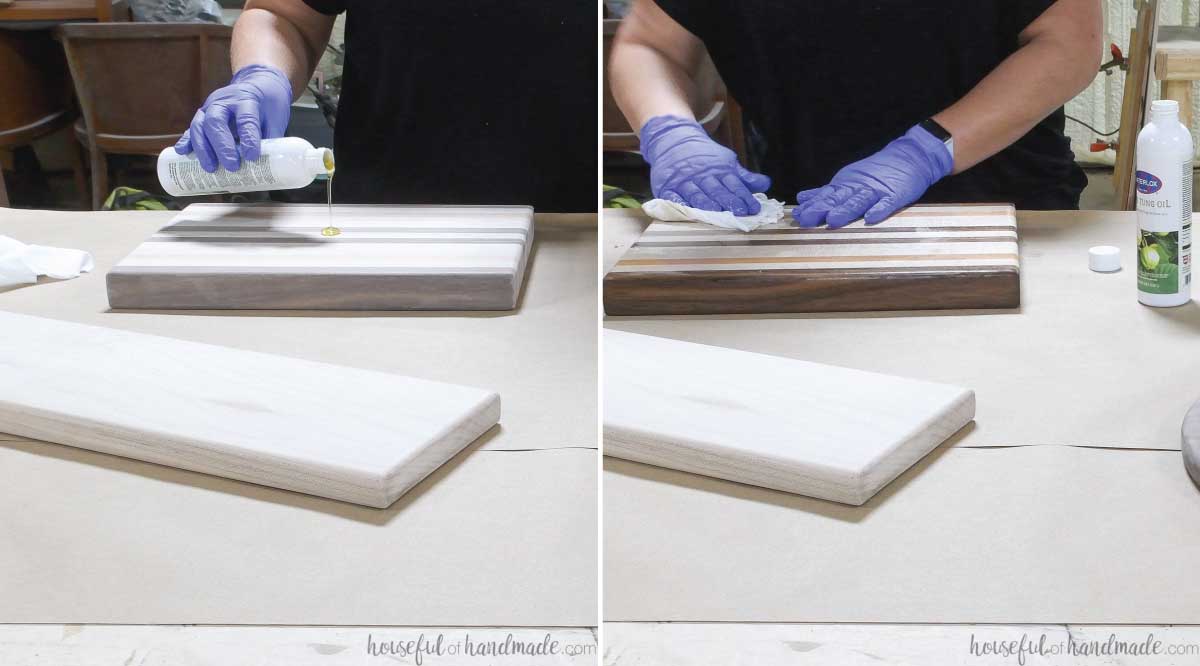
STEP 4- Seal your cutting board
Use a generous amount of cutting board oil on your new DIY cutting board.
I like to rub it into the wood with a gloved hands and really let it soak in. Make sure to add oil to the entire cutting board, including the sides.
Let the oil sit on the cutting board for 10-20 minutes to soak into the wood as much as possible. Then remove the excess with a lint free cloth.
Check the instructions on your cutting board oil to see if you need to wait so many days before using it.
Also, if you are giving this as a gift, you will want to let the cutting board sit overnight to dry out before wrapping. Otherwise the oil will start to seep through the paper.
And now you are ready to enjoy cooking on your new cutting board.
As you accumulate knife marks, you can re-sand the surface as needed. That is my favorite part of a thick handmade cutting board!
Happy building!
