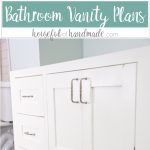
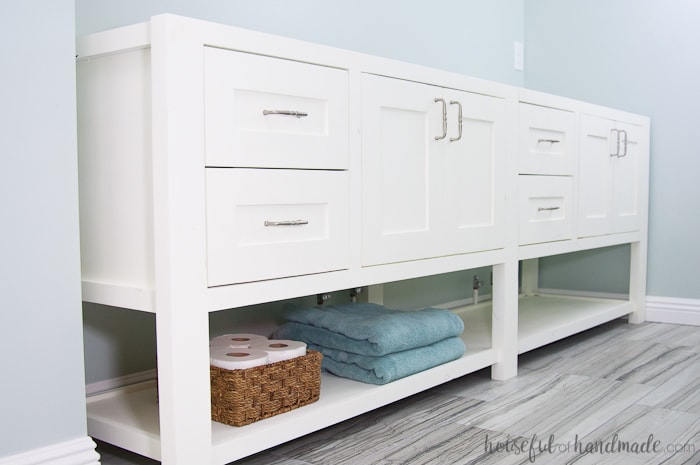
Say goodbye to your basic bathroom vanity! A new vanity that looks like a piece of furniture is the perfect way to update your bathroom.
A new vanity is a fun DIY project. These easy to follow plans are a great weekend project.
I partnered with Kreg Tools to share the build plans for our 8′ vanity for free. Or you can get build plans for this open shelf vanity in other sizes here.
This post may contain affiliate links. As an Amazon Associate I earn from qualifying purchases. Click here to read my full disclosure policy.
Open Shelf Bathroom Vanity
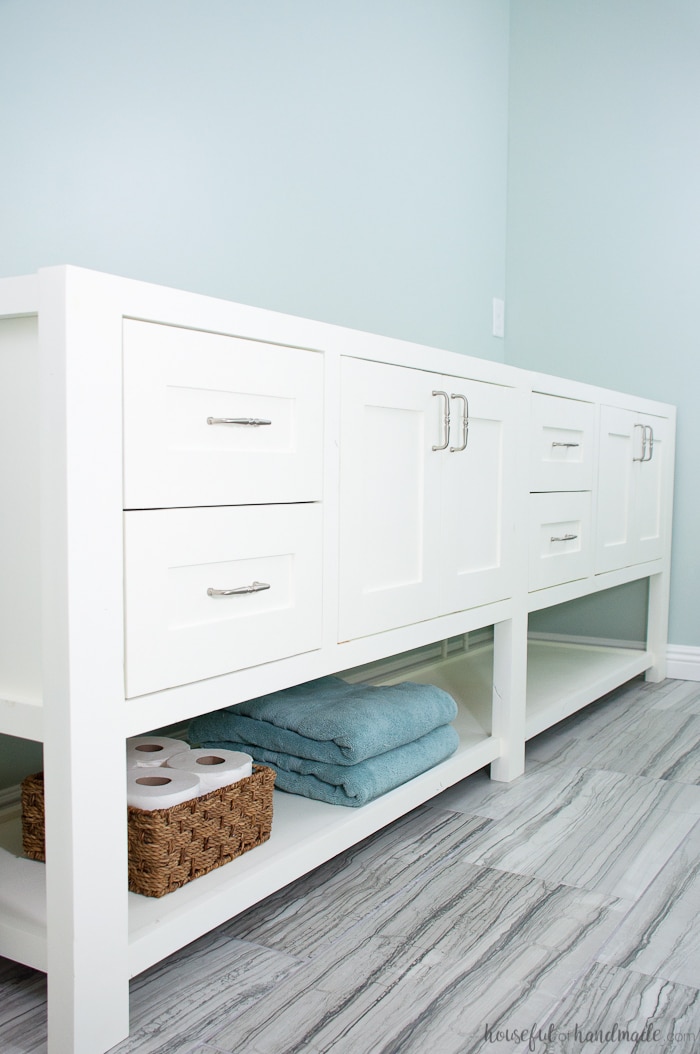
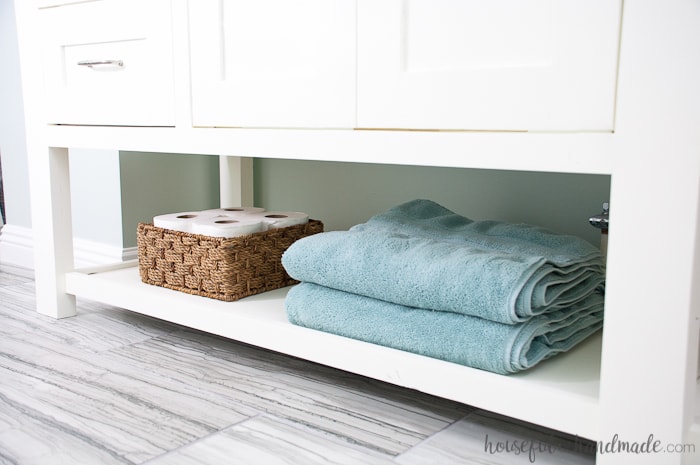
You may think you want a closed cabinet to hide away all your bathroom stuff. But an open shelf on the bottom helps to make a smaller bathroom feel less closed in.
This DIY vanity also has plenty of storage!
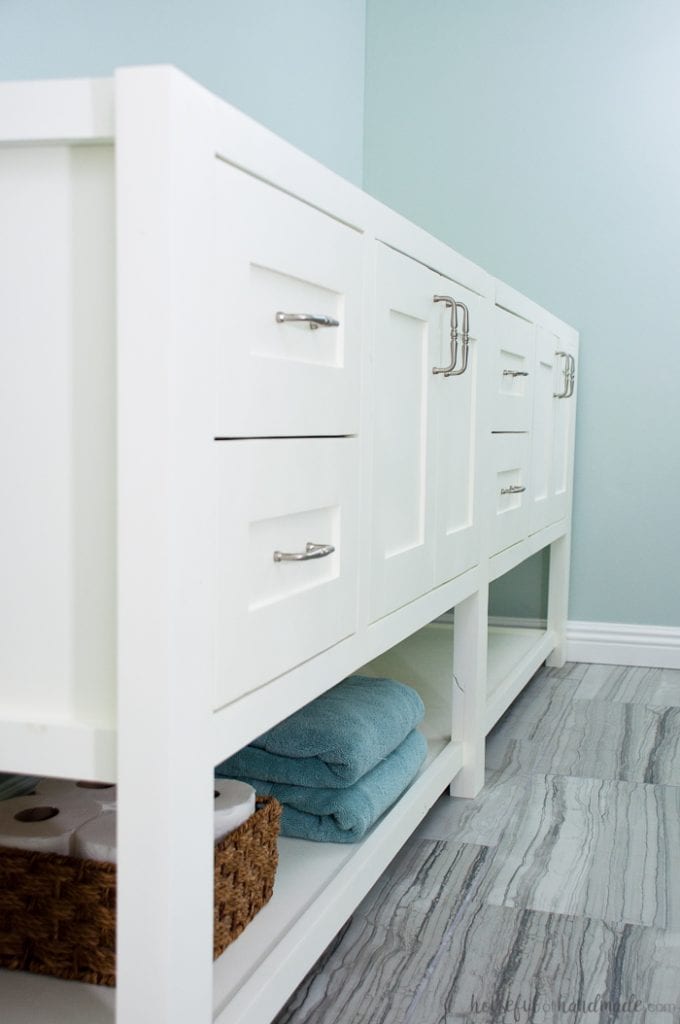
Under each sink is a large cabinet with room for plumbing as well as storage.
There are also 2 deep drawers by the cabinet. I prefer deep drawers in the bathroom because you can stand containers upright making more room for storage.
Below the closed storage is the large open shelf. The shelf is the full length and width of the bathroom vanity.
You can use this open shelf for tons of storage too!
The open shelf turns the storage into decor. I like to use it to display:
- Towels
- Extra toilet paper
- Hair styling tools in bins
- Canisters for bath accessories
Our vanity is 8′ long, so it is two 48″ cabinets combined. The 48″ cabinet has large drawers, more than I can even fill up!
But even if you do not have room for an 8′ vanity, you can still build your own beautiful open shelf one. I have created plans for each standard size from 36″ to 60″.
All of these plans have room for a single sink and two drawers with the open shelf below.
But best of all, each one is designed to fit a standard bathroom vanity top. You can buy a solid surface vanity top at the home improvement store to update your bathroom fast and on budget!
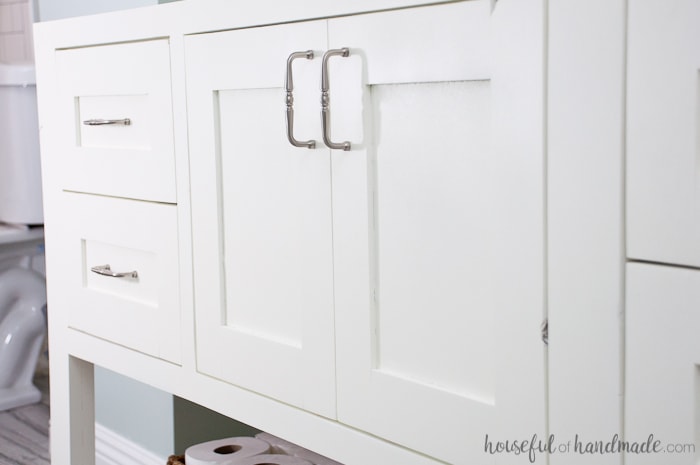
Classic Vanity Design with Shaker Doors
This DIY vanity is a simple classic design, perfect for updating any home.
The vanity is built like a piece of furniture for your bathroom, instead of basic cabinets. This gives a bathroom a high-end design without a high-end price tag.
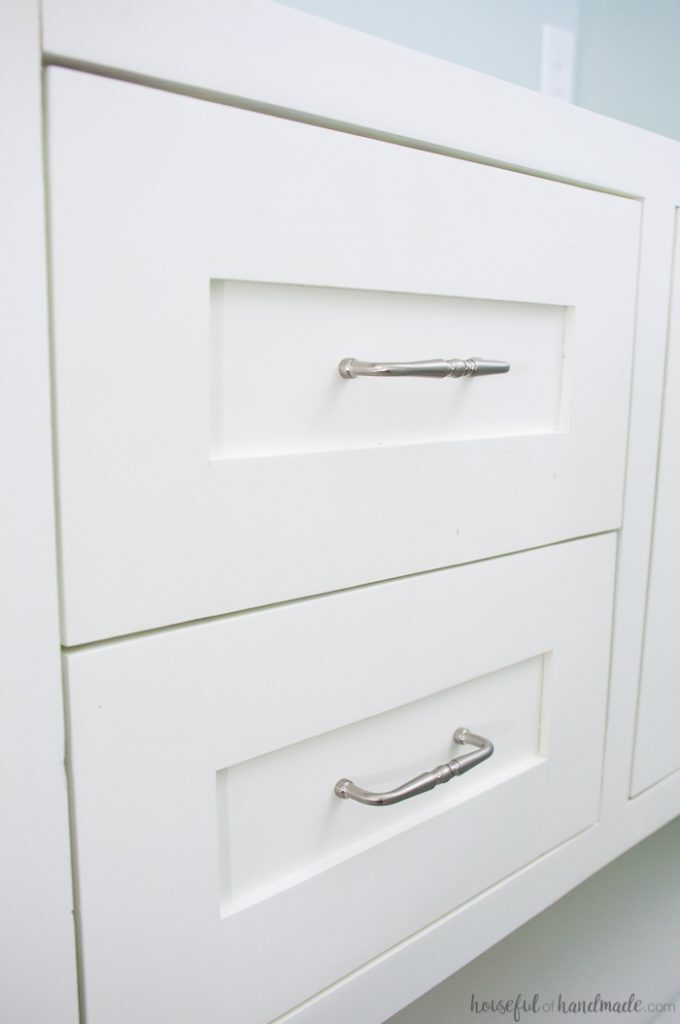
The shaker style doors are built without a router. This makes it an accessible build for a newer woodworker.
The cabinet is built with a classic face frame and inset doors. It makes a nice clean design for the bathroom.
Budget Bathroom Vanity
The very best part of our new DIY bathroom vanity might be that is was so much cheaper to build than buy!
The entire vanity cost less than $300 to build! And I didn’t use the cheapest wood to build it.
I used my favorite budget friendly hardwood: knotty alder. It is an easy hardwood for beginners to use and is beautiful. If you stain it, it looks like cherry. You can see the natural color on this DIY dining room hutch.
Find a lumber that fits your budget to make your own vanity. Then learn how to get a professional paint finish on it here.

DIY Bathroom Vanity Build Plans
Tools & Materials
Recommended Tools:
- Miter saw
- I recently upgraded to this sliding miter saw (watch for it to go on sale), but previously used this inexpensive miter saw that I love.
- Circular saw with guide track or rip guide
- Jig saw
- Pocket hole jig
- Drill
- Impact driver (optional, but I love not having to switch bits with the drill)
- Speed square
- Right angle clamp
- Face clamps
- Brad nailer
- Sander
Supplies:
- Lumber
- (2) 2×4 boards, 8’ long
- (2-4) 1×2 boards, 8’ long
- (3-4) 1×4 boards, 8’ long
- (2-3) 1×3 boards, 8’ long
- (2-4) 1×6 boards, 6’ long
- (1) 1/2” plywood, 4×8 sheet
- (1) 1/4” plywood, 2×4 sheet
- 1 1/4” pocket hole screws
- 1” pocket hole screws
- 1” brad nails
- 5/8” brad nails
- 18” drawer slides
- Drawer pulls
- Cabinet knobs
- Wood glue
Cut List
Cut out the pieces for the 8′ vanity according to the build plans on Kregtool.com.
Or get the printable PDF plans for this vanity in other standard sizes here.

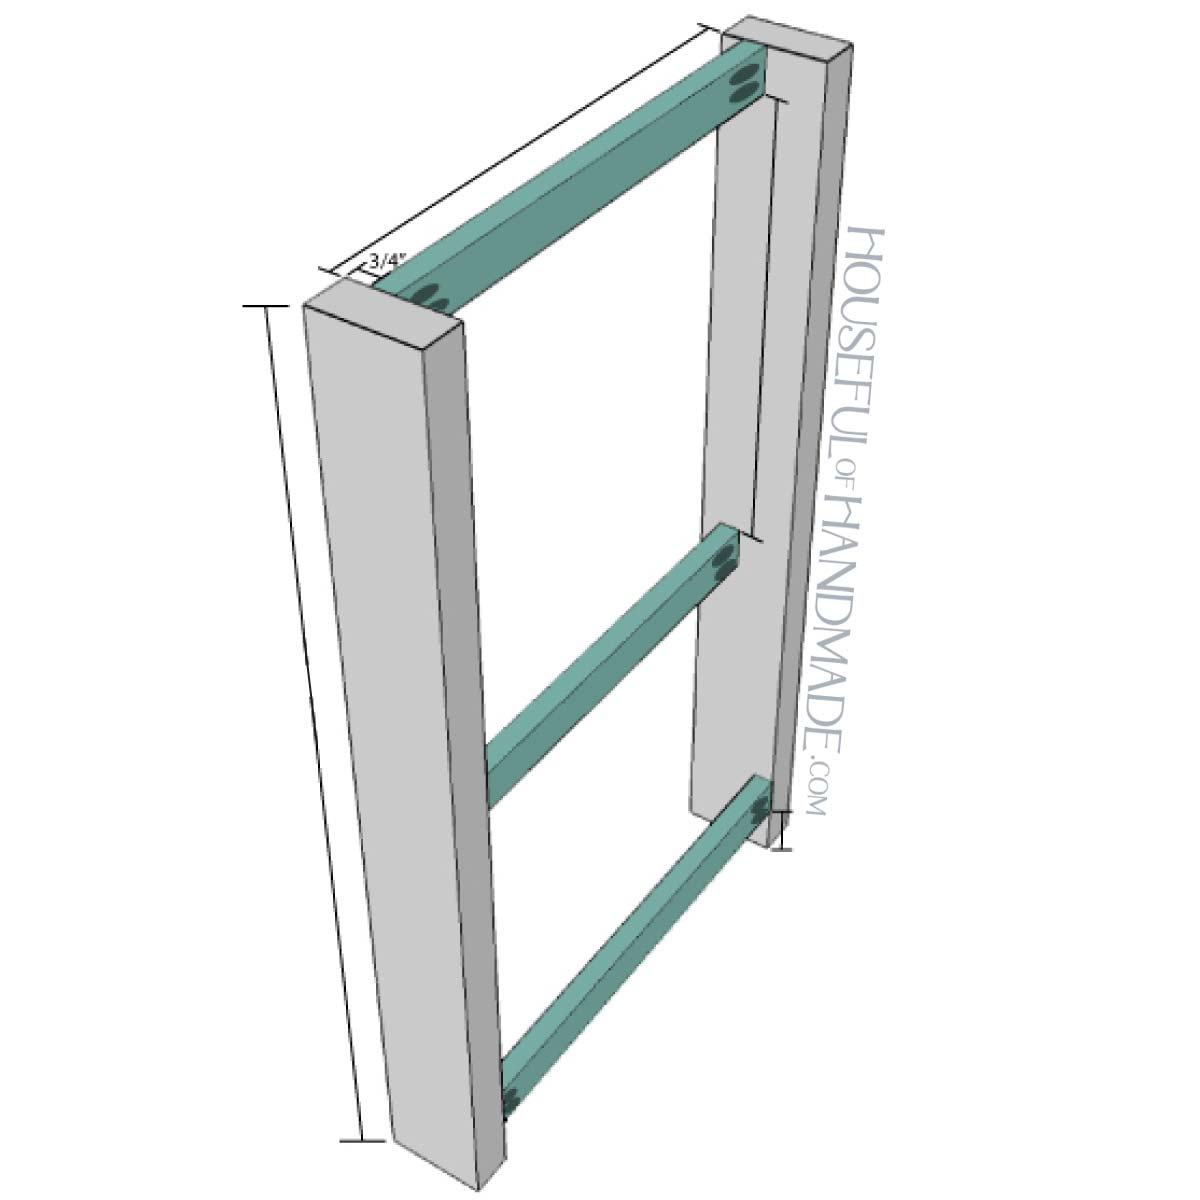
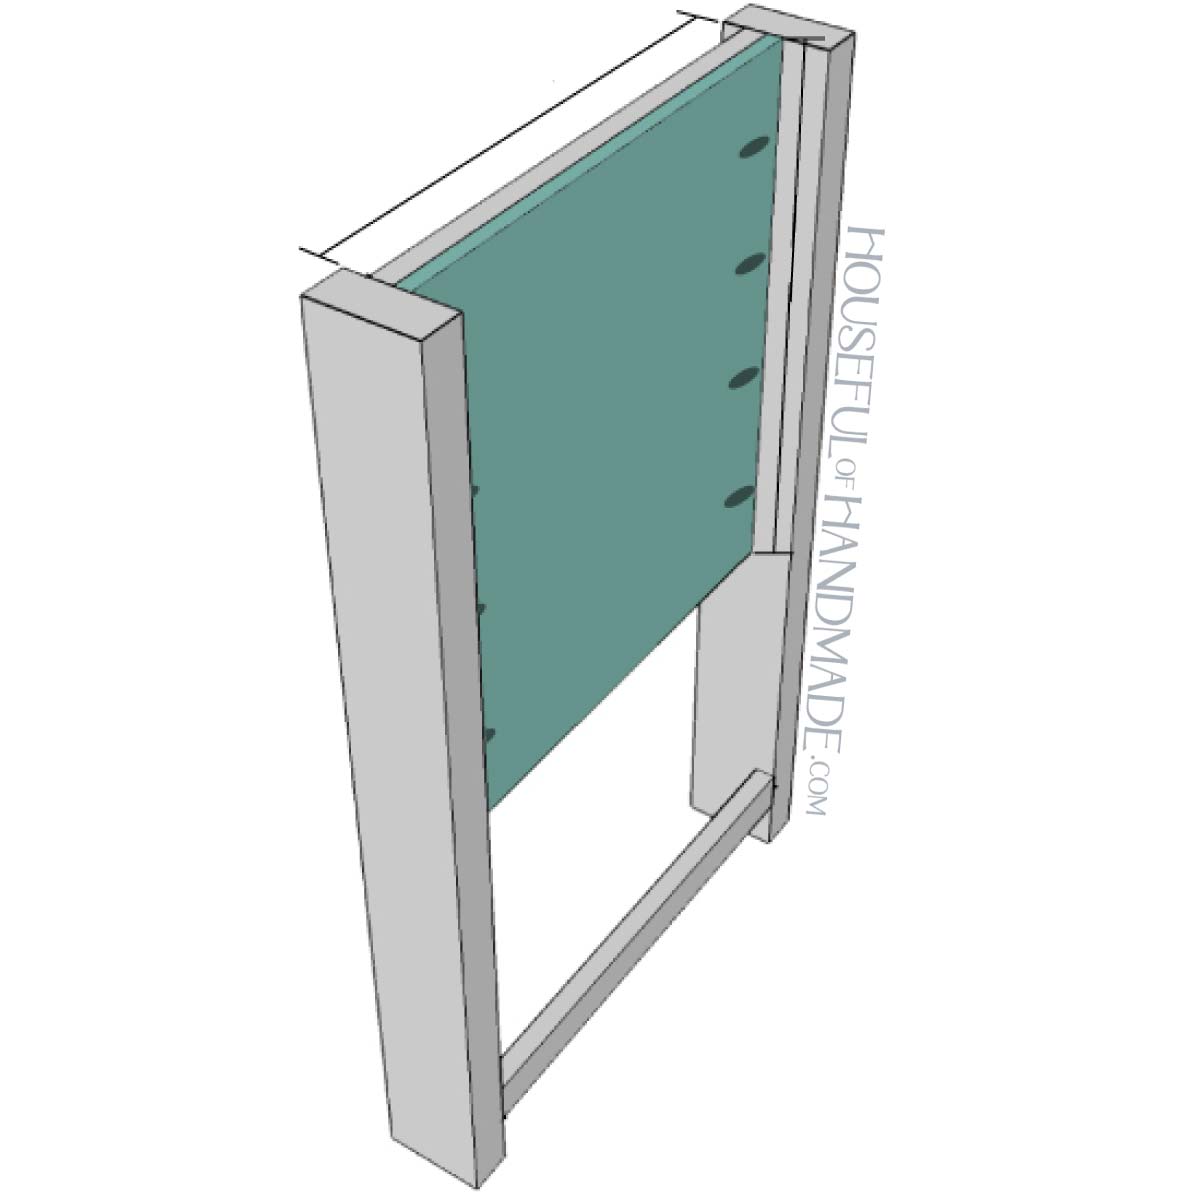
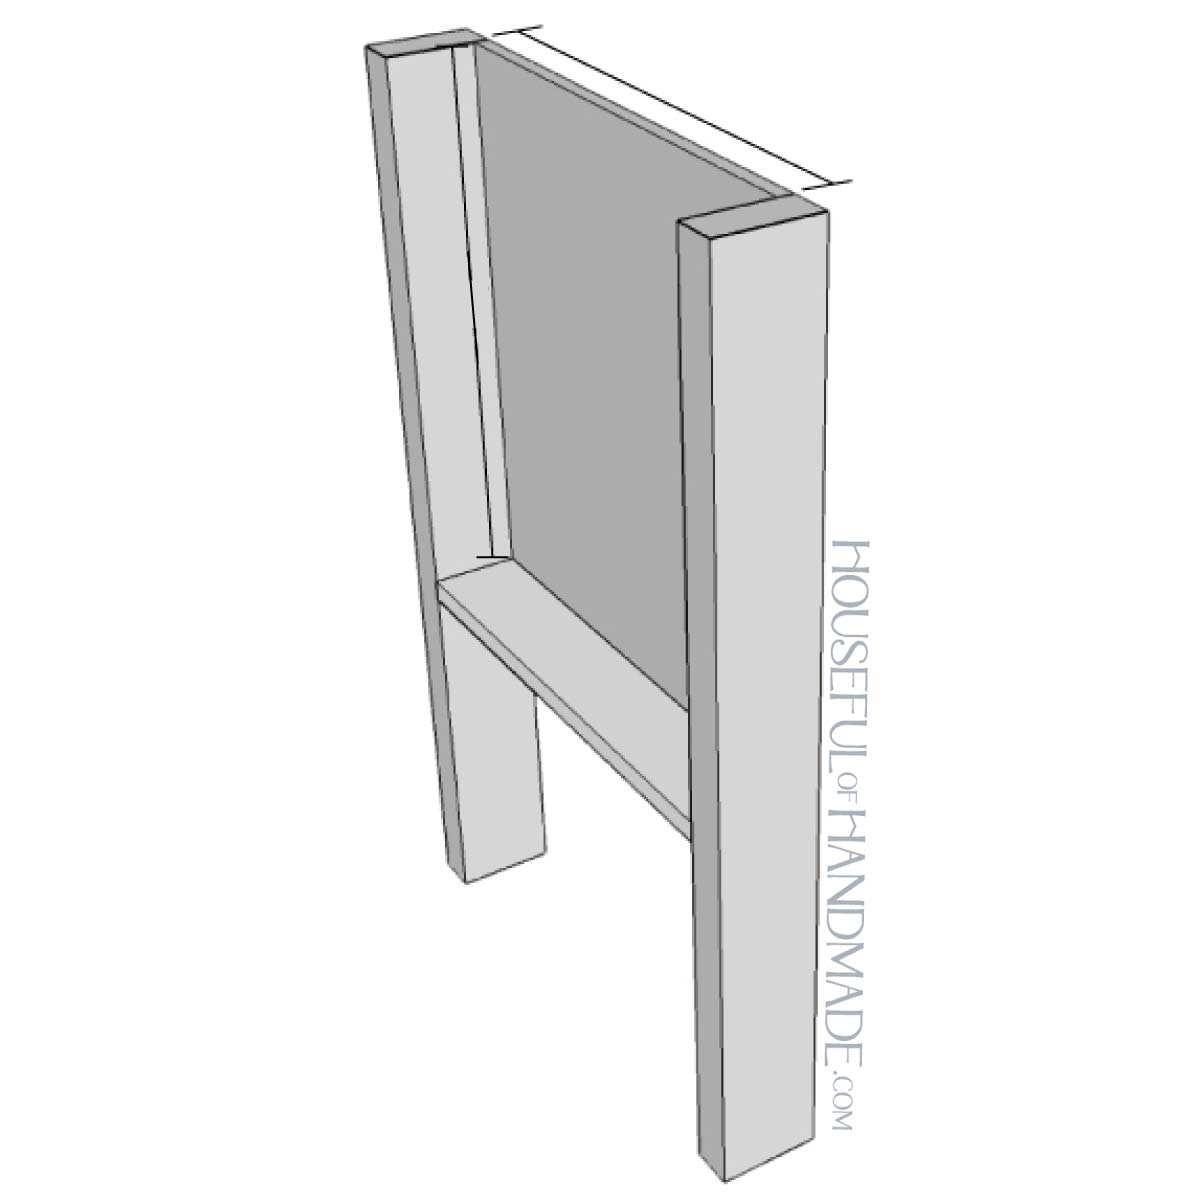
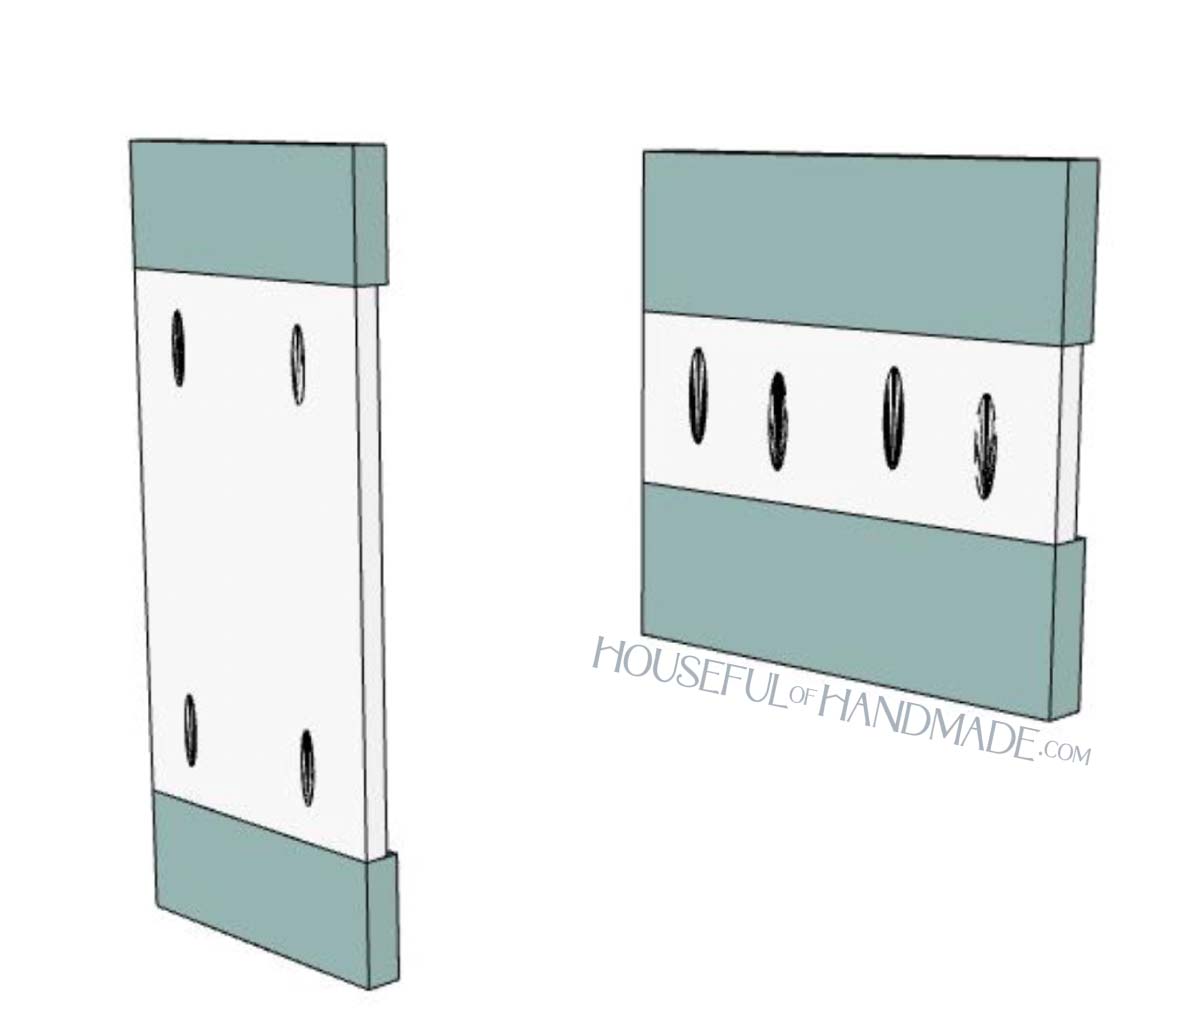
STEP 1- Build the sides
Drill pocket holes set for 3/4” thick material in both ends of the side trim pieces.
Assemble the sides by attaching the side trims boards between legs. Attach one board at the top, set back 3/4″ from the outside edge.
Then attache one board 16″ below the top one, again 3/4″ in from the outside edge. And the last board 2″ up from the bottom and flush with the inside edge of the legs.
Secure with 1 1/4” pocket hole screws and wood glue.
Repeat for the other side, making sure you mirror it.
Drill pocket holes set for 1/2” thick material in the sides of the plywood side panel pieces.
Attach the panels to the inside of the side trim pieces so they are flush with the top one and 1/2″ above the bottom one.
Secure with 1 1/4” pocket hole screws into the legs and 1” brad nails through the plywood into the side trim pieces.
If you are making a double vanity, build the center legs.
Attach the 1×4 between the 2x4s 18 1/2″ from the top with pocket holes.
Then attach the center plywood to the legs, flush with the top and the right side of the legs with pocket holes.
Put the pocket holes on the right side of the panel so it will be on the drawer side.
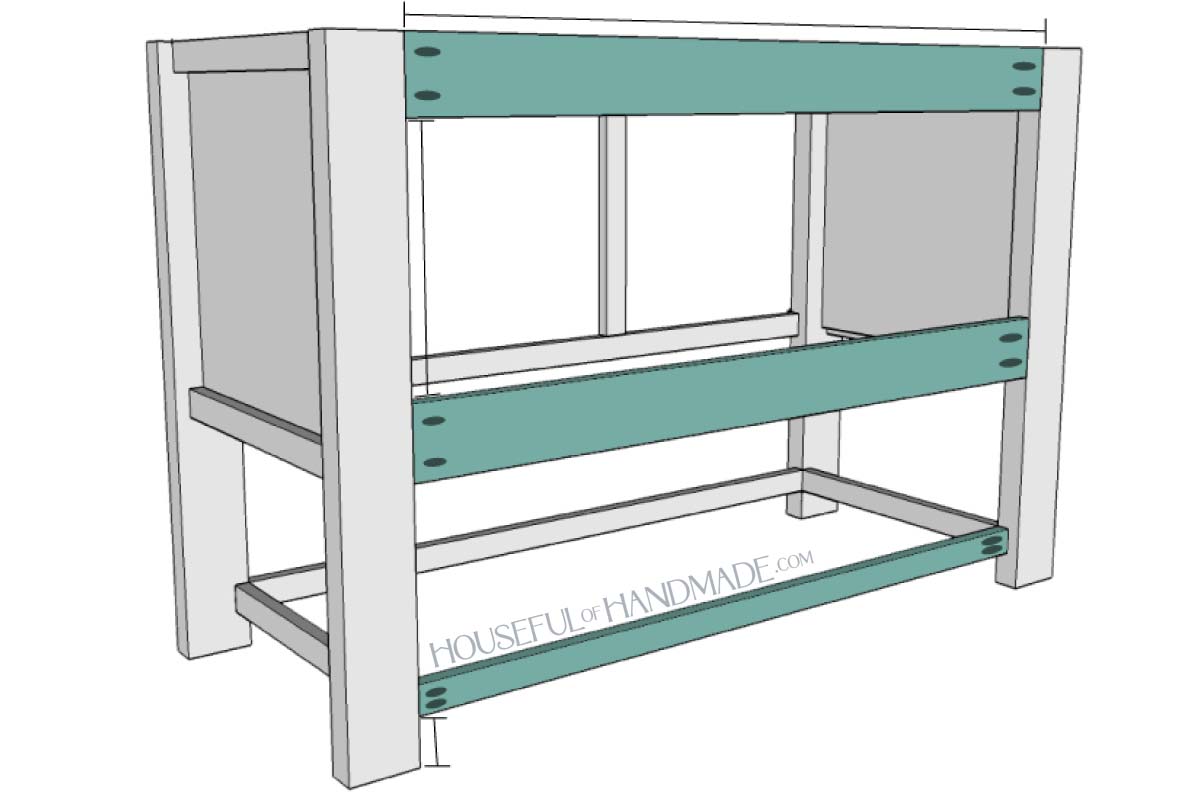
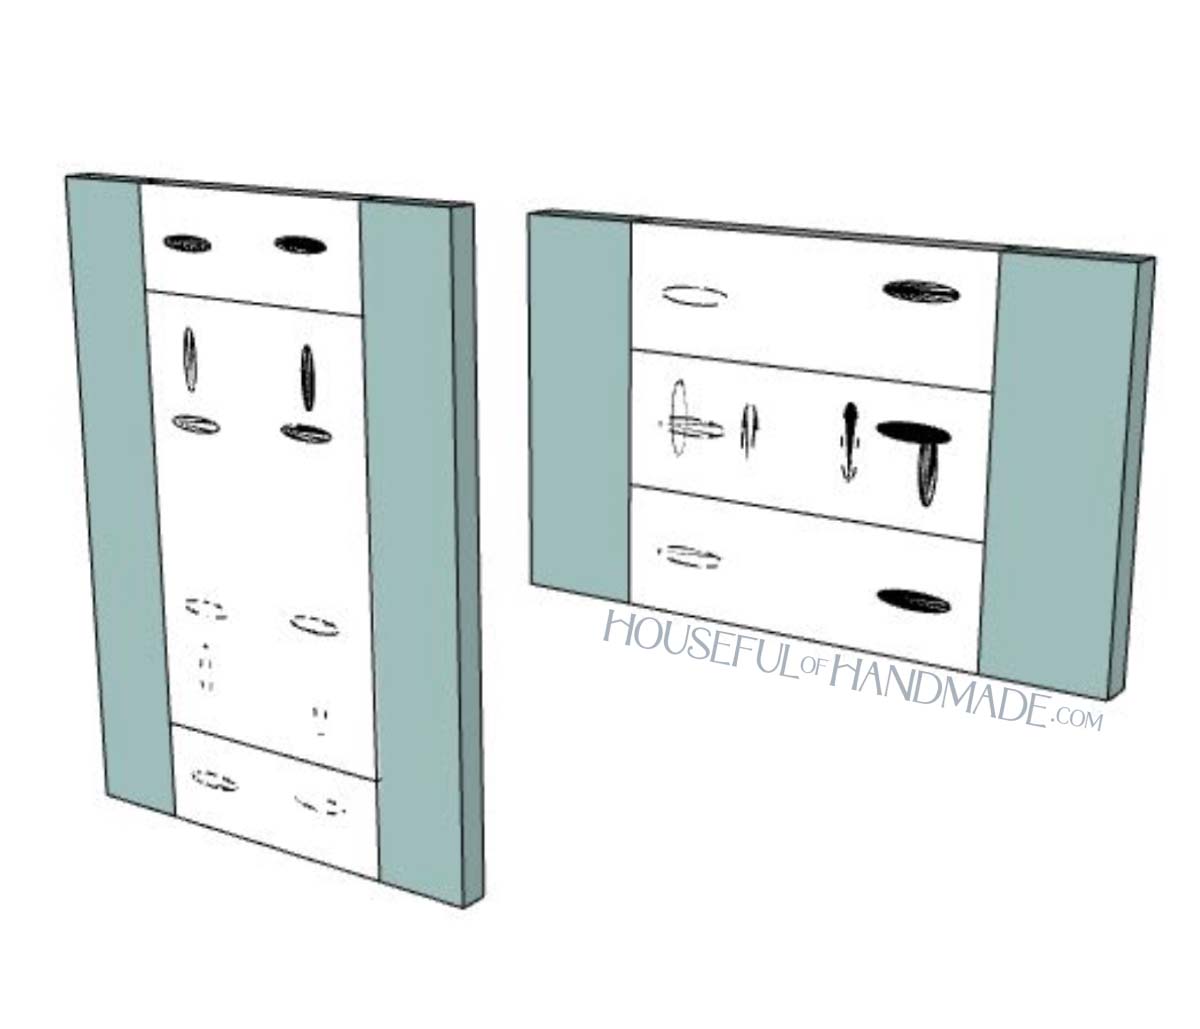
STEP 2- Attach sides together
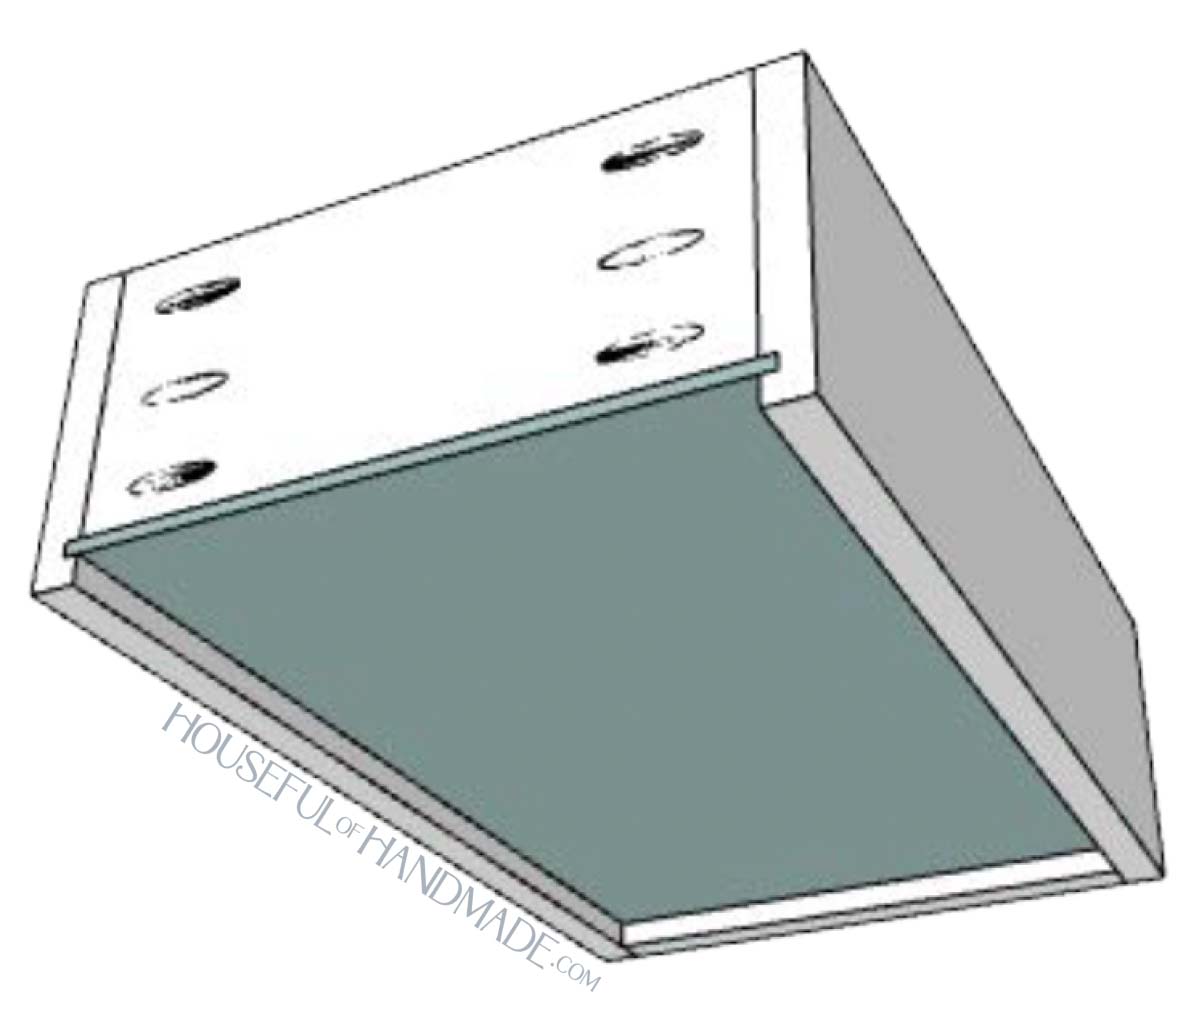
Drill pocket holes set for 3/4” thick material in both ends of the face frame rails and stiles pieces.
Attach the face frames together between the stiles as noted in the diagram in the plans. Use 1 1/4” pocket hole screws and wood glue to secure and hold flat with face frame clamps.
Then attach them between the two side pieces so the top section is flush with the top and the front of the legs.
Attach the lower one so it is 2” up from the bottom and flush with the inside.

Drill pocket holes set for 3/4” thick material in both ends of the back support pieces.
Attach one back support between the legs, flush with the top and the back of the vanity. Attach the other back support 12″ below the first one, again flush with the back of the vanity.
Secure with 1 1/4” pocket hole screws and wood glue.
Attach the last face frame rail 2″ up from the bottom of the vanity, between the legs, flush with the front of the legs using 1 1/4” pocket hole screws.
STEP 3- Finish the vanity cabinet
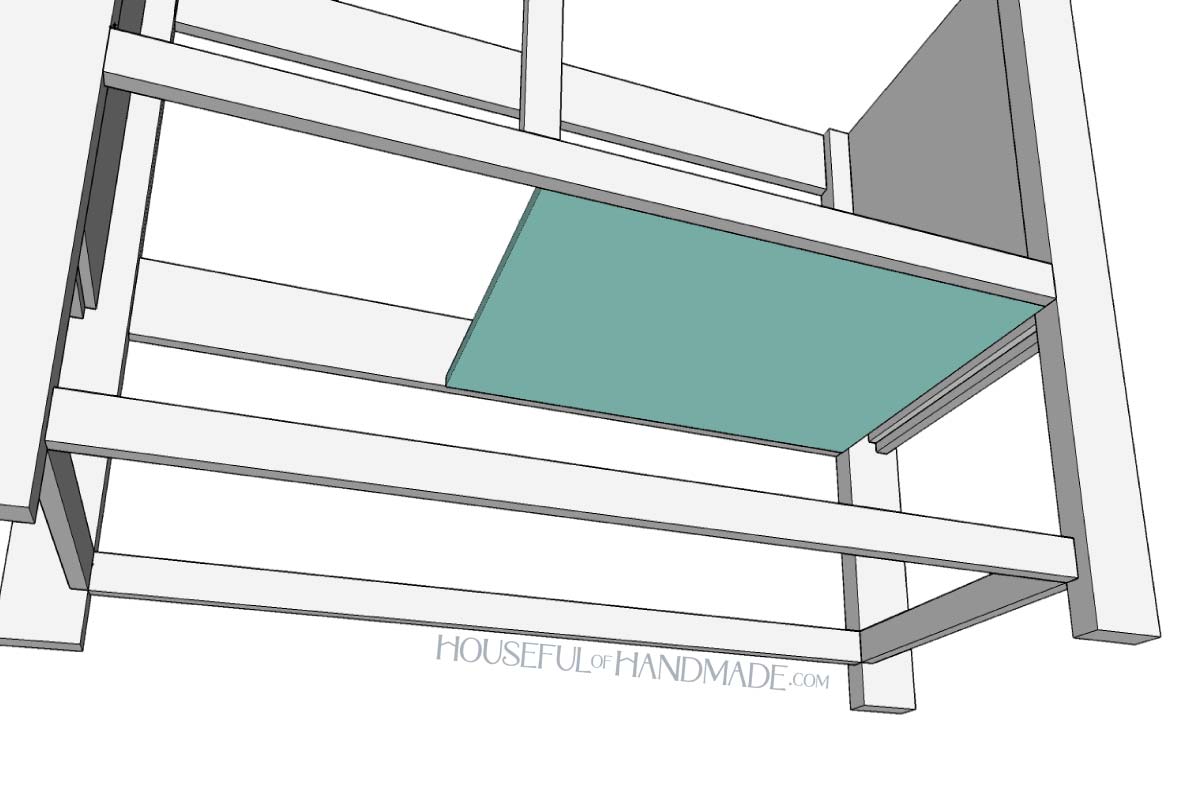
Drill pocket holes set for 1/2” material in the perimeter of the cabinet bottom and bottom shelf pieces.
Attach the bottom shelf any depth you prefer in the 1×2 frame. Secure with 1” pocket hole screws.
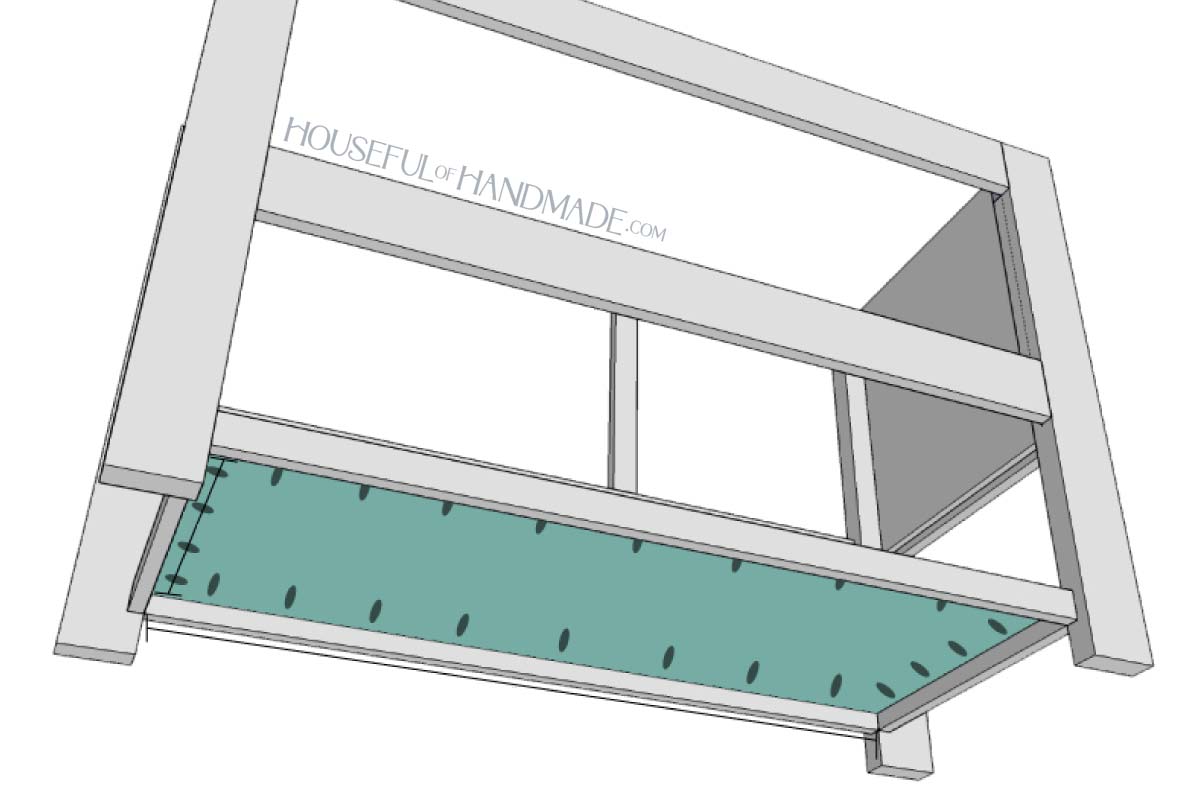
Attach the cabinet bottom so it is flush with the bottom of the face frame, under the section of the vanity where the cabinet is. There is no bottom under the drawers.
The cabinet bottom will not go all the way to the side panel, but will stop about 1″ before it (ending flush with the legs).
If you are worried about items in the cabinet falling through this small opening, you can use a scrap of 1/2″ plywood to fill it (this is what I did) or cut your bottom panel 27″ long and notch out the 3/4″ x 1″ section around the legs.
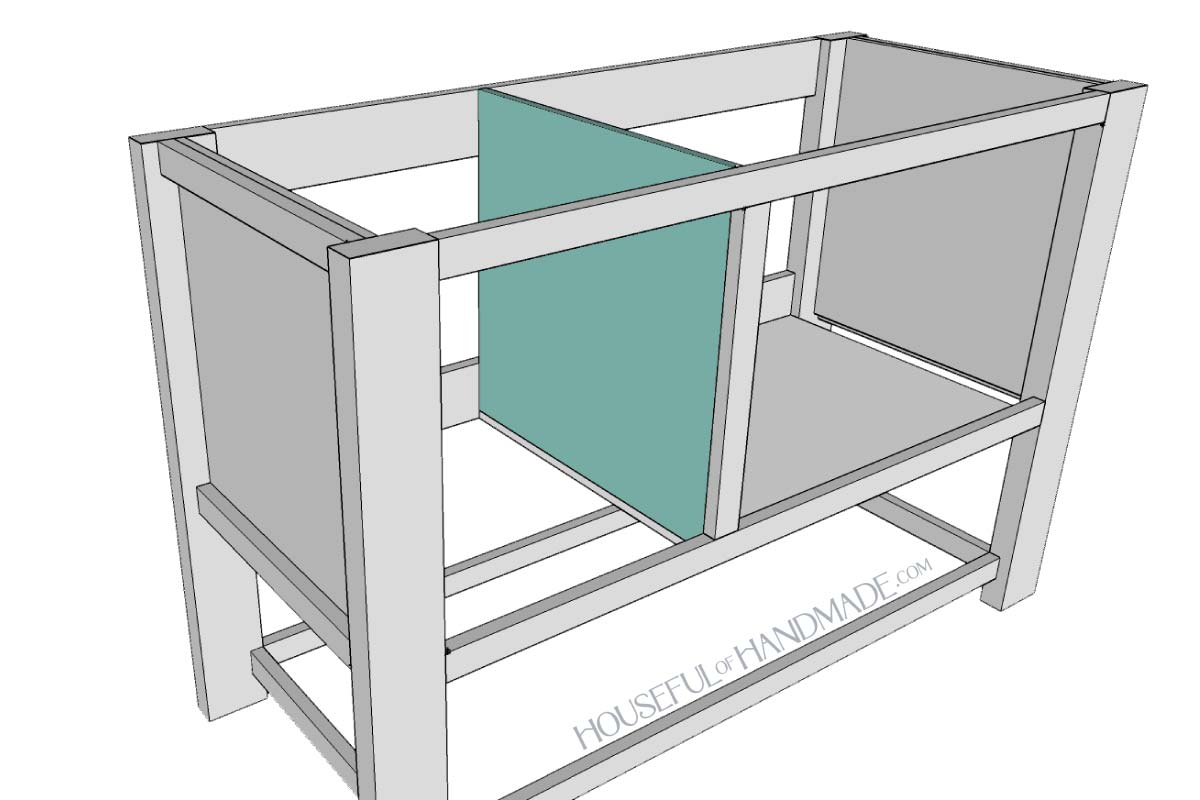
Drill pocket holes set for 1/2” material in the front, back and bottom of the cabinet center panel. Make sure the pocket holes for the back line up with the back support pieces.
Attach the panels so they sit on top of the cabinet bottom and are flush with the side of the face frame stile on the drawer sections.
Secure with 1” pocket hole screws and glue.
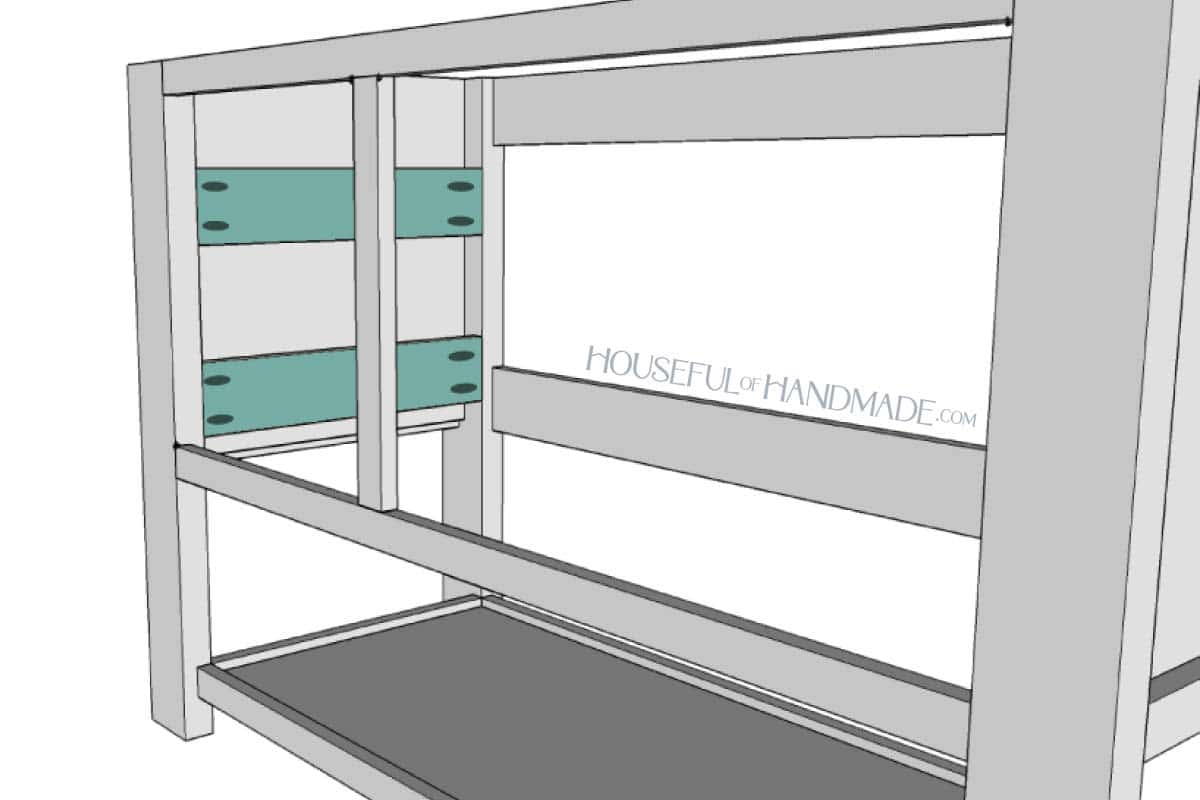
Drill pocket holes set for 3/4” material in both ends of the drawer support pieces.
Attach them between the legs so they are flush with the side of the legs where the drawer slides will go.
Secure with 1 1/4” pocket hole screws.
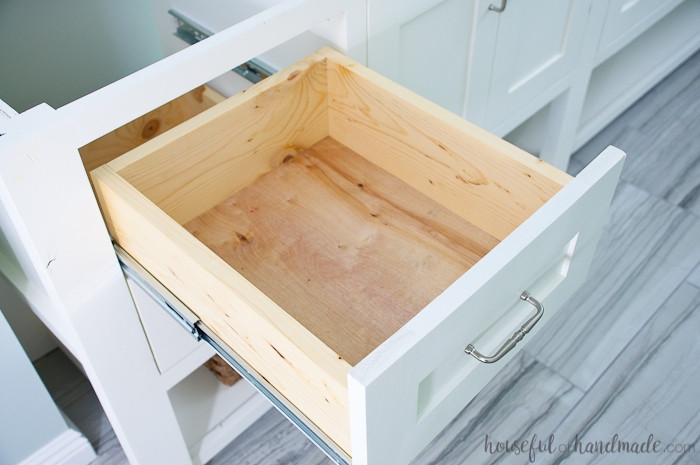
STEP 4- Build the drawers
Cut a 1/4″ wide by 1/4″ deep groove in the inside of the front and side drawer box pieces 1/4″ up from the bottom. Rip the back piece to 4 3/4” so the bottom is flush with the top of the groove.
Drill pocket holes set for 3/4” material in the front and back pieces (in the side opposite the groove).
Attach the front between the sides with wood glue and 1 1/4” pocket hole screws.

Attach the back pieces between the sides so the bottom is flush with the top of the groove.
Make sure your drawer box is square. Repeat for the second drawer.
Slide the drawer box bottom piece under the back piece and into the groove on the sides and front.
Ensure the box is square and then secure the drawer box bottom to the back piece with 5/8″ brad nails. Learn drawer building tips and other ways to build them here.
STEP 5- Build the doors
The doors & drawer fronts are sized for a full inset so they are flush with the front of the vanity face frame and to allow for an 1/8″ reveal around each drawer front.
The opening for the drawers should be 9” wide by 16″ tall. Double check the measurements of your openings and adjust as necessary.
Drill pocket holes set for 1/2” thick material in the top & bottom of the plywood panels.
Attach the rails to both sides of the center panel, making sure they are all flush at the back. Secure with 1” pocket hole screws.
Drill pocket holes set for 1/2” material in the sides of the plywood panels and then adjust the pocket hole jig for 3/4” material and add pocket holes to the sides of the rail pieces.
Attach the stiles with pocket hole screws. Use 1” to secure the plywood panel & 1 1/4” to secure the rails to the stiles.
Make sure they stay flush to the back, creating a 1/4” recessed center panel in the front.
STEP 6- Finish
Sand your new vanity, then stain or paint it. Make sure to seal your vanity to withstand the excess moisture you will encounter in a bathroom.
Install the drawer slides so the front of the drawer box is set back 3/4” from the front of the face frames. Learn how to install drawers here.
Clamp the drawer fronts to the drawer box so there is an 1/8″ gap on the sides and tops of the drawer fronts.
Secure with 1″ screws through the inside of the drawer and drawer pulls. Learn how to easily attach drawer fronts here.
Use hinges to allow the cabinet doors to be inset into the face frame. Install doors so there is an 1/8” gap all around. Add knobs if you are using.

And you are done!
Premium plans include:
- Recommended Tools
- Shopping list
- Easy to read cut list table
- Cut diagrams
- Step-by-step instructions with 3D renderings
- Helpful resources
- BONUS: 3D SketchUp file
Install your vanity in your bathroom. Learn how to install a vanity here.
Add your vanity top and enjoy.
Now I'm off to finish another project.
Happy building!

This post was sponsored by Kreg Tools. All opinions are 100% my own. Click here to read my full disclosure policy.