I am sad that I waited this long to tackle this project because these built-in storage cabinets in my office are a game changer!
Part of the wait was trying to finalize the design. I wanted to add maximum storage to my space.
The other part was motivating myself to tackle a big project that would be displacing to my office.
This post may contain affiliate links. As an Amazon Associate I earn from qualifying purchases. Click here to read my full disclosure policy.
A big job like this can be daunting, but I partnered with Kreg to make it simple! They have a bunch of cabinet jigs to make every step of building these storage cabinets easier.
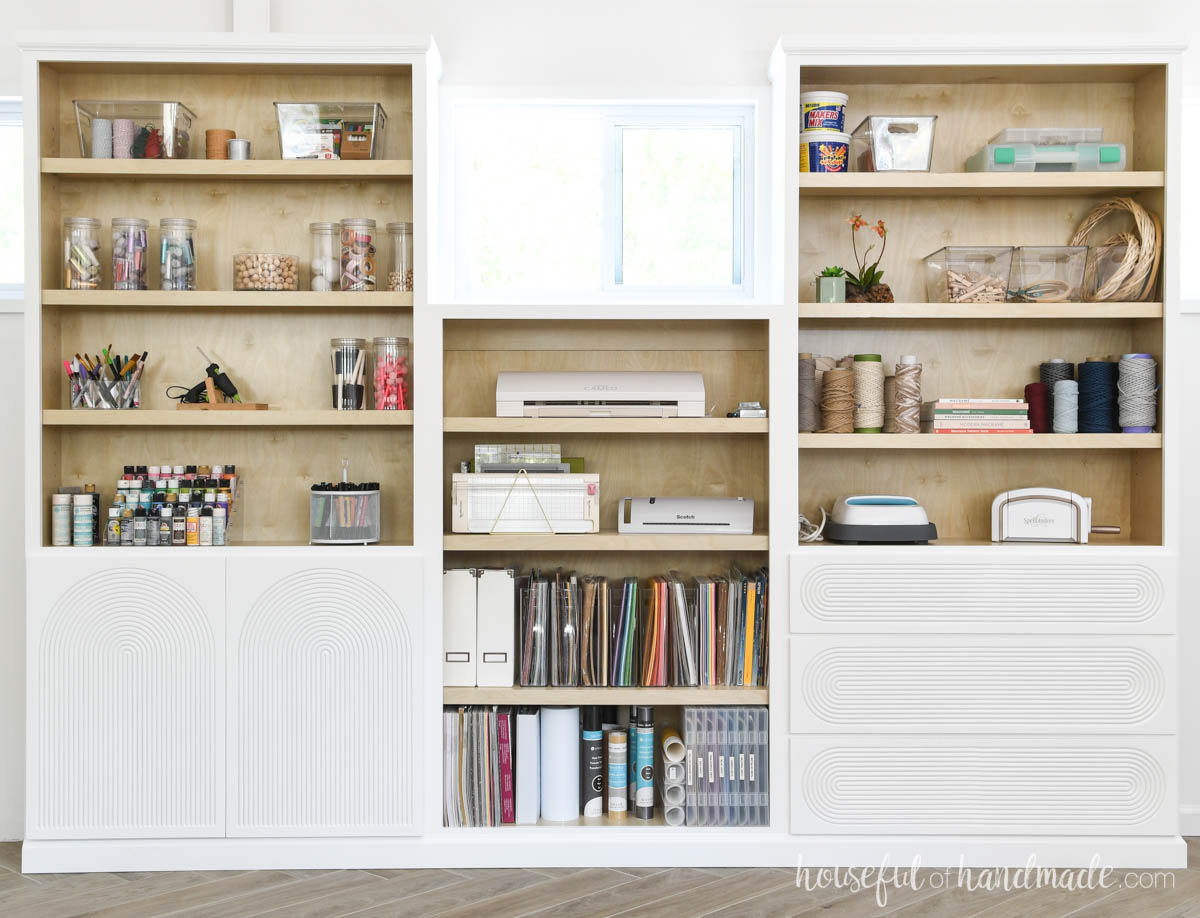
Built-in Bookcases with Doors and Drawers
I love adding extra functionality to simple bookcases. And that is exactly what I did with these built-ins. That is why I call them storage cabinets.
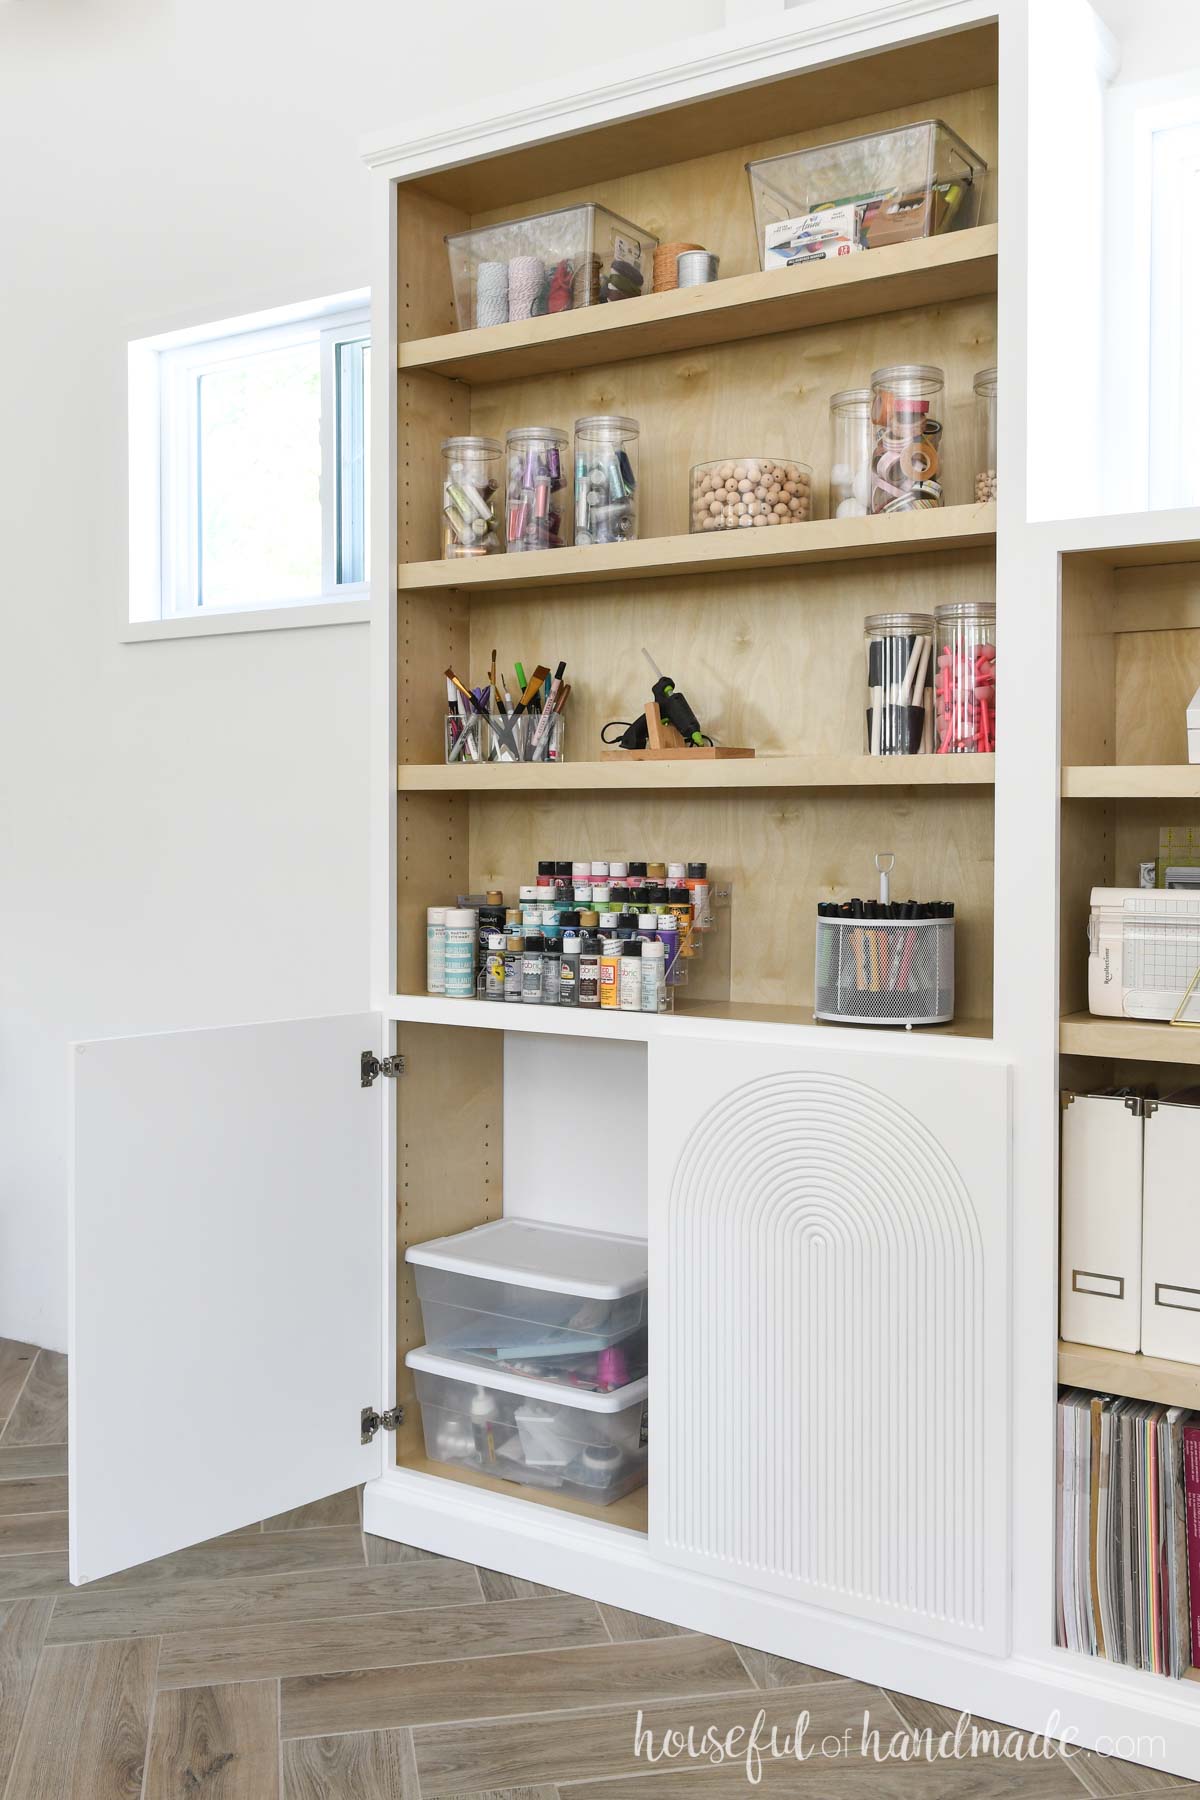
The lower sections of the tall bookcases is closed to offer hidden storage. One side has doors and space inside for shelves.
Behind this cabinet is a large metal I beam. The back for the upper section hides it, as well as the doors below, without loosing too much storage.
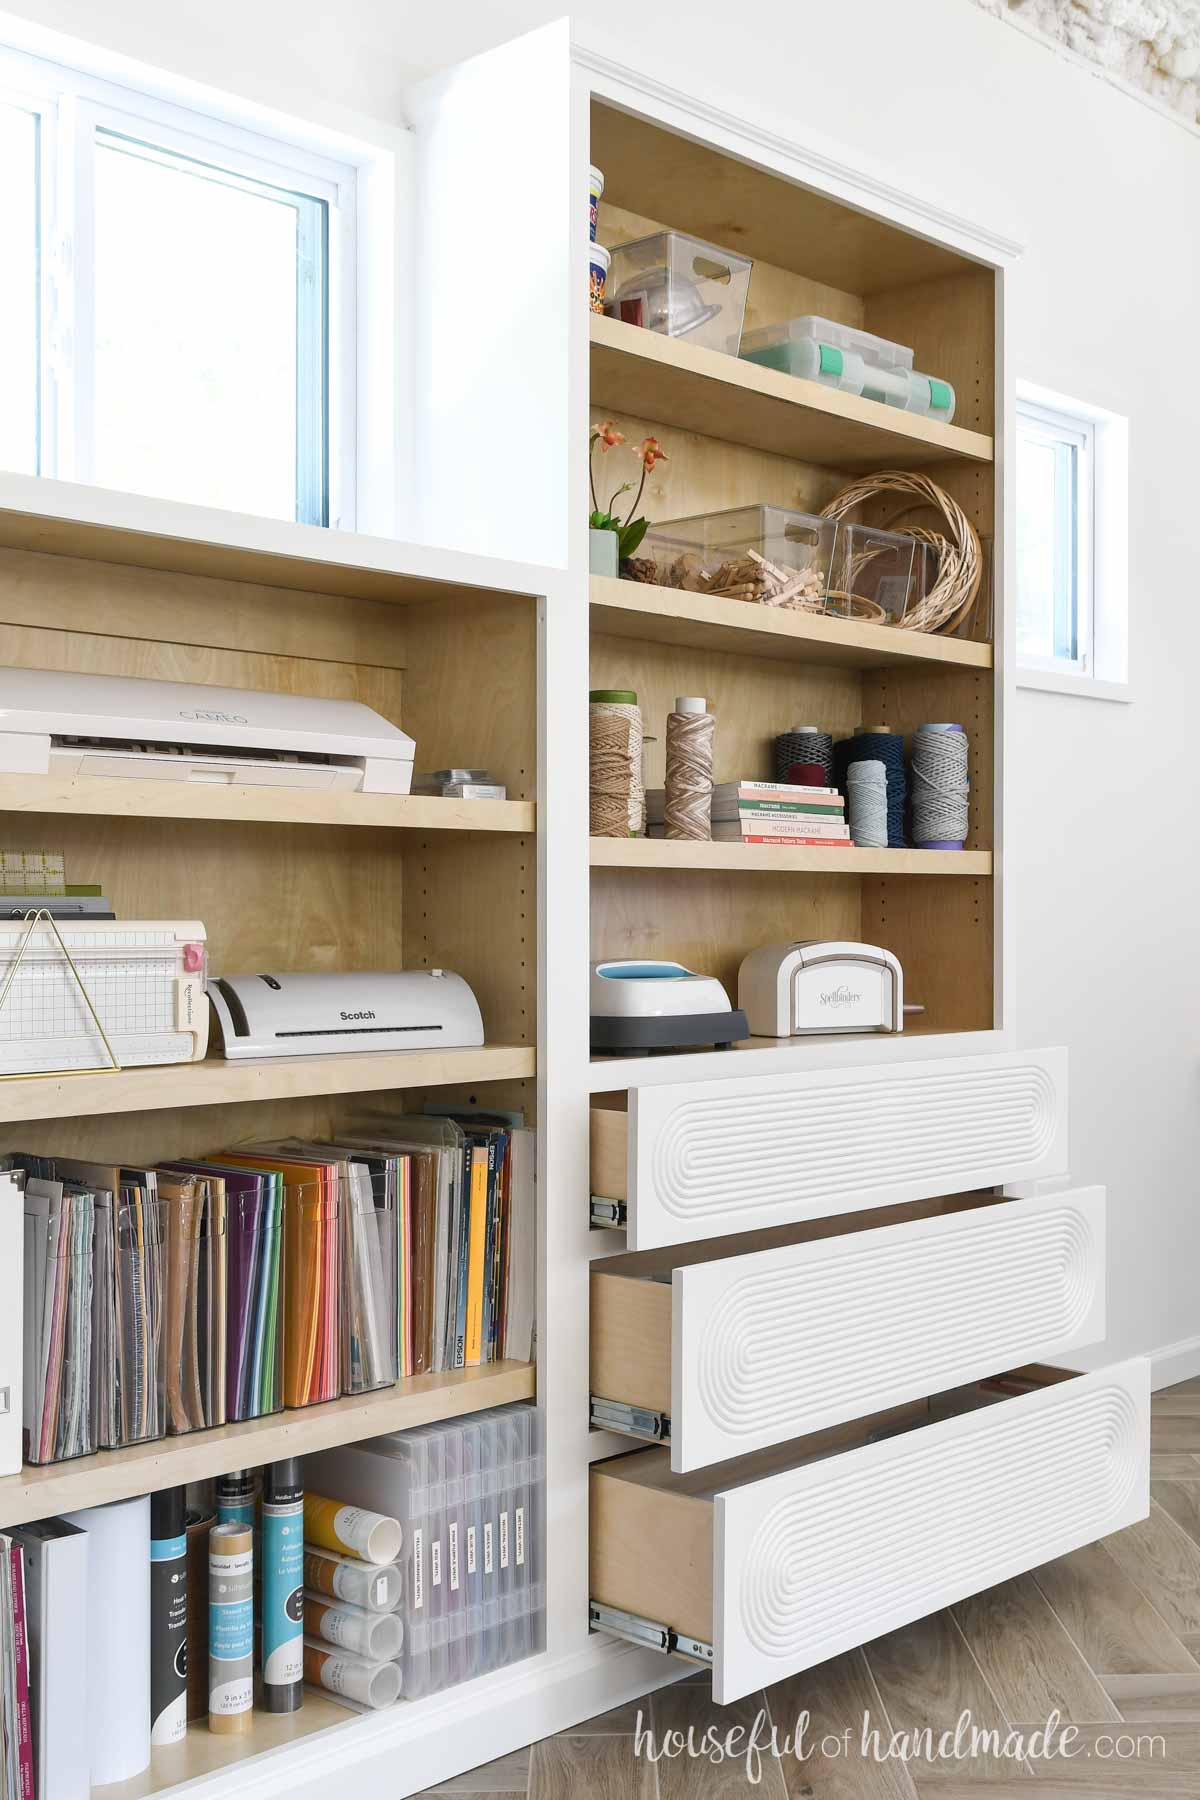
The other side has 3 wide drawers. The drawers are not super deep, but offer storage for those hard-to-store on a shelf objects.
Since we have an outlet on the wall behind this cabinet, I plan to use the top drawer as the perfect place to charge all my camera gear.
And the doors and drawer fronts were a fun way to add some interest to the wall of built-ins.
I had fun with the doors and tried something unique. What do you think?
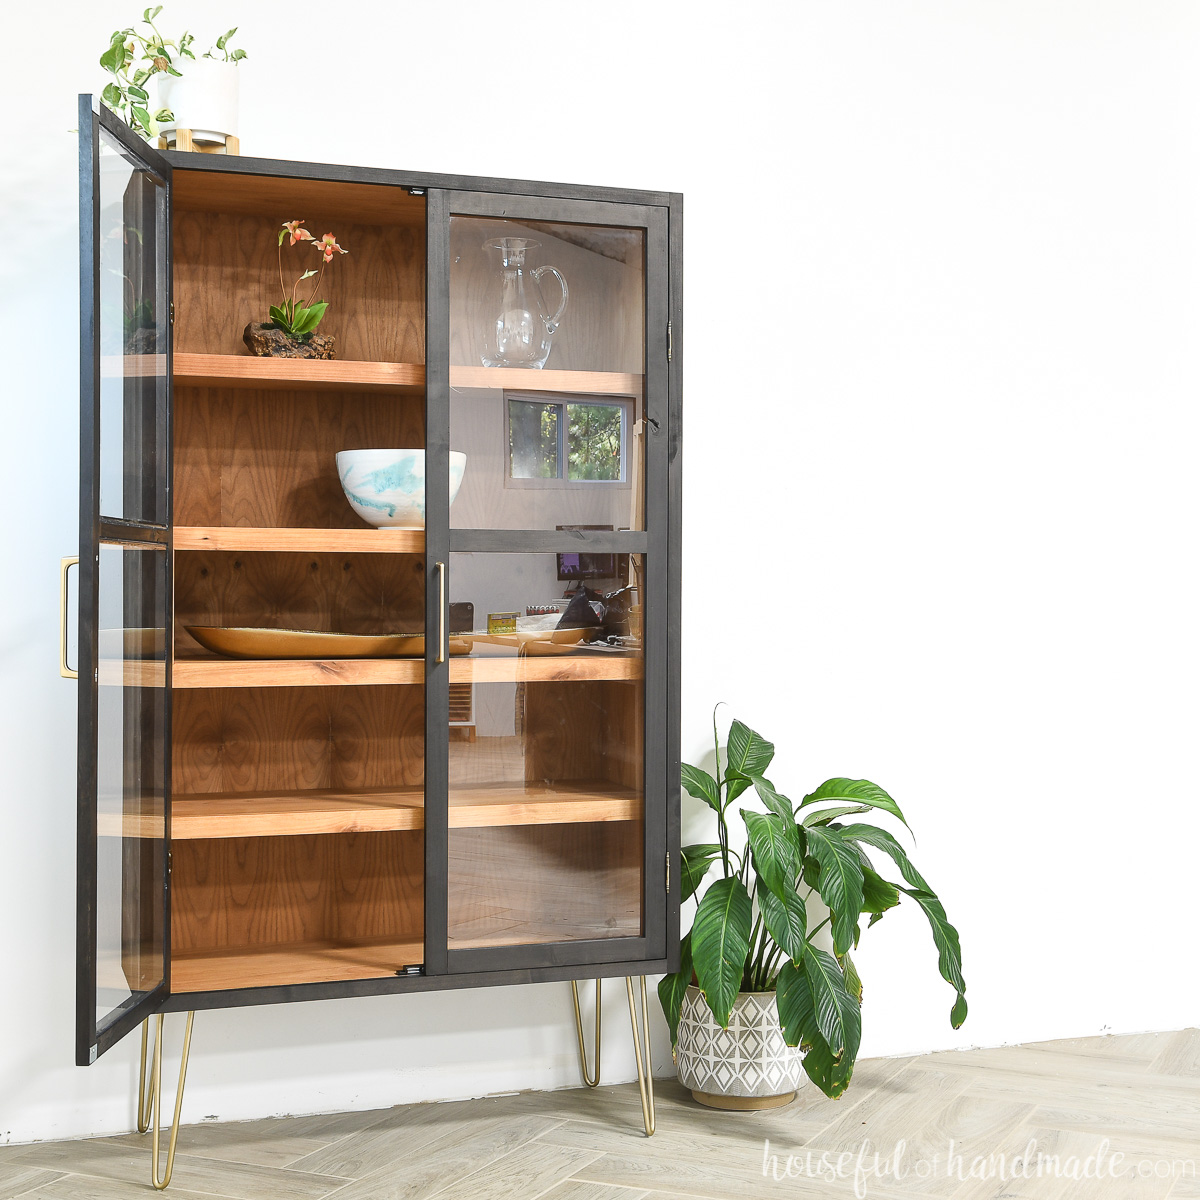
More Storage Cabinet Ideas
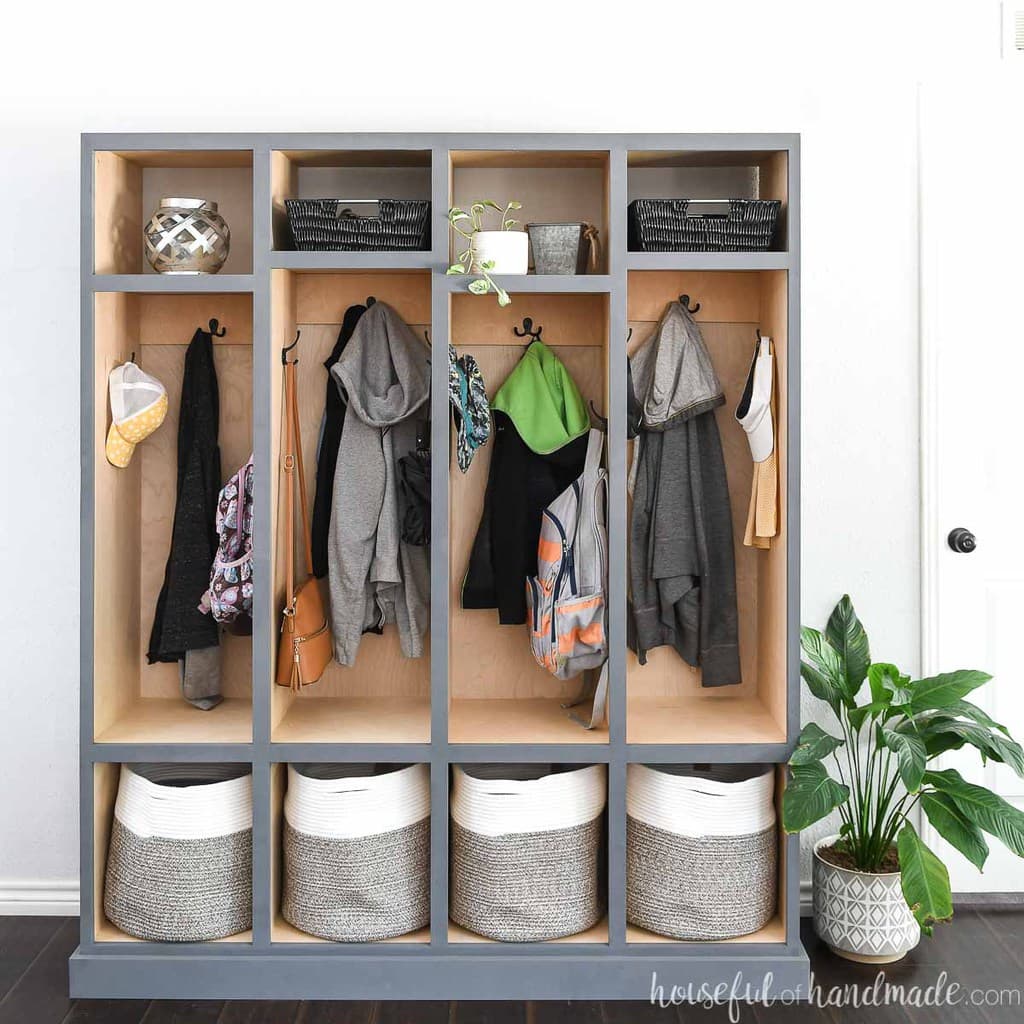
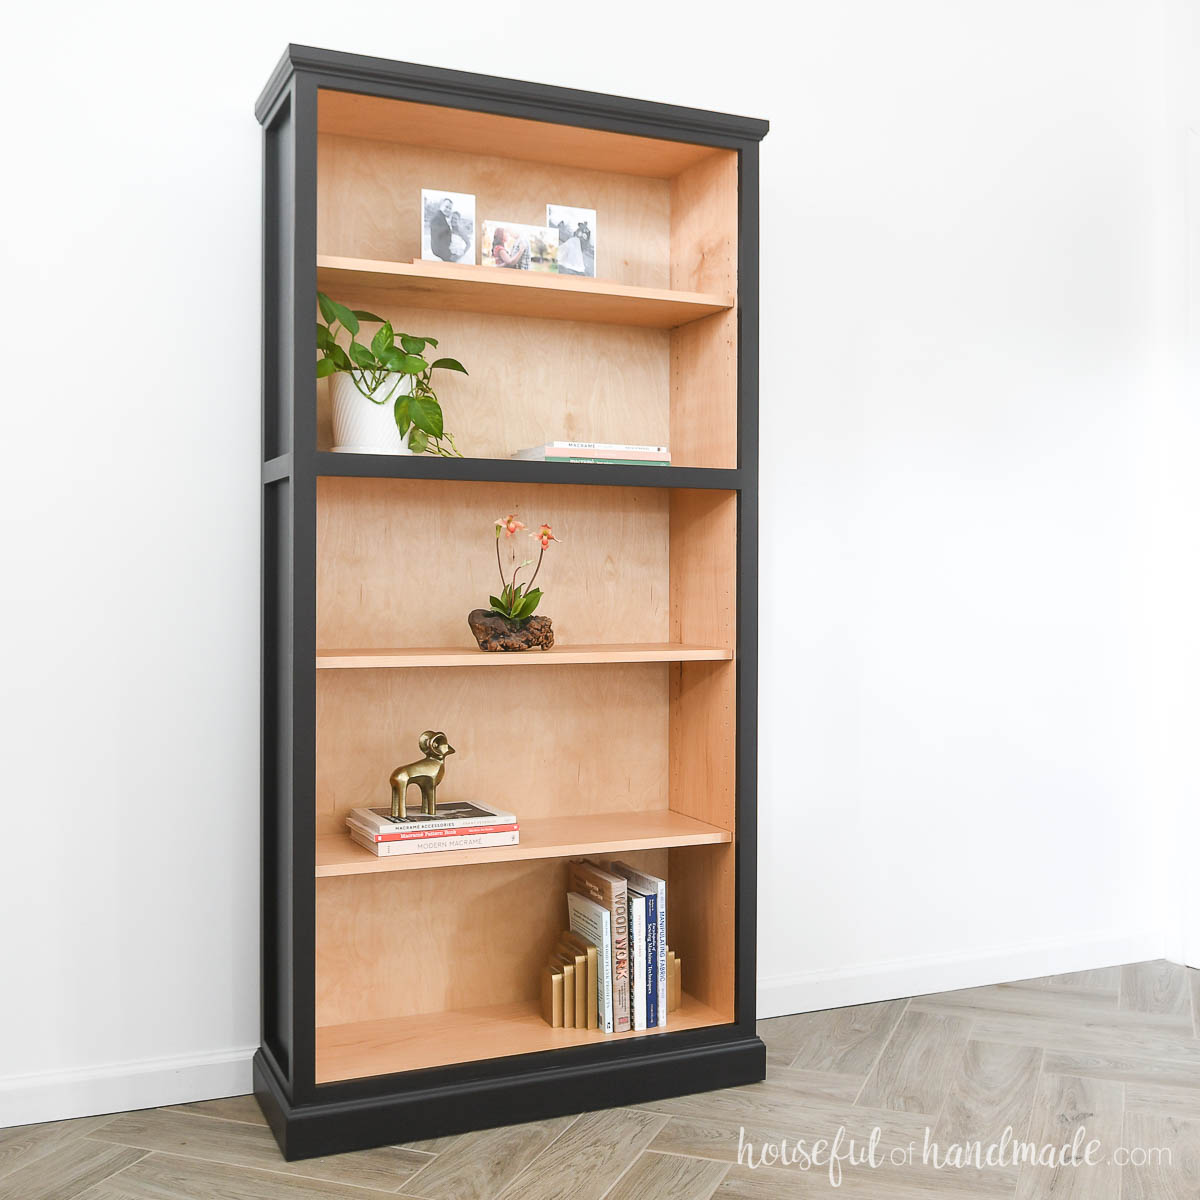
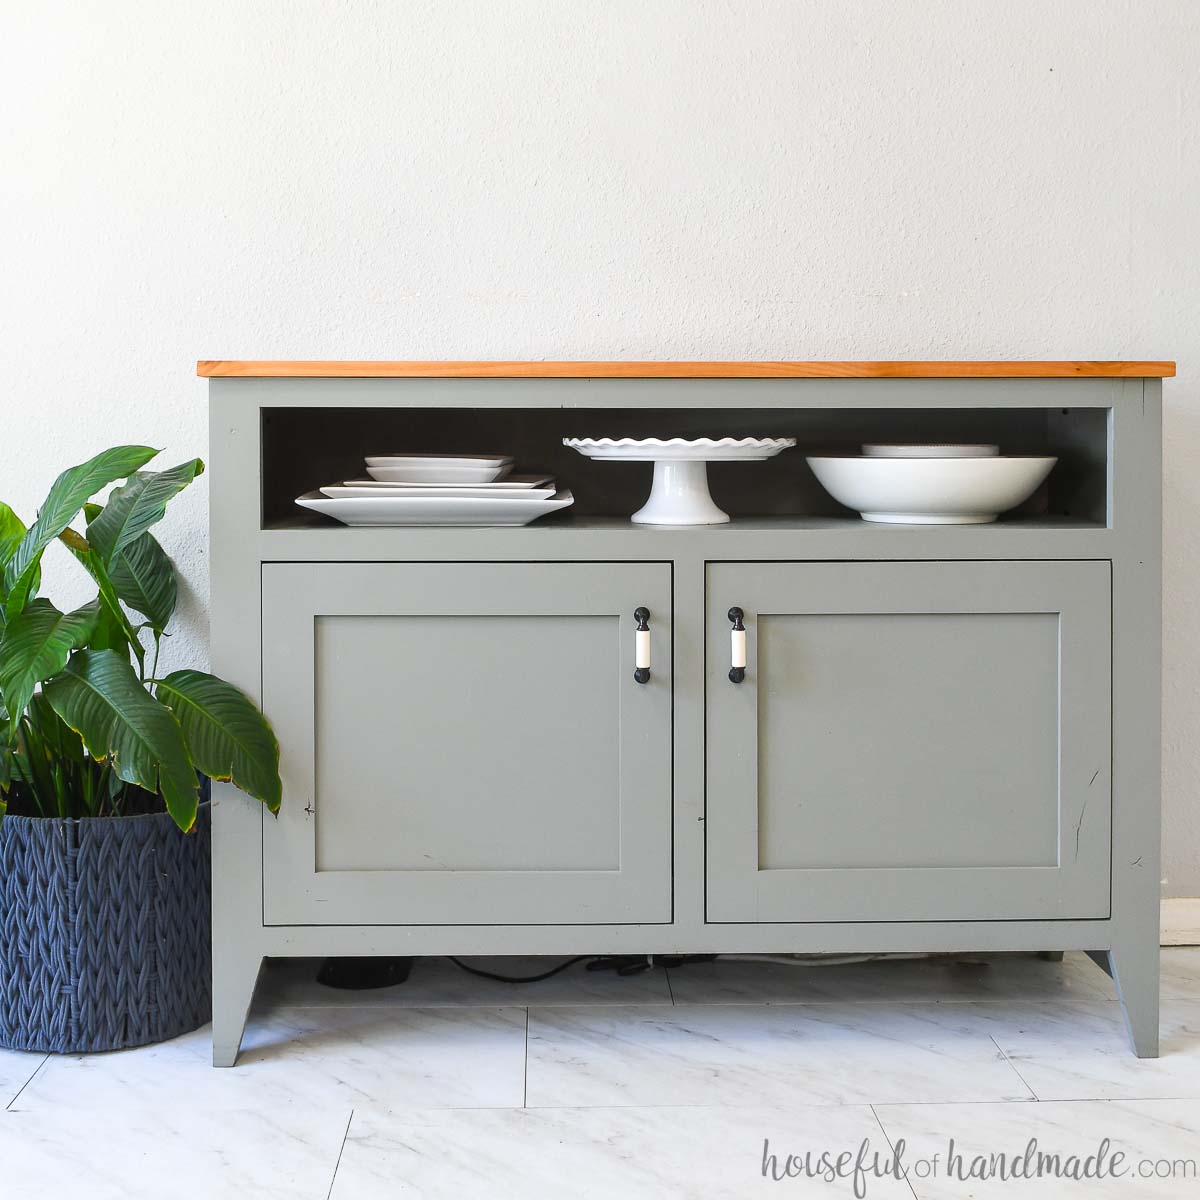
You can never have enough storage! And storage does not have to be boring.
Check out these other beautiful storage ideas you can build.
How to Build Built-ins
Tools & Materials
Recommended Tools:
- Miter saw
- I recently upgraded to this larger sliding miter saw (watch for it to go on sale), but all my projects before were built with this inexpensive miter saw that I loved.
- Circular saw with guide track
- Pocket hole jig
- Drill
- Impact driver (optional, but I love not having to switch bits with the drill)
- Multi-mark measuring tool
- Right angle clamp
- Face clamps
- Brad nailer
- Trim router
- Shelf pin jig
- Drawer front mounting jig
- Concealed hinge jig
- Sander
- Optional: Straight edge guide
Supplies:
- Wood products
- 3/4″ plywood, 4×8 sheets (~2 per cabinet)
- 1/2″ plywood, 4×4 sheet (for drawers)
- 1/4″ plywood, 4×8 sheet (1 per cabinet)
- 3 1/4″ tall baseboards
- 2″ moulding
- 1 1/4” pocket hole screws
- 1 1/4” brad nails
- 5/8” brad nails
- 2 1/2” wood screws
- 2” metal L brackets
- Wood glue or Roo glue
- 1” overlay hinges
- 10″ drawer slides
- Plywood edge banding
- Shelf pins
- Shims
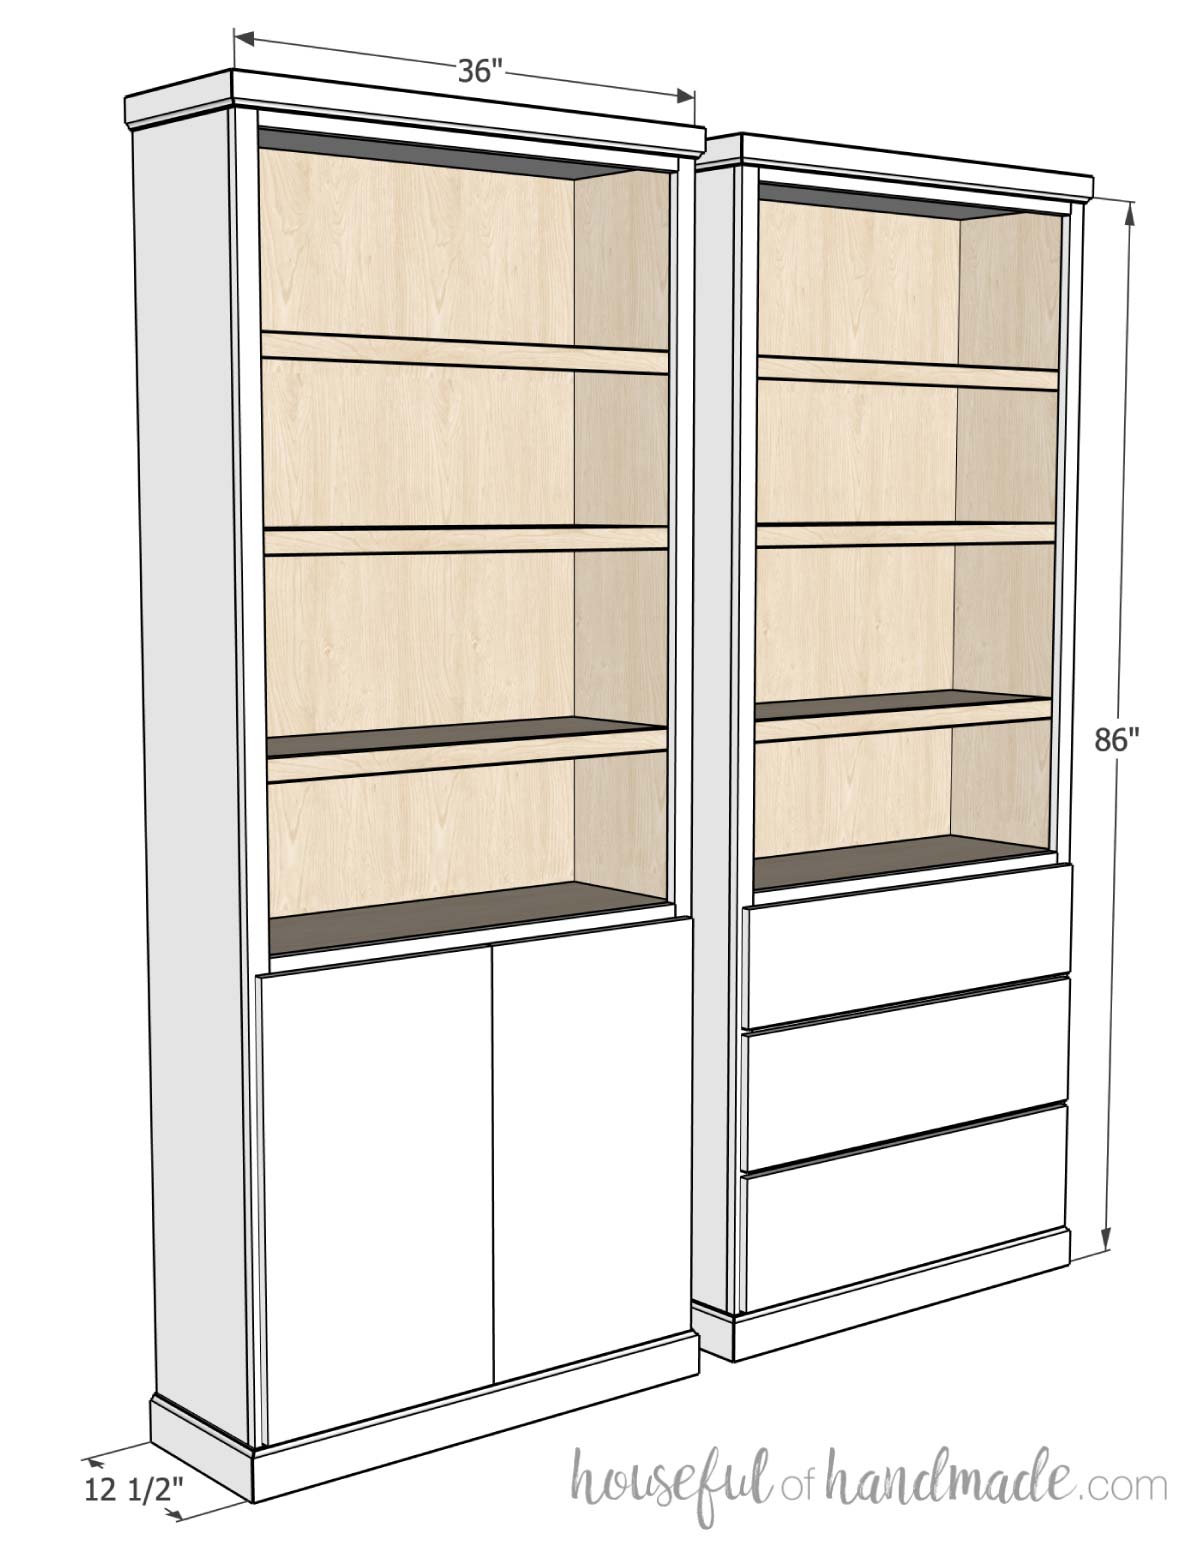
Overall Dimensions
My bookcases were custom built to fit in between and under my windows. That is the best part of DIY!
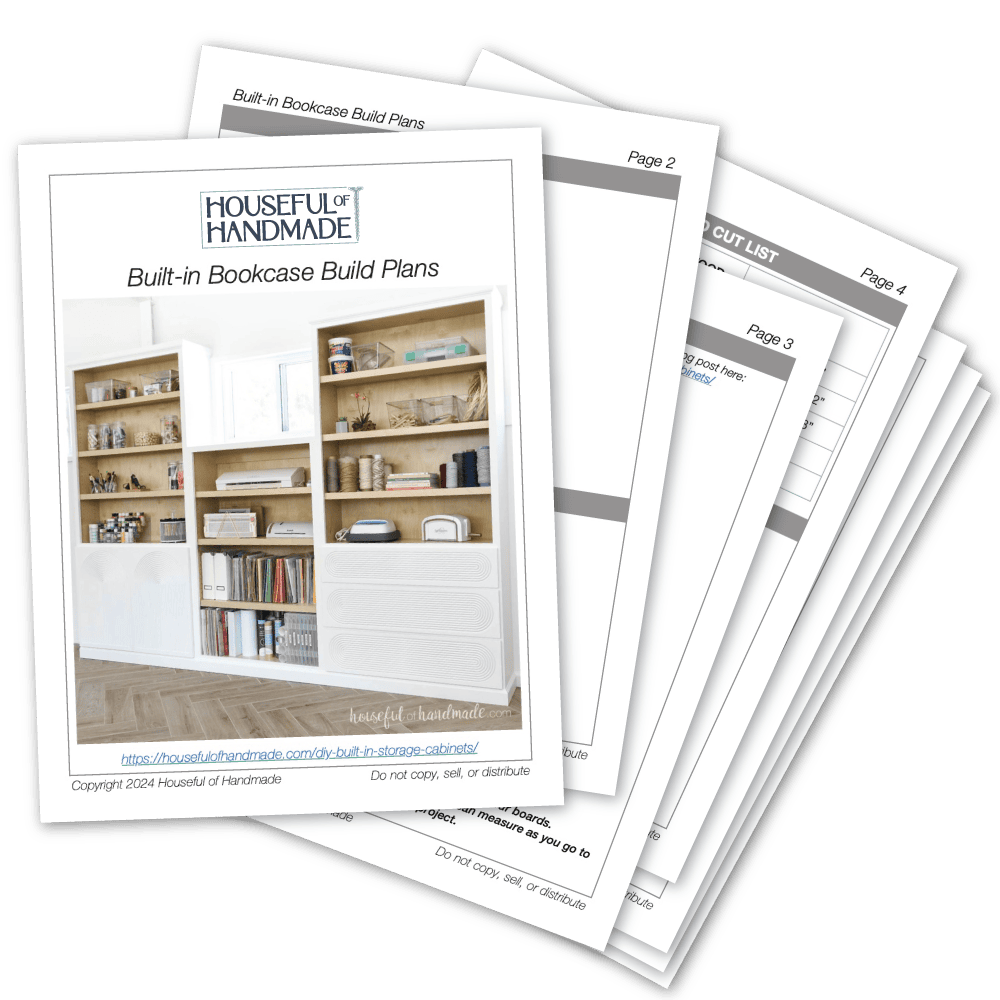
I created build plans for a 36″ wide x 12 1/2″ deep (without trim) tall bookcase to share with you. These bookcases are 86″ tall before moulding and come with either doors or drawers on the lower section.
Use the bookcase alone as a smaller built-in or build multiples and install them side-by-side for a wall of storage.
Cut List
Cut out the pieces according to the easy-to-read table in the PDF plans.
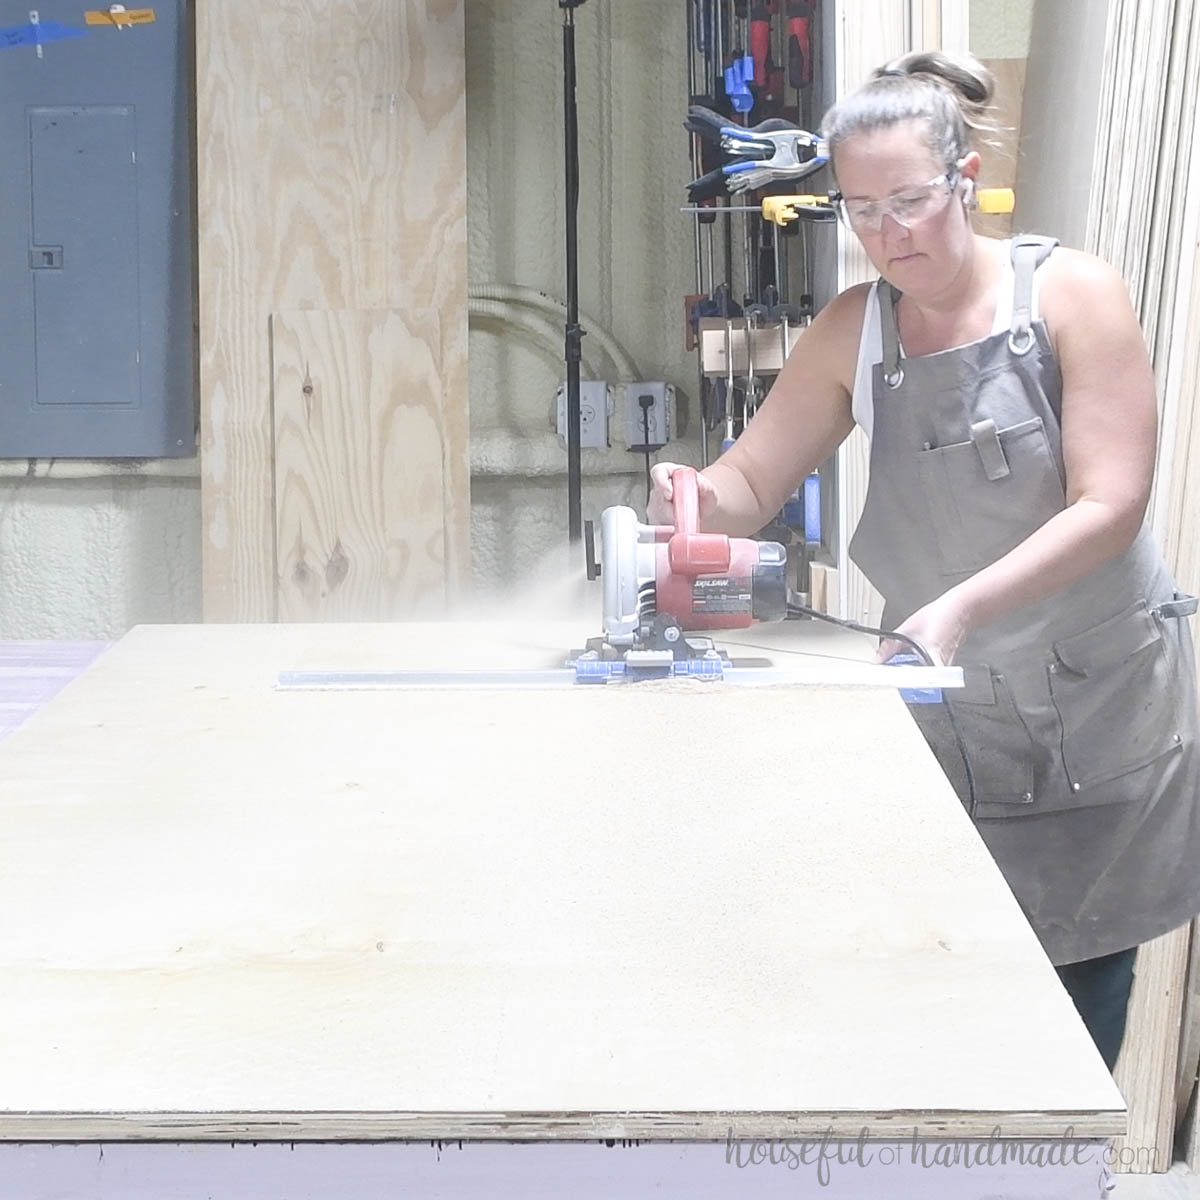
I used the Kreg Rip Cut to rip down my plywood sheets into 4 strips for the sides, tops and bottoms of the bookcases.
I like to place my plywood on a piece of rigid foam insulation when breaking it down. I use it on my work table, but you can also easily cut the plywood on the foam on the floor.
Learn all my tips for easily breaking down sheets of plywood with a circular saw here.
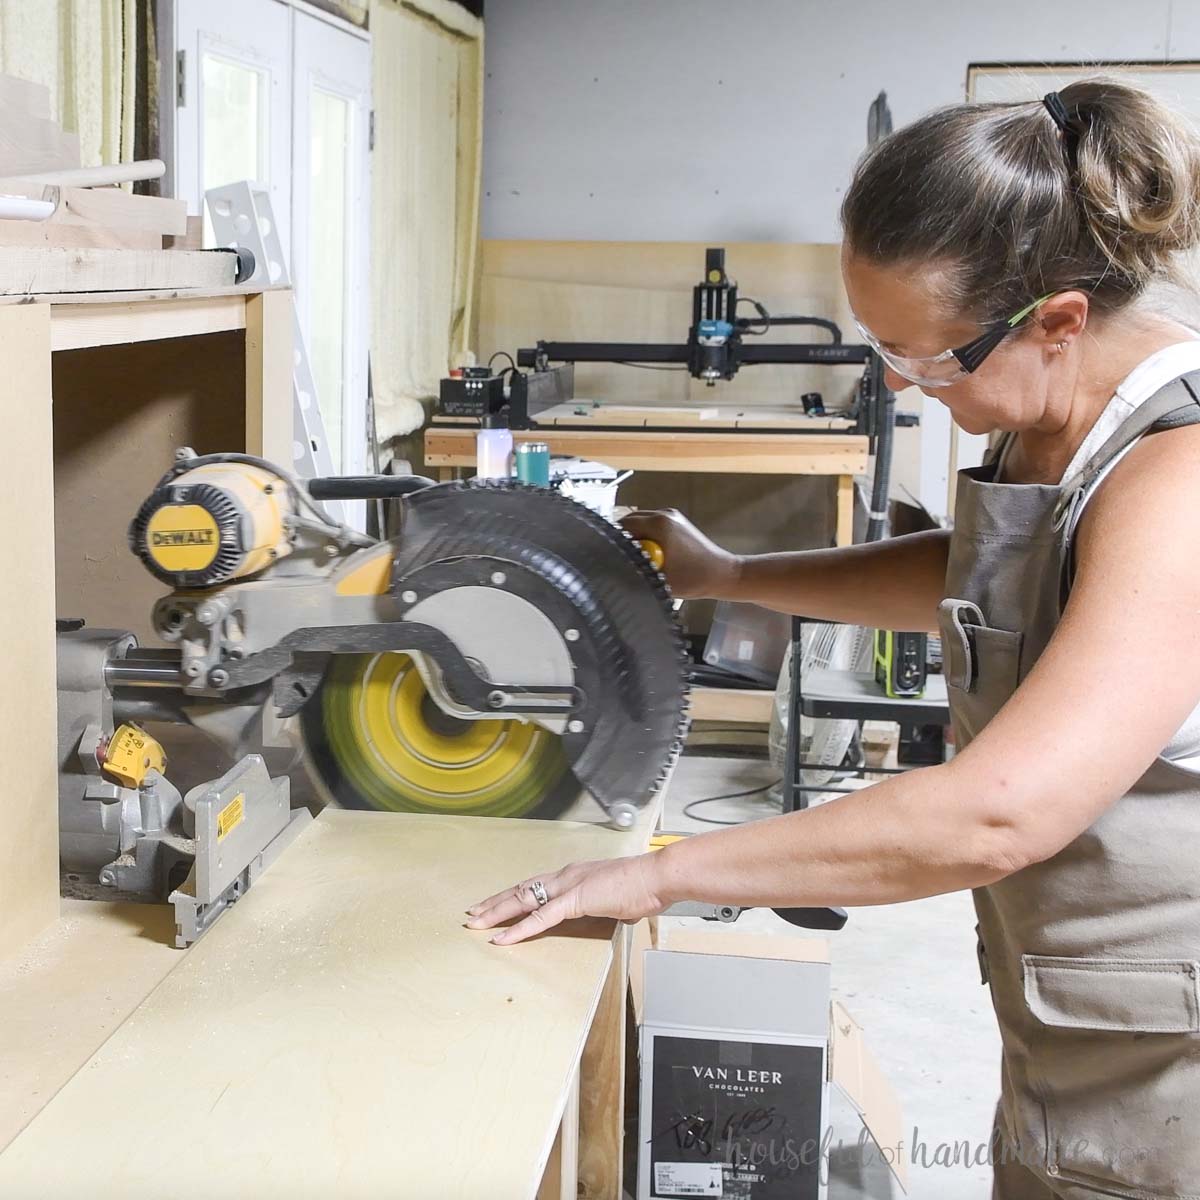
Then I used my miter saw to cross-cut the pieces to length. If you do not have a sliding miter saw, you can easily cross-cut the pieces with the Kreg AccuCut.
For each cabinet, I cut 2 sides, a top and bottom. And for the taller bookcases I also cut a stationary shelf.
STEP 1- Build cabinet boxes
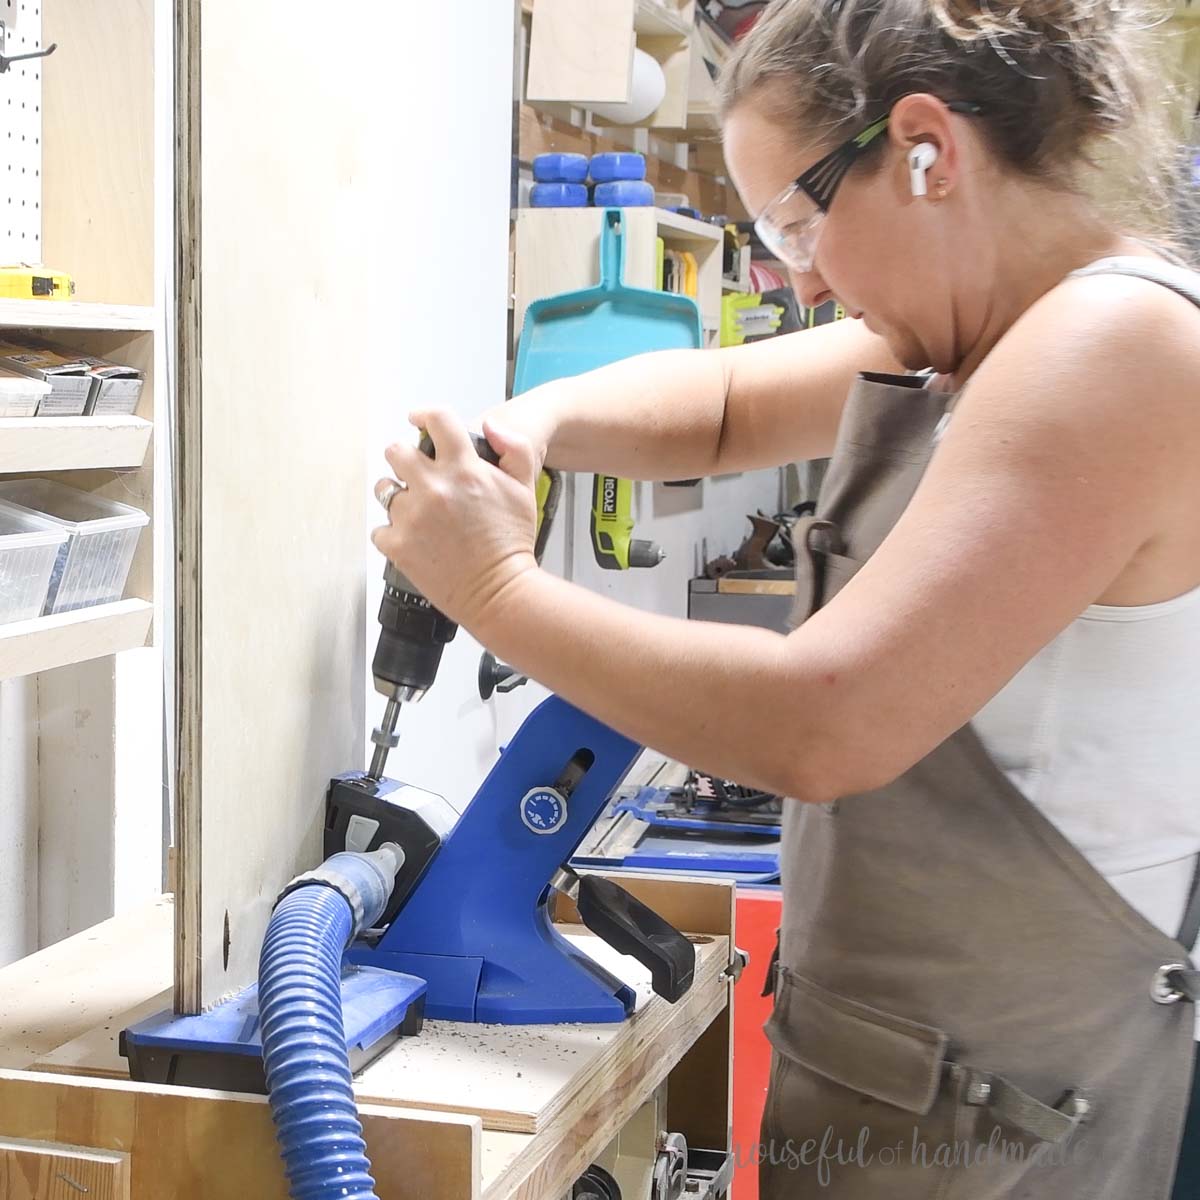
I am using pocket holes so I have sturdy bookcases.
Drill pocket holes set for 3/4″ thick material in both ends of the top/bottom and shelf boards for both the tall bookcases.
Tall bookcase assembly
Attach the top board to one side piece so it is flush with the top.
Attach the bottom so it is set up from the bottom so there is room for the baseboards around the built-in bookcases.
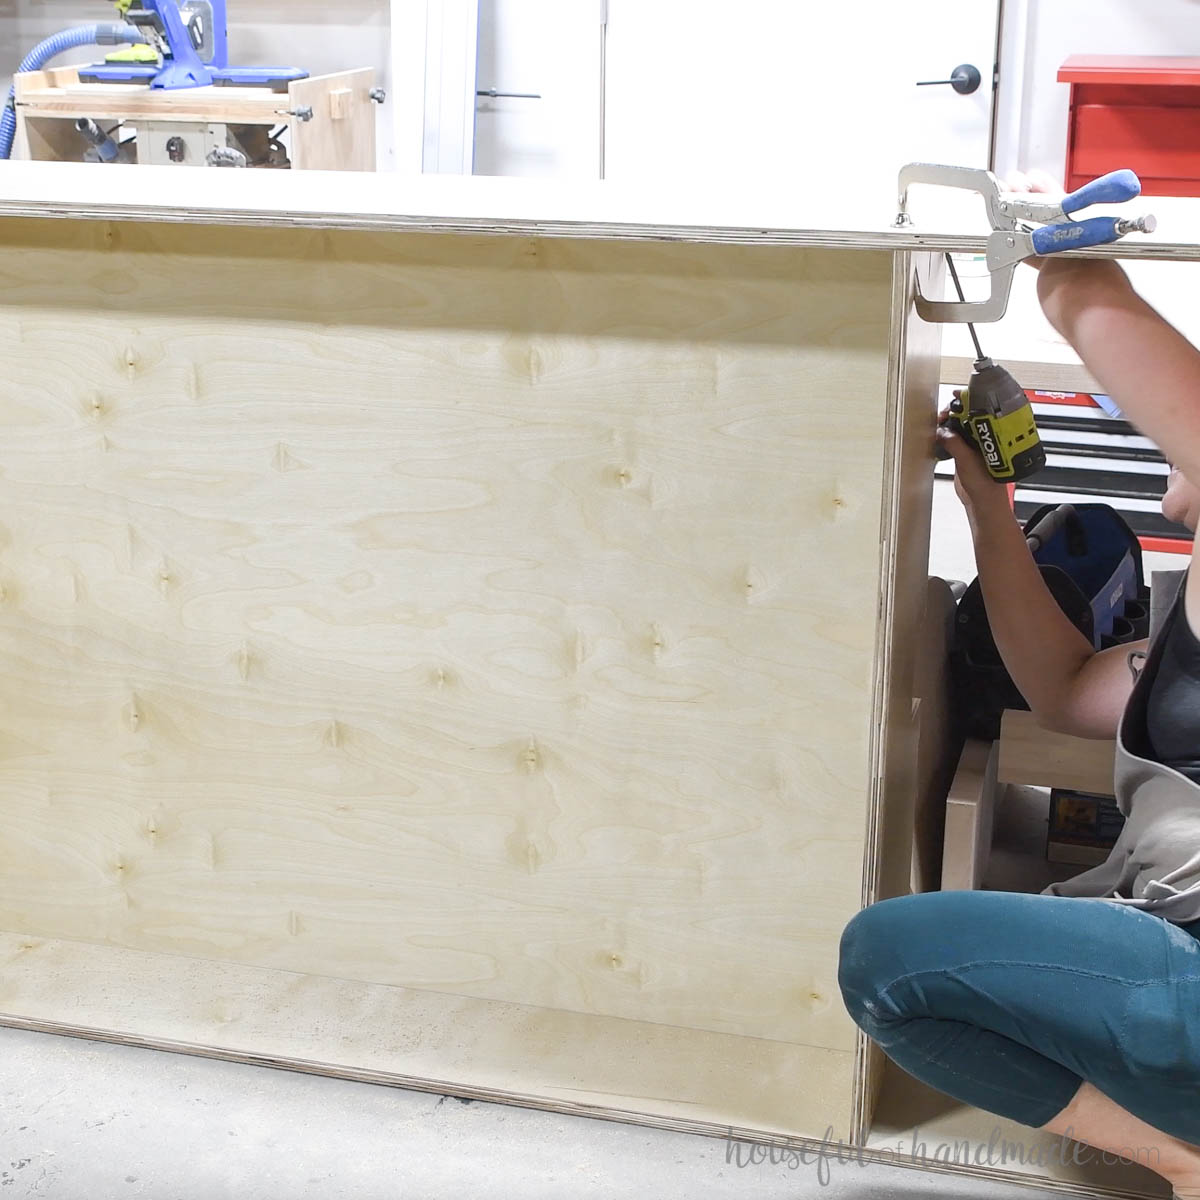
Secure with 1 1/4” pocket hole screws and glue. Since I am using pre-finished plywood, I used Roo Glue instead of wood glue.
EXPERT TIP:
For the top board, the pocket holes should face the top of the bookcase so they are not visible once installed.
Then attach the permanent shelf board according to the diagram in the plans.
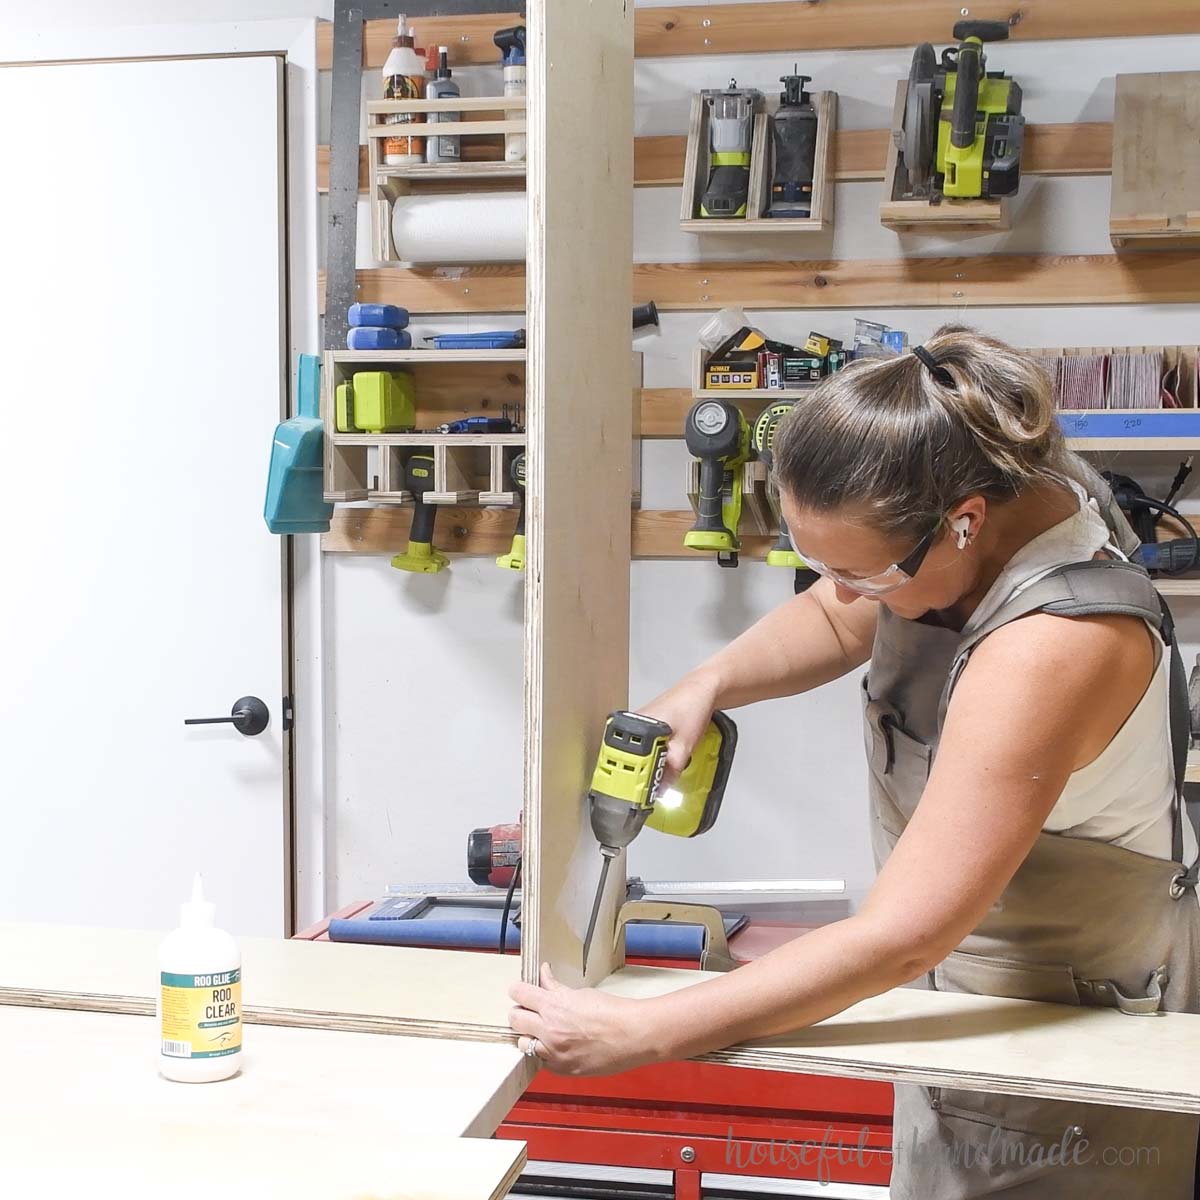
Attach the second side board to the other side of the top/bottom/shelf boards.
Make sure to line up them the same as on the first side. Secure with glue and 1 1/4” pocket hole screws.
Adjustments to cabinet to hide beam
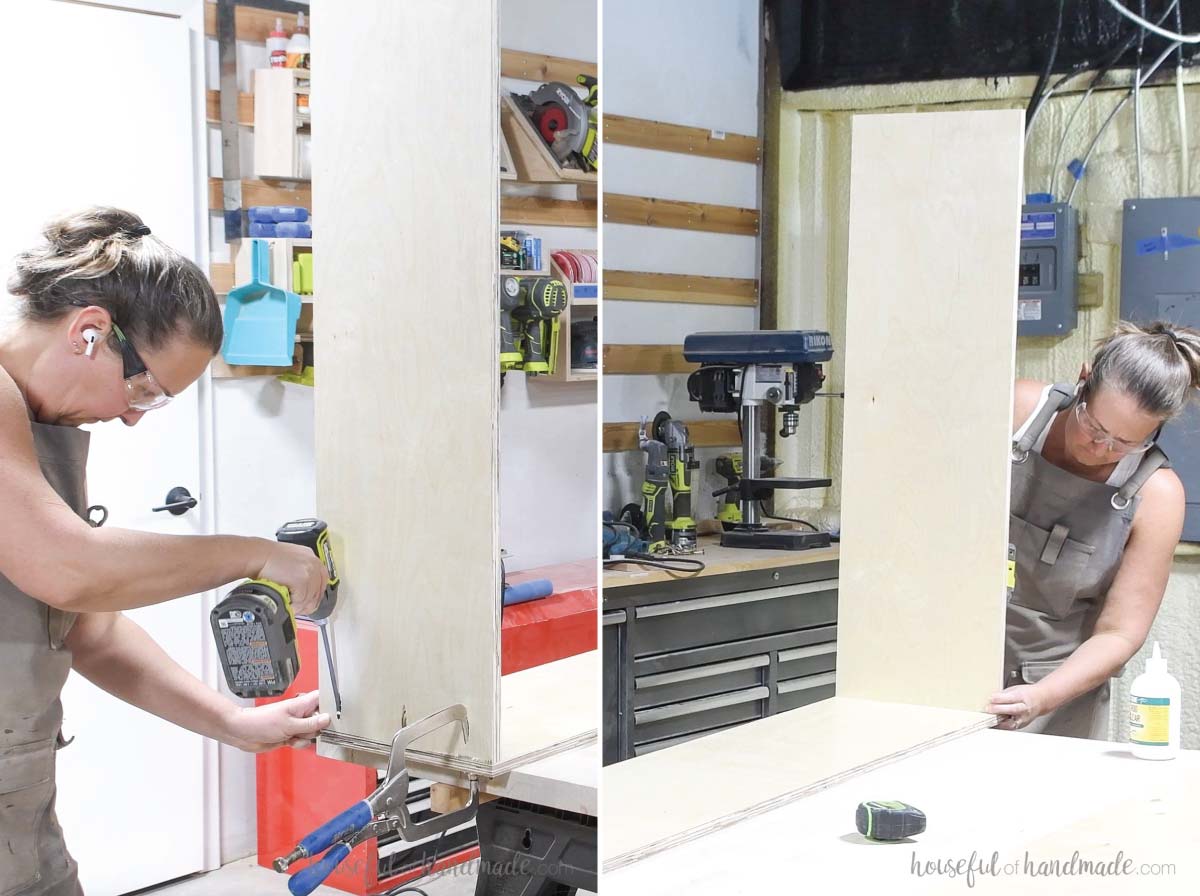
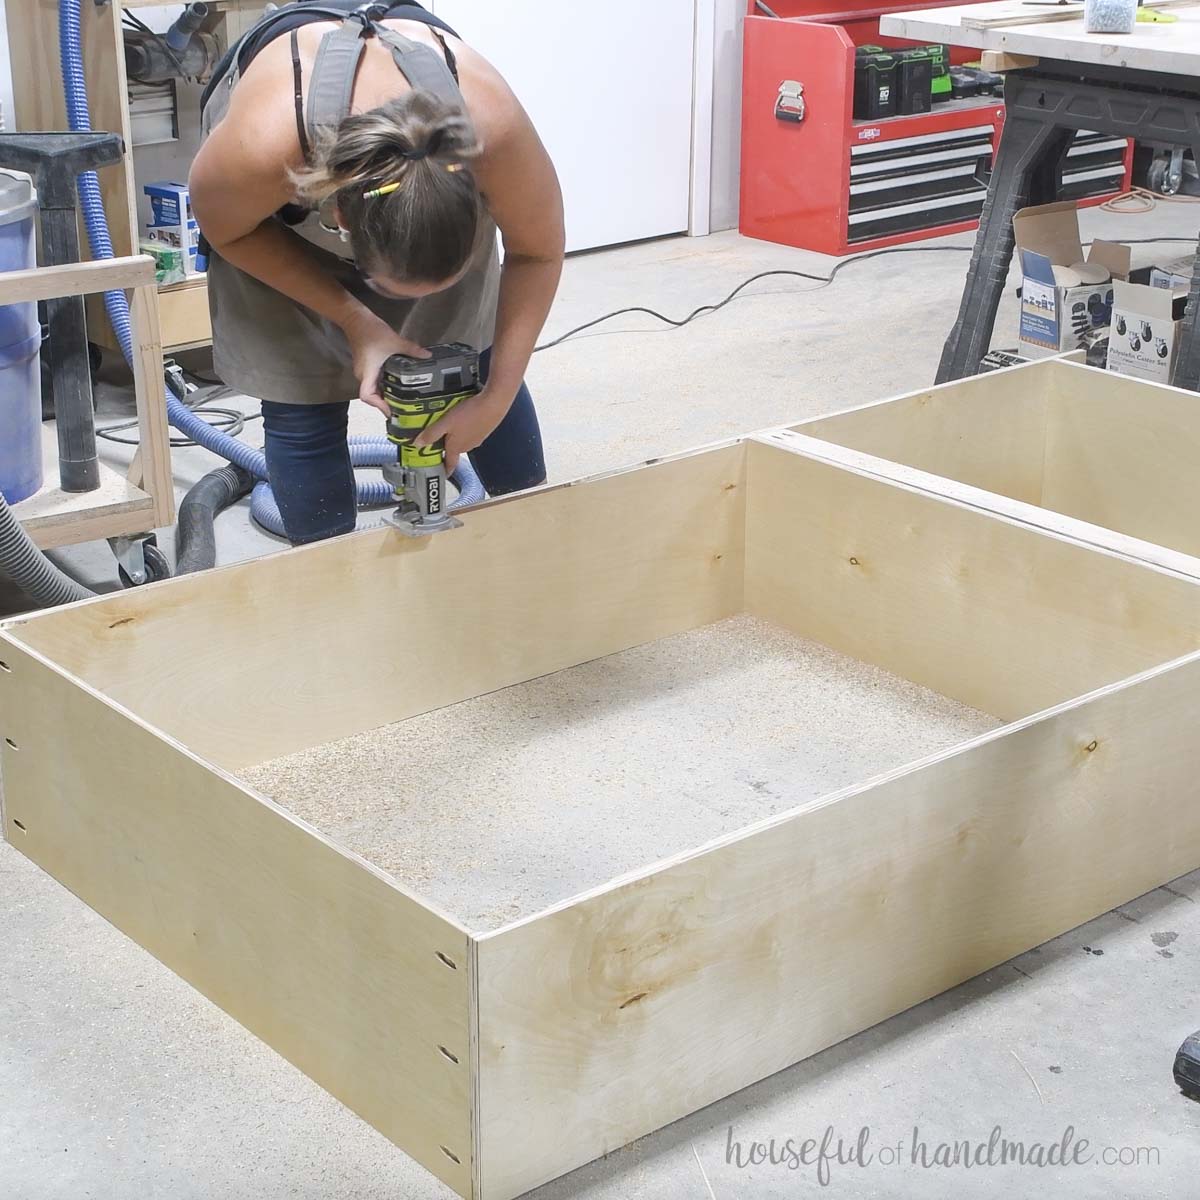
For the second tall bookcase, I decided to attach the back so it would be in front of the metal beam in my wall to hide it.
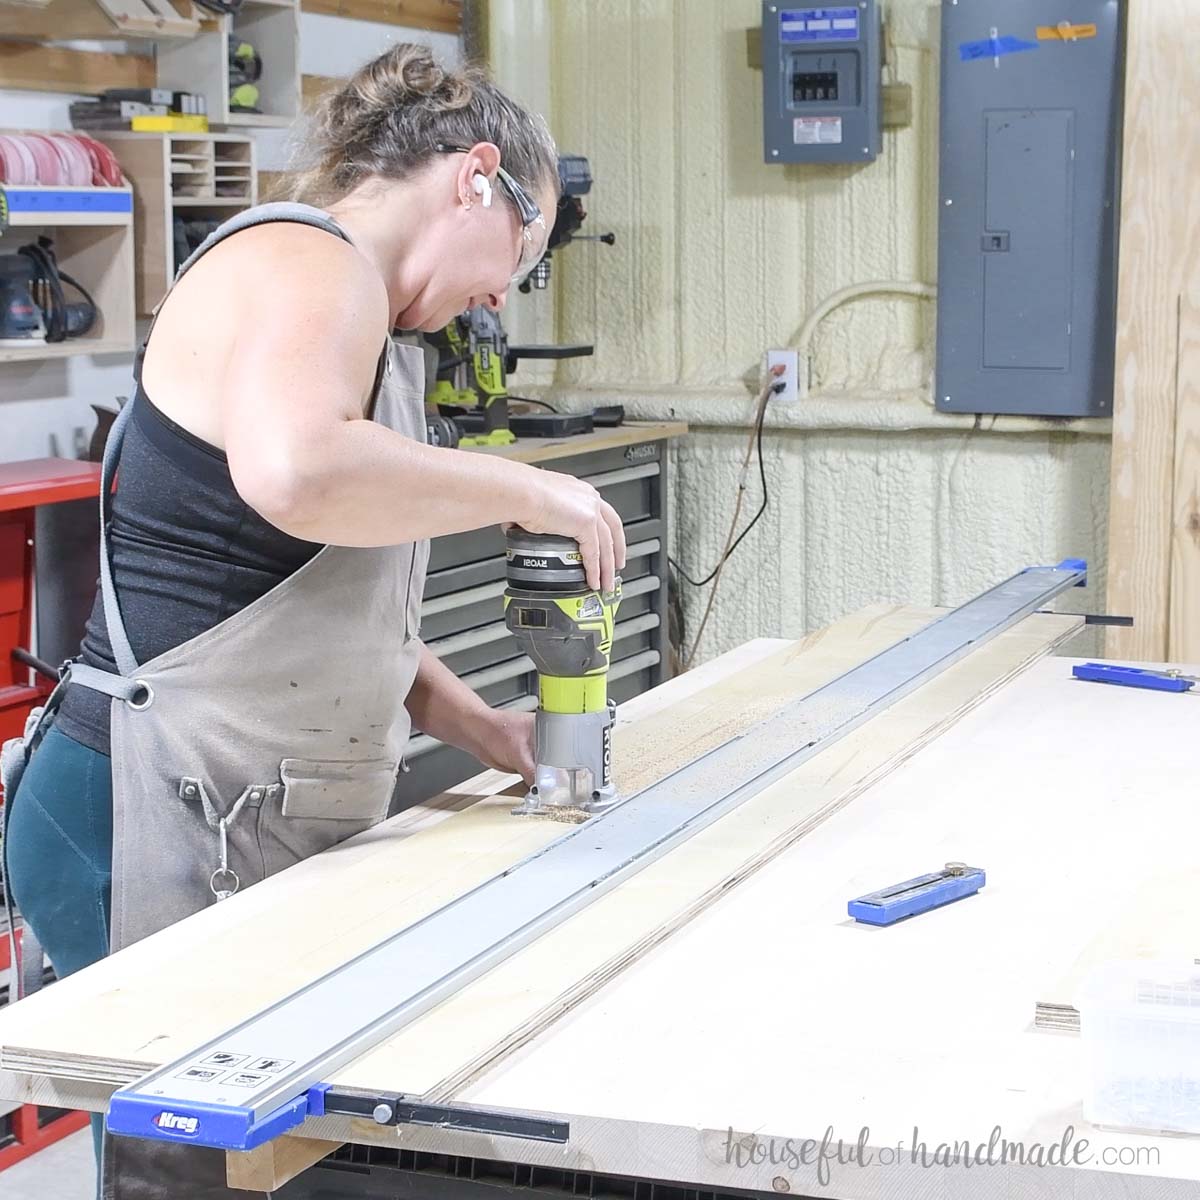
To do this, I used the Kreg straight edge guide to router a 1/4” x 1/4” groove in the sides, shelf, and top pieces before assembling my bookcase.
I also had to cut a notch in the top, bottom and shelf boards to go around the beam.
The front of the notch is even with the back of the groove.

Assemble the box the same way as the other tall bookcase, but before adding the second side board, I slide the back into the groove.
I only added a back to the upper section of my bookcase. The lower section will have doors on it and I didn’t want to loose any storage space.
Center smaller bookcase
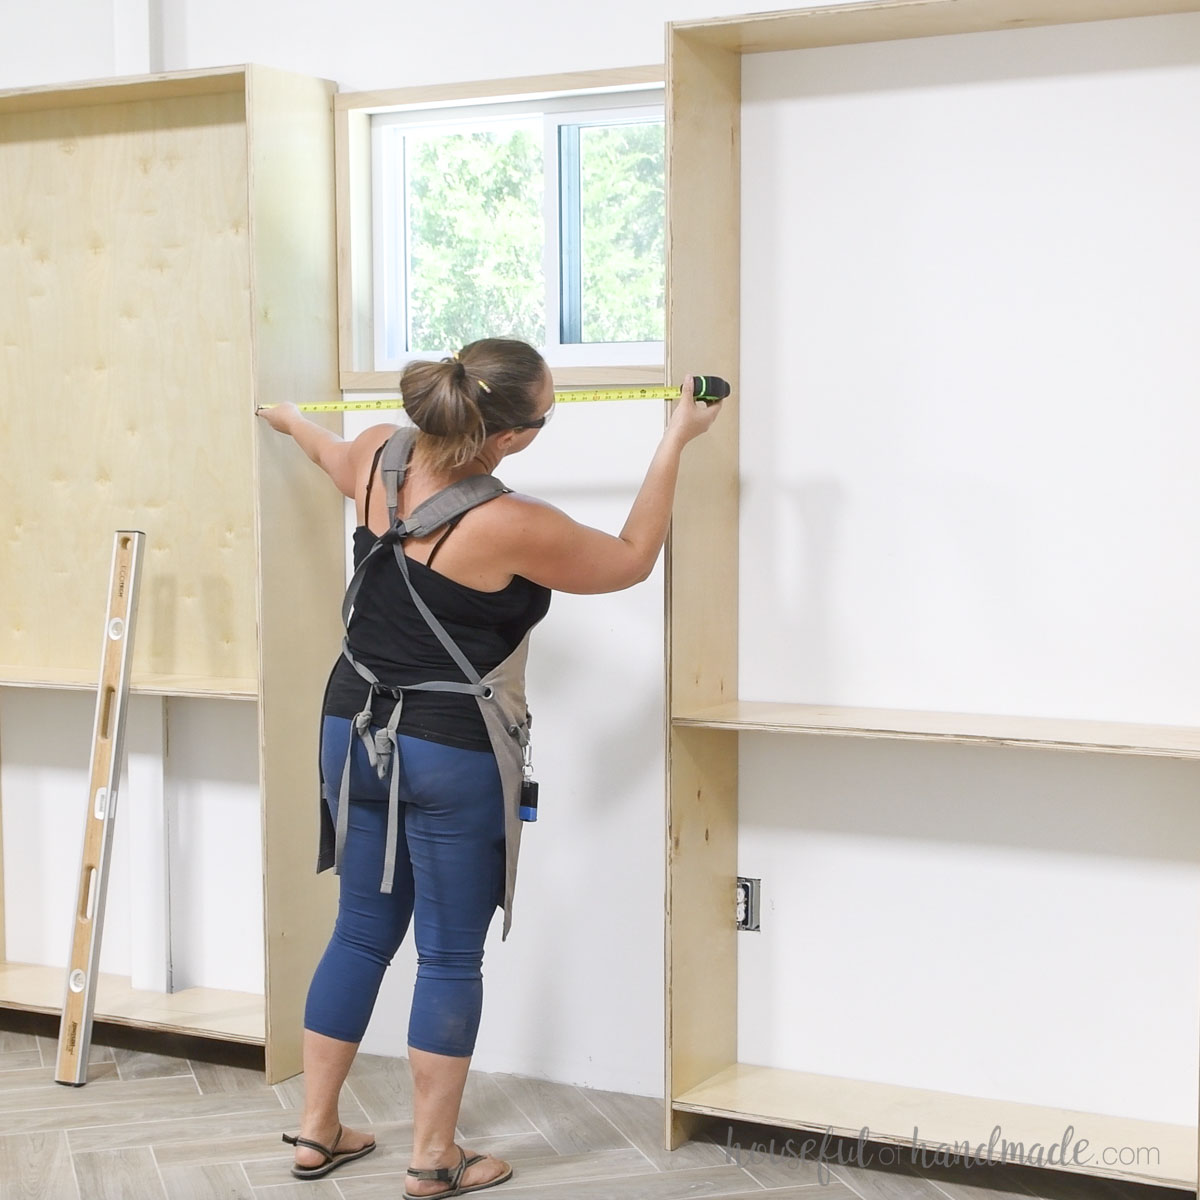
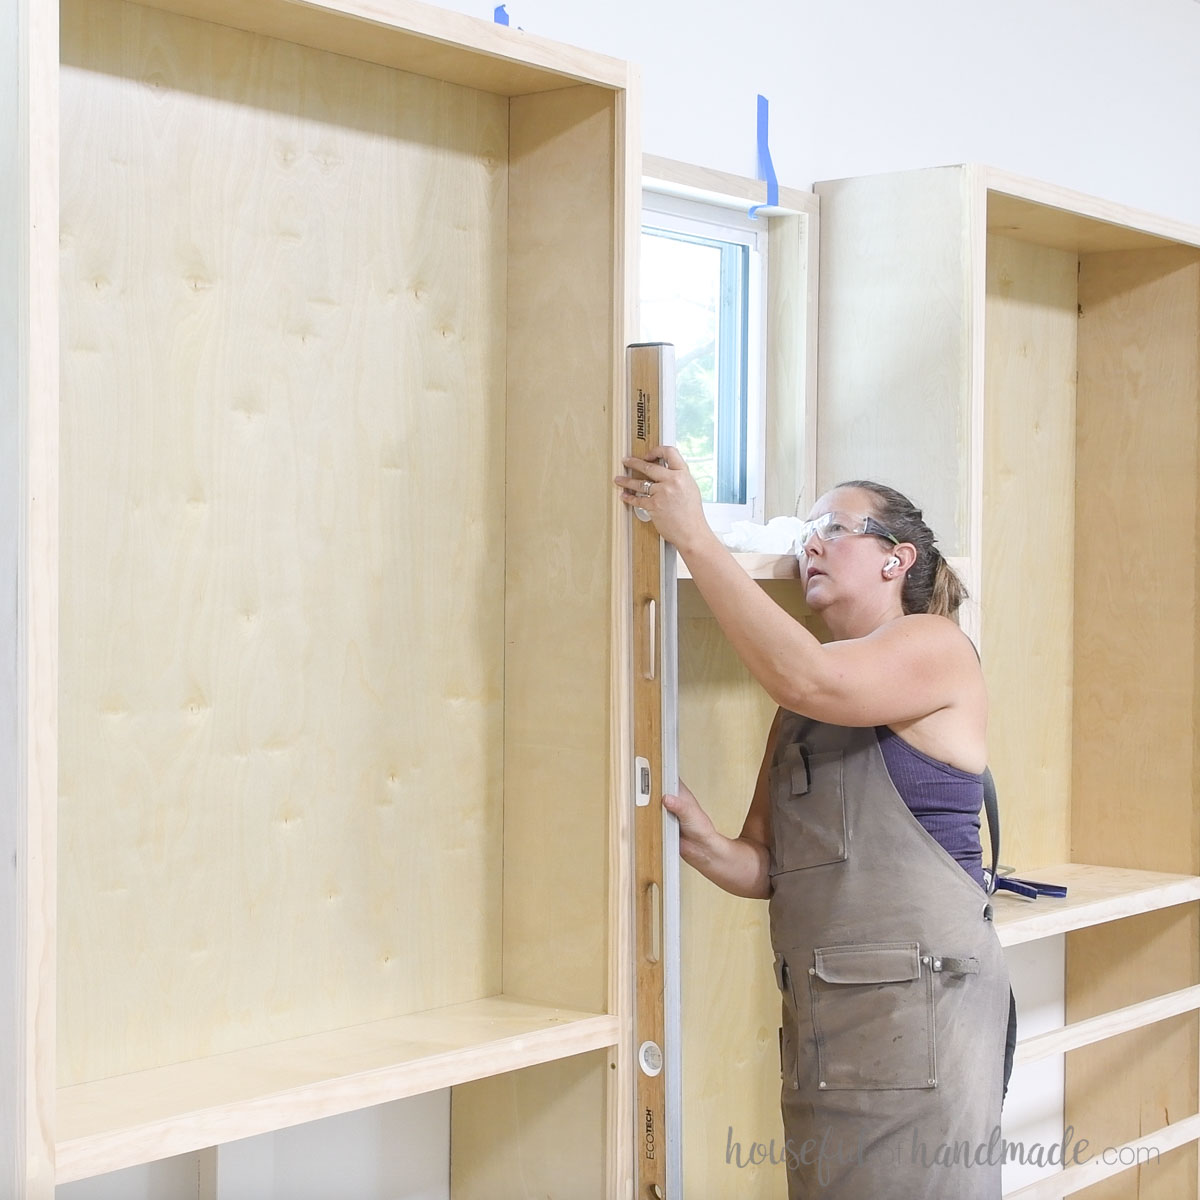
With both tall bookcases built, I took them into the room and test fit to make sure my measurements were good!
And even with all my planning and double-measuring, I still had to make an adjustment to the notch around the beam to get them to fit.
Once they were in place, I measured for the third cabinet that fits between them.
The center bookcase it is shorter than the other two because it sits under the window. I did not want visible pocket holes on the top since I plan to use the top as a shelf.
So for this cabinet, the bottom is attached the same as the others, but to attach the top I added pocket holes to the top of the side boards.
Then I cut the top so it would sit on top of the sides instead of between them like I did for the taller bookcases.
The pocket holes on the sides will not be visible once the three bookcases are attached together.
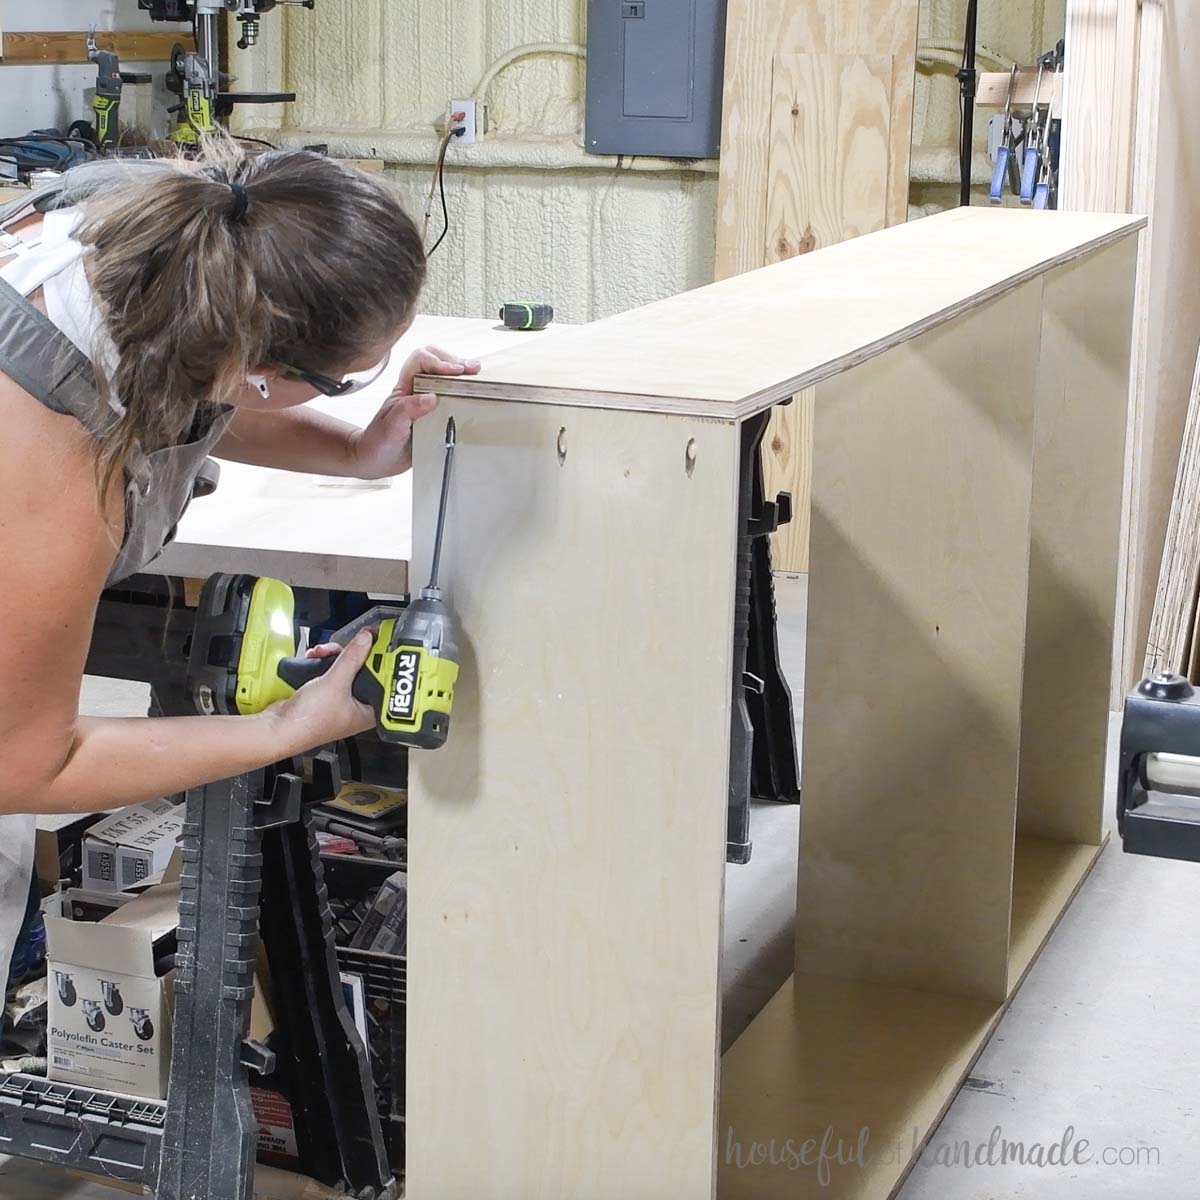
Prep for back
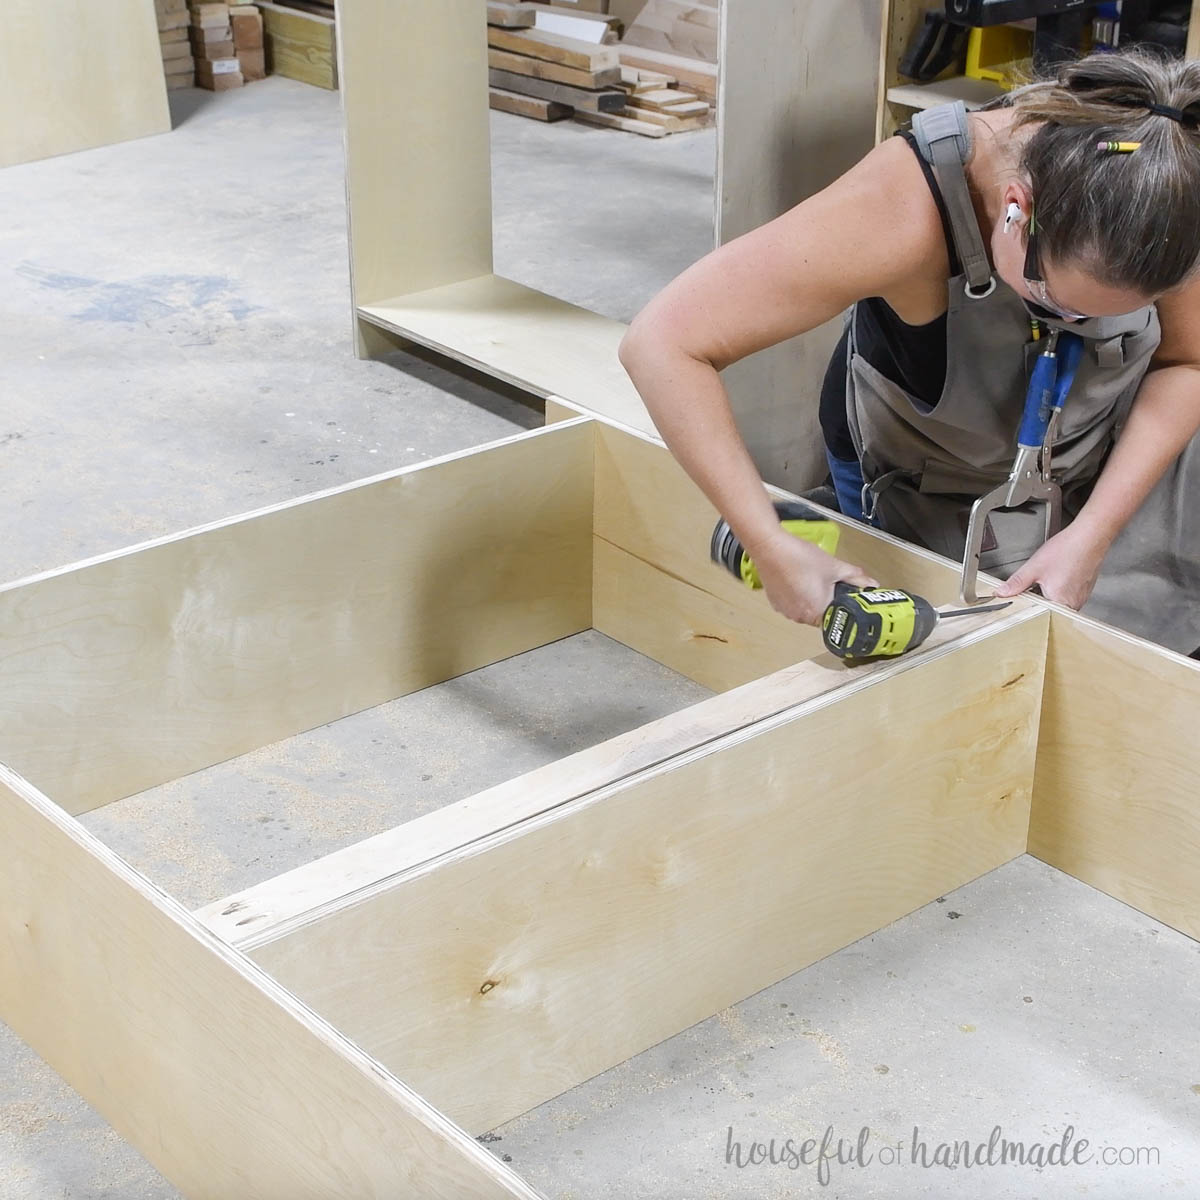
For the tall bookcases, I added a support below the shelf to allow me to attach them to the wall.
This piece was cut from scraps of plywood and is about 3″ wide.
I also added a support to the top of the shorter bookcase. This was for stability and to attach it to the wall.
Then I used a trim router to router a groove for the plywood back to sit in on the upper part of the tall bookcase and the entire shorter bookcase.
I did not add a back to the lower section of my remaining tall bookcase because I am adding drawers to it.
EXPERT TIP:
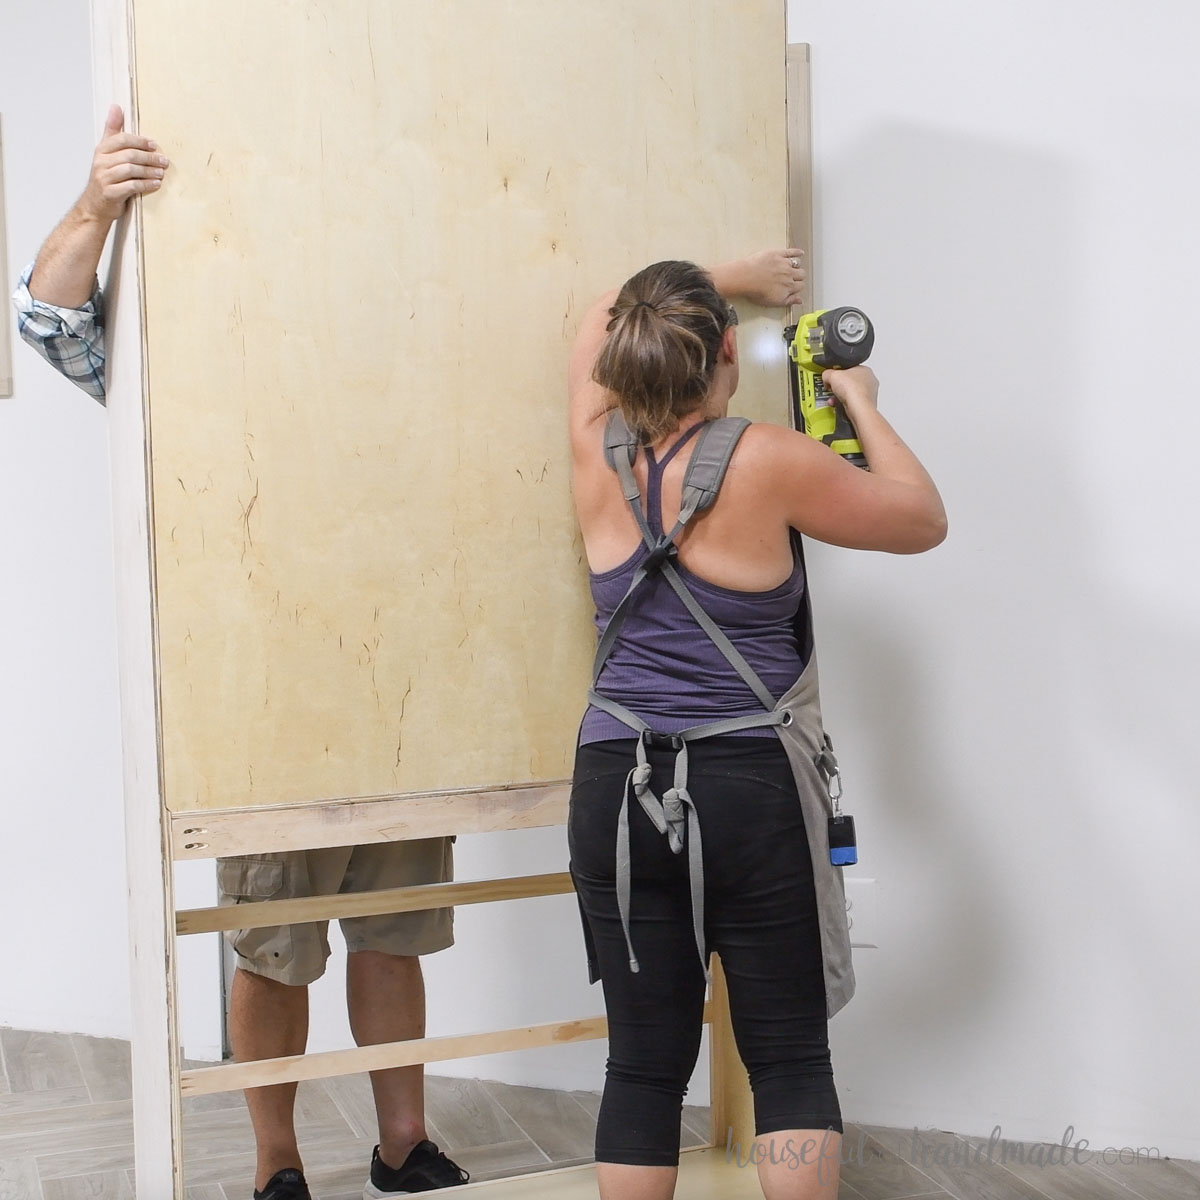
Don’t attach the back yet. Wait until you carry it into the room it will be because it is much easier to carry without a back on. And the back is quick to attach.
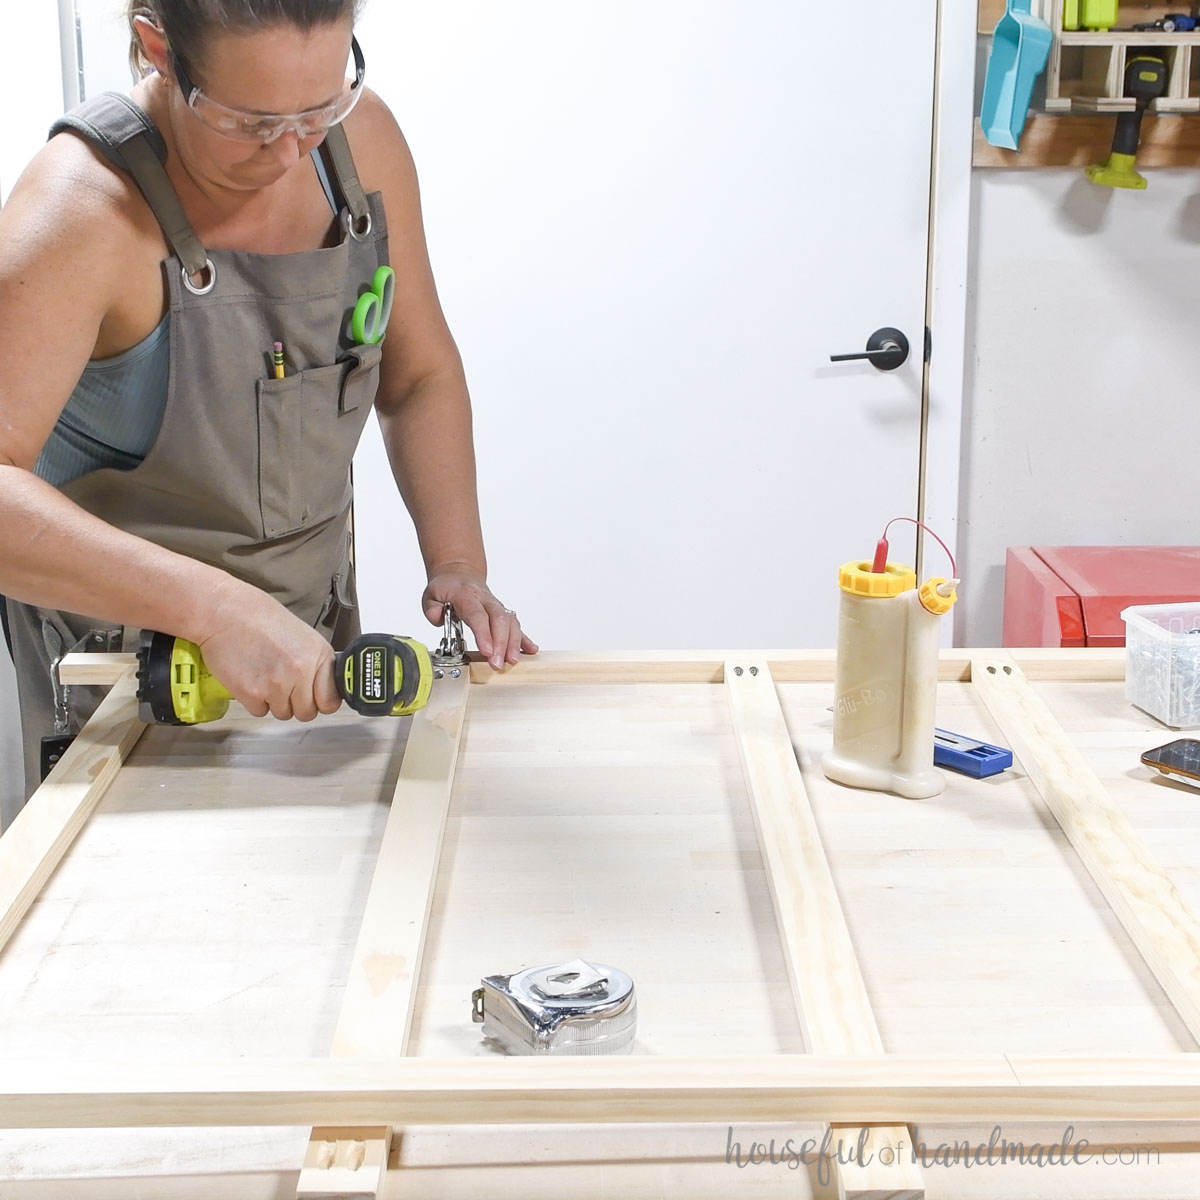
STEP 2- Build and attach face frames
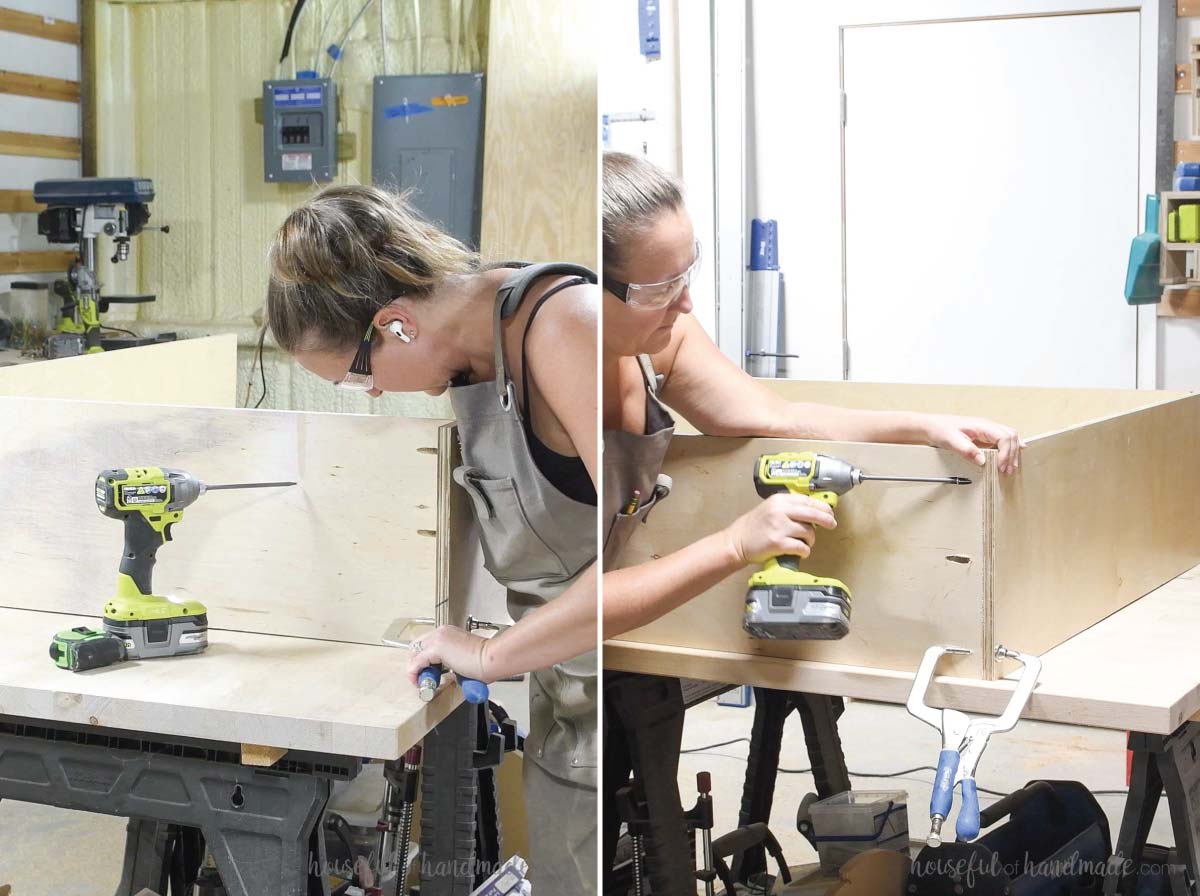
Drill pocket holes set for 3/4” thick material in both ends of the face frame rail boards.
Attach the rails between the stiles so they are flat according to the diagram in the plans.
I love the Kreg project clamp when building face frames because it keeps the boards flush while securing with 1 1/4” screws and wood glue.
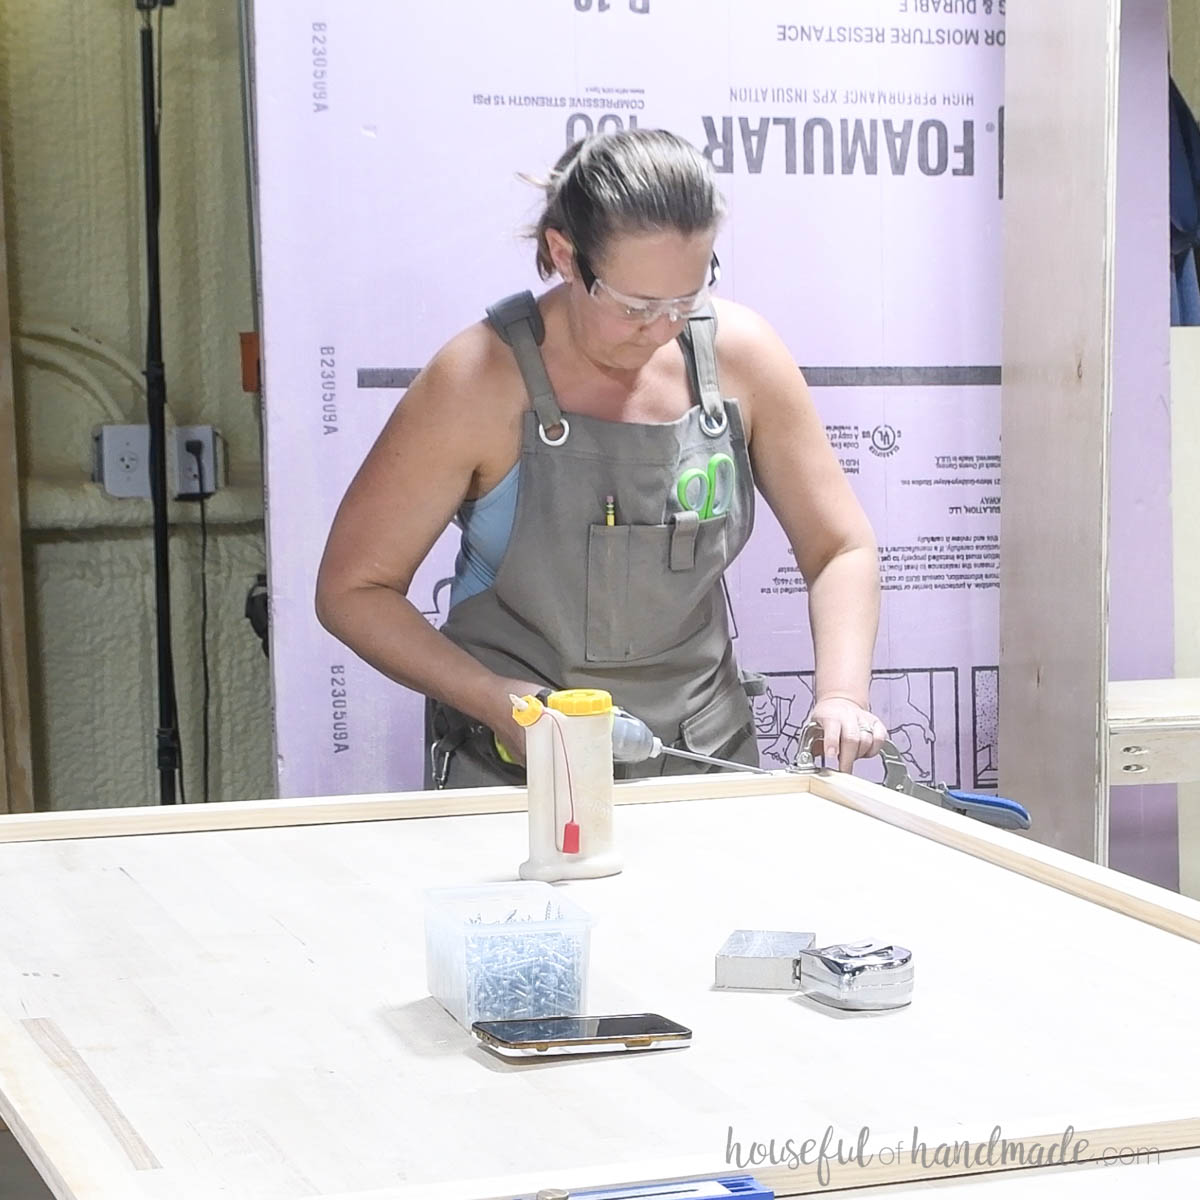
For the face frame on the cabinet with drawers, I also added additional rails to separate where the drawers will go.
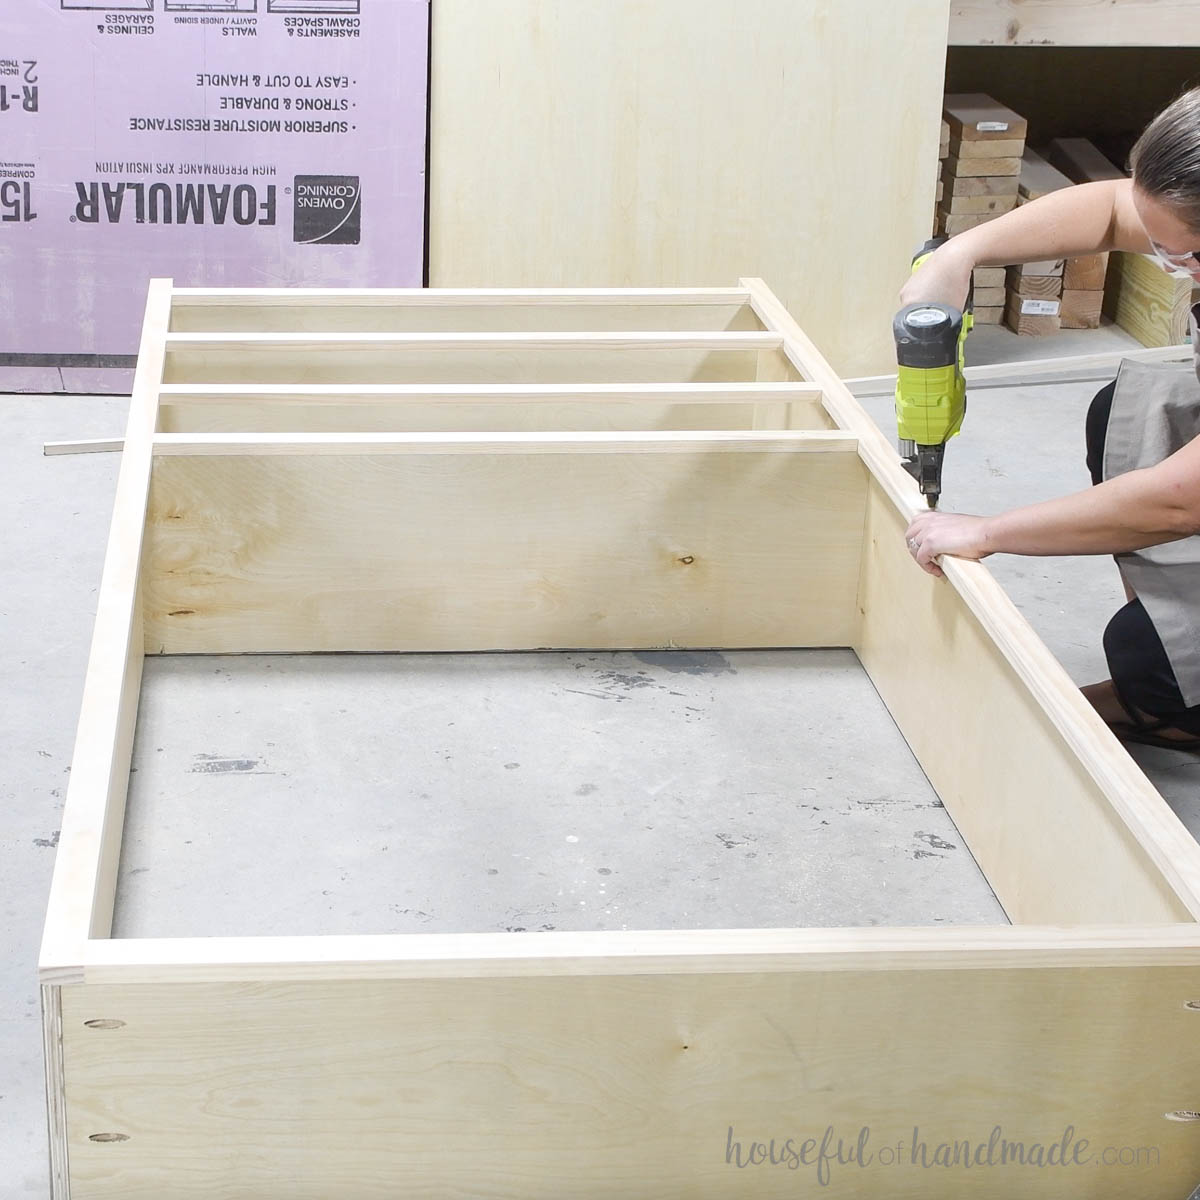
To attach the face frame to the bookcase, line it up so it flush to the sides, top, and top of the shelves.
Secure with wood glue and 1 1/4″ brad nails.
STEP 3- Install bookcase cabinets
Carry the cabinets to your room and attach the backs.
Now it’s time for the moment of truth!
Slide all the bookcases into place to make sure they fit properly.
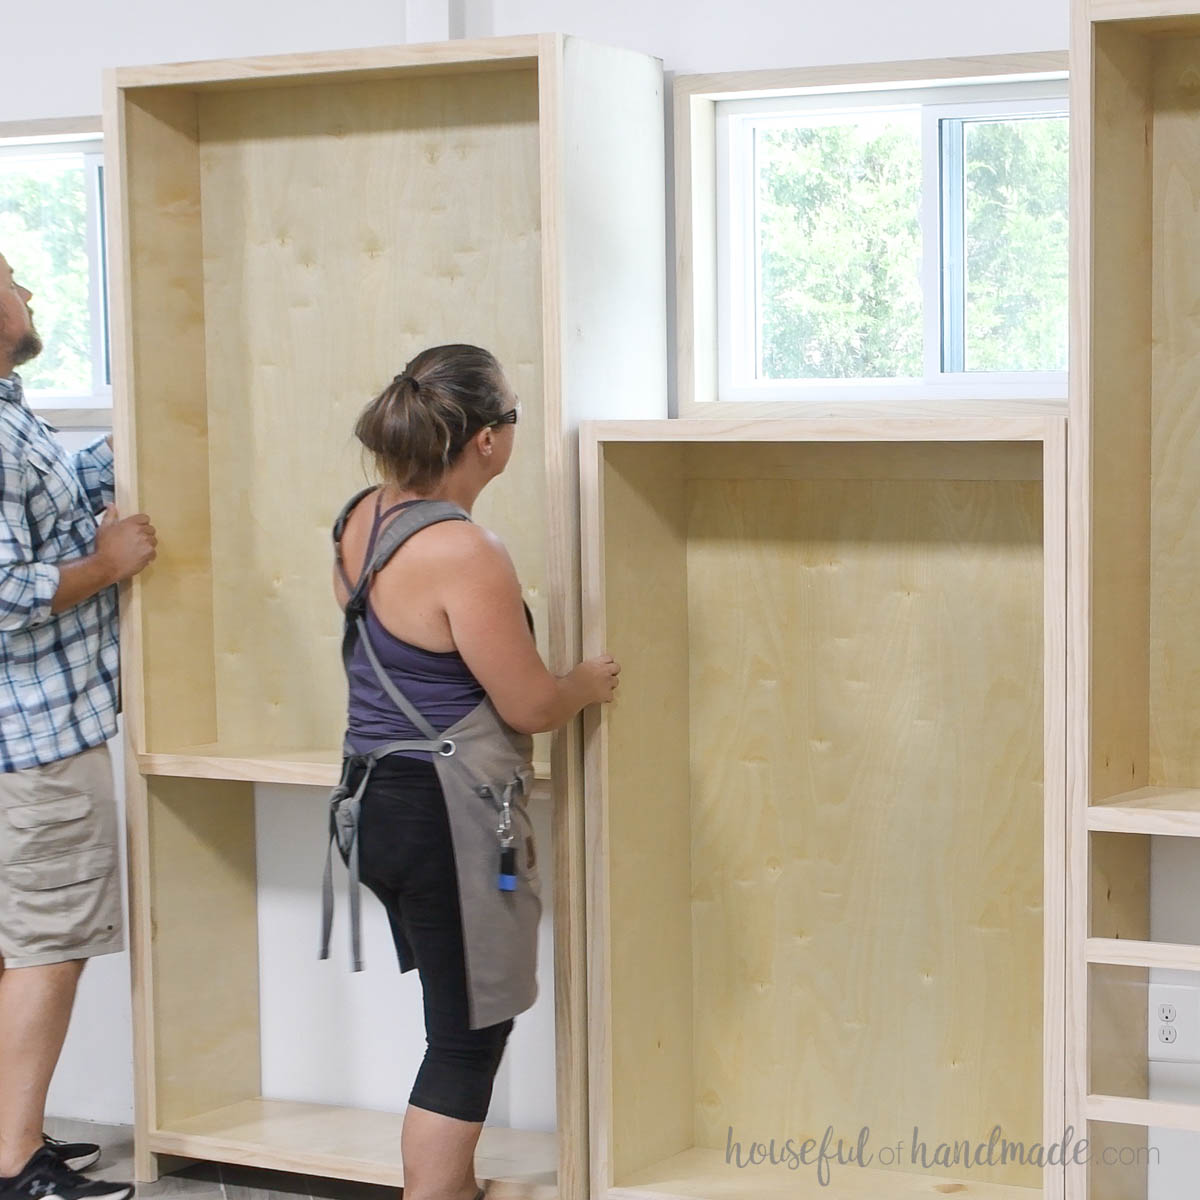
Before attaching the built-ins to the wall, you want to attach them to each other.
Kreg just released a new cabinet clamp to make attaching face frame cabinets easy. It’s called the Cabinet Face Frame Clamp.
It used 3 way clamping to pull the face frames tight side to side, while making them flush on the front.
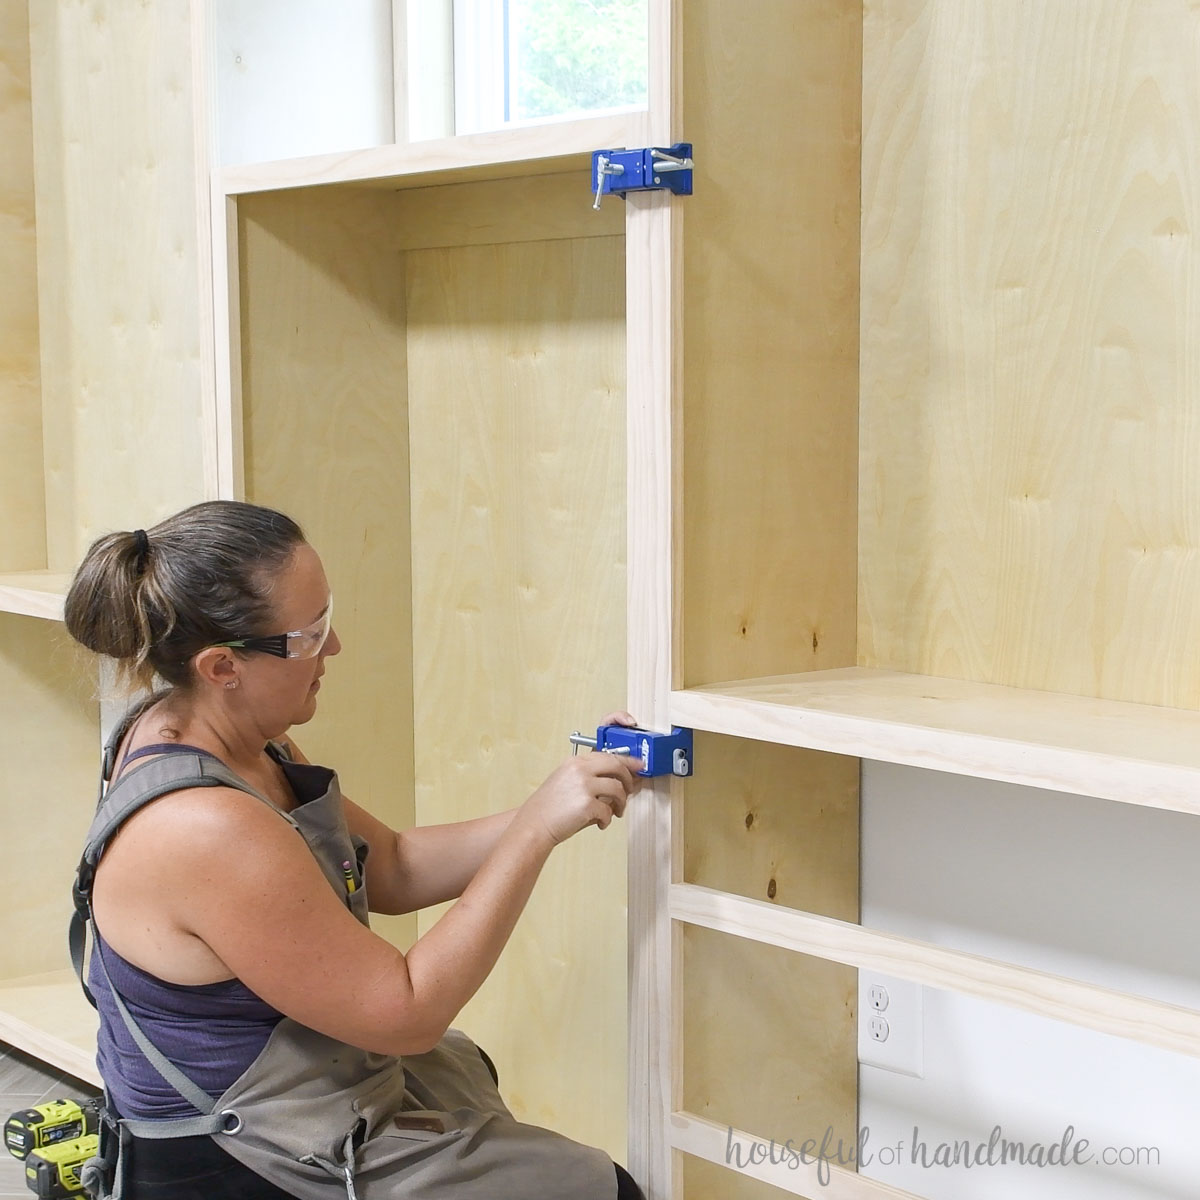
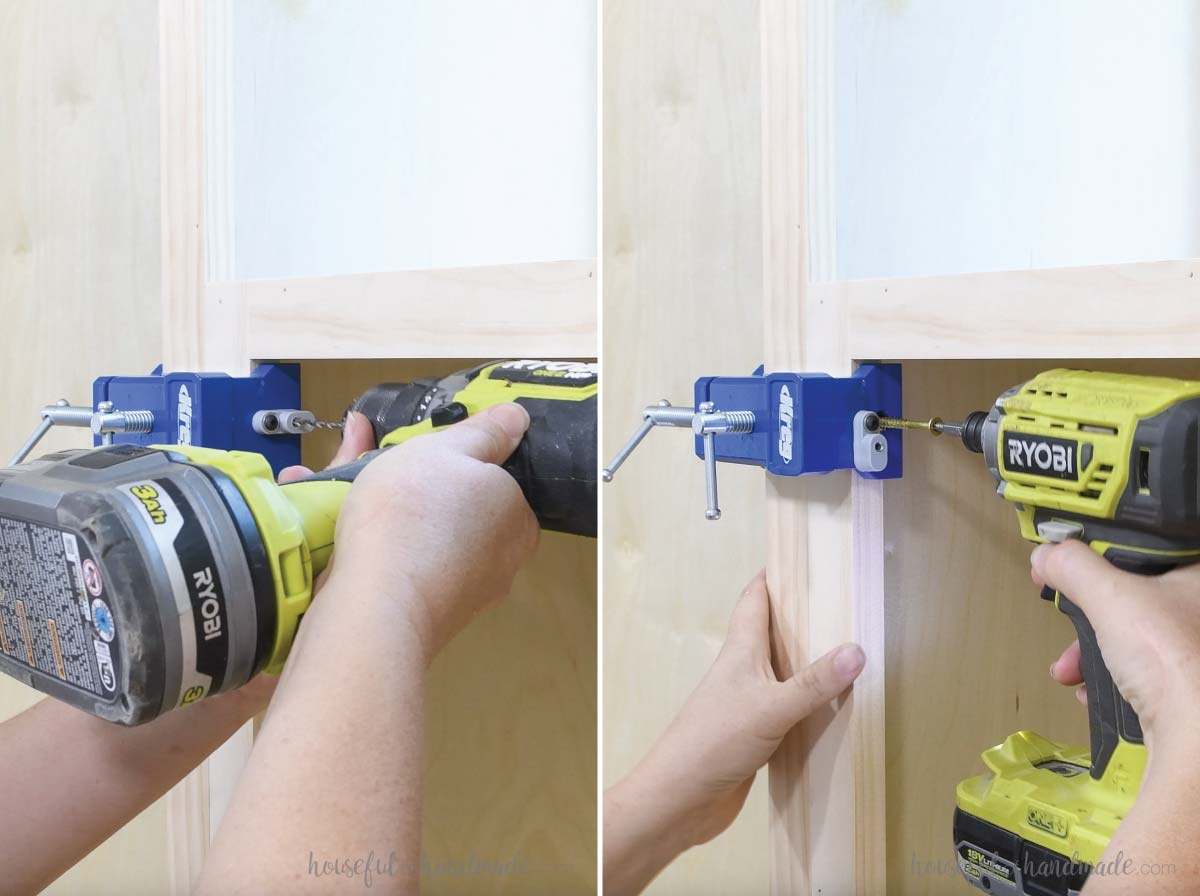
Then you can pre-drill a hole for your screw. This is very important because you definitely do not want to split your wood at this point.
Then twist the drill guide out of the way and secure the two cabinets together with a 2 1/2″ wood screw.
I attached the bookcases together at 3 points:
- the top of the middle bookcase
- just under the stationary shelf
- right above the bottom.
Check all the bookcase sections for plumb on the front and sides. Use shims to adjust as needed.
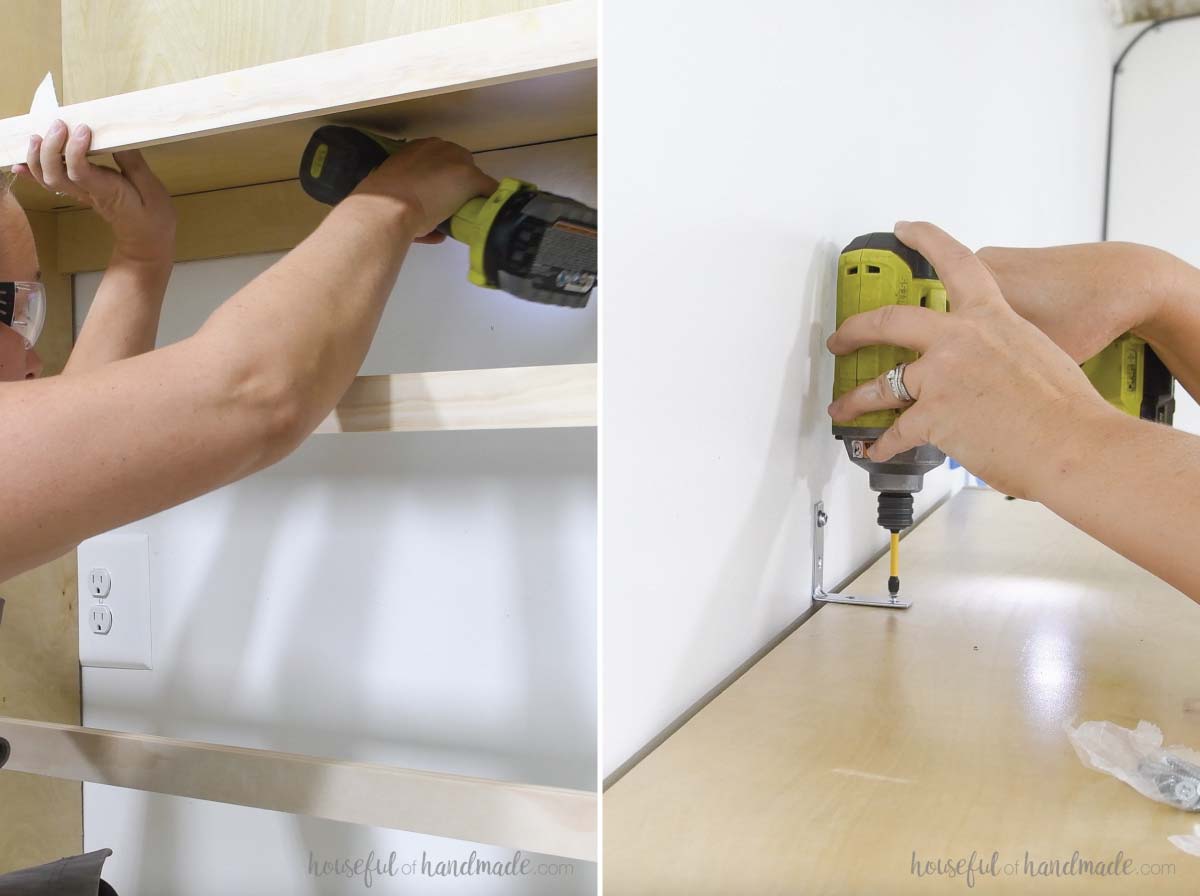
Then attach the cabinets to the wall into studs.
I used 2 1/2″ wood screws through the back supports.
For the top, I used L brackets so I wouldn’t have a visible support piece. And made sure these were secured into wall studs as well with 2 1/2″ screws.
STEP 4- Finish and paint
Now it was time to finish these bookcases!
I filled in all the nail holes and the seams on the sides where the face frame meets the plywood so I would have a seamless look once painted.
Then sanded the face frames and sides so they were nice and smooth.
I am using a pre-finished plywood so the inside of my cabinets are already done, yay!
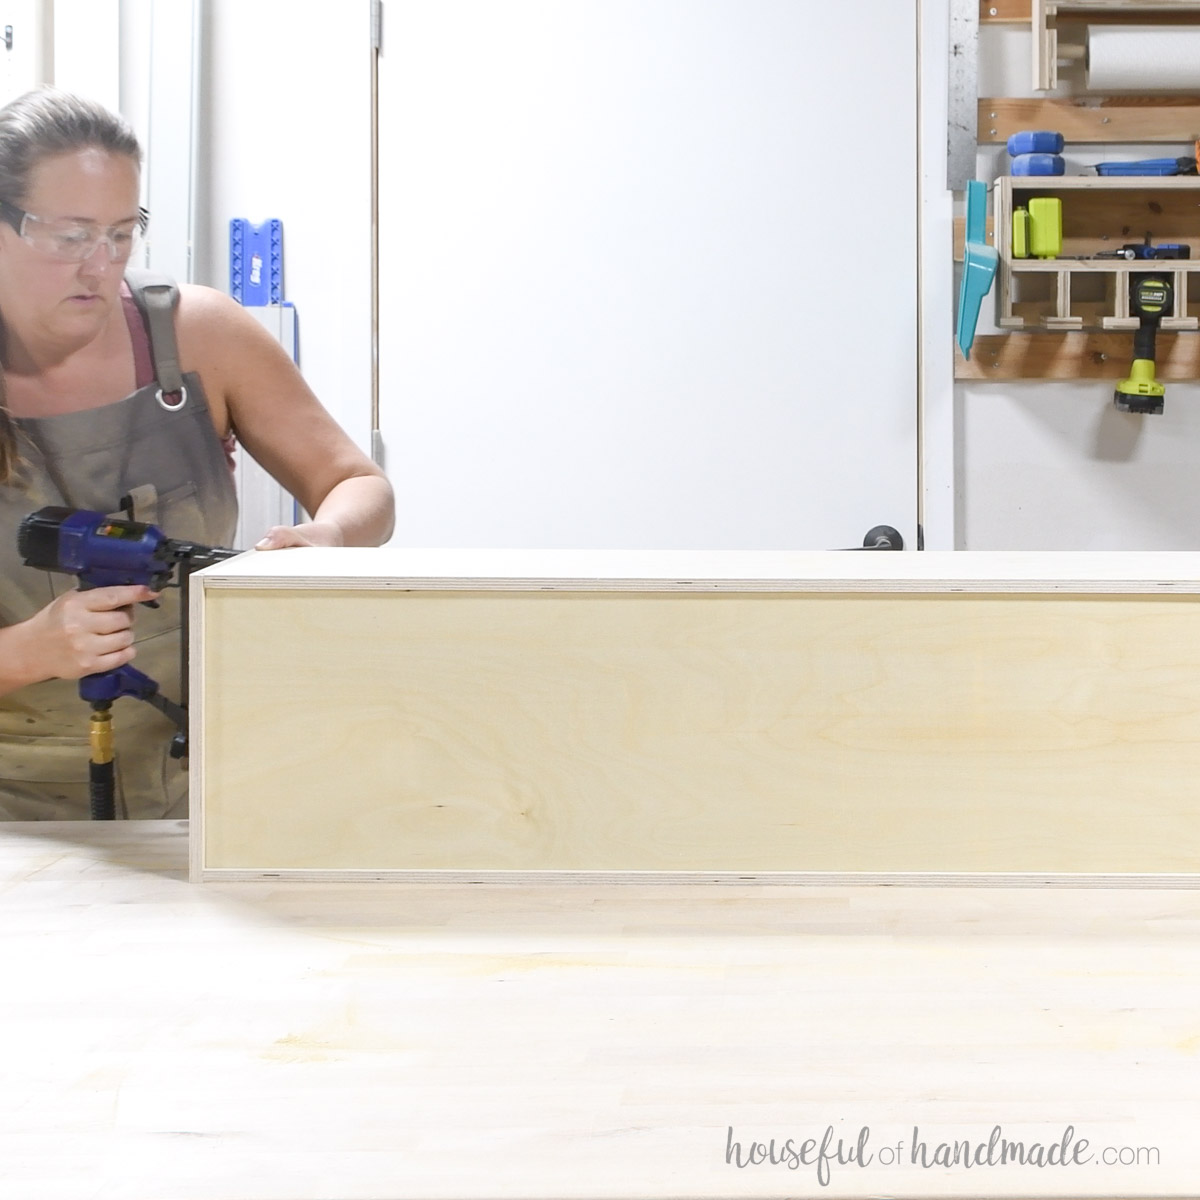
I attached a baseboard to the cabinet so it matched the baseboard in the room.
On the left side I am going to be building a kitchenette later, so I didn’t add any baseboard here.
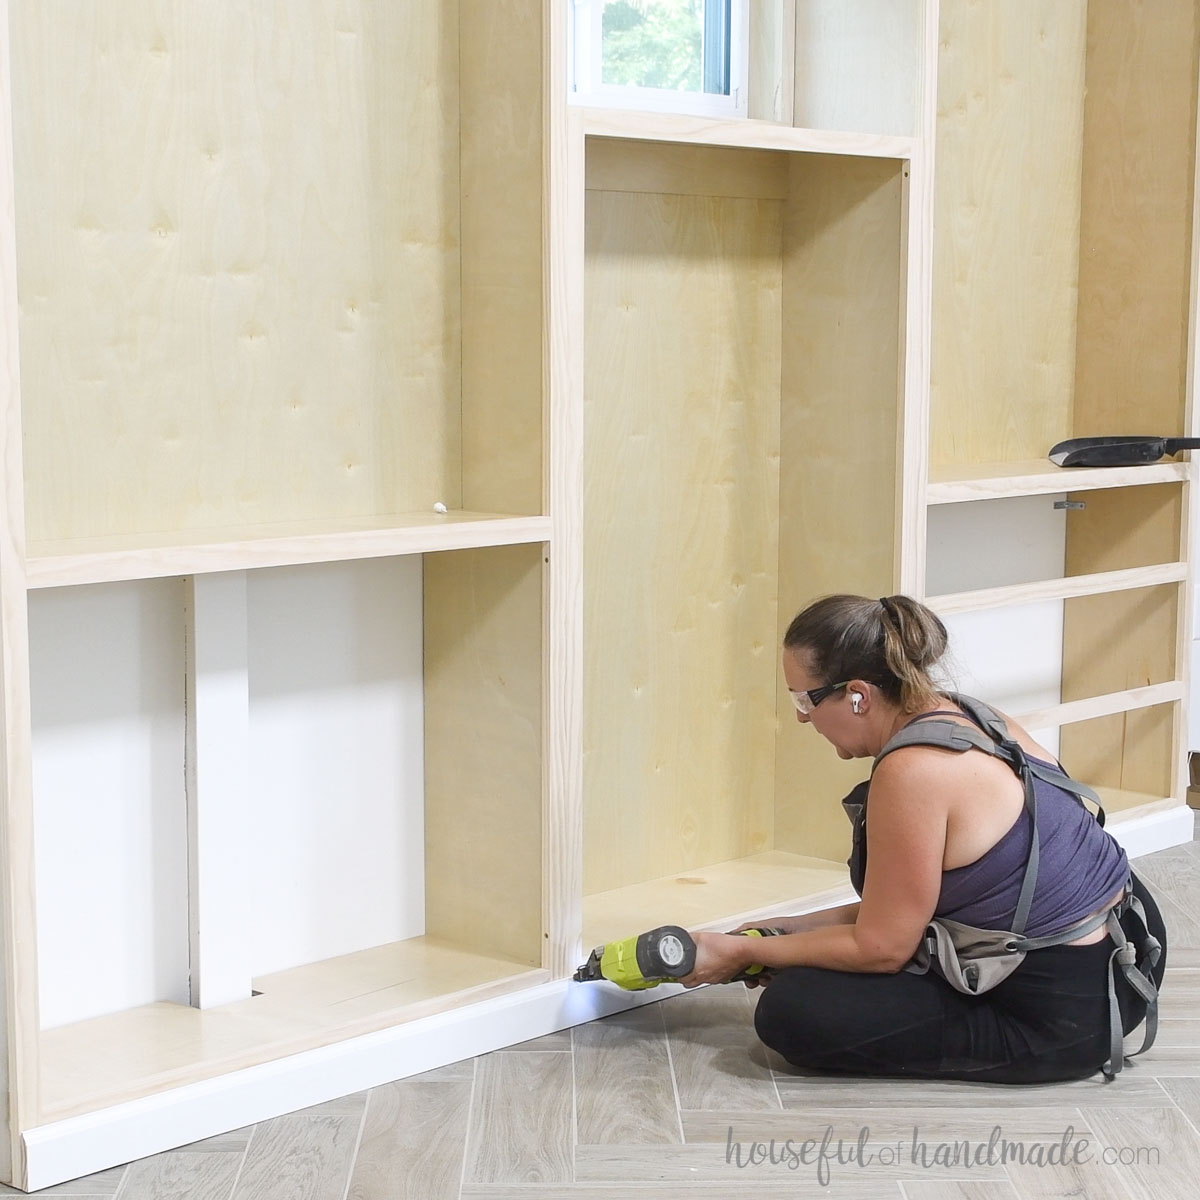
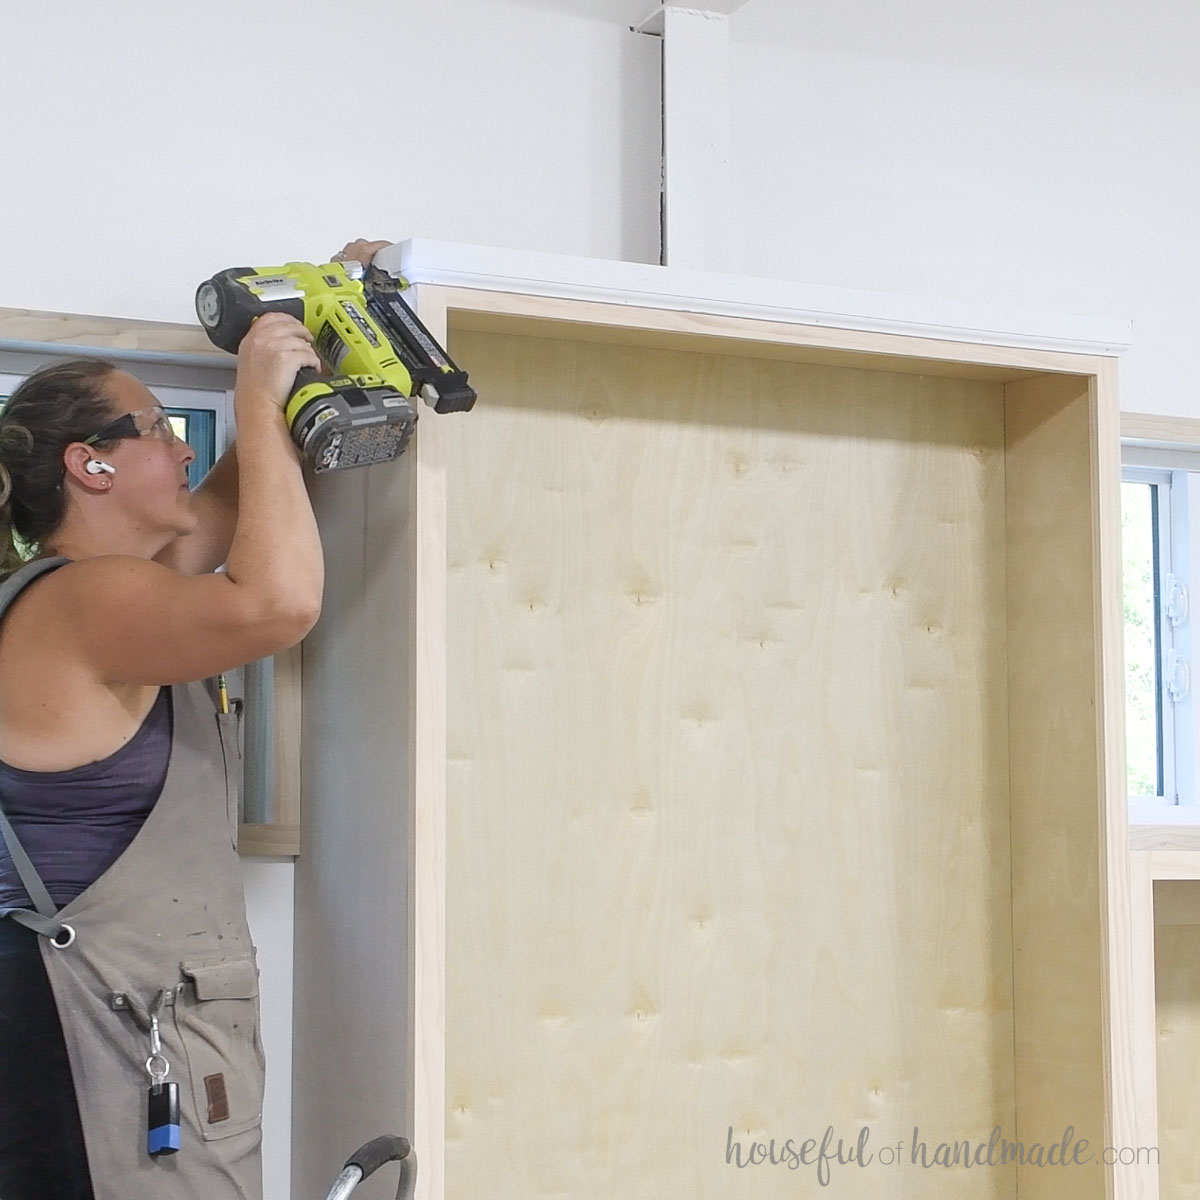
I also added moulding to the top of the two tall bookcases to finish them off. It made them look so nice and hid the L brackets.
Cut the base and moulding at a 45 degree angle in the corners and secure with 1 1/4” brad nails.
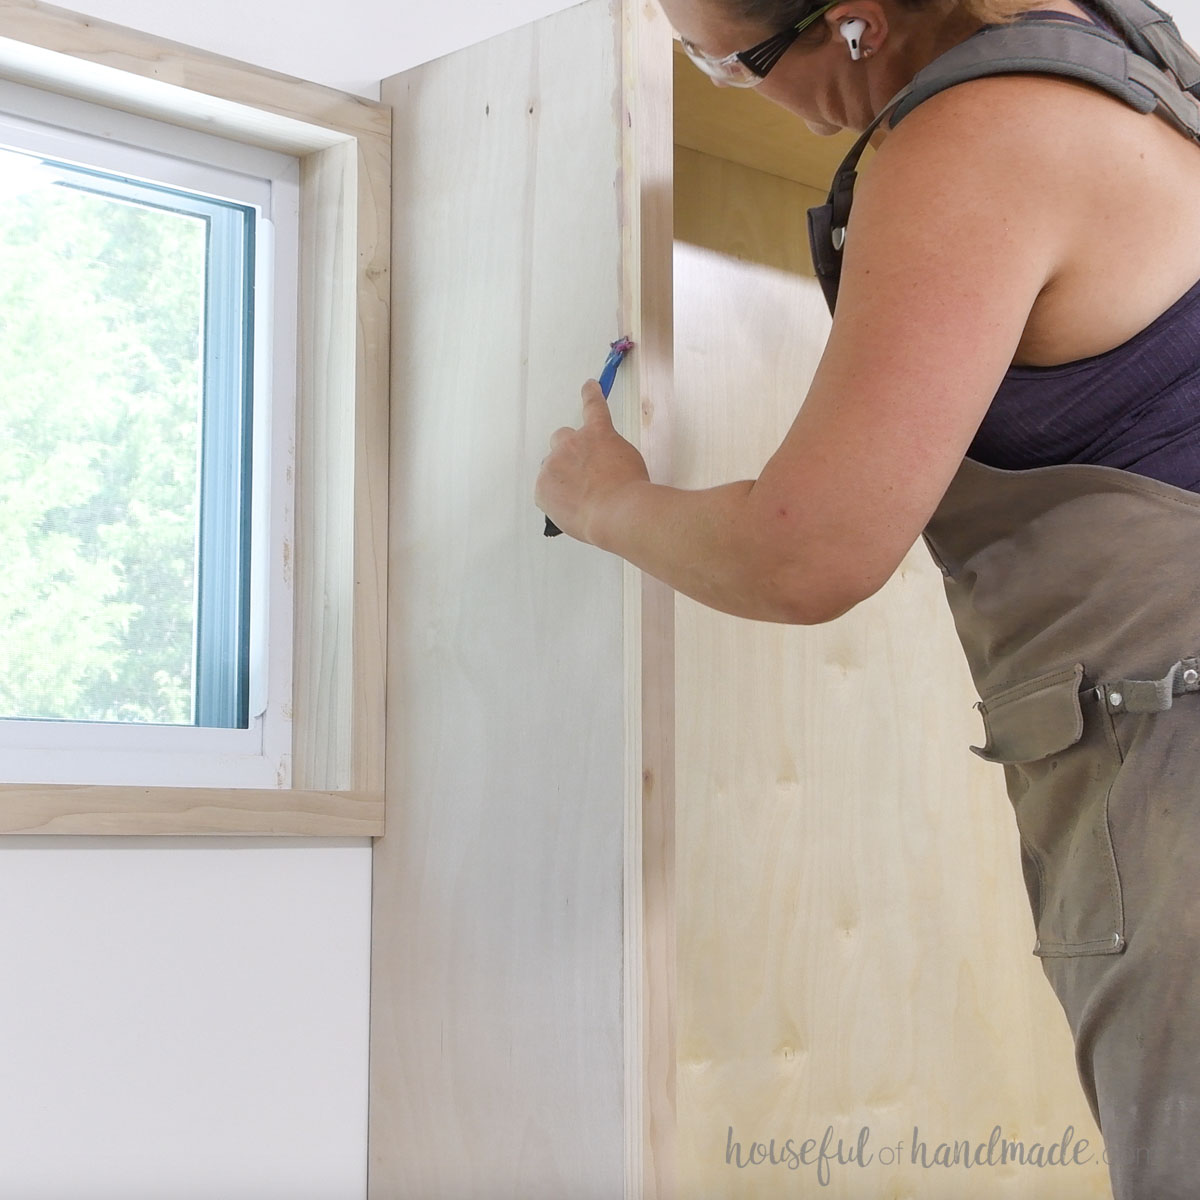
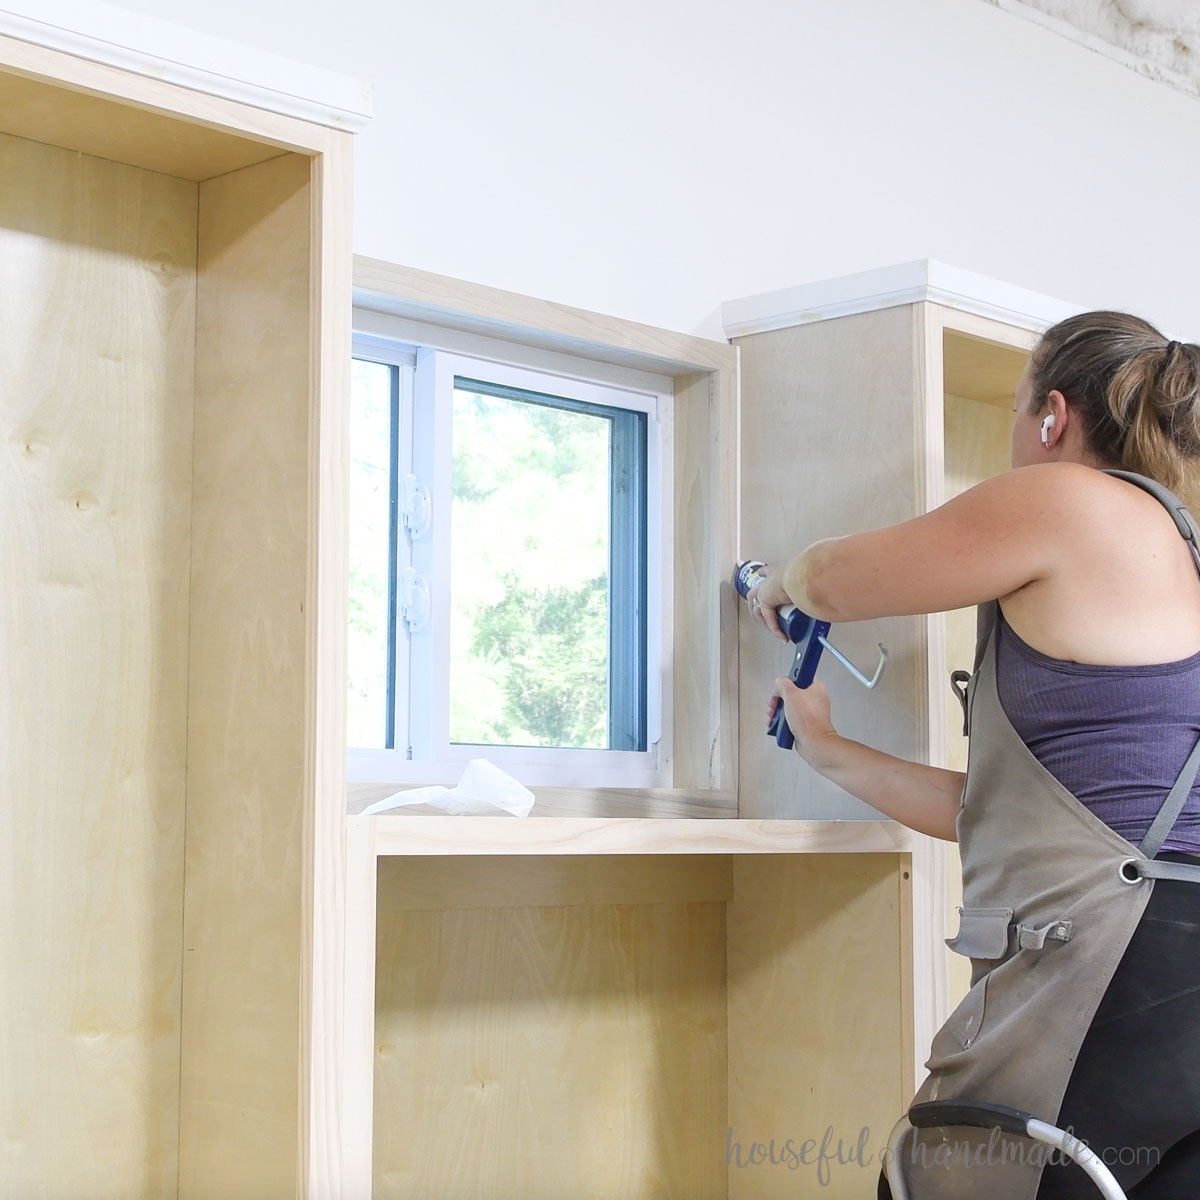
Caulk the seam to make the built ins look like they blend into the walls.
I caulked around the window trim, where the shorter bookcase meets the taller ones and where the bookcases meet the wall.
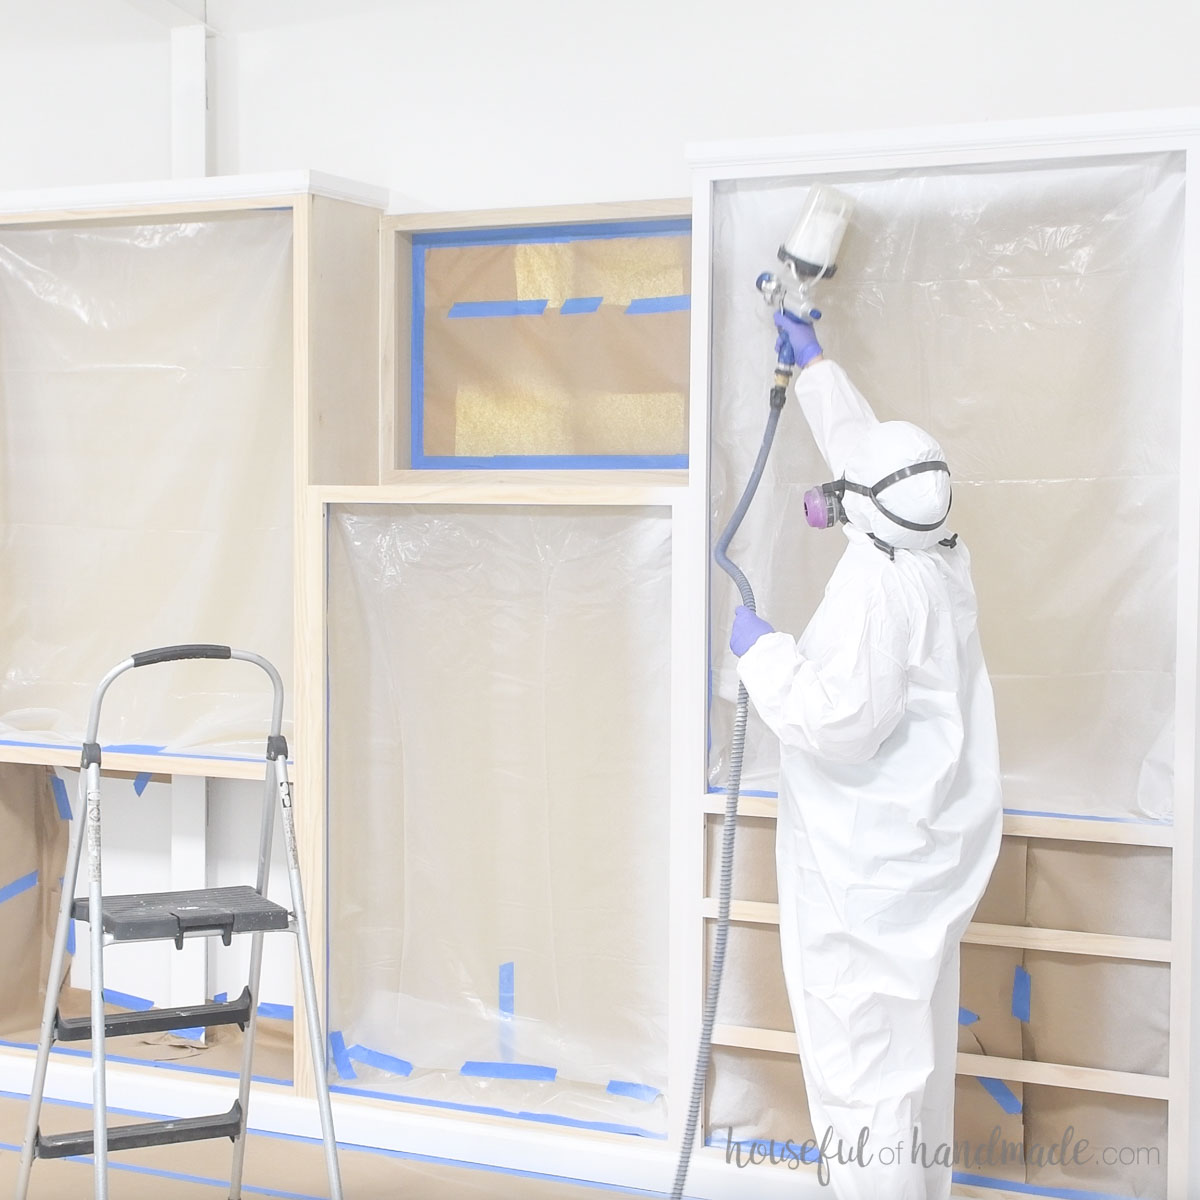
Now it is finally time for paint!
I painted my built-ins the same color as the wall so I didn’t have to tape that off, but I did have to tape off the center of the bookcases and my windows.
I used a paint sprayer to add a coat of primer and 2 coats of paint.
STEP 5- Build and install doors
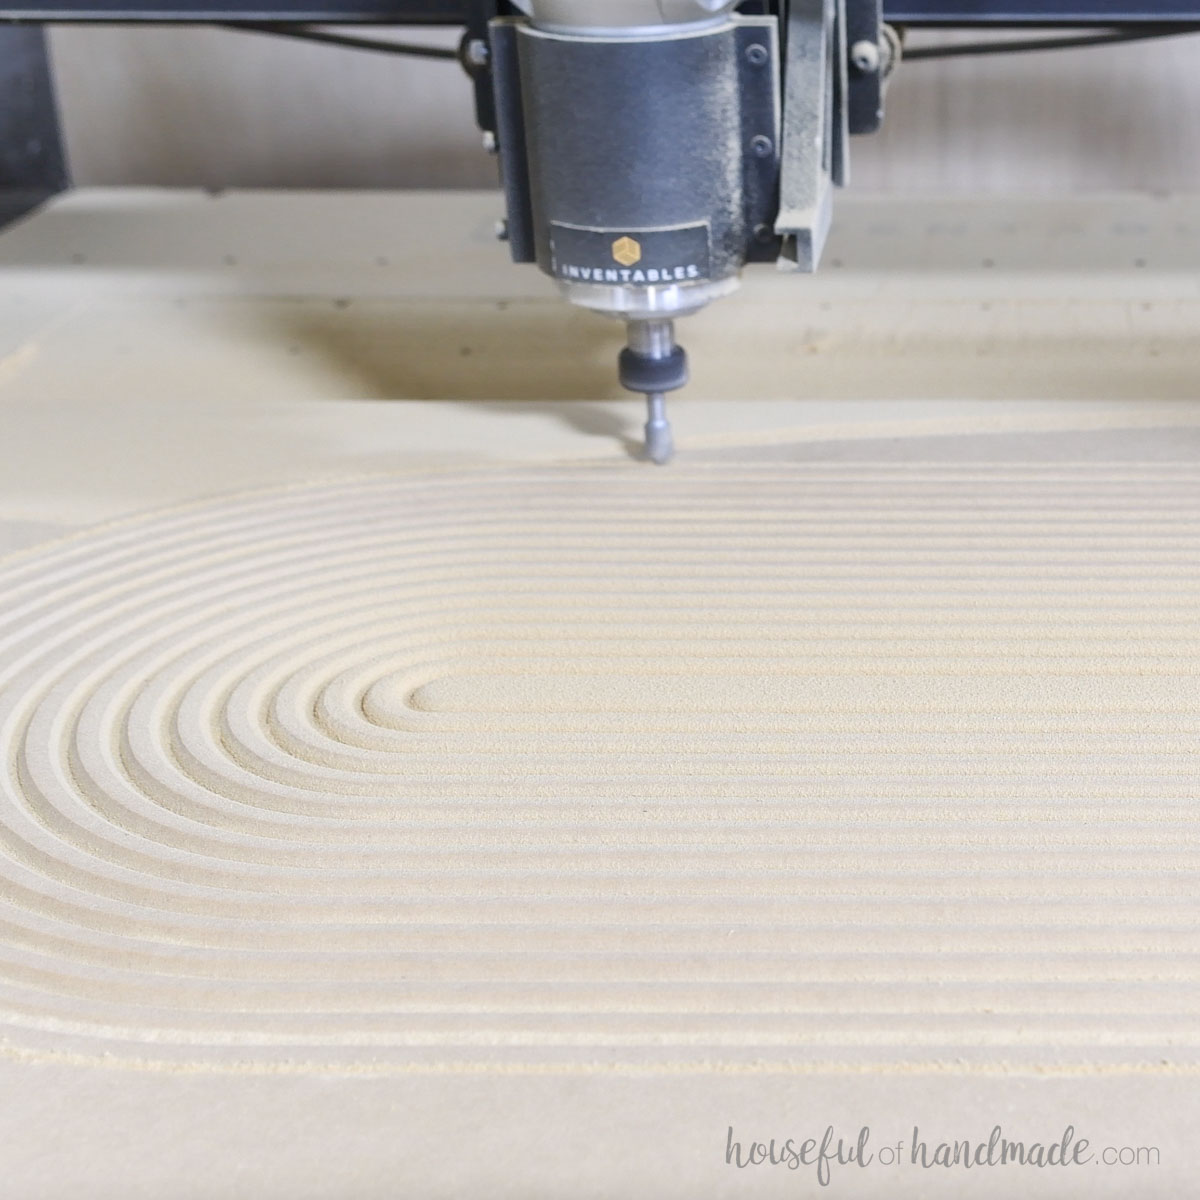
I decided to have some fun with the doors for my built-ins and created an arched door that was carved to look like reed.
I cut my doors from 3/4” MDF since they will be painted to match the cabinet and used my CNC machine to carve the design with this router bit that cuts a point in the middle of the round over.
You could also build easy slab cabinet doors or shaker style doors for your bookcases.
Once the doors were done, I drilled cups for the concealed hinges with the Kreg concealed hinge jig. Then installed the hinges by hand.
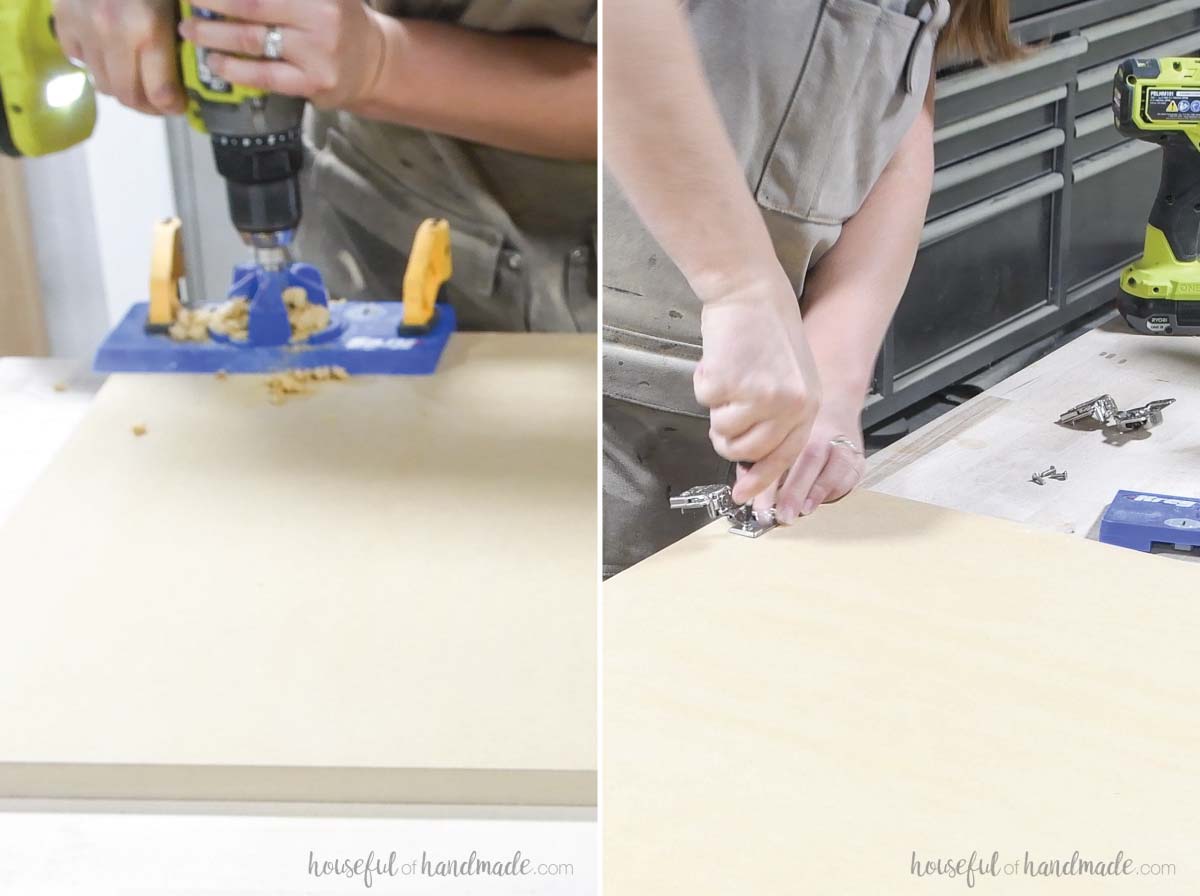
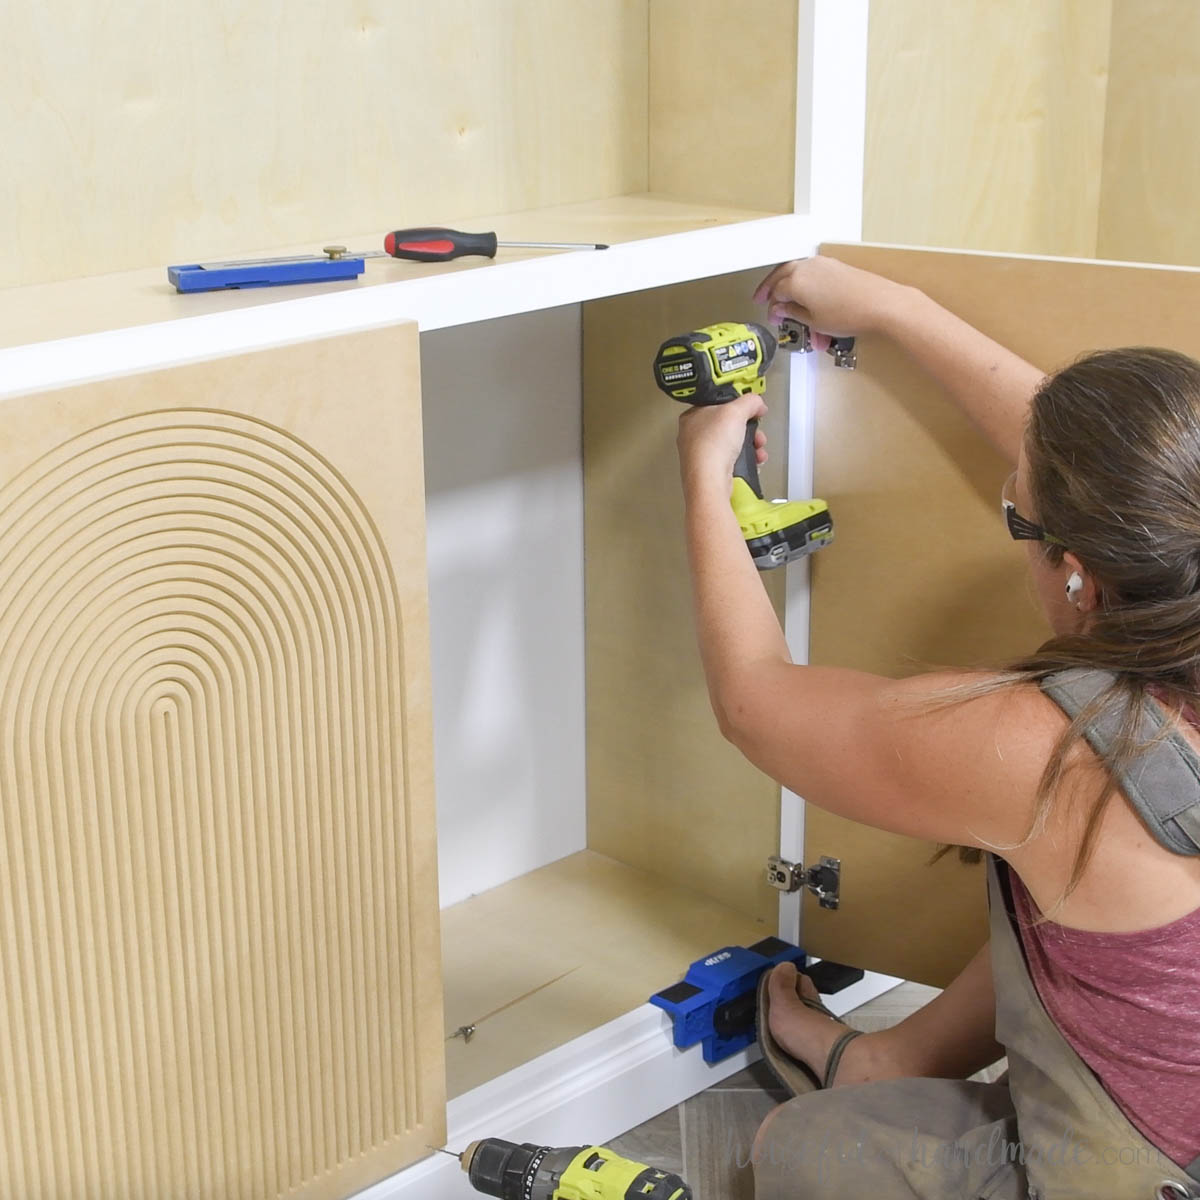
Attach the doors to the lower part of the bookcase with 1” overlay hinges (meaning they sit over 1” of the side of the face frame).
The doors should overlay 1/2” at the top and bottom as well. Learn how to install cabinet doors with concealed hinges here.
You might notice the Kreg cabinet door mounting jig in the picture below. It is very helpful in giving you a second set of hands when installing doors.
But since I could not clamp it to the frame with the baseboards installed, I used my foot to hold it in place and it worked wonderfully!
Adjust your doors as needed and then finish them to match your bookcase.
STEP 6- Build and install drawers
I built the drawers for the bookcase so they were 11″ deep. This is slightly deeper than the 10″ drawer slides, but I am still able to access everything inside easily.
The drawer boxes are built from 1/2″ plywood with a 1/4″ plywood bottom set into a groove.
Learn how to build easy drawers 3 ways here.
I attached scraps of 1×2 to the inside of the cabinet about 1/2” above the face frame rails.
This is necessary to bring the sides of the cabinet flush with the sides of the face frame before you can attach the drawer slides.
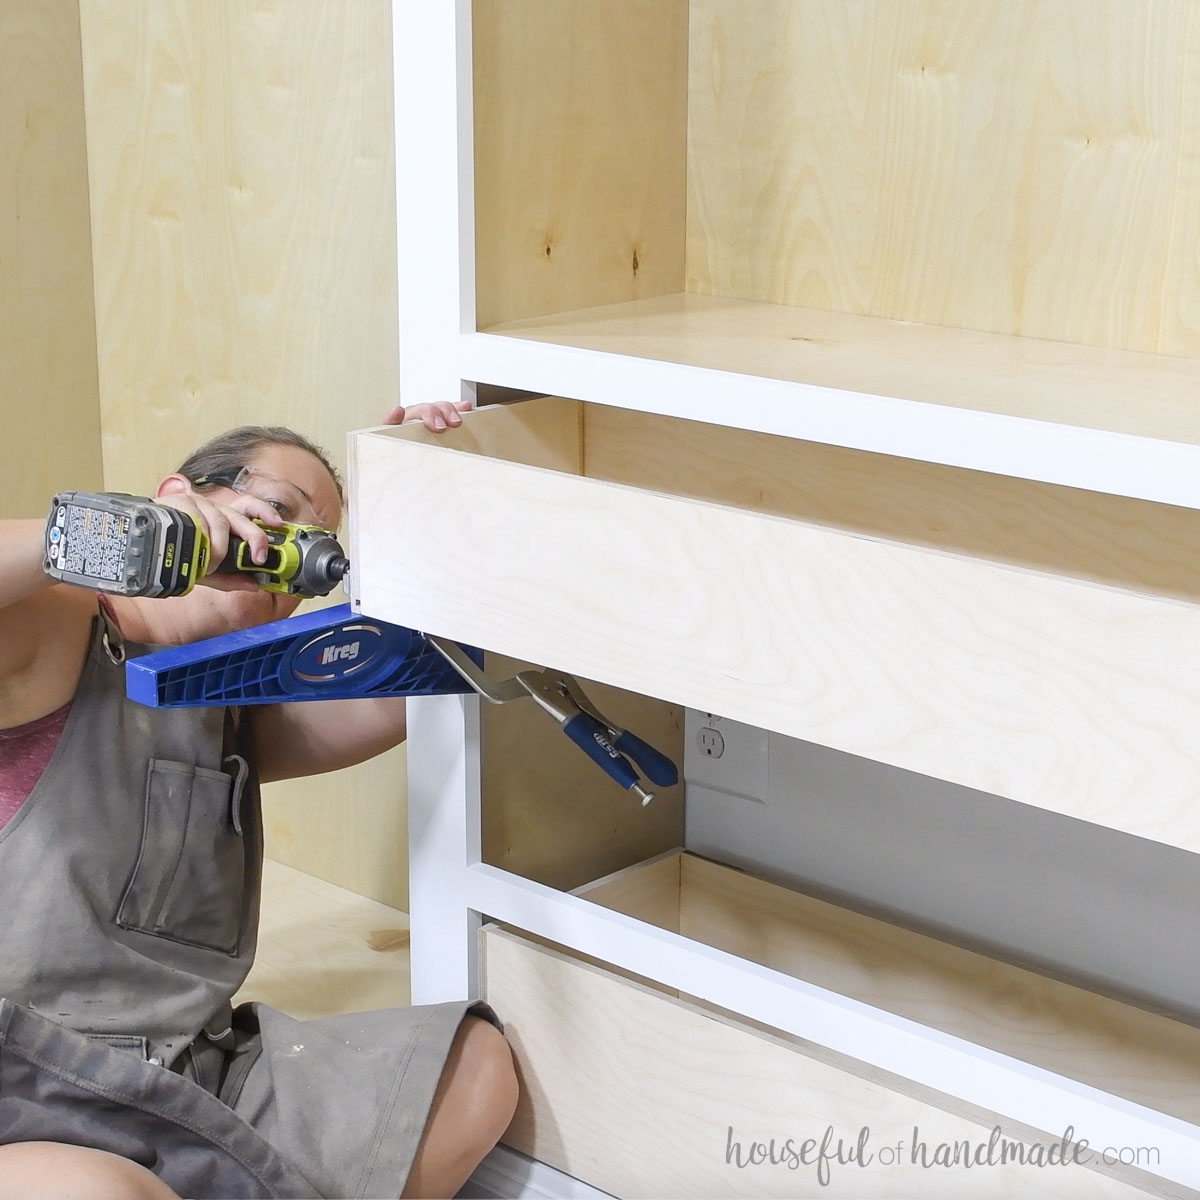
Then I attached the drawer slides and drawers. I couldn’t use the Kreg drawer slide jig inside the bookcase because it was too shallow so I used a small level instead.
But it was very handy for holding the drawers boxes in place while attaching the slides to them.
Learn how to install drawers with side slides here.
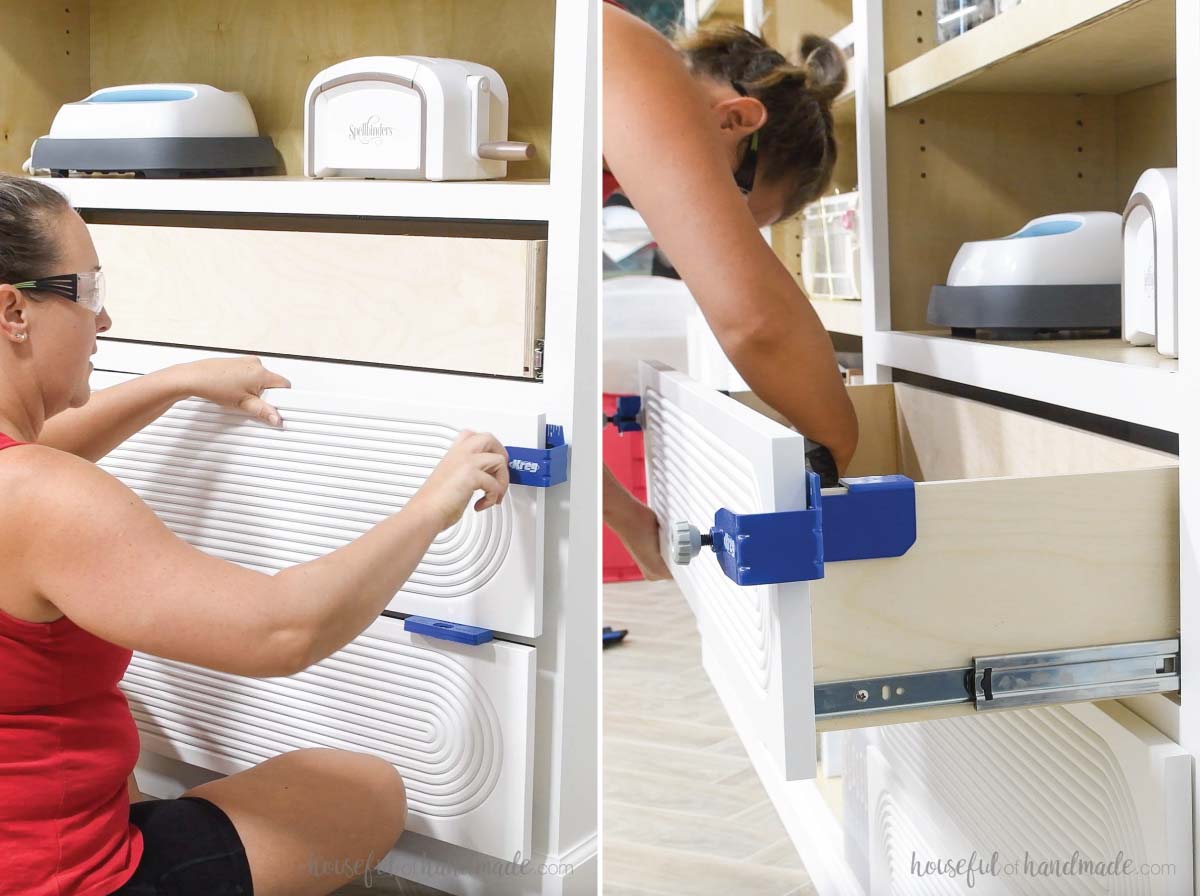
To attach the drawer fronts, I use the Kreg drawer front mounting system and am kicking myself for not using it earlier!
These clamps hold the drawer fronts in place and make it so easy to line them up. Then they stay in place while you open the drawer and secure them.
I had all three drawer fronts installed perfectly in less than 30 minutes. And that included carrying the drawer fronts from the shop to the office.
I chose not to add drawer pulls or knobs to my drawer fronts because they were too pretty without them.
But if you want to add them, I highly recommend the Kreg cabinet hardware jig pro. It makes lining up the holes easy.
STEP 7- Add adjustable shelves
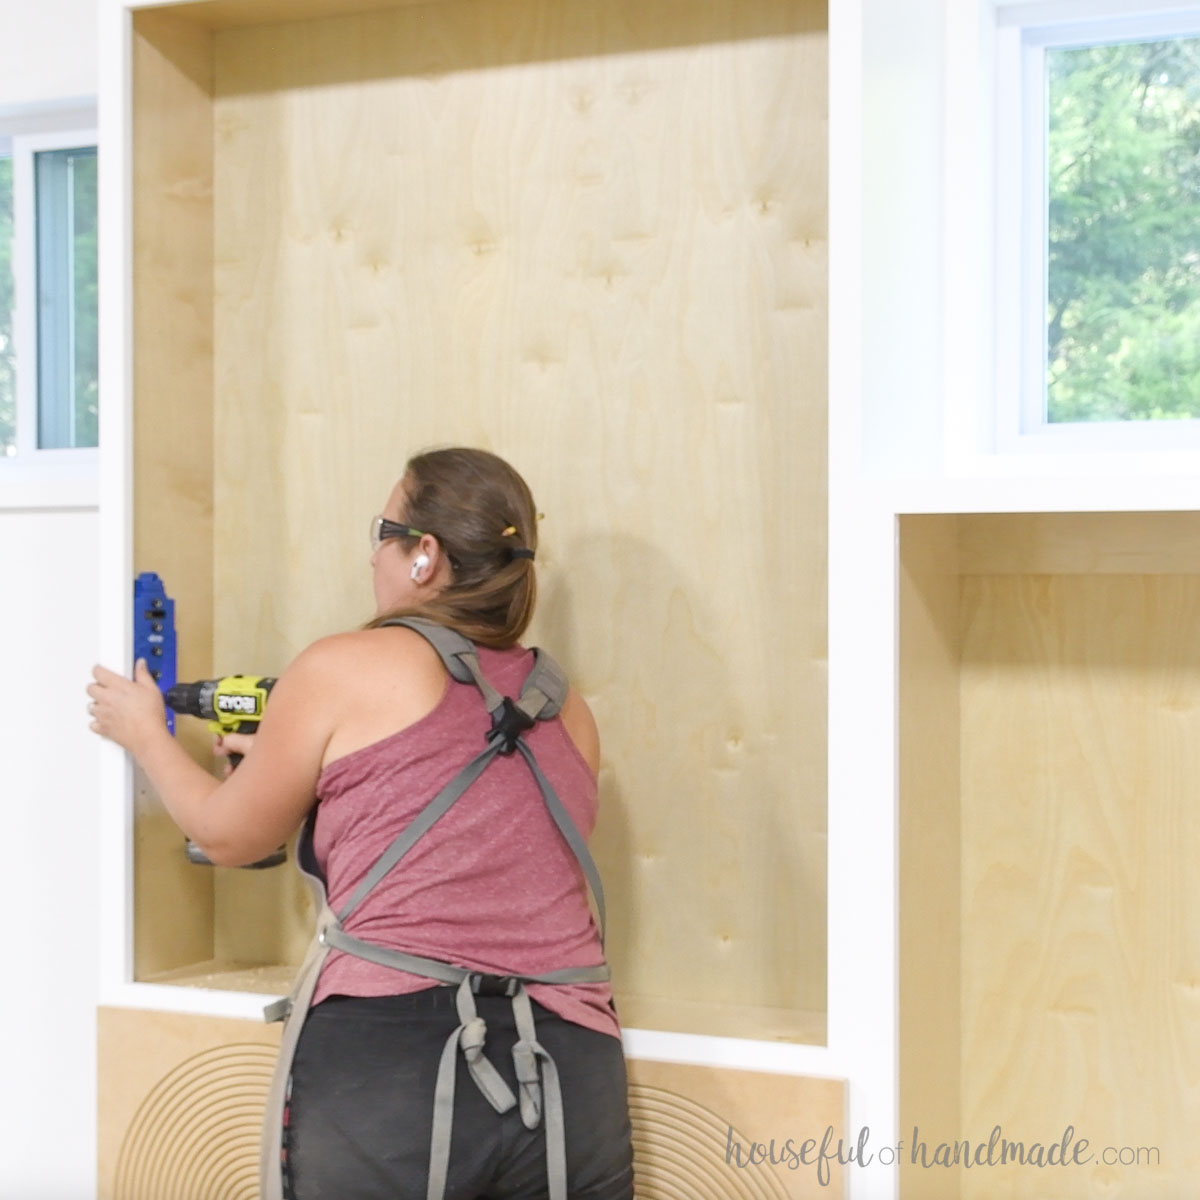
Using a shelf pin jig, drill holes for the adjustable shelves up both sides of the bookcase.
The Kreg shelf pin jig makes it easy to add perfectly space shelf pin holes.
Now you can add your shelves and load them up!
Since the bookcases are wide and I plan to use them to store a lot of stuff, I added a 1×2 board to the front of each shelf.
This offers additional strength to prevent sagging and makes the shelves look larger.
Premium plans include:
- Recommended Tools
- Shopping list
- Easy to read cut list table
- Cut diagrams
- Step-by-step instructions with 3D renderings
- Helpful resources
- BONUS: 3D SketchUp file
You did it!
I am obsessed with my new built-ins storage cabinets! They are perfect for organizing and displaying all my crafting supplies it our office.
Next up I am making more built-ins to go on the opposite wall to hold all my sewing supplies so stay tuned.
Happy building!

Thank you to Kreg Tools for sponsoring this post. I only recommend products that I use and love and all opinions are 100% my own. Click here to read my full disclosure policy.