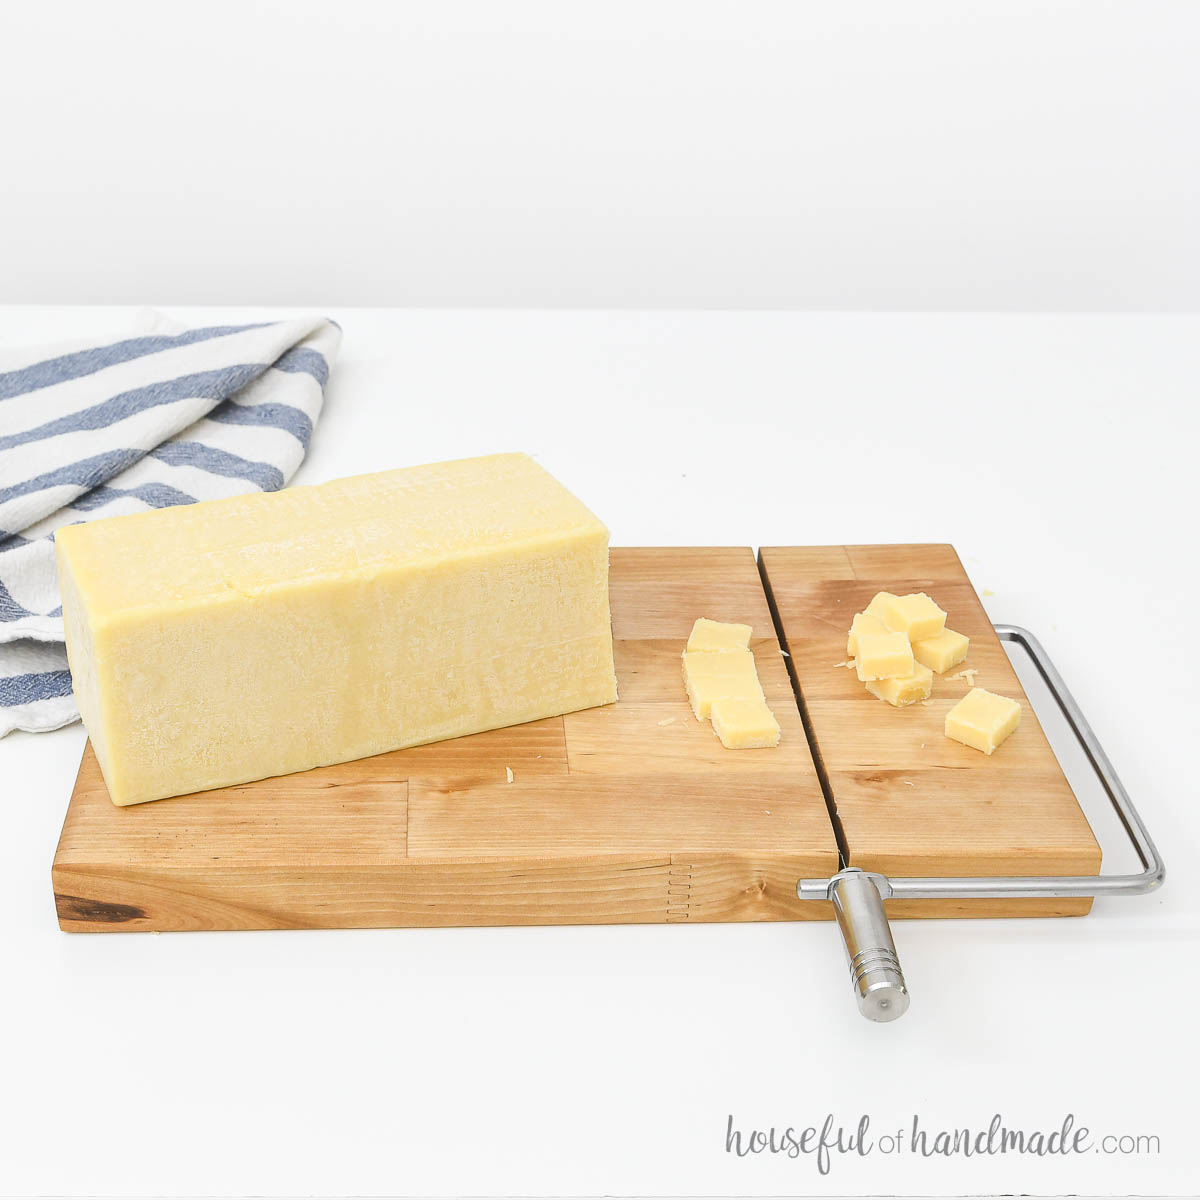
I’ve been wishing for a cheese slider for a while now. If you’ve ever tried slicing a soft cheese with a knife, you know how frustrating it can be.
Now I am kicking myself for not making one earlier! This DIY cheese slicer takes less than an hour to make, minus waiting for the oil to absorb.
I saved the scraps when installing butcher block countertops in our office. And had a perfect sized piece for this simple project.
This post may contain affiliate links. As an Amazon Associate I earn from qualifying purchases. Click here to read my full disclosure policy.
But you do not need a piece of butcher block, you can also make it from any hardwood board. So raid the scrap bin or go grab a piece from the store and get to building.

How big of a scrap is needed?
The smallest size board you can use with the cheese slicer kit is 6 1/2″ wide. Since a 1×8 board is 7 1/4″, it is the perfect size for it.
But you can go bigger for your cheese slicer board if you want! Just think how cool a slicer on the edge of a large charcuterie board would be. And handy too.
The board needs to be at least 3/4″ thick which is the standard thickness for a 1x board.
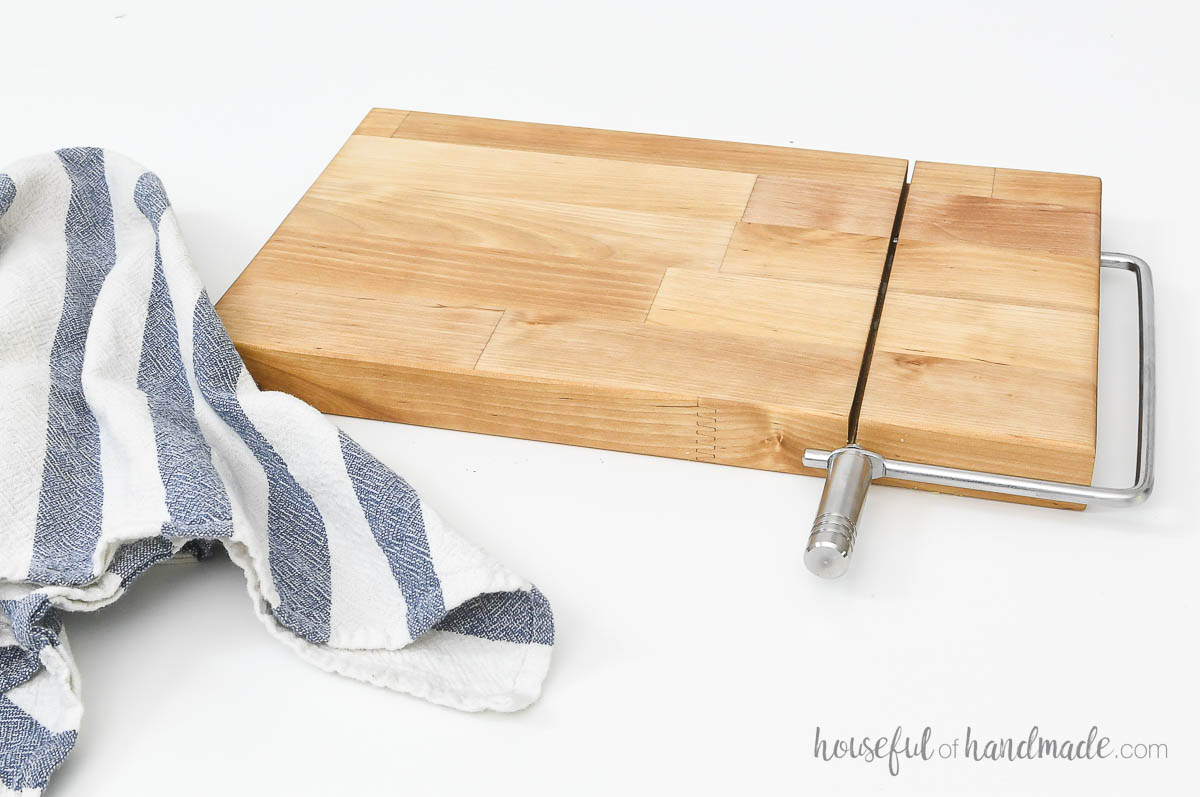
I used a scrap of butcher block which was 7″ x 12″. The butcher block was originally 1 1/2″ thick, but I planed it to 1″ thick.
Planing the board is not necessary, you can keep it thicker if you prefer or do not have access to a planer.
What type of wood should I use?
A cheese slicer is best made from a hardwood with a tight grain pattern.
Any wood that is recommended for DIY cutting boards, wood utensils or wood countertops will work great.
I love using maple, walnut, and cherry and they are usually easy to find. Bamboo, acacia or birch butcher block would also be fun options.
Avoid soft woods like pine, poplar and cedar, or open grain woods like oak and hickory.
How to Make a Cheese Slicer
Tools & Materials
Recommended Tools:
Supplies:
- Wood products
- (1) 1×8 board, 12″ long or 7″ x 12″ piece of butcher block
- Cheese slicer kit
- Cutting board oil
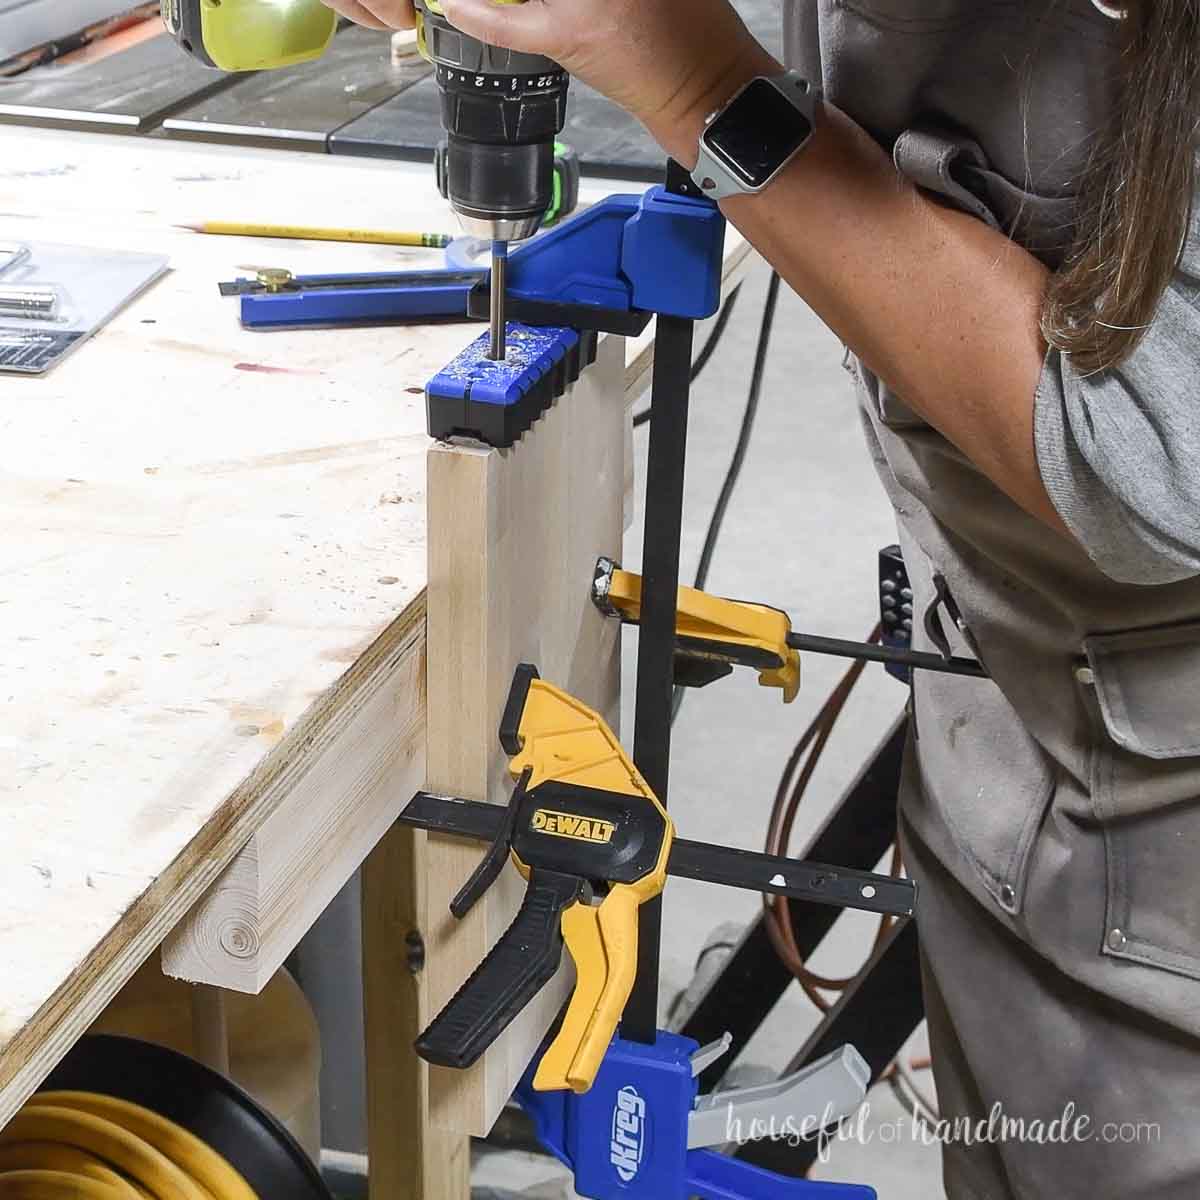
STEP 1- Drill a hole
Cut your piece of wood to your desired sized.
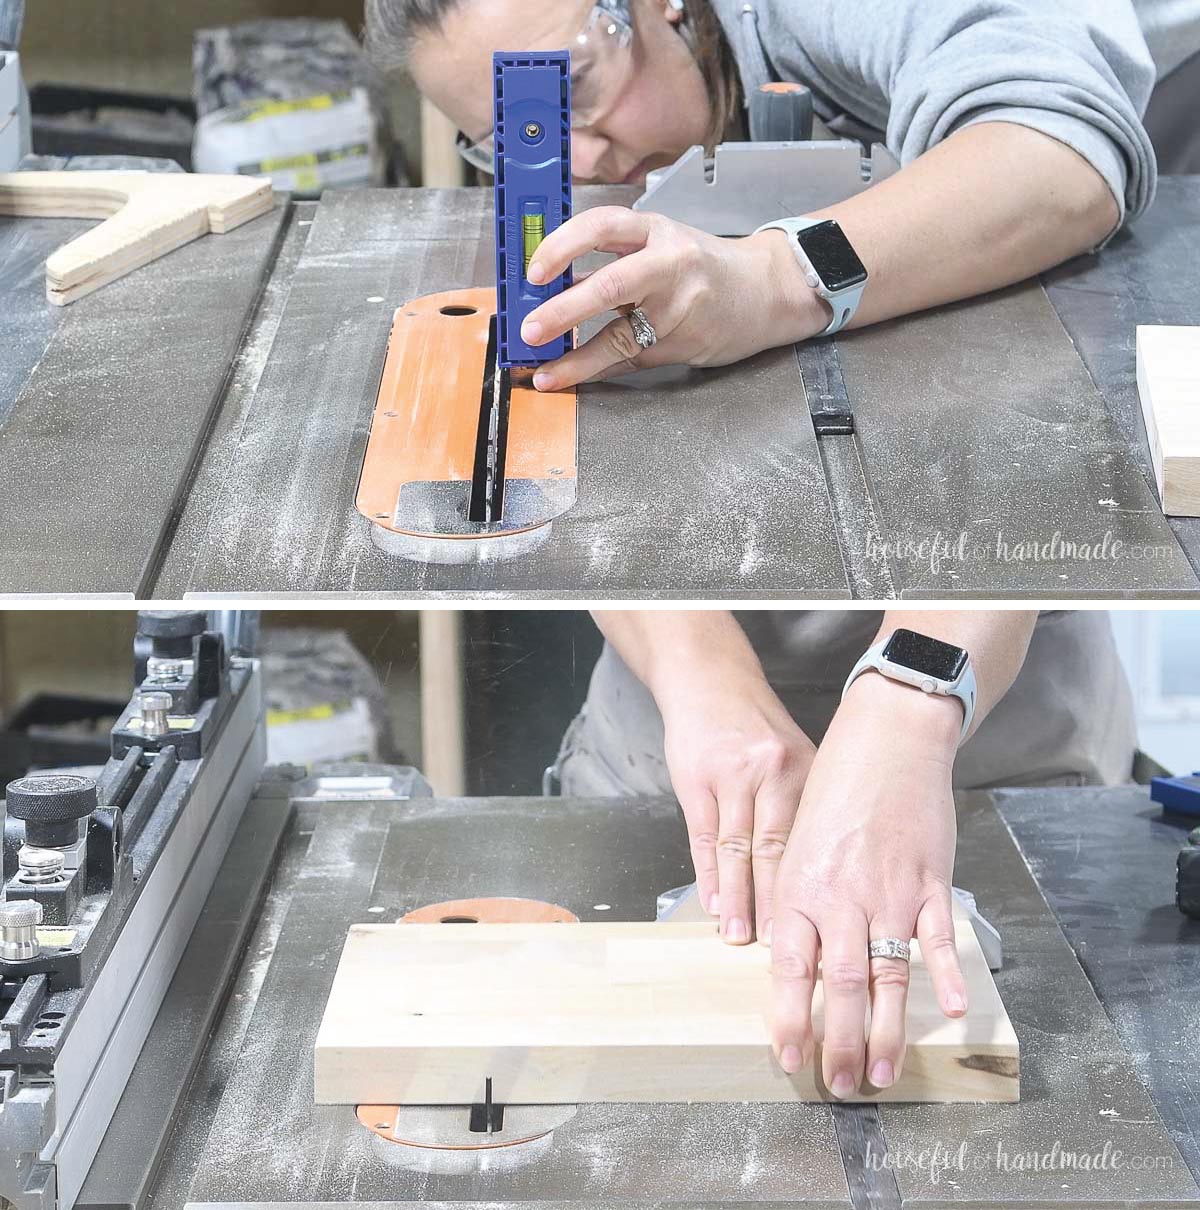
You will need to drill a 3 3/4″ deep hole in the end of the board for the slicer to slide into. The hole needs to be 5 3/4″ away from the edge of the board.
The easiest way I found to drill a straight hole was with a simple portable drill guide and inexpensive long drill bit.
First I clamped the board to the side of my work table. I added a 2×3 board to help me build these slab cabinet doors and it’s already coming in useful again.
Then measure the thickness of your drill guide block. Add that to the 3 3/4″ needed and mark it on the drill bit with a strip of blue painters tape.
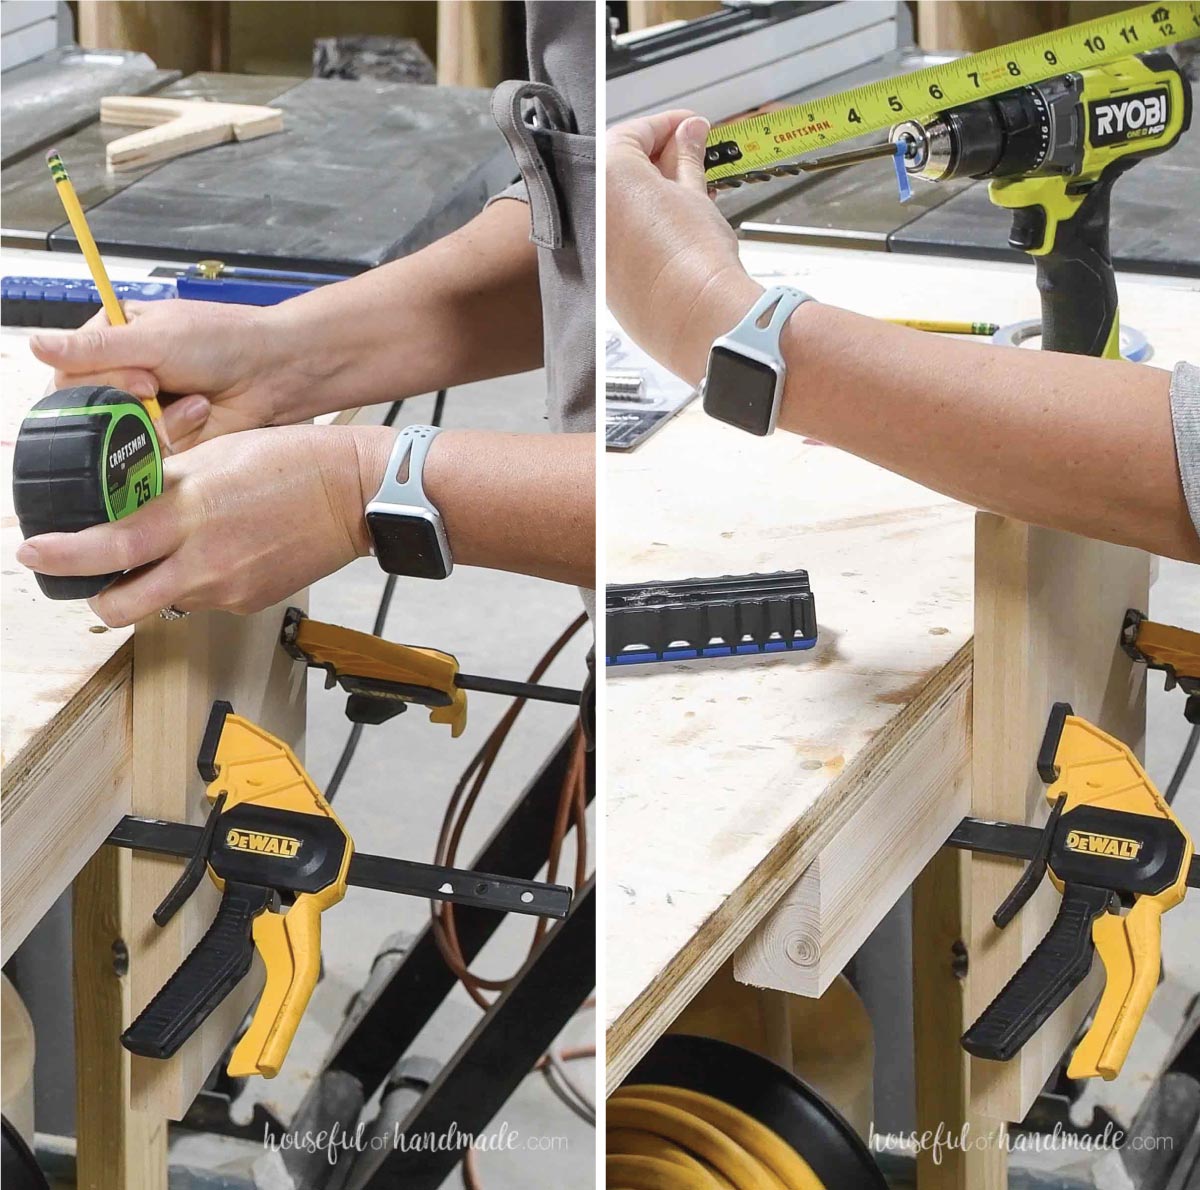
Clamp the drill guide in place and drill straight into the edge of your board until the tape touches the guide.
You will have to pull the drill out a few times to help release the sawdust.
STEP 2- Add a groove
Next you will need to add a groove for the slicer wire to nestle into. This needs to be 3″ away from the edge with the hole.
Using a table saw or circular saw, set your blade so it is half the board thickness. For a 3/4″ thick board use 3/8″ and for my 1″ thick board I used 1/2″.
Then cut a single line in the board over the top of the hole. You should be able to see it in the groove.
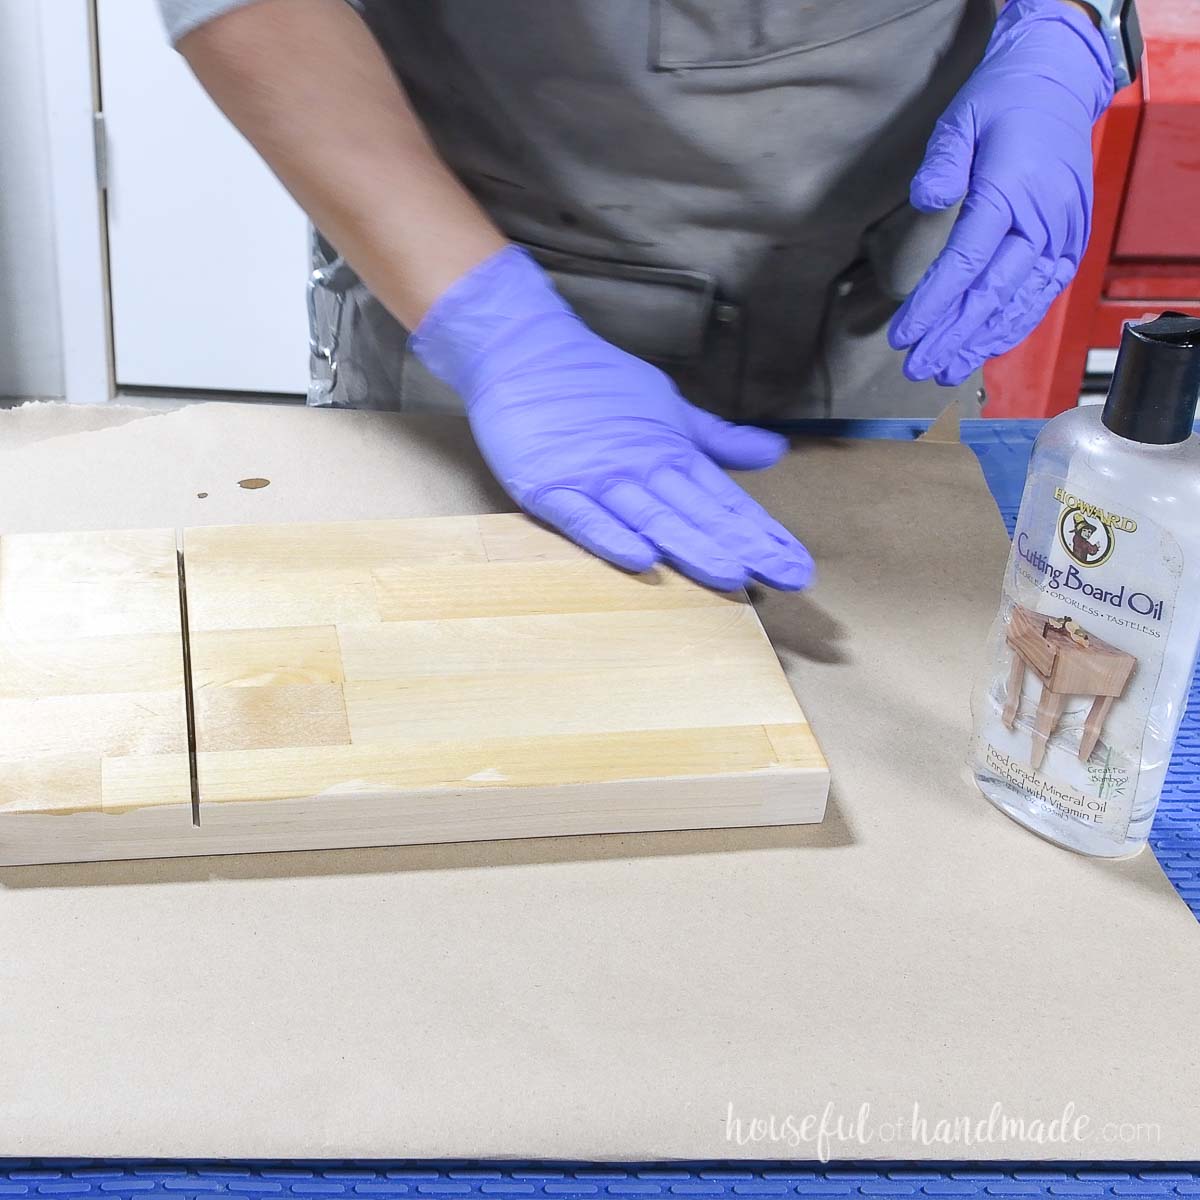
STEP 3- Sand and finish
Sand the board smooth to 220 grit sandpaper (start with 150 or 180). Don’t forget to sand in the groove.
Once it is smooth, spray it with a little water. This will raise the grain on the board.
Then sand it again with 220 grit sandpaper. Now your grain will not get raised when you wash it for the first time.

Seal your cheese slicer with a food safe oil.
Use cutting board oil, beeswax or tung oil. I used tung oil on these easy woodworking gift ideas and really like it, but I was all out so I used what I had.
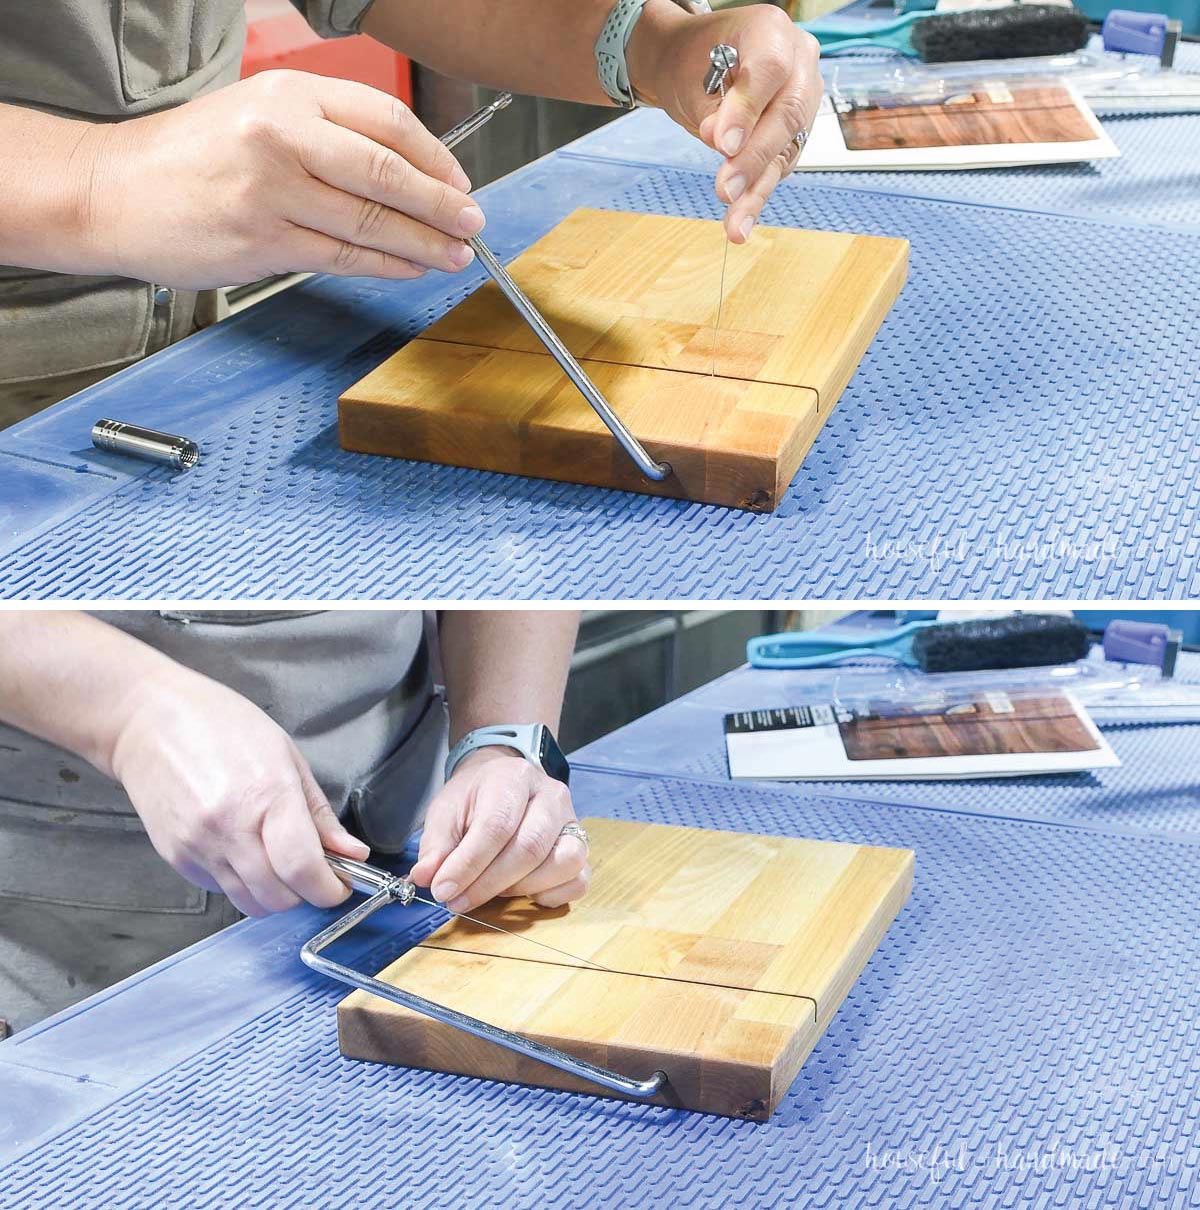
STEP 3- Install slicer handle
Once your oil is dry, twist the handle open to remove the wire.
Slide the slider arm into the hole and loop the wire onto the end. Then reattach it to the handle.
Twist to pull it tight.
You did it!
This beautiful cheese slice is a great gift idea. Pair it with some fancy cheeses, wine or crackers for something extra special.
I love how easy it is to slice my favorite cheese. I know this tool will get lots of use at our house!

DIY Gift Ideas
This easy cheese slicer makes an fun DIY gift!
And with the holidays fast approaching, I teamed up with my friend Shara from Woodshop Diaries to share 5 easy DIY gift for everyone on your list.
Check back everyday until Thanksgiving for new gift ideas and check out any you may have missed below.


Happy building!
